WEEK04 - Embedded Programming
WEEK FOUR ASSIGNMENT
- compare the performance and development workflows for other architectures.
COMPARISONS
To start off we did a little comparetive breakdown of the various micro-chip which run in the various architectures.
The ATmega328P, XIAO SAMD21, XIAO ESP32 all run with the Arduino workflows, the BBC microbit however features a nRF52833 chip from Nordic and the programming actually happens online!
| Parameters | ATmega328P | XIAO SAMD21 | XIAO ESP32 | nRF52833 | ATTINY3216 |
|---|---|---|---|---|---|
CPU TYPE |
8-bit AVR | 32-bit | 32-bit | 32-bit | 8-bit AVR |
Architecture |
RISC | ARM Cortex-M0 | RISC-V | Arm Cortex-M4 | |
Performance |
20 MIPS at 20 MHz | 48MHz | 160 MHz | 64MHz | 16 MHz |
Maximum CPU speed |
20 MHz | 48MHz | 160 MHz | 64MHz | 16 MHz |
FLASH MEMORY |
32 KB | 256KB | 4MB | 512KB | 32 KB |
SRAM |
2 KB | 32KB | 400KB | 128KB | 2 KB |
EEPROM |
1 KB | 256 bytes | |||
Package pin count |
28 or 32 | 14 GPIO PINs | 20- or 24 | ||
Maximum I/O pins |
23 | 11 analog, 11 digital | 11pmw/4analog | 19 GPIO | |
Voltage |
2.7V - 5.5V | 3.3V/5V DC | 5V | ||
WIFI / Bluethooth |
no | no | yes | bluetooth | |
PRICE |
$3.11 | $5.40 | $4.99 | $3.40 | $1.44 |
ARDUINO ( XIAO SAMD21; XIAO ESP32; ATmega328P)
Step 1: Install Arduino IDE
Arduino IDE is an integrated development environment for Arduino, which is used for single- chip microcomputer software programming, downloading, testing and so on. Download and Install Arduino IDE for your desired operating system here.
Step 2: Install USB drivers
Arduino connects to the PC via a USB cable. The USB driver depends on the type of USB chip you’re using on your Arduino. Note: USB chips are usually printed on the back of the development board. For Mac OS users: You can navigate to on the top left corner, and choose About this Mac -> System Report… -> USB . A CP2102 USB Driver should appear. If the driver is not installed, or if the driver is installed incorrectly (not matching the chip model), it will appear as an “unknown device” in the device manager. At this point, the driver should be reinstalled.

For this week I installed the drivers for: ATmega328P –> here
For the XIAO SAMD21 and XIAO ESP32 I added the board to Arduino IDE this way:
Navigate to File > Preferences, and fill “Additional Boards Manager URLs” with the url below:
XIAO SAMD21 –> https://files.seeedstudio.com/arduino/package_seeeduino_boards_index.json
XIAO ESP32 –> https://raw.githubusercontent.com/espressif/arduino-esp32/gh-pages/package_esp32_dev_index.json

NEXT: Click Tools-> Board-> Boards Manager…, print keyword “Seeed Studio XIAO SAMD21 ” or “ESP32” in the searching blank. Here comes the “Seeed SAMD Boards”. Install it.


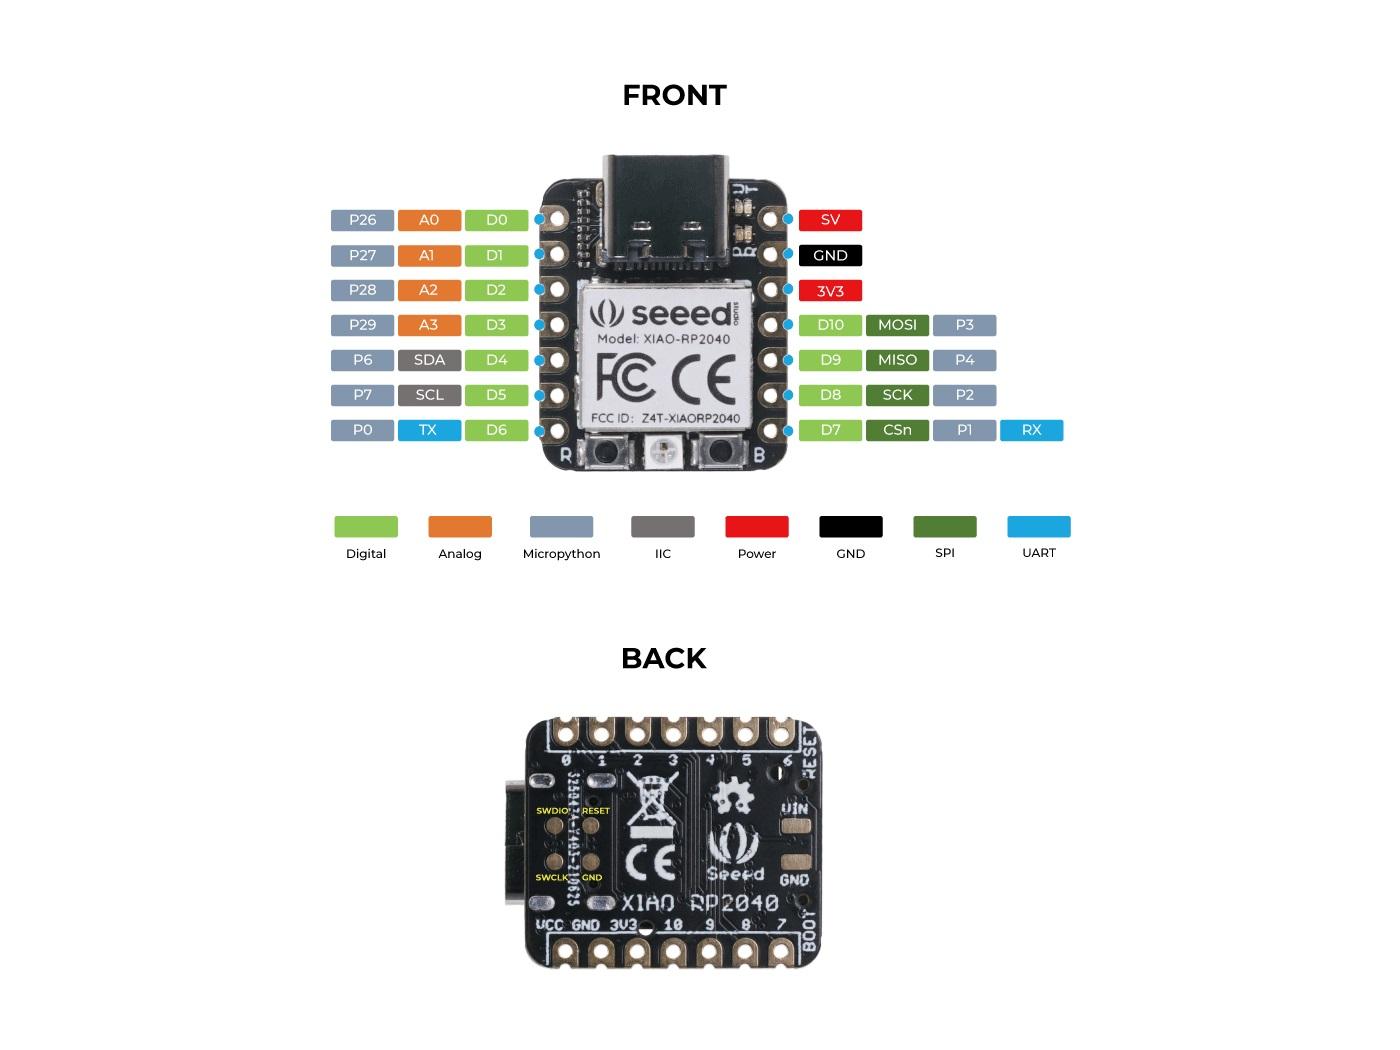
Micropython Xiao RP2040 (From Seeed Studio)
The Xiao RP2040 is a micro-controller, it does not use an operating system, rather code can be written for it, then sent and saved to it. The interface is just programming, not visual like you find on a computer.
You can program in MicroPython, CircuitPython and Arduino on the Xiao RP2040.
Using an IDE (Integrated Development Environment) you can access the Xiao RP2040 to program it. The following IDEs are suggested by Seeed to choose from:
- Arduino IDE
- Thonny (for MicroPython)
- Mu Editor (for CircuitPython)
For this task MicroPython was selected and thus Thonny has been used. For additional guidance on setup refer to https://wiki.seeedstudio.com/XIAO-RP2040-with-MicroPython/
Xiao Pin Layout
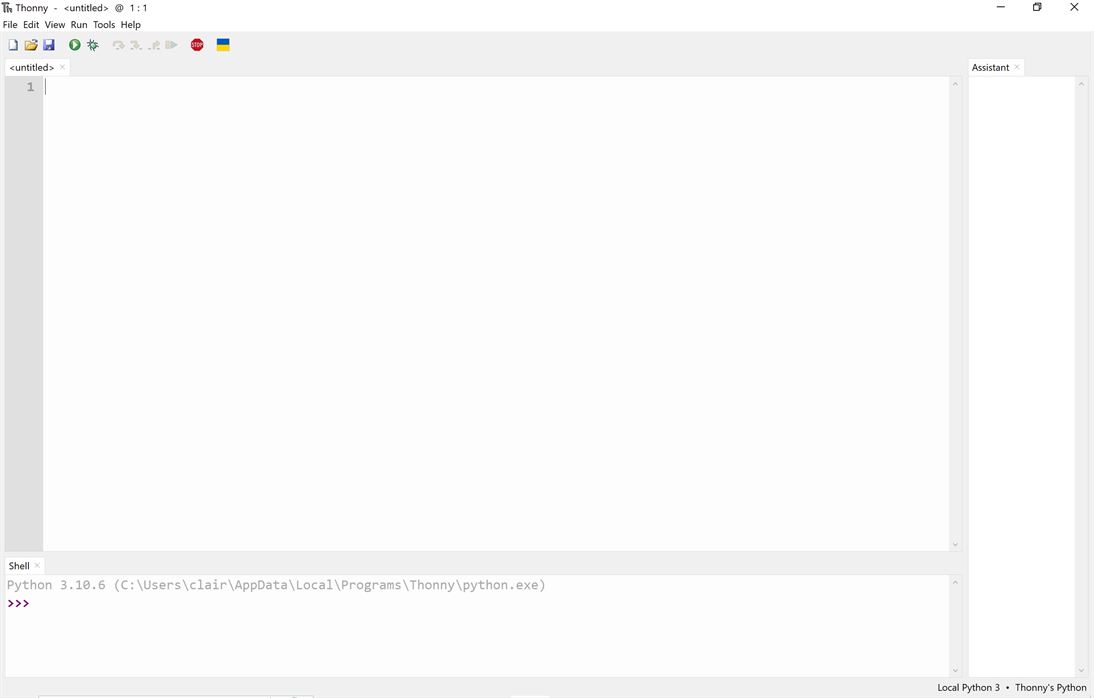
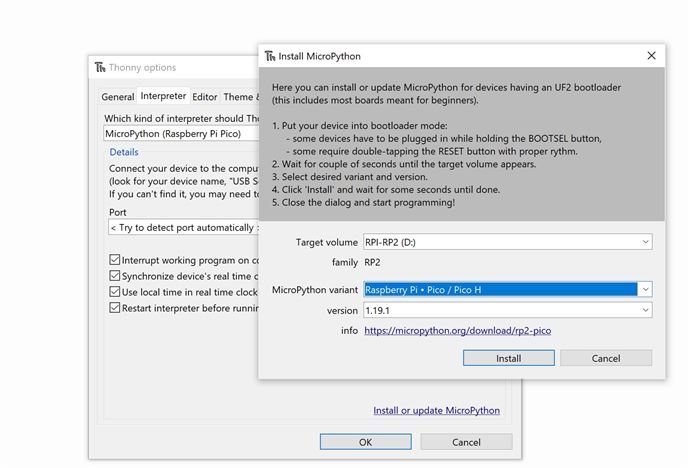
Setup Thonny
Open Thonny
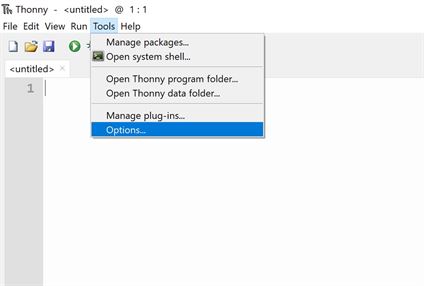
Go to Tools > Options
Select Interfaces and set the interpreter to “MicroPython Raspberry Pi Pico”, leave this open.
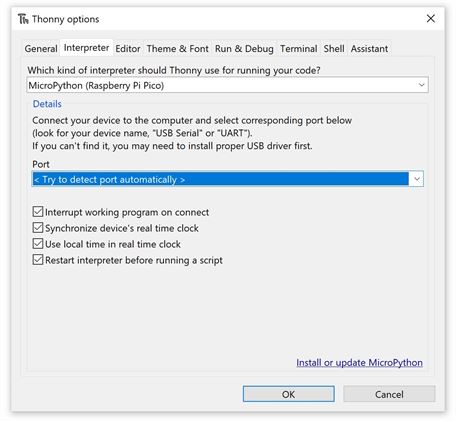
Connect the Xiao to the computer while holding down the boot button. A drive called RP1-RP2 should appear.
Click on “Install or update MicroPython”
Select the RP1-RP2 drive as the target volume
Select Raspberry Pi + Pico/Pico H as the MicroPython variant
Click “Install”
You can now test the Xiao using the following code. It will cause the User LED to blink.
Code by Seeed Studio 2023 https://wiki.seeedstudio.com/XIAO-RP2040-with-MicroPython/

from machine import Pin, Timer

led = Pin(25, Pin.OUT)
Counter = 0
Fun_Num = 0

def fun(tim):
    global Counter
    Counter = Counter + 1
    print(Counter)
    led.value(Counter%2)

tim = Timer(-1)
tim.init(period=1000, mode=Timer.PERIODIC, callback=fun)
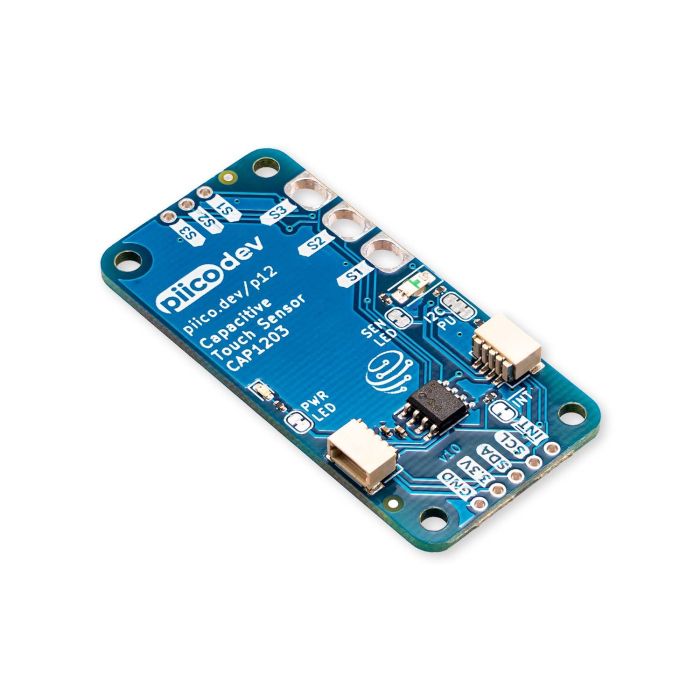
Program Xiao with I2C
To test connecting the Xiao to an external input, a PiicoDev capactive touch sensor was connected to the Xiao via a jumper cable.
Note for PiicoDev jumper cable:
- Black for GND
- Red for Power (3V)
- Blue for SDA
- Yellow for SCL

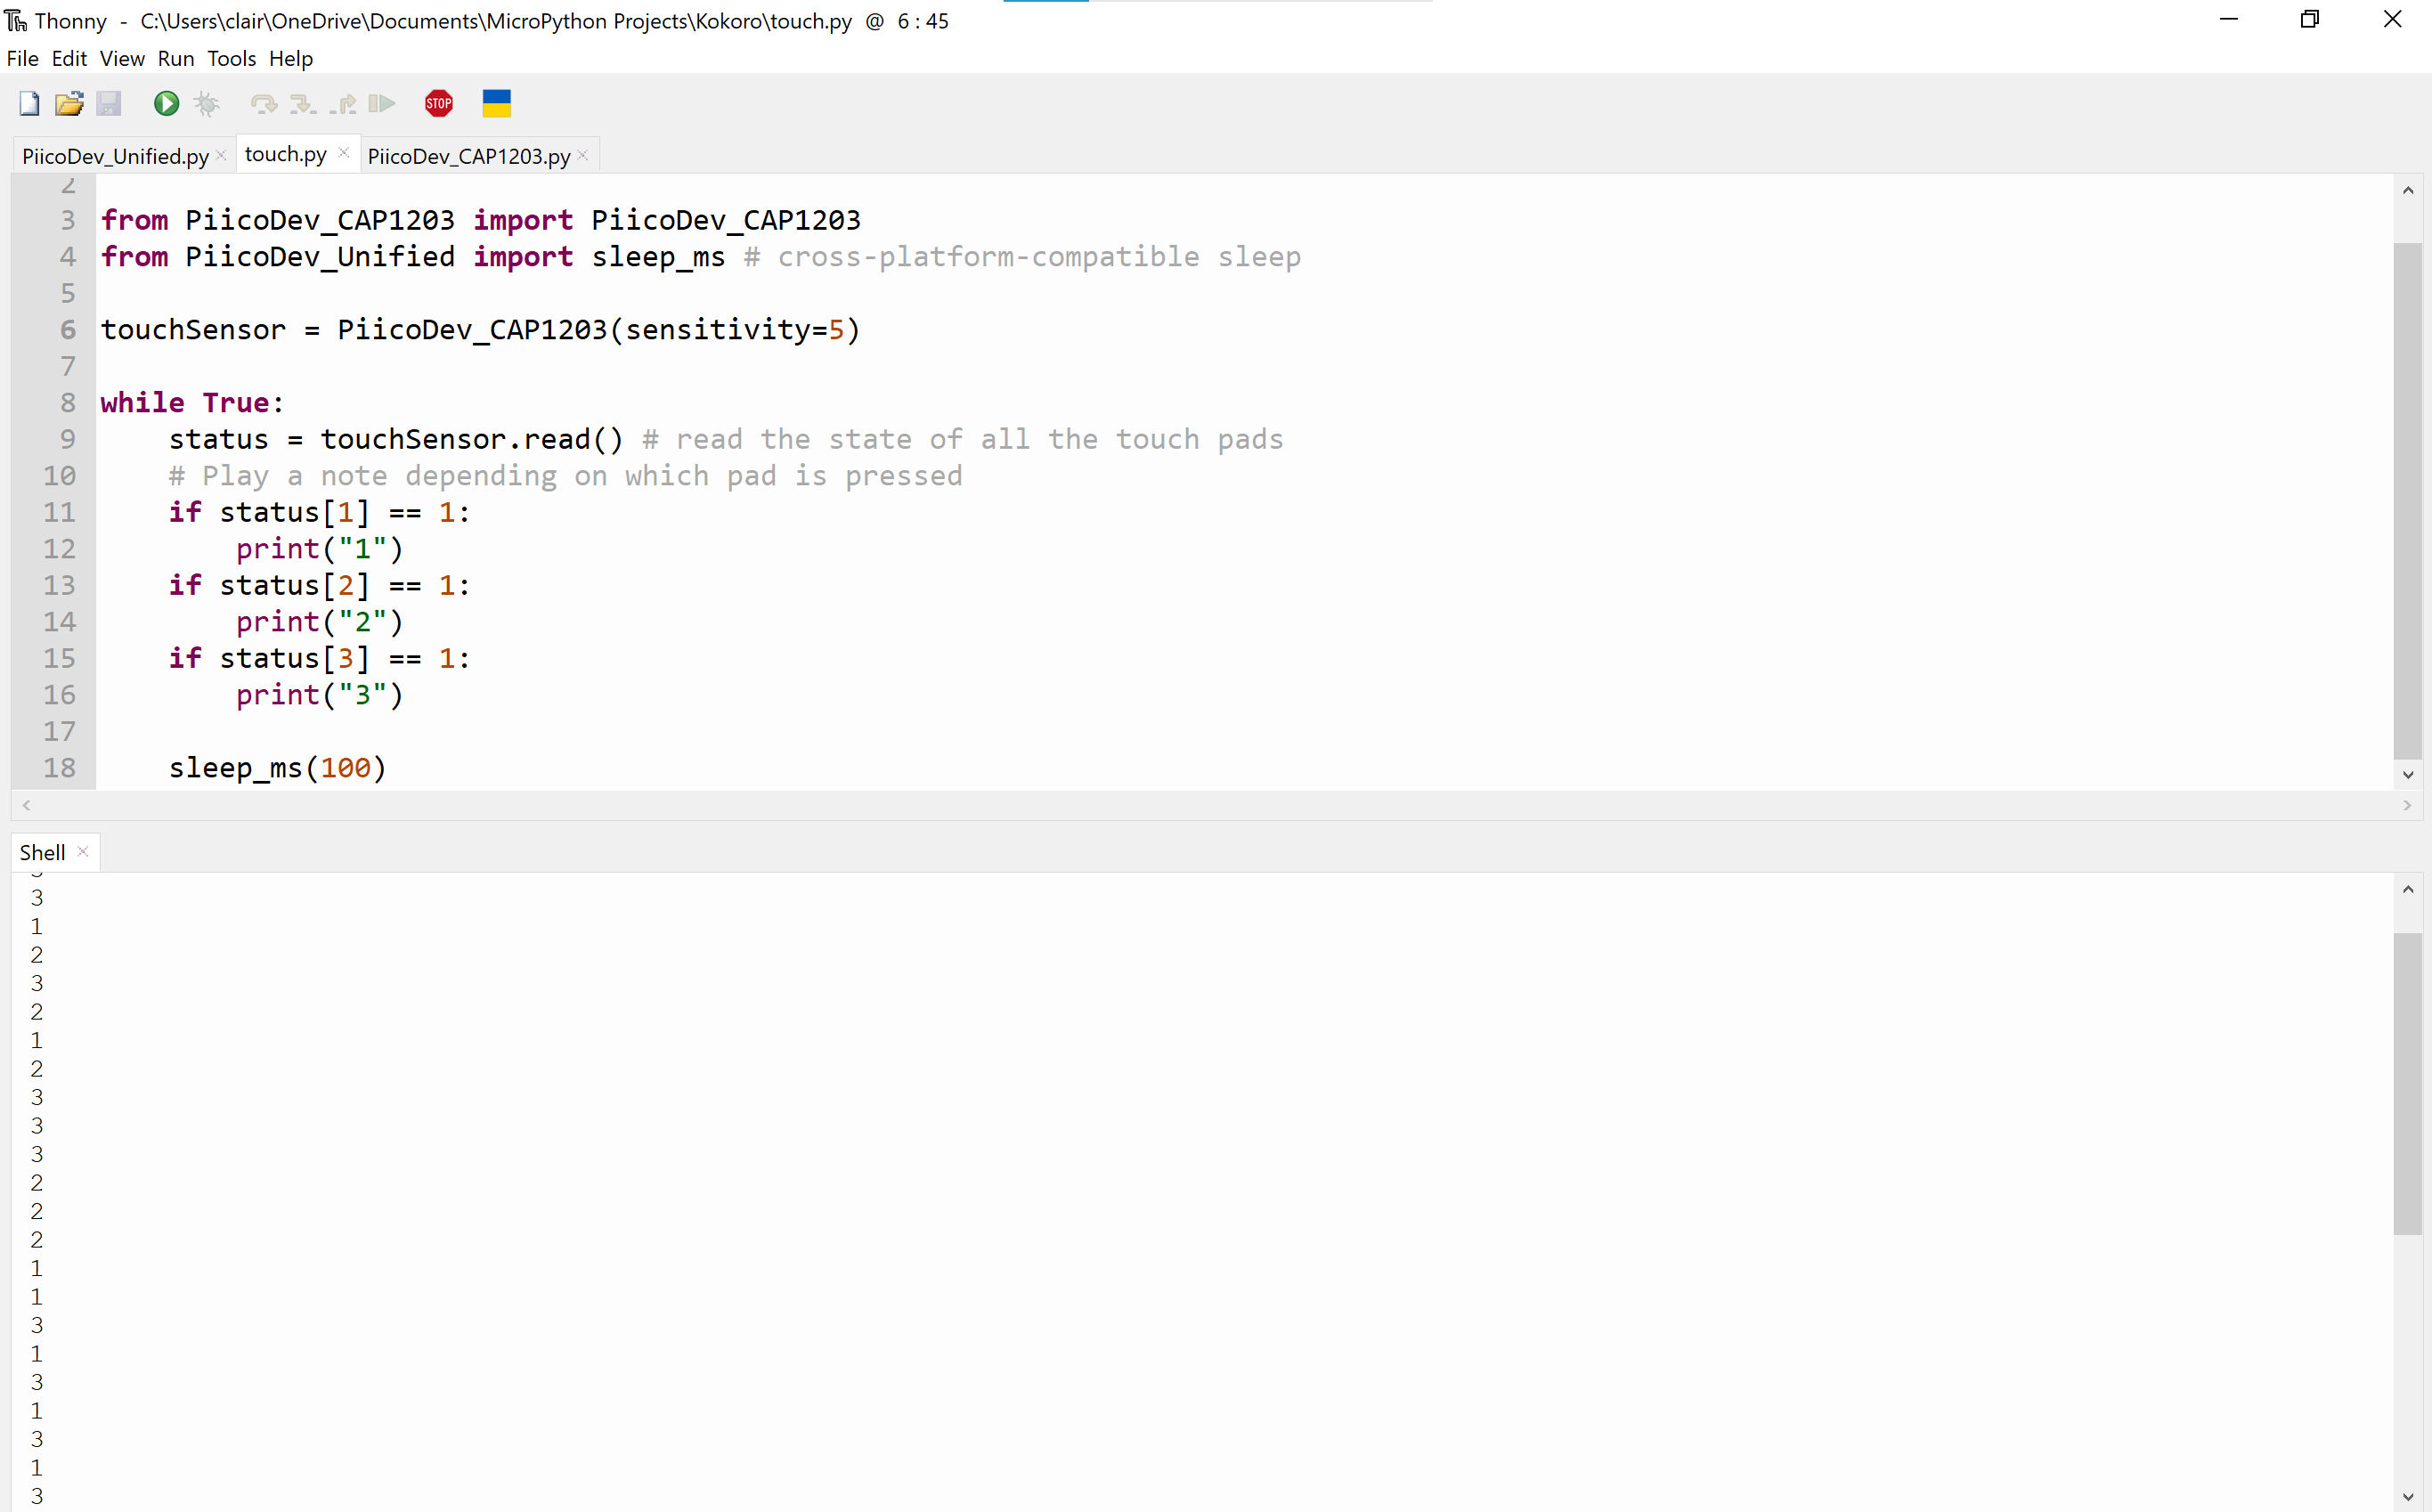
When Button 1, 2 or 3 is pressed the code will print into the Shell the corresponding number.
# Original code by Core Electronics 2023, modified April 2023 by Claire Chaikin-Bryan
# PiicoDev Capacitive Touch Sensor CAP1203 demo code

from PiicoDev_CAP1203 import PiicoDev_CAP1203
from PiicoDev_Unified import sleep_ms # cross-platform-compatible sleep

touchSensor = PiicoDev_CAP1203(sensitivity=5)

while True:
    status = touchSensor.read() # read the state of all the touch pads
    # Play a note depending on which pad is pressed
    if status[1] == 1:
        print("1")
    if status[2] == 1:
        print("2")
    if status[3] == 1:
        print("3")

    sleep_ms(100)
Reference code
PiicoDev_Unified.py
PiicoDev_CAP1203.py