Week 12
Apr 19: molding and casting
List of task this week
Group assignment
To see the group assignment go here.
My thoughts on this week’s group assignment, Review the safety data sheets for each of your molding and casting materials, then make and compare test casts with each of them: It was nothing new since it is a rule in the lab to check the safty data sheets before use.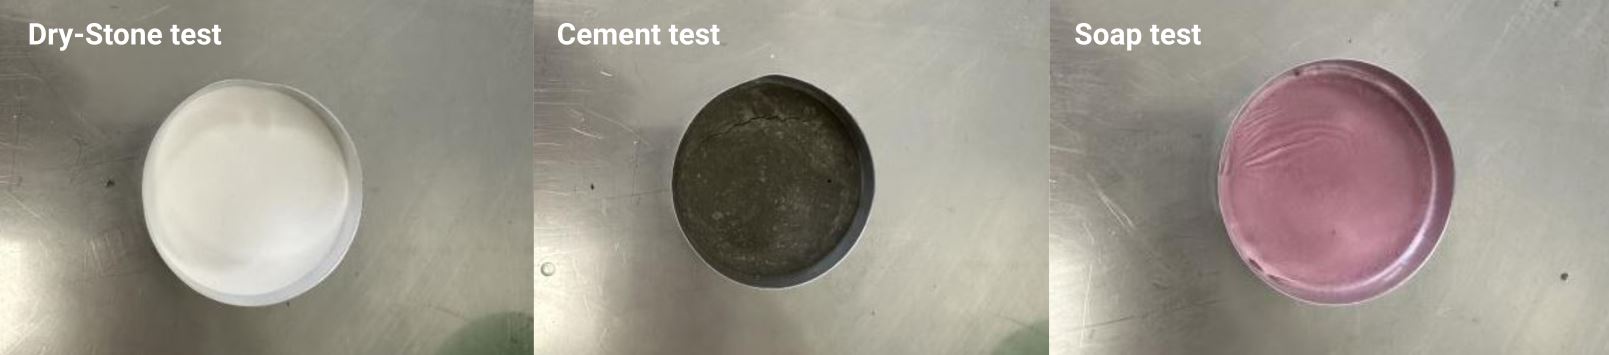
Design a mold around the stock and tooling that you'll be using, mill it (rough cut + three-axis finish cut), and use it to cast parts
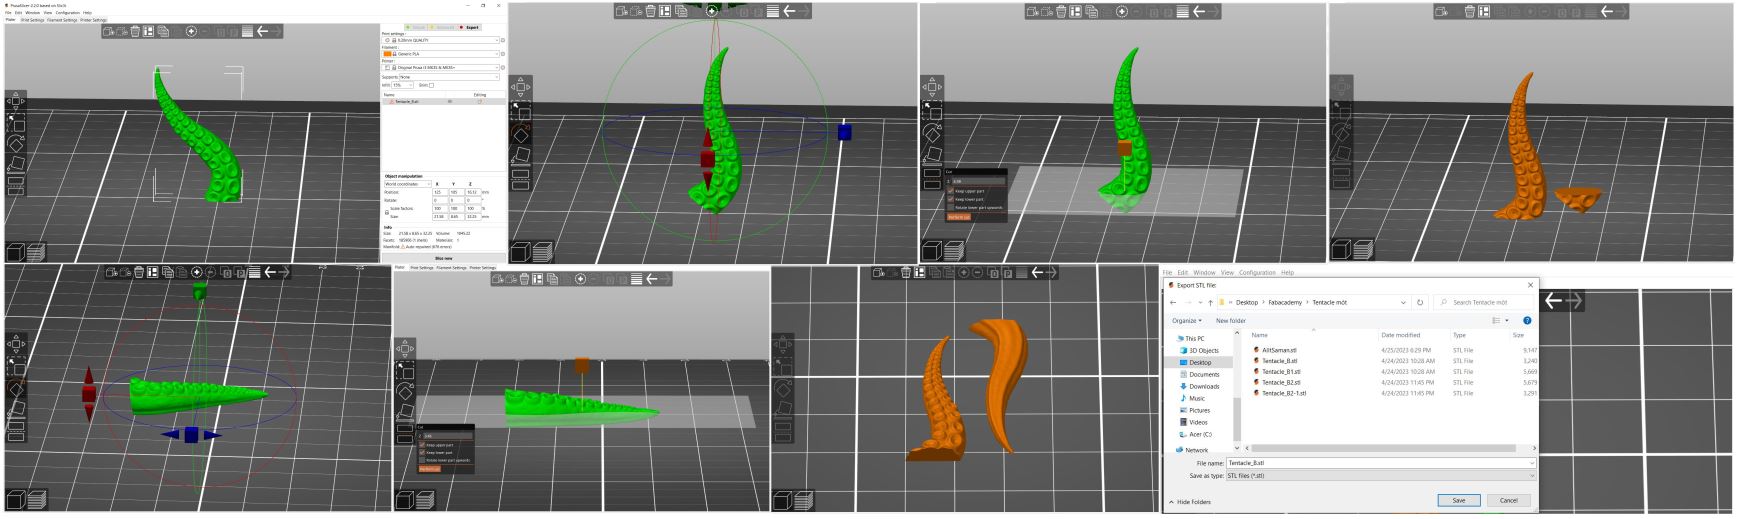
I got the original tentacle file from here, I put the file into Prusa slicer 2.6.0 alpha, I turned it so it would be more strait and the suckers would all be on the front, I used the cut function to level the base and then cut it in half and saved each half as a new .stl.
I measured how much space was on the wax block we had and went into Fusion360 and made a box in that size by using the sketch tool and the rectangle tool and pulled it up. I used those same methods to only pulling down to make the pockets in the box. I loaded in the .stl files I made earlier and moved them into the pockets. I used the sketch tool and the rectangle tool to make a small rectangle sketch the same size in both corners of the pockets so I could have the half’s start in the same spot. I made a frame out side of the pocket and pulled it further down than the pocket so that part hold on to the other and it would fit together.
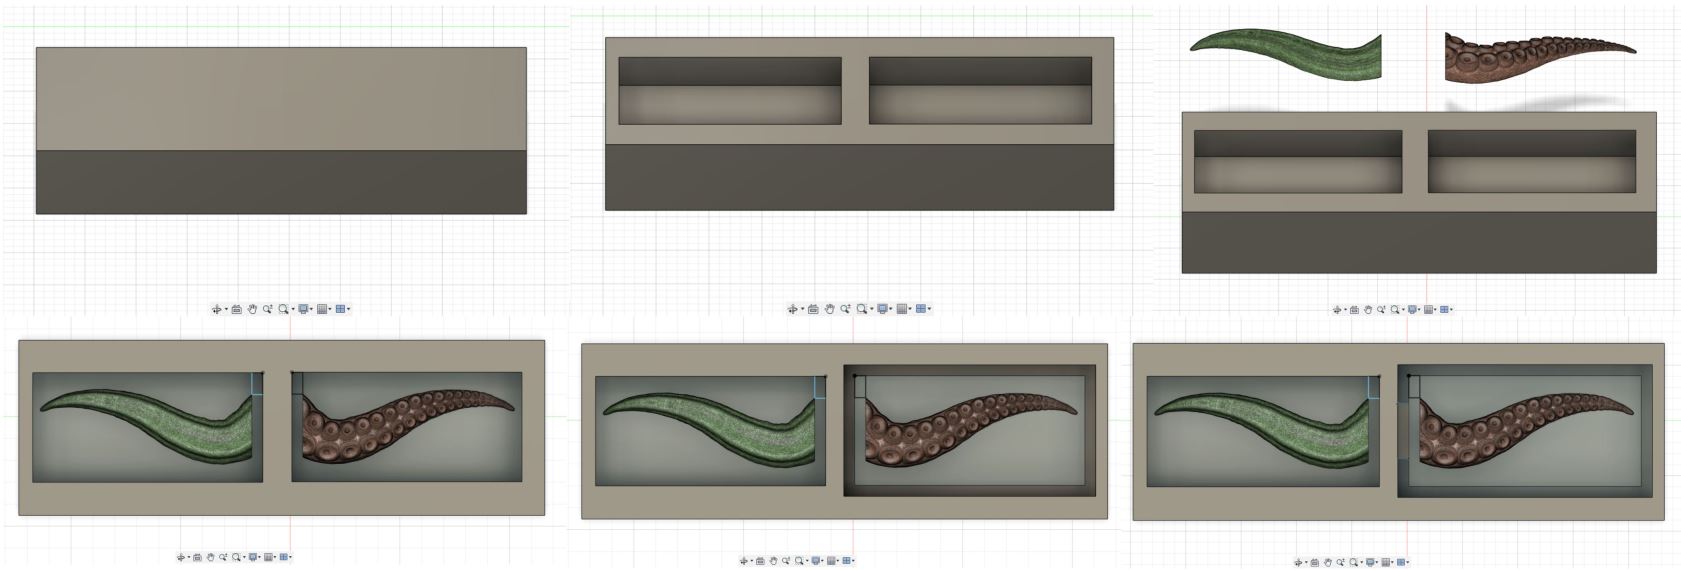
I made the air hole by just making a rectangle and the pouring hole by using circles and the roof tool.
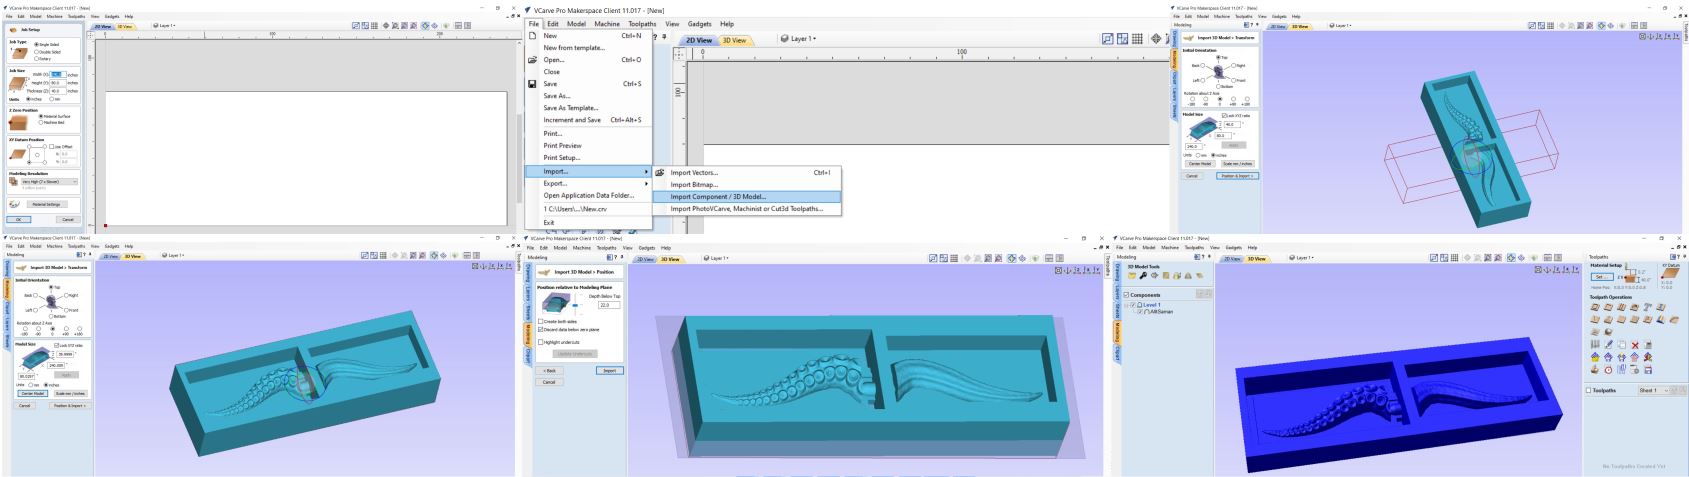
I could not combine this all together because the tentacles were a mesh, so I turned the base into mesh
too and combined it all as mesh. To do that I had to unlink the tentacles to their original, use mesh
repair to repair the tentacles, mesh tessellate to change the base to mesh and mesh combine to combine
the base and the tentacles. I exported the file as .stl.

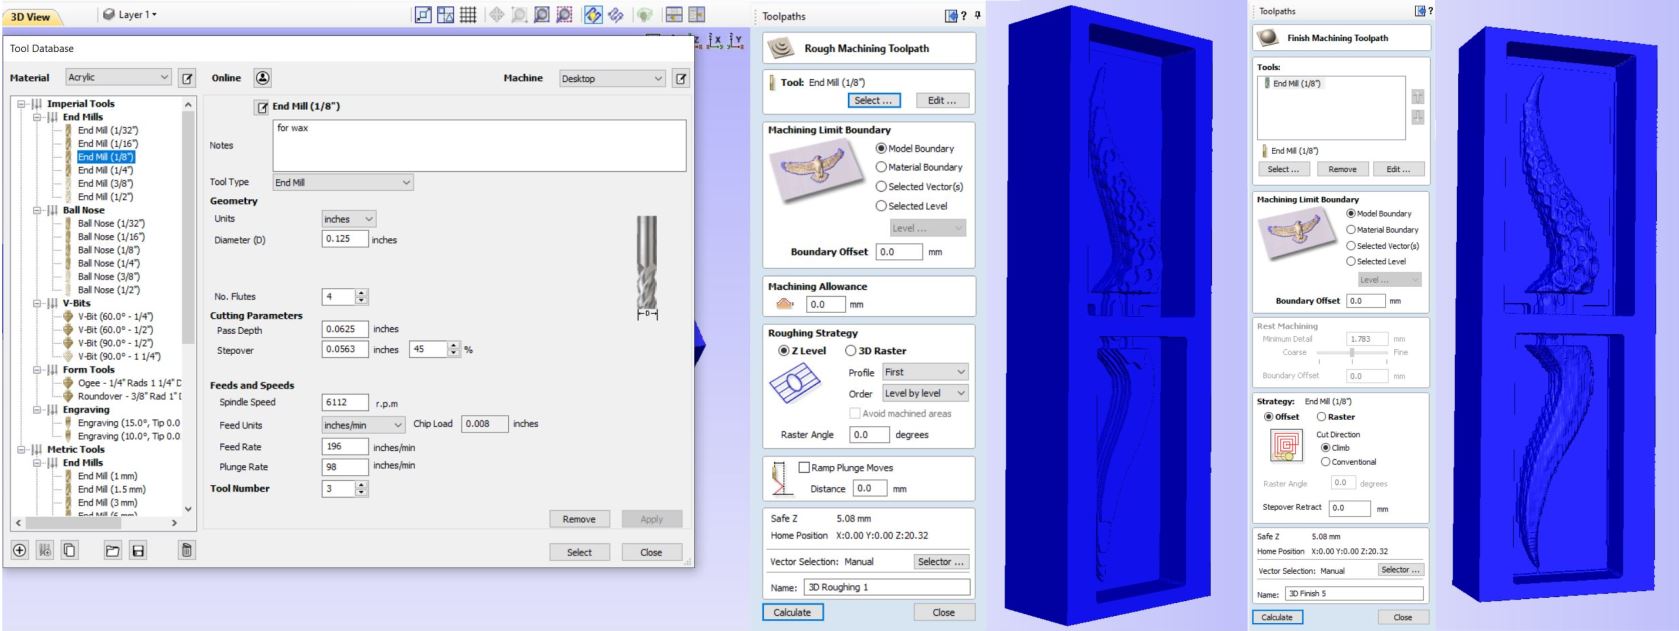
I used too different bits, one 1/8” and one 1/16”. I got the settings to use from here , I started with the 1/8” bit and did a rough pass and a finishing path.
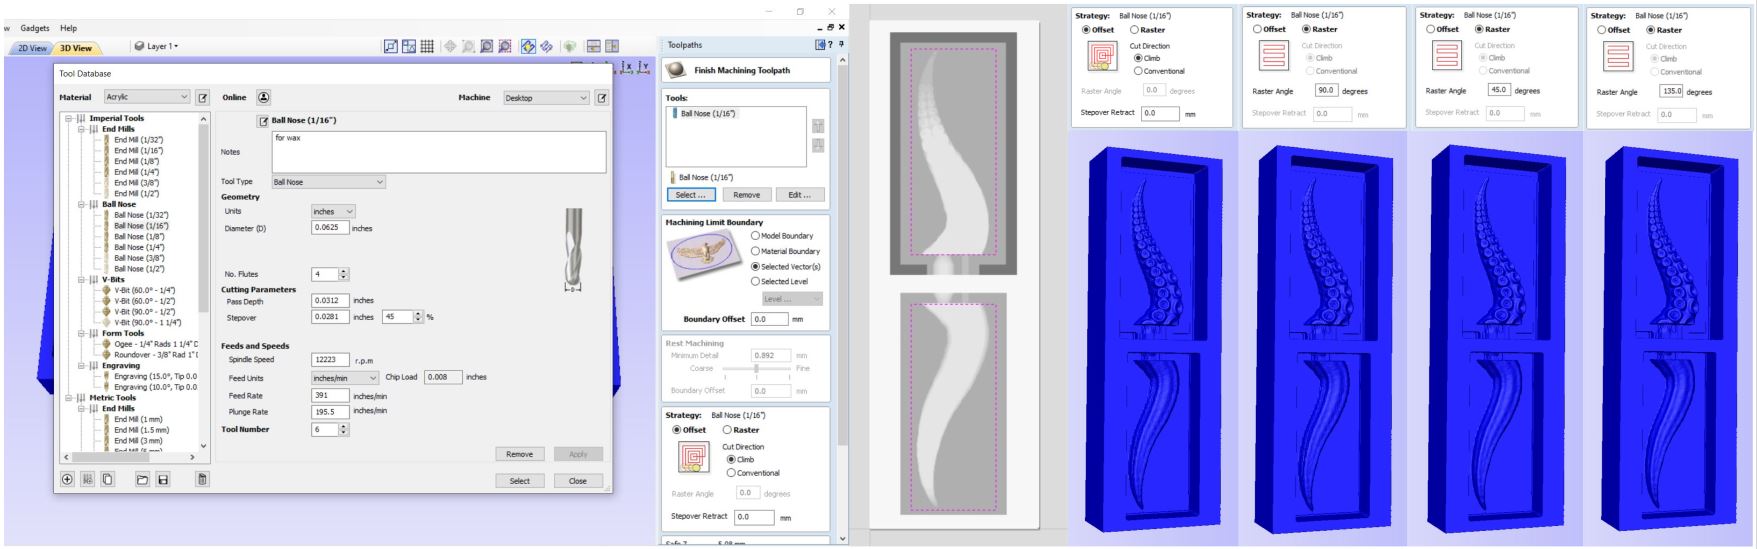
For the 1/16” bit passes it had to be just around the tentacle, so I made a rectangle and set the Machining limit boundary to Selected vectors. I made four finishing passes at the raster angle at 0.0, 45.0, 90.0 and 135.0.
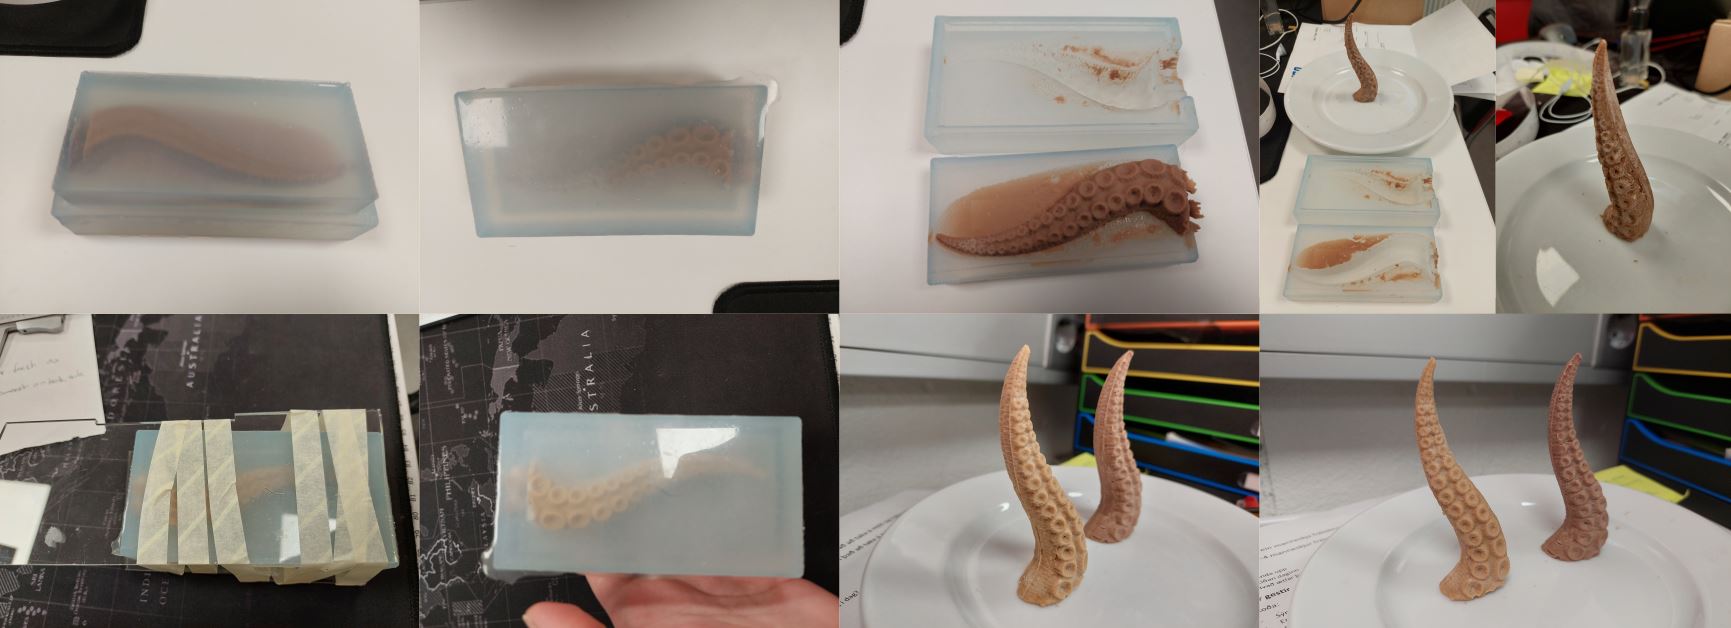
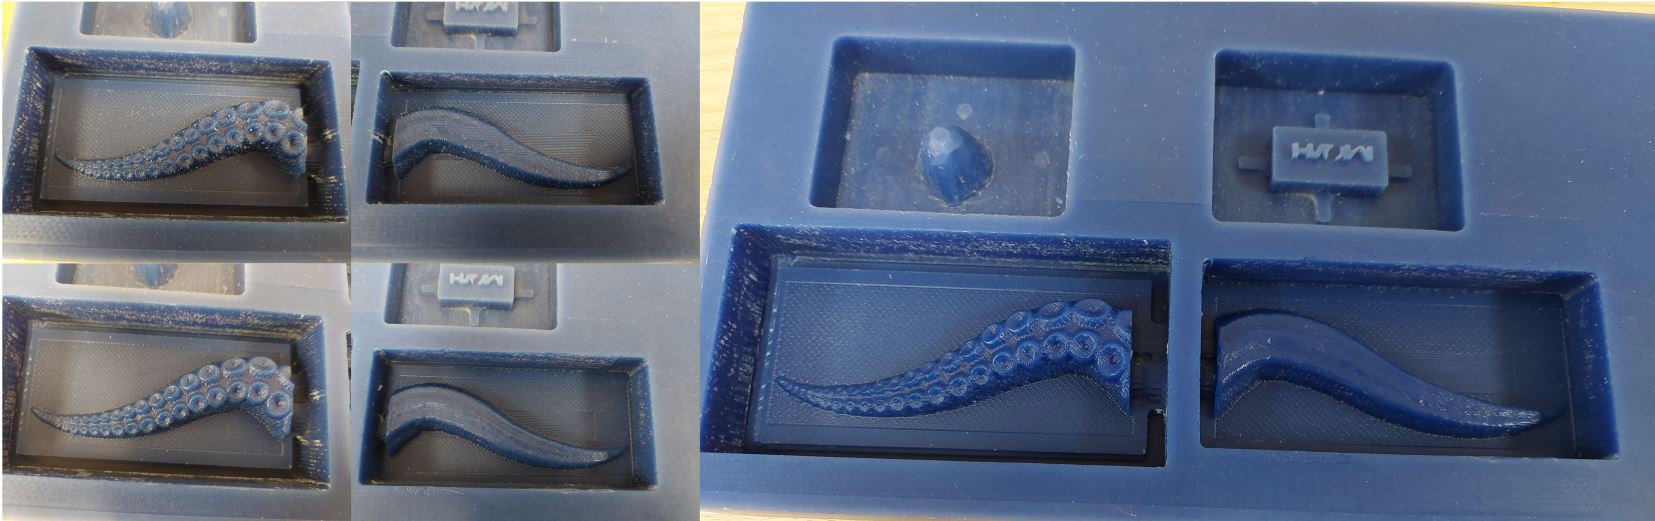
I set the wax up in the Shopbot and milled out the tentacle mold. You can see the data sheet here.
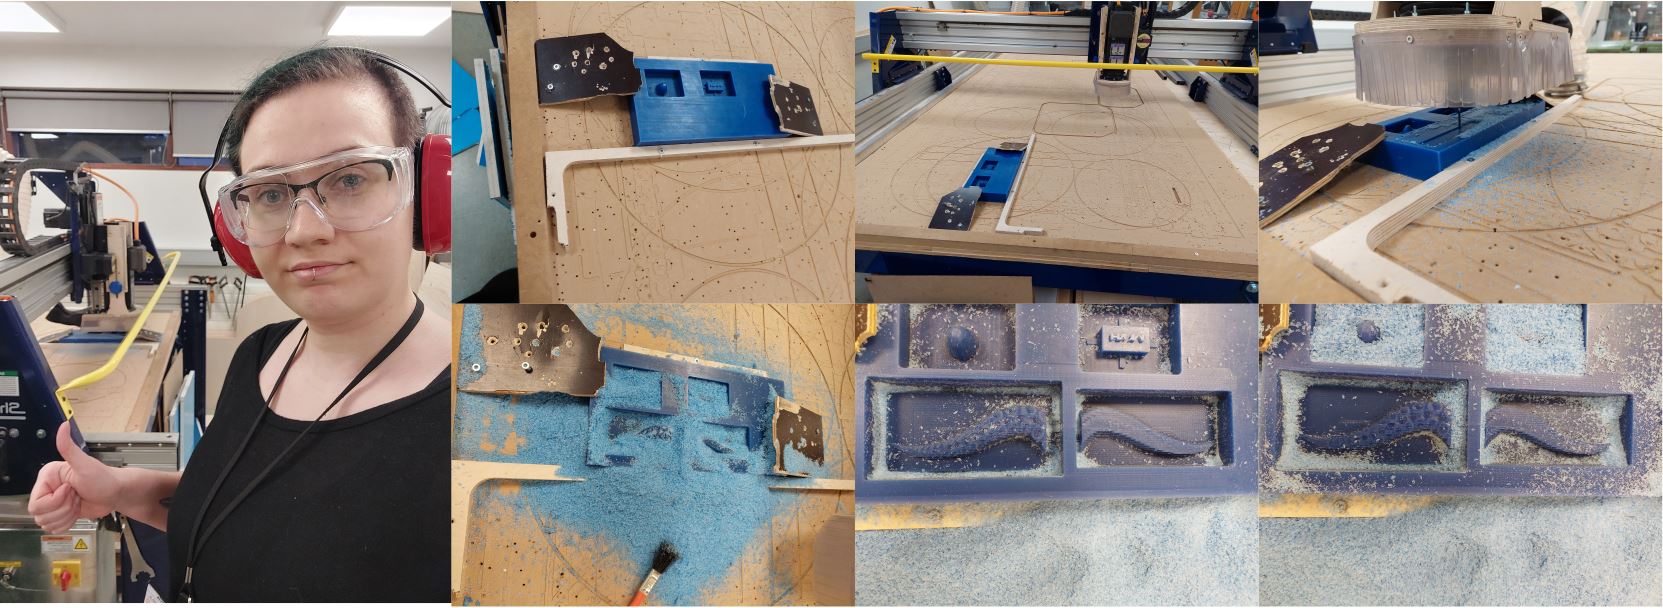
The wax came out very good but I wanted it a little smoother, so I took the heat gun
and heated it up a little and used my finger to smooth it out a little, a trick I learned from Andri.
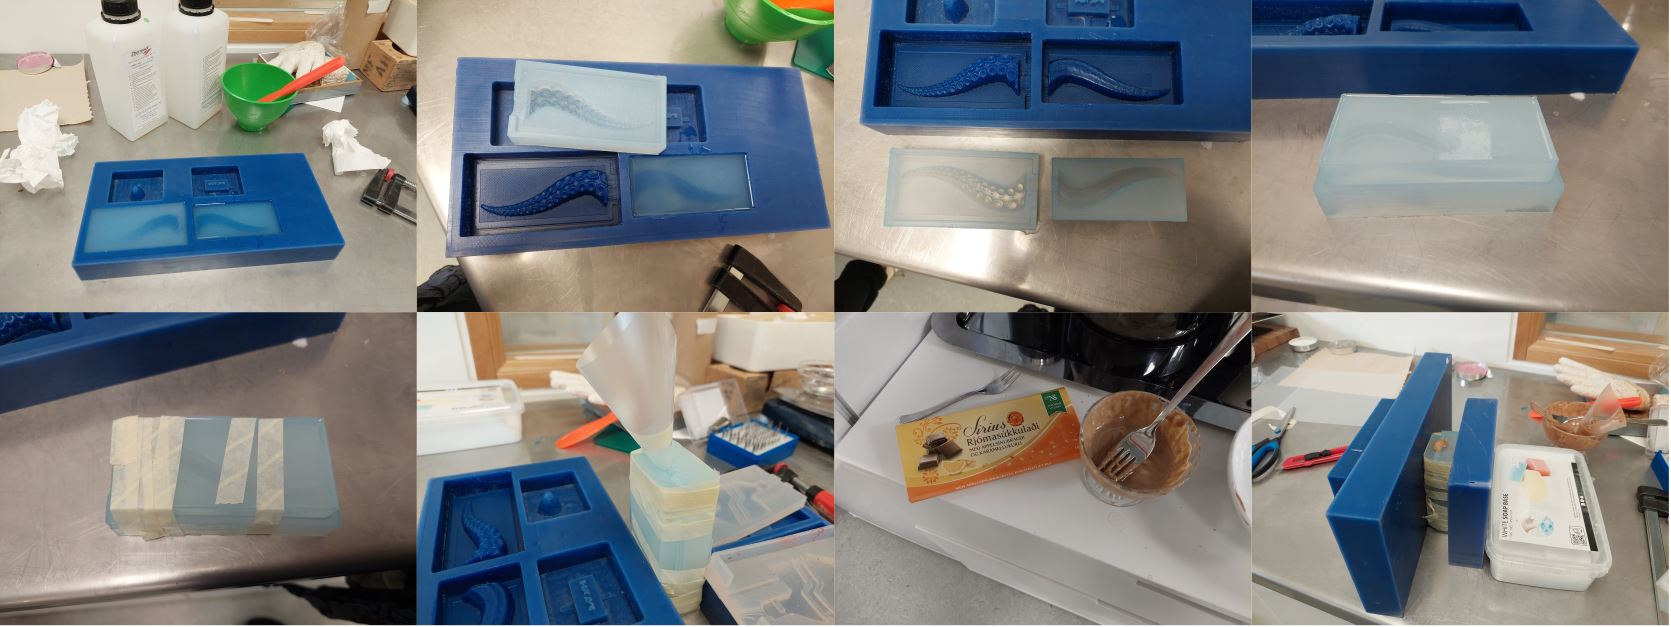
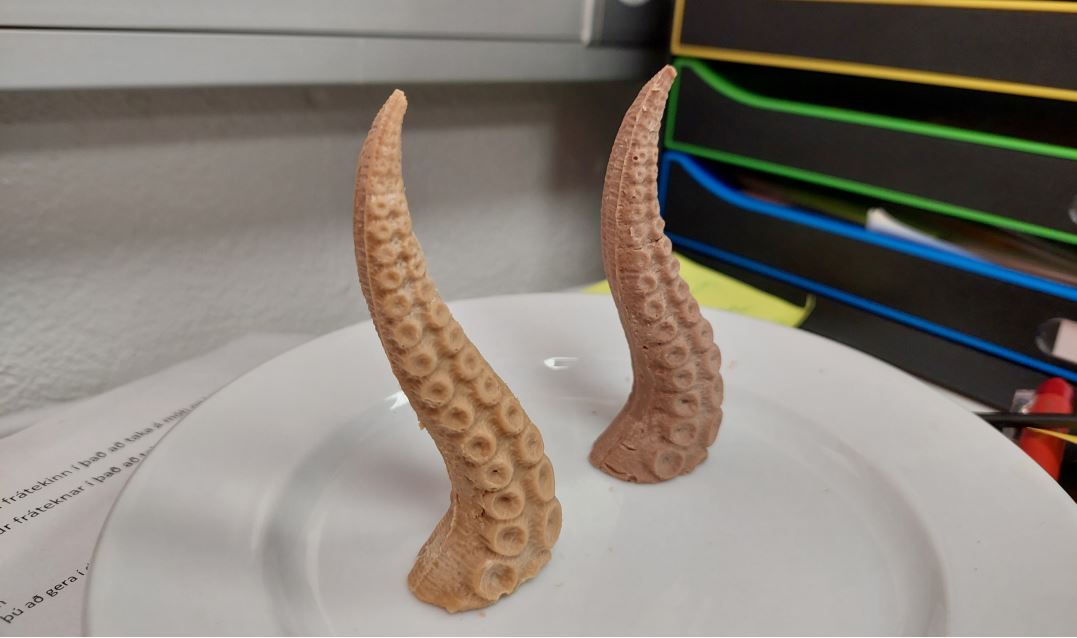
I let it sit and then opened it a little to early but it was okei. I made another one with another type of chocolate and put left over plexyglass on each side to have more even pressure and that one came out great.