Week 7
Mar 08: computer-controlled machining
List of task this week
Group assignment
To see the group assignment go here.
My thoughts on this week’s group assignment, do your lab's safety training test runout, alignment, fixturing, speeds, feeds, materials, and toolpaths for your machine: The safety training I have seen and listened to so many times that that didn’t do all that much for me, but the test pieces did a lot, I have used the Shop bot quite a few times but it was good to do all the tests and really think about how things fit best together and how best to mill things.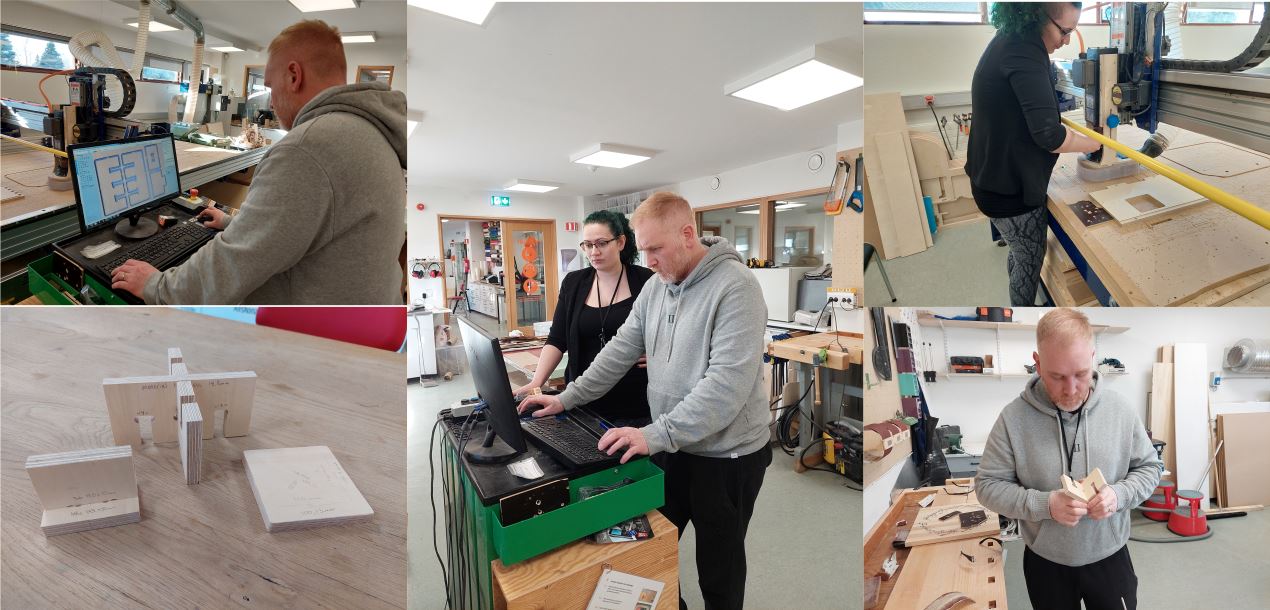
Make something big (~meter-scale) that could not be made subtractively
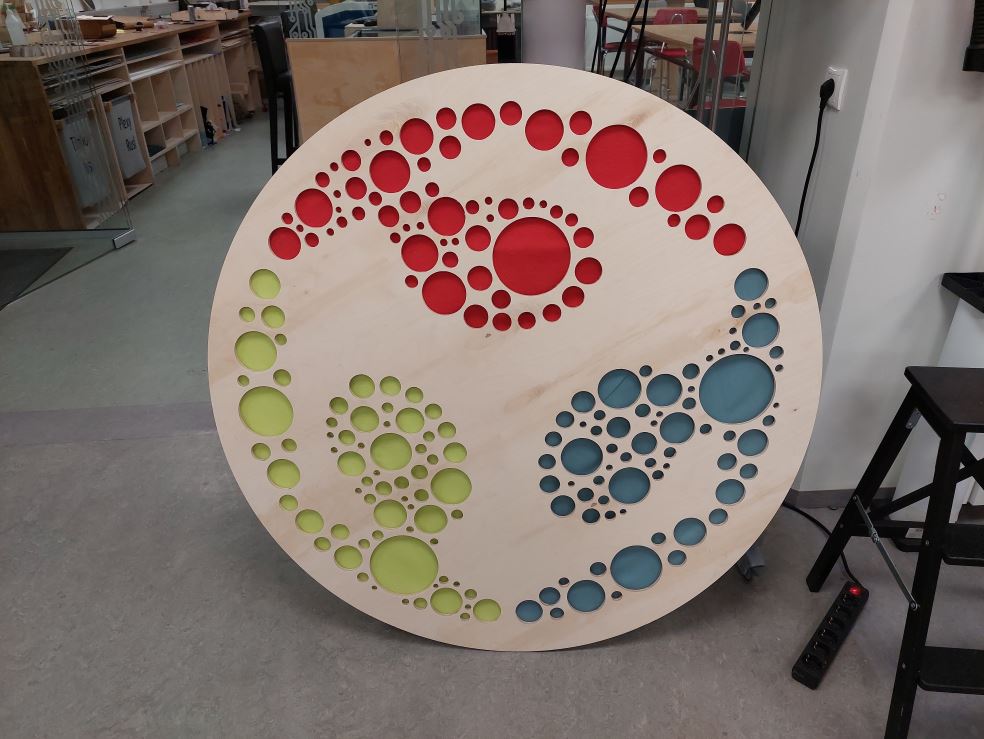
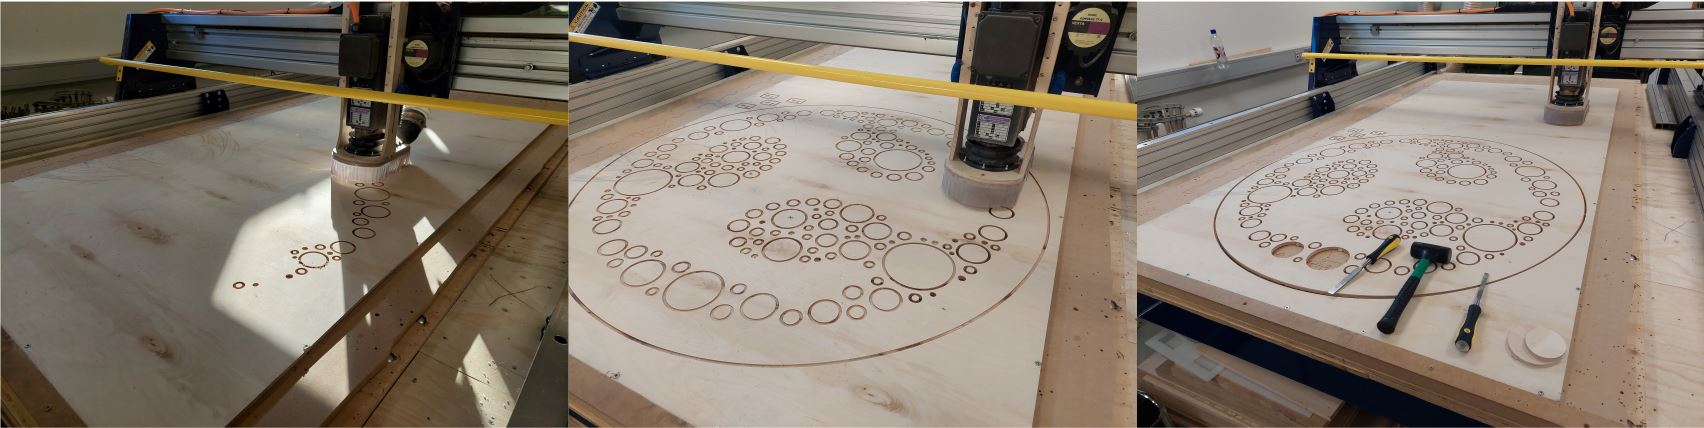
My idea was to make a big Fab Lab logo but with more surface area with rgb textile on the back to
minimize the eco in the classroom part of the Fab Lab. I put the Fab Lab logo into Inkscape and worked with circles,
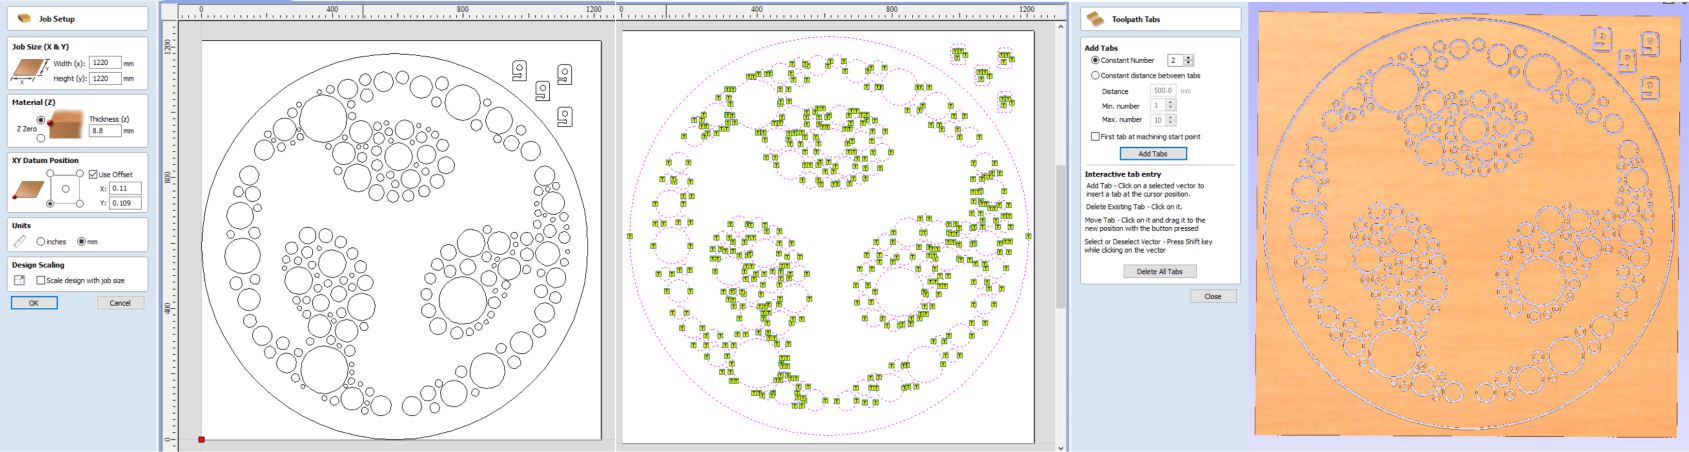
I made one that covered the whole logo and made it a bit see through and made a lot of different sized circles on the
logo to make into holes, to see better how it would look like I made it in the rgb colors. I made holders with holes
in it to hang it up, and once I was happy with it, I put everything into cutting lines which are red and 0.02mm thick
and saved as pdf.

I milled out the down cut, changed the bit, zeroed the z- axes and milled the up cut, it took about 1.5 hours to mill. After it finished I took a chisel and a rubber hammer and broke all the taps and took the circles out.
After that I had to get rid of the leftovers of the tabs so I got out our dremel. When the logo was ready I took fleece material in rgb and cut out on the back and stabled it on with a stable gun.
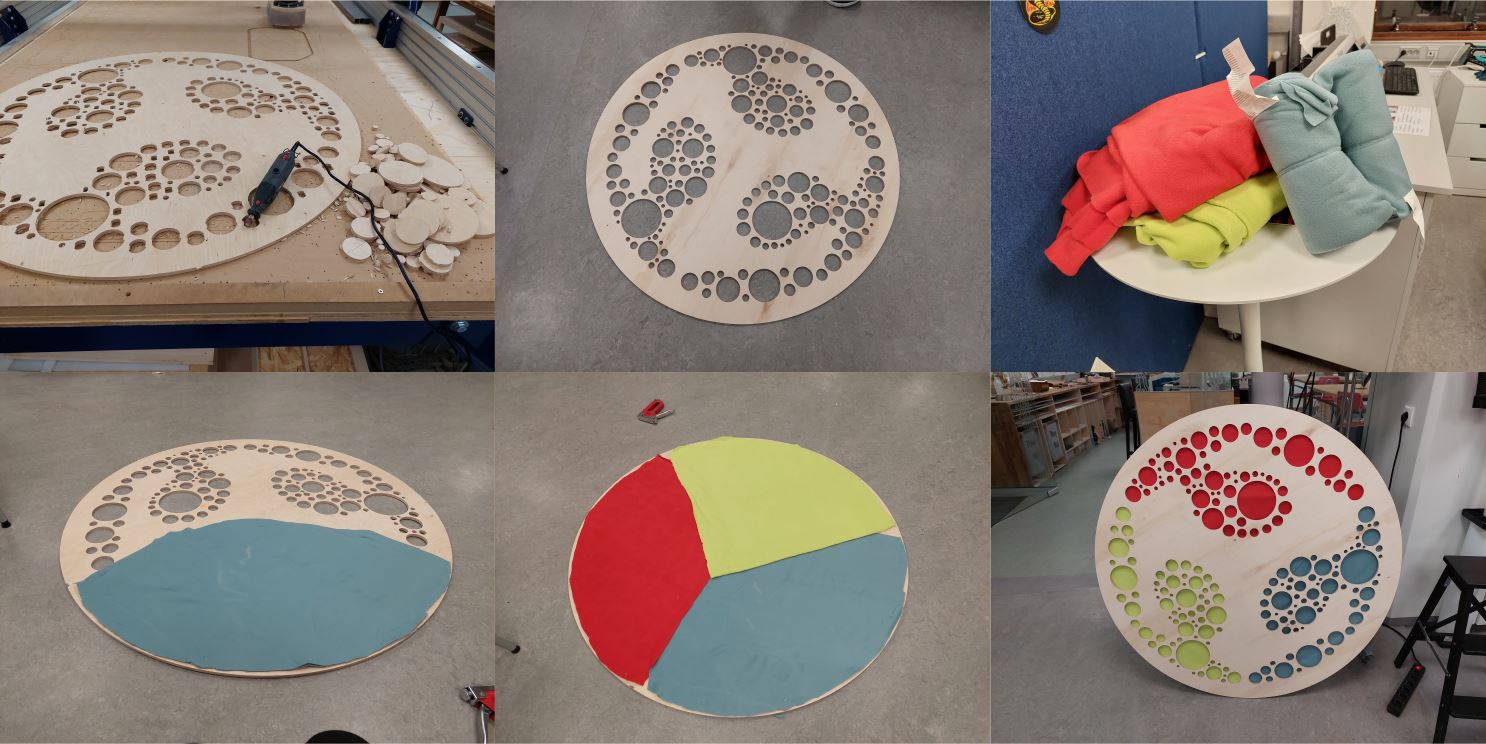
I put on the holders and will add a photo when I have hung it up.
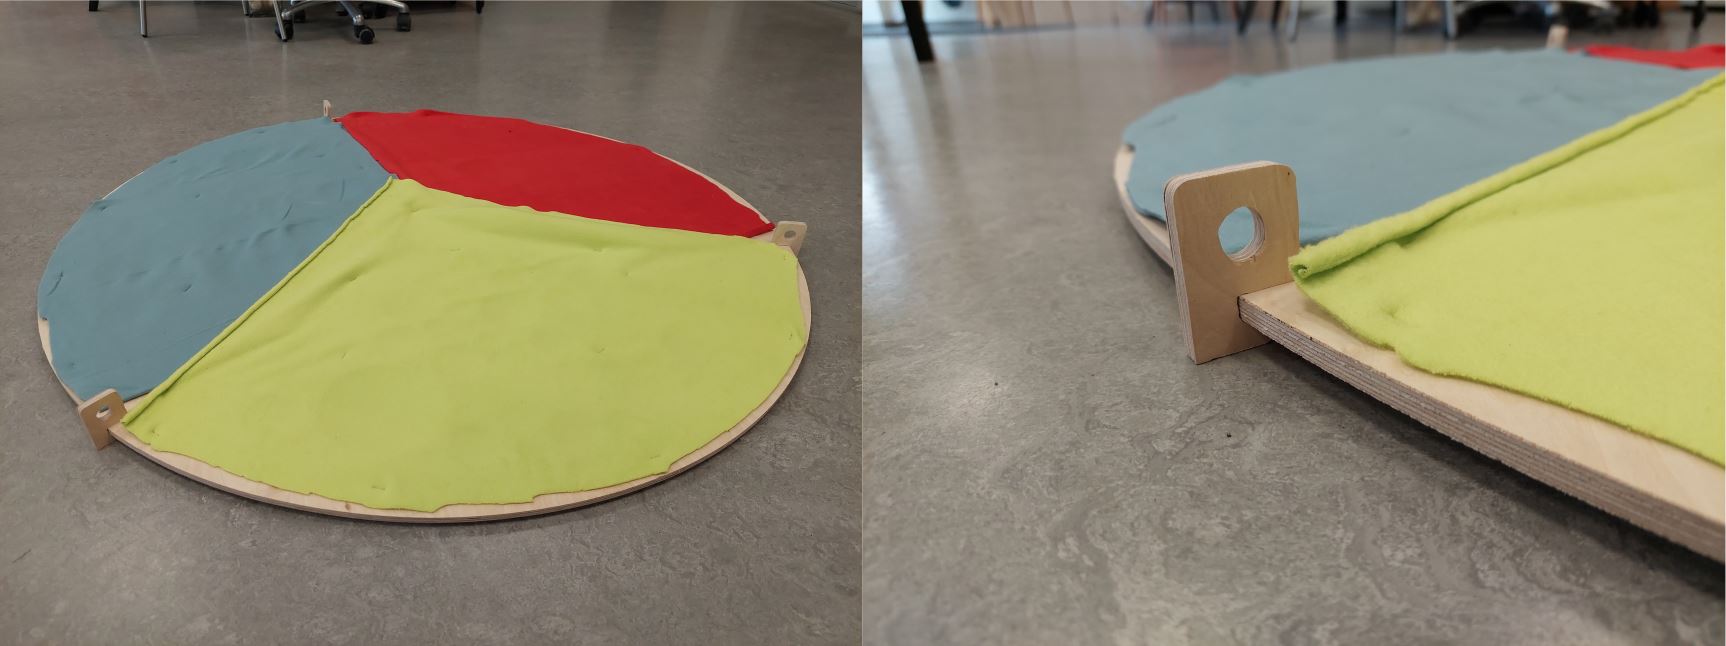
Here it is hung up, I hung it up for the pictures and took it down again, we will be puting up hooks for this but can't get to it until later on.

Other projects in the Shop bot that I have made
When I started working at Fab Lab Reykjavík there was little of a system in the laser room, so I designed in Fusion360 a system that would go under the table to sort material for the laser cutters.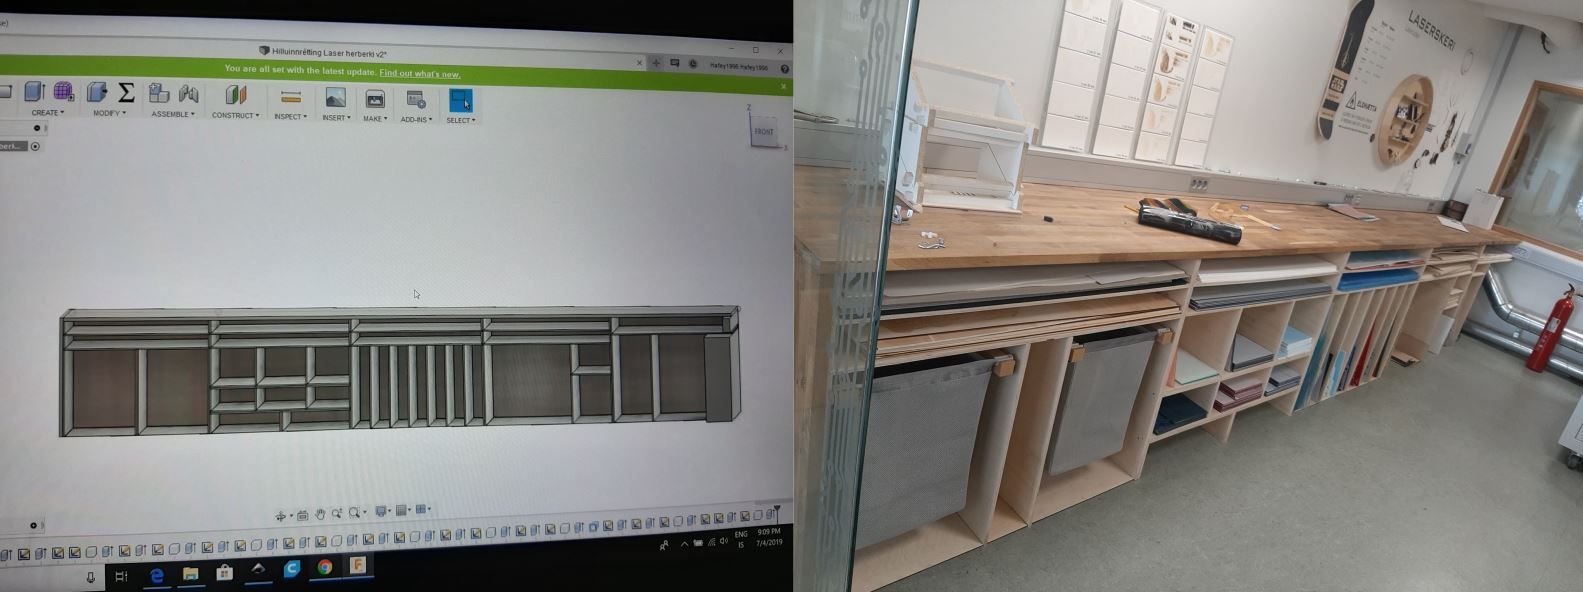
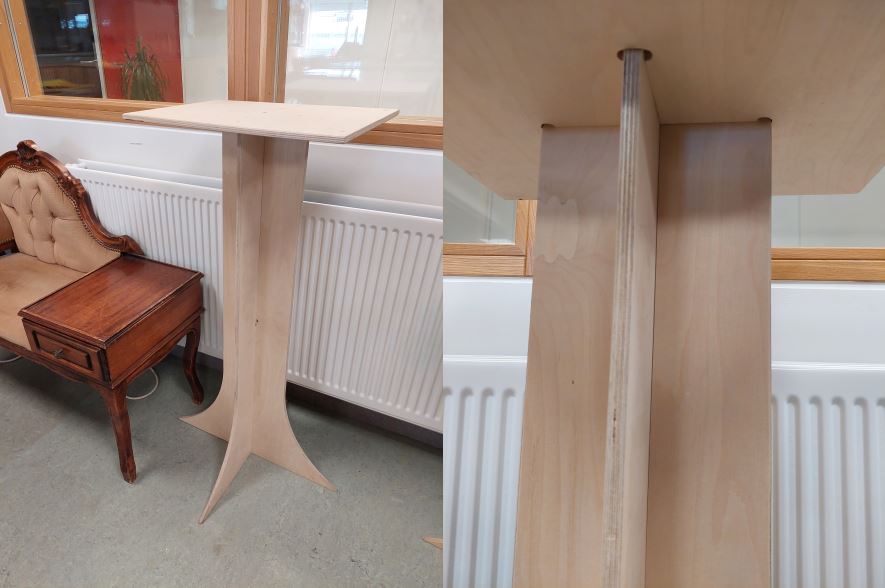
We also one needed little, tall tables however that one I did design in Inkscape.