13. Networking and communications
1.1 Assignments of the Week
- Group assignment:
- Send a message between two projects
- Document your work to the group work page and reflect on your individual page what you learned
-
Individual assignments:
- design, build, and connect wired or wireless node(s) with network or bus addresses
1.2 Group Assignment
This is the link of our group assignment.
1.3 Individual Assignment
1.3.1 What is RFID?
An RFID or radio frequency identification system consists of two main components, a tag attached to the object to be identified, and a reader that reads the tag.
A reader consists of a radio frequency module and an antenna that generates a high frequency electromagnetic field. Whereas the tag is usually a passive device (it does not have a battery). It consists of a microchip that stores and processes information, and an antenna for receiving and transmitting a signal.
When the tag is brought close to the reader, the reader generates an electromagnetic field. This causes electrons to move through the tag's antenna and subsequently powers the chip. The chip then responds by sending its stored information back to the reader in the form of another radio signal. This is called a backscatter. The reader detects and interprets this backscatter and sends the data to a computer or microcontroller.
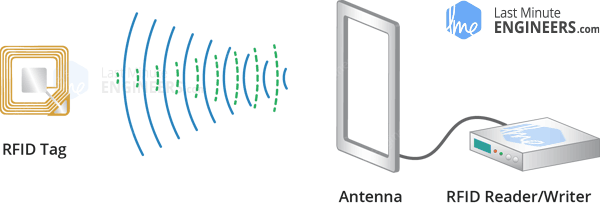
Image Source: "Interface RC522 RFID Module with Arduino" by Last Minute Engineers
1.3.2 Wiring
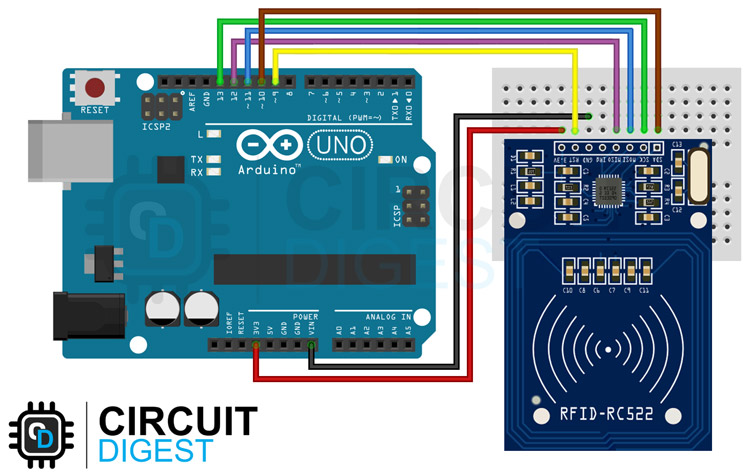
Image Source: "Interfacing RFID Reader With Arduino" by Circuit Digest
1.3.3 Reading an RFID Tag
First, I need to install a library called the MFRC522.
Library Manager > search "MFRC522" > look for library by GithubCommunity > Install

After installing the library, open the example code called "DumpInfo" and upload to the Arduino board.
File > Examples > MFRC522 > DumpInfo
Here is the example code for reading an RFID. Remember the check whether the RST_PIN is initialized correctly according to your wiring.
        #include <SPI.h>
        #include <MFRC522.h>

        #define RST_PIN         9          // Configurable, see typical pin layout above
        #define SS_PIN          10         // Configurable, see typical pin layout above

        MFRC522 mfrc522(SS_PIN, RST_PIN);  // Create MFRC522 instance

        void setup() {
          Serial.begin(9600);		// Initialize serial communications with the PC
          while (!Serial);		// Do nothing if no serial port is opened (added for Arduinos based on ATMEGA32U4)
          SPI.begin();			// Init SPI bus
          mfrc522.PCD_Init();		// Init MFRC522
          delay(4);				// Optional delay. Some board do need more time after init to be ready, see Readme
          mfrc522.PCD_DumpVersionToSerial();	// Show details of PCD - MFRC522 Card Reader details
          Serial.println(F("Scan PICC to see UID, SAK, type, and data blocks..."));
        }

        void loop() {
          // Reset the loop if no new card present on the sensor/reader. This saves the entire process when idle.
          if ( ! mfrc522.PICC_IsNewCardPresent()) {
            return;
          }

          // Select one of the cards
          if ( ! mfrc522.PICC_ReadCardSerial()) {
            return;
          }

          // Dump debug info about the card; PICC_HaltA() is automatically called
          mfrc522.PICC_DumpToSerial(&(mfrc522.uid));
        }
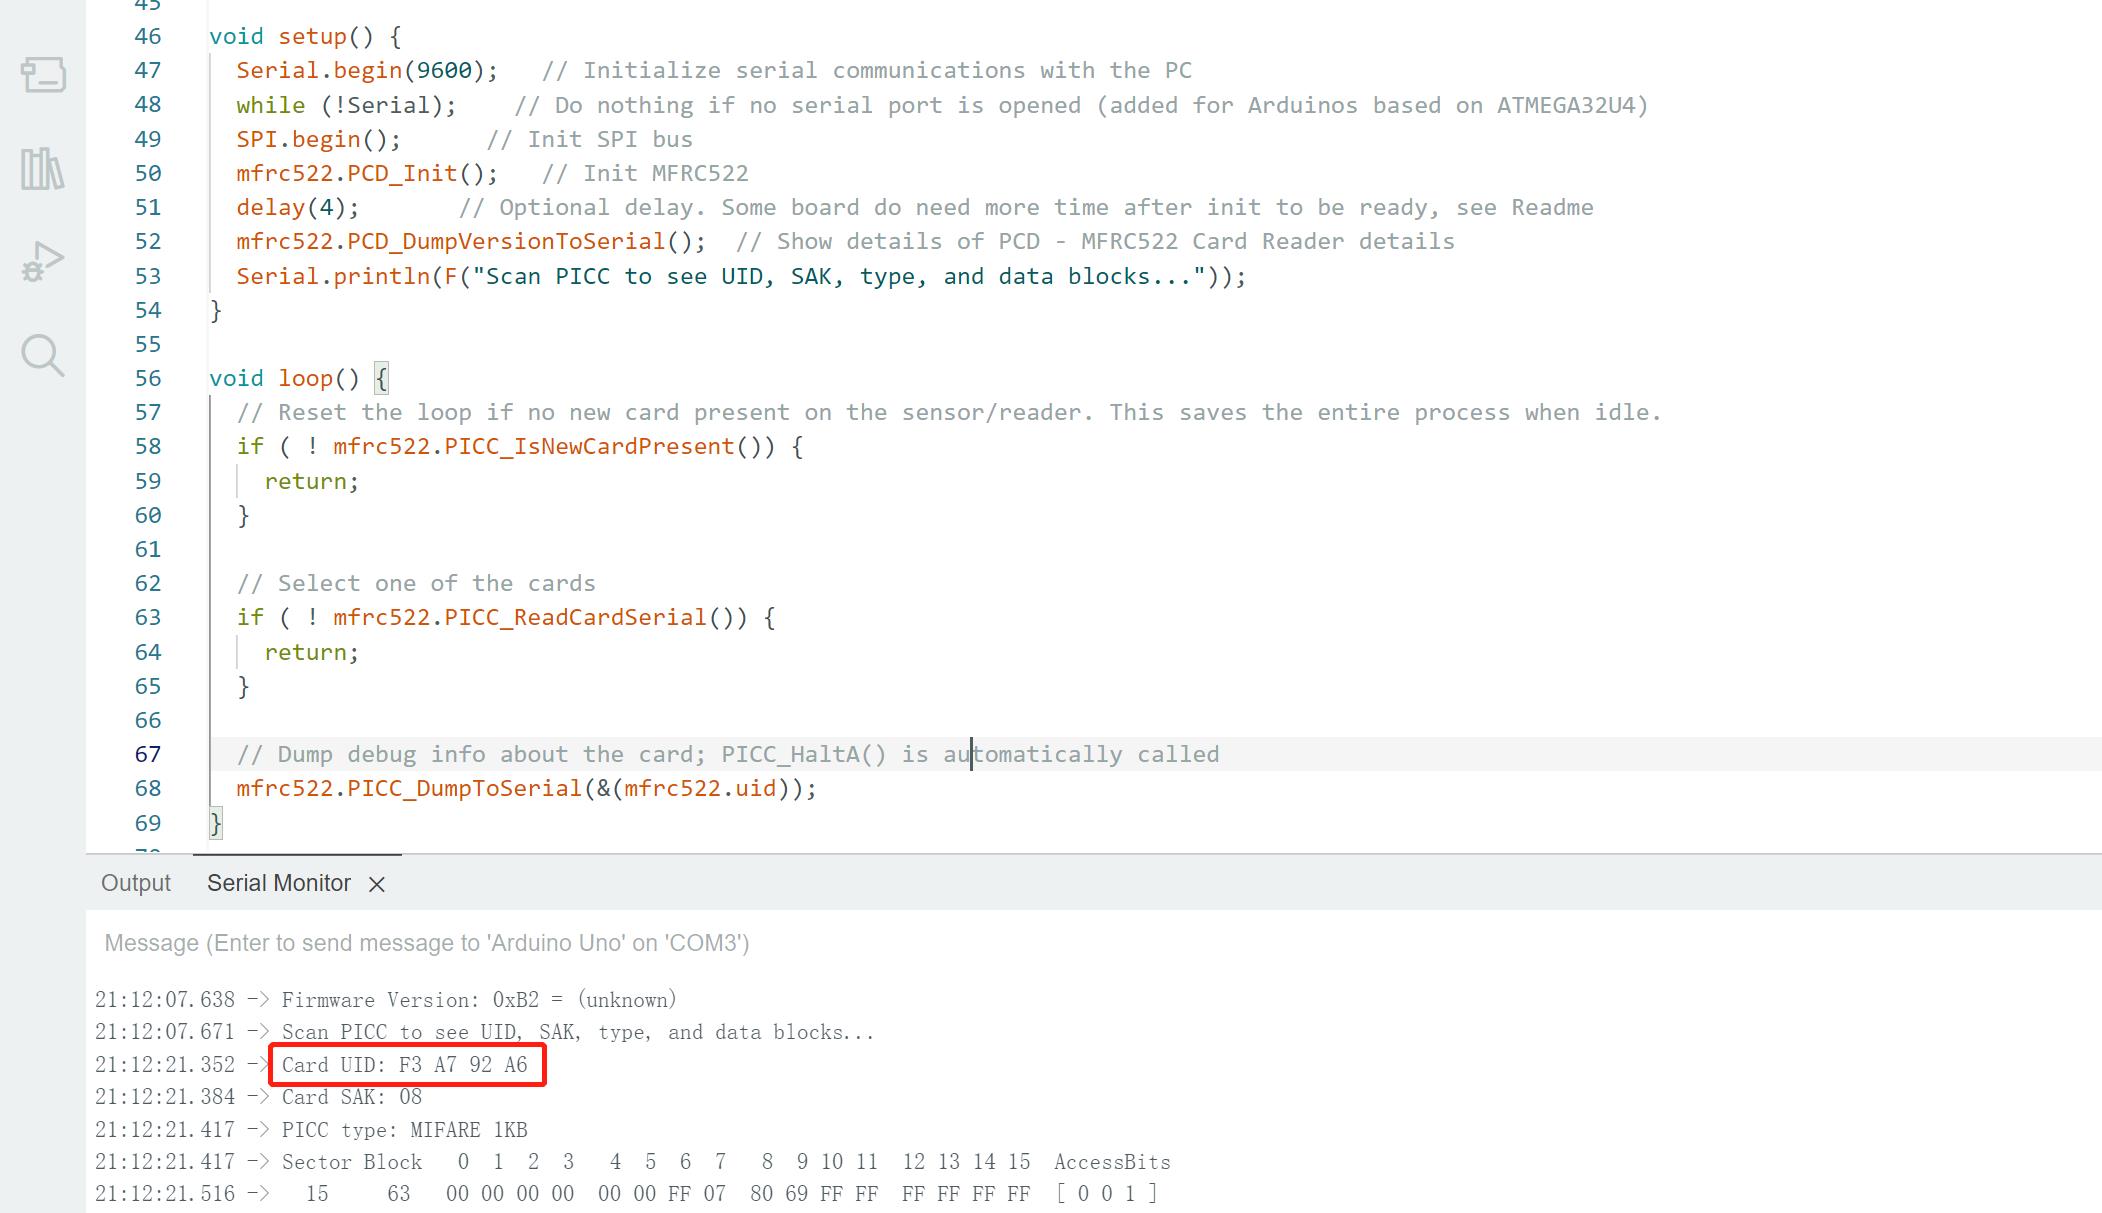
Now I can read an RFID Tag
Every tag has a unique UID.
1.3.4 RFID Based LED Control System
For my final project, I plan to use RFID technology for identification. When the correct tag is detected, the system will activate lights and animations. To test this functionality, I initially experimented with using RFID to control the LED.
I modified the code of "RFID Based Door Access Control System" project from the Last Minute Enginners. Here is my code below.
            #include
            #include

            #define RST_PIN 9
            #define SS_PIN 10

            byte readCard[4];
            String MasterTag = "F3A792A6";  // REPLACE this Tag ID with your Tag ID!!!
            String tagID = "";

            // Create instances
            MFRC522 mfrc522(SS_PIN, RST_PIN);

            void setup() {
              // Initiating
              SPI.begin();         // SPI bus
              mfrc522.PCD_Init();  // MFRC522
              Serial.begin(9600);
              pinMode(3,OUTPUT);
            }

            void loop() {

              //Wait until new tag is available
              while (getID()) {

                if (tagID == MasterTag) {
                  digitalWrite(3, HIGH);
                  delay(500);
                  digitalWrite(3, LOW);
                } else {
                  digitalWrite(3, LOW);
                }
                Serial.print("MasterTag=");
                Serial.println(MasterTag);
                Serial.print("tagID=");
                Serial.println(tagID);
              }
            }

            //Read new tag if available
            boolean getID() {
              // Getting ready for Reading PICCs
              if (!mfrc522.PICC_IsNewCardPresent()) {  //If a new PICC placed to RFID reader continue
                return false;
              }
              if (!mfrc522.PICC_ReadCardSerial()) {  //Since a PICC placed get Serial and continue
                return false;
              }
              tagID = "";
              for (uint8_t i = 0; i < 4; i++) {  // The MIFARE PICCs that we use have 4 byte UID
                //readCard[i] = mfrc522.uid.uidByte[i];
                tagID.concat(String(mfrc522.uid.uidByte[i], HEX));  // Adds the 4 bytes in a single String variable
              }
              tagID.toUpperCase();
              mfrc522.PICC_HaltA();  // Stop reading
              return true;
            }
When the correct tag is read, the LED is on for 0.5 seconds, otherwise the LED is off