10. Mechanical design & machine design
1.1 Assignments of the Week
- Group assignment:
- Design a machine that includes mechanism + actuation + automation + application
- Build the mechanical parts and operate it manually.
- Document the group project
-
Individual assignments:
- Document your individual contribution.
1.2 Group Assignment
It's an exciting week as we we embark on the design and production of a machine. both my two teammates and our instructor, Nancy, all agreed to create an auto-massage machine. The motivation behind this choice came from our shared experiences of dealing with sore backs due to physical exercise or long time of sitting. We often found it challenging to effectively massage our lower backs using a masasge gun for lower back muscle relaxation. So we all need an auto-massage machine very much.
Here is the complete group documentation.
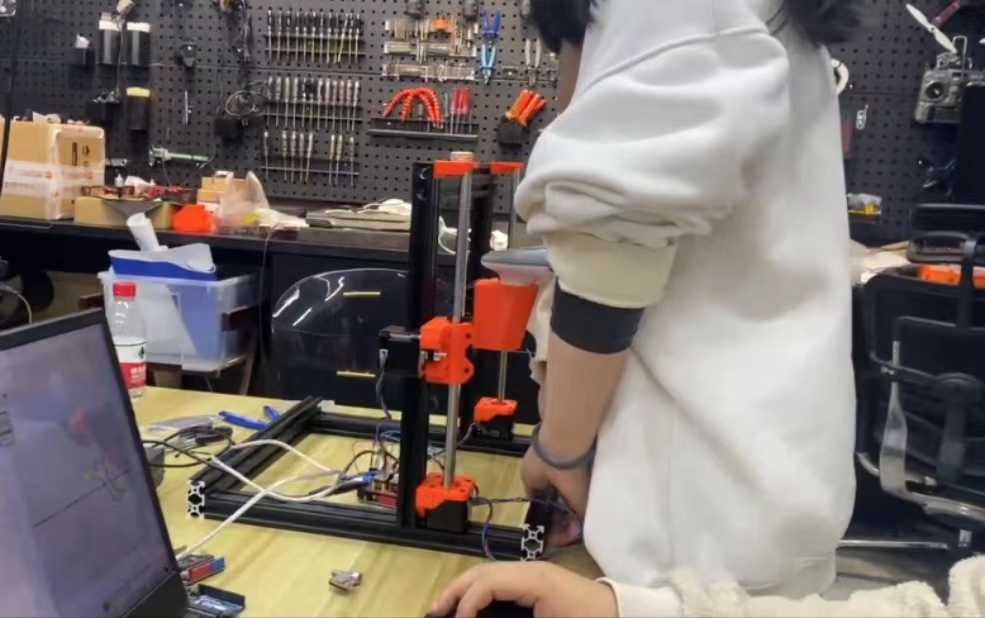 👈 Me enjoying the service of our auto-massage machine
Hero Shot:
1.3 Individual Assignment
During the whole process, in addition to completing the assembly and testing of the machine with the team members, I was mainly responsible for the design and manufacture of the massage gun holder.
1.3.1 Massage Gun Holder
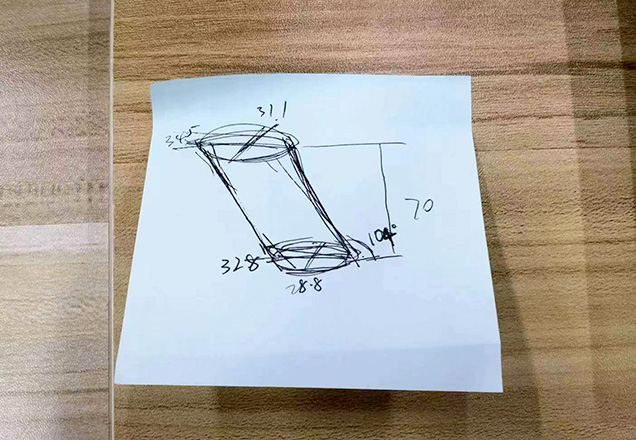
(1) Sketch
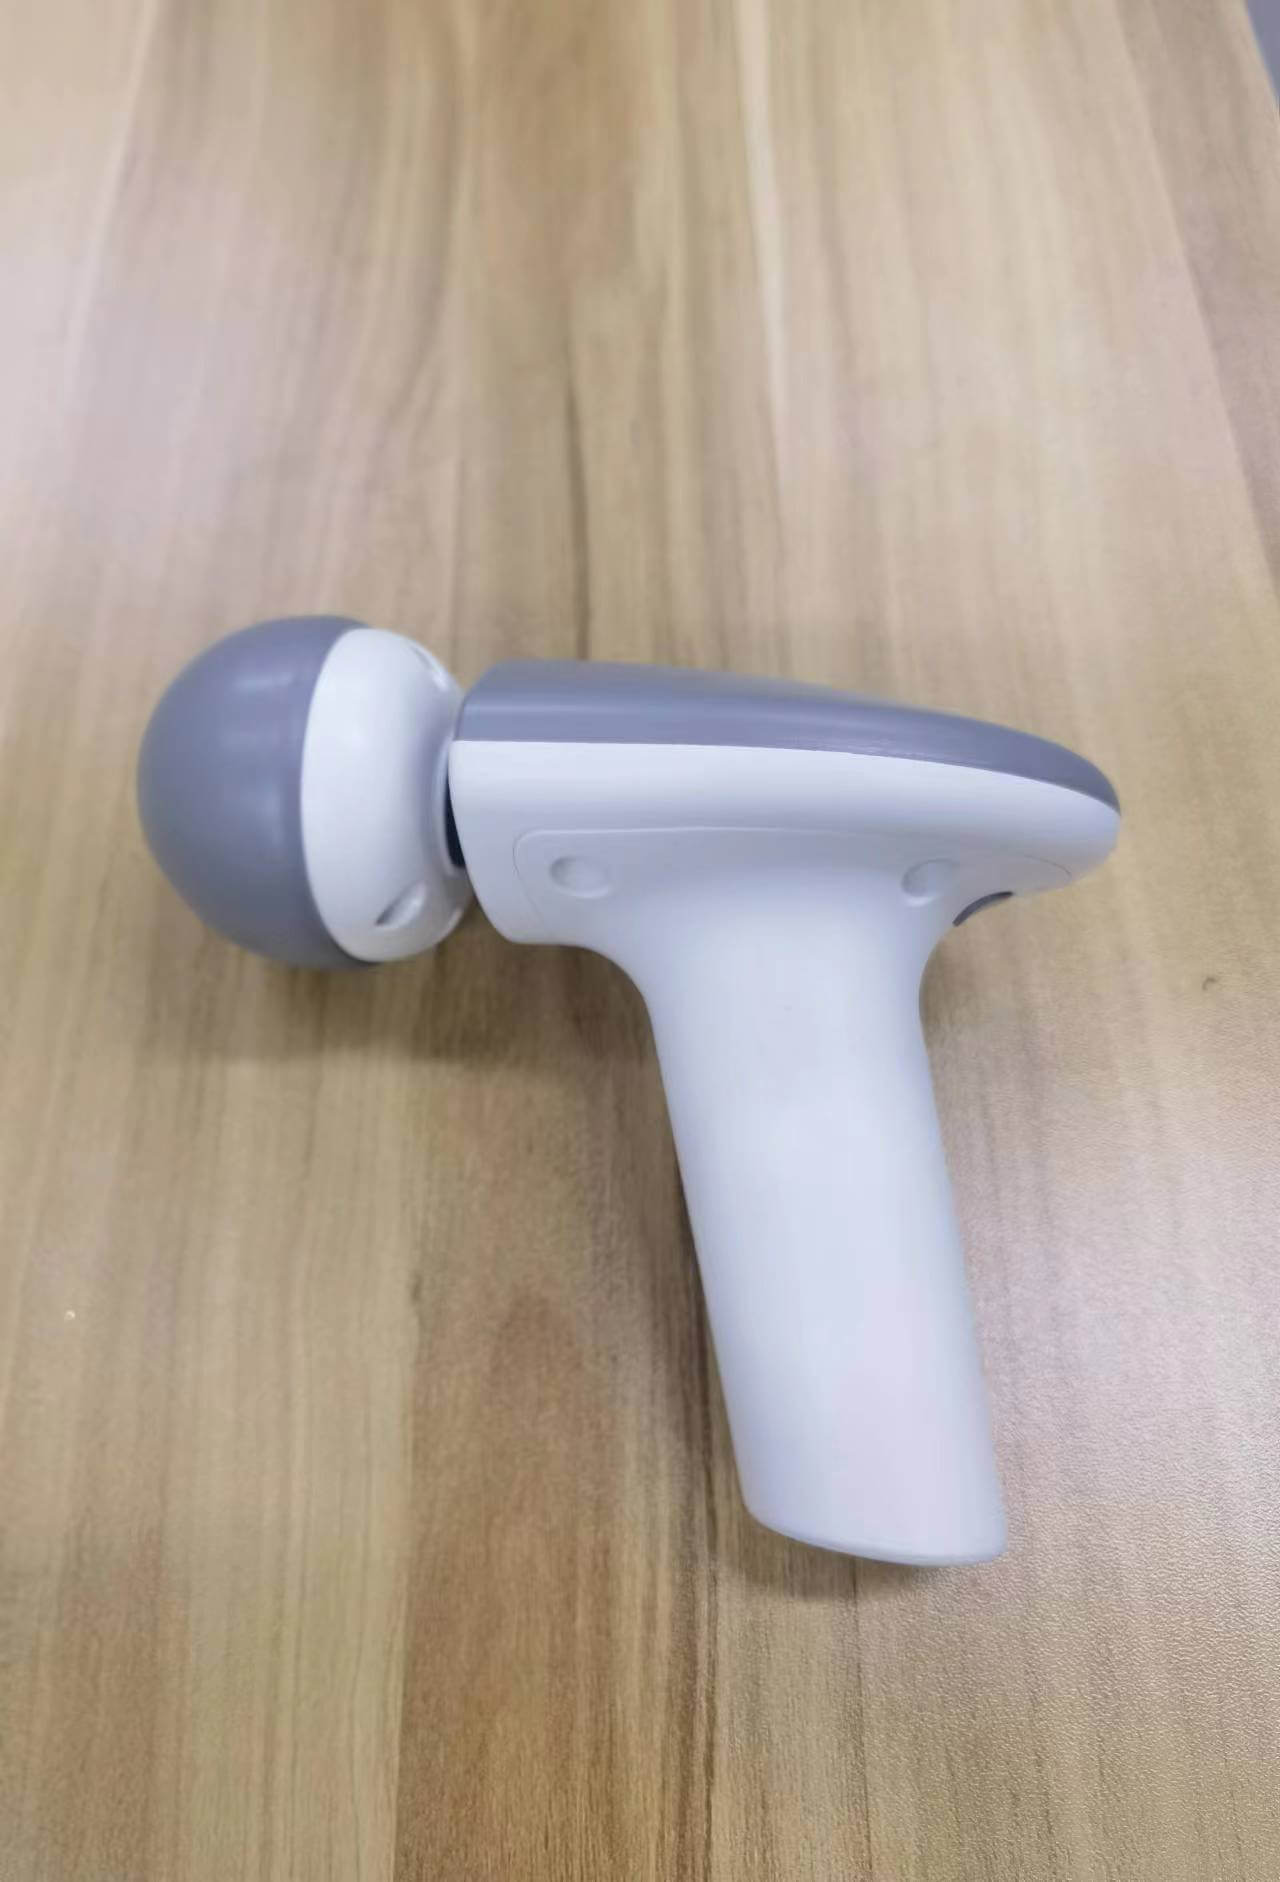
For the first version of this machine, we decided to use a small massage gun. To create a suitable holder, I began by measuring the size of the massage gun handle and sketching out its shape. The holder I envisioned would fully enclose the massage gun. Both the upper and lower sections of the massage gun handle is resembling an ellipse, and the handle is angled obtusely in relation to the head of the massage gun. The information provided in my sketch was sufficient for me to create a computer model.
(2) 3D Modeling
Referring to the sketch, I drew the sketch of the upper and lower planes in fusion360, and use the loft and the cut operation in combine to realize the modeling of the main body.
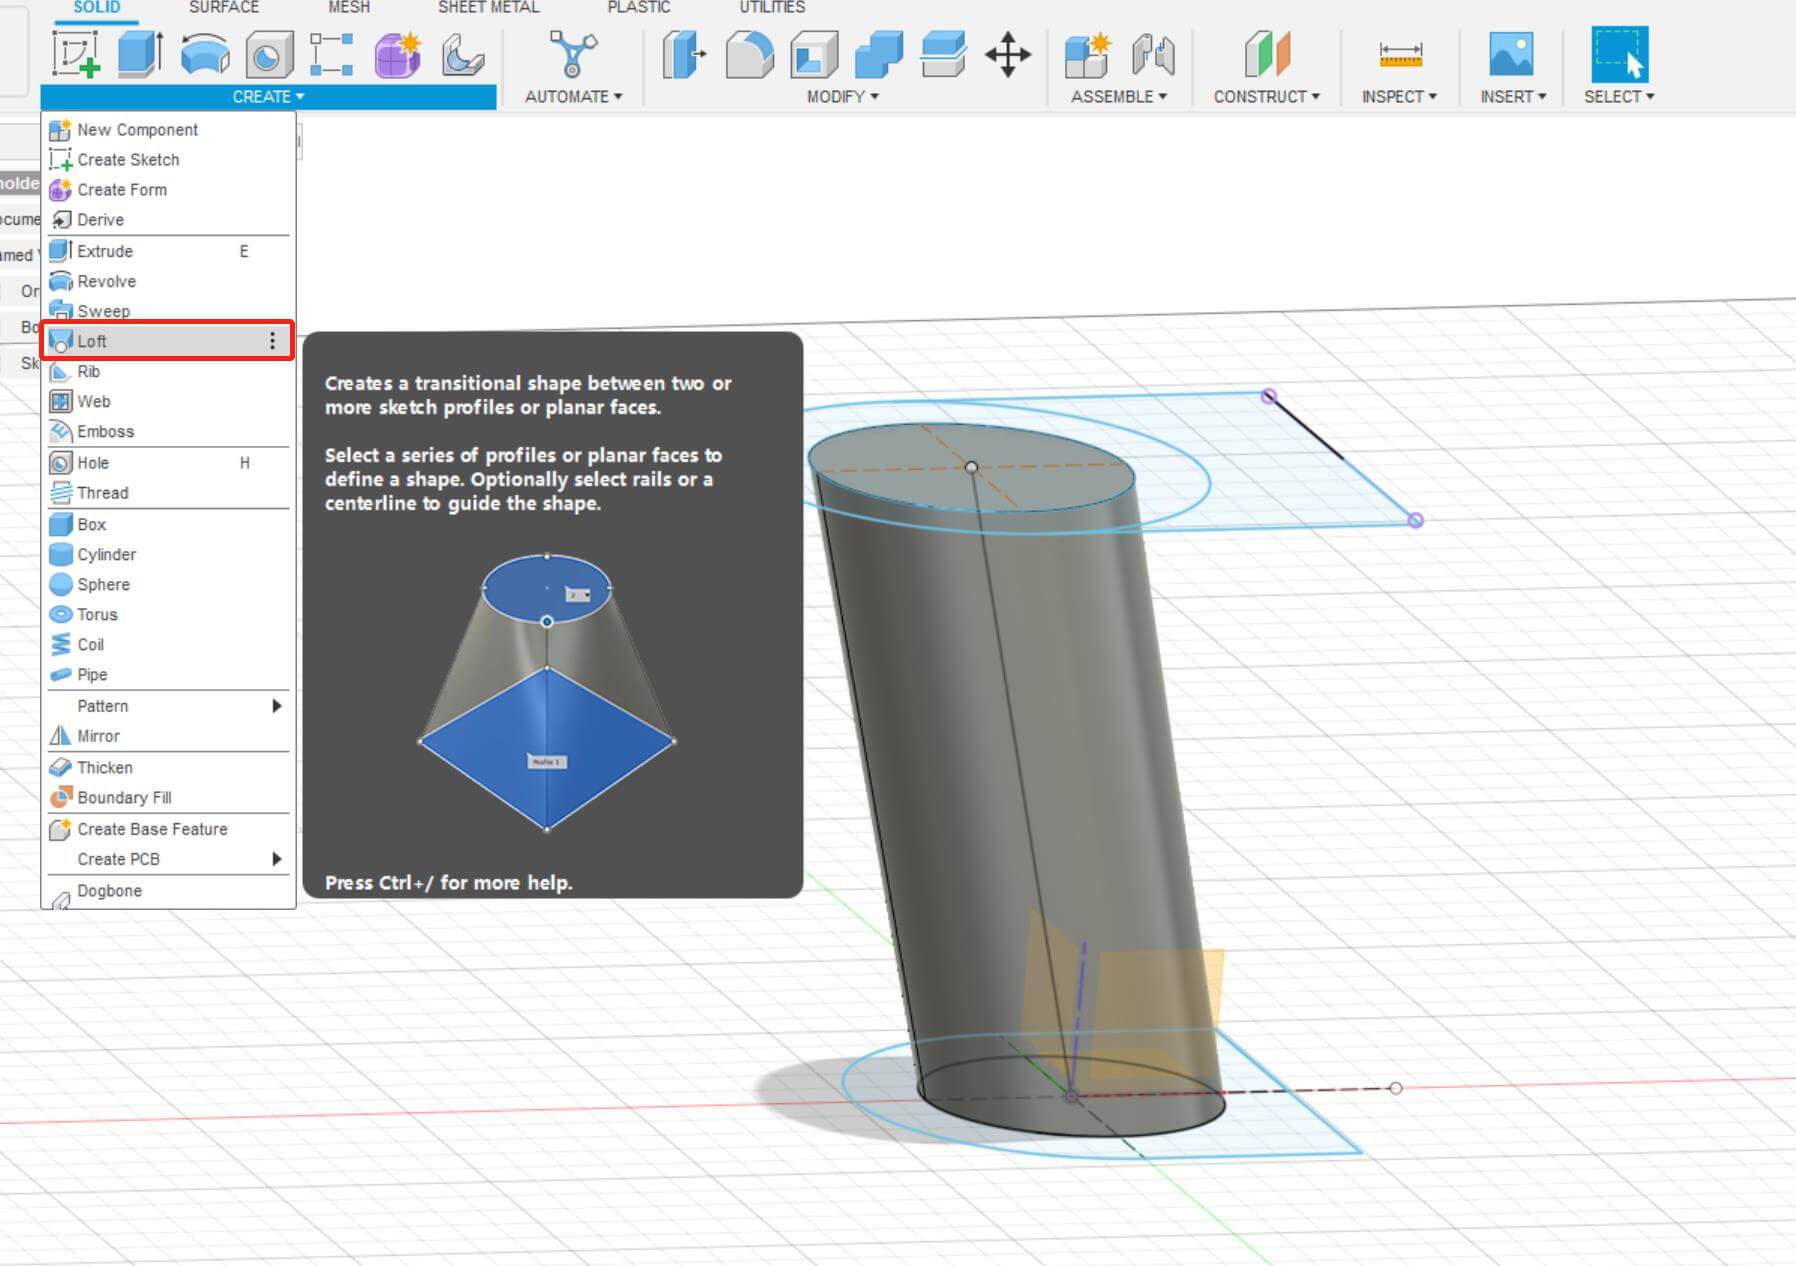 👈 Loft - Inner Body
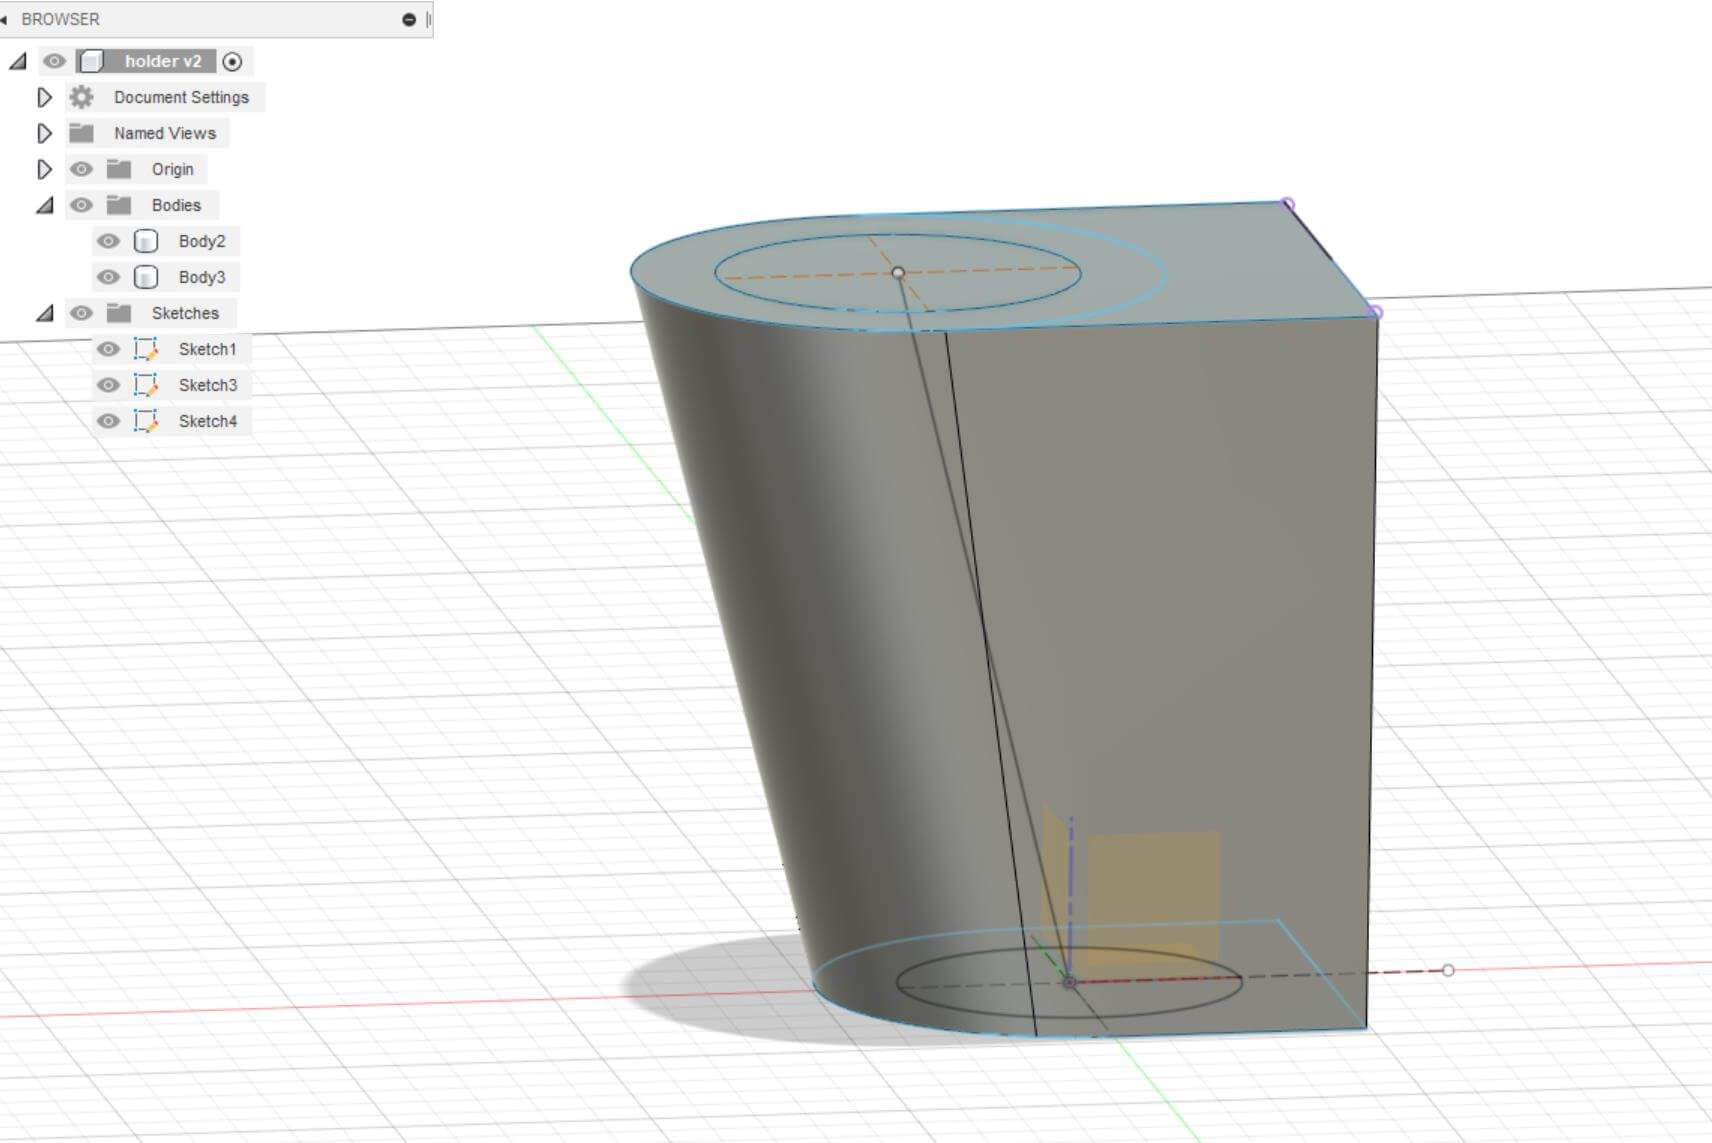 👈 Loft - Outer Body
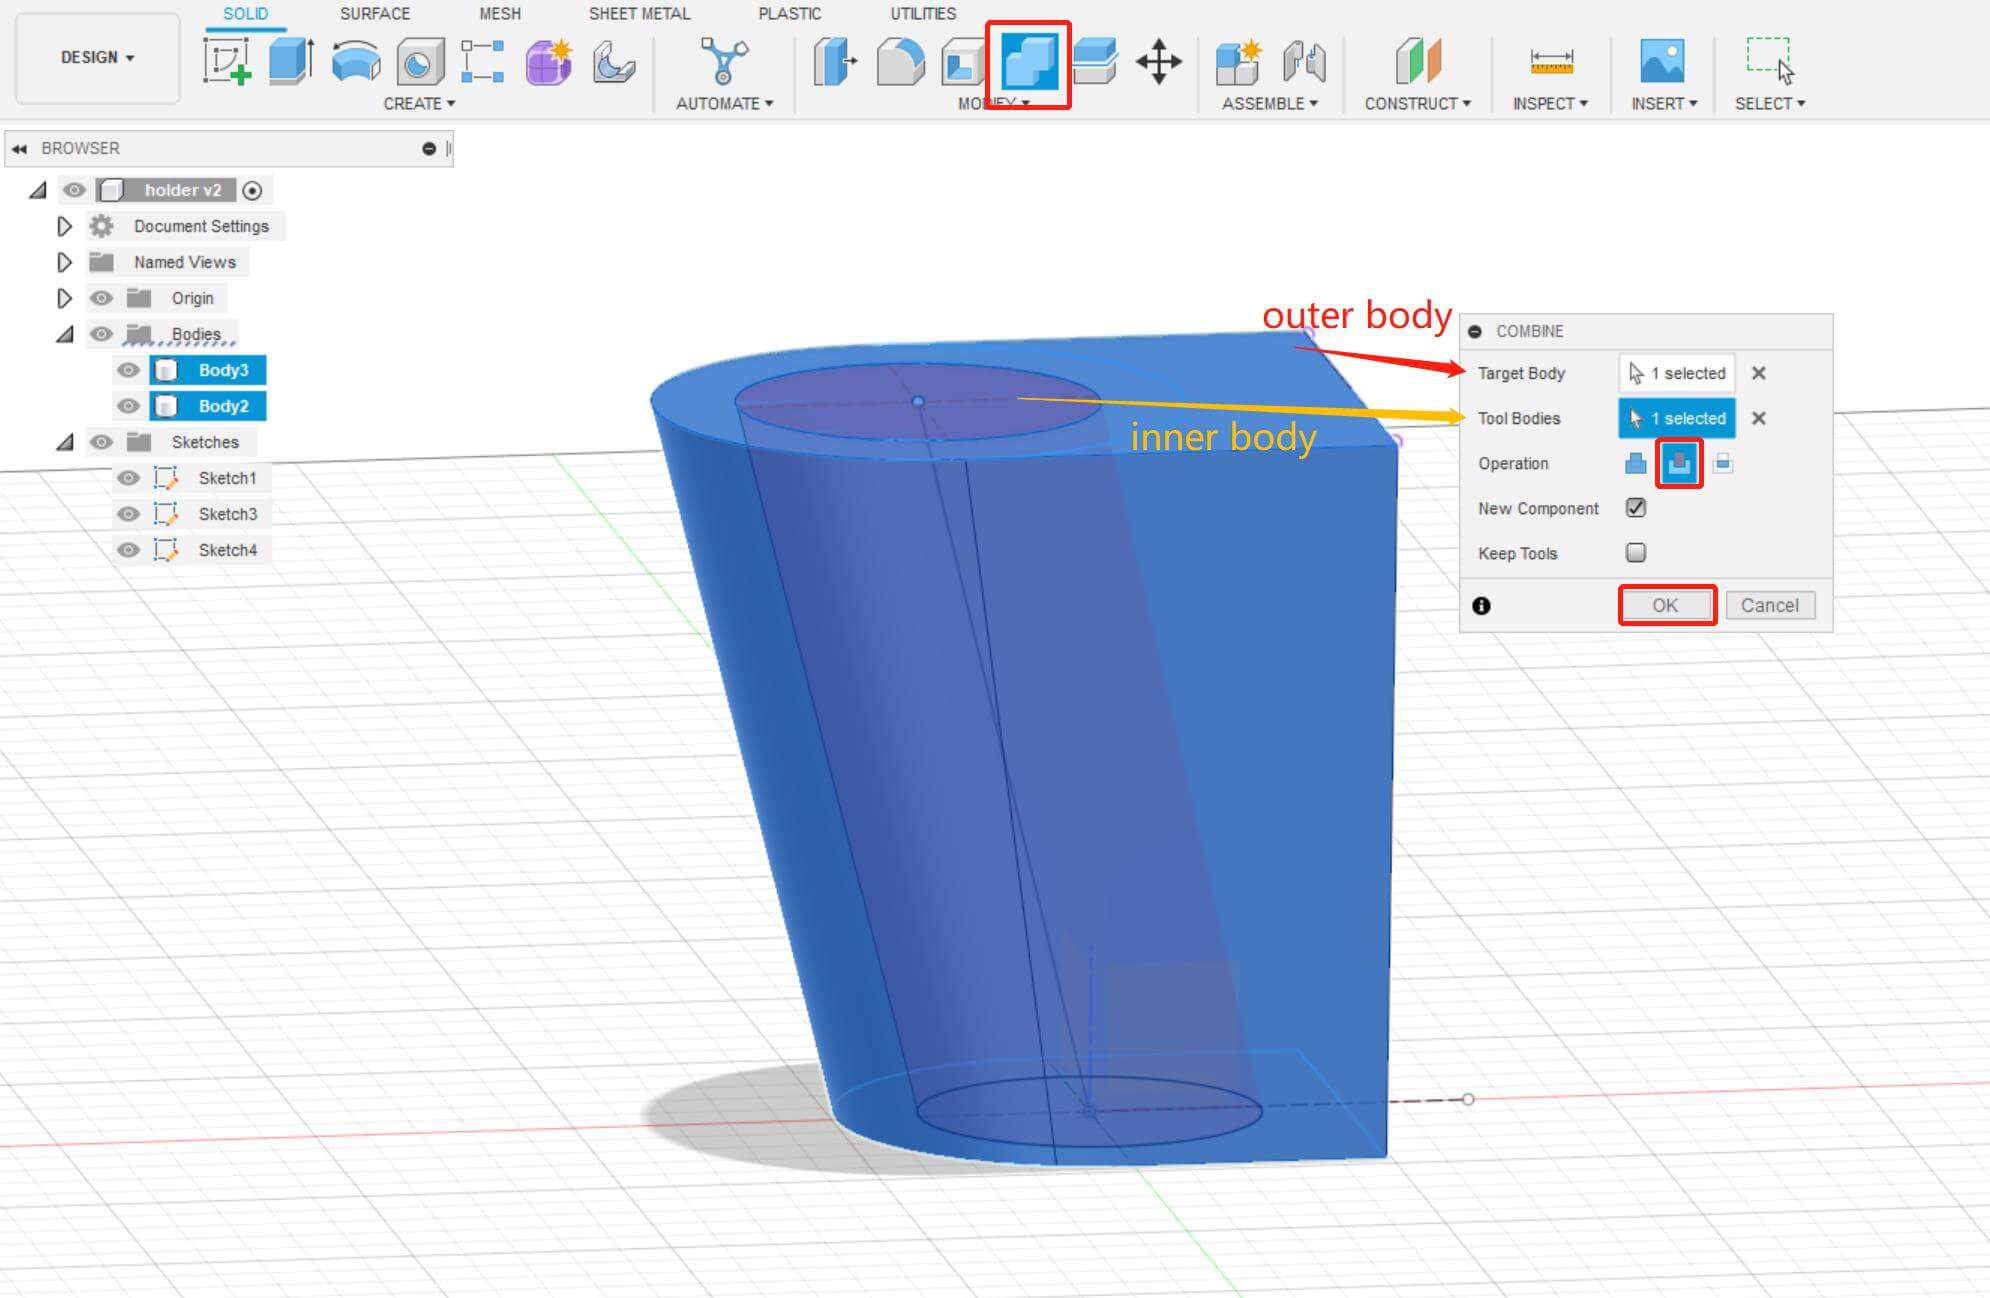 👈 Combine - Using Inner Body to Cut the Outer Body
Determine the hole location. We used the Prusa frame as our main frameset, which has a designed back carrige connected to the x-axis smooth rods and linear bearings. 4 holes have already reserved for connecting other equipment (such as extruder). I need to project these 4 holes to the suitable position on the massage gun holder.
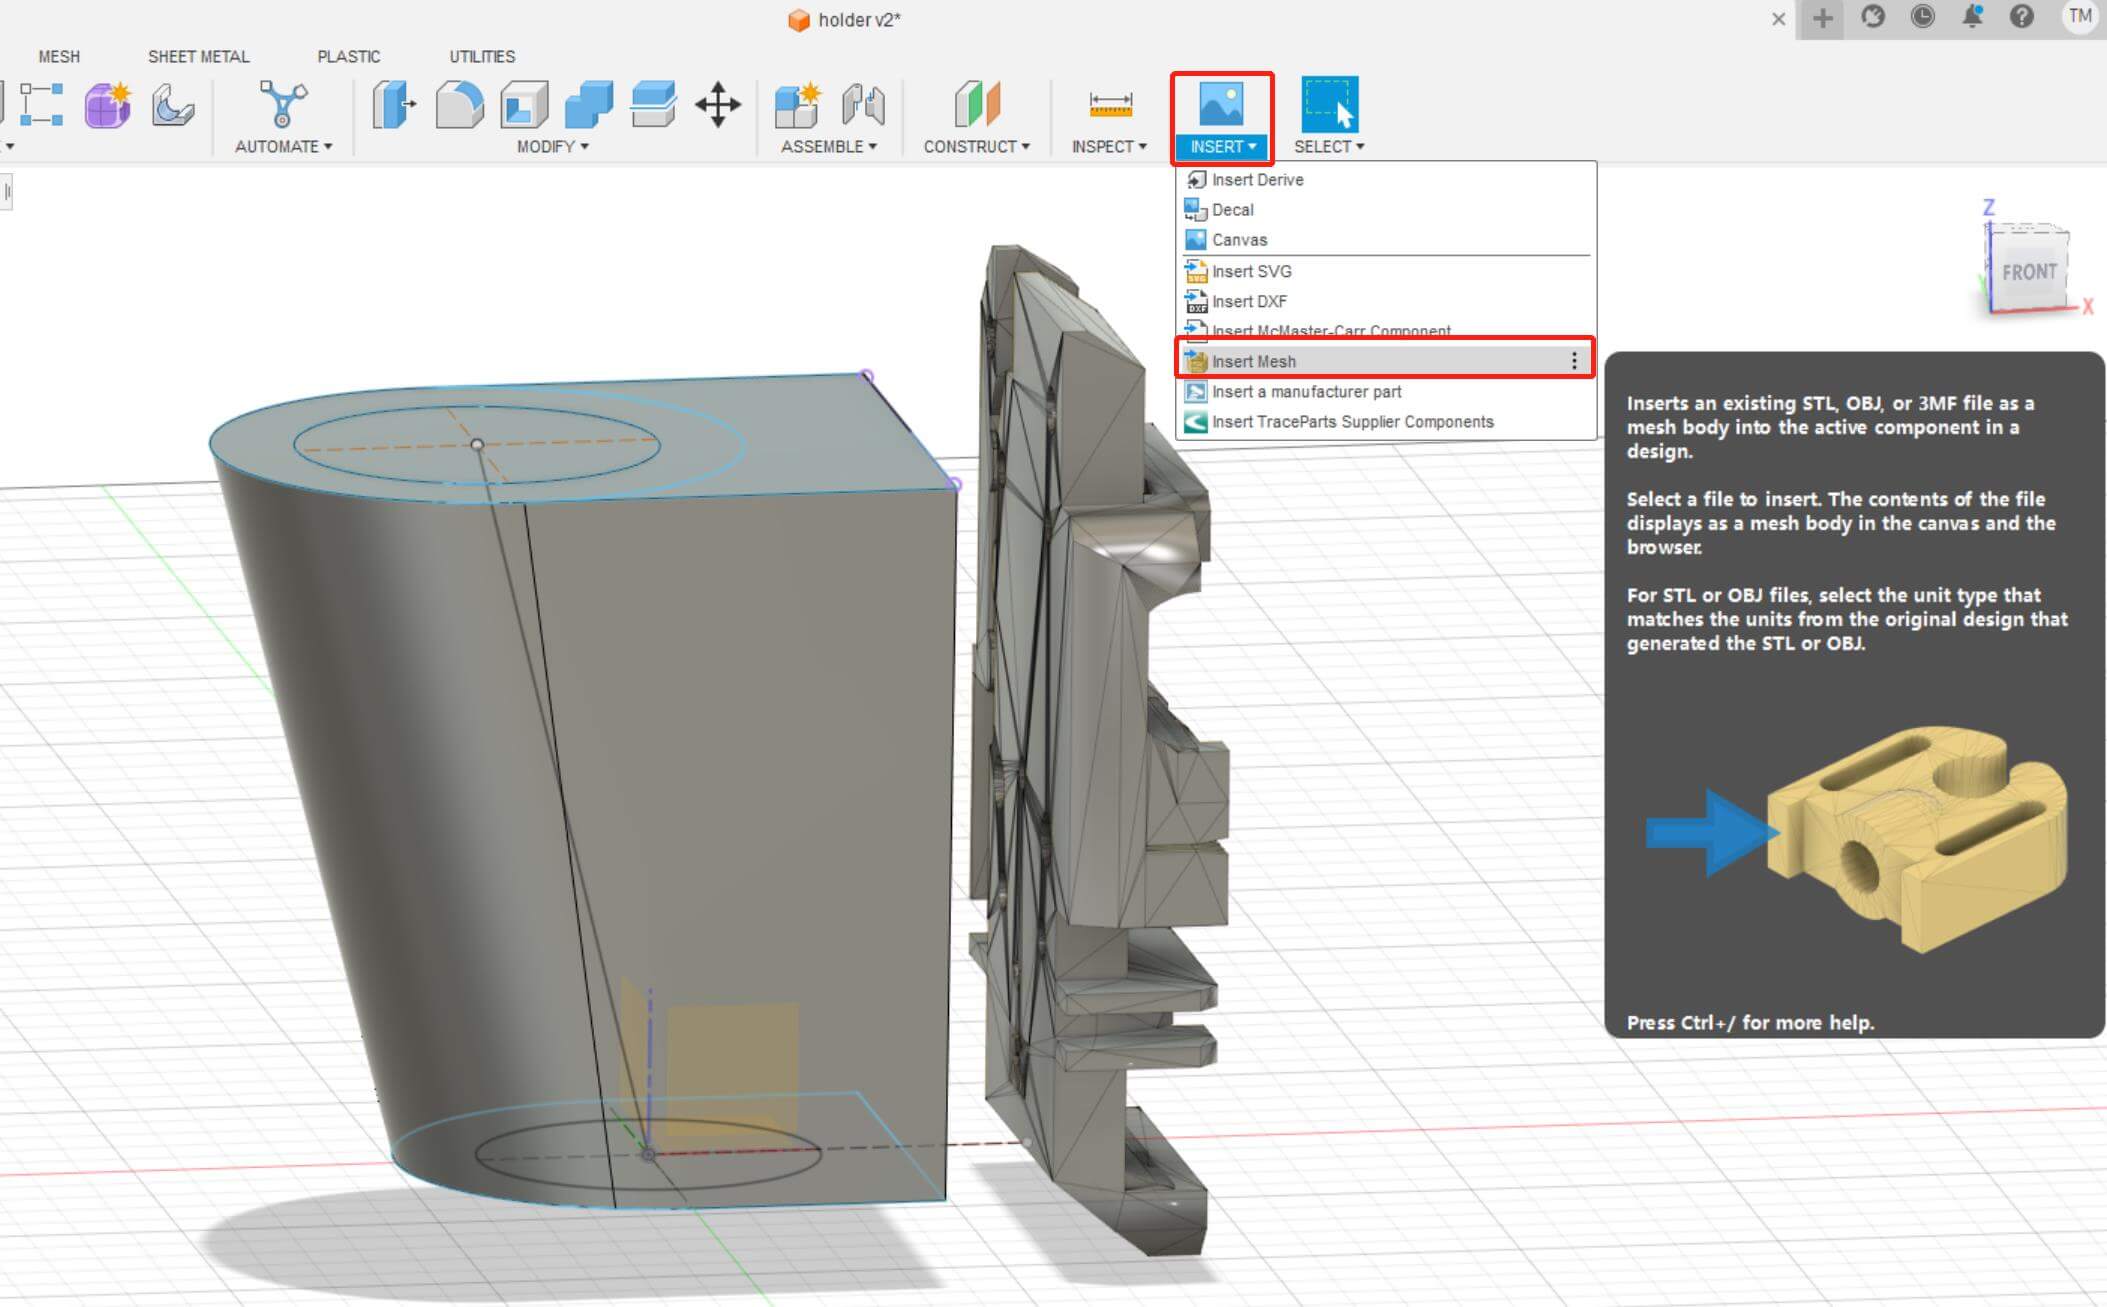 👈 Insert the Back Carrige
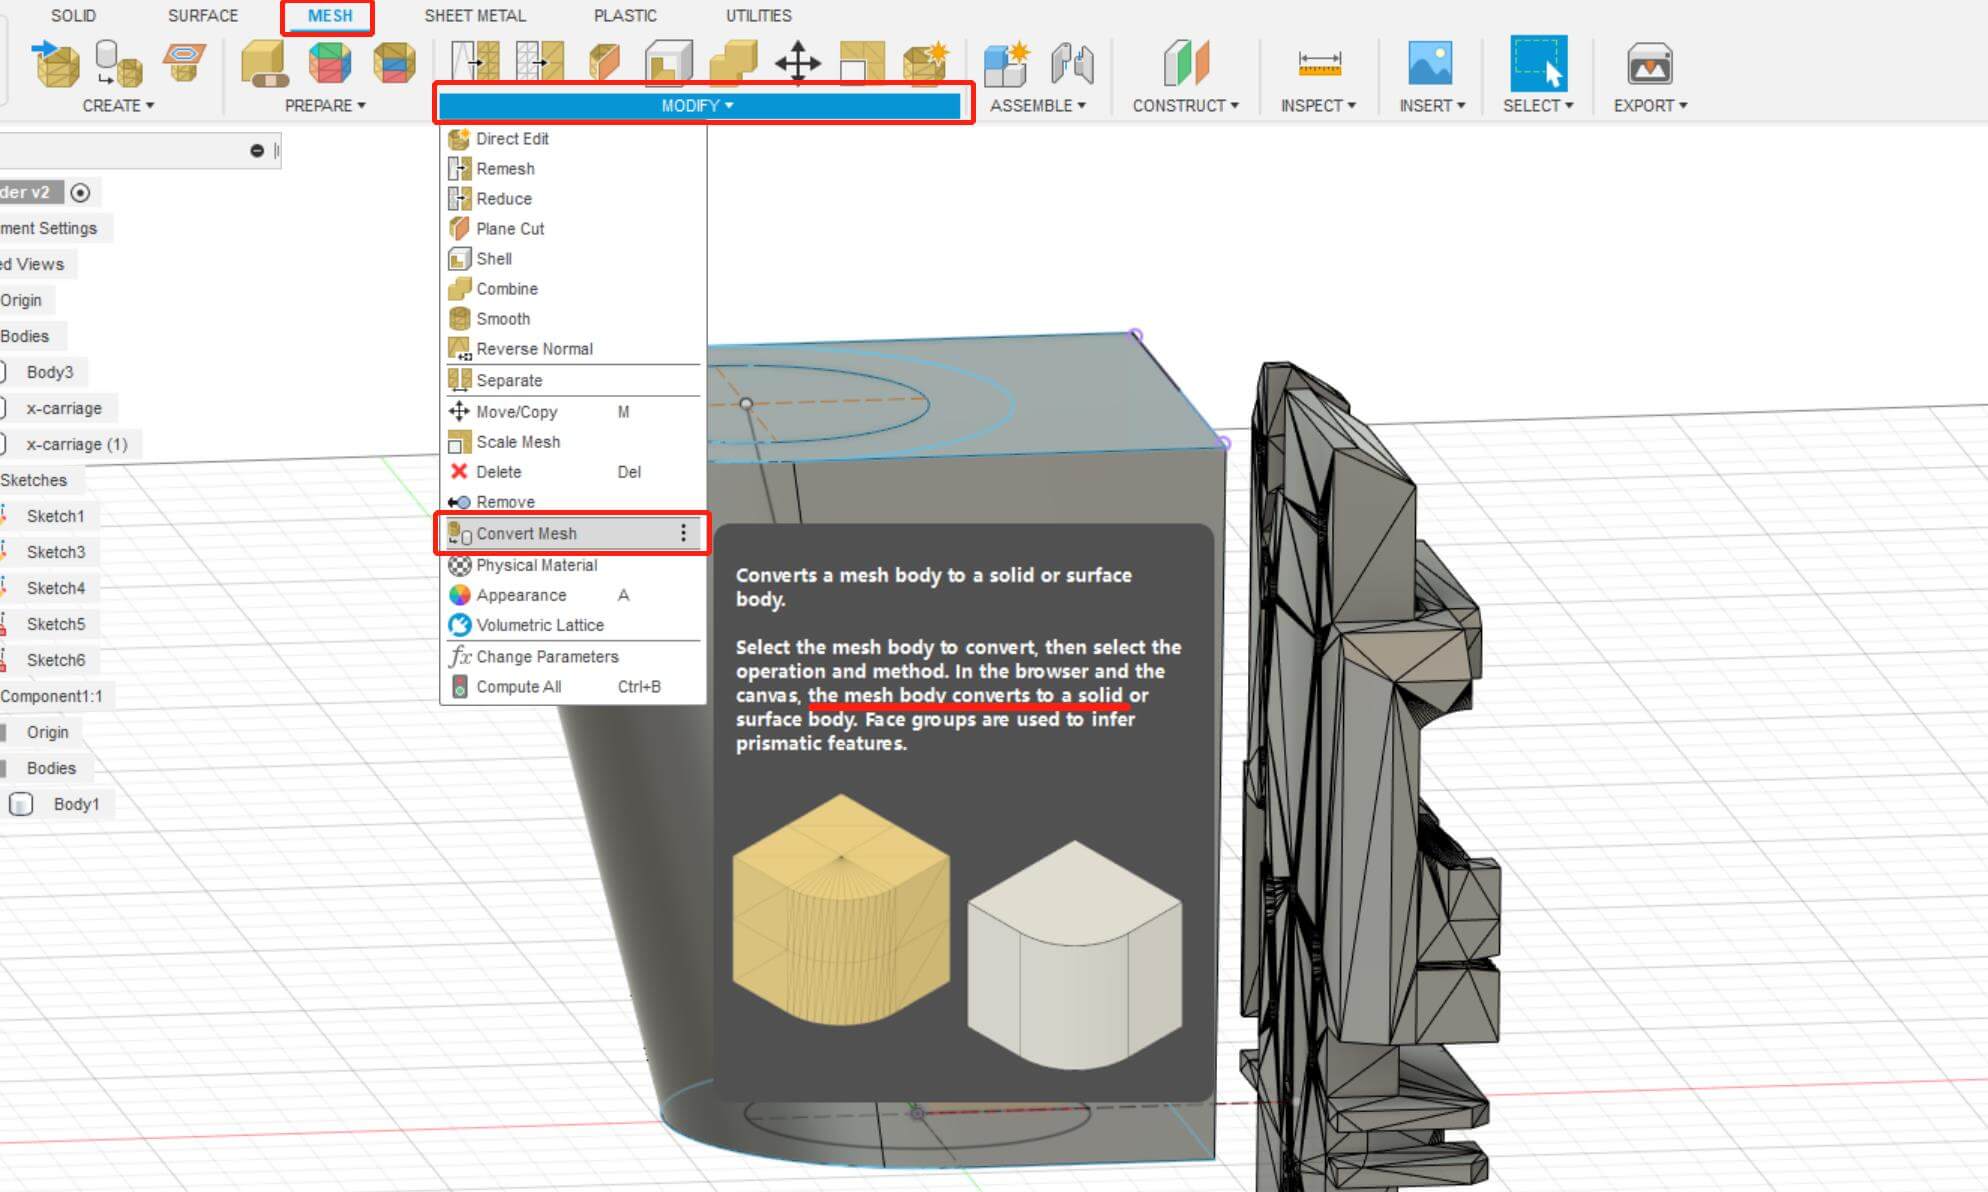 👈 Turn the Mesh to the Solid
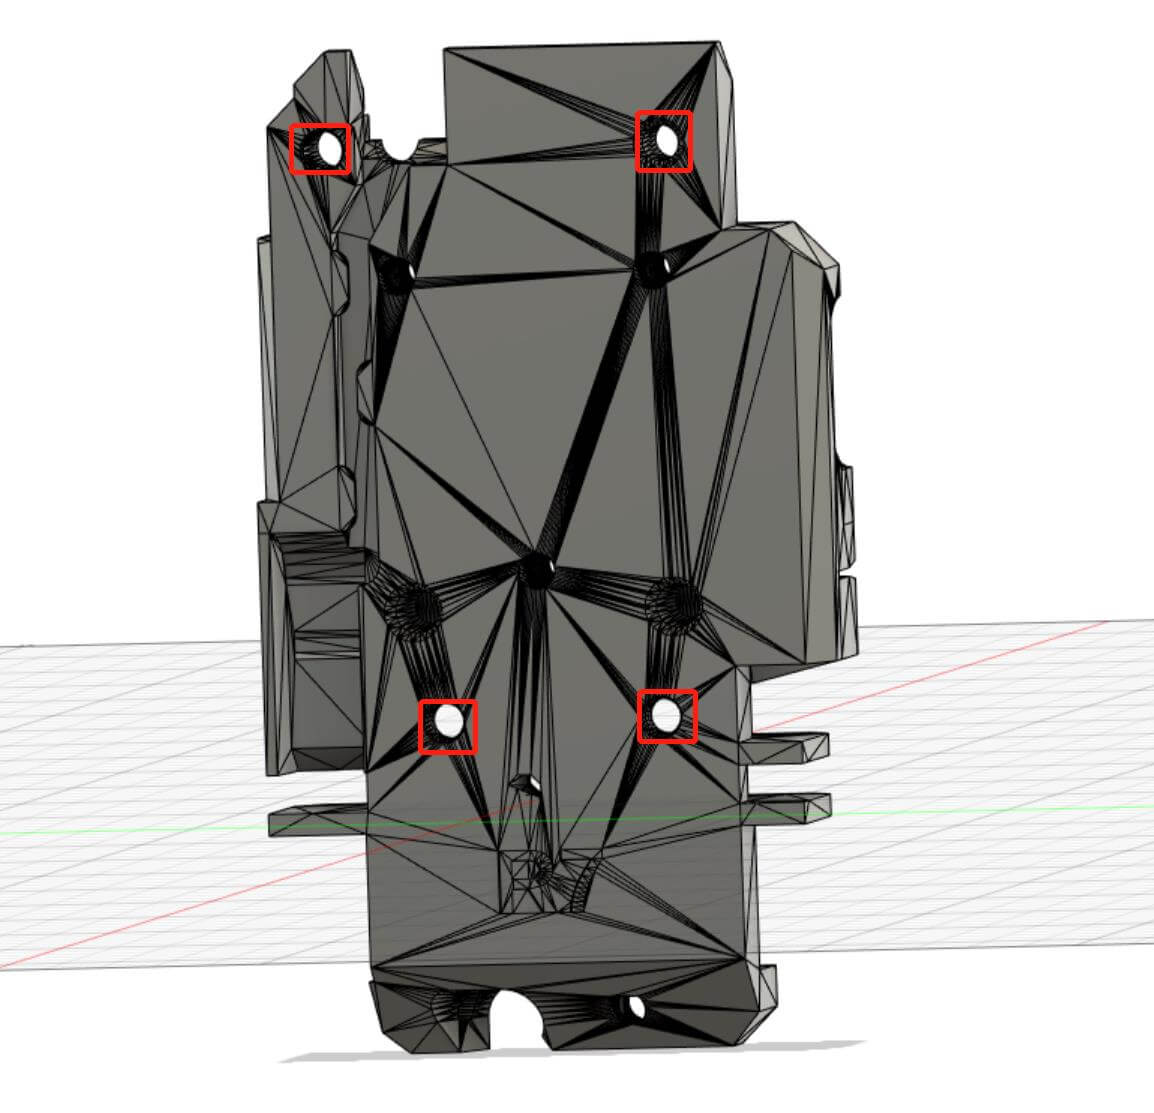 👈 4 Screw Holes
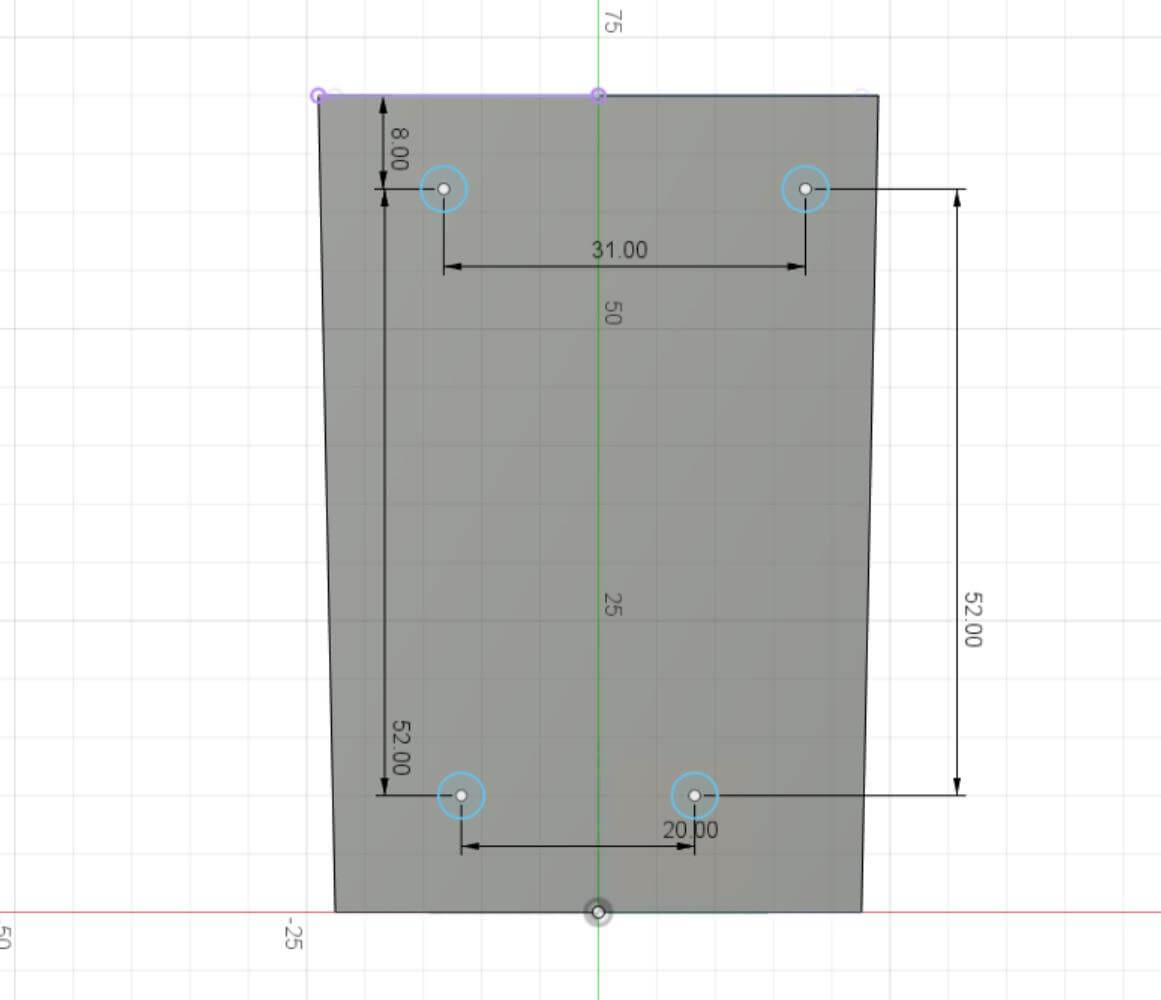 👈 Projection
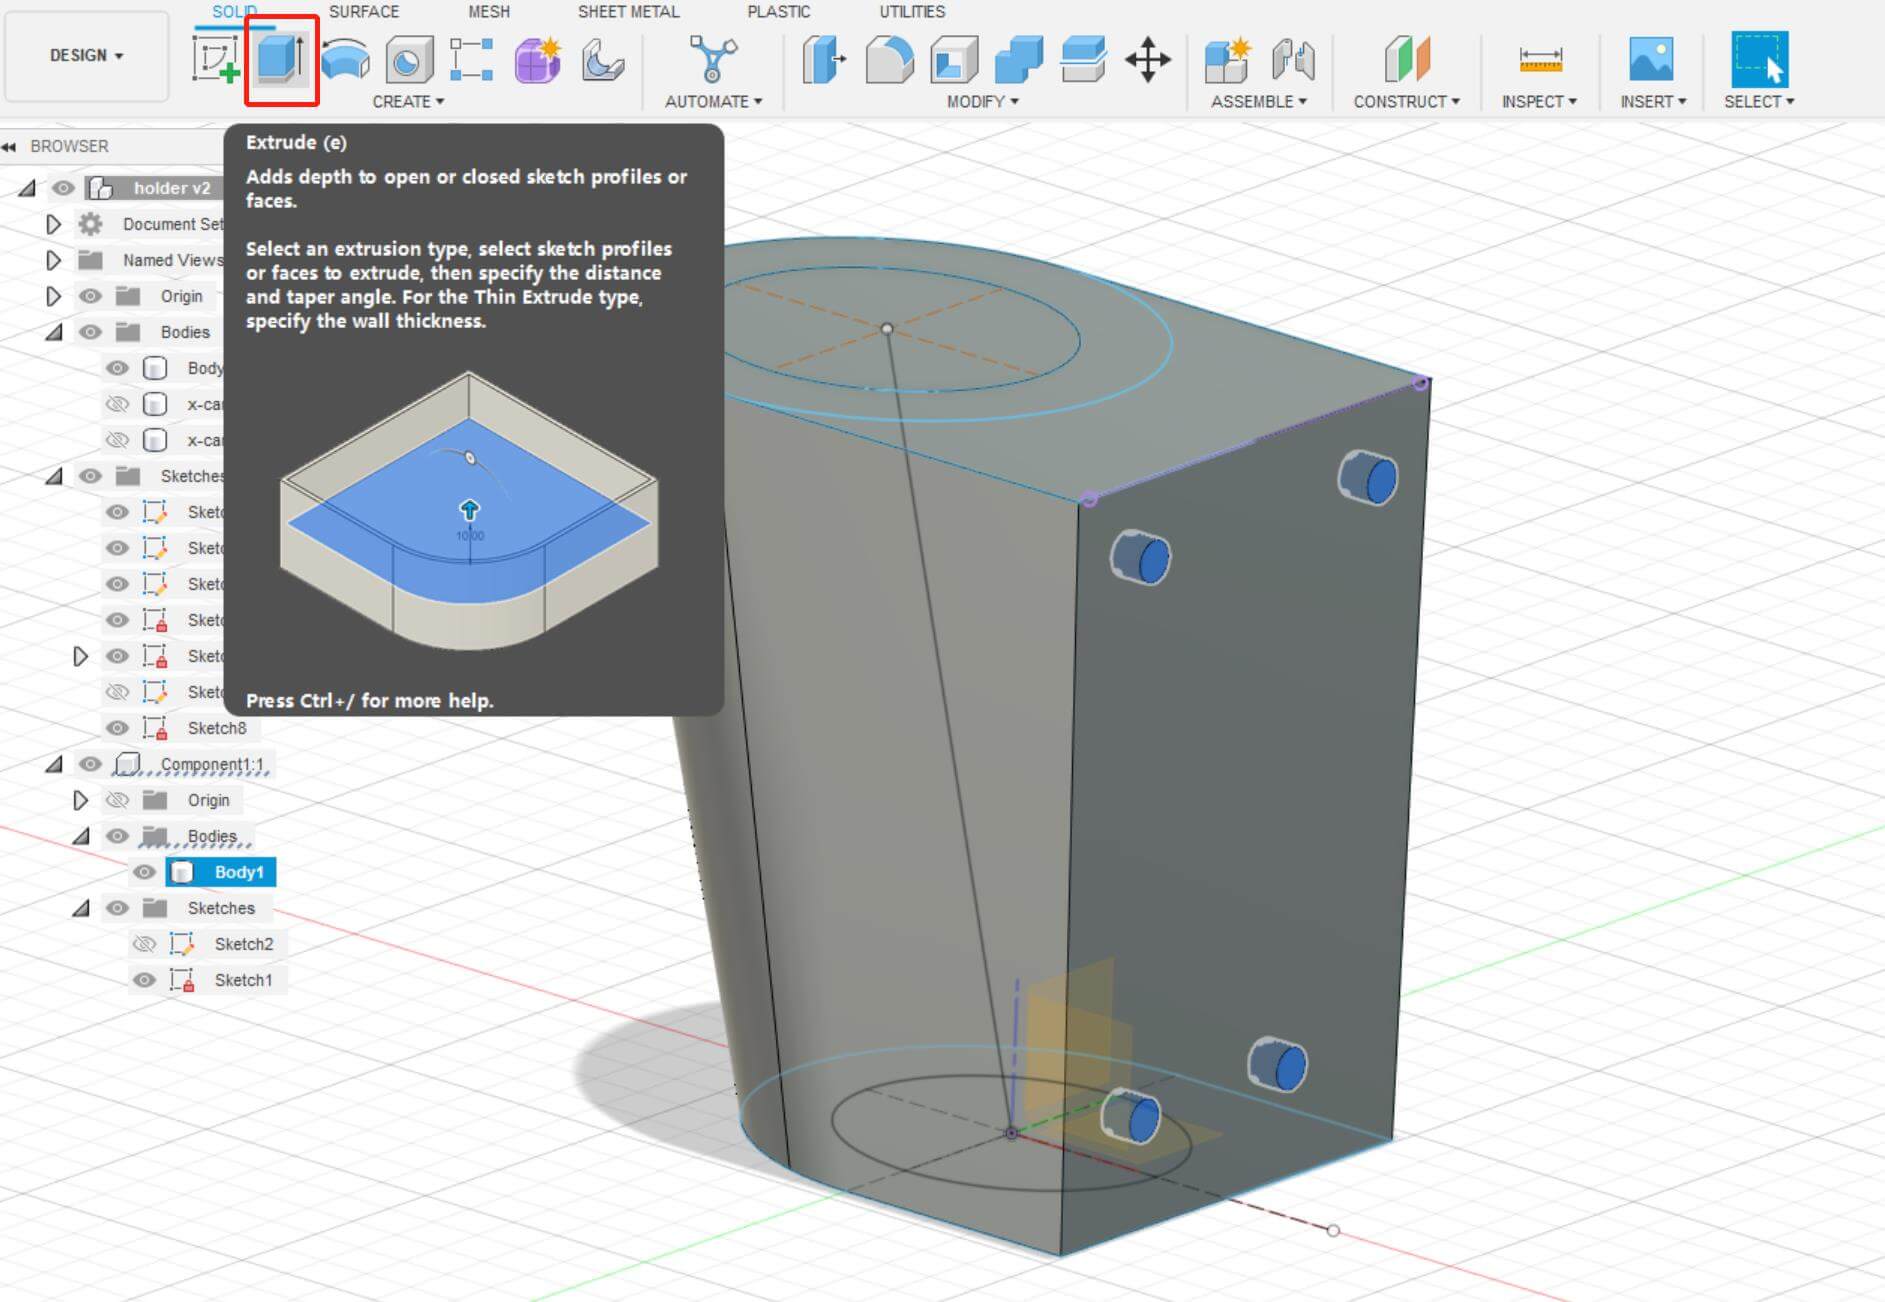 👈 Extrude - According to the Size of the Hot-melt Copper Nut
(3) 3D Printing and Assembling
3D print the holder and assemble it.
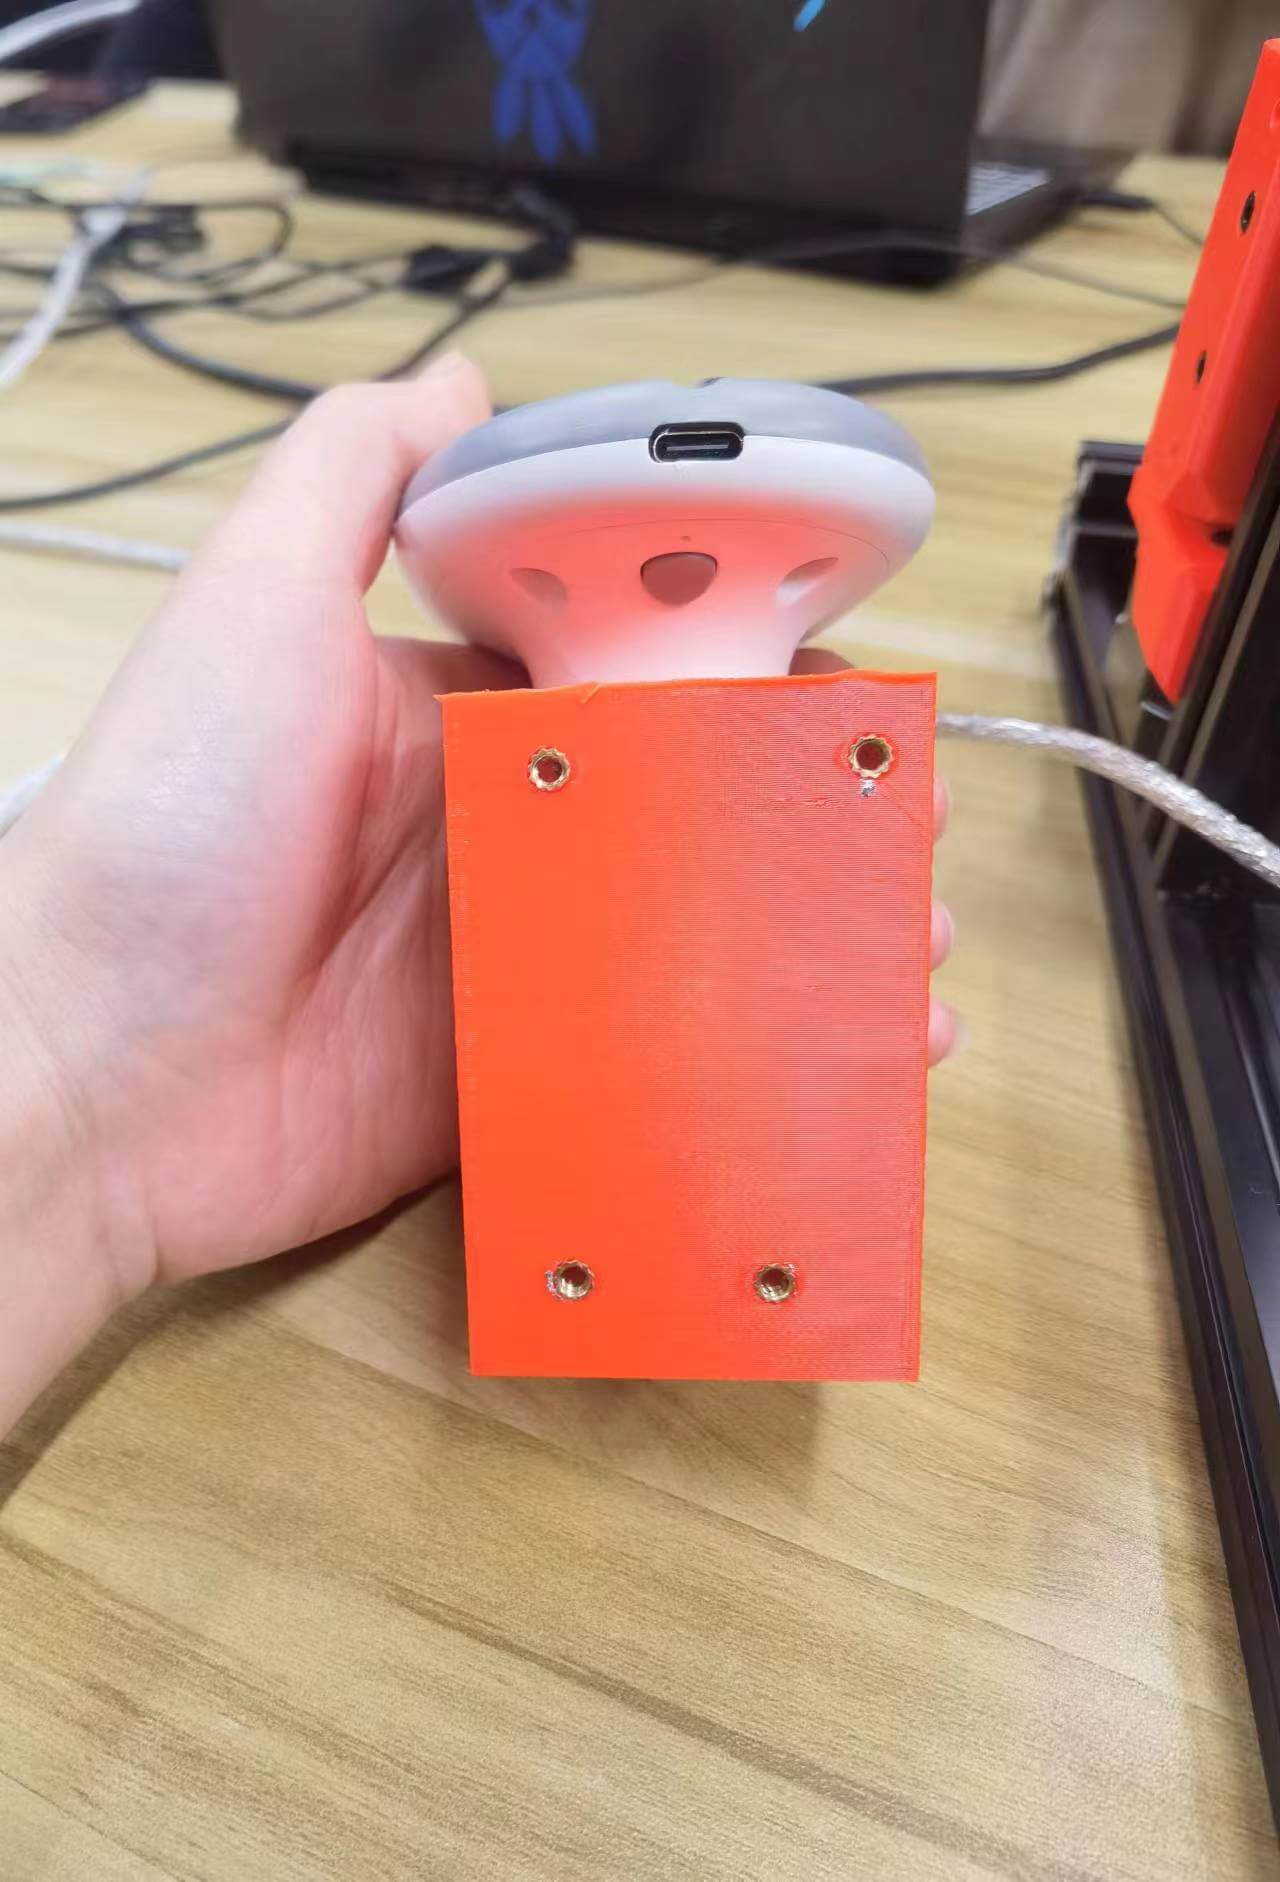
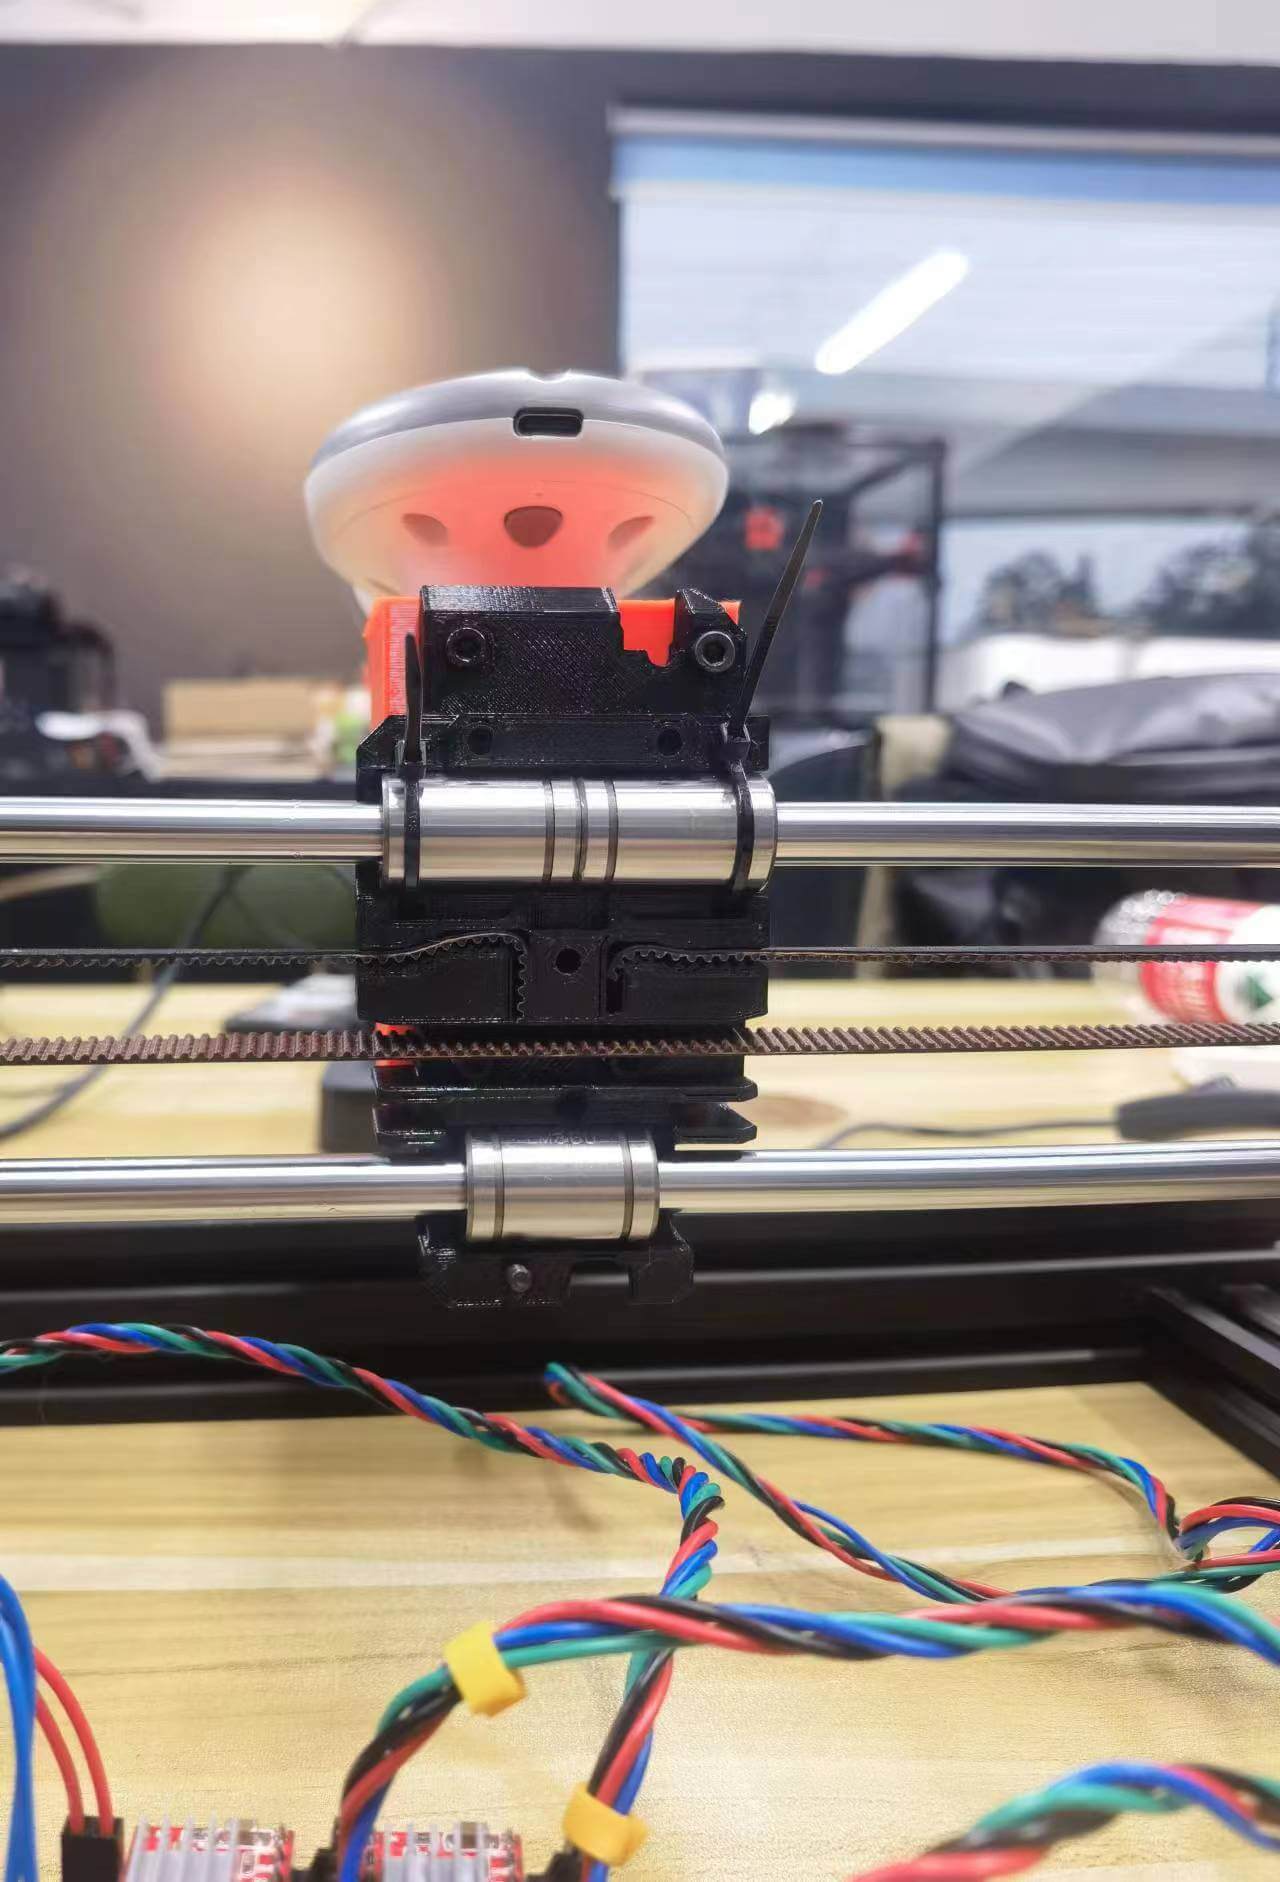
👆 Install Hot Melt Copper Nuts and Assemble with the Back Carrige
It worked well on the auto-massage machine.