5. 3D Scanning and printing
3D printing week is the most interesting week for me so far. I used to think that 3D printers are omnipotent manufacturing machines, but this week's practice has changed my mind. Still, it's interesting to explore the boundaries of what a 3D printer can do.
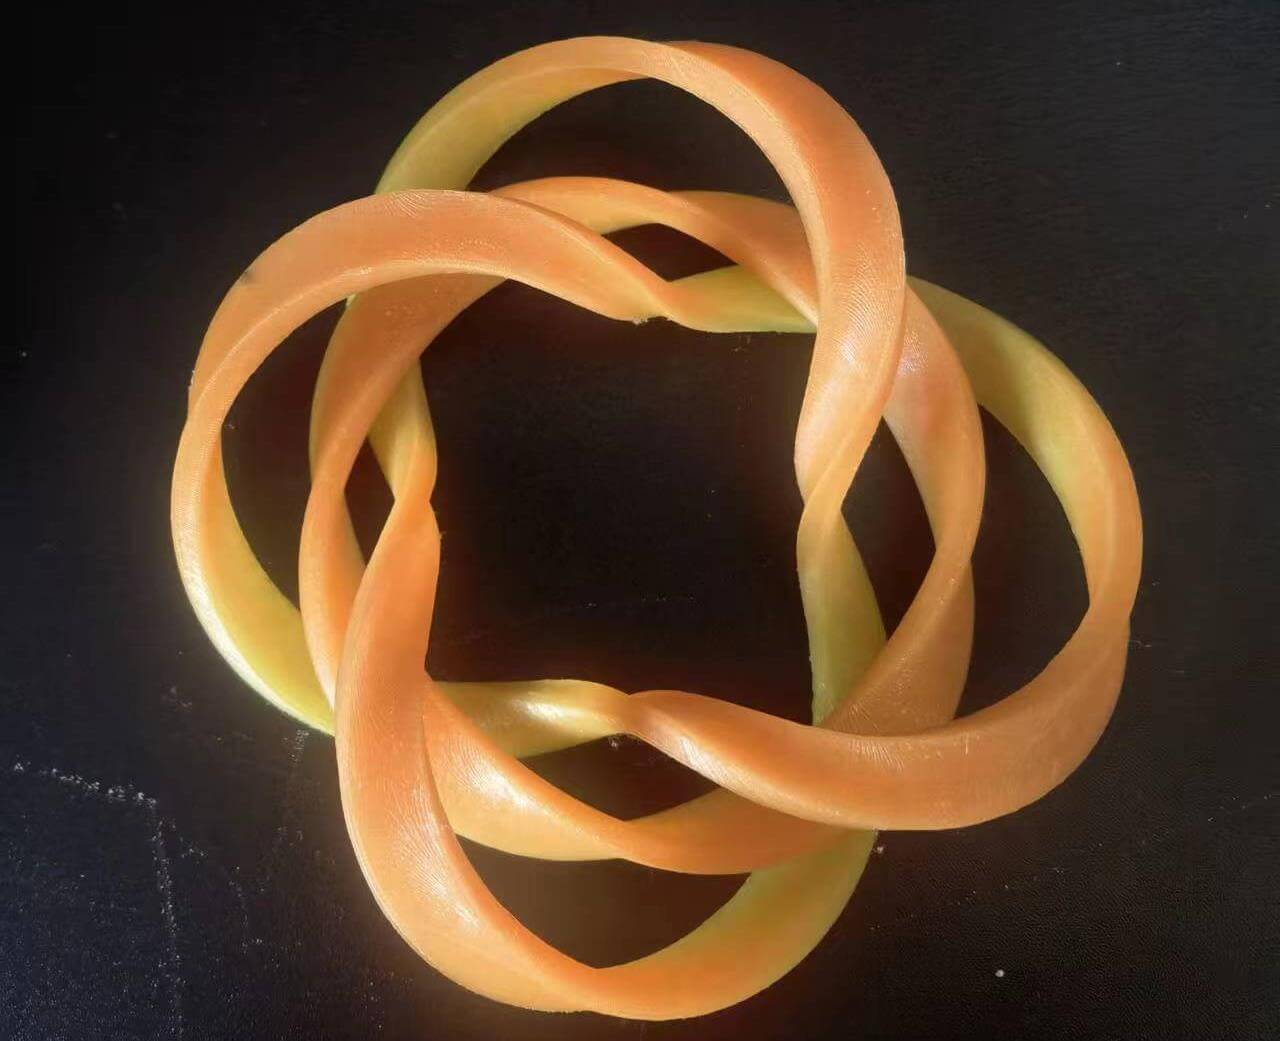
Here are the hero-shots of this week.
1.1 Assignments of the Week
- Group assignment:
- Test the design rules for your 3D printer(s).
- Document your work on the group work page and reflect on your individual page what you learned about characteristics of your printer(s)
-
Individual assignments:
- Design and 3D print an object (small, few cm3, limited by printer time) that could not be easily made subtractively
- 3D scan an object (and optionally print it)
1.2 Group Assignment
There are serveral FDM (Fused Deposition Modeling) 3D printer in our lab. Here is the documentation of our 3d printer testing.
I also want to highlight some of the rules about using 3d printers.
- Check the type of filament and set the corresponding temperature of the nozzle and bed.
- Check whether the remaining filament is sufficient to make sure you don't run out of filament halfway through the print.
- Clean the bed to avoid uneven surfaces.
- When setting the temperature of the nozzle, the environment temperature should be considered, and the temperature should be increased or decreased if the weather is too cold or too hot.
- Keep an eye on your print, especially at the beginning, to make sure it adheres to the bed and that the layers are being printed correctly.
- Don't touch the bed or nozzle when printing.
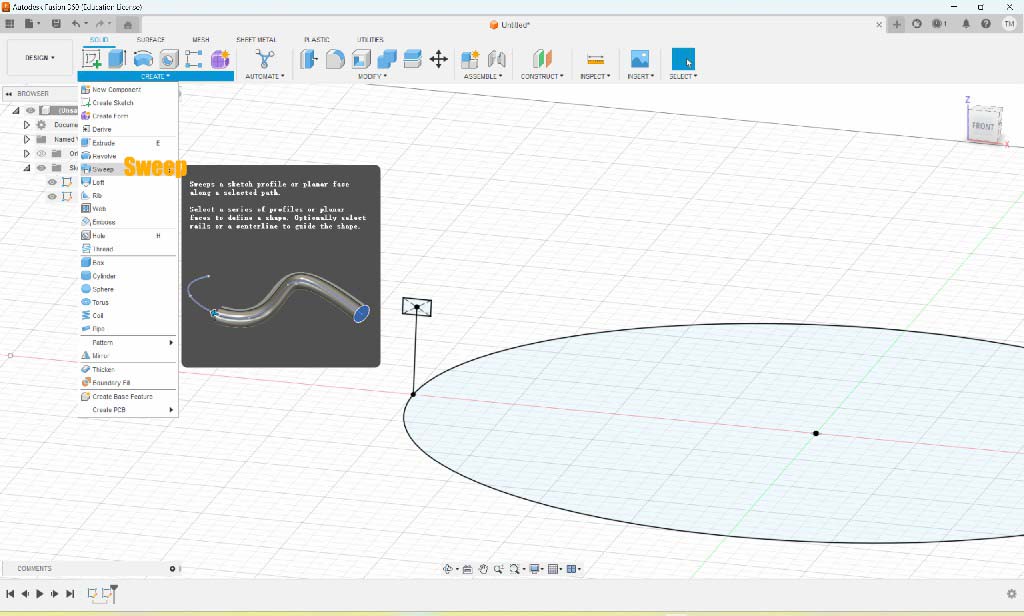
1.3 Modeling in Fusion 360
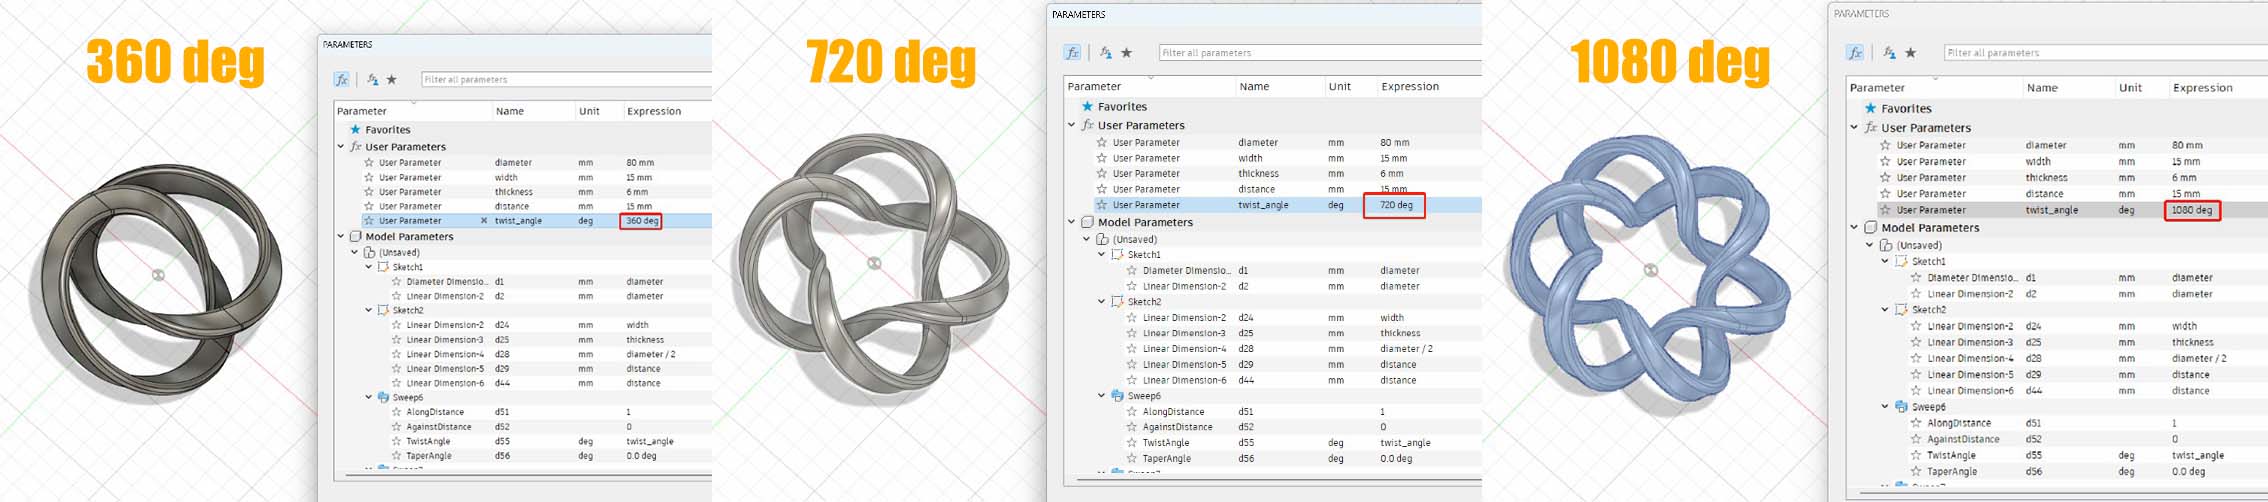
I want to use a 3d printer to print two twisted rings nested together as a bracelet.
- 1) Draw a circle and a rectangle above its circumference in the sketch.
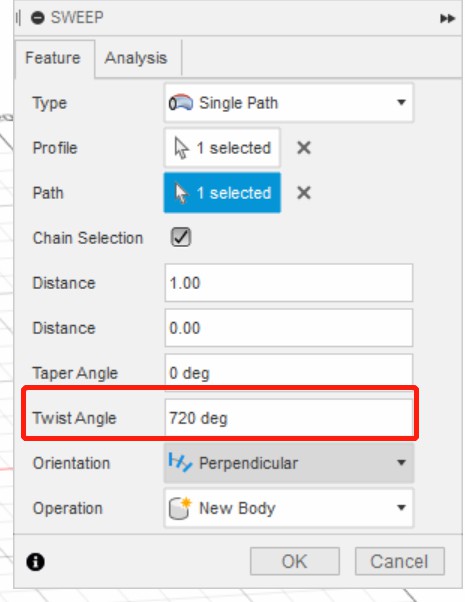
- 2) Sweep the rectangle around the circle, and enter the multiple of 360 in the twist angle.
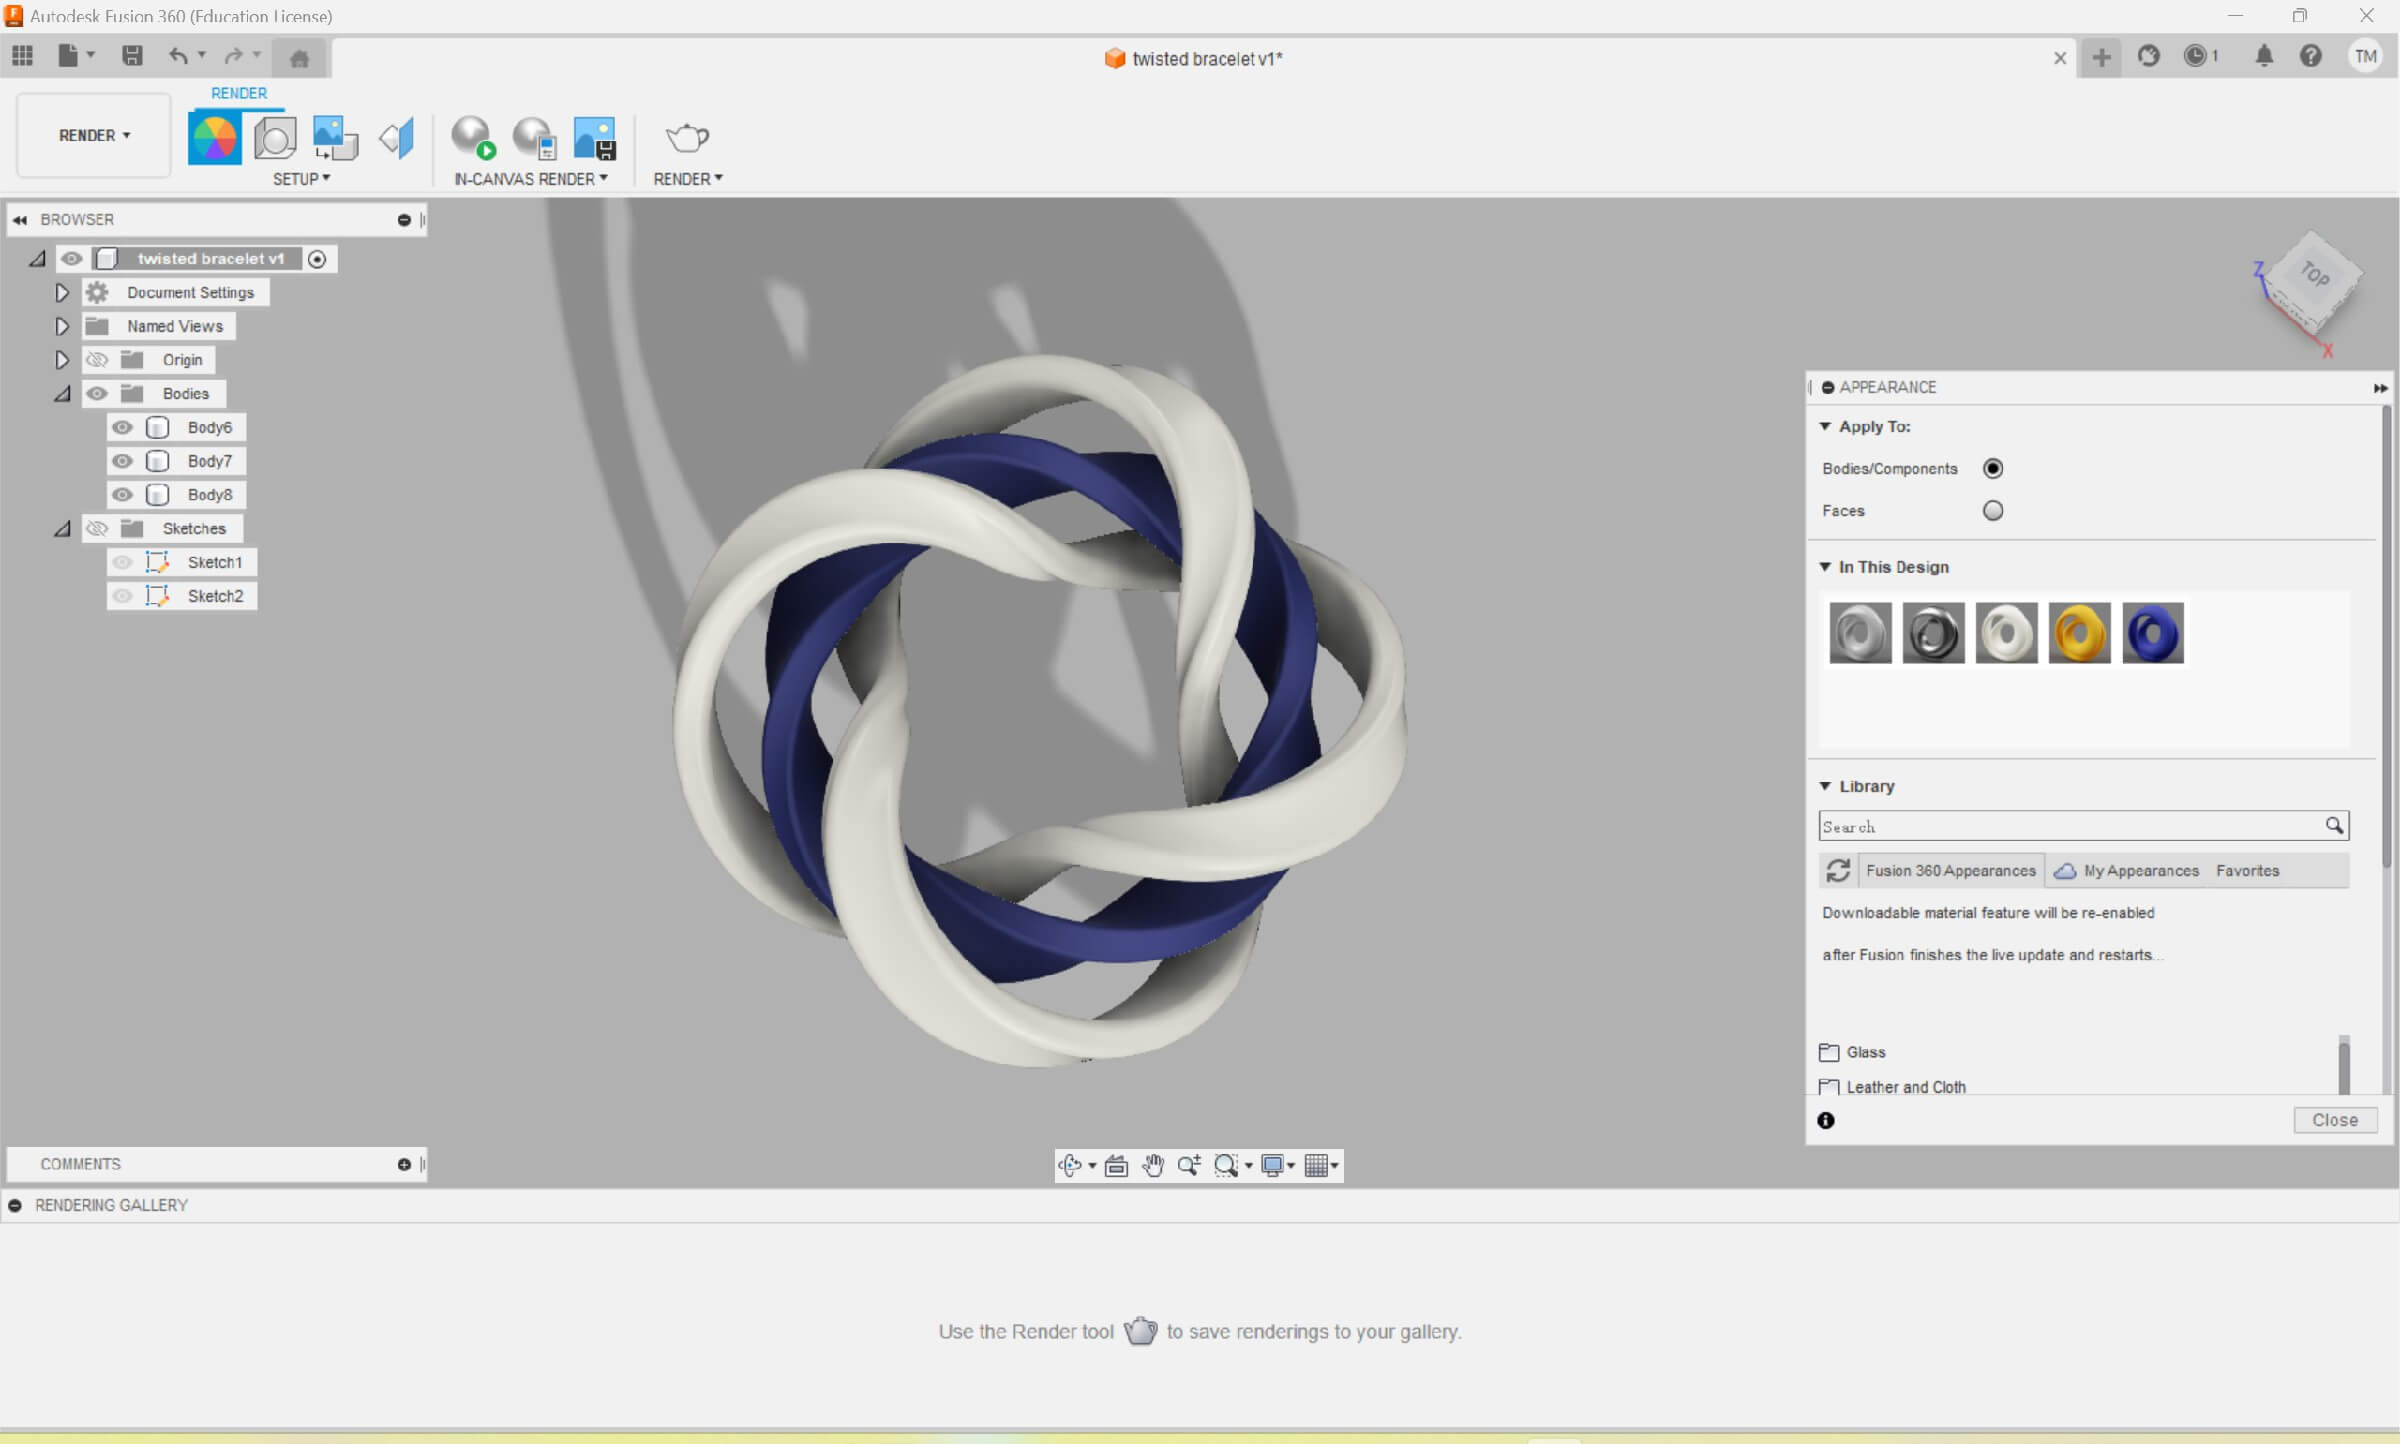
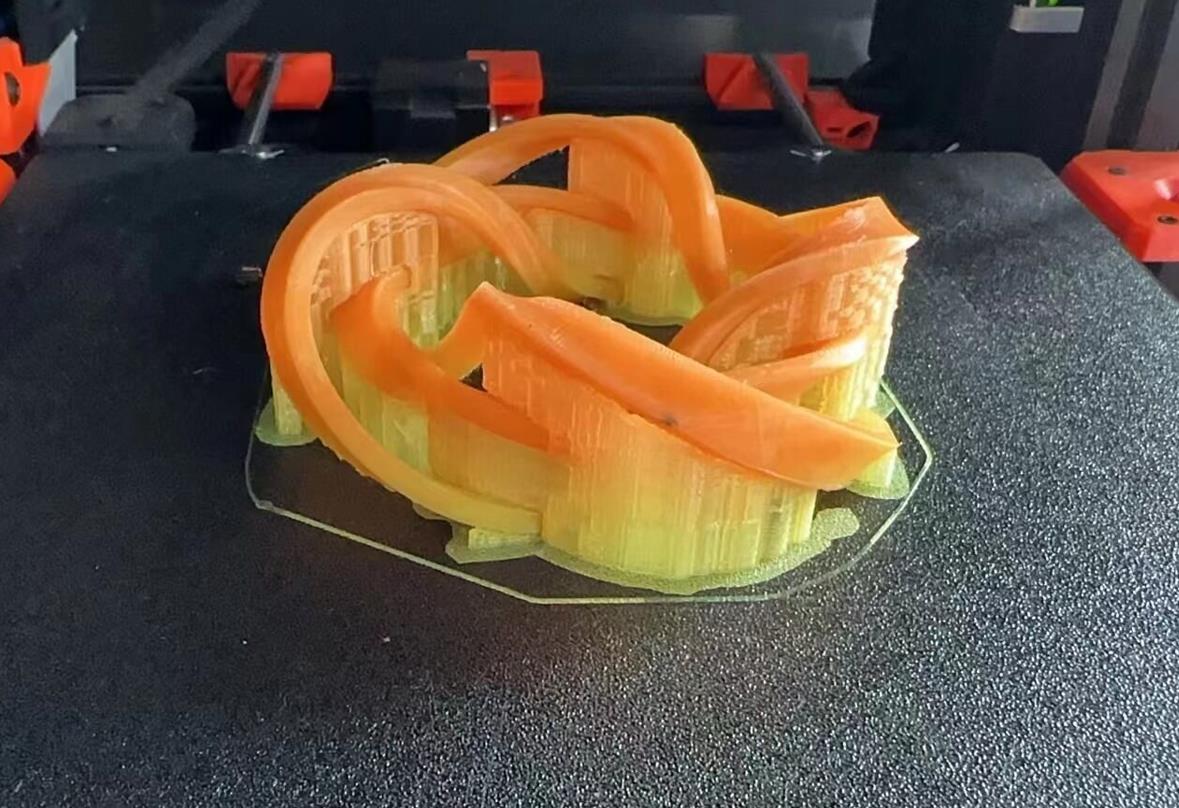
- 3) Nest two 720deg twisted ring and a 360deg twisted ring together to have a nested set of rings. Here I tried the rendering in Fusion 360.
- 4) Export the model in STL format.
1.4 3D Printing
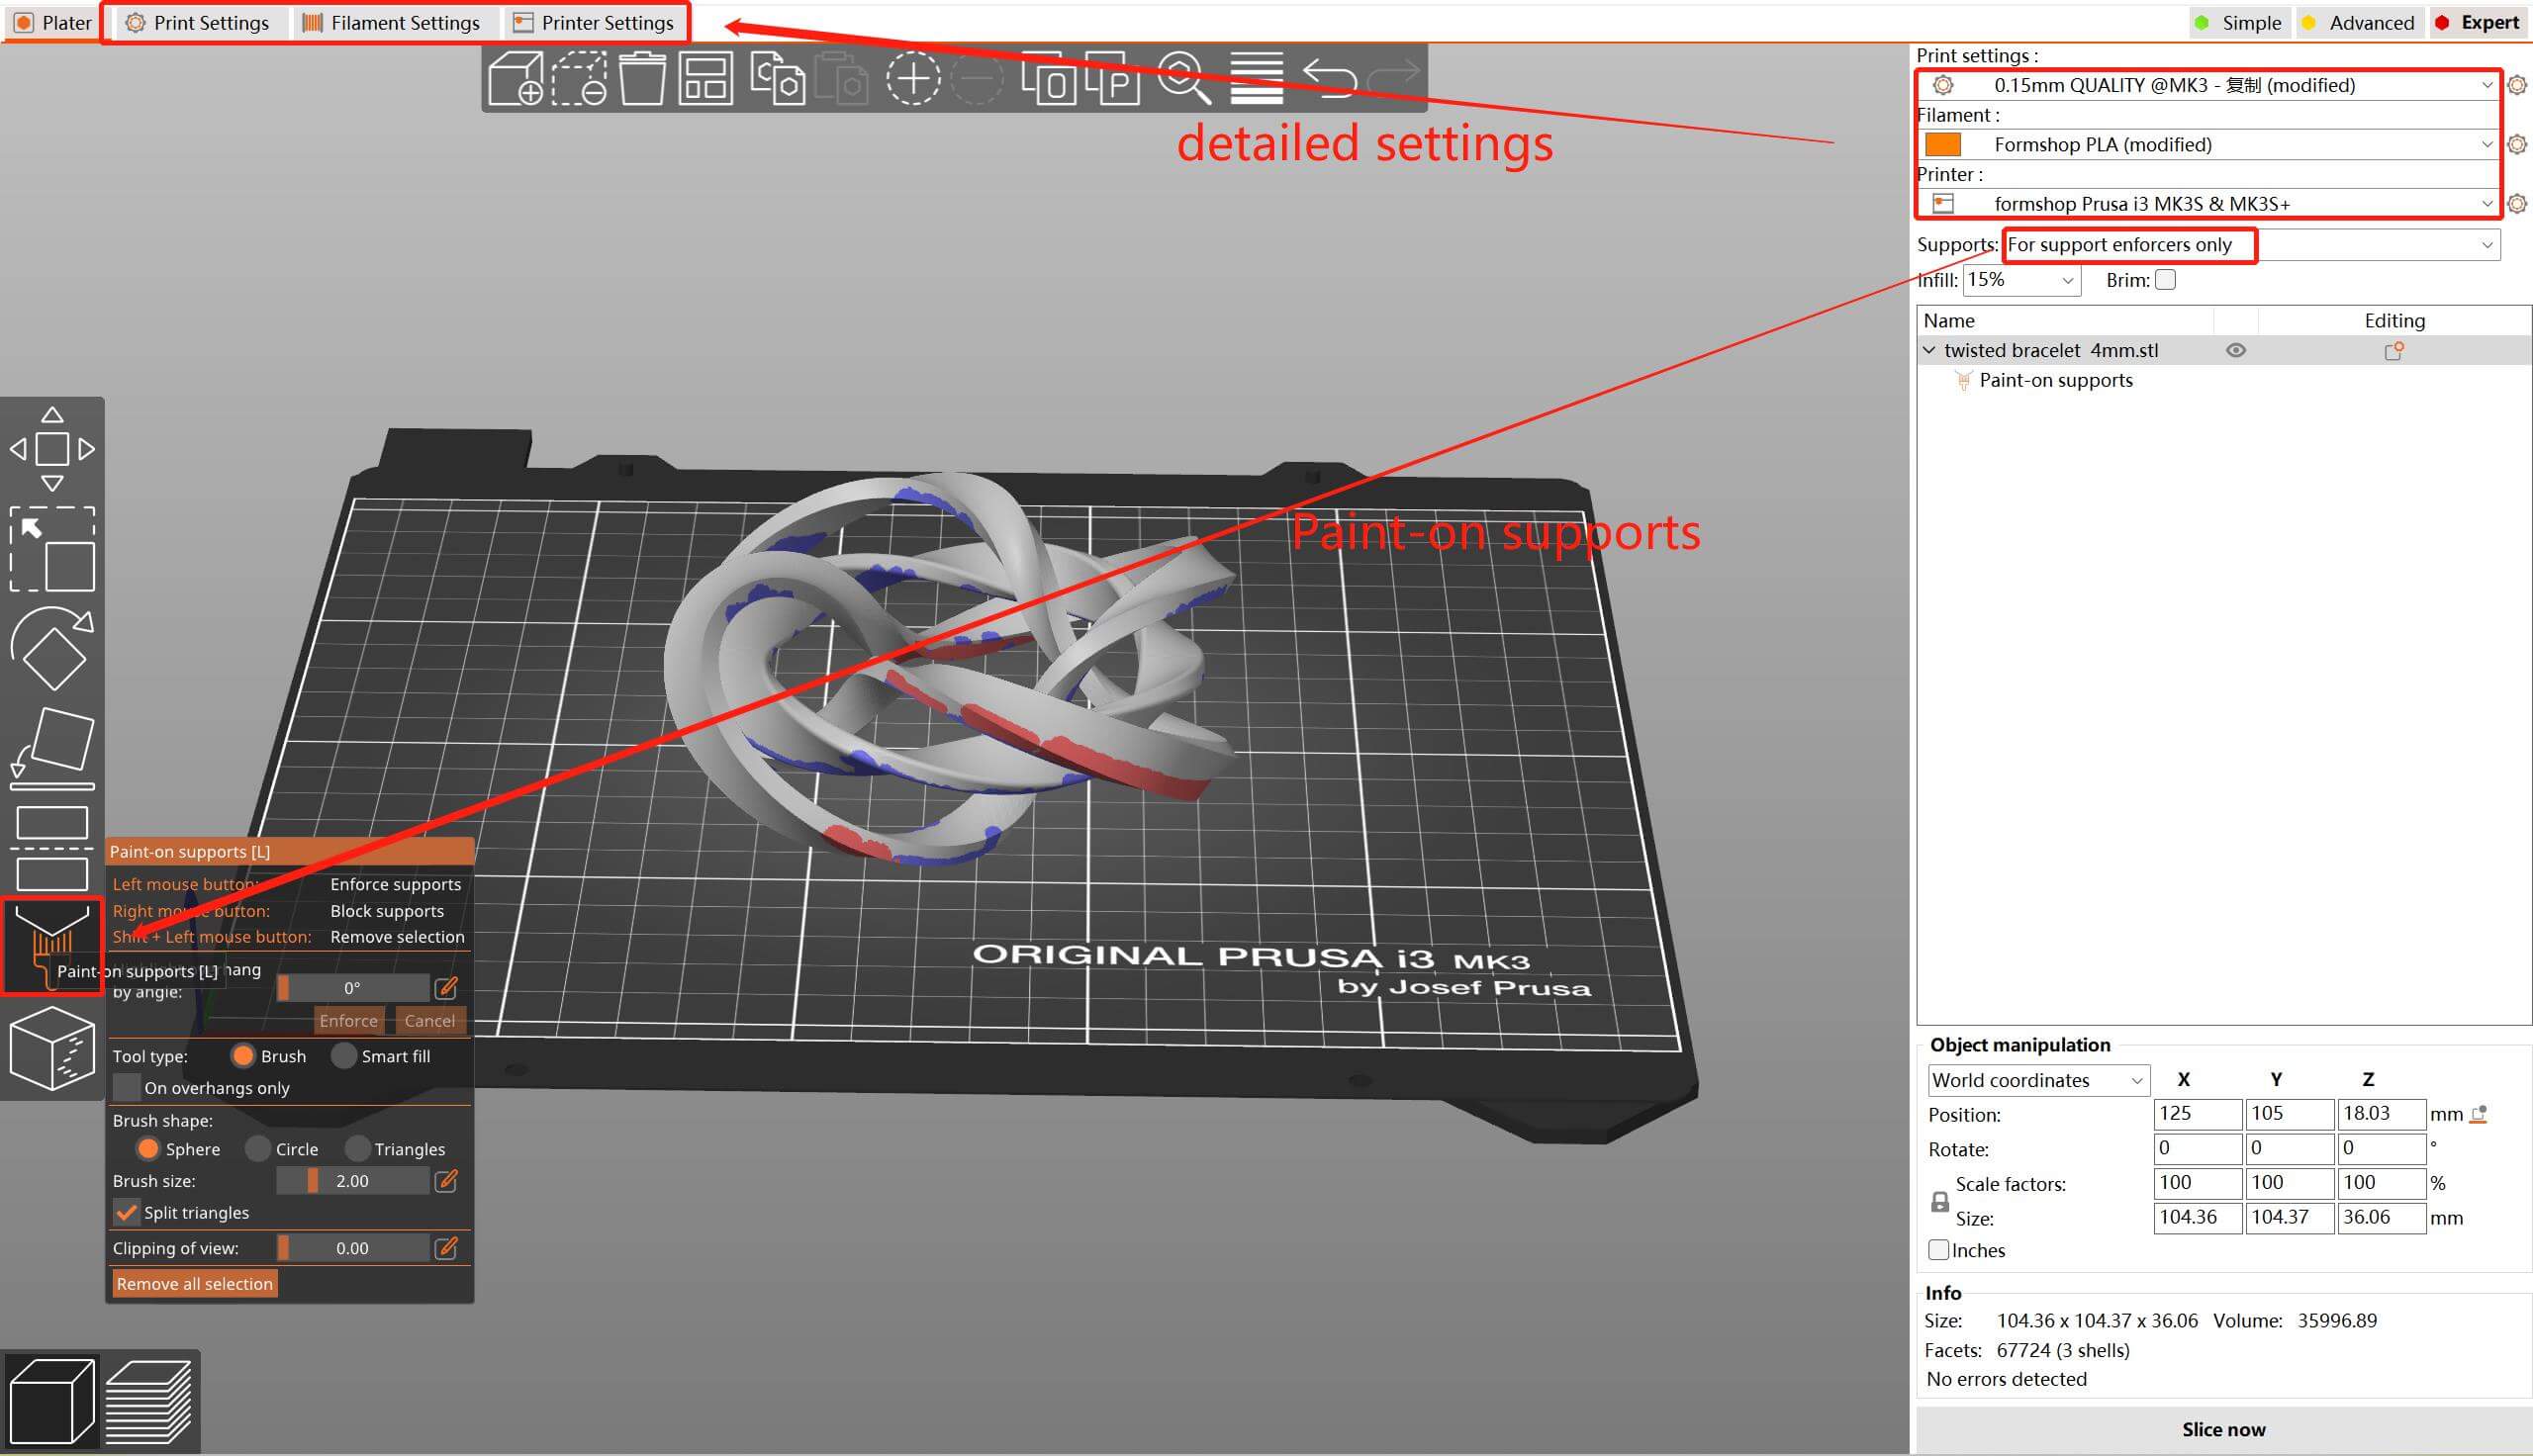
- Software Settings
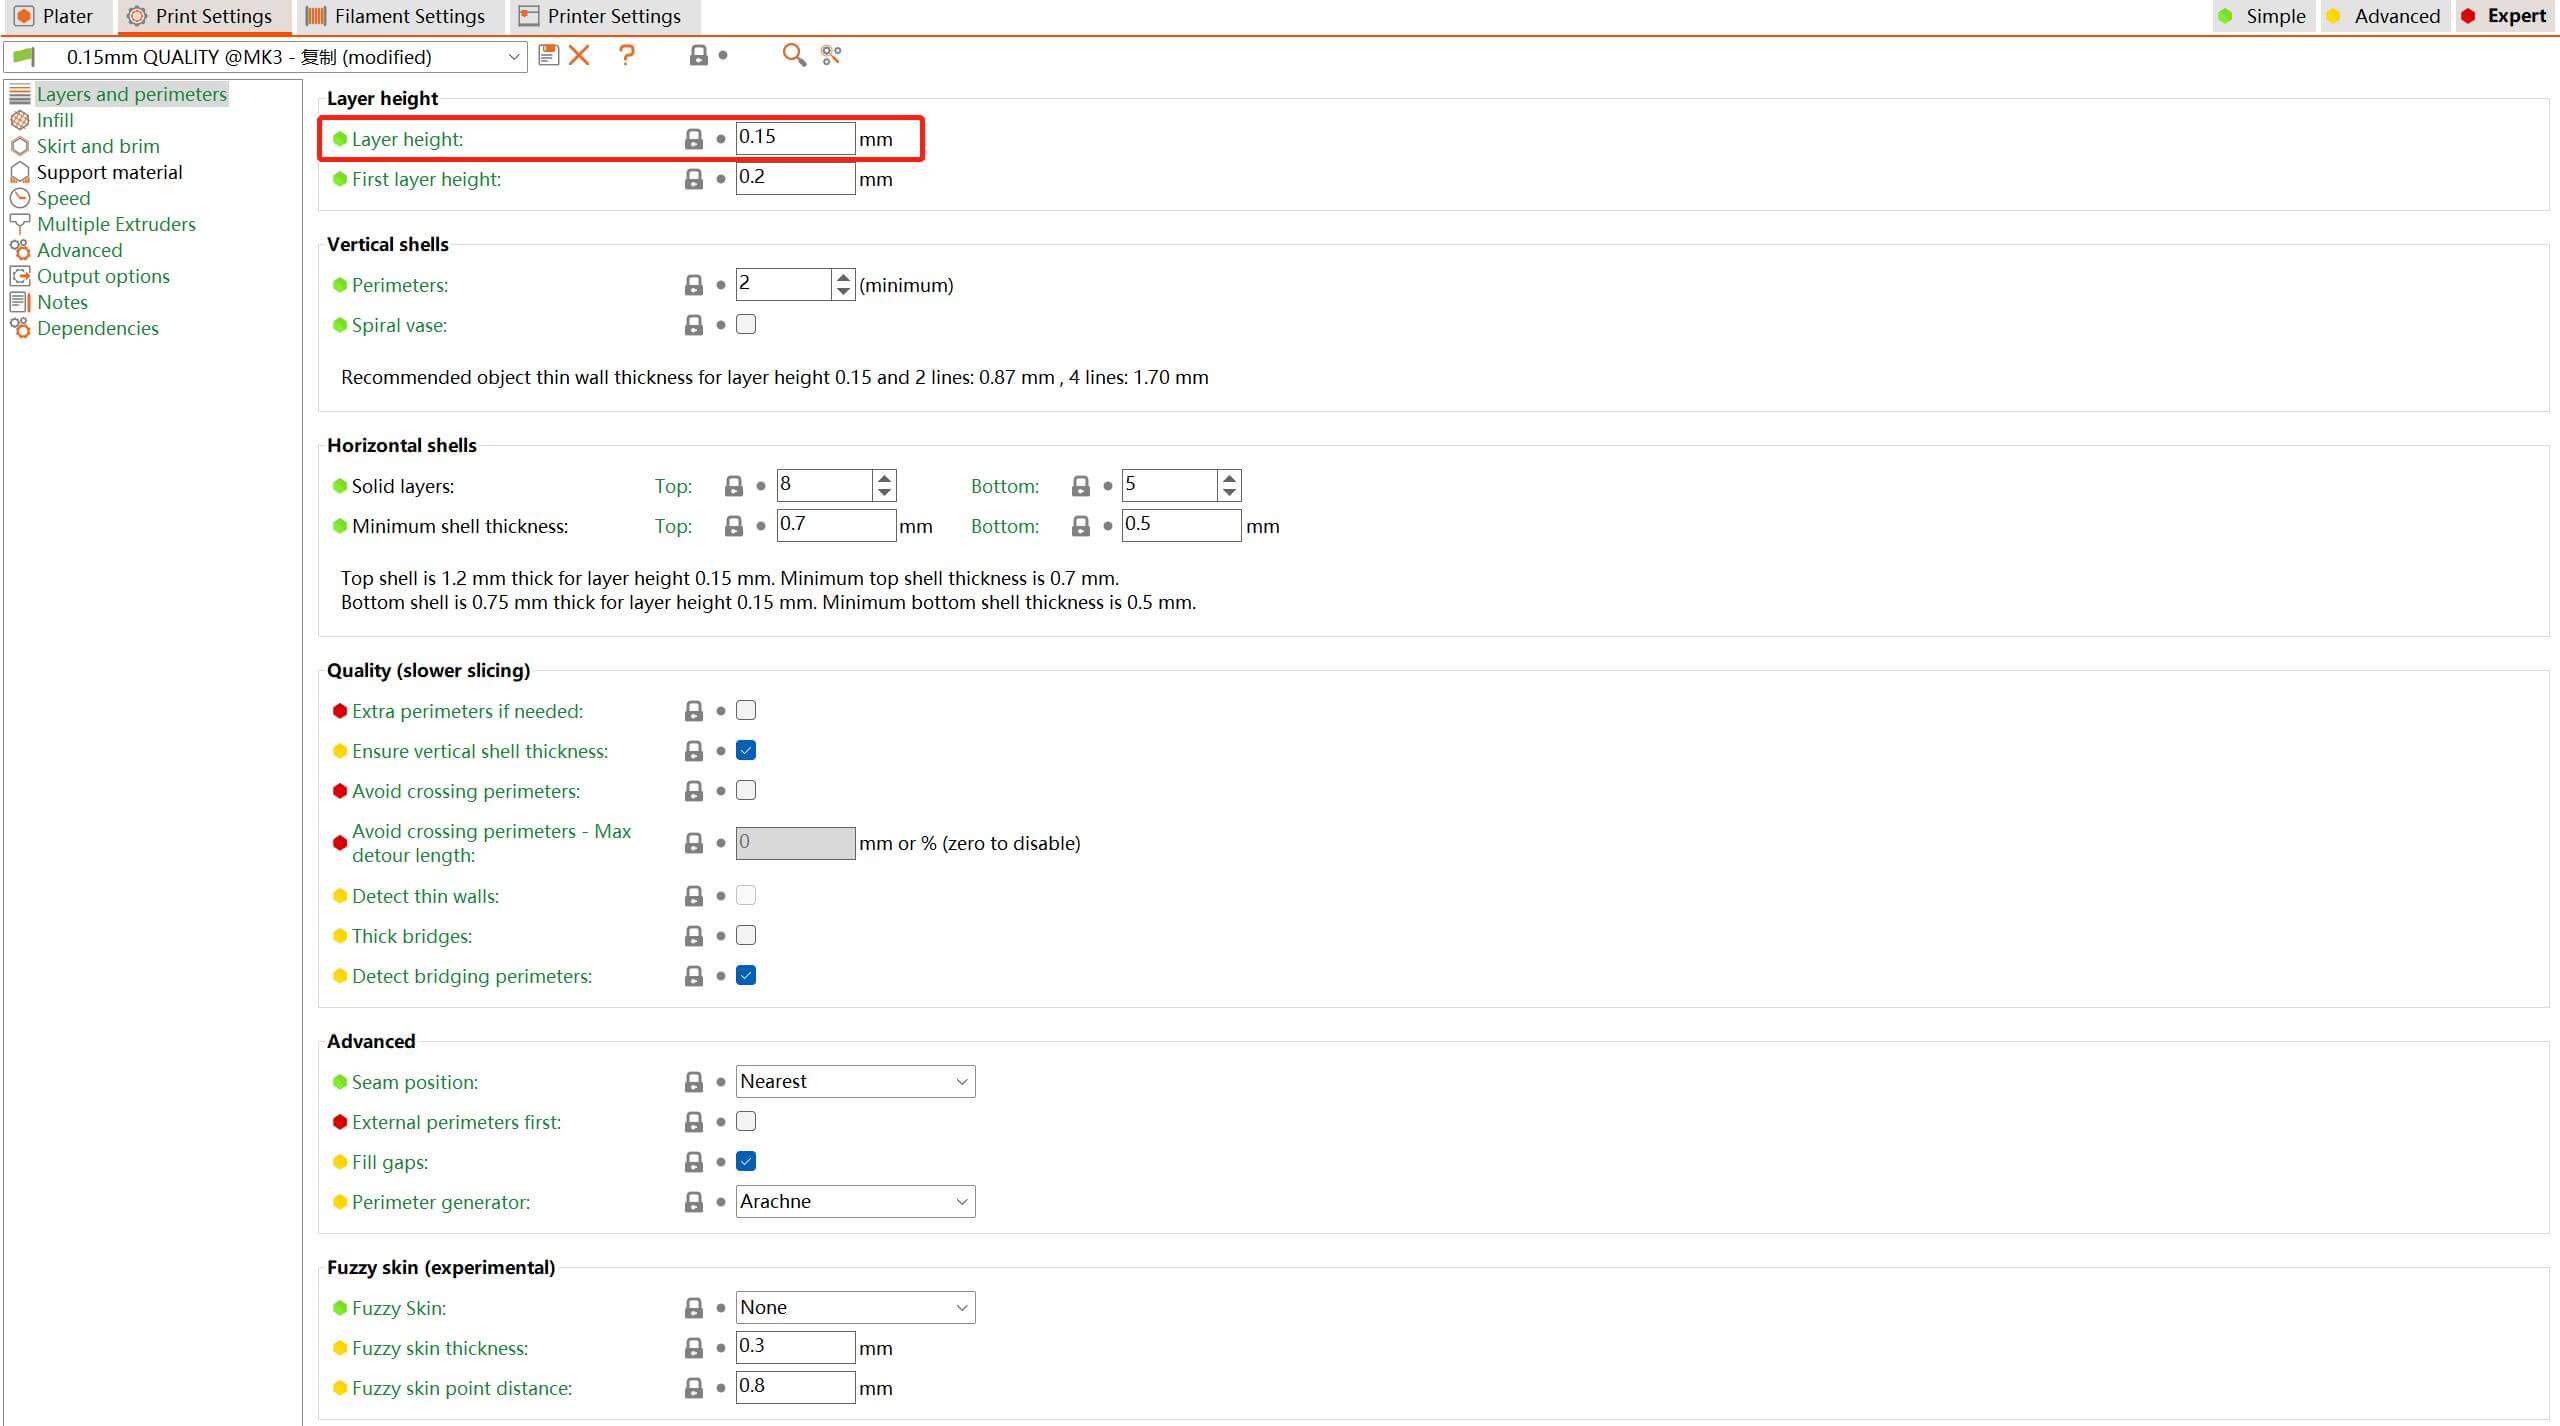
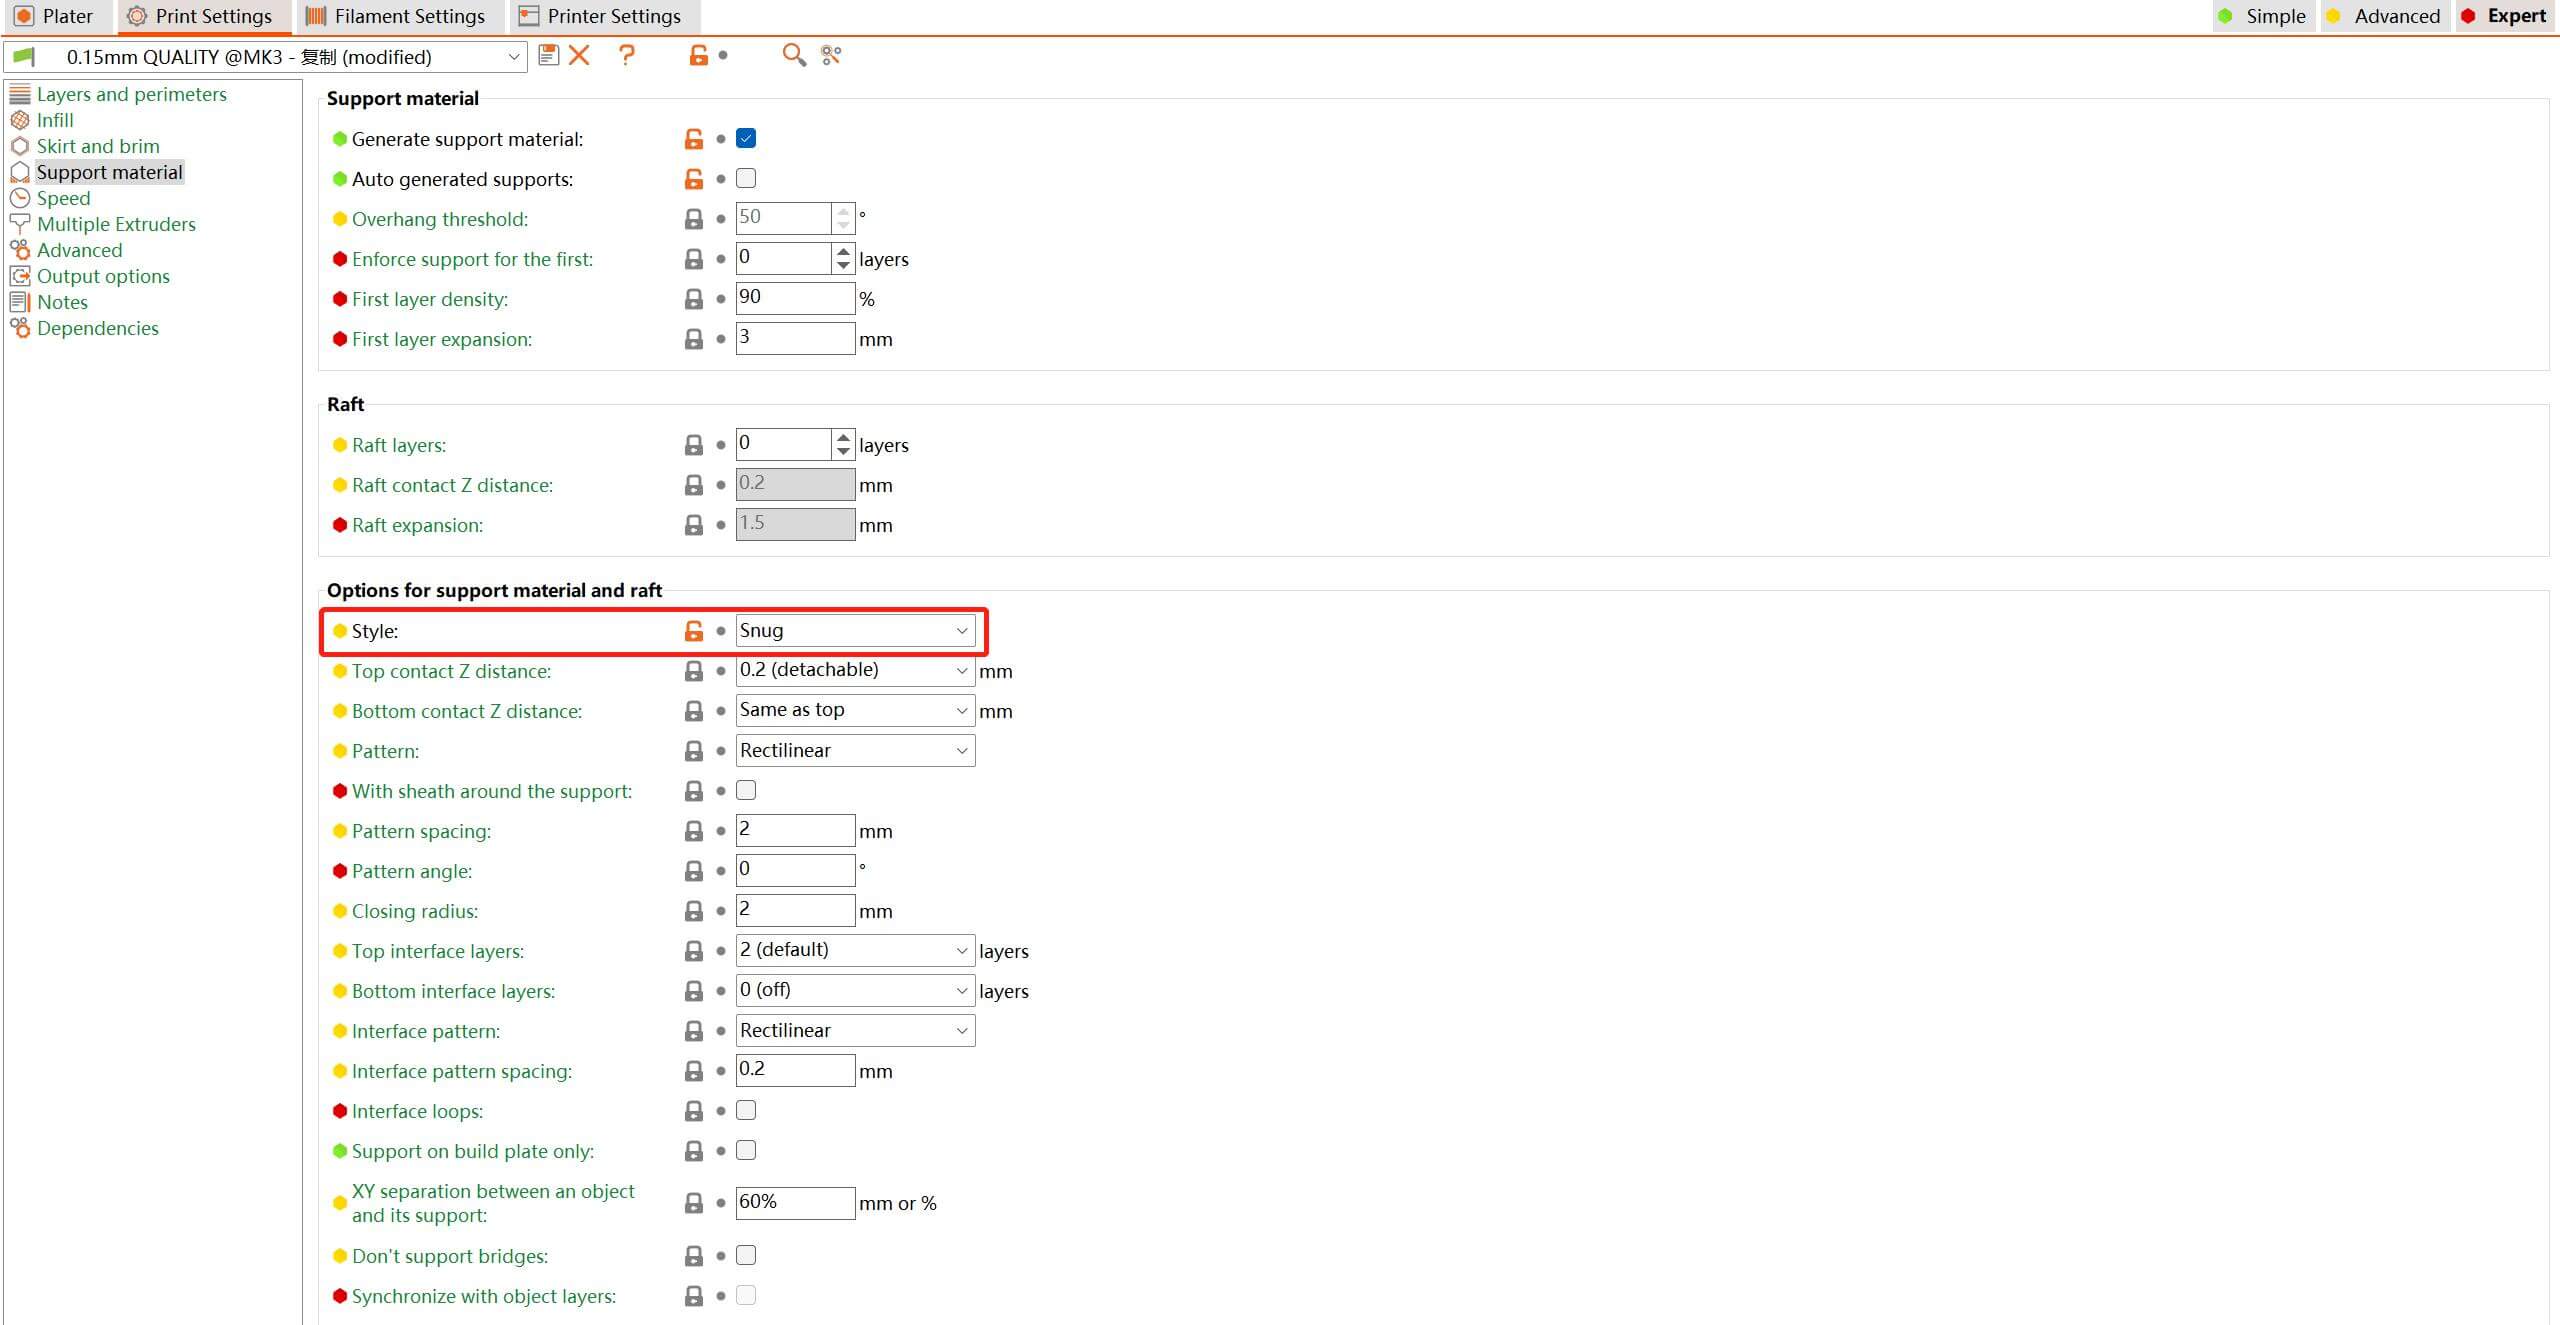
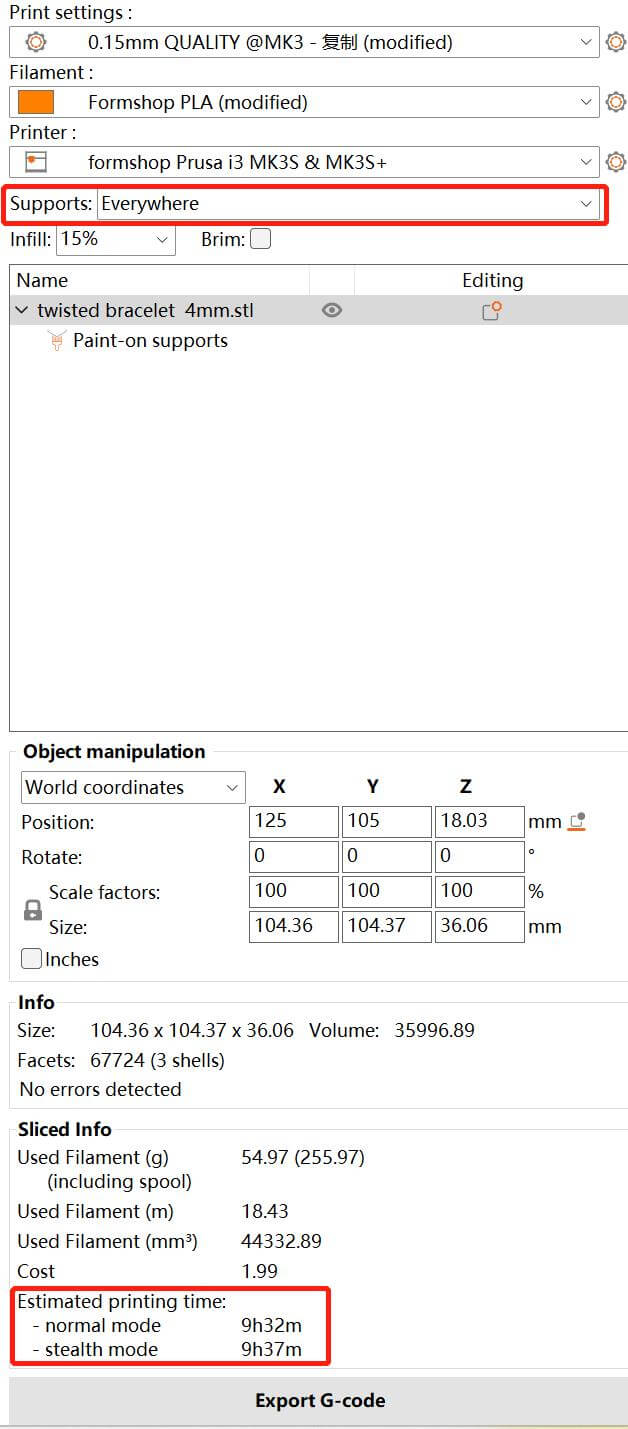
- Print Settings: mainly to set layer height and support material. I chose 0.15mm to get a more delicate effect and set the support style to snug. The others remain the default settings.
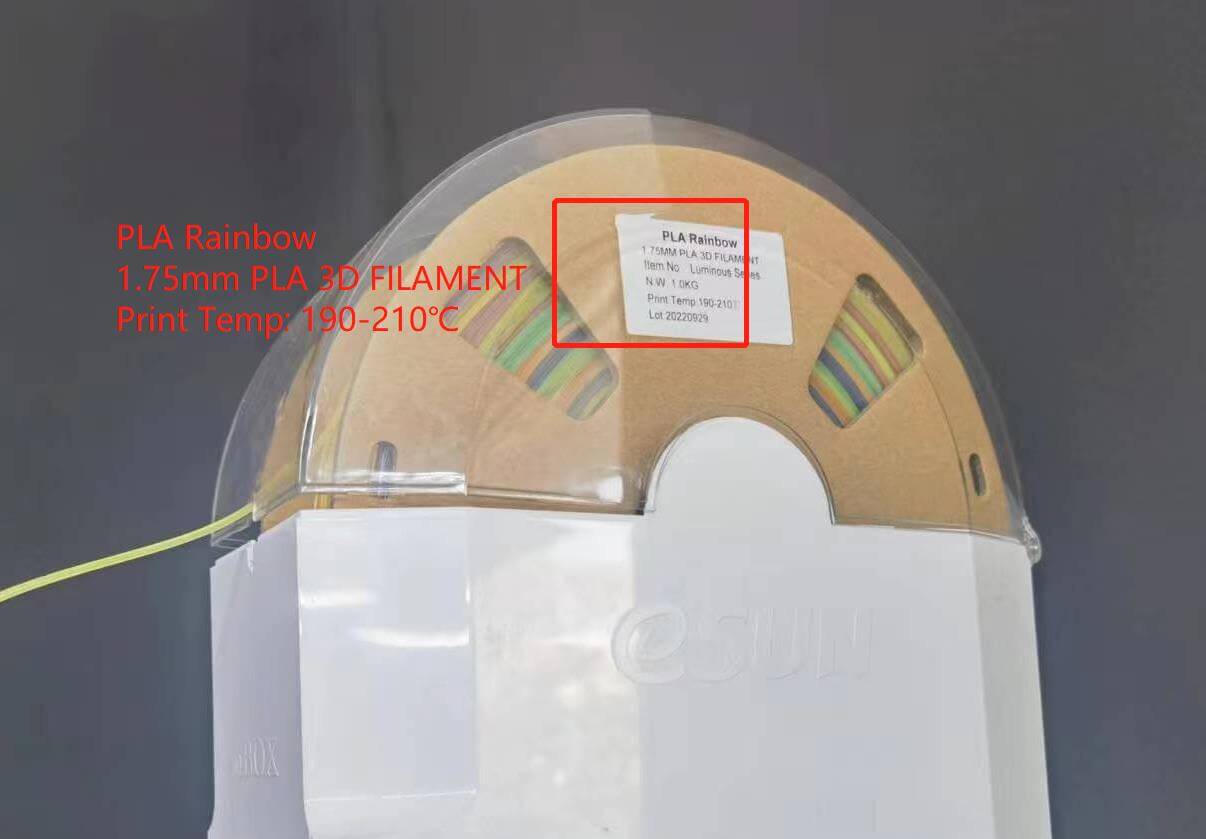
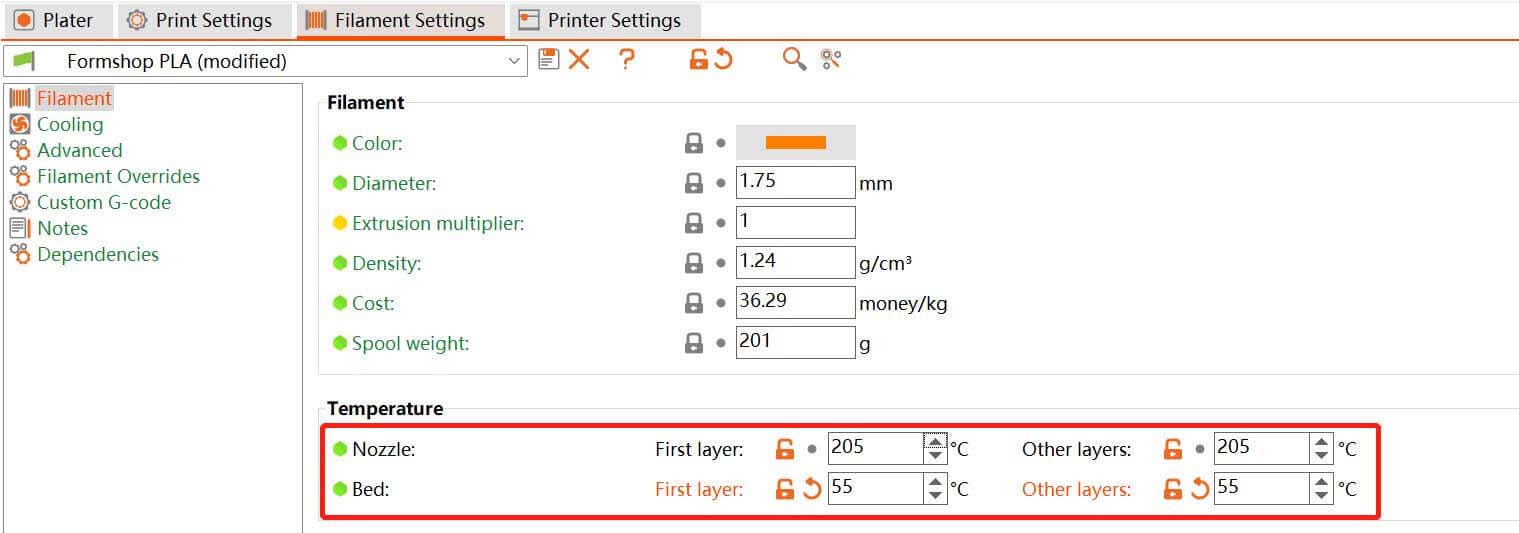
- Filament Settings: mainly to set the temperature of the nozzle and the bed. Here I used PLA, the print temperature is 190-210℃. So the nozzle temperature is set to 205 and the bed is set to 55.
- Printer Settings: mainly to choose the correct model of printer. I used Prusa i3 MK3S+.
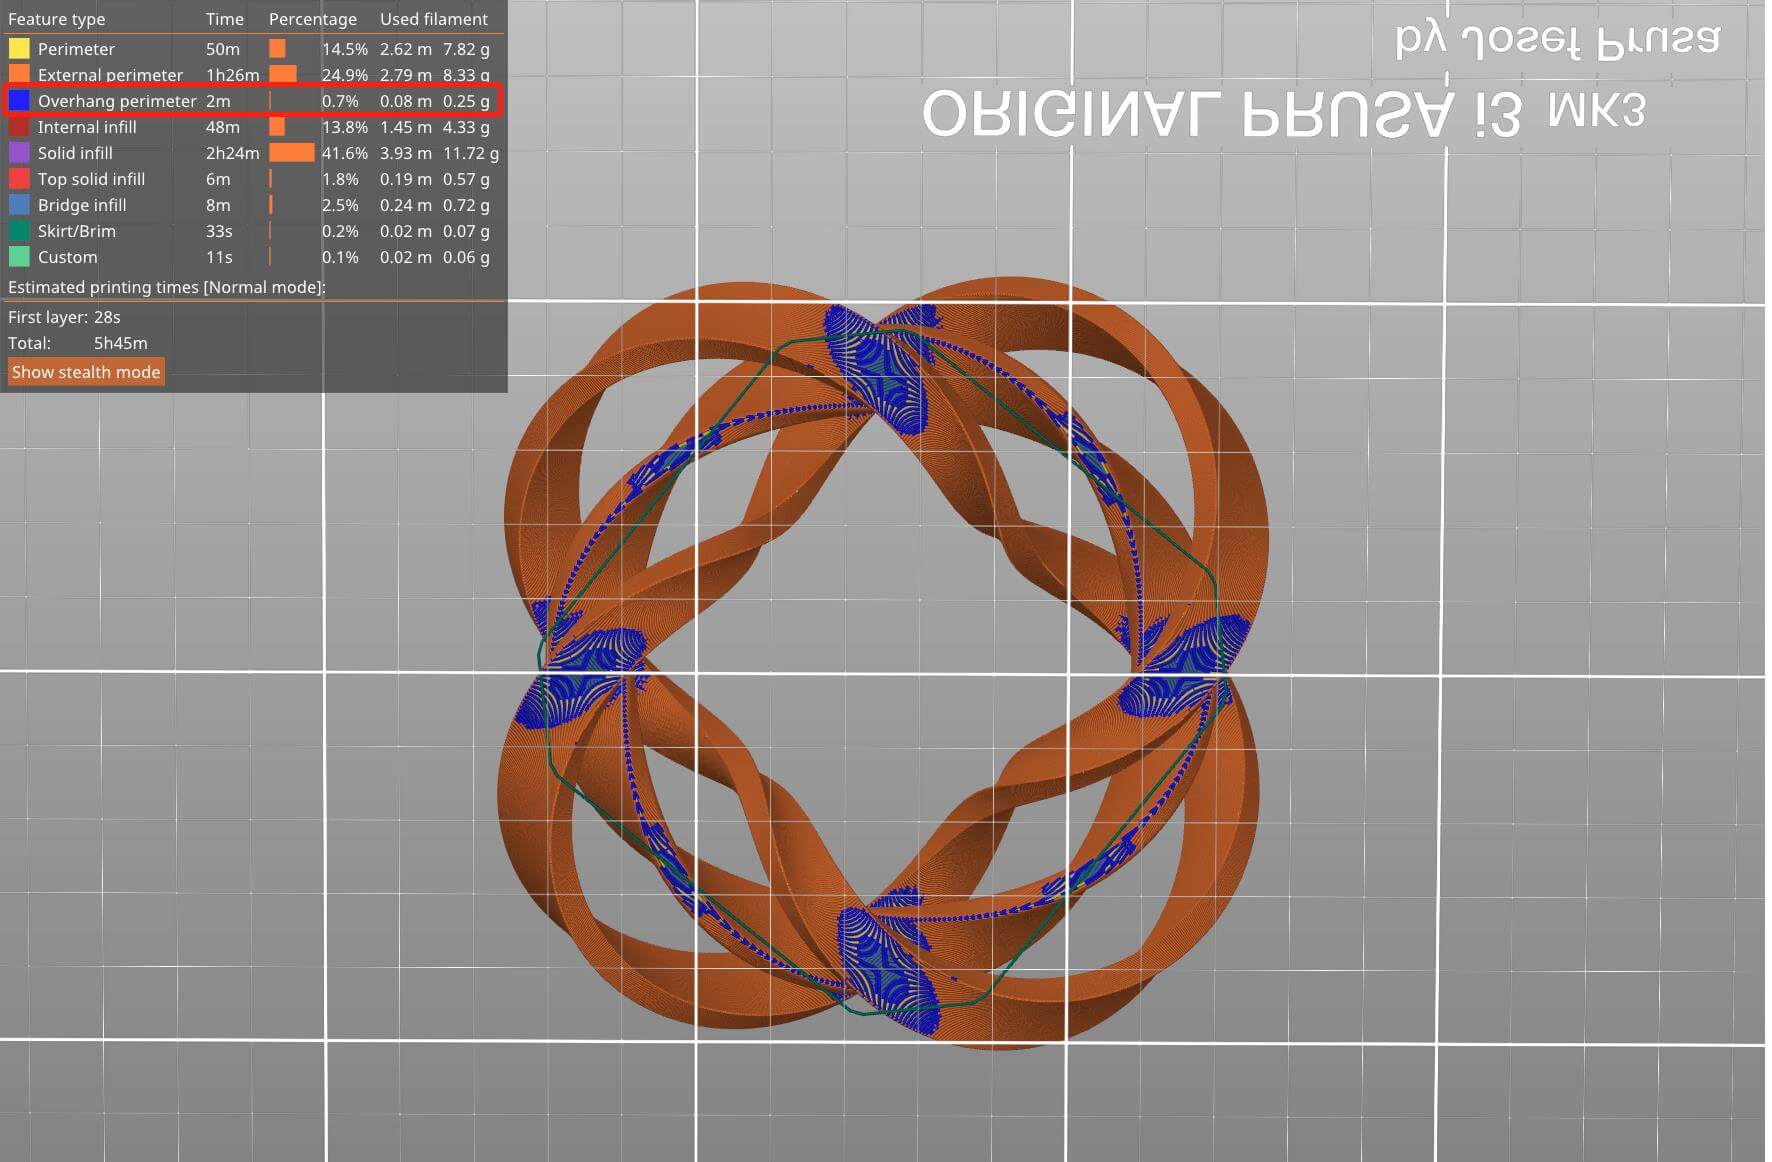
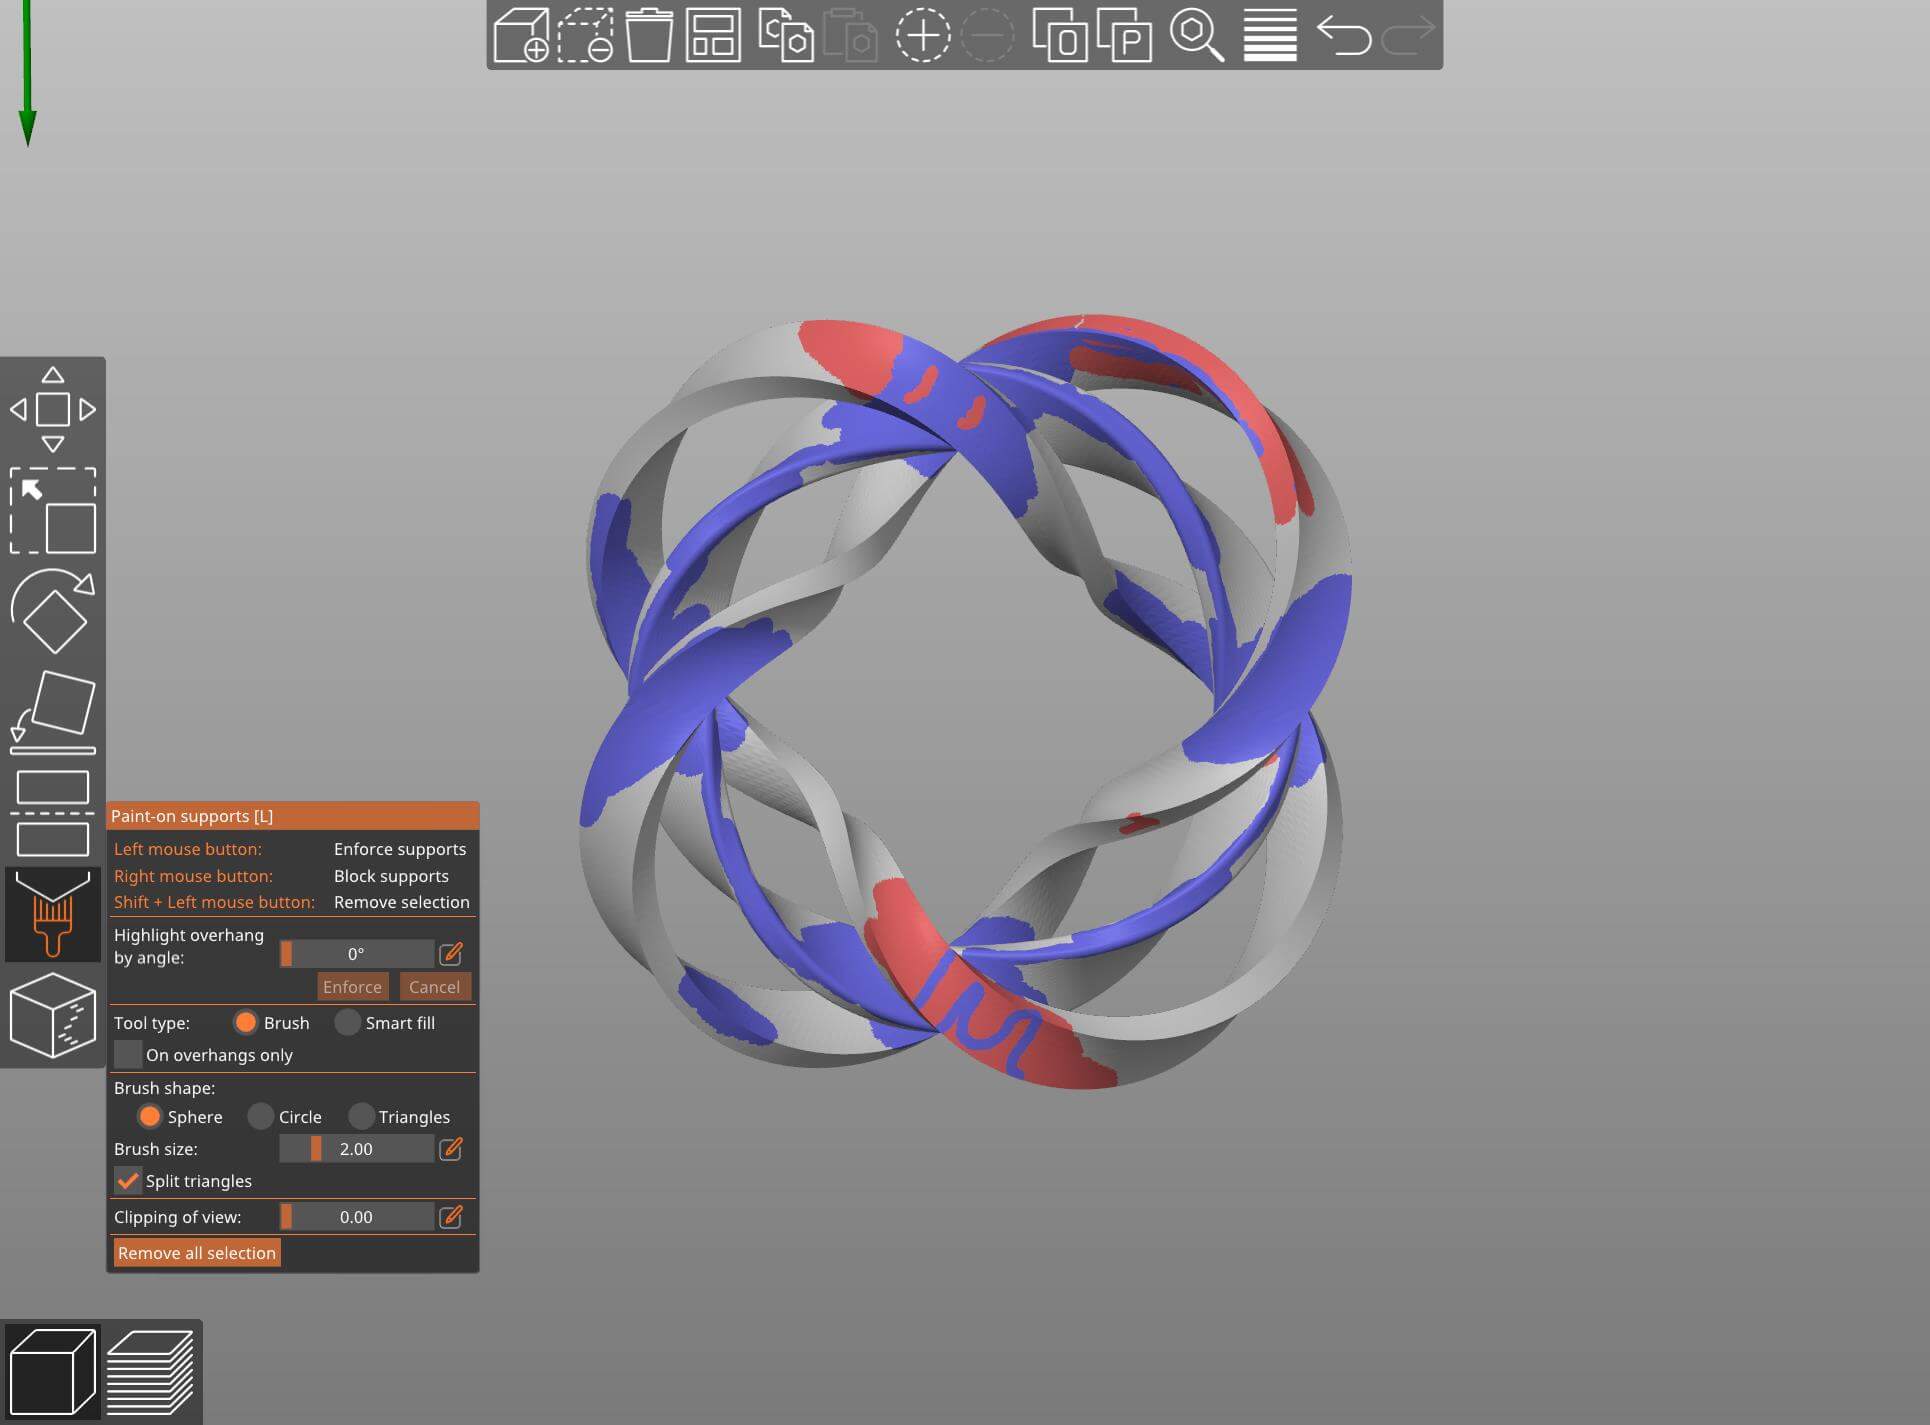
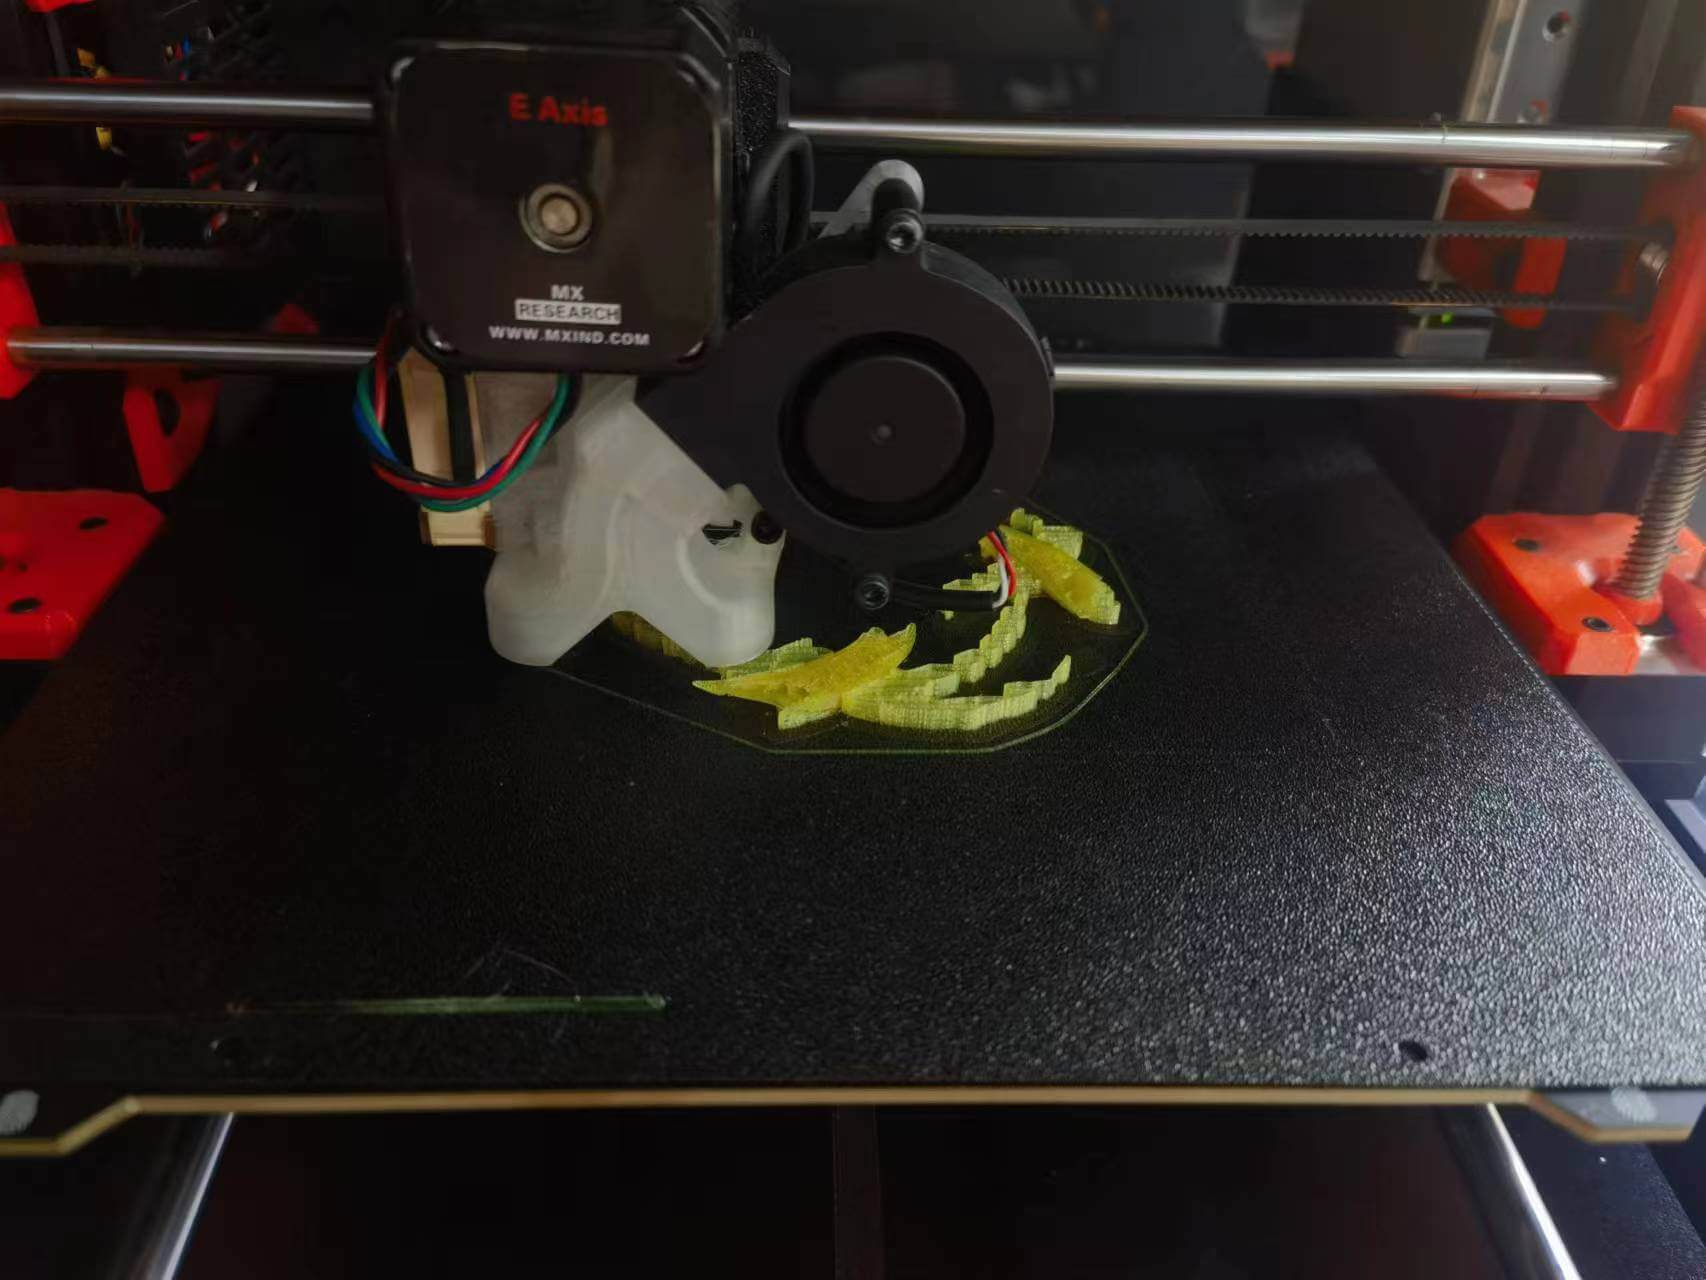
- Paint-on Supports: Finishing all the settings above and clicking the "Slice Now" button at the bottom right, I found that the estimated time of printing is more than 9 hours😮! Because I chose supports "every where", that means the software generates all the supports according to it calculation. That's a safe way to insure the model can be printed by the manufacturing, but not the most efficient way. So I decided to use paint-on supports. The button at the left bar with a brush is used to draw supports. In the preview panel, blue parts are overhange perimeters, that where I need supports.
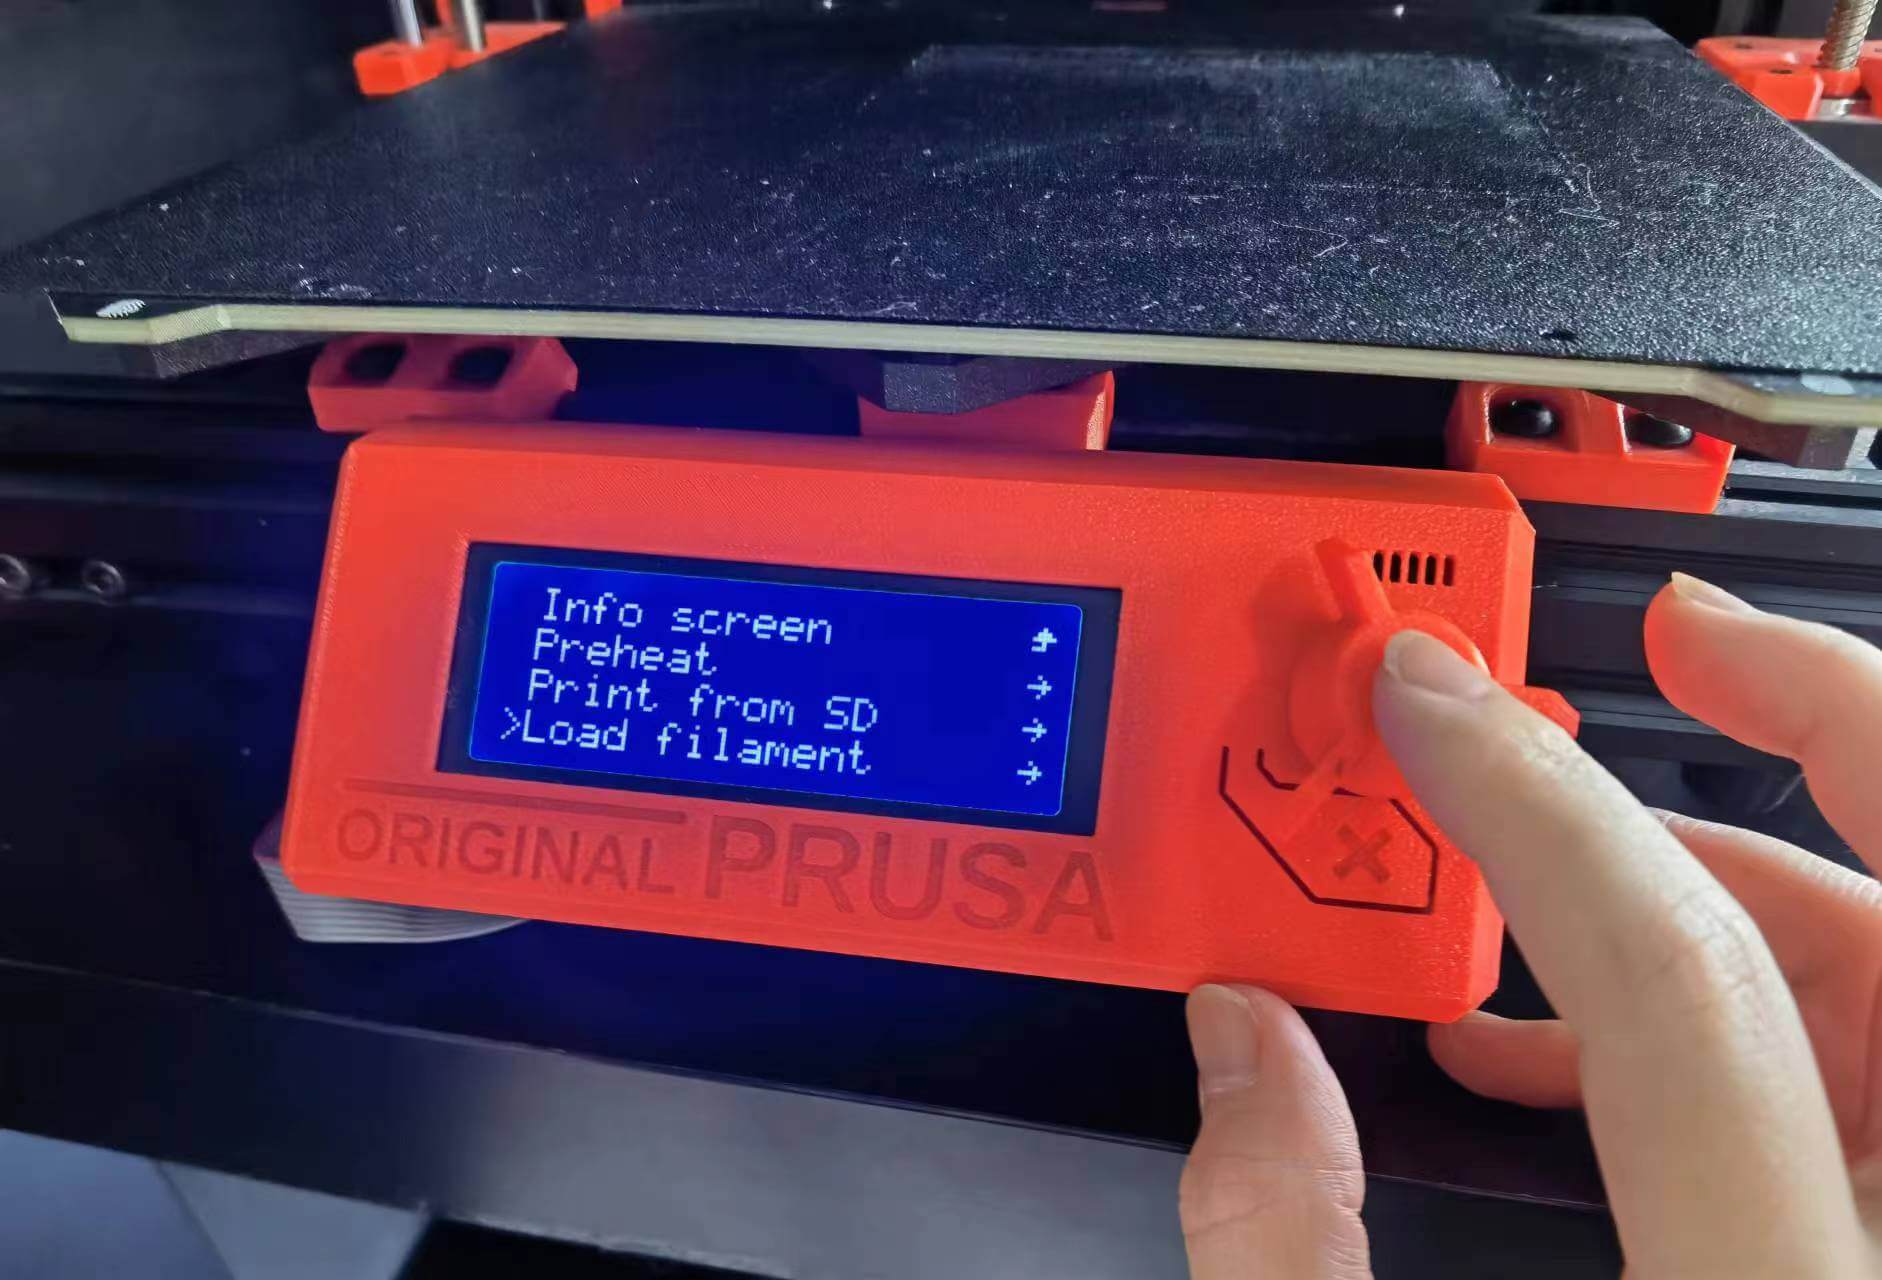
- Unloading and Loading Filament
- Unload filament: pressed "unload filament" on the manufacturer, it started to preheat the nozzle. When the temperature was ready, the manufacturer asked you to pull the filament out immediately.
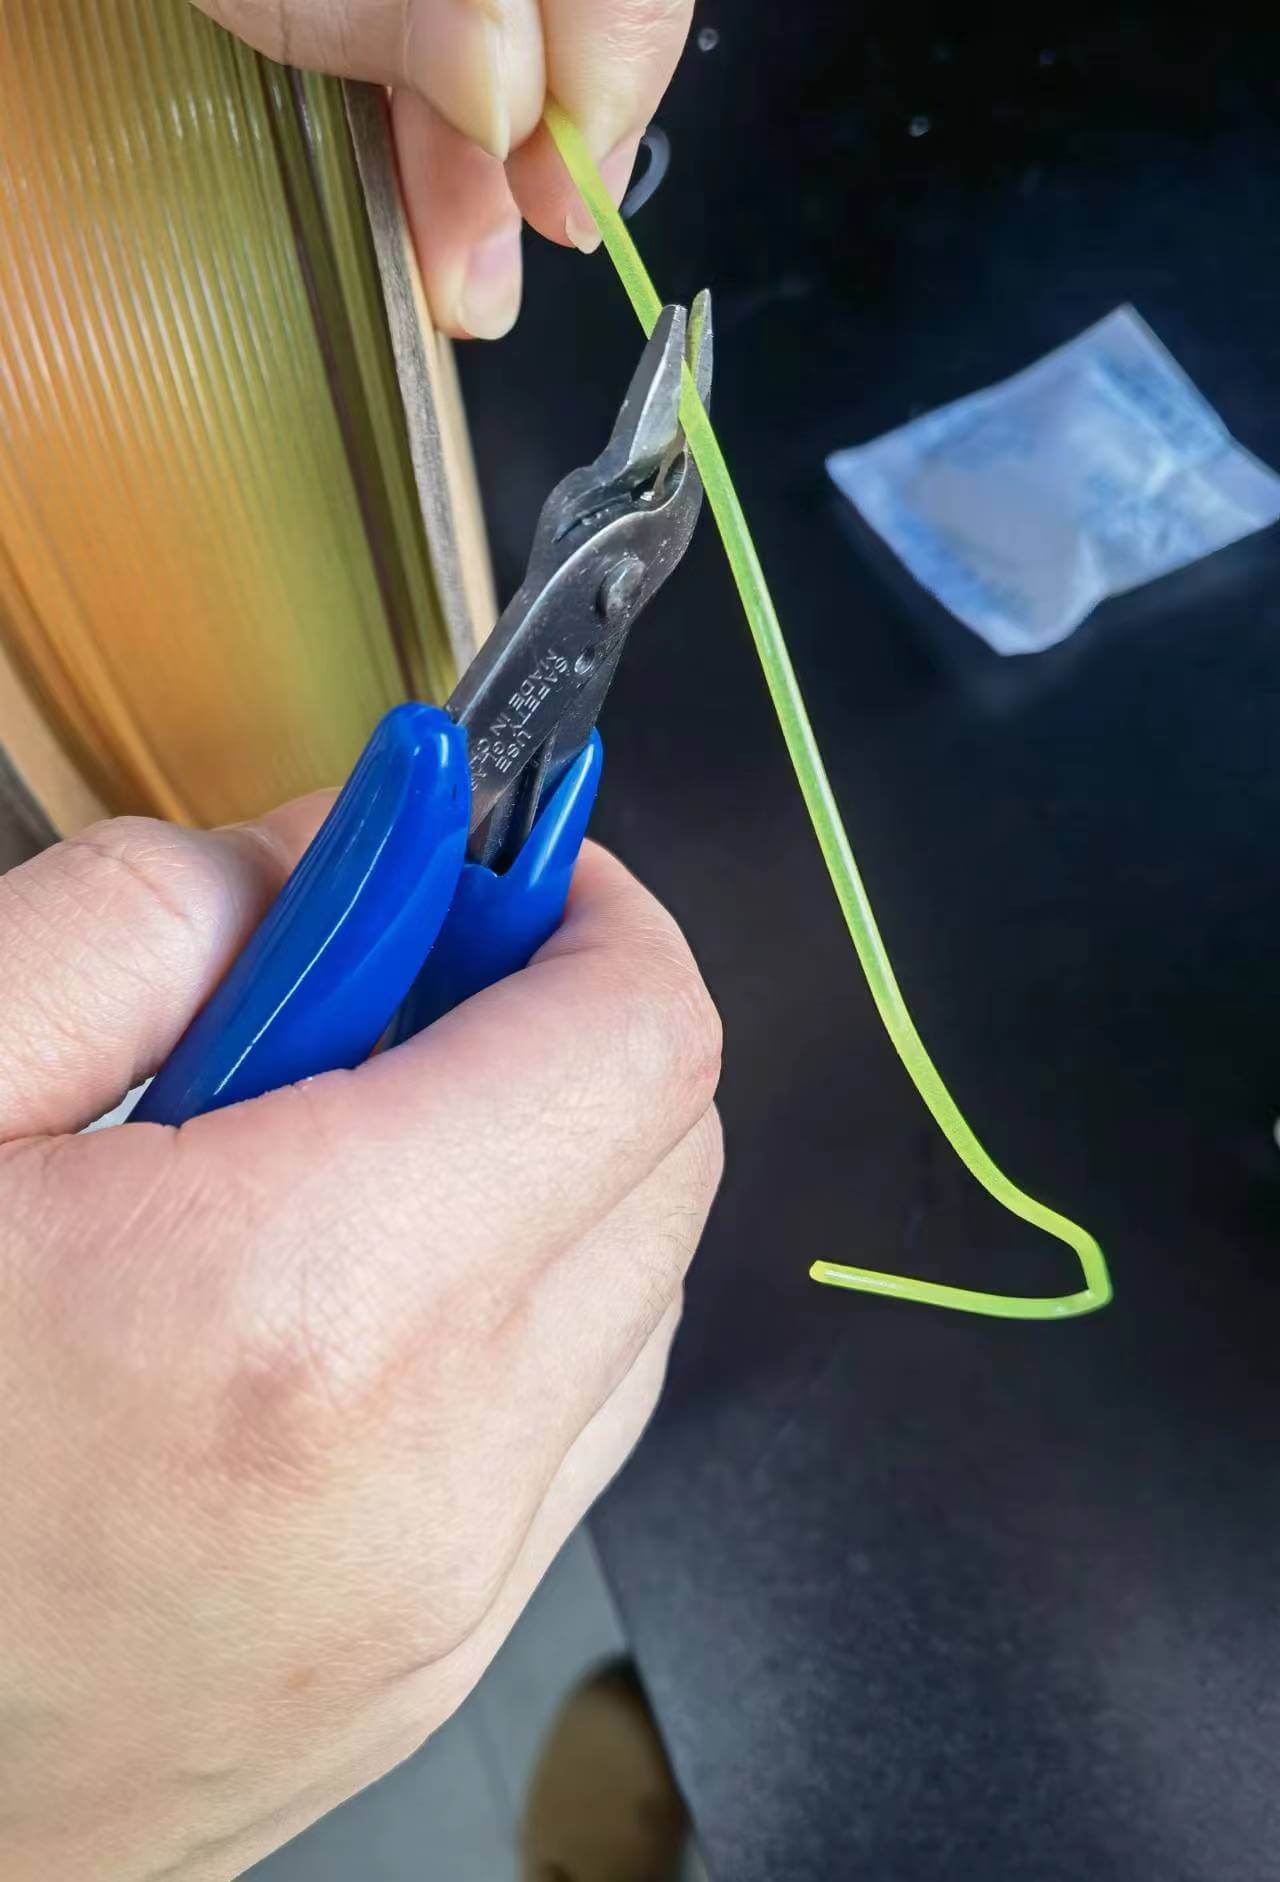
- Load filament:Diagonal cut the new filament, and insert it in the inlet, and press "load filament" on the manufacturer.
- 3D Printing
Since the 3d printers are Prusa open source printers, we use PrusaSlicer to generate the G-code. There are 3 main settings panels:Print Settings, Filament Settings, and Printer Settings.
Comparison of print times for different support settings:
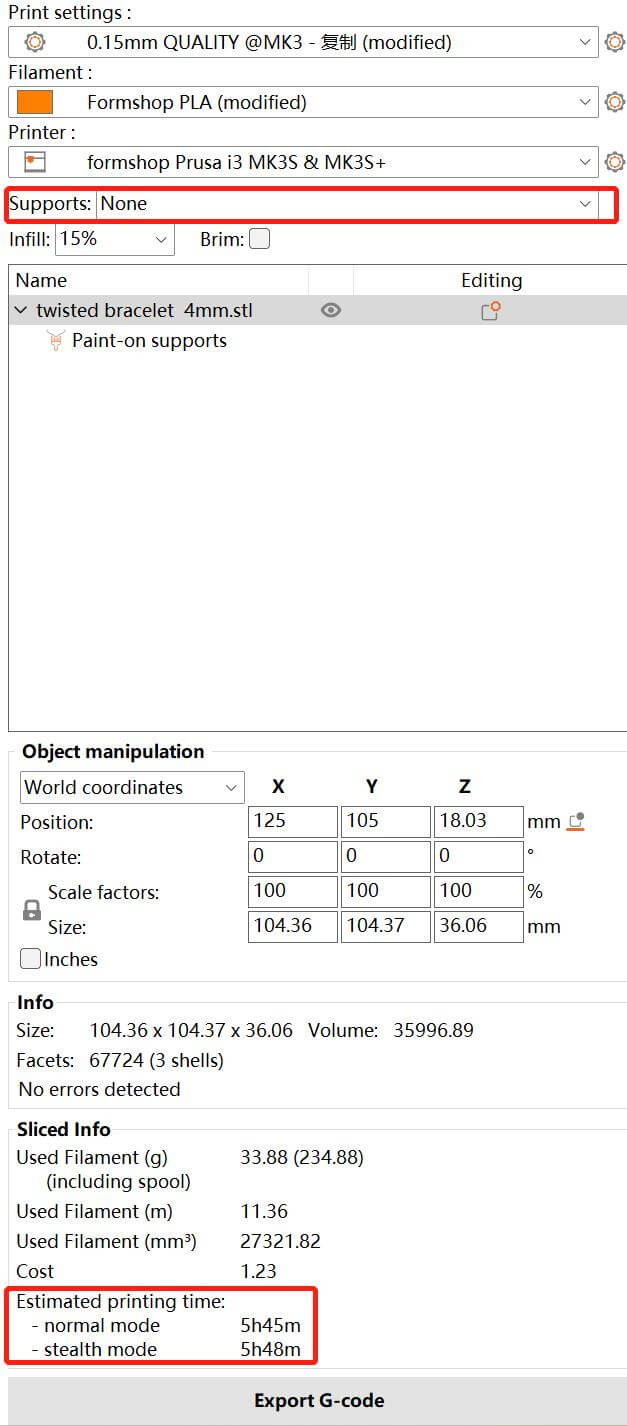
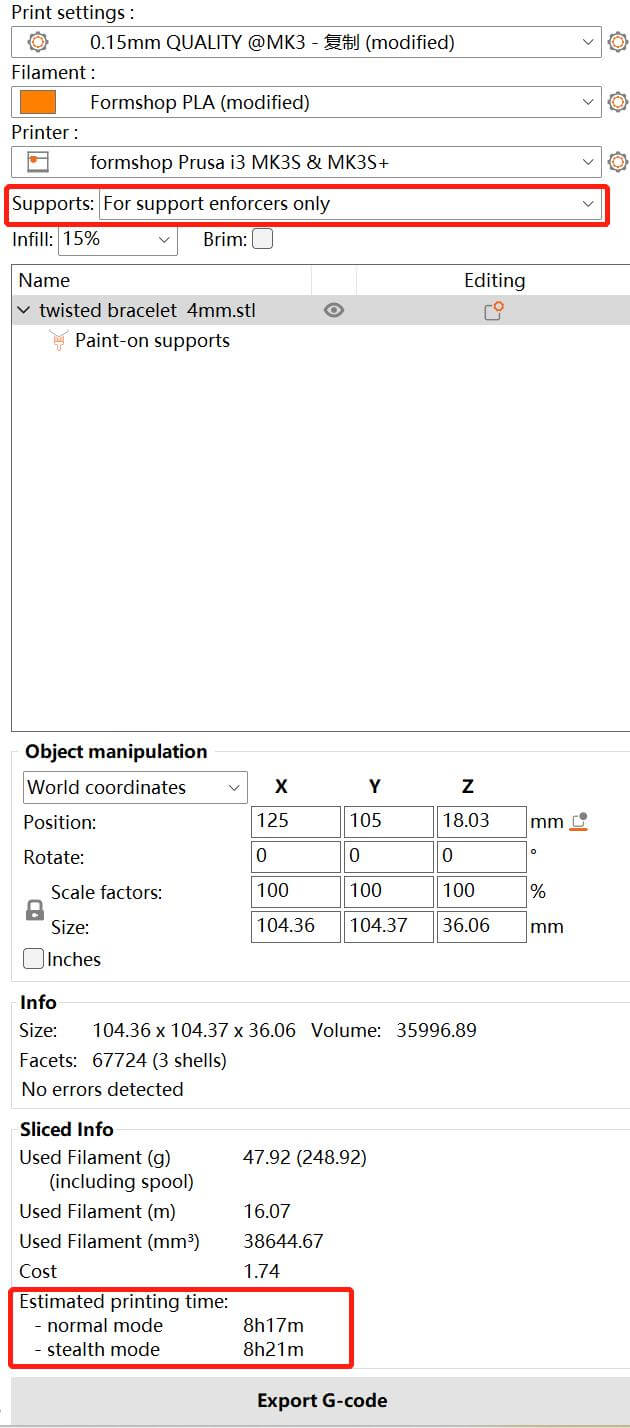
The Paints-on supports not only saved me about 1 hour printing time, but also saved me some effort when removing the support.
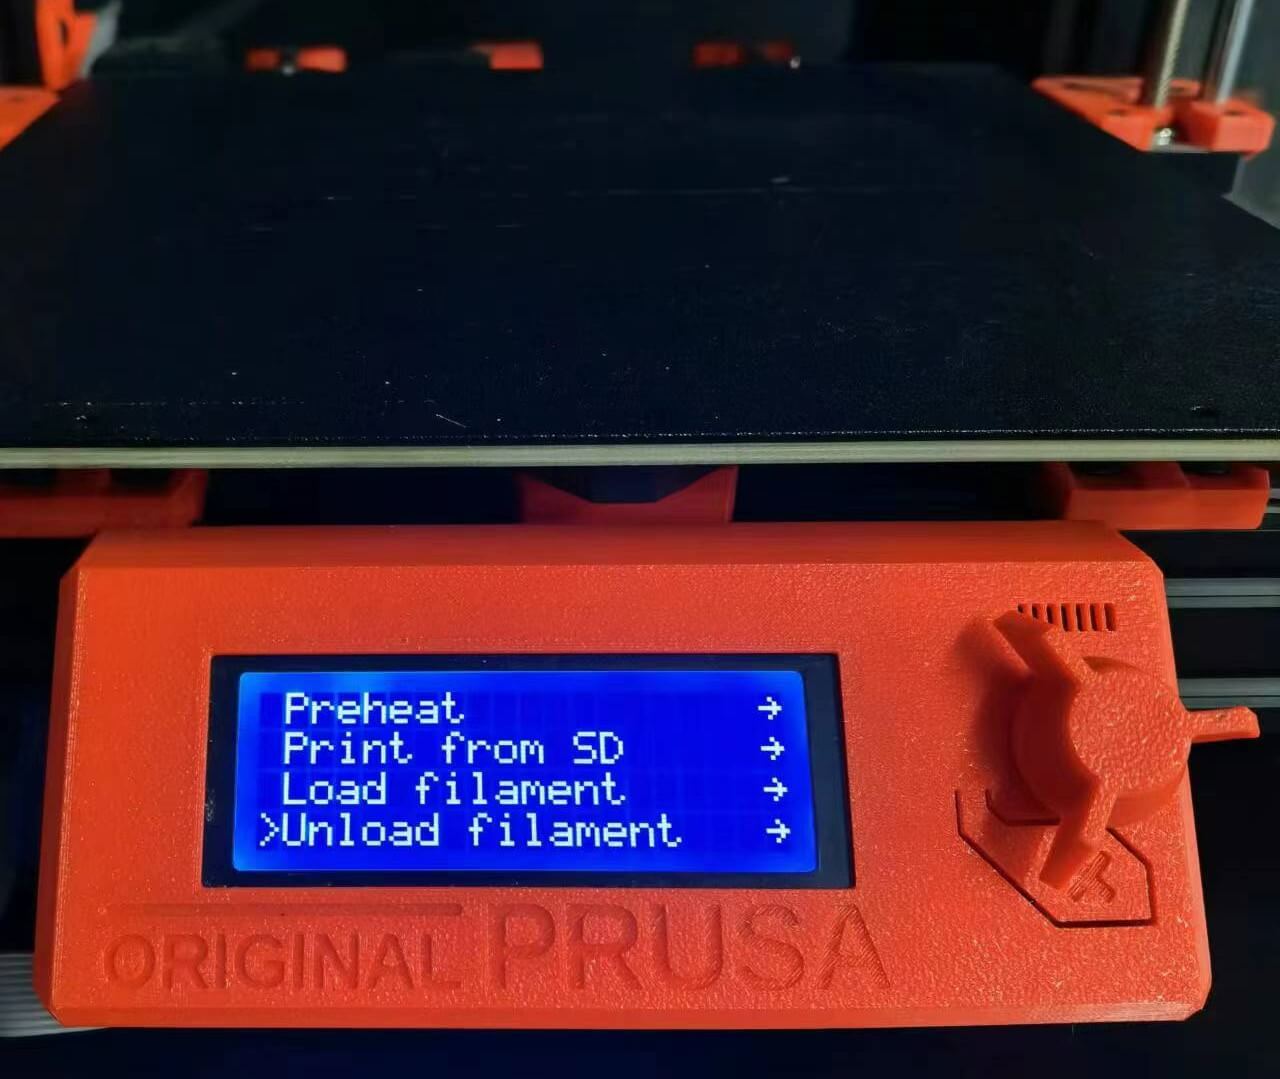
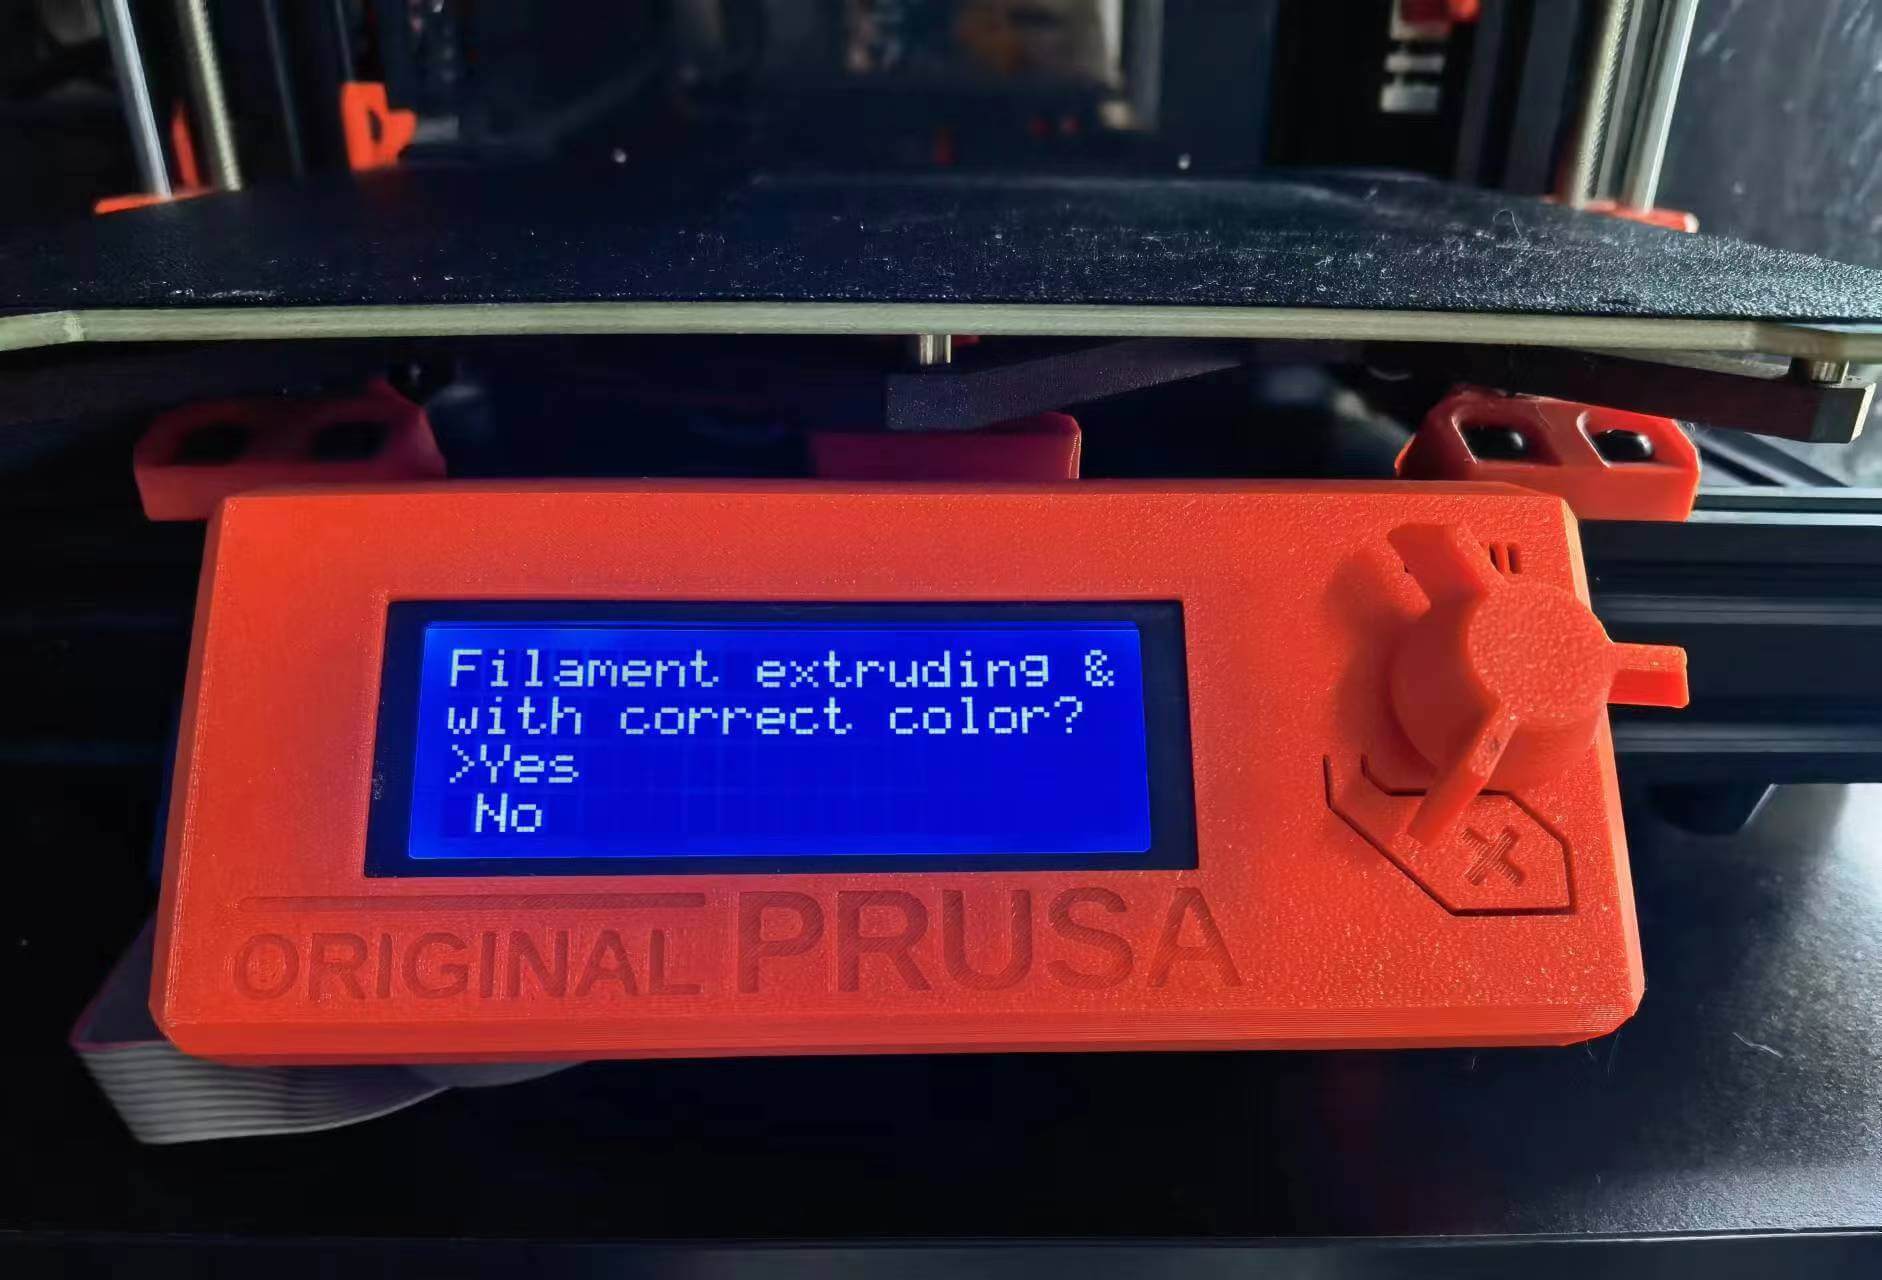
Waiting for a while, the manufacturer will ask you "Filament extruding with correct color?" I saw the nozzle extruded the remaining previous filament and then the correct color of the new filament, so I chose "yes". If you don't see the correct color, choose "no".
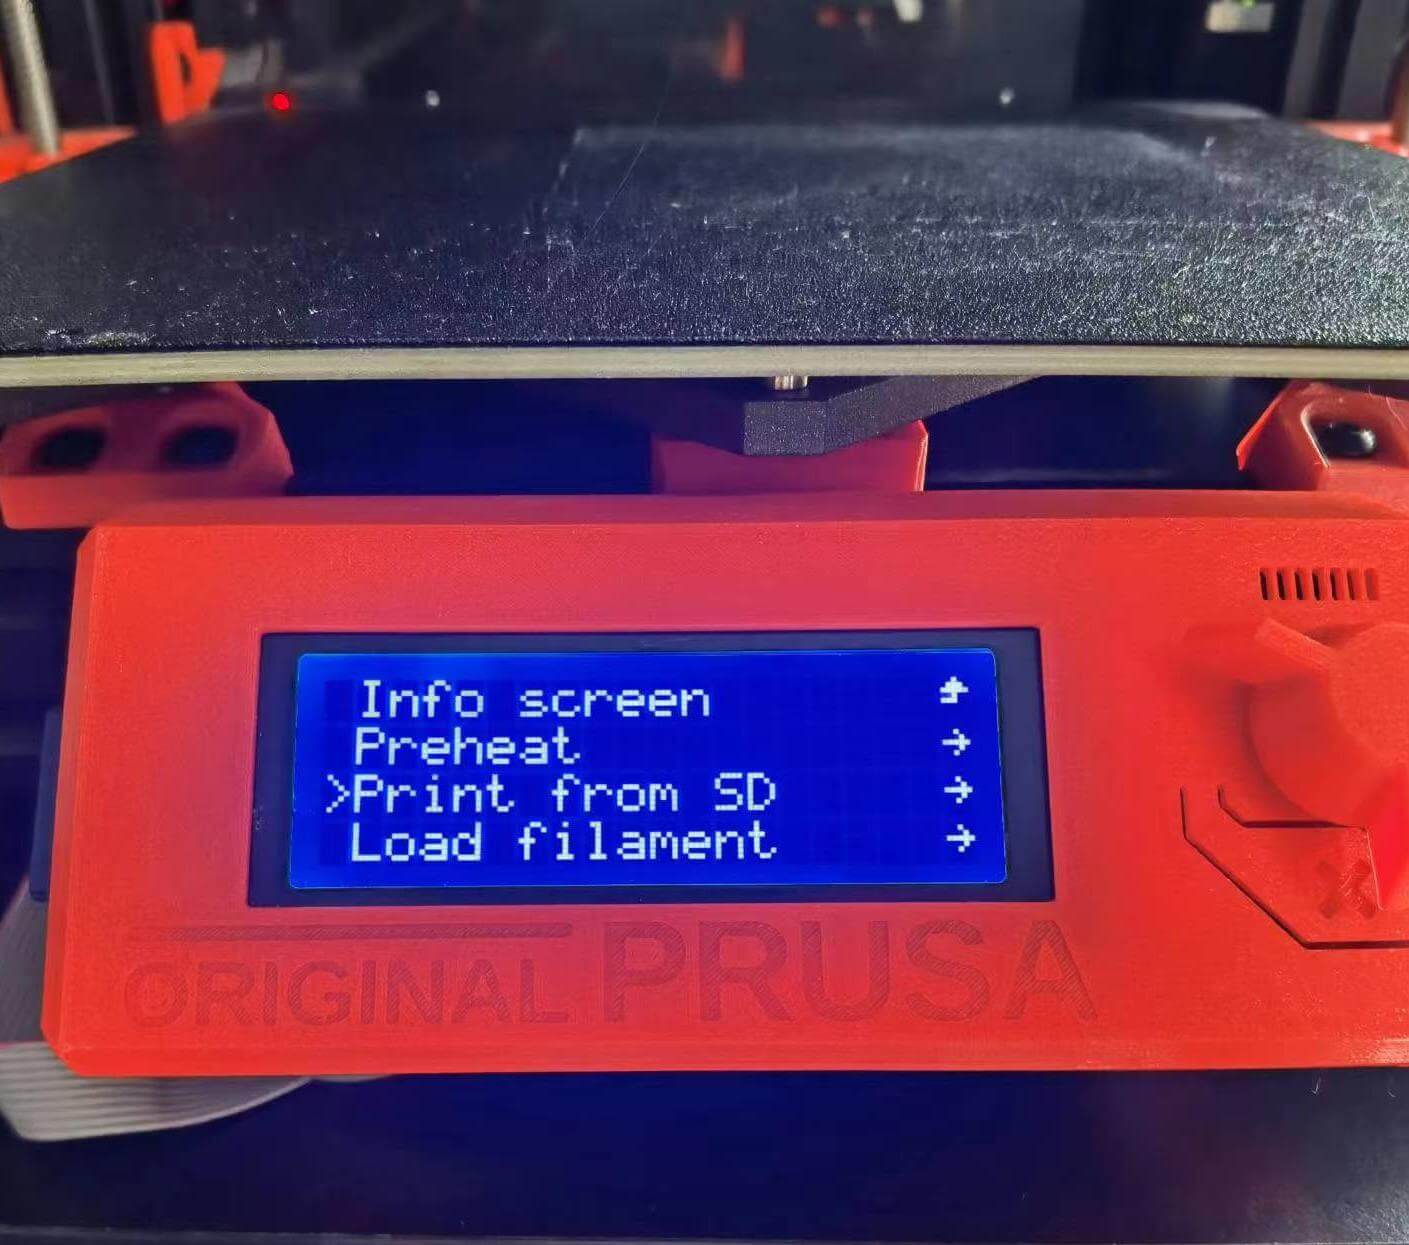
After all the preperation, save the G-code in the SD card and insert it into the manufacturer. Choose "Print from SD". All you need is to wait.

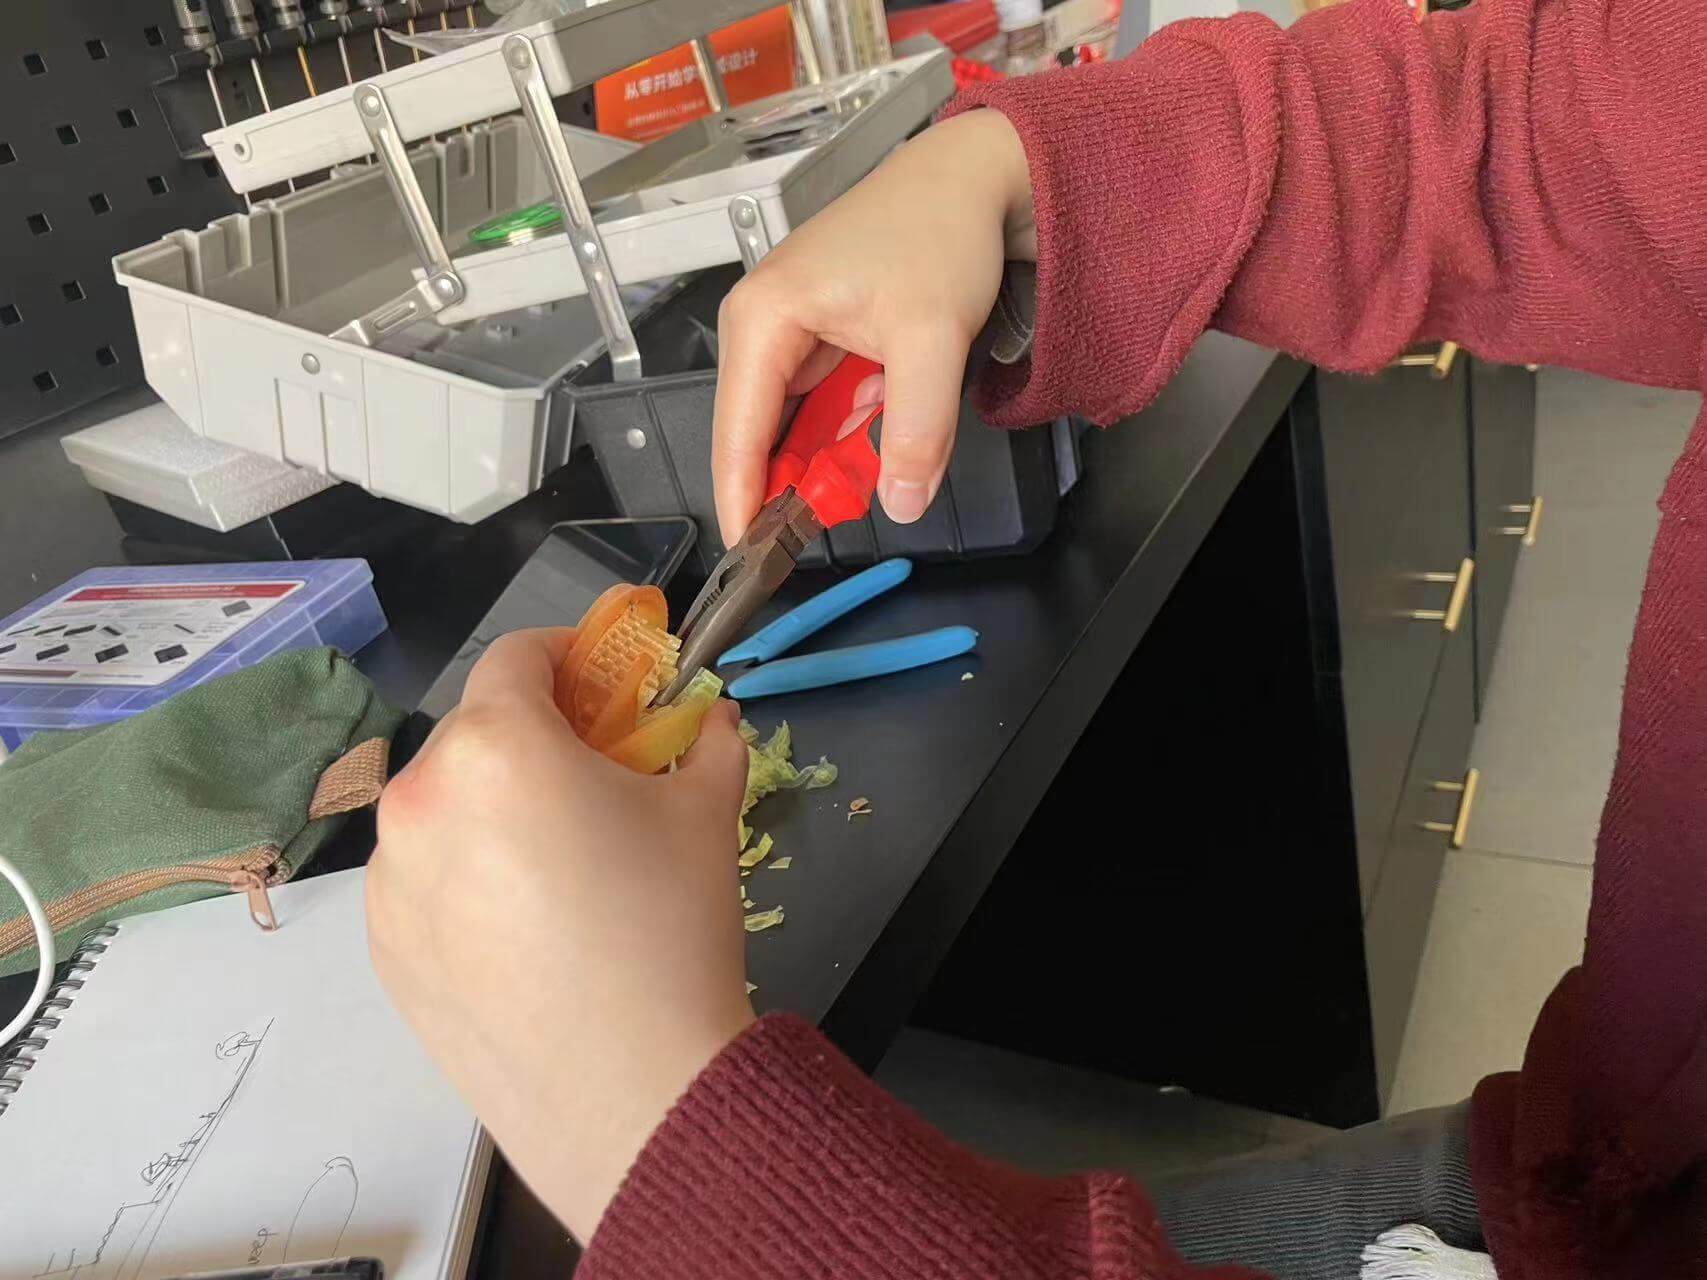
It was my first time to remove supports.

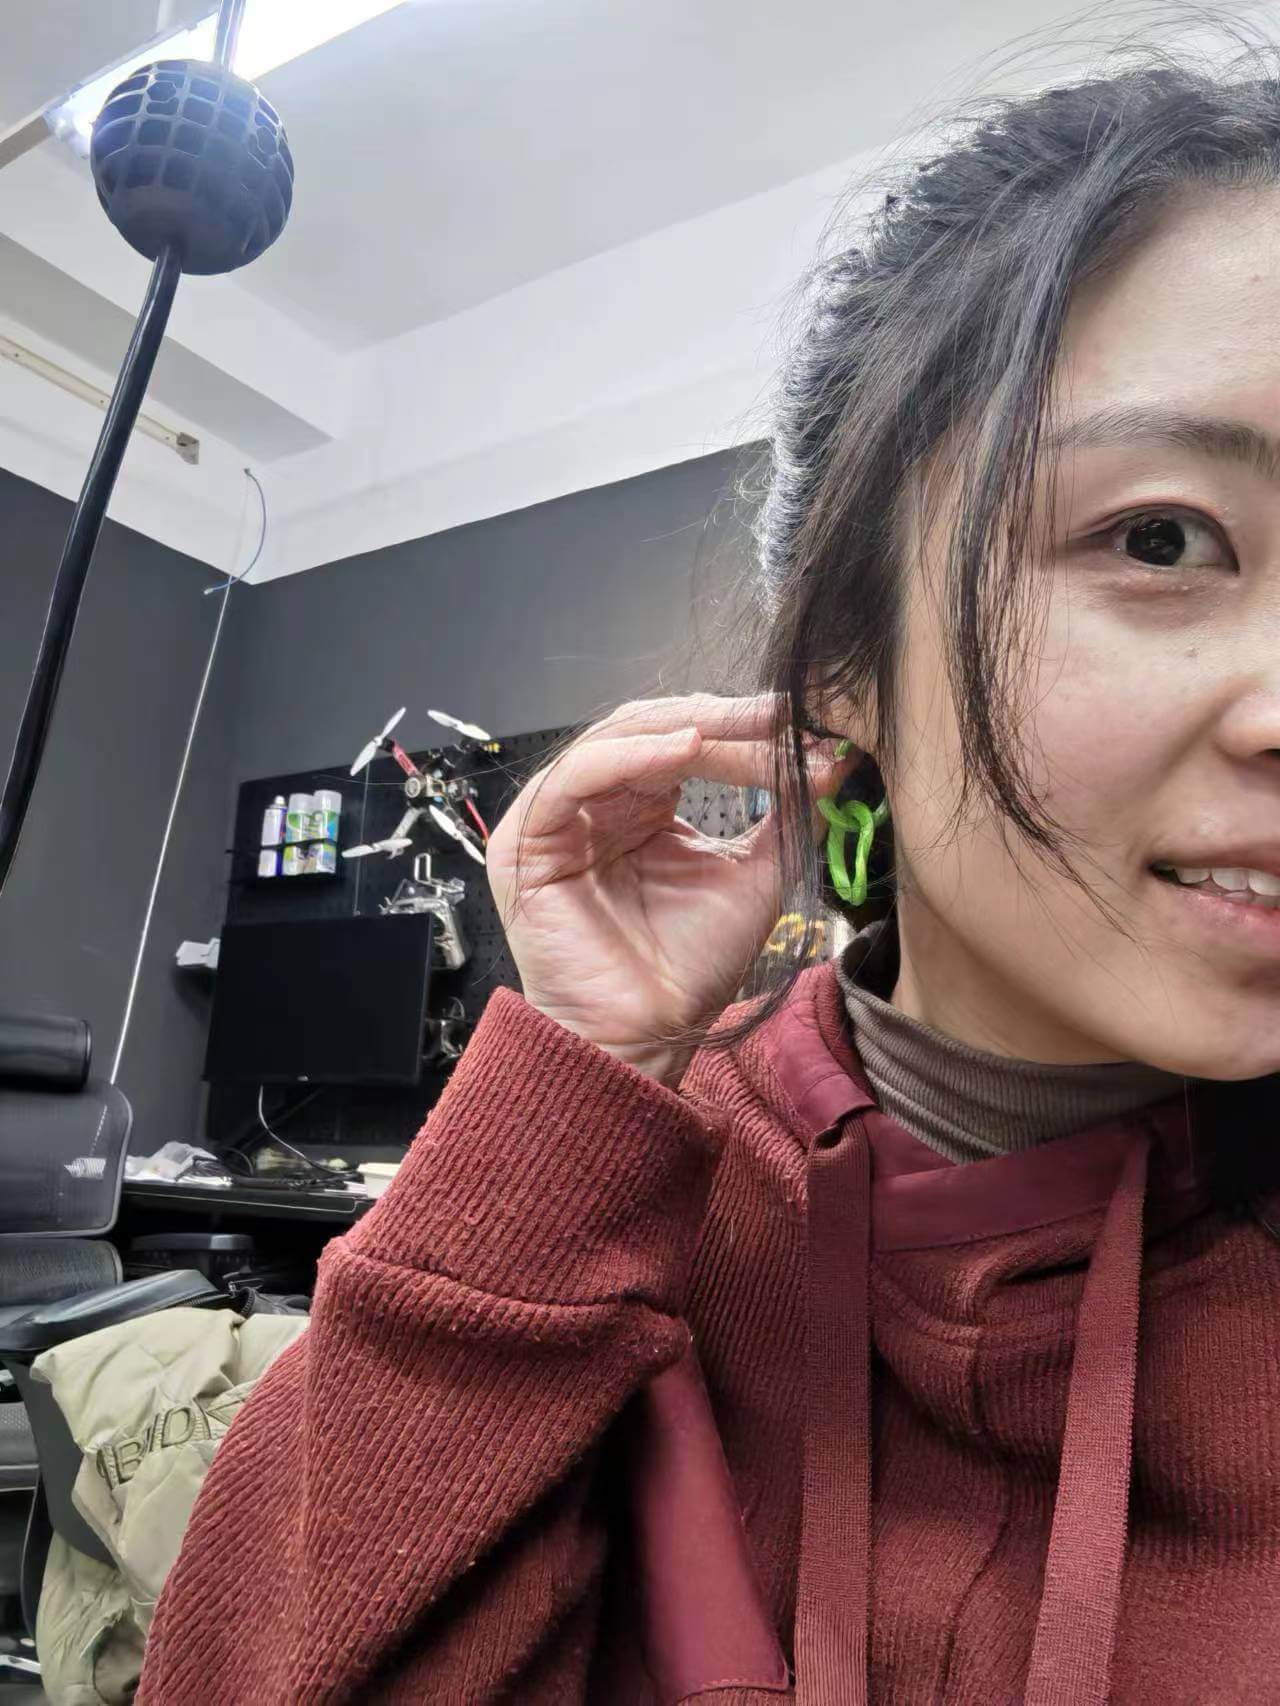
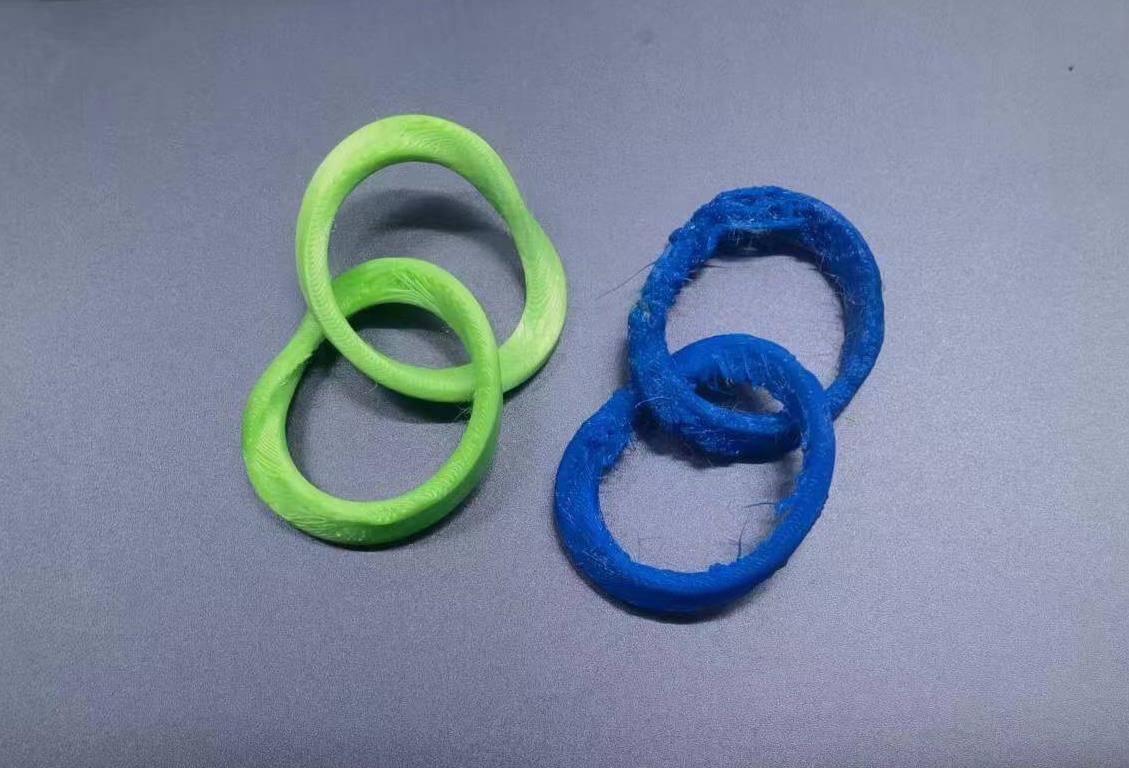
I also tried to print a nested earring. The left is PLA, the right is TPU. With the same digital model, TPU is too soft to be printed with this nested twisted shape.
1.5 3D Scanning
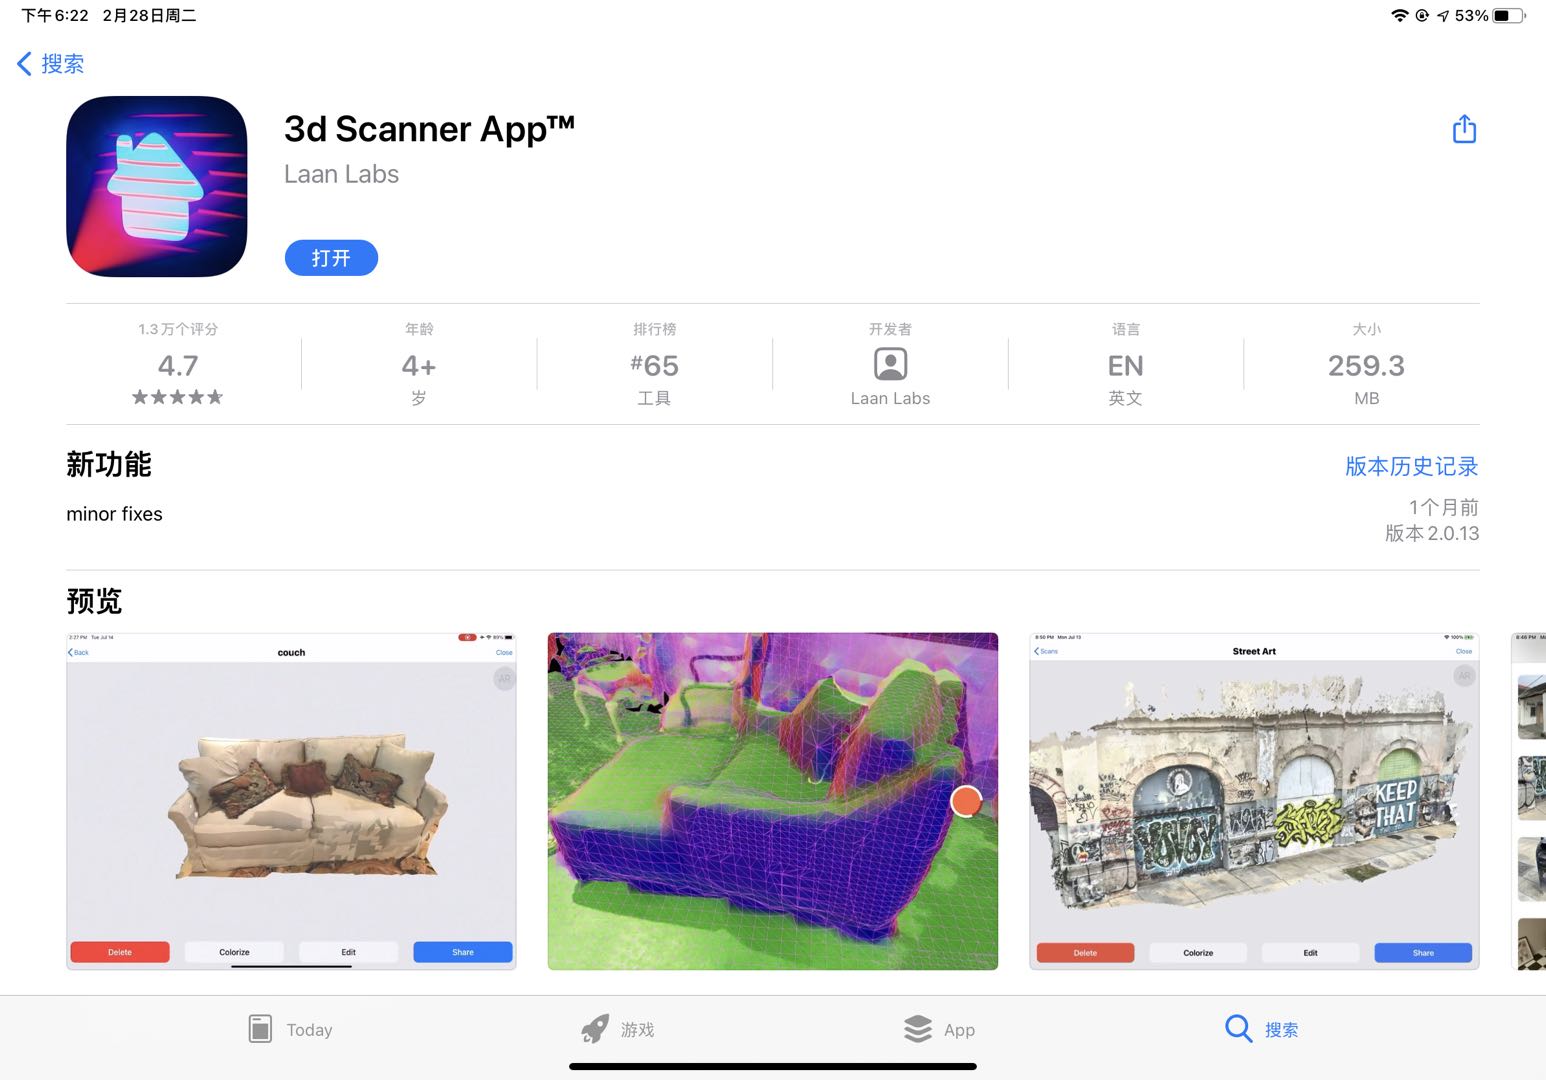
1.5.1 "3D Scanner APP" ---- a User Friendly 3D Scanning APP in Ipad
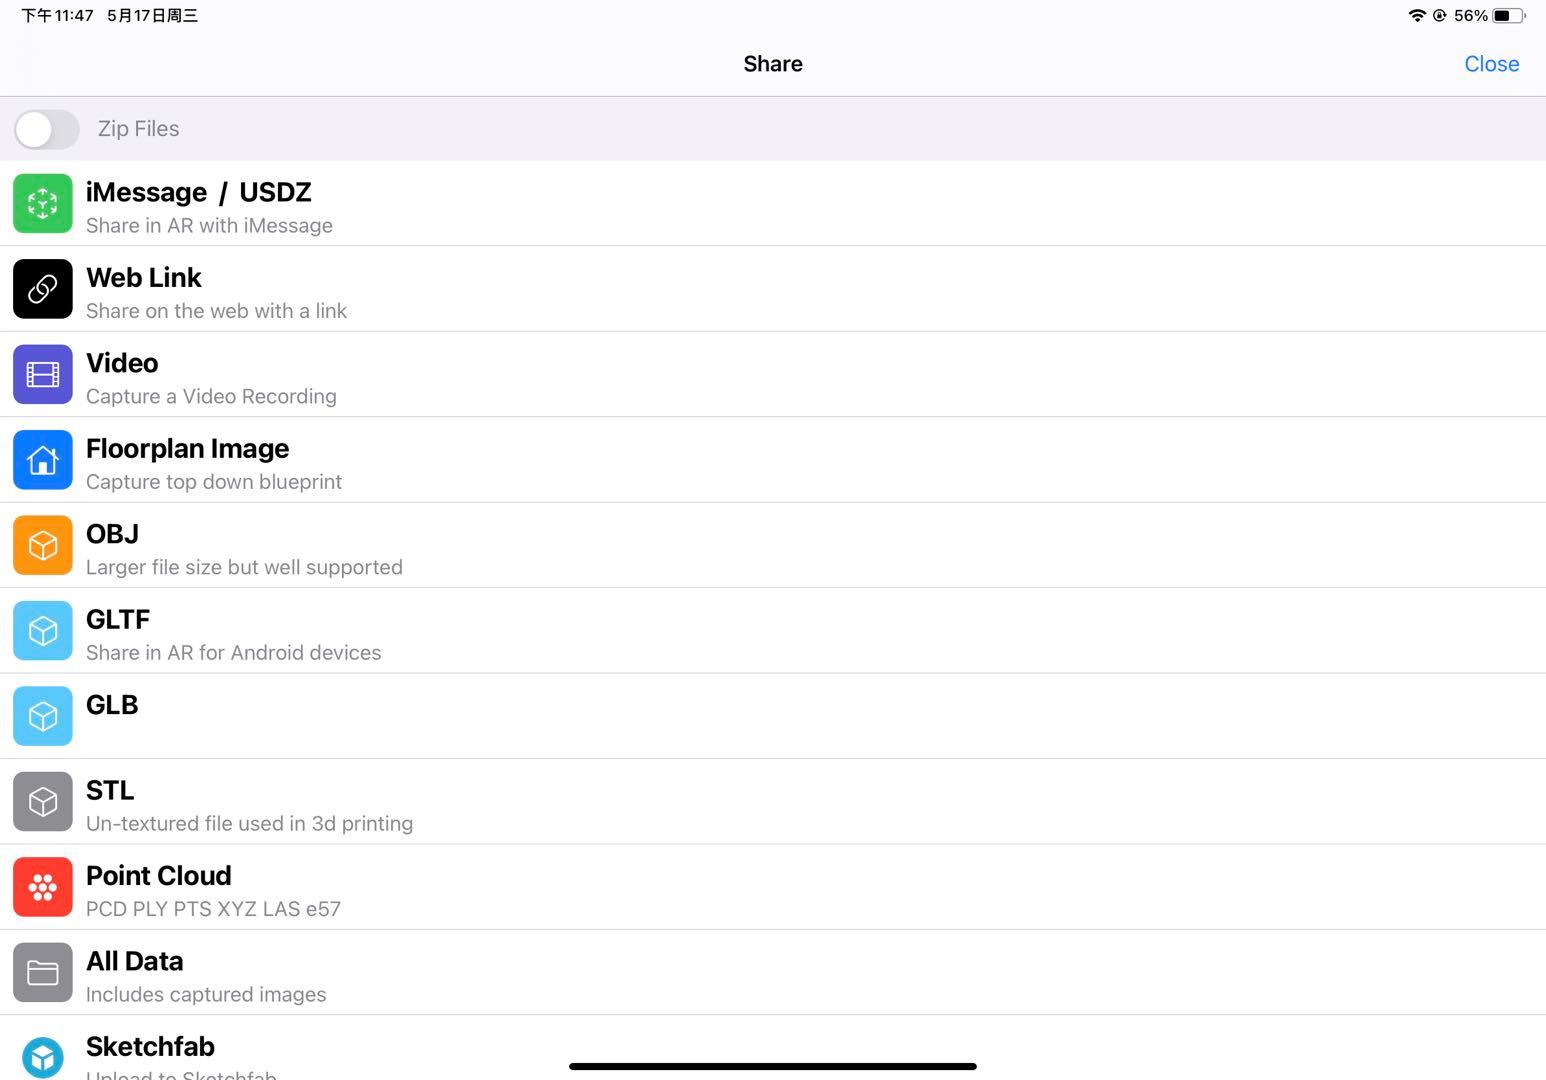
It requires a LIDAR camera sensor device. The 3d scans can be exported in popular formats such as OBJ, GLTF, STL, etc. Also export the model as a raw point cloud in formats: PTS, PCD, PLY, XYZ, ect.
1.5.2 Scanning Process
This app is incredibly user-friendly. When opening the app, a reminder pops up reminded me that the front camera would be used, as the only available LIDAR camera on this iPad is the front camera. After clicking 'OK', I was directed to the interface showed below, where I could start the 3D scanning process by clicking on the red button (which looks the same as the video button).
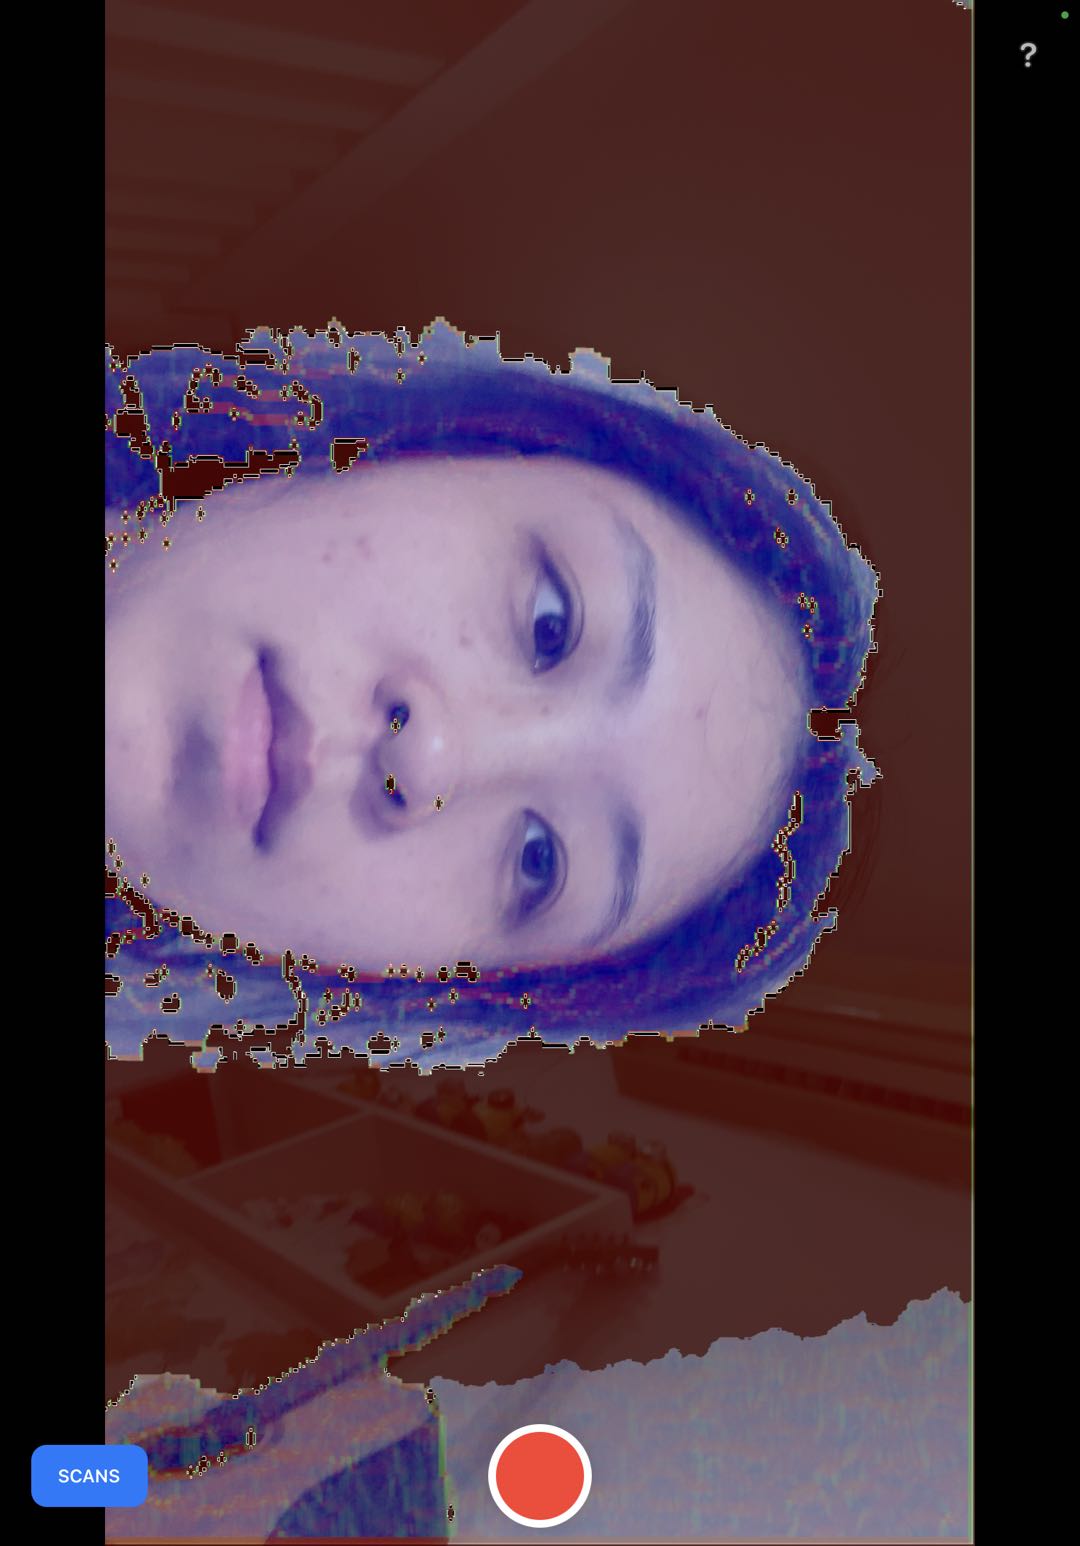
Then all I need to do is to walk around the subject and shoot from different angles. Note that the subject cannot move during this process. It's as easy as taking a video with your phone. To finish scanning, press the red button again.
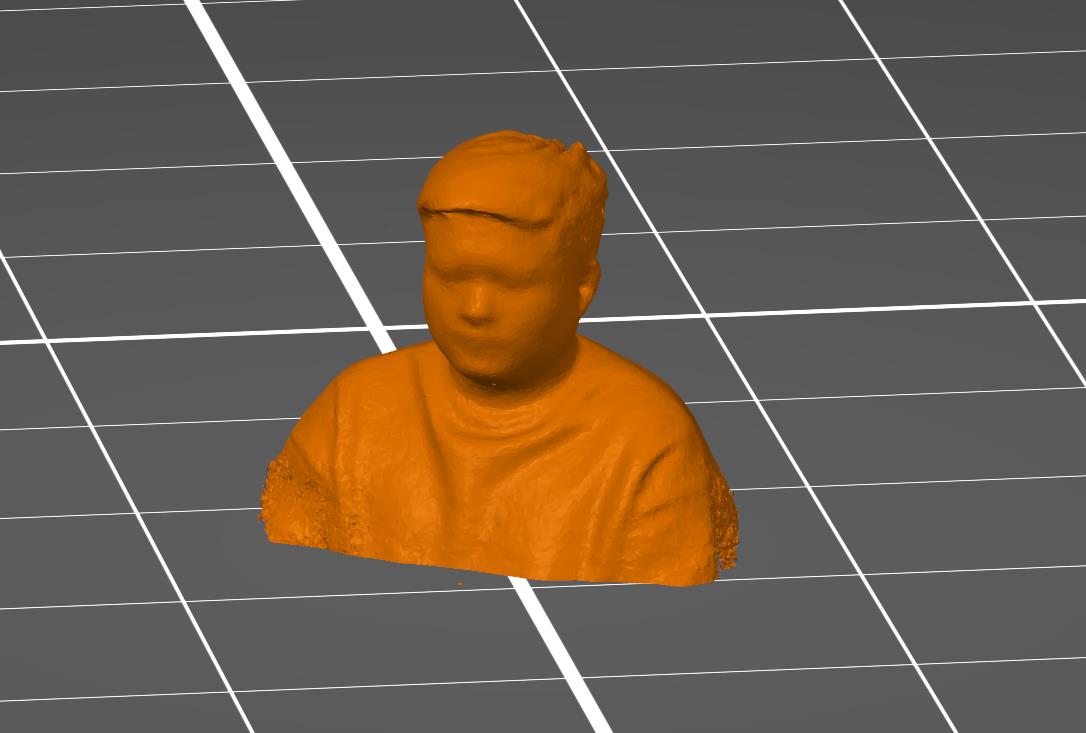
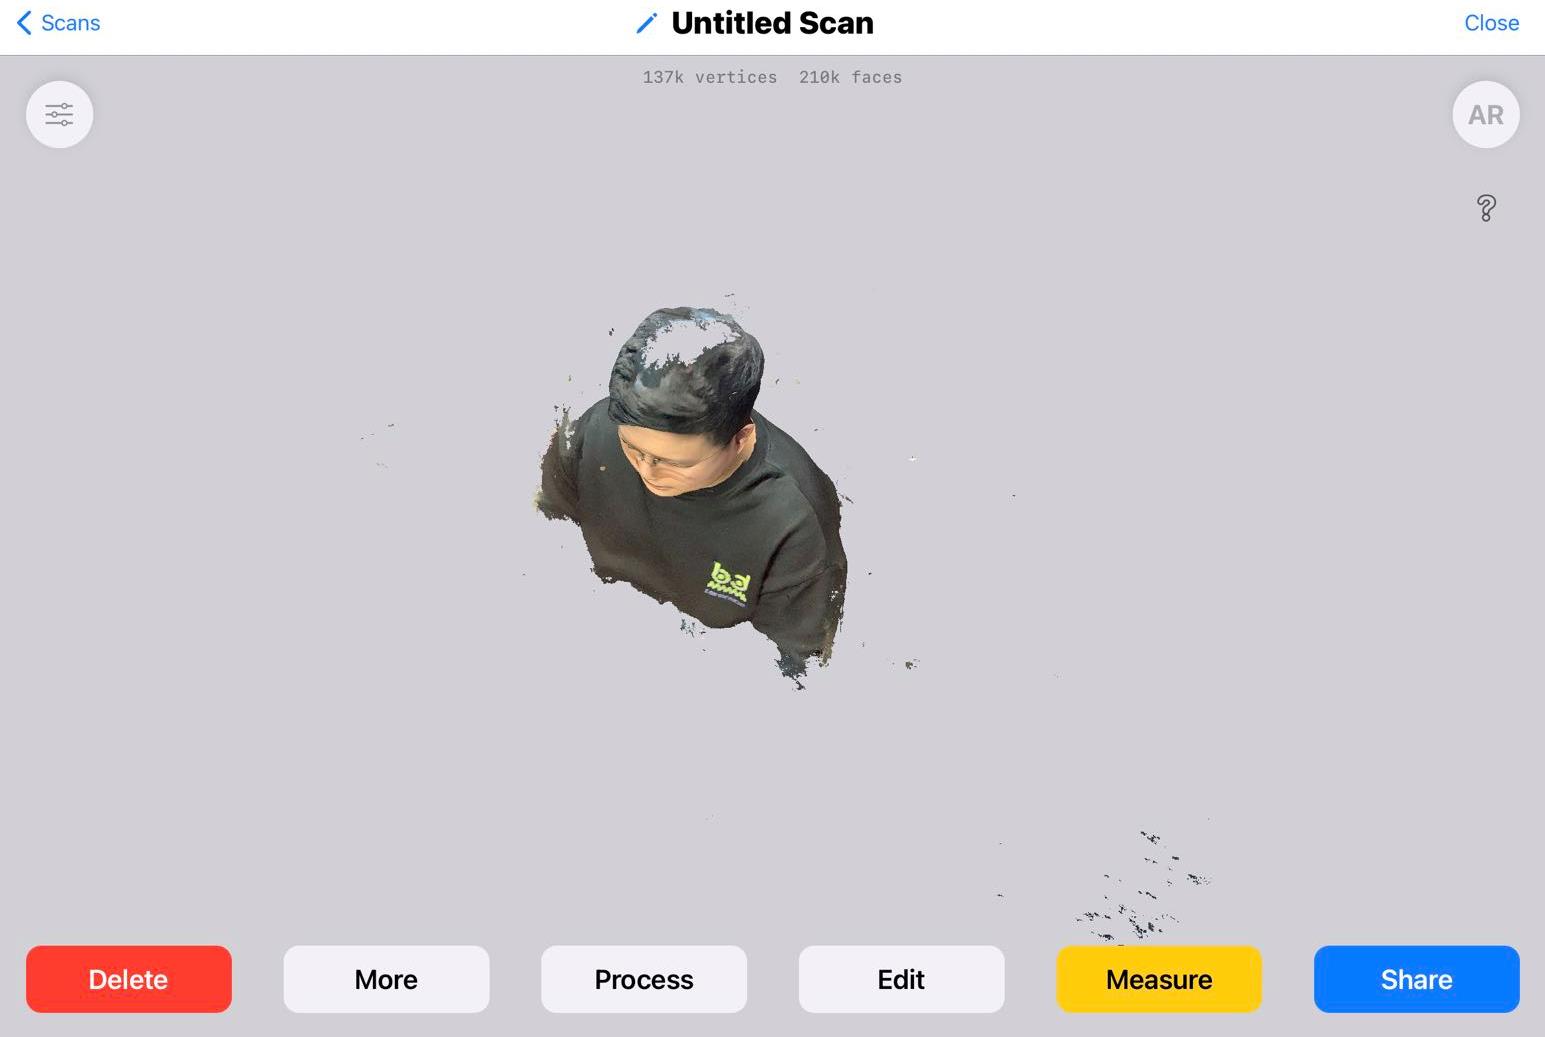
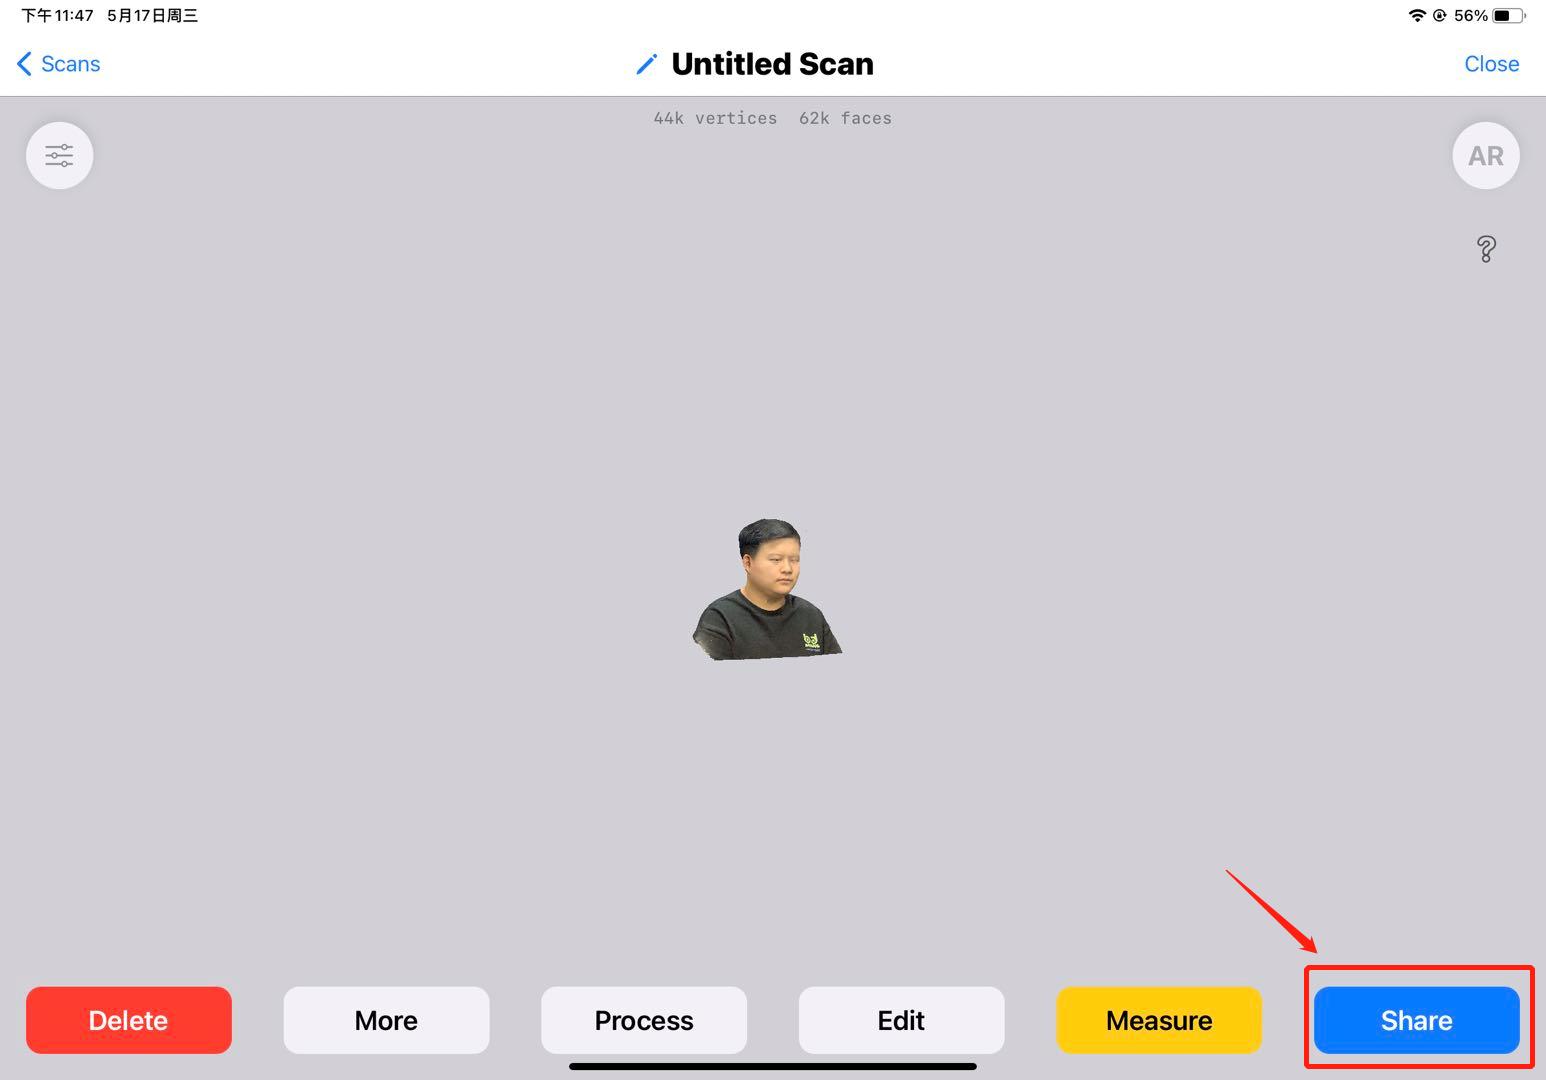
I scanned my classmate Meng. In the first scan I left out the top part of Meng's head and got this model with a hole in the top of the head.
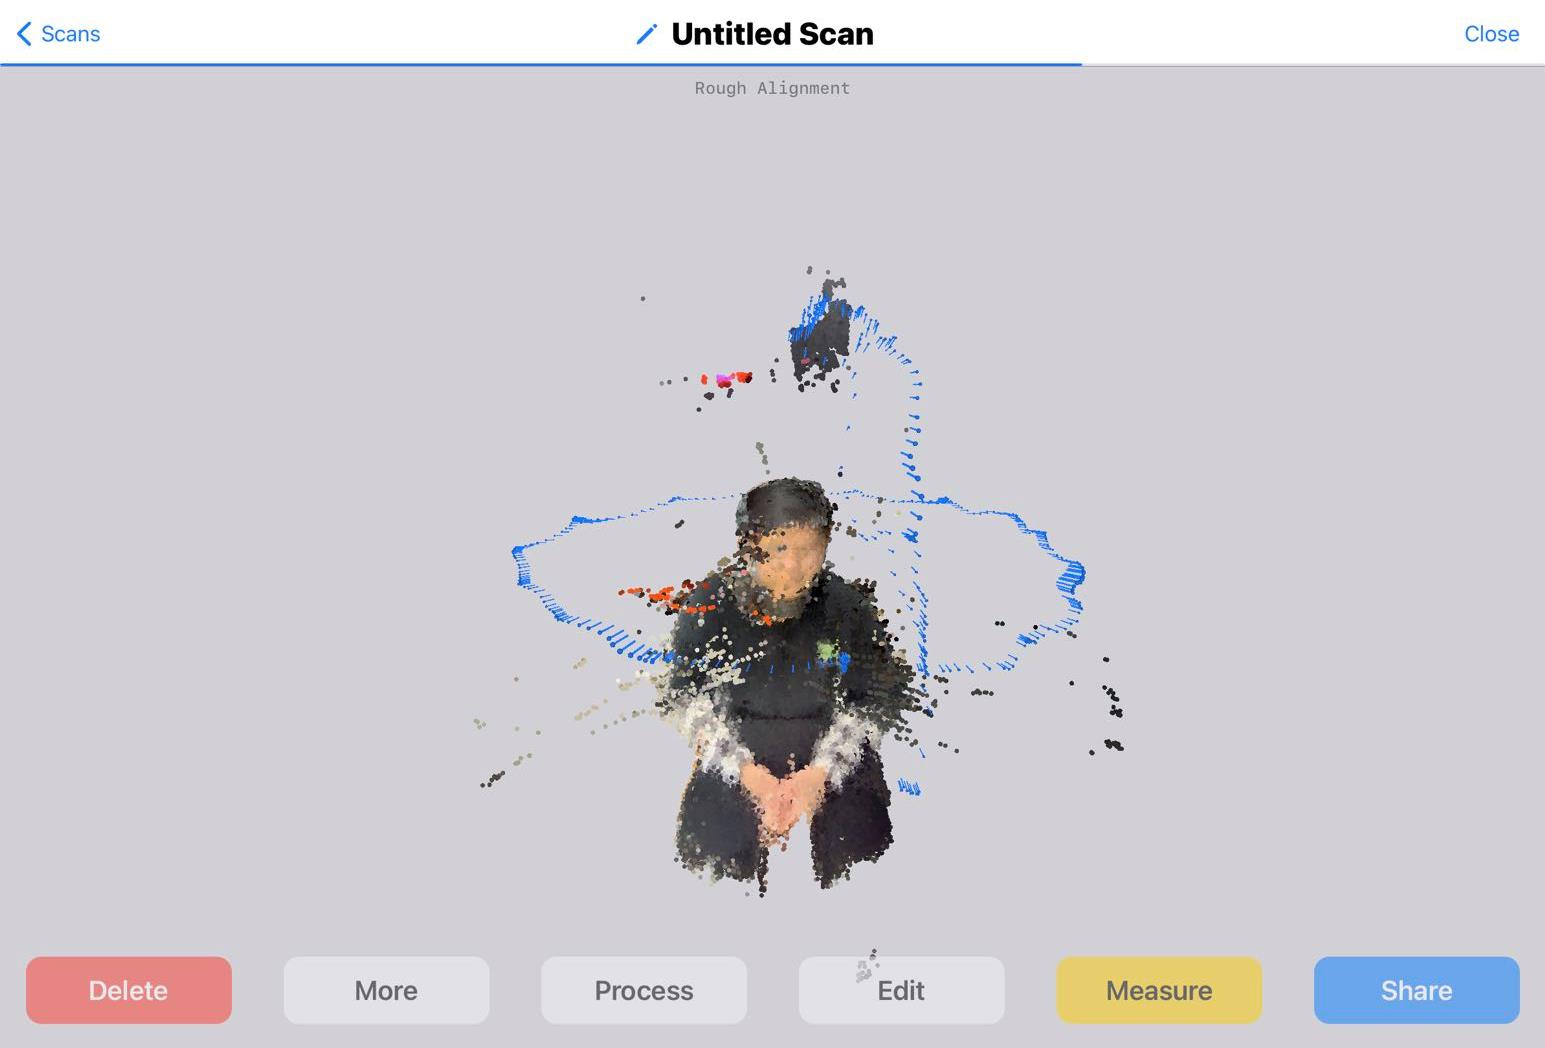
So I tried again. Below is the process of the scanning which you can review in the app.
The second scan was perfect. The blue dots represent the movement of the scan, and you can see the scan's trace overhead to assure there was no hole in the head this time.
1.5.3 Edit the Scanned Model
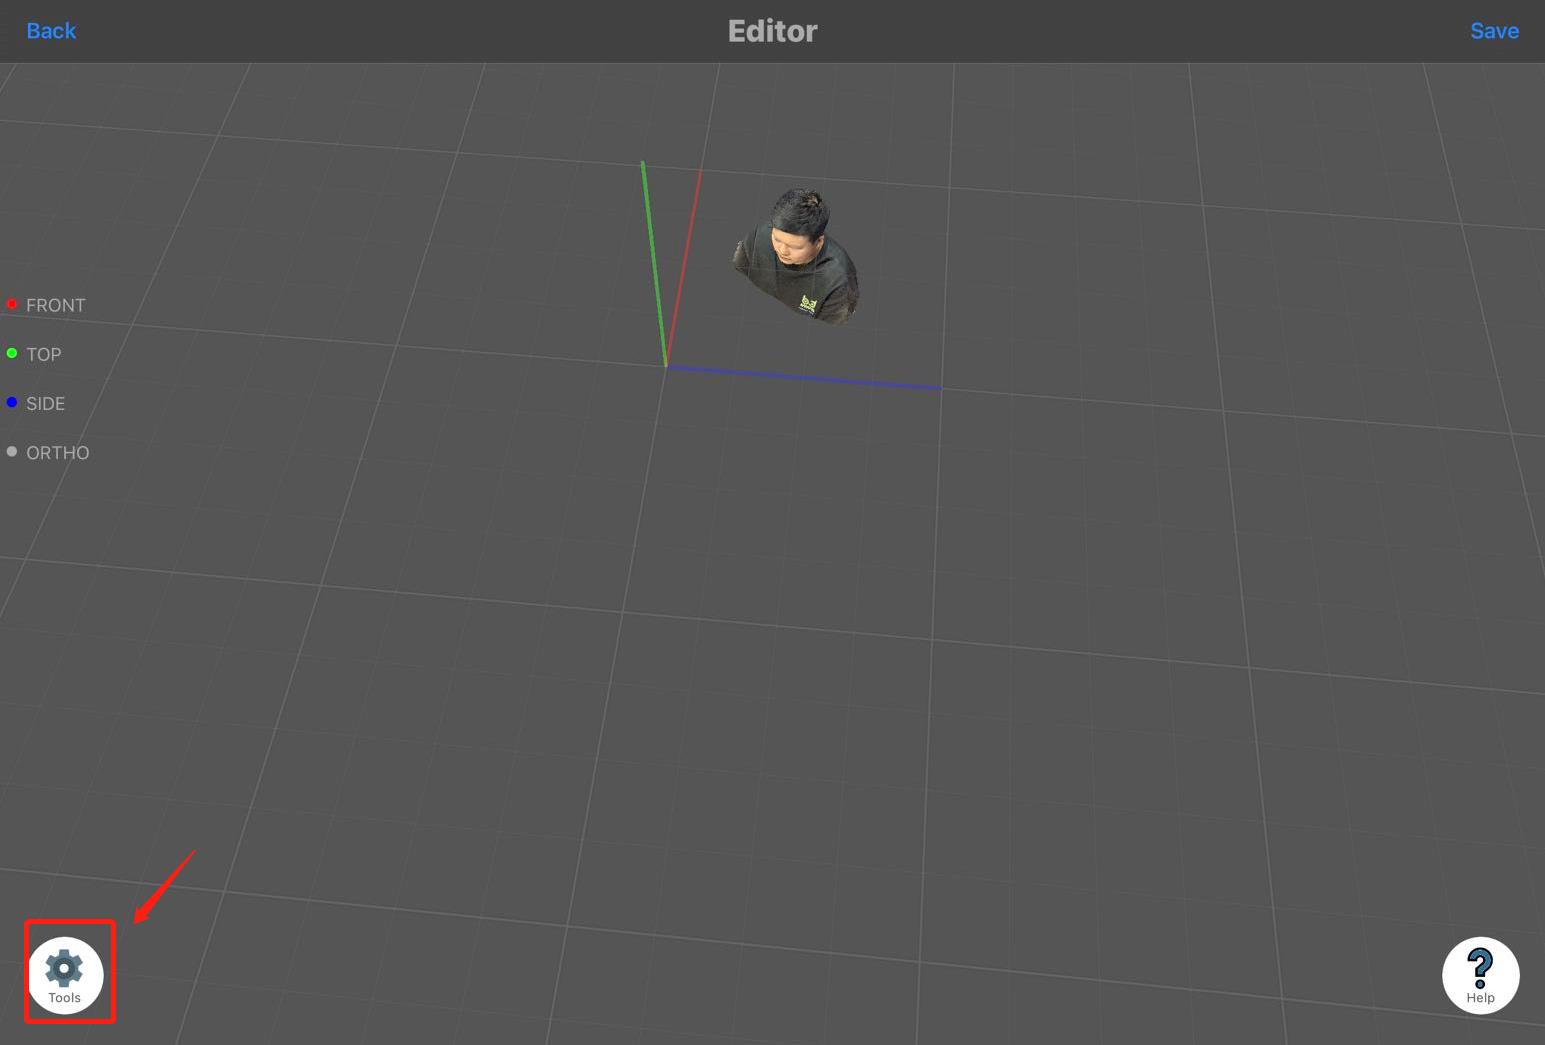
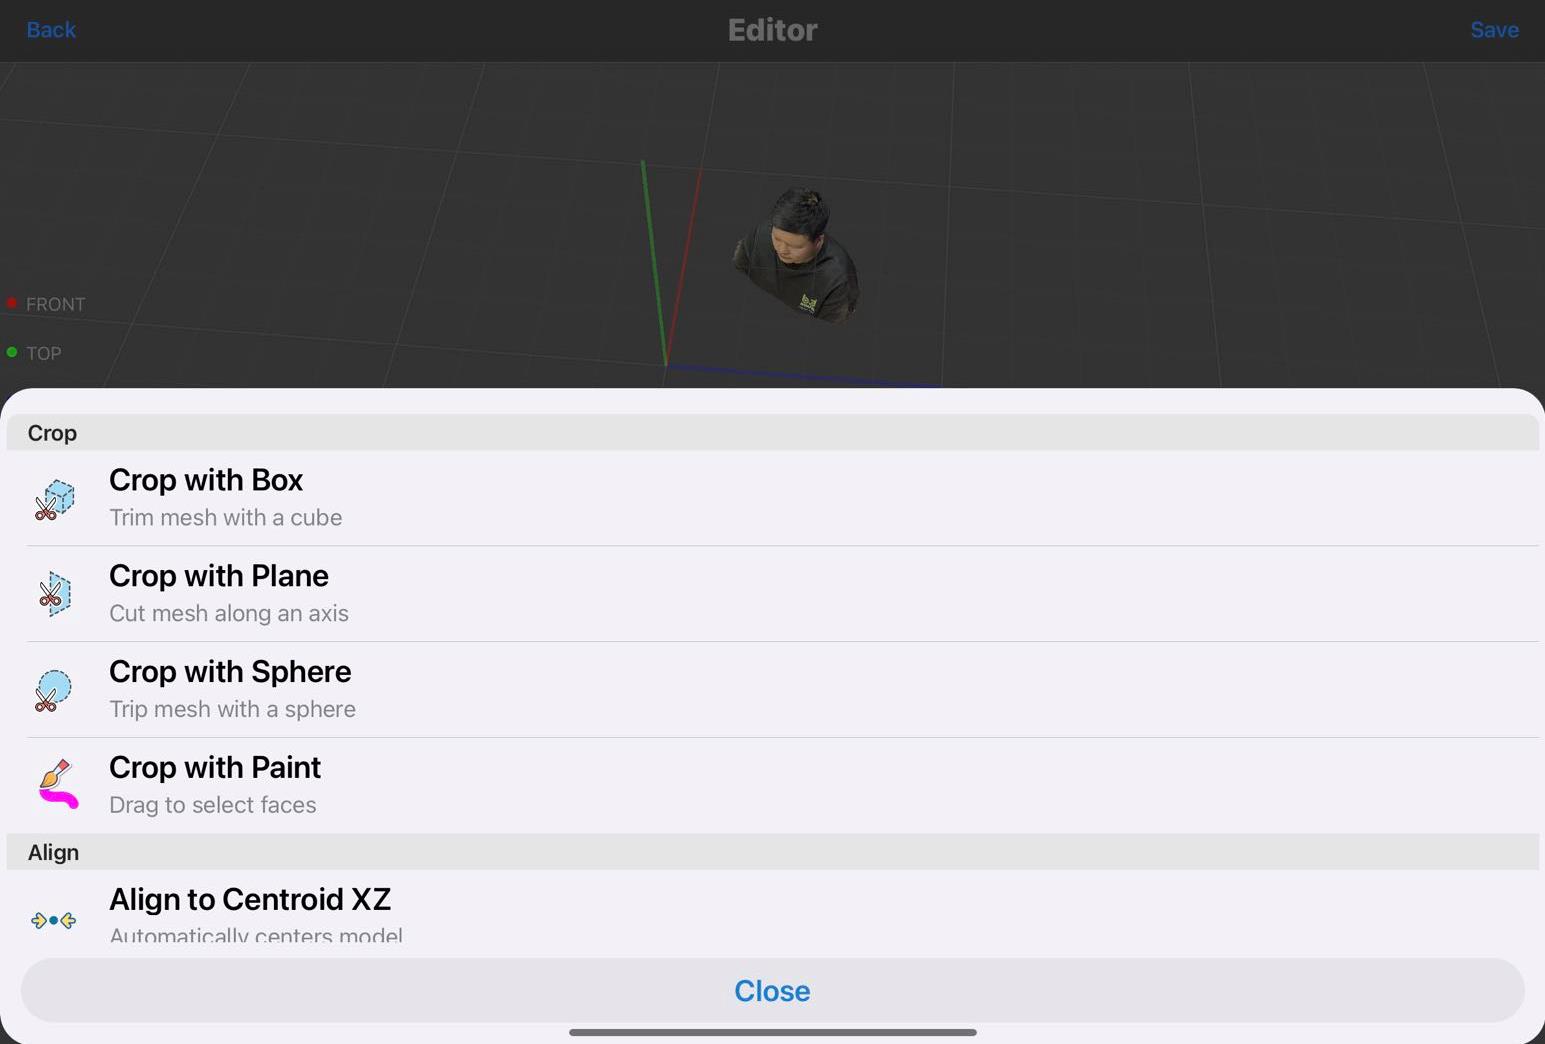
This APP also allows simple editing of scanned models. Just click "Tools" and choose the crop mode to enter the editing interface and crop the redundant parts.
This is the "crop with paint" mode which allows you to use your finger to draw out unwanted parts to delete: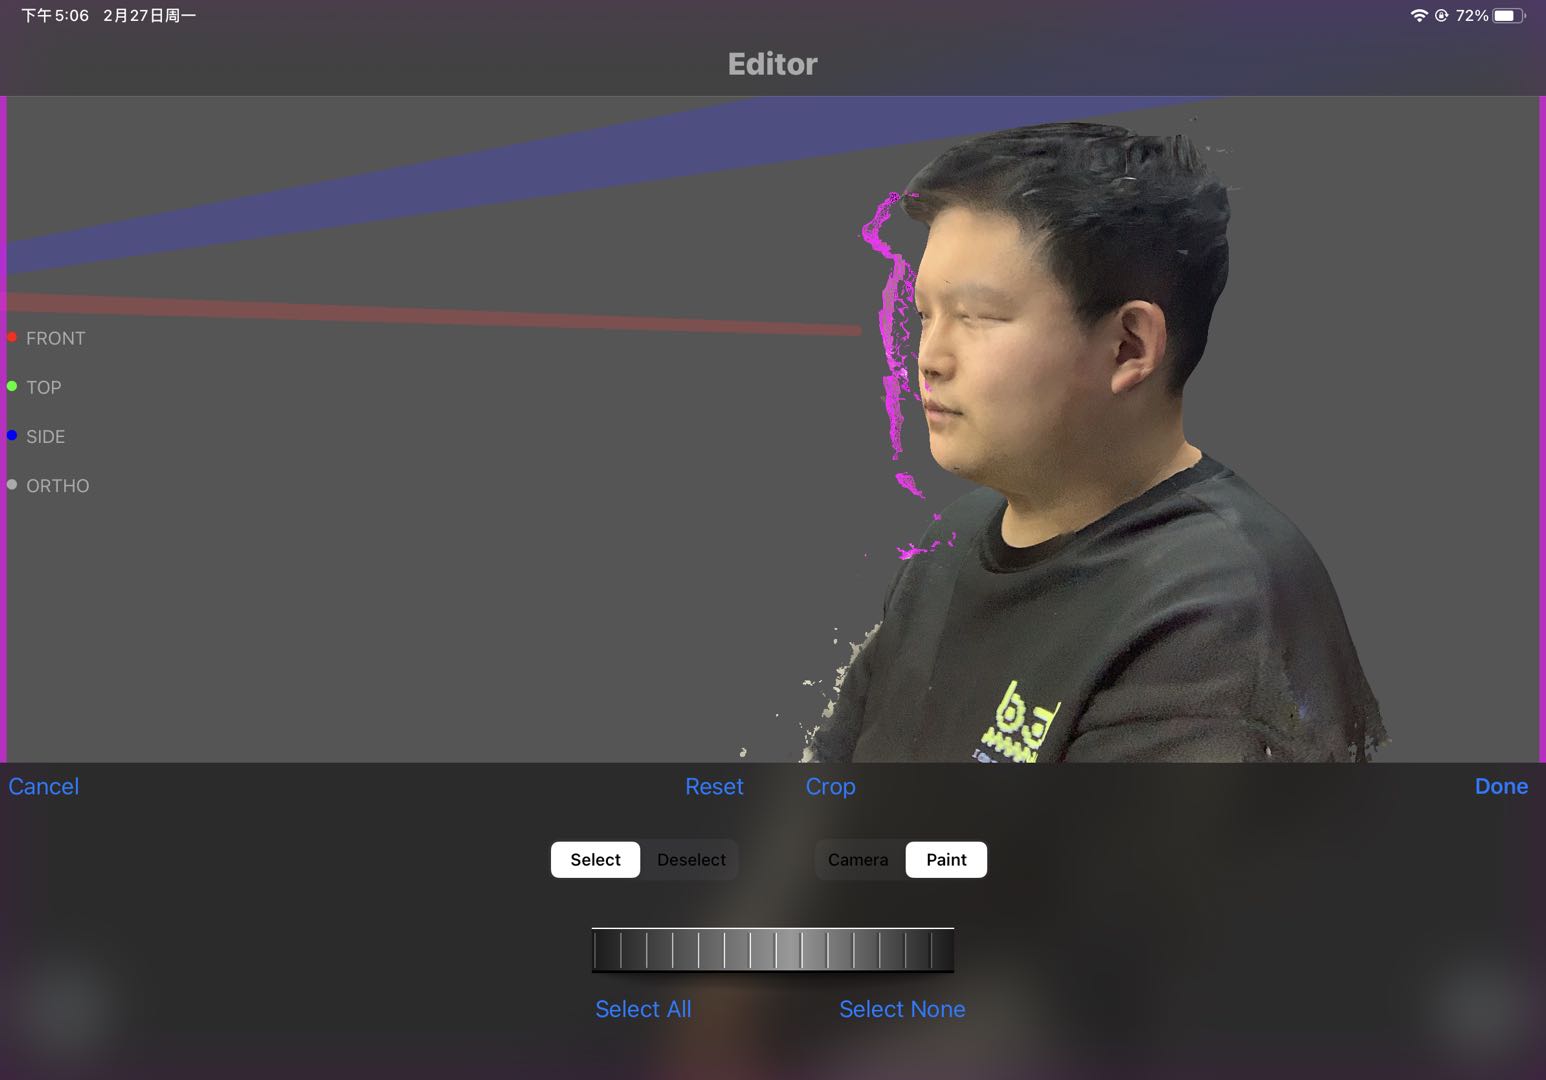
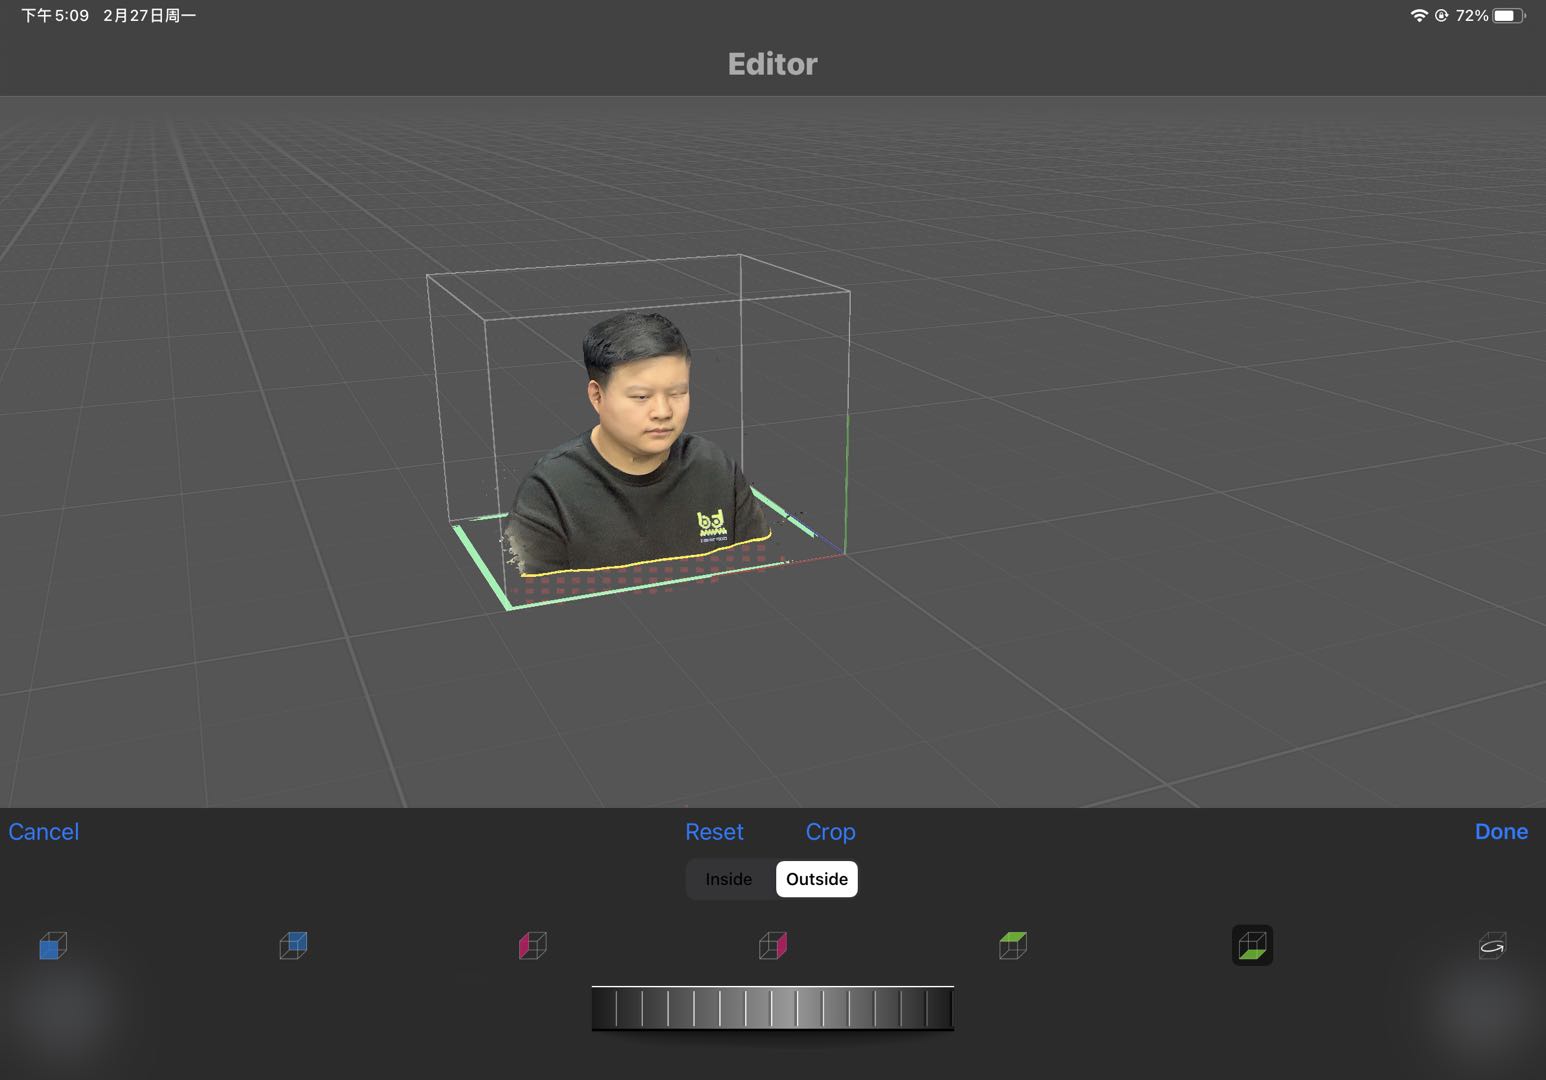
This is the "crop with box" mode:
1.5.4 Export
Click "Share" to export the model.
The model without texture.