PlatformIO is my go-to open-source ecosystem for IoT development, supporting a wide range of
microcontrollers. I find its unified interface great for configuring, building, and uploading code to
various platforms. It’s versatile, supporting multiple programming languages and frameworks with powerful
debugging tools and automation options.
Setting up the ESP32 with PlatformIO in VS Code
To get started, I followed these steps:
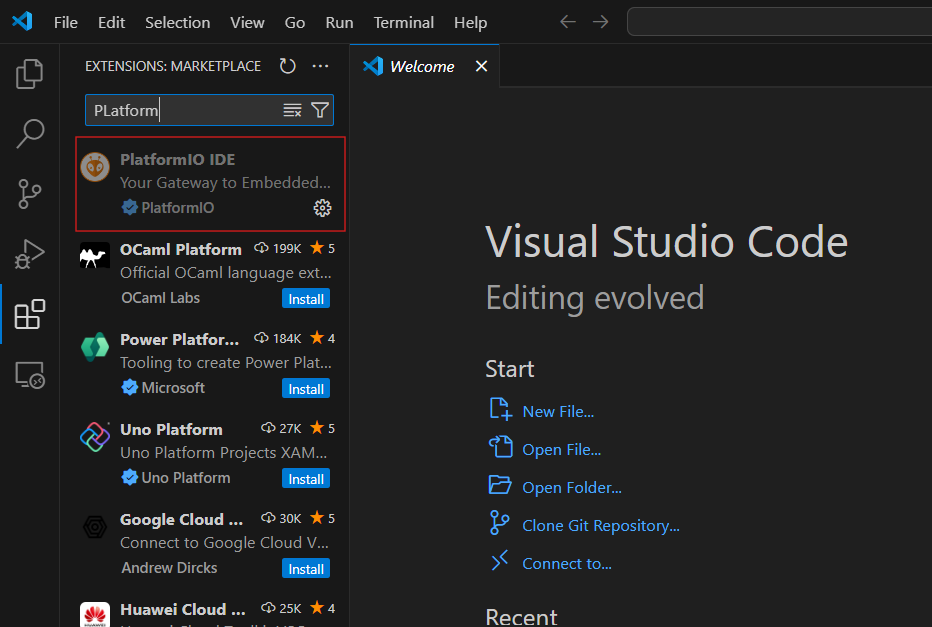
I installed the PlatformIO extension in Visual Studio Code by visiting the Extensions marketplace and
searching for "PlatformIO IDE".
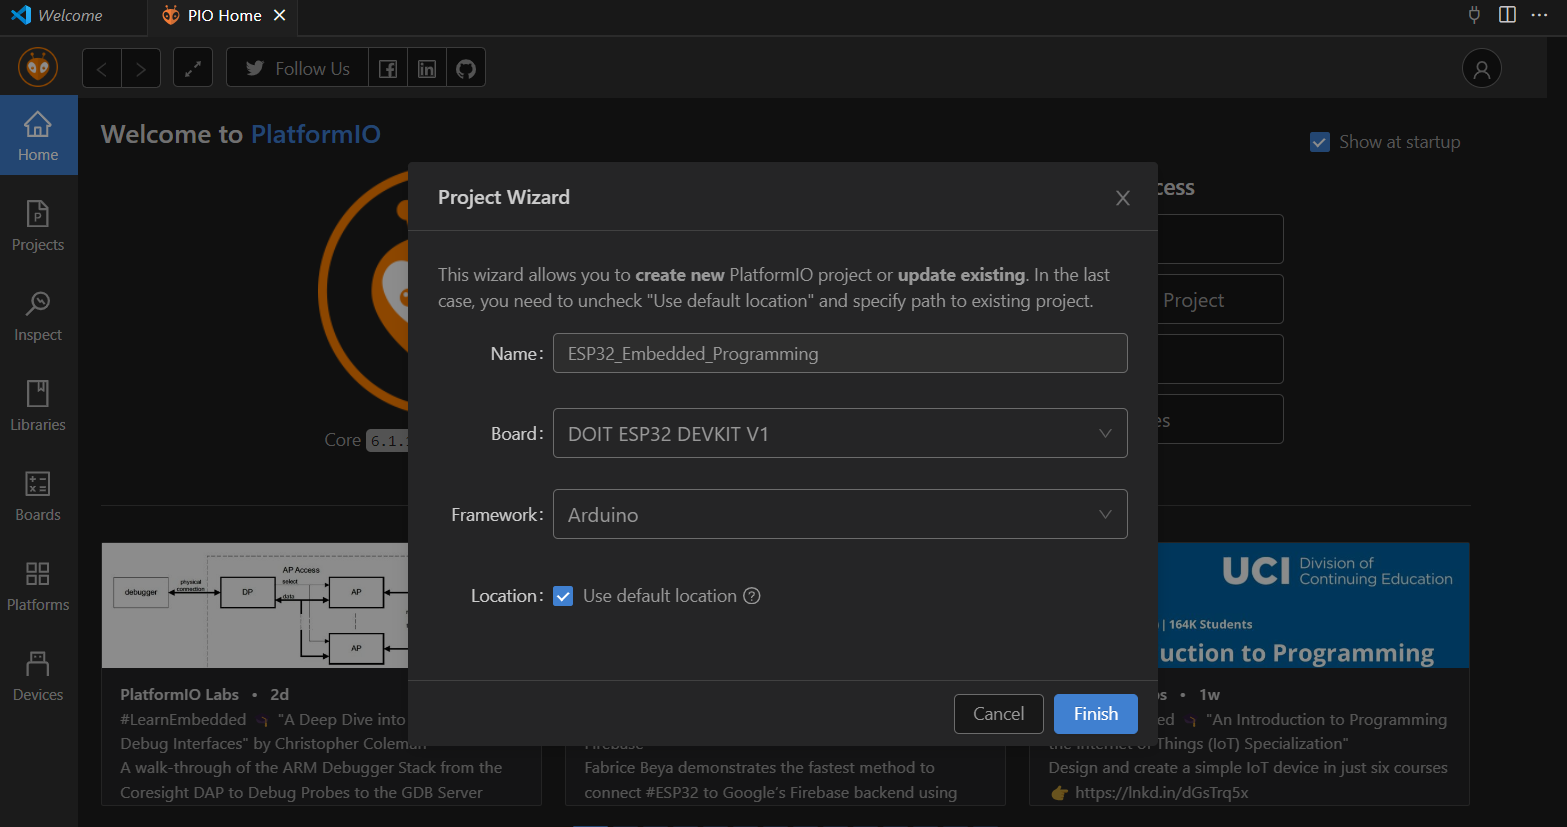
After installation, I created a new project. In VS Code, I opened PlatformIO and clicked on "New
Project." I entered a project name, selected "ESP32" as the board type, and chose "Arduino" as the
framework.
Then, I opened the platformio.ini file and added the following lines to set up the project
for my ESP32 board:
[env:esp32dev]
This defines the environment name as esp32dev. It is used by PlatformIO to reference
this specific configuration. Naming it esp32dev clarifies that it’s set up for an ESP32
development board.
platform = espressif32
This specifies the platform to be espressif32, which is the PlatformIO platform package
for ESP32 microcontrollers. This setting tells PlatformIO to use the ESP32-specific toolchain and
settings.
board = esp32dev
This sets the board type to esp32dev, representing a general ESP32 development board.
This informs PlatformIO of the board's specifications, such as pin layout and memory configuration.
framework = arduino
This specifies the programming framework as arduino, meaning the project will use
Arduino libraries and functions. This setup allows for ESP32 development using the familiar Arduino
API.
Finally, I uploaded the code to the board by clicking the "Upload" button in PlatformIO. After modifying
the code in the src folder, I can re-upload as needed.
For more details on using PlatformIO with the ESP32, I found the documentation helpful at PlatformIO ESP32
Documentation.
Controlling LED Brightness with a Potentiometer on ESP32
To create a circuit that changes LED brightness using a potentiometer with the ESP32, I followed these steps:
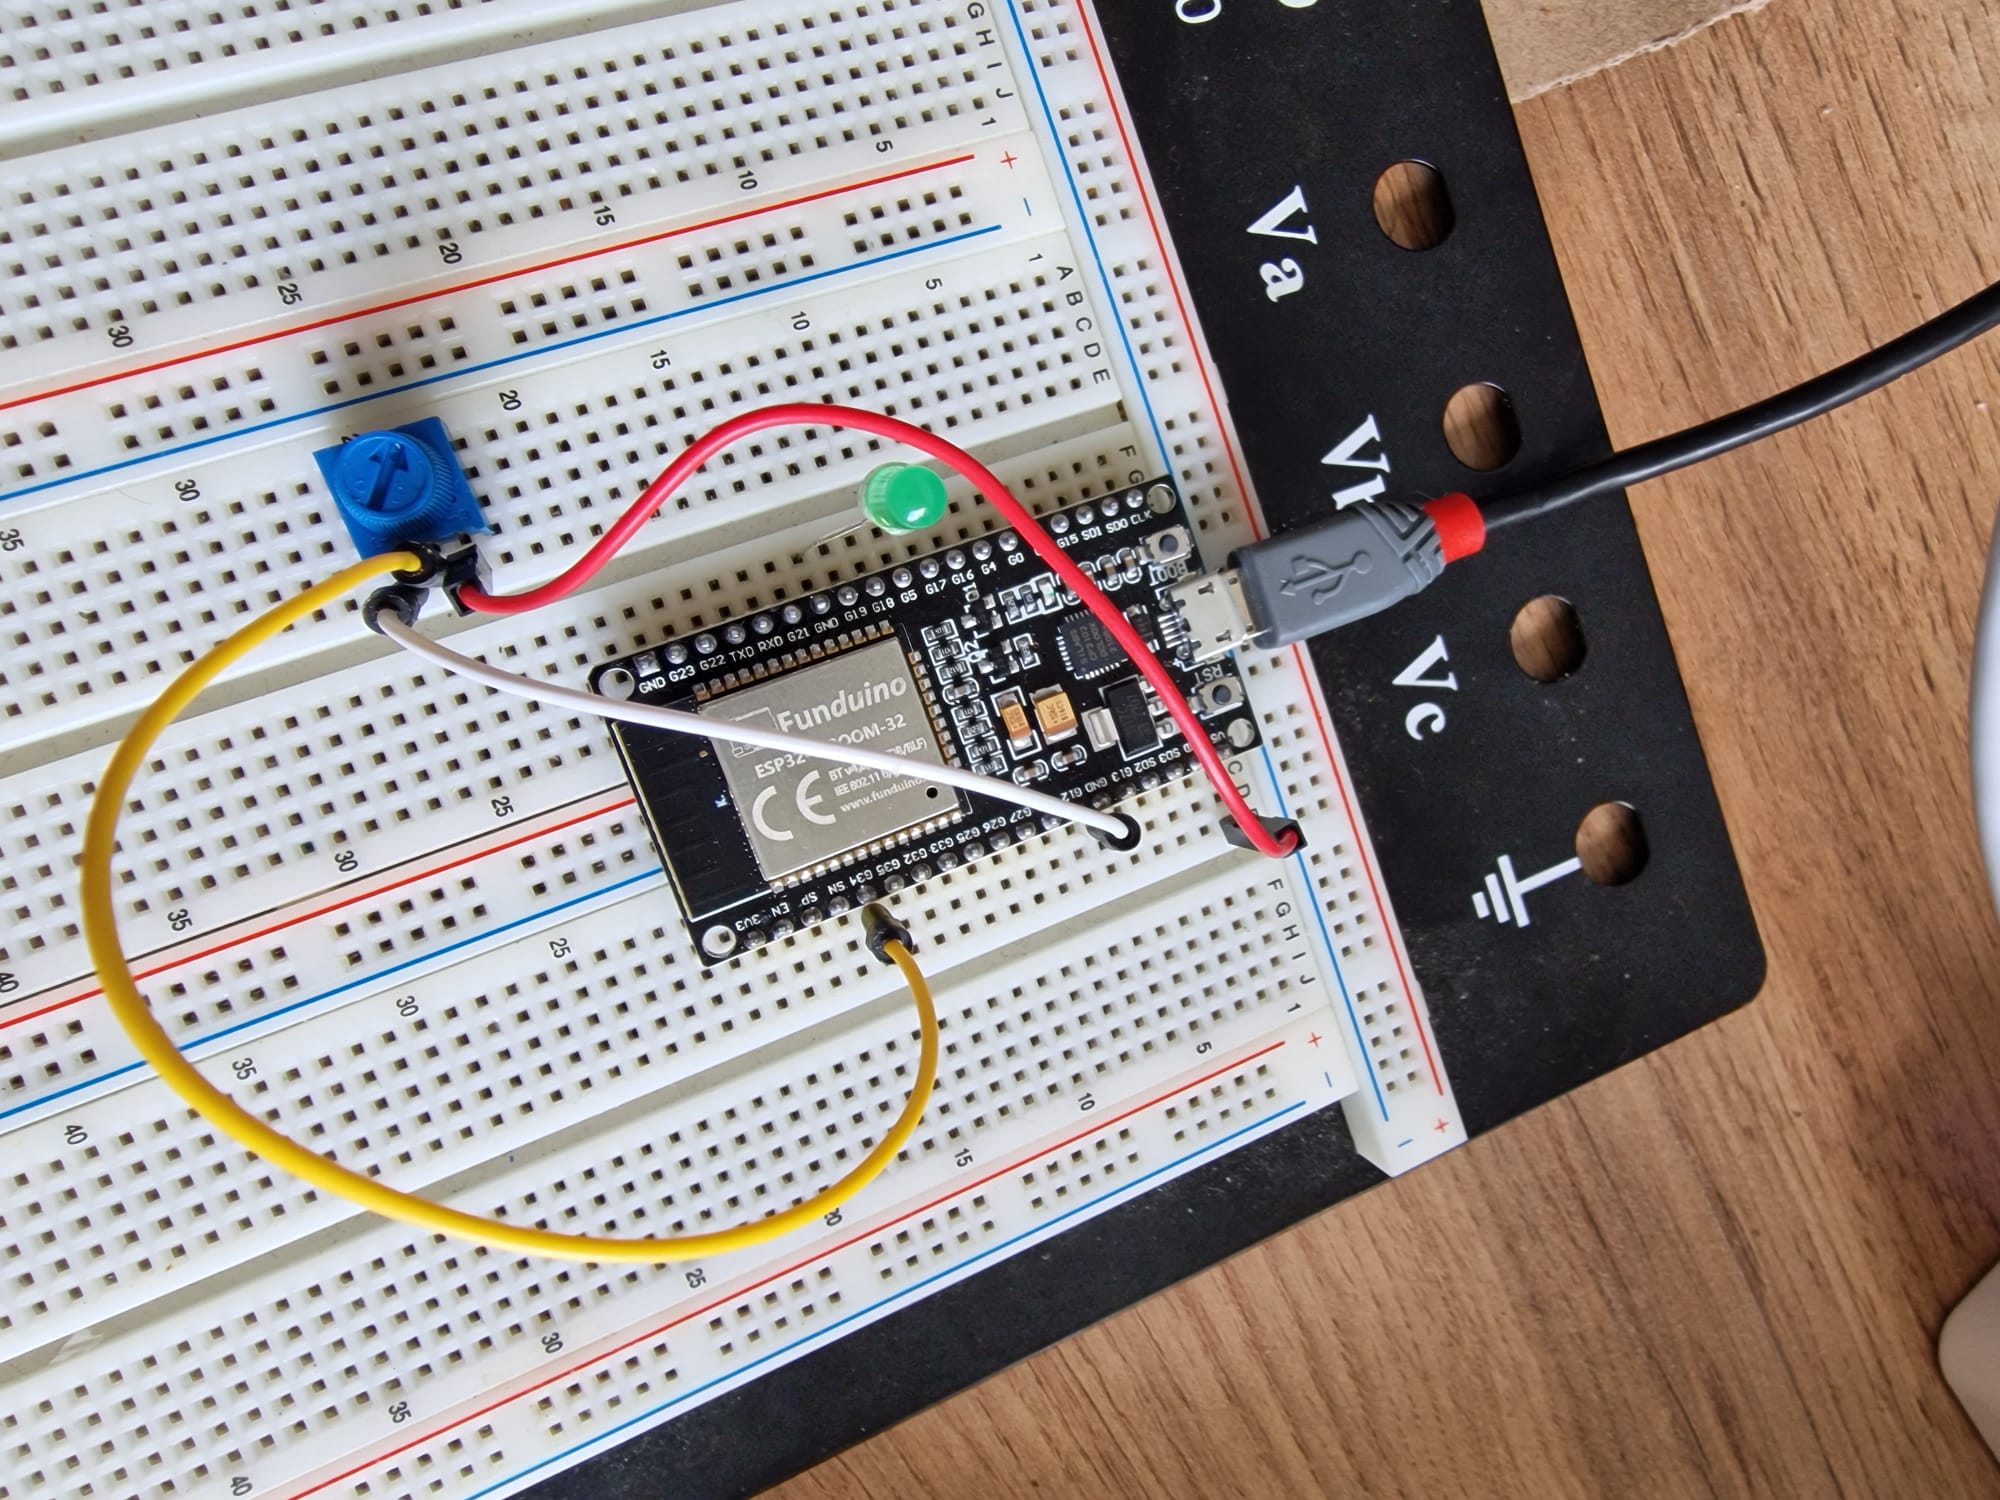
I connected the components: the potentiometer’s middle pin to ESP32’s analog input pin (e.g., pin 34),
one side to ground, and the other to 3.3V. I also connected the LED’s anode to a digital output pin
(e.g., pin 27) with a 220-ohm resistor and the cathode to ground.
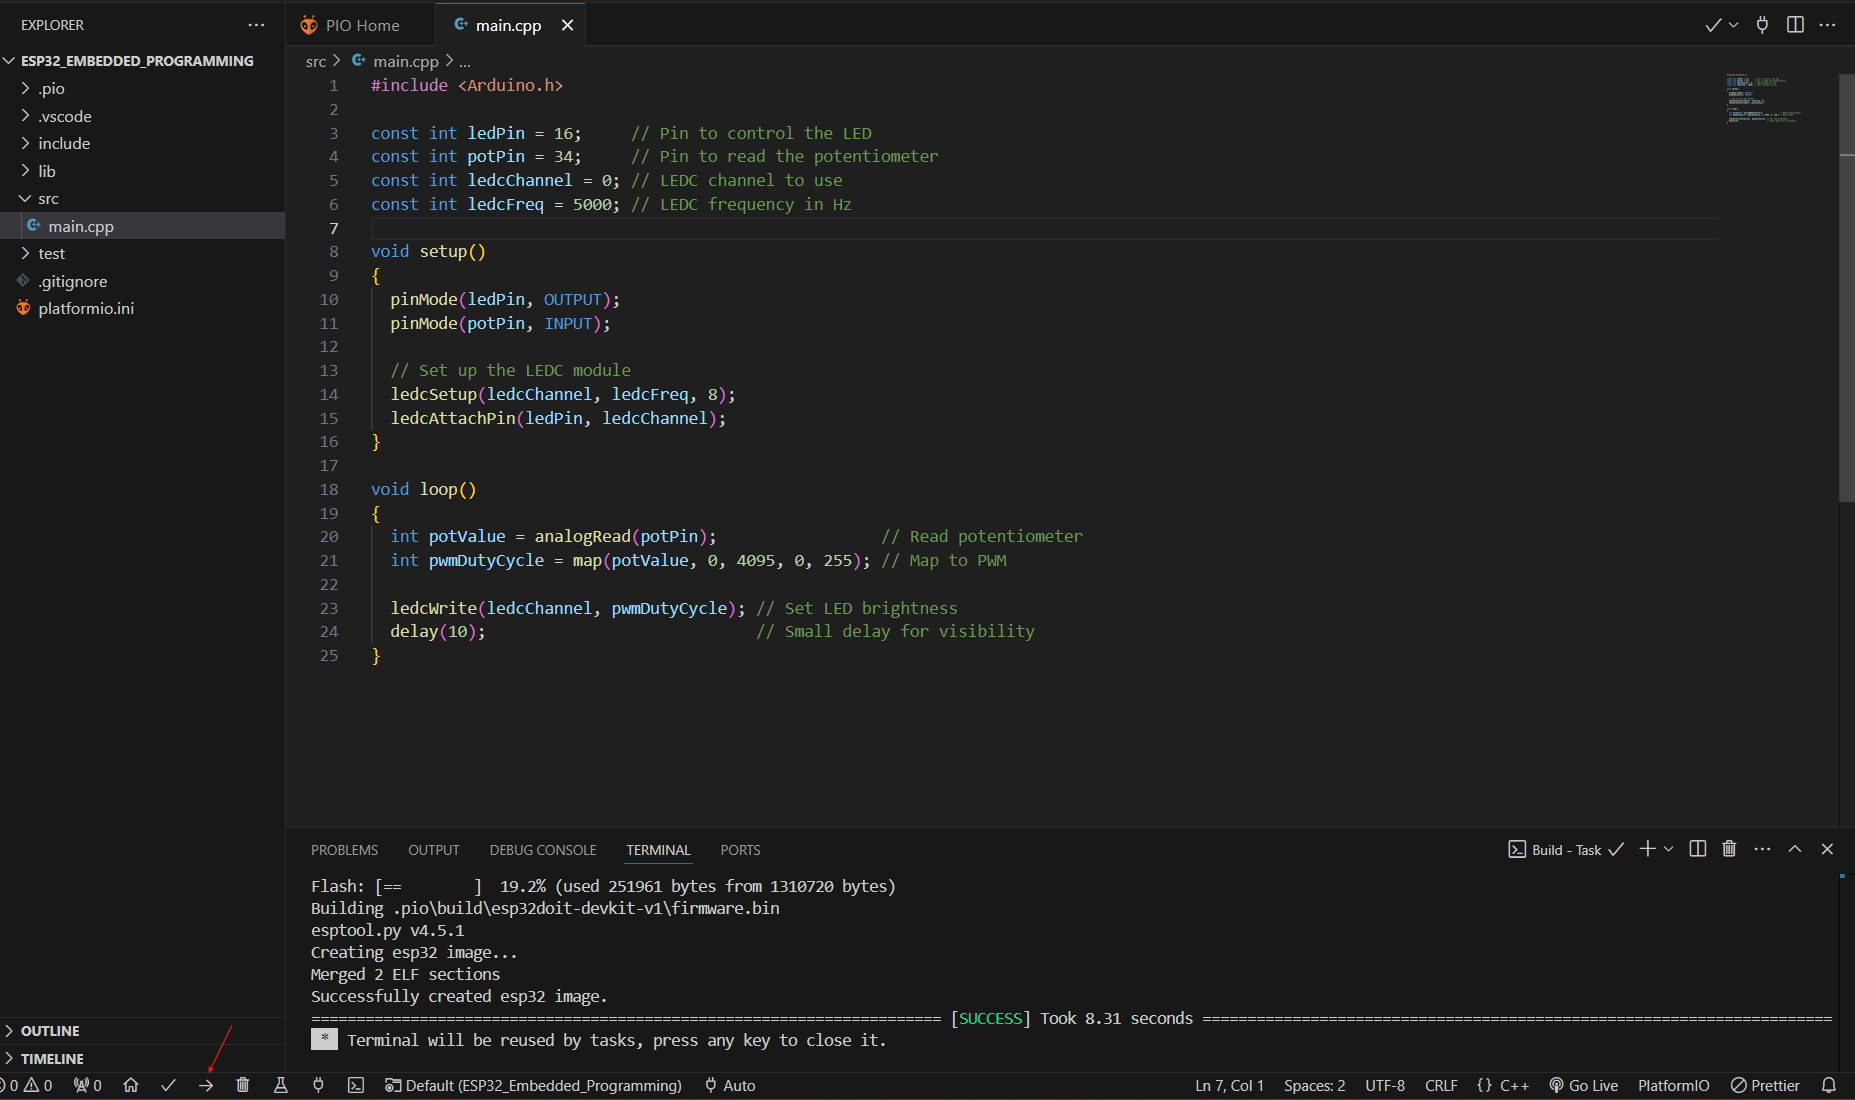
Then, I added the following code in src/main.cpp:
        const int ledPin = 16; // Pin to control the LED
        const int potPin = 34; // Pin to read the potentiometer
        const int ledcChannel = 0; // LEDC channel to use
        const int ledcFreq = 5000; // LEDC frequency in Hz

        void setup() {
            pinMode(ledPin, OUTPUT);
            pinMode(potPin, INPUT);

            // Set up the LEDC module
            ledcSetup(ledcChannel, ledcFreq, 8);
            ledcAttachPin(ledPin, ledcChannel);
        }

        void loop() {
            int potValue = analogRead(potPin); // Read potentiometer
            int pwmDutyCycle = map(potValue, 0, 4095, 0, 255); // Map to PWM

            ledcWrite(ledcChannel, pwmDutyCycle); // Set LED brightness
            delay(10); // Small delay for visibility
        }
After connecting my ESP32, I uploaded the code through PlatformIO in VS Code. I opened the serial
monitor to see the values from the potentiometer and LED brightness in real time.
Now, I have a working circuit where the LED brightness changes based on the potentiometer's position, and I
can monitor the values on the serial display.
Explanation of Arduino Code on ESP32
This Arduino code controls the brightness of an LED based on the position of a potentiometer, both connected
to an ESP32 microcontroller. The potentiometer’s analog input is read using one of the ESP32’s analog pins,
which measures the voltage output as the potentiometer is adjusted. This analog value (ranging from 0 to
4095 on the ESP32) is then mapped to a PWM (Pulse Width Modulation) duty cycle value from 0 to 255. This
mapped value is applied to the LED using PWM to adjust its brightness smoothly according to the
potentiometer’s position. The PWM frequency and resolution are configured to ensure flicker-free dimming of
the LED. Additionally, the code includes a small delay in the main loop to make the brightness change smooth
and responsive to adjustments in the potentiometer.