This week is about design tools. 2d, 3d, raster, vector, CAD. Tools for creating 3d printer designs, tools for creating lasercutter designs, tools for rendering beautiful artist impressions. It is tempting to think that by learning these tools I, too, will be able to draw a fully working steam engine. But I know better, because I also know how to use a knife and that does not make me a good surgeon.
to learn / to do
Model (raster, vector, 2D, 3D, render, animate, simulate, …) a possible final project, compress your images and videos, and post it on your class page
looking ahead
what I already know
2D design
I know the difference between vector and raster. I have used (and edited by hand) svg files. I can tell you in my sleep what the difference is between .png, .jpg and .gif . I know about The Gimp, but it stays in the cellar. I can work with Photoshop no problem. Illustrator is a bit harder for me, because I still have trouble drawing bezier curves.
3D design
Nothing really. Apart from working a bit in Unity, but that is a whole different kind of world.
what I want to learn:
I want to learn 3D design: I want to understand the lingo used (bodies, components, sketches) I want to learn to work with Fusion 360: understand the interface, understand what I am doing and why, how to get to the different ‘views’ like design and sketch etc I want to be able to create a basic lasercutter box design, with parameters and slots & tabs I want to get fluent in extruding I want to learn to render and possibly animate
the process
lectures
After enjoying some insightful lectures (Fusion360, FreeCAD, FreeSCAD) I kind of started to get a basic understanding about the 2d and 3d modelling process. The Fusion360 lecture went a bit over my head, but the FreeCAD lecture went better because by then I had gotten more familiar with the workflow, like selecting a plane to work in and creating a sketch, and the different concepts and tools, like using construction lines, mirrors, constraints and parametric design.
The FreeSCAD lecture helped me to get a better understanding of the details, because it felt like working ‘under de hood’ in a way that was more familiar to me as a programmer.
2D design programs
As I already have worked a lot with both raster (Photoshop) and vector (Illustrator) programs, I did not think of making my designs for this week in one of these programs. I did use Illustrator however in the Computer Controlled Cutting week, both for post processing the shapes that I wanted to lasercut, as well as creating a shape by myself. You can see this here
comparing different programs
At home, I also checked out Rhino3D and SketchUp, mostly by reading side by side comparisons to Fusion360. In the end I selected Fusion360 to start with, as it looked like the more versatile option.
Fusion360
I did a lot of tutorials in Fusion360. See the list at the bottom of this page. I will not show all the steps I took, but here a a few things I learned in the process.
sweep
I created a sweep in a tutorial for a paperclip. I was much easier that I thought. It involved creating a sketch with a raw outline of a paperclip with sharp corners. Then using the fillet tool to round them. After that, I switched to the front plane and drew a small circle with its centerpoint at the far end of on of the lines. Then I quit the sketch tool and selected the Sweep tool. I selected the circle as Profile and the lines for the Path. And that was it.
Autodesk Fusion 360 Tutorial Paper clip (Sweep feature)
constraints
A tutorial about constraints clarified a lot about why I could not move objects around. It also showed me how I could change dimensions later and gave me more insight in how Fusion360 thinks and works. To get a Sketch from being blue (not fully constrained) to black (constrained) it is important that it is:
- placed
- dimensioned
Learn Fusion 360 or Die Trying LESSON 3: Understanding Constraints
offset planes
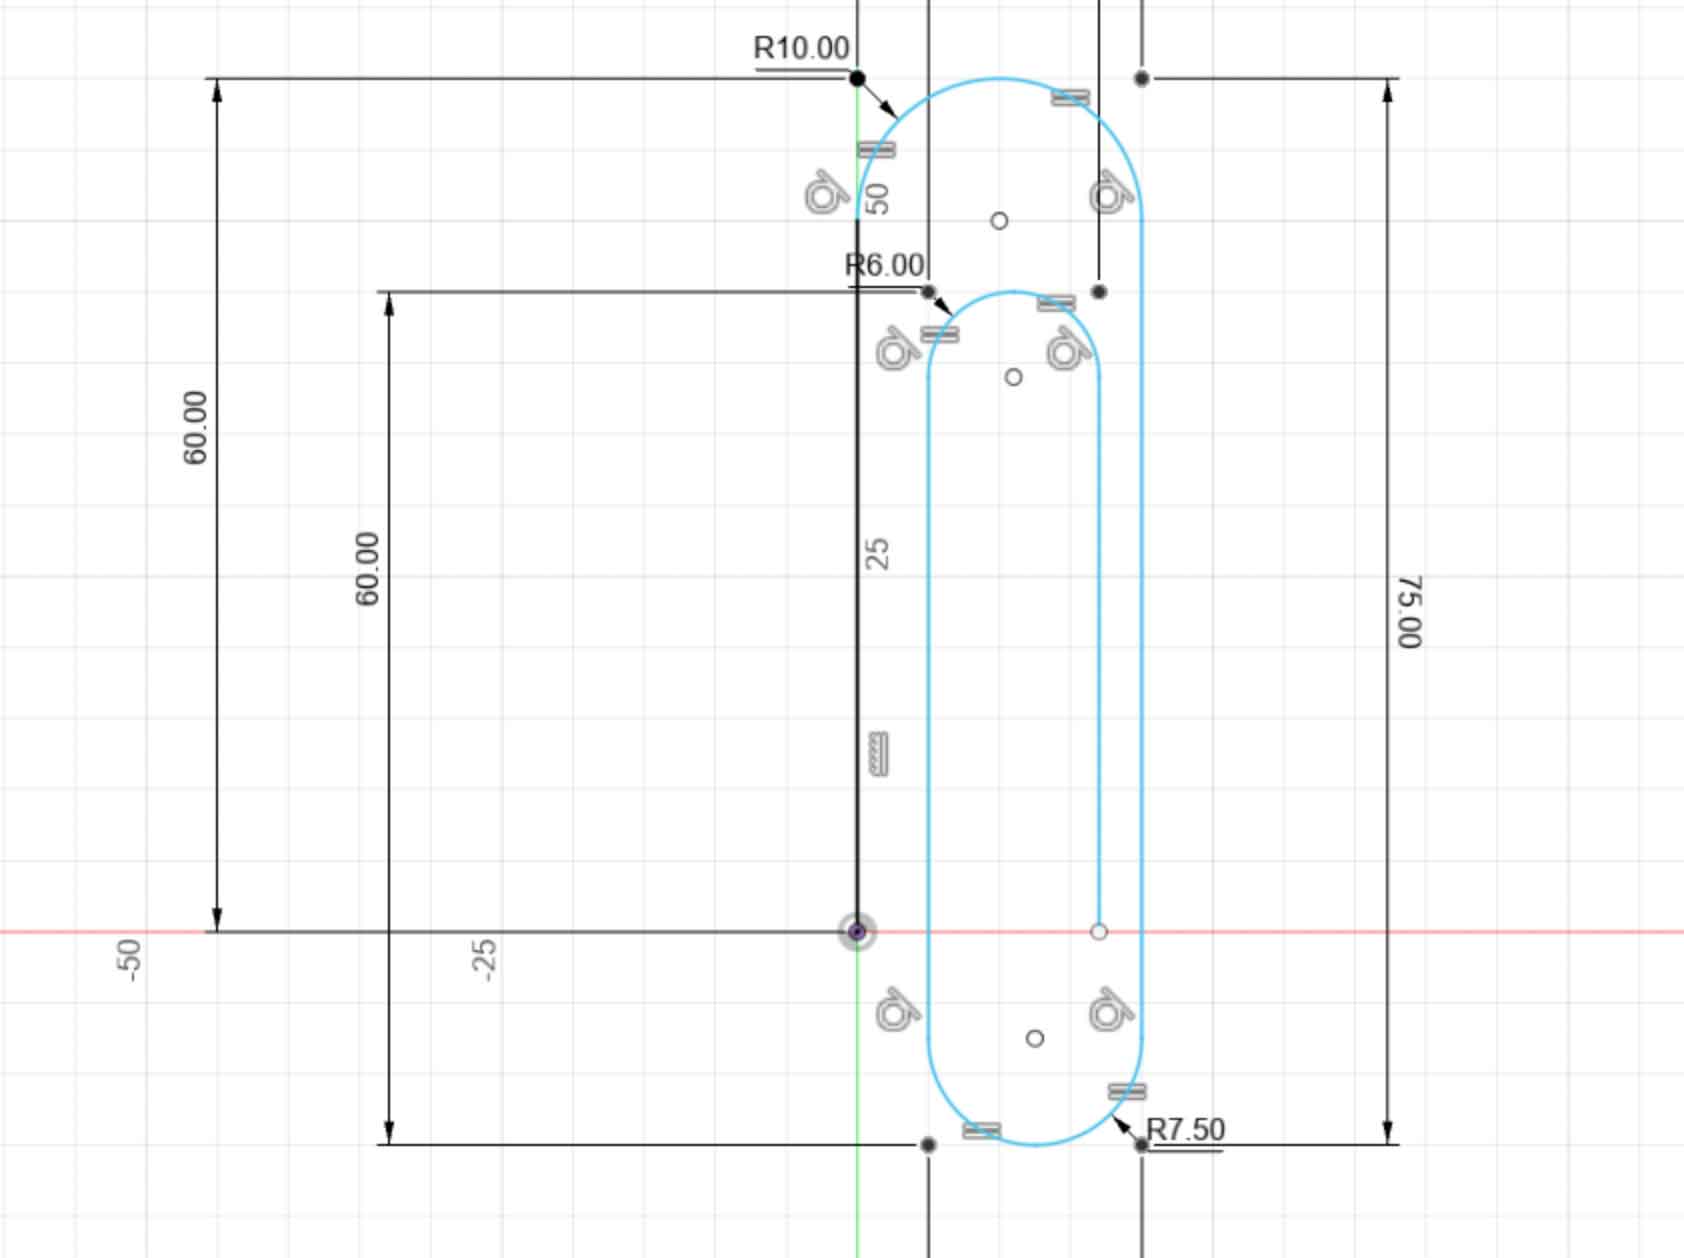
You can also create objects over multiple planes. For this you use offset planes. I created a Whiskey bottle with this tutorial, and used the Loft tool with a guide rail. It was a bit tricky to get the guide rail to connect to the sketchlines in the different planes, but eventually I figured it out.
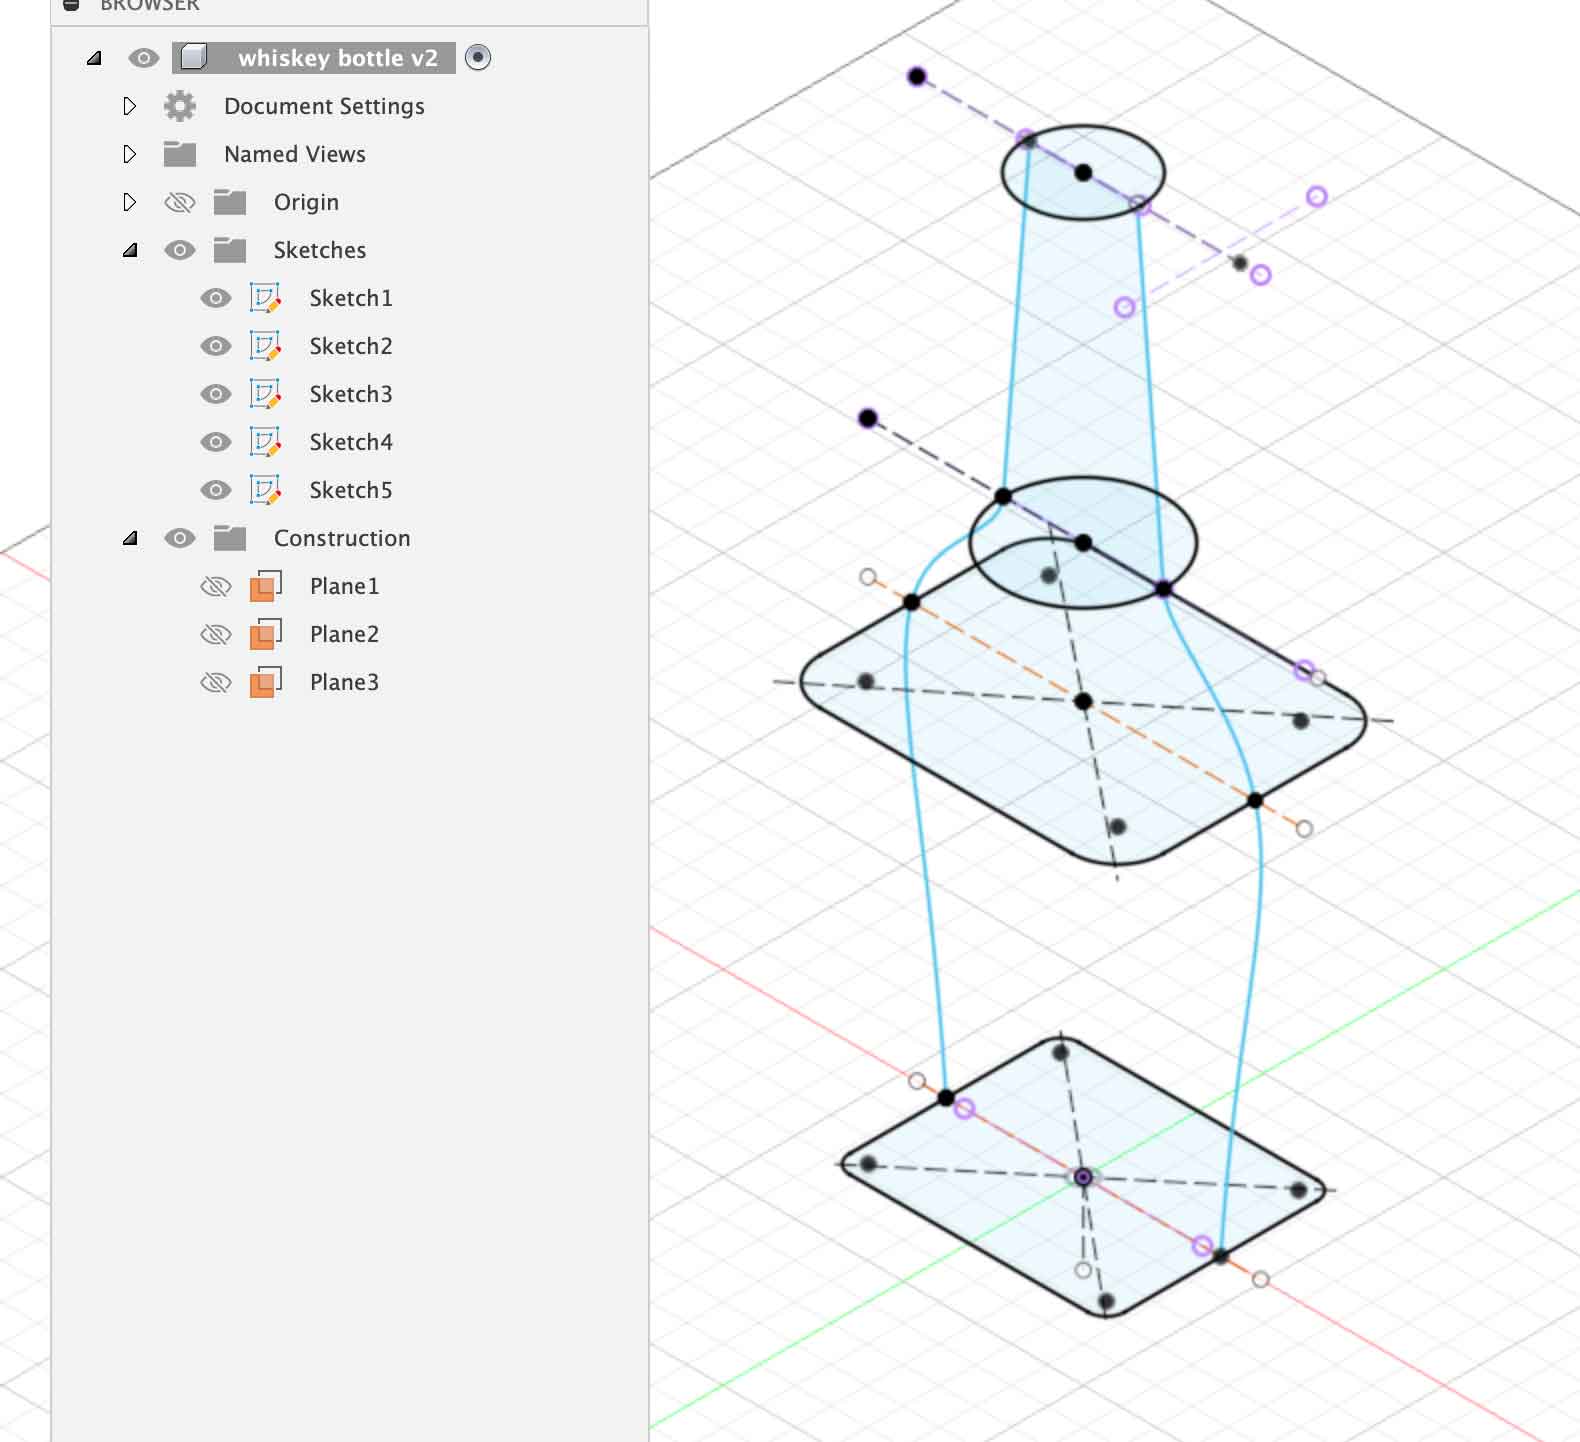
How to 3D Model a Whiskey Bottle - Learn Autodesk Fusion 360 in 30 Days
change of plans
During the week the shape/form of my end project had changed from something vertical to something more horizontal. More like a bowl with a water vortex in it. While watching fusion360 tutorials I had this shape in mind, but when I wanted to start making it I realised I wanted to animate the vortex in a way that was not possible in fusion360. In Blender on the other hand, it was possible. Should have thought of that and studied that program first :-/
So I started a Blender tutorial, to see if I could get to understand the steps from the Blender 3d water vortex tutorial. I should probably first create a Fusion360 model at this point so that I have at least something to upload to my project documentation. But I really feel more like diving into Blender. Even though I know this is not a circular step at all, I decide to go along with my instinct. Let’s see where it gets me. Better be adventurous and risk to fail the circular pattern in the beginning of the course, than in the middle.
Blender
Blender has some good video tutorials and after working my way through Fusion360 it almost felt like coming home. Most of the concepts and tools where familiair to me, probably because my little experience in Unity. Still, it took me a whole day of trying, playing and tutorialing to get to the point that I had a basic idea of the steps I needed to take.
The things I needed to learn for that were:
how to create a (glass) bowl
tutorial: Making a Glass Bowl in Blender 2.8
The tutorial I followed started with a Sphere, and deleting the top vertices. It also flattened the bottom vertices, leaving a hollow bowl shape. It then changed the material of the bowl to look like glass.
Mantaflow
tutorial:An Introduction to Fluid Simulation | Blender Mantaflow Part 1
The liquid simulator consists of 3 parts:
domain cube
this is the ‘world’ where the simulation takes place. Here you can specify general settings that modify the liquid and how it is rendered
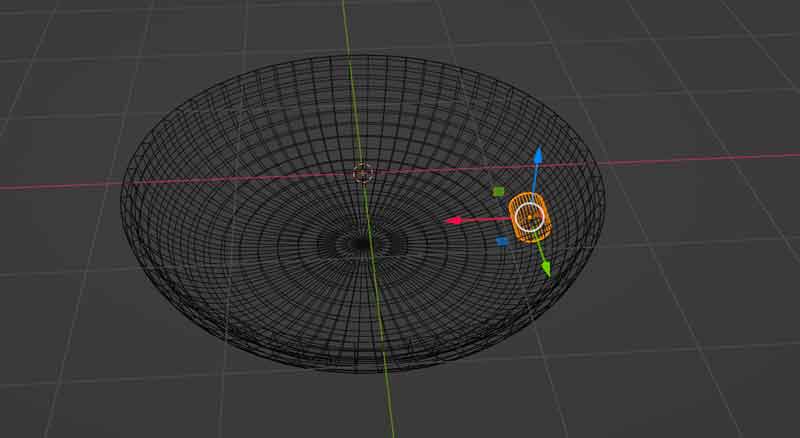
flow objects
a flow object generates the flow. I used an inflow object, because I thought that would come in handy when creating the movement.
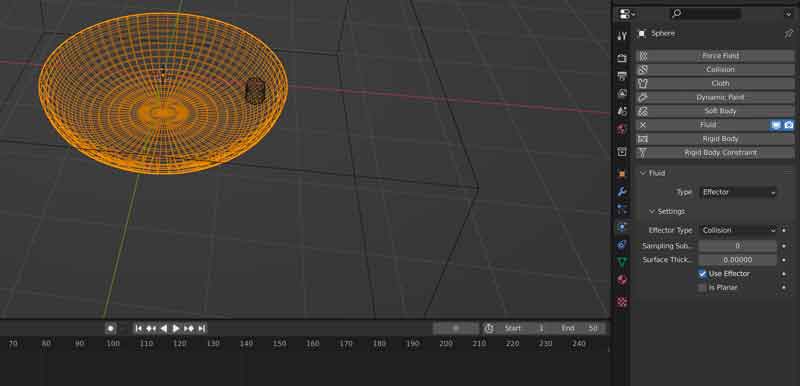
effectors
effectors are objects that can collide with the flow or guide it. I set my bowl to be an collision effector, so that the liquid would flow into it
circular momentum/flow
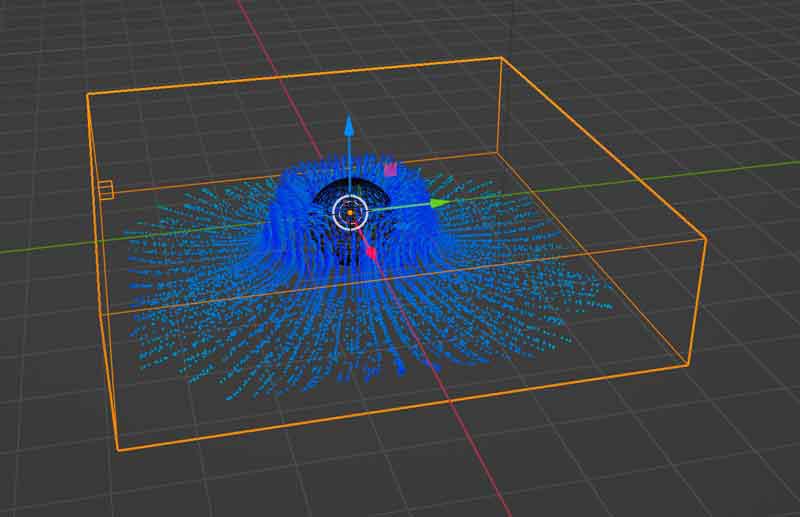
First try: directing the Flow object
First I tried directing the flow from the flow object horizontal so that it would collide with the inside of the bowl. I hoped it would flow naturally round in the bowl that way. That worked a bit, but the force of the collision made the liquid also splash back and so I got a kind of messy flow that collided with itself. As far as I could see there was no option to fine tune the flow so that it would collide gentler and in the right angle. After some tweaking I abandoned this idea.
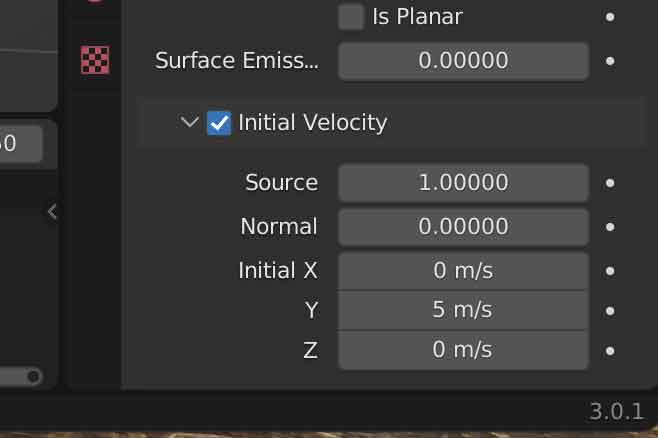
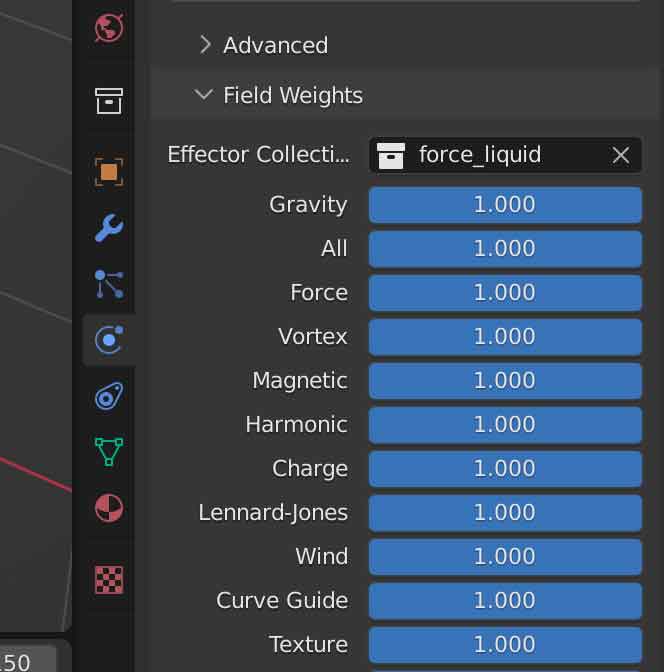
Second try:using a vortex
tutorial:Creating a Vortex in a Glass | Blender Mantaflow Part 11
Next I tried to create a vortex. This seemed to work better. It involved 3 steps: - creating a vortex Add - Force Field - Vortex - moving it into a Collection: M -> new Collection - add it to the Liquid Domain: Section Field Weights, property Effector Collection, select created Collection
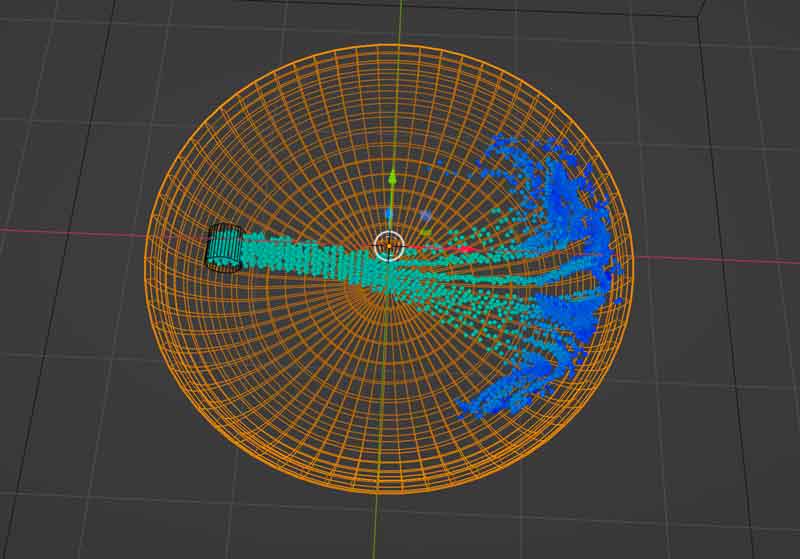
The vortex looked better than the horizontal flow. I played a bit around to make the liquid look more like water, but since the bowl was already a glass bowl it became hard to see. In the end I settled for a ceramic looking bowl and a blueish looking liquid. I had no time to make it look better by adding something like a surface under the bowl, or play with light, so I rendered the bowl hanging in mid air.
rendering the final animation
tutorial:Blender 2.8 Tutorial: Rendering an Animation
Rendering took about two hours and resulted in an image sequence of 150 pngs that I could convert into an mpeg movie with the image sequencer.
For this, I changed the output properties to
- Output:
- file format ffmpeg video — Post Processing:
- check Image Sequencer
Don’t forget to reset these to
- Output:
- file format PNG
- UNcheck Overwrite — Post Processing:
- UNcheck Image Sequencer
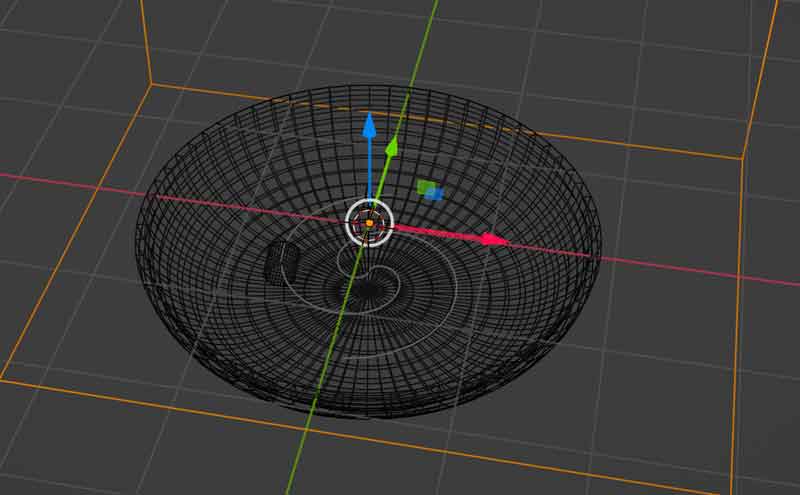
When the render was complete I saw that I made the wrong assumption. I thought the ‘flow’ object was a virtual element, and that it would not be rendered visually. I was wrong. Now that I had a more detailed view, I saw it lying in the middle of the bowl.
I also saw that the vortex did not really work as I expected. It generated a kind of bump, while I thought it would be more of a flat horizontal stirring motion.
And lastly: no light! Still a lot to learn I guess.
Not what I had in mind. A rabbithole of late hour tweaking followed. I changed the flow object from ‘inflow’ to ‘geometry’ , in the assumption that I would create a body of liquid in this way. I also tweaked with the vortex settings and how the vortex reacted in the container. But there were a lot of settings for that, and I did not really know what they all meant.
The vortex flattened a bit when I turned down its strength. Ofcourse that also resulted in a weaker movement. But it was late. I was getting tired. I initiated another render, saw that it would take almost 4 hours and went to bed.
In the morning I was greeted by this:
Yes, I made the wrong assumption again. That soap in the middle is my flow object. But at least I was able to fix the lighting.
after the global review
During the global review I was pointed out that indeed, you can keep an object from rendering in the final render. Just set its visibility in the object properties.
My fellow student Bas pointed me to some optimisation settings in Blender so I actually had a functioning Render Preview panel(I forgot, have to ask him again) and also showed me that you do not have to render all samples if the model already looks good after the first 100 or so samples.
He also showed me how to use a light emitting material, for more natural lighting without a actual light source (sun, spot) and to add a hdr image to the background to also enhance the final render.
In that process I also found out that I had the Intel version of Blender installed, while I have a M1 processor. Downloading the Silicon version as we speak. Looking forward to blazingly fast renders.
So here is the real final render:
looking back
- I want to understand the lingo used (bodies, components, sketches)
- I want to learn to work with Fusion 360: understand the interface, understand what I am doing and why, how to get to the different ‘views’ like design and sketch etc
- I want to be able to create a basic lasercutter box design, with parameters and slots & tabs
- I want to get fluent in extruding
- I want to learn to render and possibly animate
I again learned a lot this week! When looking at my goals from the beginning of the week, I would say that I was successful enough. I got to understand the lingo, figured out how sketches and bodies were connected in Fusion360 and I also got a good understanding of the interface.
I got to understand parametric design in Fusion360 (and also in FreeCAD)
I did not create a basic lasercutter design however, because I focussed on the tasks for this week to create a (3d) model for my final project. I did not become fluent in extruding, but I became as fluent as I hoped to be.
I did not go into the animation part in fusion360, because I needed that time to get to understand Blender.
I learned to use Blender! Compared to Fusion360, Blender works really intuitively. I enjoyed working with Blender more, it feels more free to work in it. I understand where Fusion360 is coming from though, it has a completely different background, and also a different use case. With Fusion360 you have to be specific, it is point and click and type. The whole interface radiates its history as a product design tool. Blender is much younger.
I am happy with my decision to dive into Blender before trying to to make my model in Fusion360. Although it took me much longer that I thought, and involved more steps and lots of tutorials (listed below). And even though it did not really work out in the end.
I am happy that I was able to create a basic animation that shows what I think my final project can look like. Since the flow of the water is the important part, the animation is necessary. I will get rid of the bar of soap in the middle eventually. Or who knows, maybe there is some serendipity in there.
In hindsight it would have been better to think of what I wanted to create first before diving into a program (Fusion360). But I will use Fusion360 anyway, so that work was not in vain.
lessons learned
The struggle with the flow object is a lesson in learning to step back. All the time I was trying to hide the input, while in would have been better to give it a place. After all, in the real world there also would be some kind of flow or water input. For example, I could have built it through the wall or the bottom of the bowl. That way I can play and simulate with different solutions before building them.
What I also learned is that it is better to set reasonable goals. There is only so much time in a week, and part of it is also spent learning the tools at hand. It might look cool in my head, but if I am not able to make it that way in the time I have, it is better to go for a more simple but realistic solution. It’s also a good idea to keep monitoring my progress during the week and adjust the goals accordingly.
But still, going in the way I did also meant I learned much more than expected.
files
here are the files for this week
tutorials, tutorials, tutorials
Fusion360
Fusion 360 Tutorial for Absolute Beginners
Fusion 360 Tutorial for Absolute Beginners (2020)
Fusion 360 Mistakes I Make Sketching (10 Things To Avoid)
Learn Fusion 360 or Die Trying LESSON 1: Introduction tutorial for Absolute Beginners
Learn Fusion 360 or Die Trying LESSON 3: Understanding Constraints
Learn Fusion 360 or Die Trying LESSON 5: Understanding Parametric Design and Modeling
Blender
Blender Fundamentals 2.8
Creating a Vortex in a Glass | Blender Mantaflow Part 11
An Introduction to Fluid Simulation | Blender Mantaflow Part 1
the New Blender Fluid Simulator is AWESOME - MantaFlow Tutorial
Learn Blender’s NEW Water Physics in 6 minutes! (Blender 2.9+)
Quick Water Animation in Blender 3.0 (API methods) Easy Way
Making a Glass Bowl in Blender 2.8
Blender 2.8 Tutorial: Rendering an Animation