to learn / to do
- Propose a final project masterpiece that integrates the range of units covered
The real deal. The final masterpiece (master as in mastering a skill). I am sticking to my plan to create a Tide Clock, as I think it will give plenty of opportunity to show the units covered. And besides: I want to connect with the tides :-)
looking ahead
what I already know
By now I have a general idea of all the steps involved, and I also have (sometimes basic) skills to take all these steps myself. But I also know I will run into problems, as there are still quite a few unknowns at this point.
the process
What will it do?
I want to catch the essence of being at the beach and looking at the sea.
For this I will make a device, a clock so to say, that will be able to display the tides in my hometown Noordwijk. High tide and low tide (and the transformation between) at the minimum. Ideally also the height of the waves. Sunset and sundown are a bonus.
Who’s done what beforehand?
Ocean Clocks
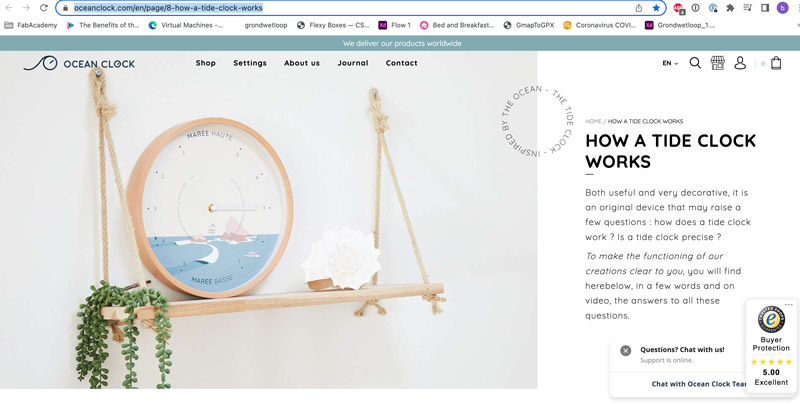
I have researched and found a lot of tide clocks or ocean clocks. For example this one:

The way most of these clocks work are like a real clock, they have a clockwork with a fixed interval. Not of 12 hours, but 12 hours 25 minutes and 14 seconds, which corresponds to the average time between 2 high and two low tides (in an average location with regular tides). They give you an indication of the time remaining before low/high tide
Jacob Venker
This tide clock from Jacob Venker takes this principle to a next level. The average time between the tides is influenced by the location of sun and moon (gravity) and thus fluctuates between weeks. This clock in Maassluis, NL allows for this fluctuation with software that compensates for about 95% of all deviations.
Tijd voor getij
I also found this page, in Dutch. This clock approaches the solution I have in mind, as it uses a wifi connection and real time data to display the actual tide in a location of your choice. For this it uses LED lights and a nice wavelike sculpture. It has a sensor to adjust the LED brightness to its surroundings.

NAP
In Amsterdam, NL, at the city hall, there is the NAP (Normaal Amsterdams Peil) visitor’s centre. NAP stands for Normal Amsterdam Level, and is the waterlevel that everybody in the country uses as a zero point (datum) for comparison. For instance, the top of our highest mountain Vaalserberg is measured as 322,4 m above NAP (yes, meters, we do not have mountains here). A NAP of 0 is more or less equal to the average waterlevel in the North Sea. In this visitors centre, there is an installation with 3 pillars. One of the pillars shows this NAP as a bronze reference point. But there is also a water column that shows realtime tide levels in IJmuiden and Vlissingen. This is accomplished by means of a telephone connection with the central measuring station of the Tidal Waters Department of the Directorate-General for Public Works and Water Management. The third water column shows the water level at the time of the 1953 Zeeland flood disaster (4.5 metres above N.A.P.).
Article in PC Active magazine
And then there is this article (dutch) in PC Active magazine. It details how to build a Tide Monitor using webscraping and a Raspberry Pi Zero and Neopixels. It is from january this year and that is no coincidence, as it was this article that sparked my own idea. I never really read it untill now as I am writing this documentation. It is nice to realise that I now understand every detail in this article, especially the electronics part. As opposed to the beginning of this year.
I have not found examples that use water to display the tides in a wallclock, as I am planning to do.
What will you design?
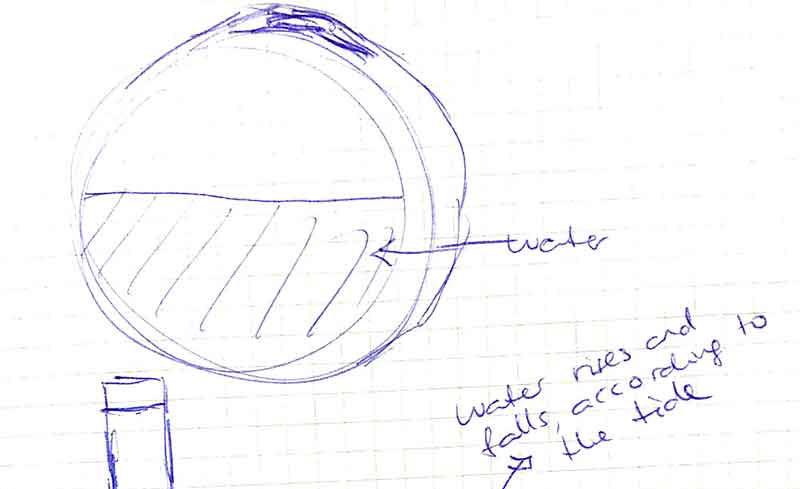
I will design a ‘clock’ that can display the tides using real water. Ideally using realtime data, with Wifi. But if I run out of time, I can use hardcoded fixed time tables like these.
I have thought about showing both tide as well as waves. The tide is represented by the water (or liquid) level in the visible tank. The waves would be represented by rocking the tank. But I decided to leave this plan for now as it gives me too many unknowns for the time I have left.
I will need two tanks to hold the water. One is visible, with a glass front. The other one is invisible and holds the water when it is low tide.
It has LED lights so that I can support the display of the tide with lights, for atmosphere and better visibility in the evening. And to visualise sunset and sundown.
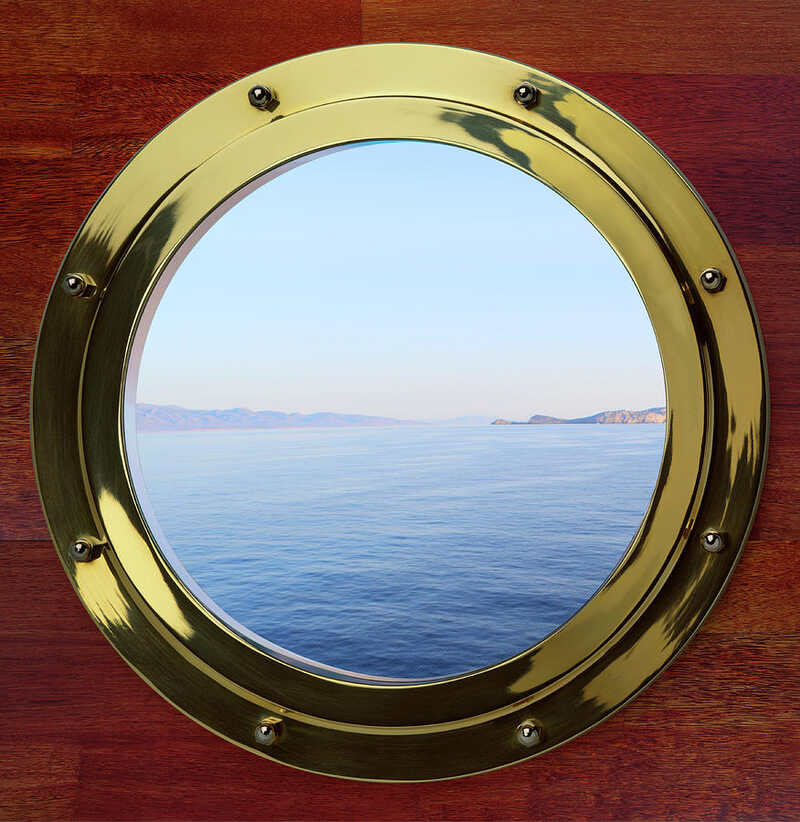
The clock will be round, like a real clock. If anyway possible, I will make it so it can hang on a wall. If I have to, I will make a stand so it can stand on a table. For the nautic touch, I will design it to look like a porthole.

What materials and components will be used?
For the casing I will use plywood.
For the tanks I will need something that is waterproof. I want to combine the making of the tanks with the Wildcard Week, where I used epoxy resin to cast a waterproof tank.
I need 2 acryllic sheets. One clear for the glass that covers the visible tank, and one translucent to seal of the invisible tank and function as a diffuser for the LED’s at the same time.
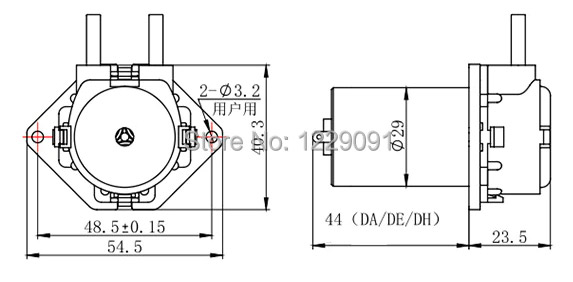
I need a peristaltic pump 6V or 12V (to pump the water between the tanks), and the electronics to control the pump which are
- a motor driver to control the speed and direction of the pump
- a waterlevel sensor to know how much water there is in the tank
- wireless connection board to get realtime data
- LED lights (Neopixels)
And ofcourse a microcontroller to rule them all. Because of the number of inputs/outputs and expected memory use I opt for the AtTiny1614
For the nautic touch I will need 6 brass cap nuts. For assembling I need some nuts and threaded rod.
How much will they cost?
| amount | component | size | lab | cost | source |
|---|---|---|---|---|---|
| 1x | peristaltic pump 12V * | no | € 9,15 | https://opencircuit.nl/product/Peristaltische-pomp-12V | |
| 1x | waterlevel sensor | no | € 1,50 | https://www.tinytronics.nl/shop/nl/sensoren/vloeistof/waterniveau-sensor | |
| 1x | RGB LED (strip of 40) 5V * | yes | ~ € 10,00 | https://www.tinytronics.nl/shop/nl/verlichting/led-strips/led-strips/sk6812-digitale-5050-rgbw-led-strip-60-leds-1m | |
| 1x | motordriver A4953 | yes | ~ € 1,90 | https://www.digikey.nl/nl/products/detail/allegro-microsystems/A4953ELJTR-T/2765624 | |
| 50gram | silicone kit | no | ~ € 1,50 | https://www.action.com/nl-nl/p/spectrum-siliconenkit-sanitair/ | |
| 10gram | Prusament PLA | yes | ~ € 0,50 | ||
| 200ml | Tarbender (tank) | yes | ~ € 10,00 | https://www.smooth-on.com/product-line/tarbender/ | |
| 1x | microcontroller AtTiny 1614 | yes | ~ € 1,00 | https://www.digikey.nl/nl/products/detail/microchip-technology/ATTINY1614-SSFR/7354615 | |
| 1x | acryllic sheet transparent 2mm * | 310mm x 310mm | yes | ~ € 1,00 | |
| 1x | acryllic sheet white translucent 3mm | 310mm x 310mm | yes | ~ € 2,00 | |
| 1x | glassfiber cloth * | 500mmx500mm | yes | ~ € 1,00 | |
| 1x | plywood sheet 3mm (sidewall) | 5mmx900mm | yes | ~ € 2,00 | |
| 1x | plywood sheet 5mm (front + back plate) | 620mm x 310mm | yes | ~ € 10,00 | |
| 1x | isolation foam 50mm (for the molds) | 650mmx340mm | yes | ~ € 5,00 | https://www.isolatiemateriaal.nl/xps/xps-isolatieplaten/jackodur-kf-300-1250x600x50mm-rd145-8plpak-600-m2 |
| 6x | cap nut (brass) | M6 | no | € 3,96 | https://www.hornbach.nl/shop/DREssELHAUS-Dopmoer-M6-DIN-1587-messing-100-stuks/3830904/artikel.html |
| 500mm | threaded rod | M6 | no | € 1,26 | |
| 12x | nut | M6 | no | € 0,75 | |
| 6x | press-in nut | M6 | no | € 0,72 |
added after production, in hindsight, about components marked with an asterisk:
- Either 5V pump and 5V LED or 12V pump and 12V LED
- Either a glass front or aquarium silicone kit
- There are better epoxy choices than Tarbender
What parts and systems will be made?
I will make the casing, the tanks, the PCB’s and the brackets to hold PCB and pump myself. I thought about making the peristaltic pump myself, but opted against it because of available time. I will also buy the waterlevel sensor and all the micro electronics
What processes will be used?
- lasercutting to cut out the acryllic sheets and the plywood front and back plate.
- 3D printing to print brackets that hold the pump and the PCB boards
- 2D milling (Roland Modela MDX-50) to mill the PCB boards
- 3D milling (Shopbot) to mill the molds for the watertanks
- Casting with epoxy resin
- Soldering of electronics components
- Fusion360 for 3D designs
- KiCad for PCB design
What questions need to be answered?
How to position the two tanks?
The visible one goes in front ofcourse. But the invisible one? Is it right behined it? Same size? Or maybe half the height and twice the width, so I have space for the pump?
Where to put the pump?
It is rather big in its dimensions. If I put it at the back, the sidewalls need to be very high. Maybe I can make space by having a back tank that is half the height, but still, that also adds a lot of height.

Where to put the LED lights?
Ideally at the back of the visible tank, behind the translucent sheet. But that means they need to be sealed and watertight. And I can never access them again after sealing the back tank.
What waterlevel sensor to use?
To measure the level, there are 3 sensors that come to mind:
Weighing is not an option in my case, as both tanks are connected to each other and I will thus not be able to weigh one tank individually
What about the Wireless connection?
As I am not sure if I will even get to that, I opt for an extension board for a ESP8266 Wifi Module I will design my main board in a way that I will be able to connect a board with the WiFi controller, probably via Serial.
Just in case, I find some api’s that will provide me the neccesary data:
https://nl.tideschart.com/Netherlands/South-Holland/Gemeente-Noordwijk/Noordwijk-aan-Zee/ https://www.rijkswaterstaat.nl/water/waterdata-en-waterberichtgeving/waterdata https://rijkswaterstaatdata.nl/data-zoeken/#h44e71266-b3b1-4266-9ed3-f62baf77b779
How will it be evaluated?
Although my hopes and ambitions are high, I also know there is a lot I don’t know yet. Therefor, at the bare minimum, my final result should be able to:
- pump water between two tanks in a controlled manner
- have LED lighting for atmosphere
- looks well finished (packaging, no loose ends, no loose wires)
- run independently with a power source (not connected to a laptop)
