Molding and Casting
Group Assignment:
Group Assignment can be found here.
Objectives
Review the safety data sheets for each of your molding and casting materials,then make and compare
test casts with each of them
Materials to be Tested:
- Flexwax
- Machinable wax
- Silicone rubber
- Smooth-on's Ecoflex silicone rubber
- Hydro-stone's gypsum cement
- Instamold
- Epoxy resin
- MDF
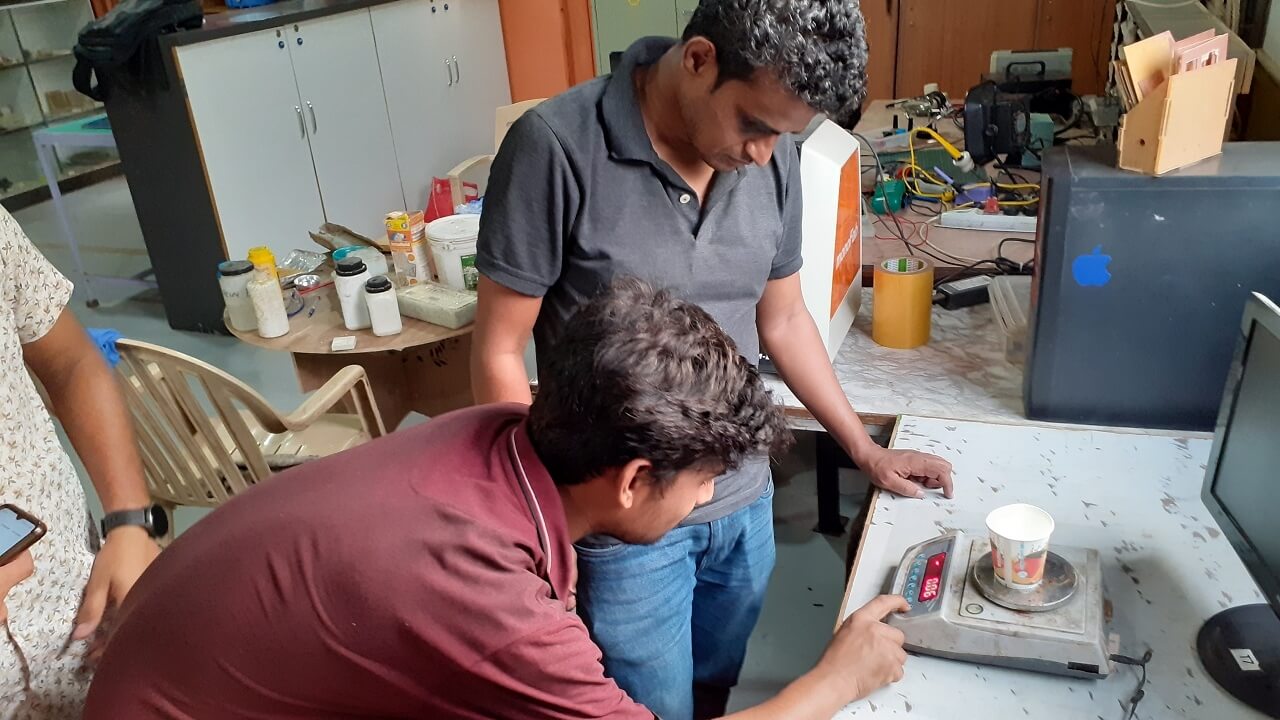
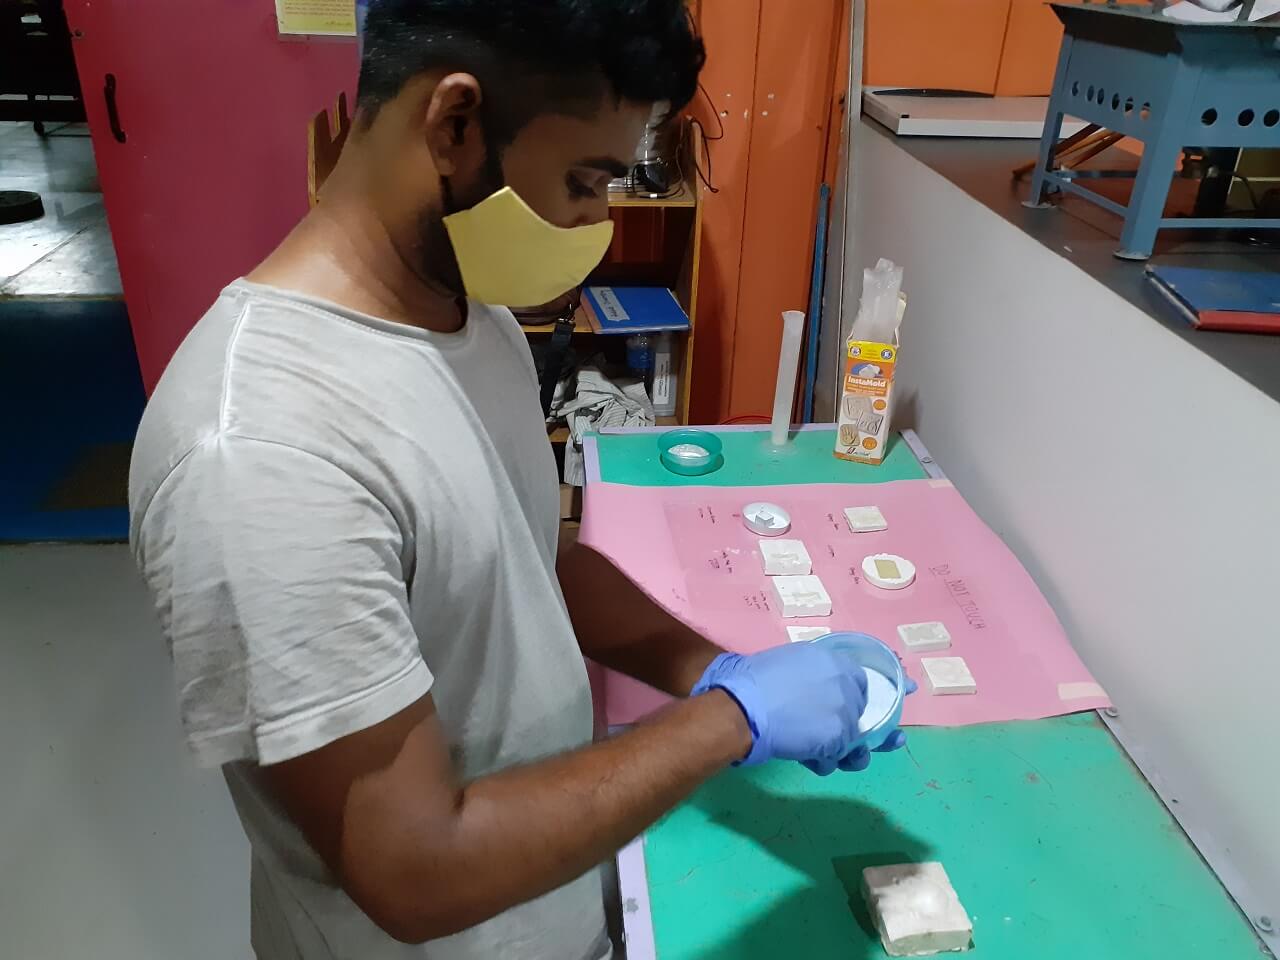
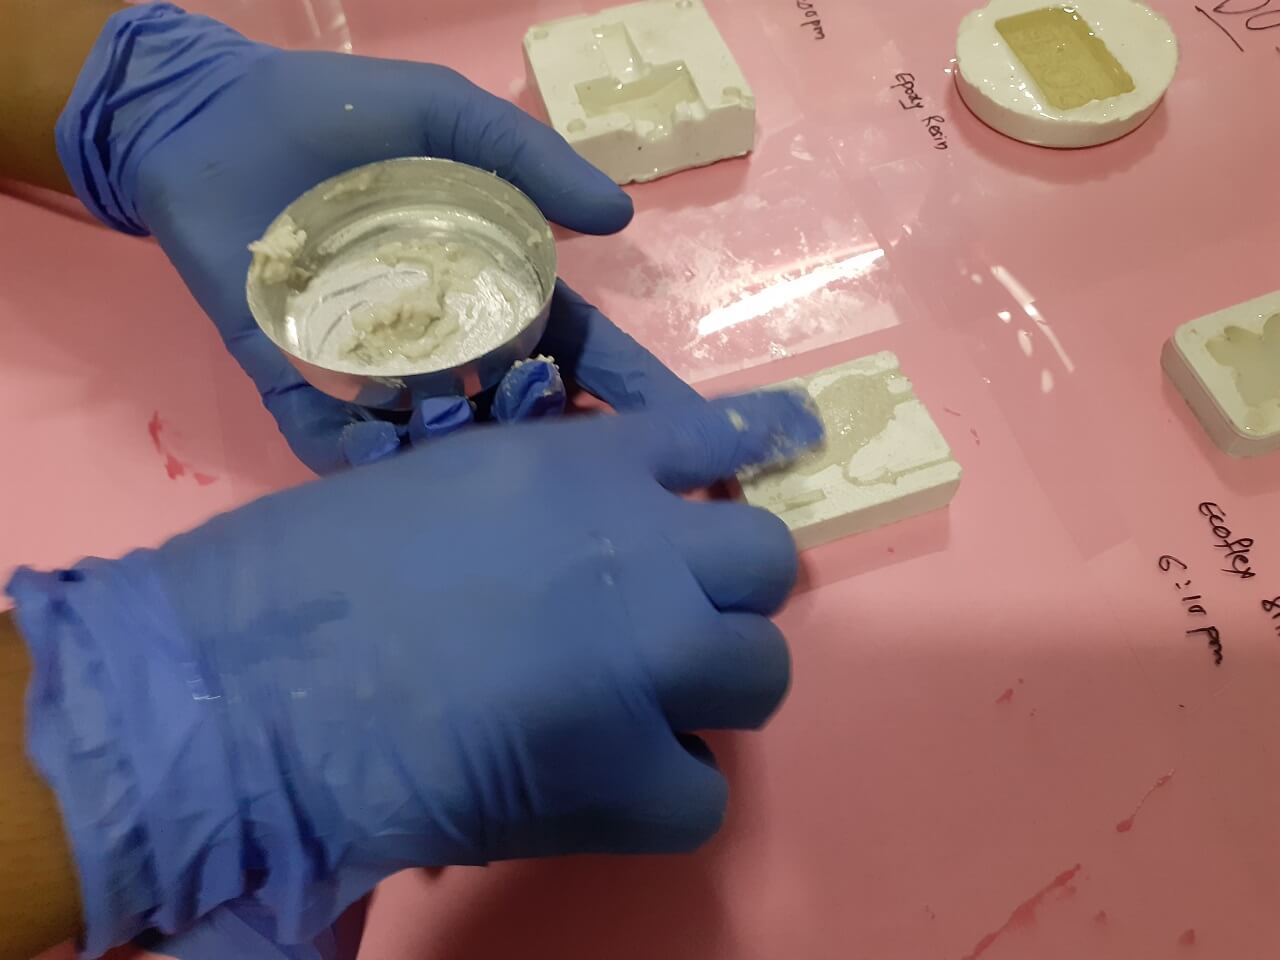
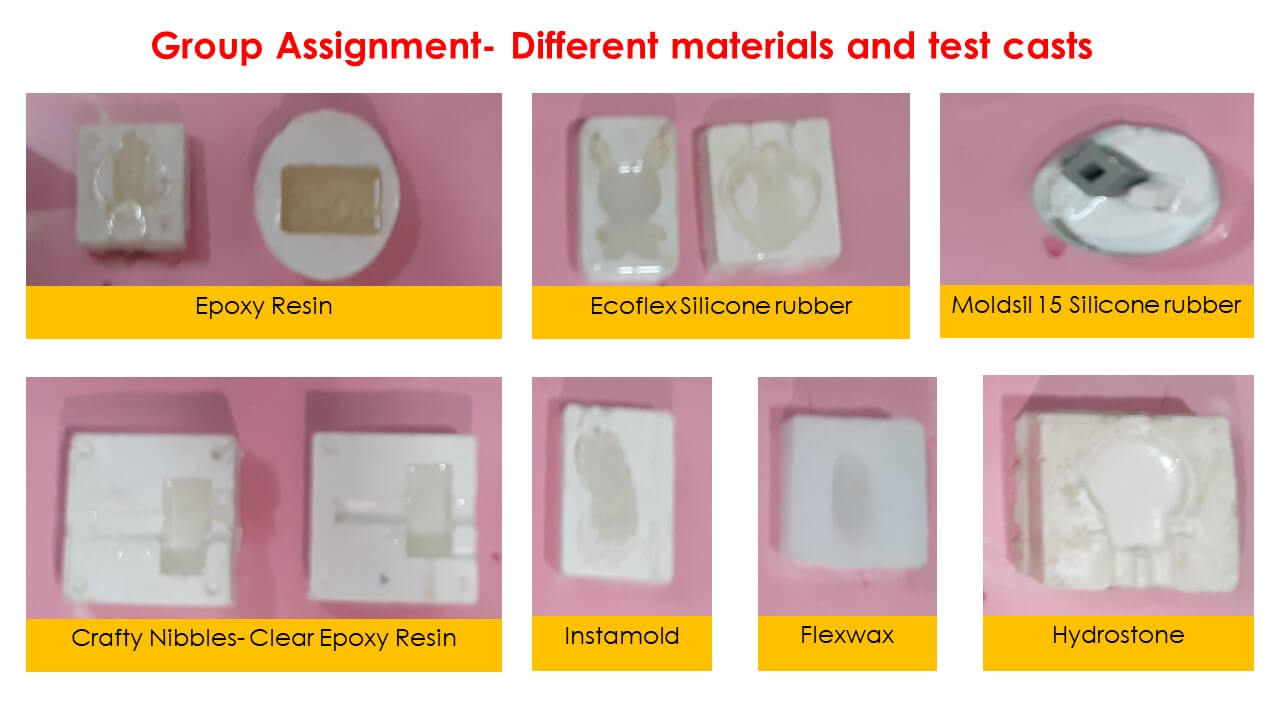
Each of us tested the above materials and reviewed their safety data sheets. We used various molding and casting materials in our Fab lab at Vigyan Ashram. We prepared test castings and observed proportions, mixing procedures, and curing times for each material. We also discovered which materials are suitable for molding and suitable for casting. Some of them can be used for both casting and molding.
individual assignment::
Design a mold around the stock and tooling that you'll be using,
mill it (rough cut + three-axis finish cut), and use it to cast parts
extra credit: use more then two mold parts
This week’s group assignment is about study of various moulding and casting materials available in the lab. For group assignment work assign to me was to study Epoxy resin that we have purchased from local manufacturer and study its safety and technical datasheet. As it was purchased from local manufacturer, he has not provided any technical details and safety precautions during casting. Here I am considering general information about Epoxy resin and its use.
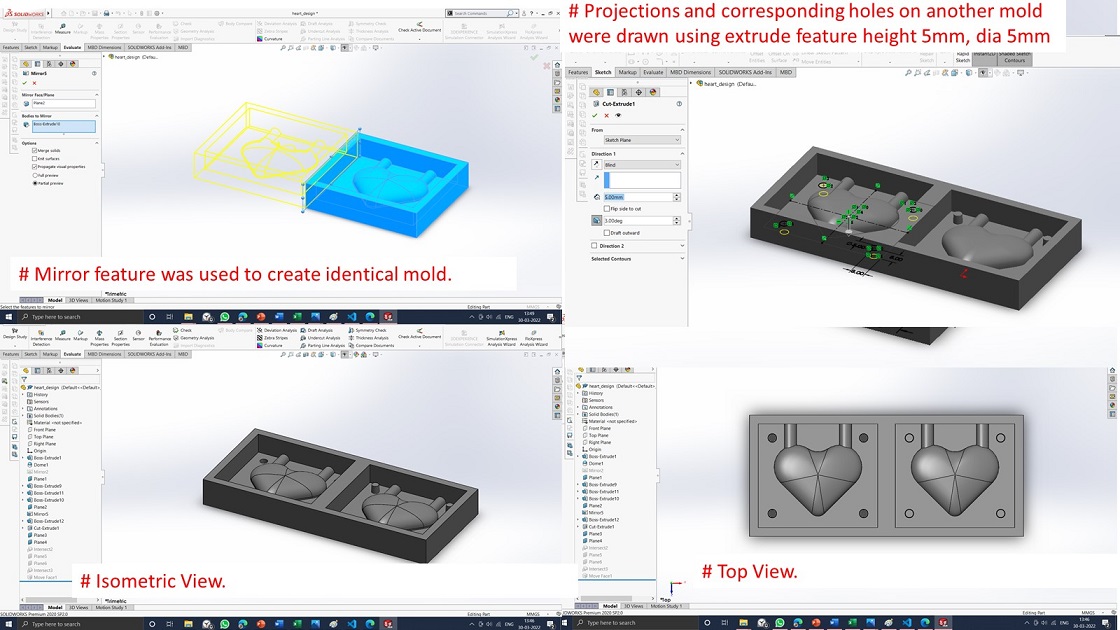
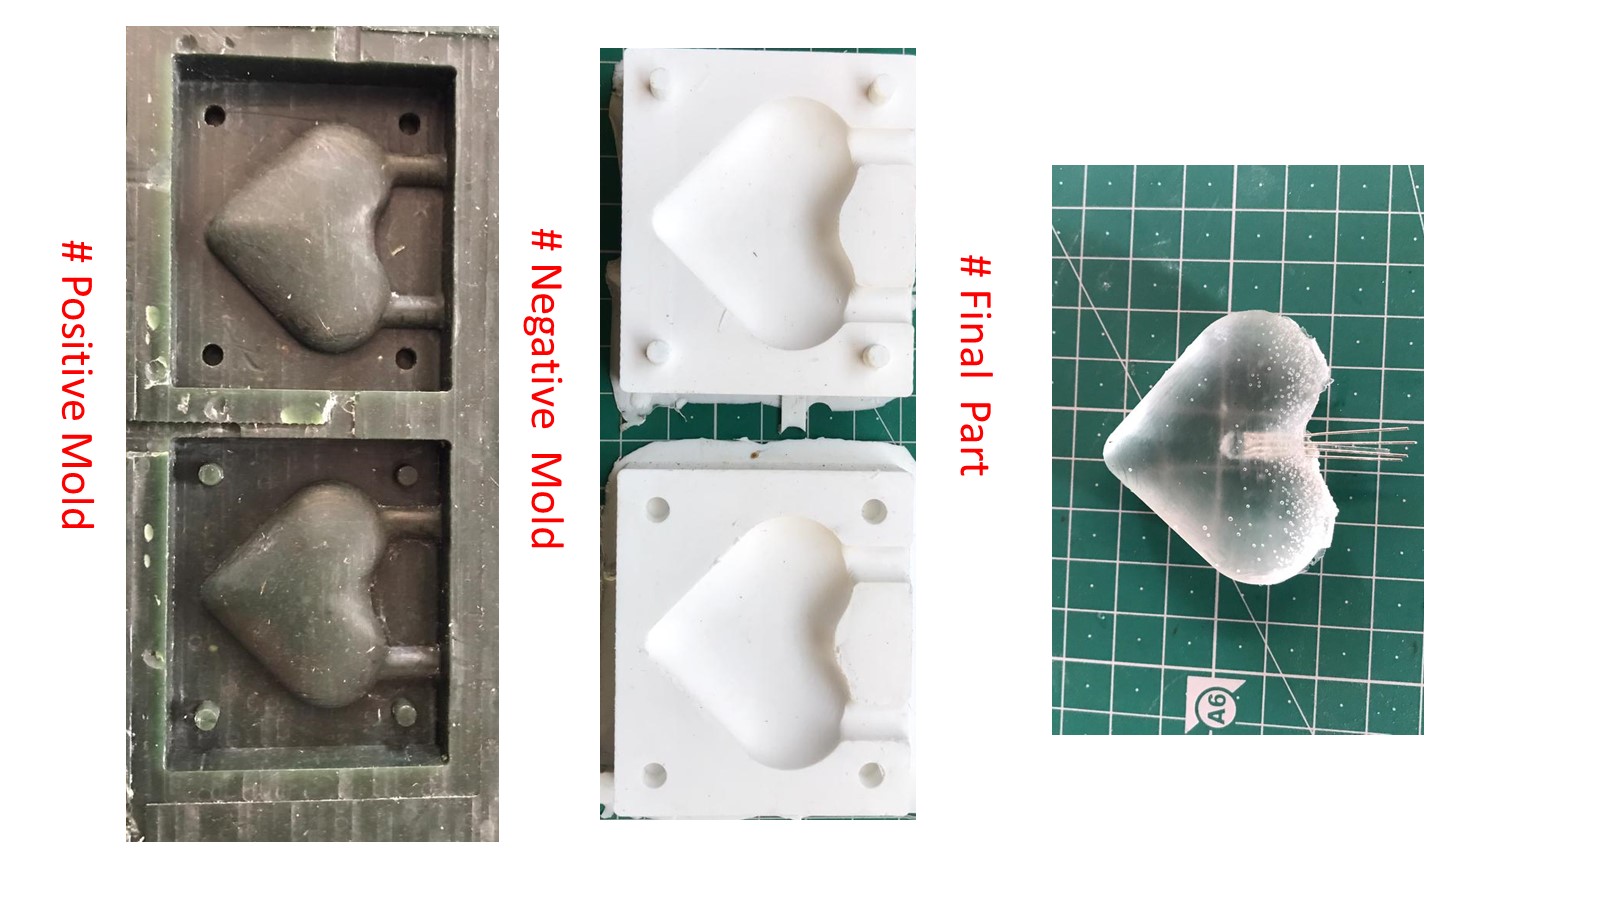
Part 1. Create a Positive Mold Model
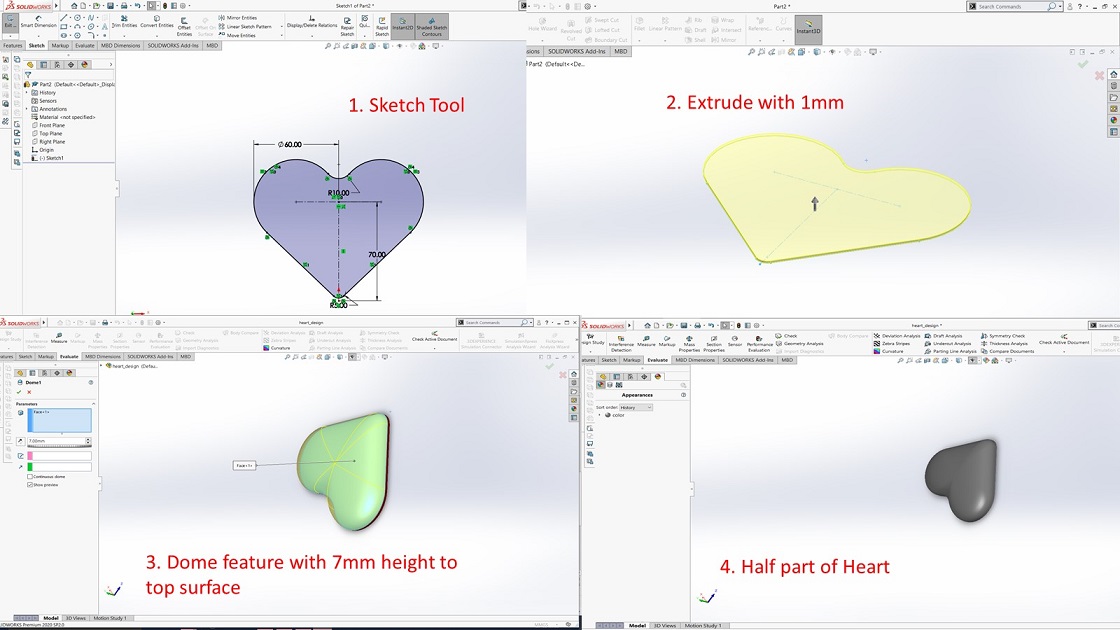
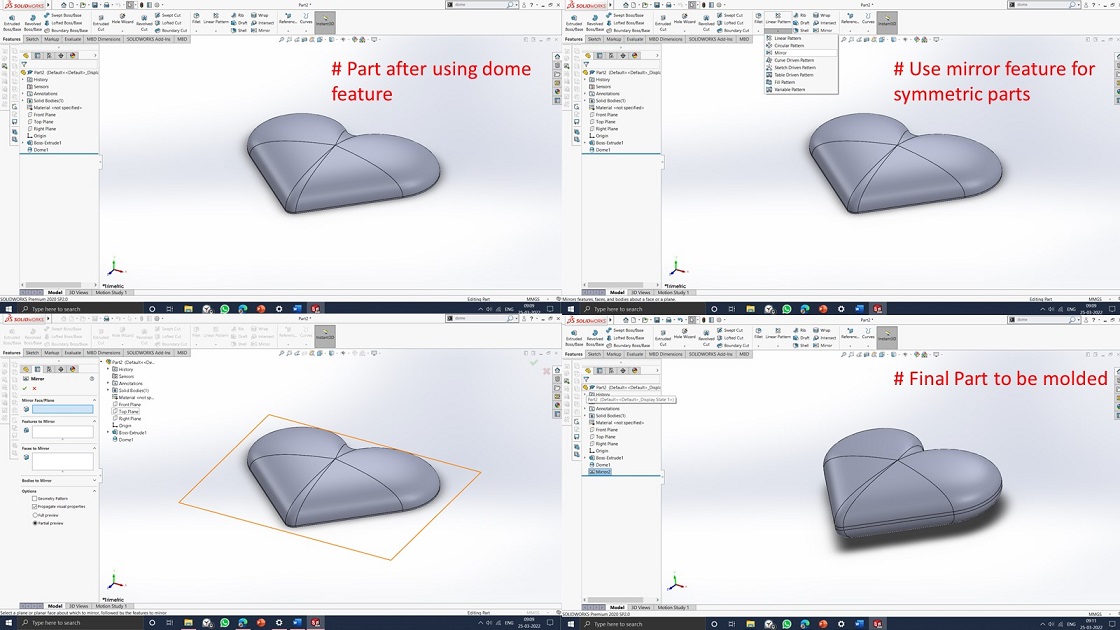
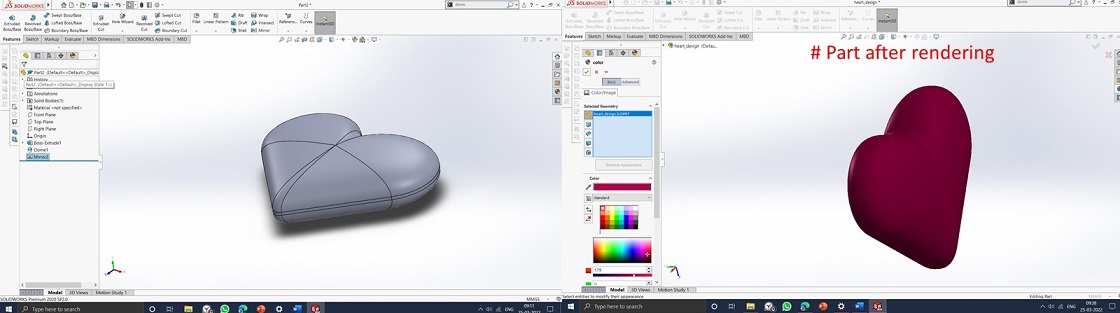
For this week, I have planned to make a heart shape and embed RGB LED into it to feel the heartbeat
through LEd lighting. So I have referred to youtube videos to model heart shape and design a 3d
model using Solidworks Software. I want to prepare 2 part mold. Accordingly, I started developing a
mold.
I have referred Youtube: How to just make a heart in
SolidWorks | Solidworks Tutorial to design the model.I have made changes in the model
dimensions according to design requirements.
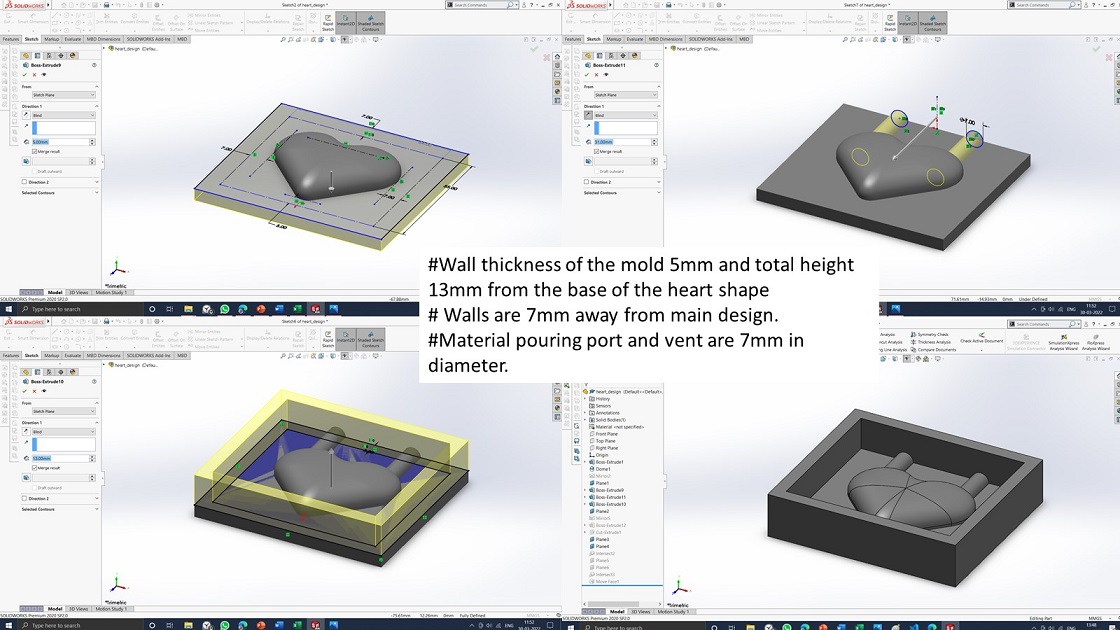
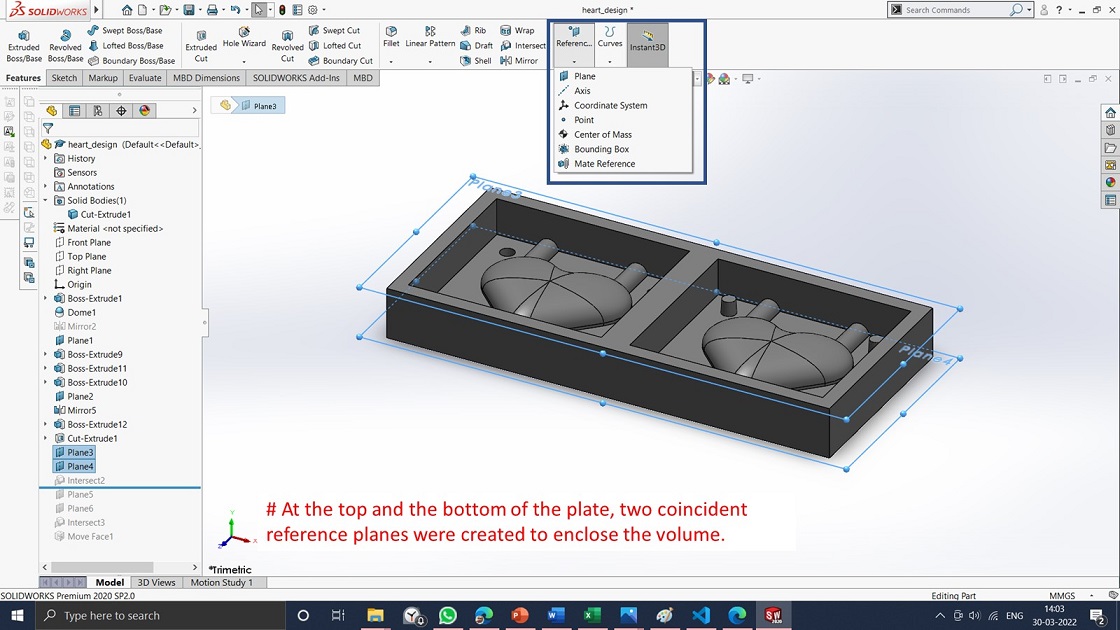
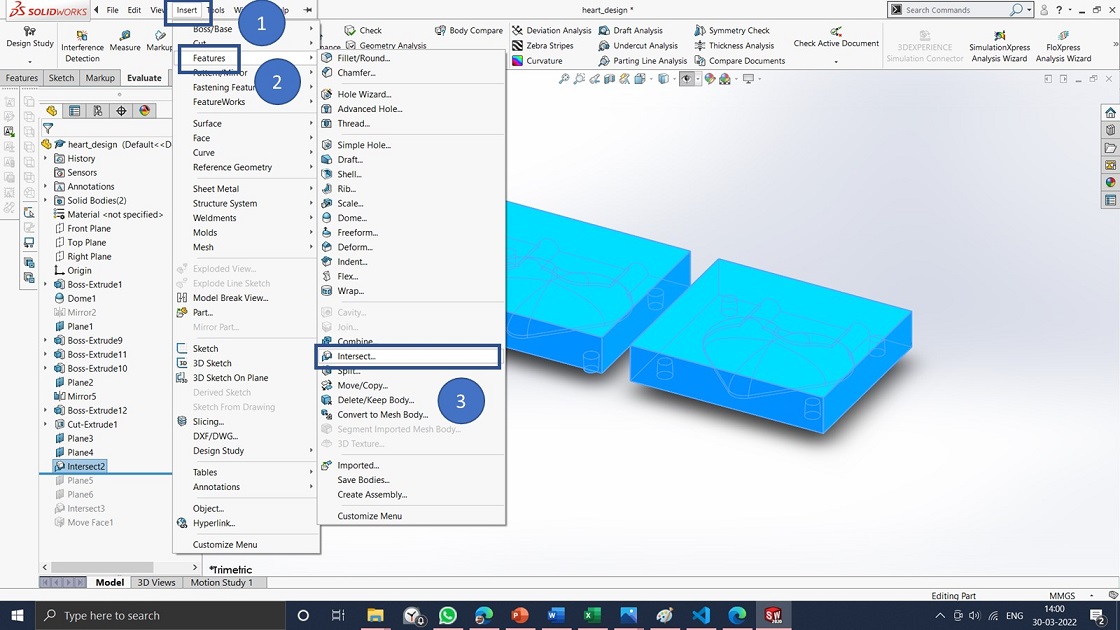
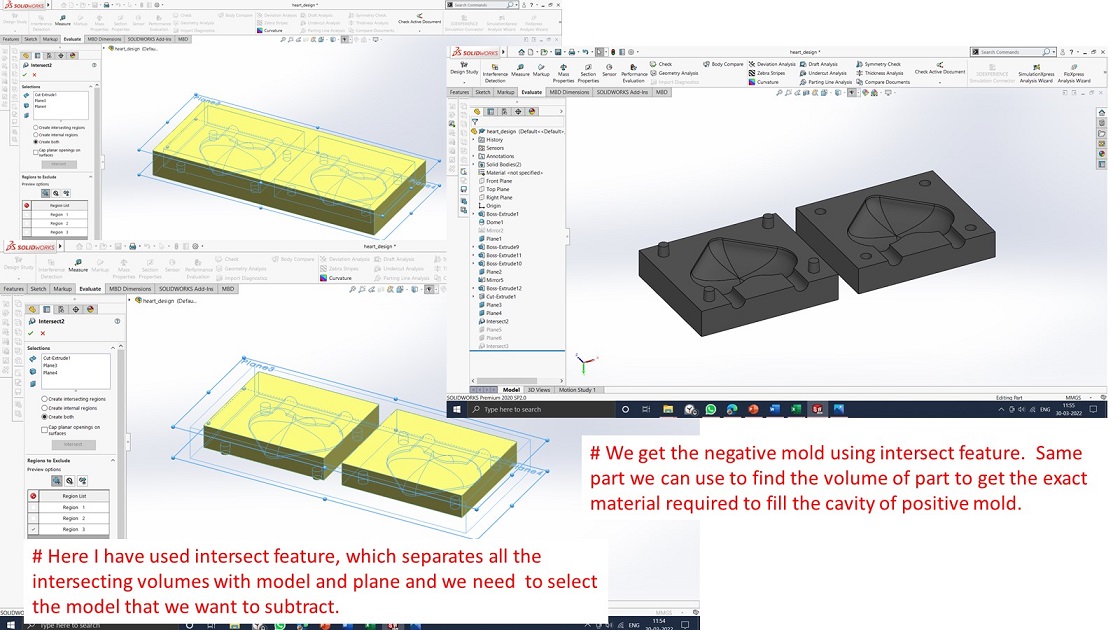
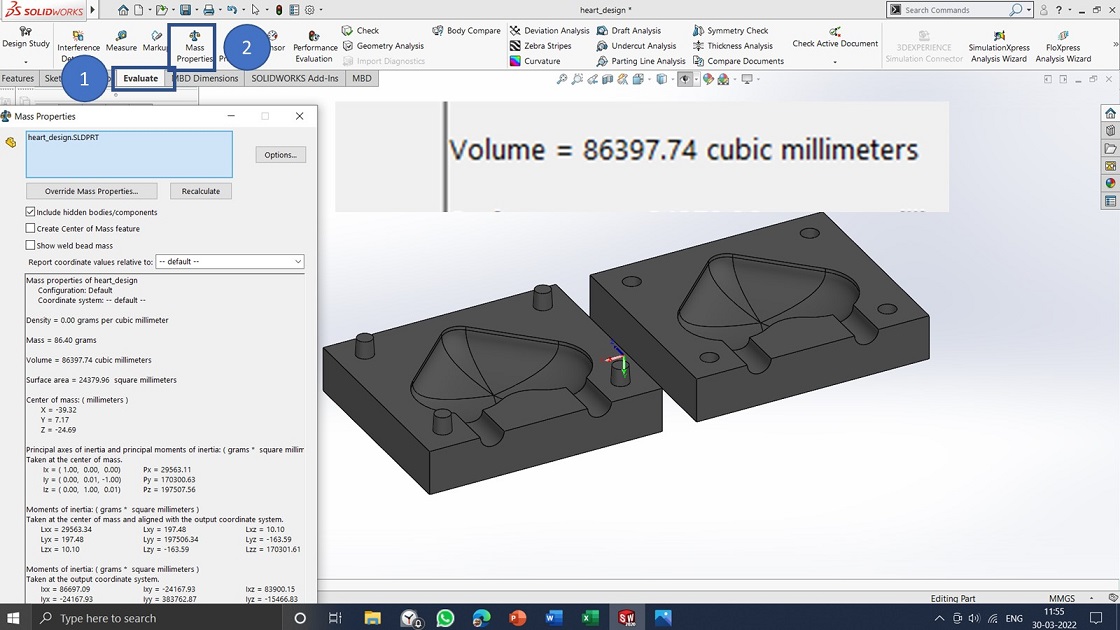
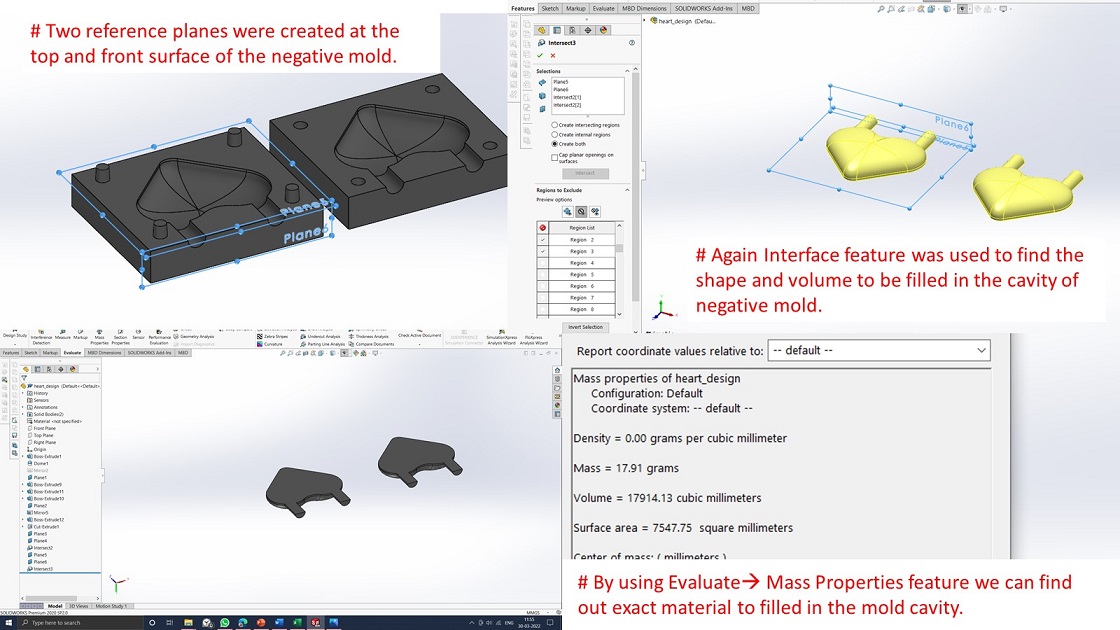
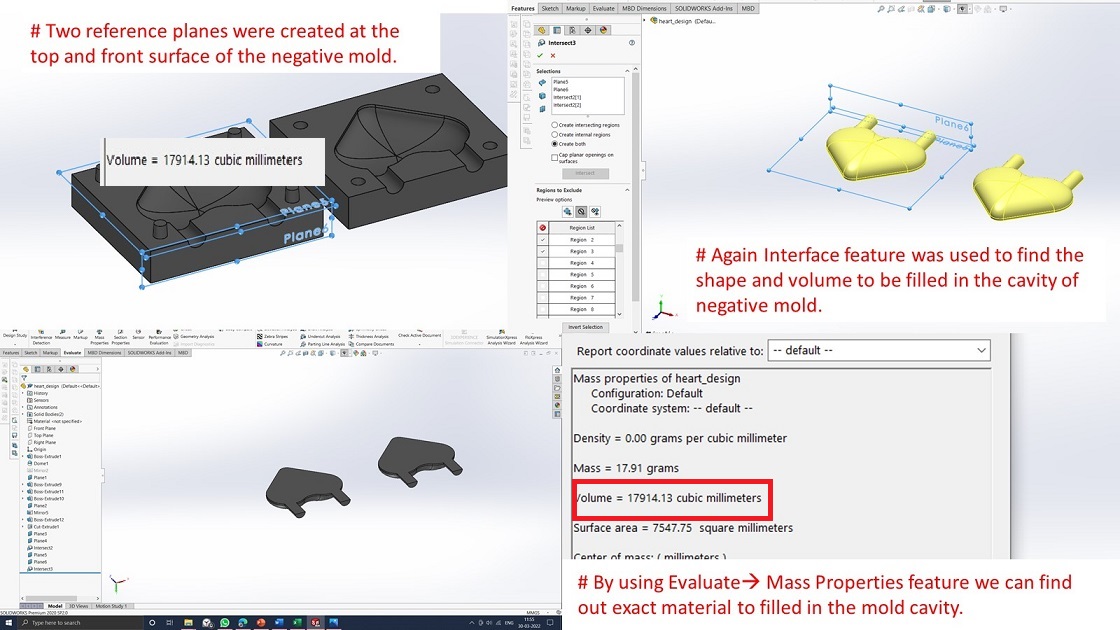
To calculate the mold cavity volume in both positive and negative mold, I have used Solidworks intersect feature to separate both volumes. This is an exciting and essential feature required in mold casting, CFD modeling. I have already done part modeling in mold in Solidworks; then I have created the coincident plane on the open face of the mold cavity. THen I have used the intersect feature in the following using path- Insert-features-intersect. In intersect feature, the created plane at the open face closed the cavity and filled the volume, just like filling the cavity with water. Then we need to select the volumes that we need to subtract. This means in this case mold that we have designed, we need to choose, and only cavities with filled volumes are remaining, which is the negative mold of our design. Don't forget to click on the intersect of the feature after selecting the required cavity. Then I have used the feature Evaluate- Mass properties. This feature shows the Center of gravity, Mass, density, and volume. In this case, we have not assigned any density, so don't consider the mass of this feature. Here we are going to take volume from this feature.
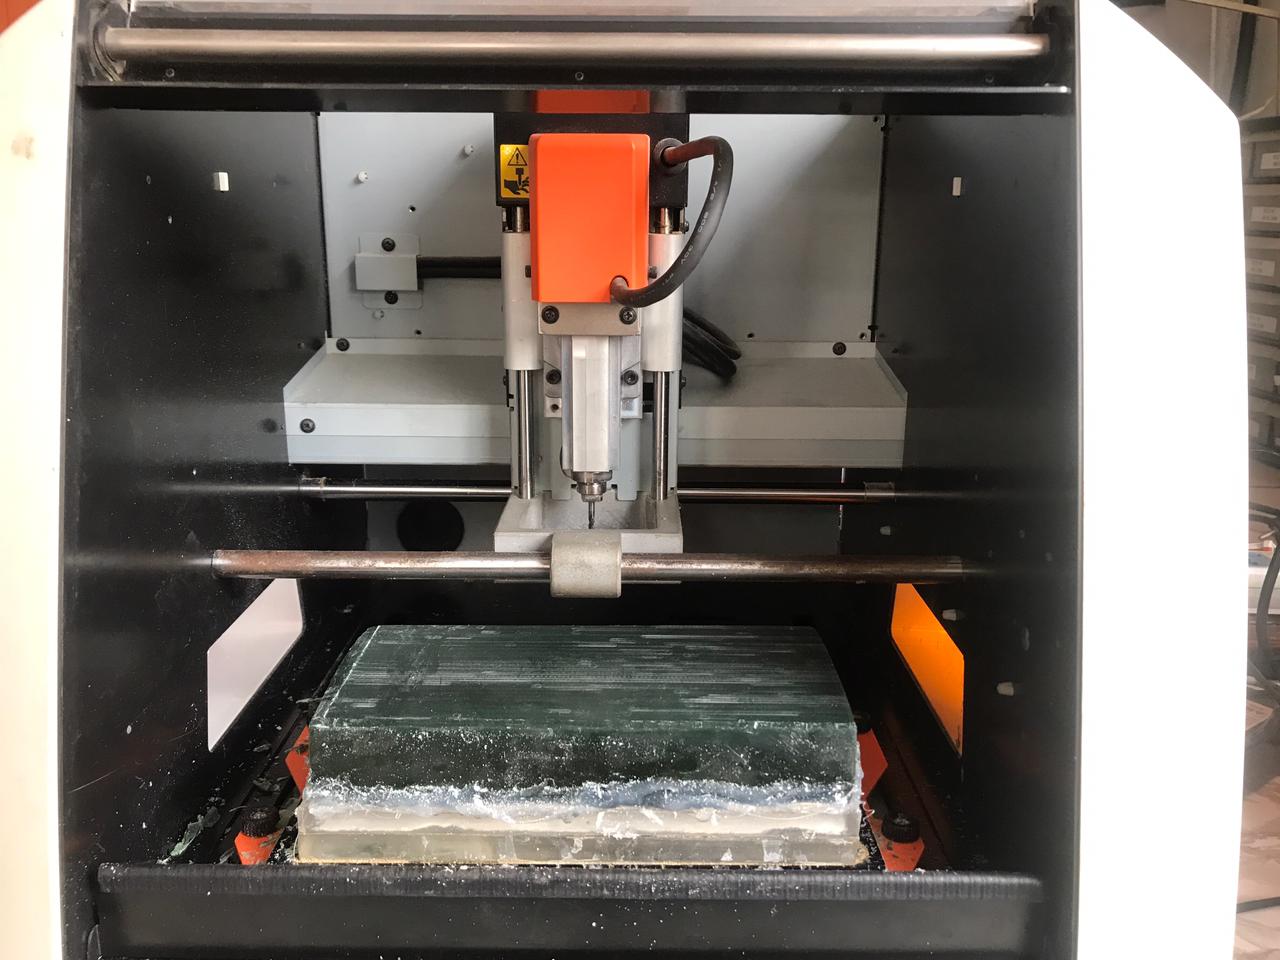
Part 2: Generation of Toolpath using MODELA player 4 and Milling of wax on SRM20 Milling machine
Here we are using Roland SRM20 Milling machine to create a positive mold. I have used Modela player software tool to generate the machining toolpath.
To fix the machinable wax on the SRM 20 machine bed, an double-sided tape with hot glue on all the sides of the stock was placed.
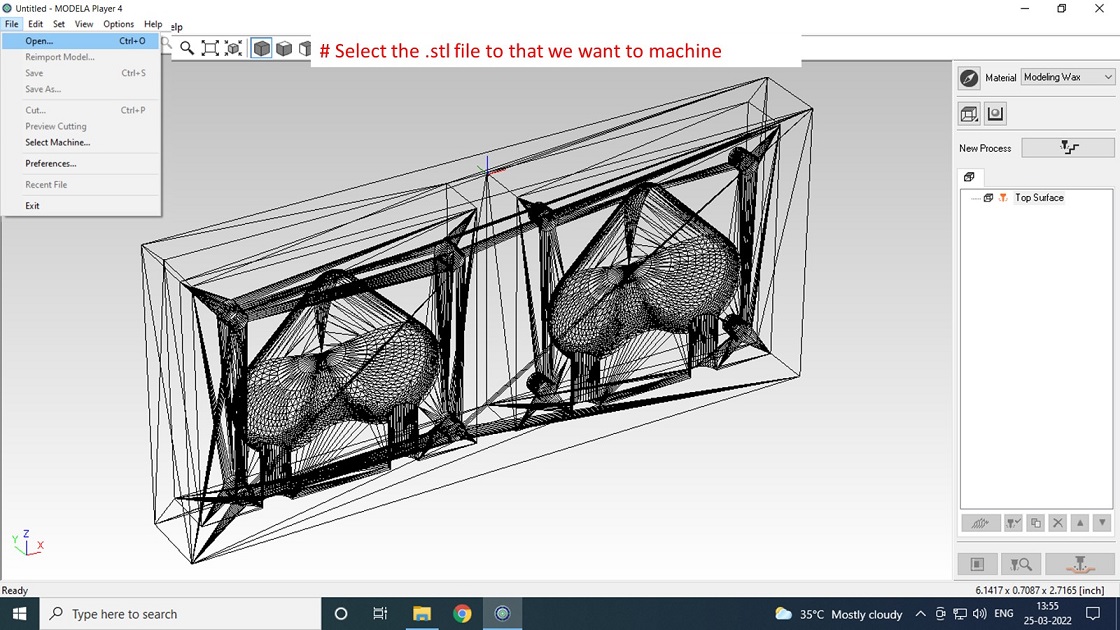
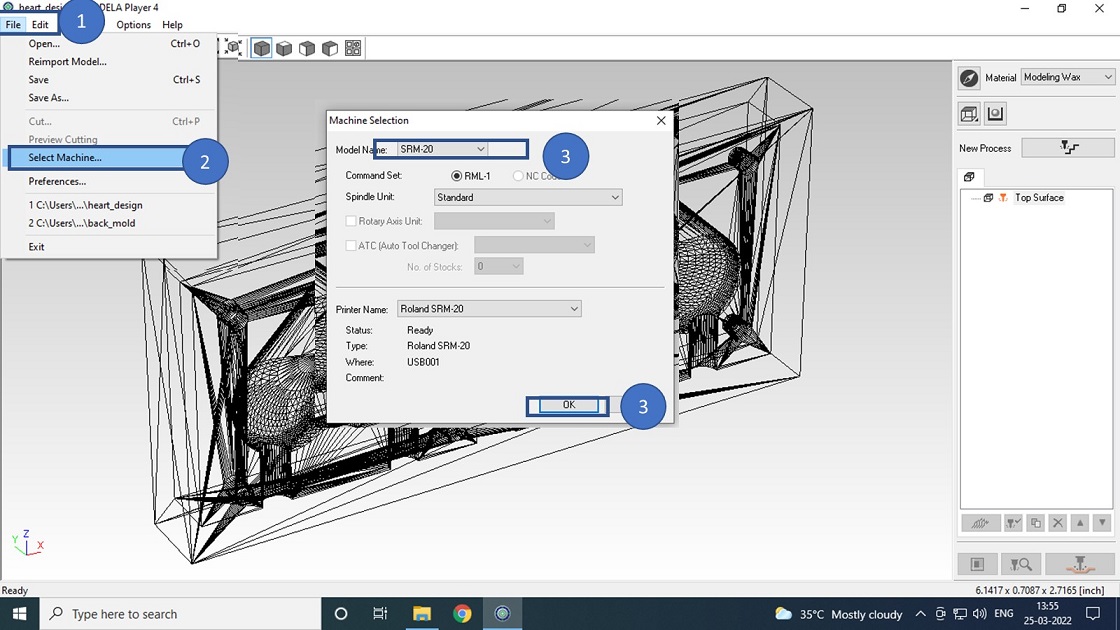
Then I have selected the SRM20 machine for the machining in the preferences.
After setting up molding wax stock on the SRM 20, its top surface was not flat. I have selected Surfacing operation to to make top surface flat.
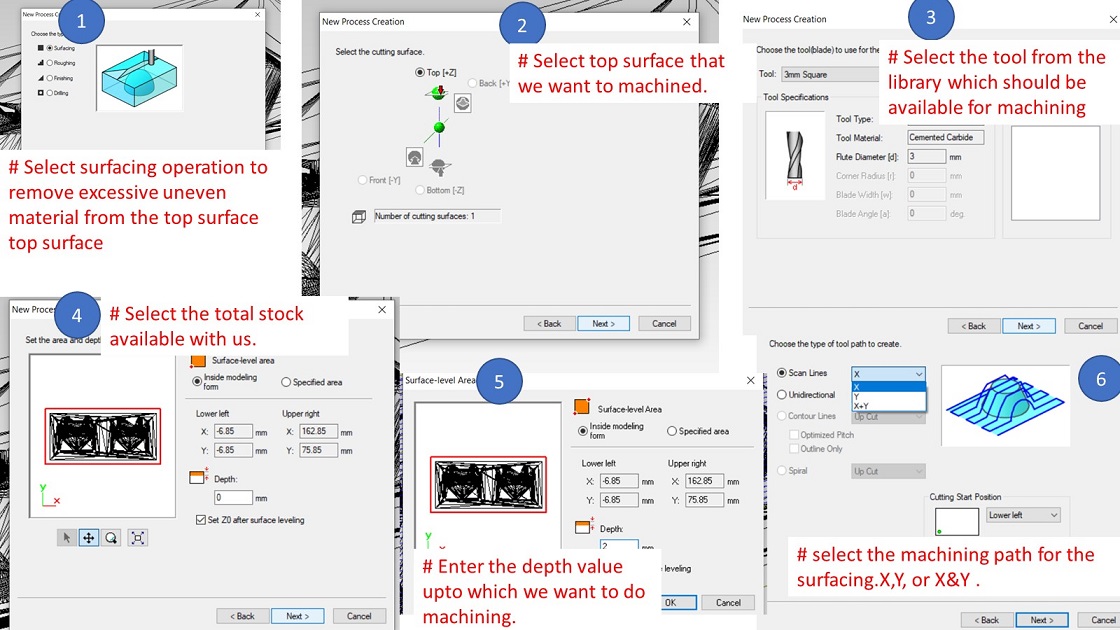
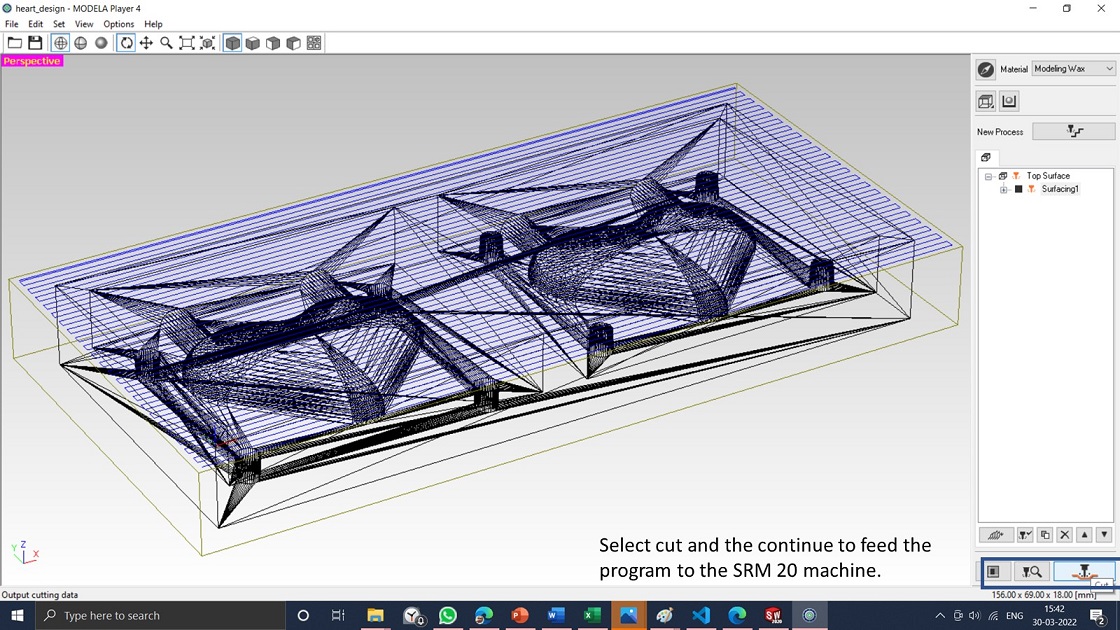
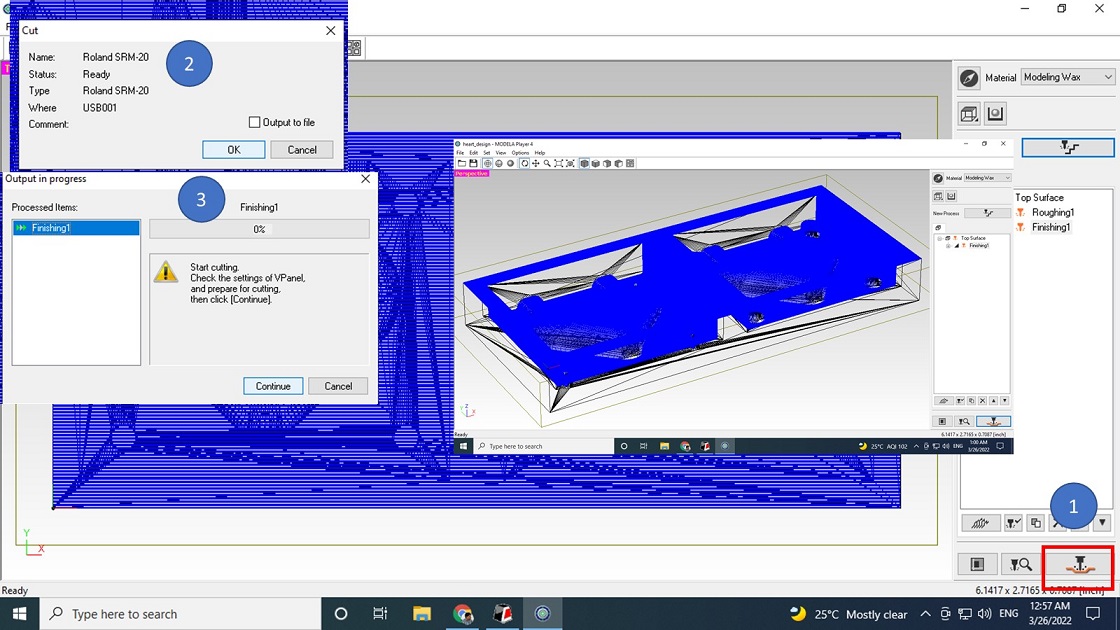
Tool path for the surfacing is as shown below.After doing initial setup, program is send to SRM20 machine by pressing cut option.
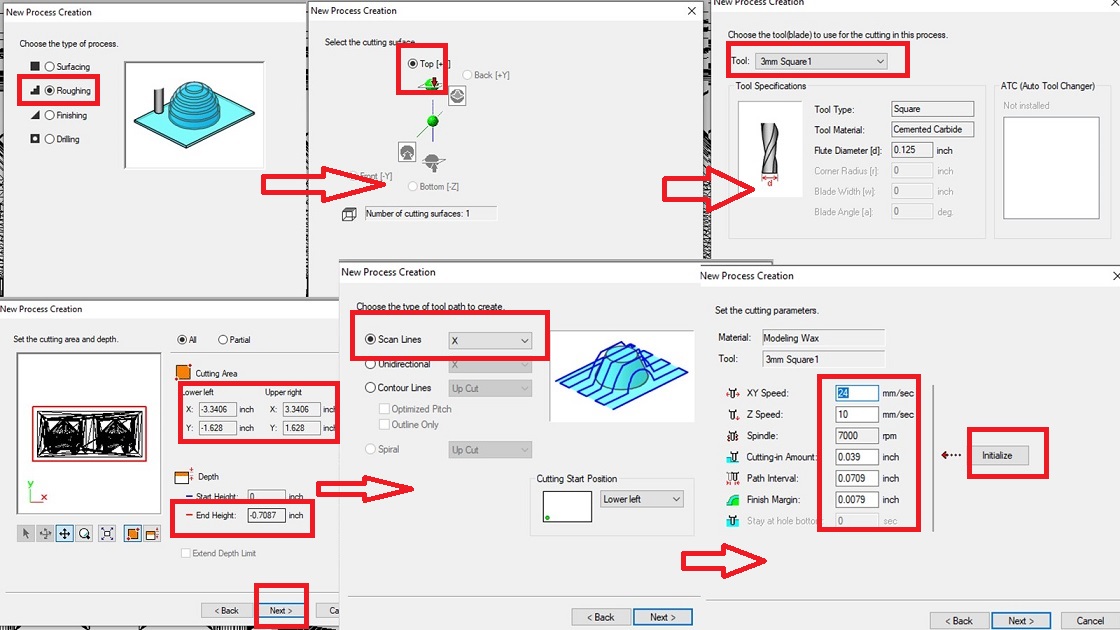
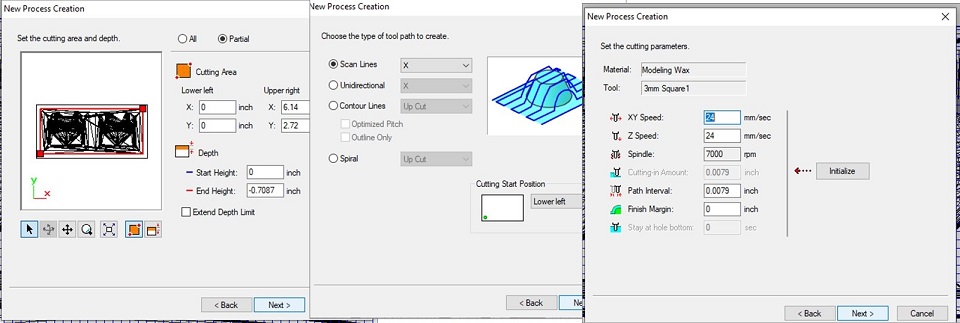
After surfacing operation, I have selected Roughing operation to cut the required in the molding wax. To setup roughing operation, we need to set surface from which we need to start machining, Machining area, depth of cut, tool selection, cutting speed all the processes shown below.
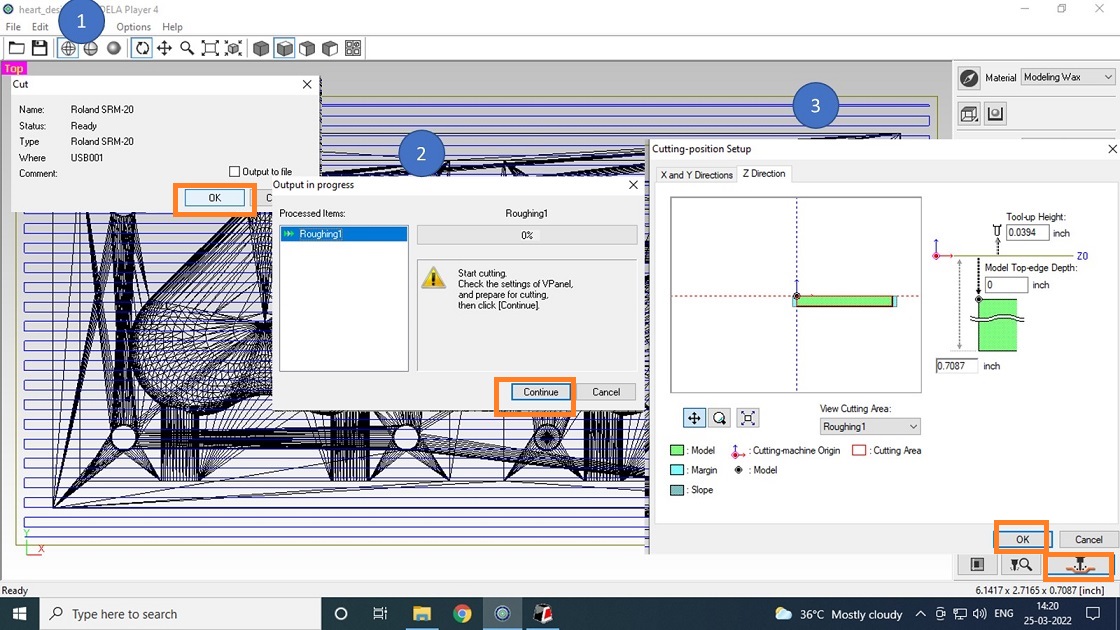
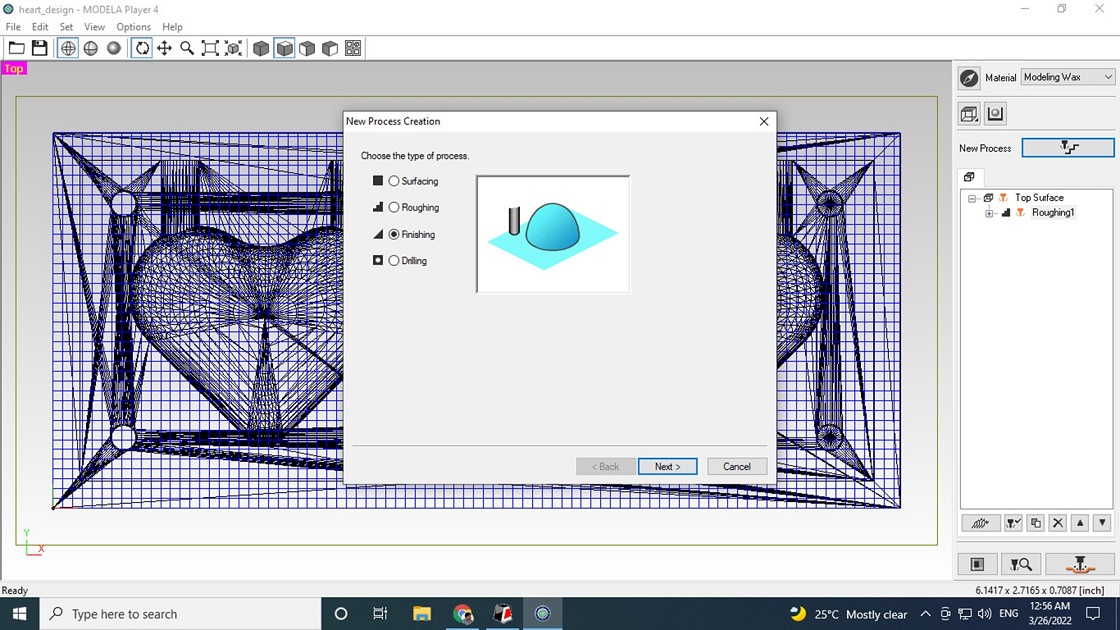
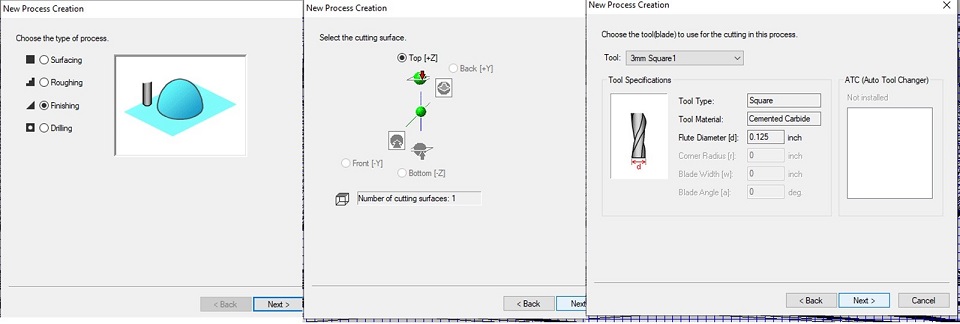
After the roughing operation, to finish the part left by the rough cut, finishing operation is done.
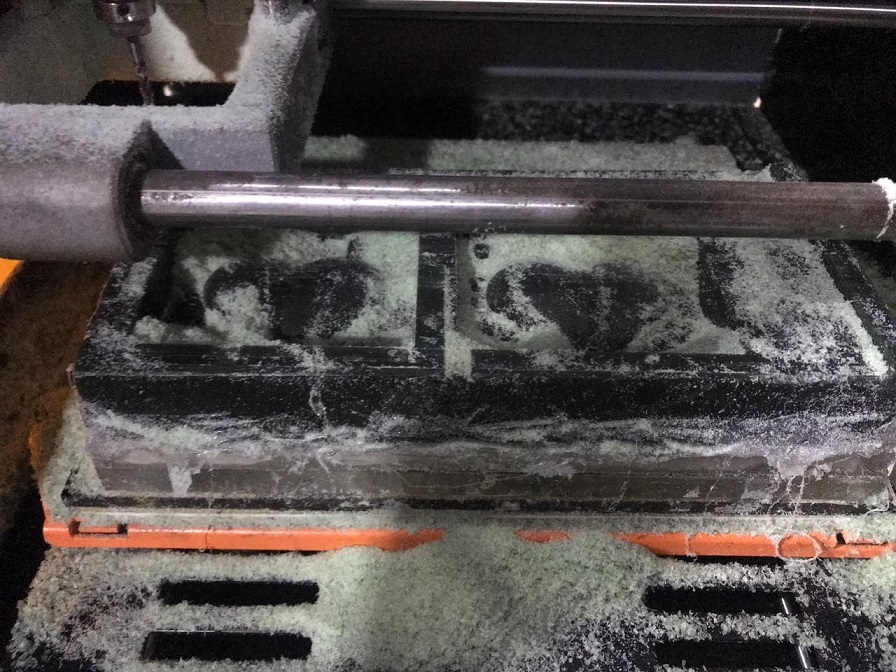
Positive mold machined using Roland machine shown below.
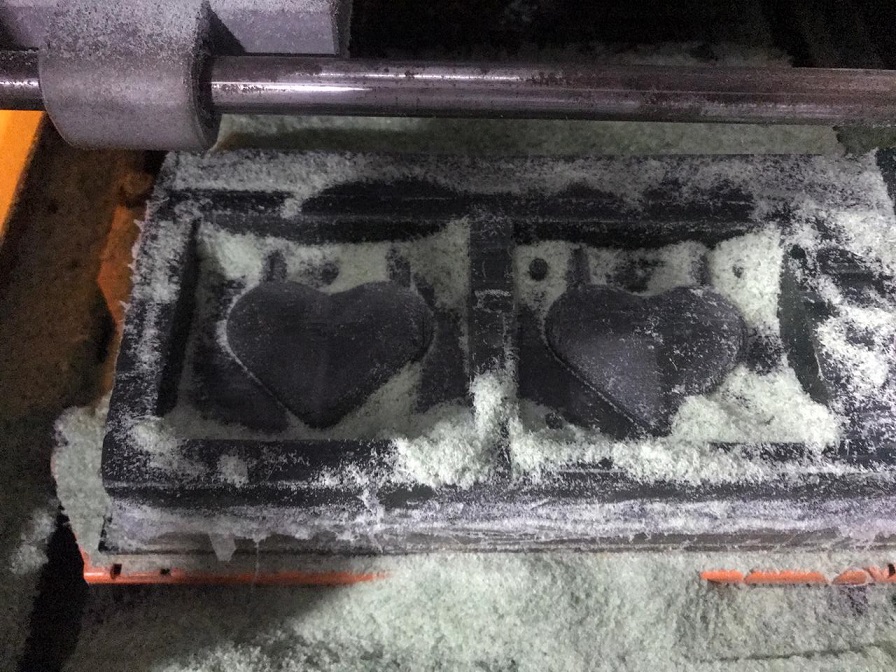
Machining operation video.
Part 3: Mold Making
I have used liquid silicon rubber, which we used to create mold from wax and its hardener. Using SolidWorks software, I have calculated volume, and by multiplying density, the total mass is calculated. I have calculated volume using solidworks software.
Calculations are done to find the exact weight of hardener and the silicon shown below.
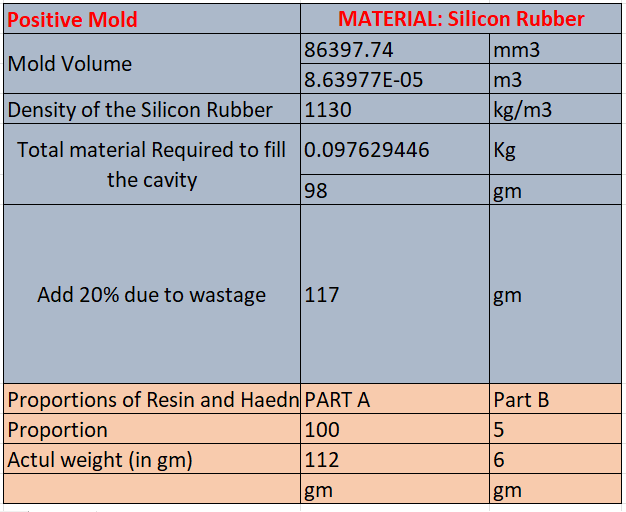
Here we use Silicon rubber to fill the cavity, which requires two materials, Material A -Silicon
rubber and Material B hardener with proportions 100:5. We need to find out the required volume of
material A and Material B according to these proportions. This mass of part A = total mass of cavity
* 100/(100+5) and mass of part B = Total Mass of material required to fill the cavity * 5/(100+5).
We will get the mass of both the parts using this method. Then I took part A and Part B using a
weighing scale with proper safety precautions and stirred it for 5 minutes as per the standard
datasheet.
Before pouring the material into the cavity, the mold is cleaned with a vacuum cleaner. The inner
parts are polished with vaseline to avoid the adhesion of the material with the mold cavity and ease
removing the negative mold from the cavity.
I stirred the mixture as prescribed (so that bubbles do not form inside the liquid mixture) for 3
minutes. The mold got filled, and I waited for 24 Hrs for it to get cured properly. I allowed it to
set correctly..

Part 4: Casting of the Final Object
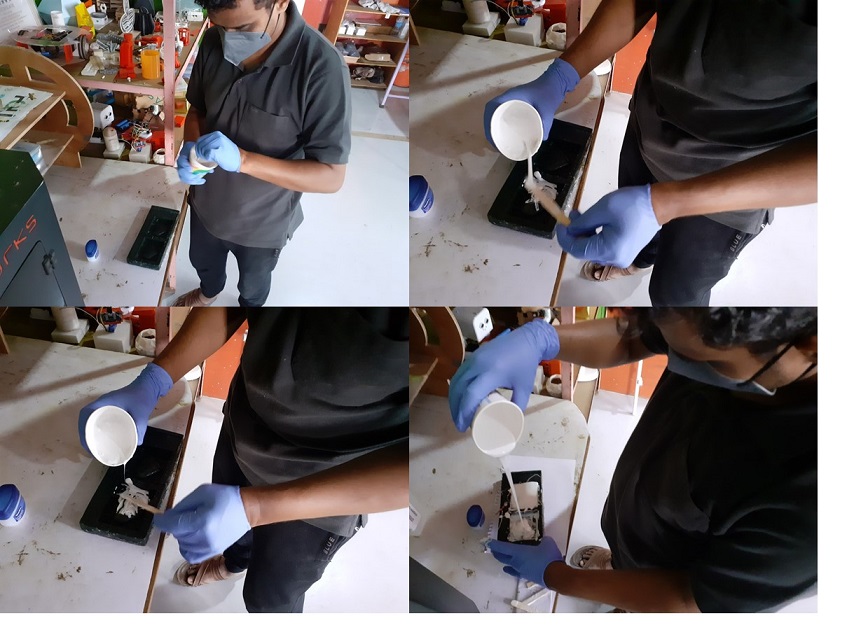
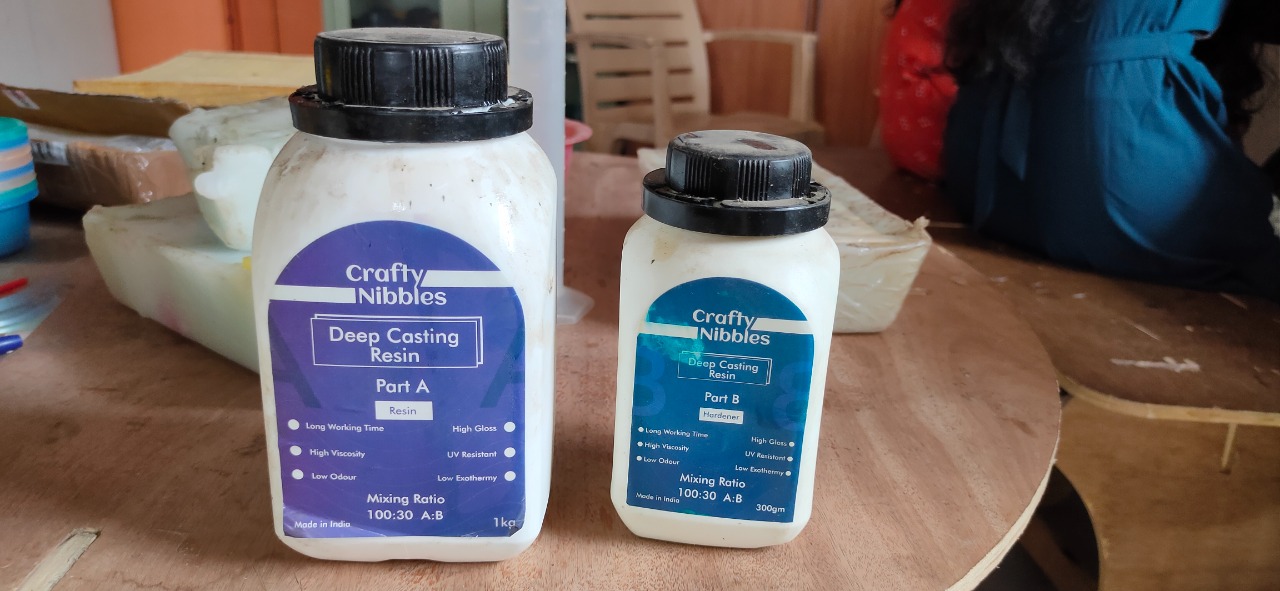
I want to make my heart model transparent to embed LED into it, so I decided to use Epoxy resin. Epoxy resin is a two-part substance for the casting of my part. It involves being mixed with a hardener to cure at room temperature.
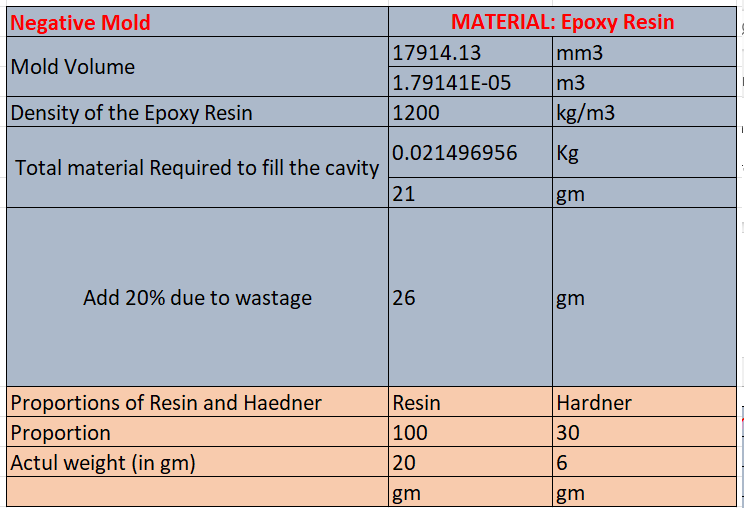
In our lab, we have Crafty Nibbles make Deep casting Resin with a Part A and part B ratio of 100:30. By calculating the volume on Solidworks and multiplying it by the material density, I have calculated the total mass and calculated mass of parts A and B.
Volume of the cavity of casting is calculated using Solidworks software.
Calculations are done to find the exact weight of hardener and the resin shown below.
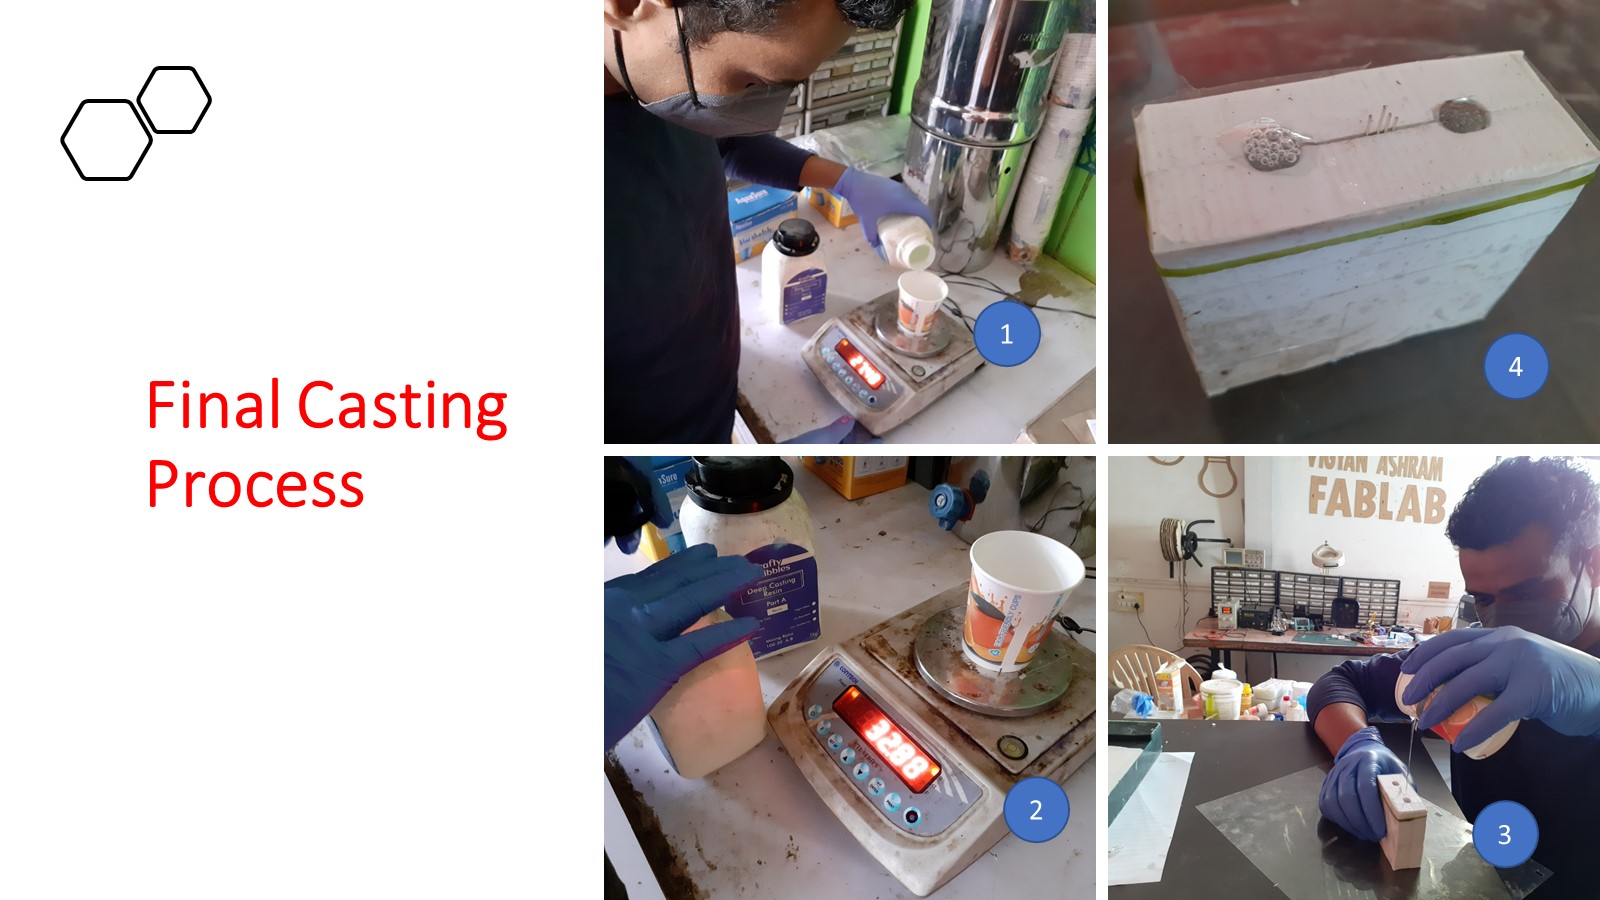
The mold got filled with epoxy resin. I waited for another 24 Hrs for it to get cured properly. I allowed it to set properly.
I have programmed RGB led with Arduino Uno. I want to make LED should glow like a heartbeat. I tried hard but failed to make it but failed. Somewhat I managed to glow LED.
Downloads
Program files