9. Embedded Programming
# Goal:
Program the designed PCB using FabTiny ISP and IDE programs.
# Tasks:
1- Read the Datasheet of ATtiny44.
2- Program the PCB using Arduino IDE software.
3- Program the PCB using PlatformIO IDE platform.
# Procedures:
I manufacuted a programmer called FabTinyISP in the Electronics production week and an ATtiny44 echo board with a button and an LED in the Electronics Design week. I was able to program the ATtiny 44 echo board using the FabTinyISP, a ribbon cable, and Arduino IDE software. In this week, I read the datasheet of the ATtiny44 microcontroller. Engineer Hashim gave us a workshop about programming using C++ language in Arduino IDE software. Then, I used three different tools that depend on the C++ programming language to program the board. These tools are Arduino IDE software, ArduBlock, and PlatformIO IDE.
a. Datasheet Summary for ATtiny44:
ATtiny44 is a low-power 8-bit AVR microcontroller RISC-based. It has twelve main parts: 4k bytes ISP Flash Memory, 256 bytes EEPROM memory, 256 bytes SRAM memory, 32 working registers connected to an Arithmetic Logic Unit (ALU), 12 digital input and output (I/O) lines, a single 8-bit timer connected to two pulse-width modulation (PWM) channels, a single 16-bit timer connected to two PWM channels, interrupt unit, a 10-bit analog-to-digital converters with eight channels, a programmable gain stage, a watchdog timer with internal oscillator, and internal calibrated oscillator. This microcontroller has four software-selectable power-saving modes: Idle mode, ADC Noise Reduction mode, Power-down mode, and Standby mode. Also, this microcontroller can operate at 1.8 to 5.5 V at a speed of 20 MHz.

b. Coding using Arduino IDE software:
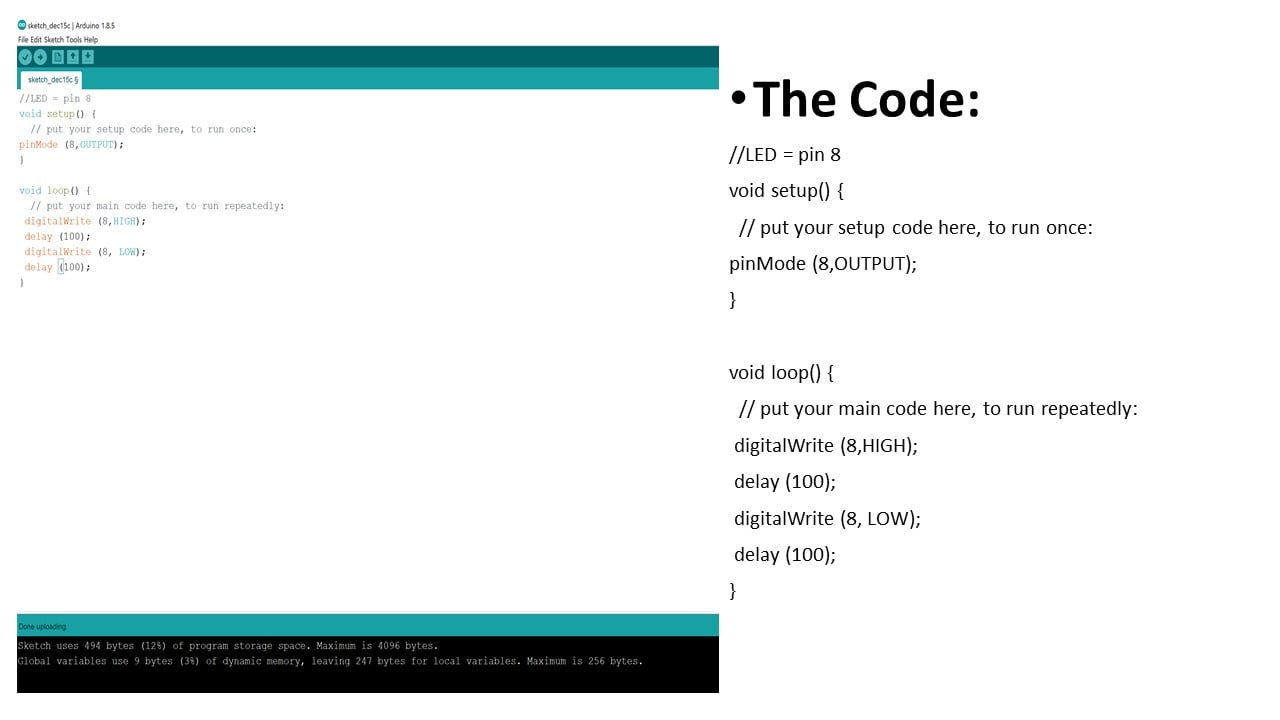
After I connected the FabtinyISP and the ATtiny44 echo board in the electronics production week, I used the Arduino IDE software to write a code to control my echo board. Arduino IDE software is open-source software to write, compile and upload C and C++ languages codes in the majority of Arduino Modules. The Arduino IDE code has two main parts: void setup and void loop. The void setup code will be run once only at the start of the program, while the void loop code will run repeatedly.
To control the green LED in the echo board, I stated the LED pin number 8, as shown in the ATtiny44 pinout, as an output using the "pinMode" function in the void setup. In the void loop, I set the digital pin 8 on and off using the "digitalWrite" function as high and low, respectively.
The video below is showing the impact of the blinking code.
c. Coding using ArduBlock:
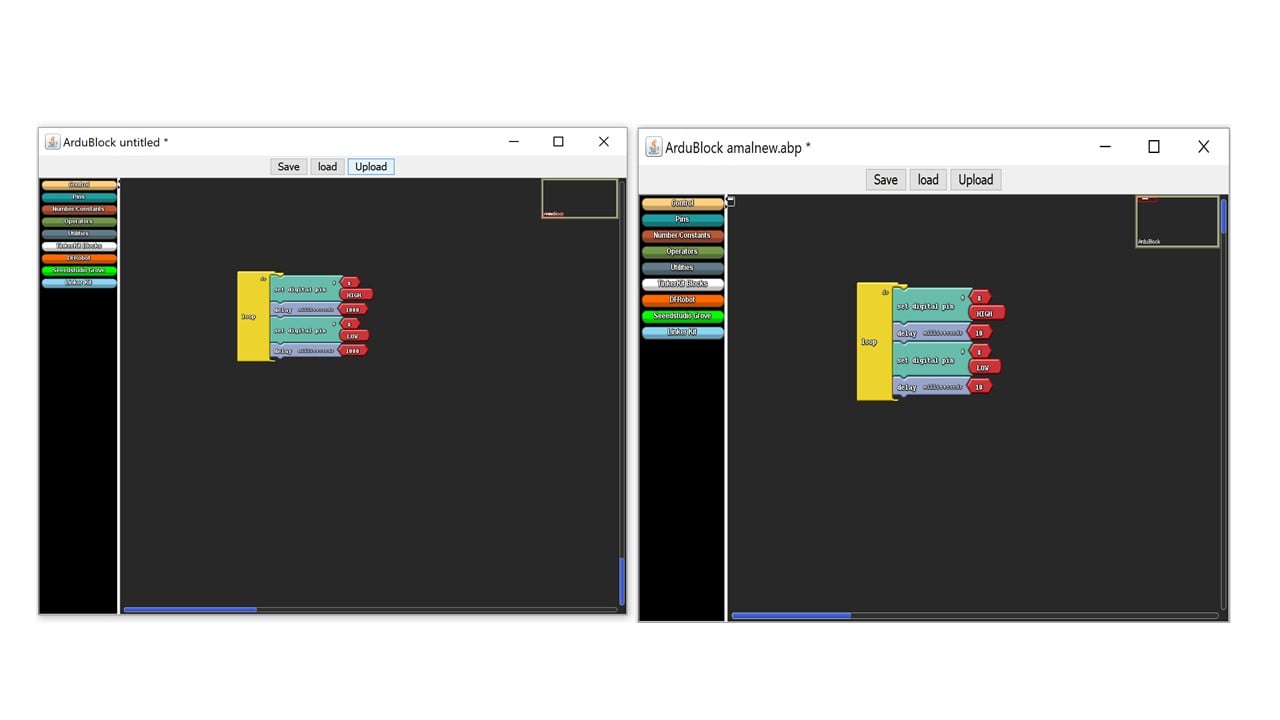
ArduBlock is a graphical programming language for Arduino, where the Arduino code is generated automatically. I downloaded and installed the "ArduBlock" using this tutorial.

Then, I followed this tutorial to control the LED using three main blacks: the "loop" block, the "set digital pin" block, and the "delay" block.
The video below is showing the impact of the blinking code.
d. Coding using PlatformIO IDE Platform:
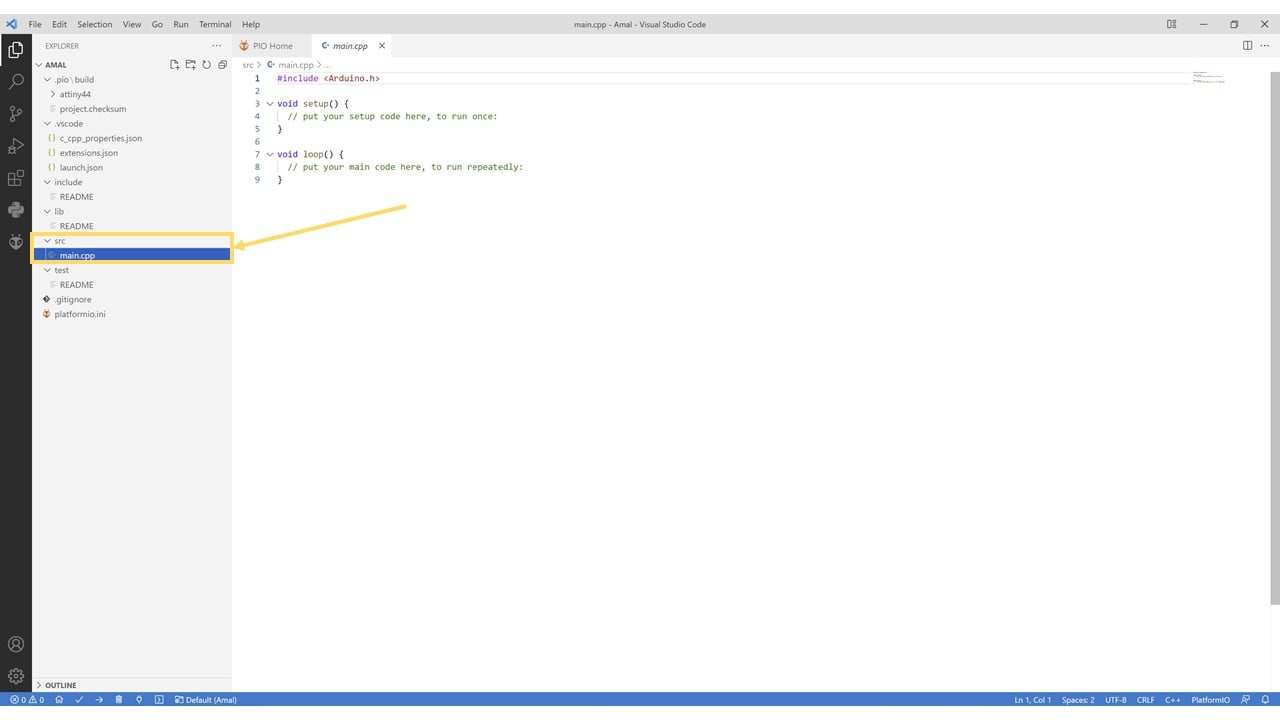
To start using the platform, I downloaded and installed the Visual Studio Code (VS Code) software which is a free open-source code editor. Then, I installed the PlatformIO extension for VS Code using this website. To create my first project, I clicked on "Projects" in the PlatformIO Home screen and "Create New Project" and selected the name, board, and the framework, as shown below.

In PlatformIO, there are various files created for a single project. The principal coding file is named "main.cpp" in a subdirectory named "src" or source. After opening the "main.cpp" file, I noticed that the code started with [#include “Arduino.h”] because of the chosen Arduino framework.
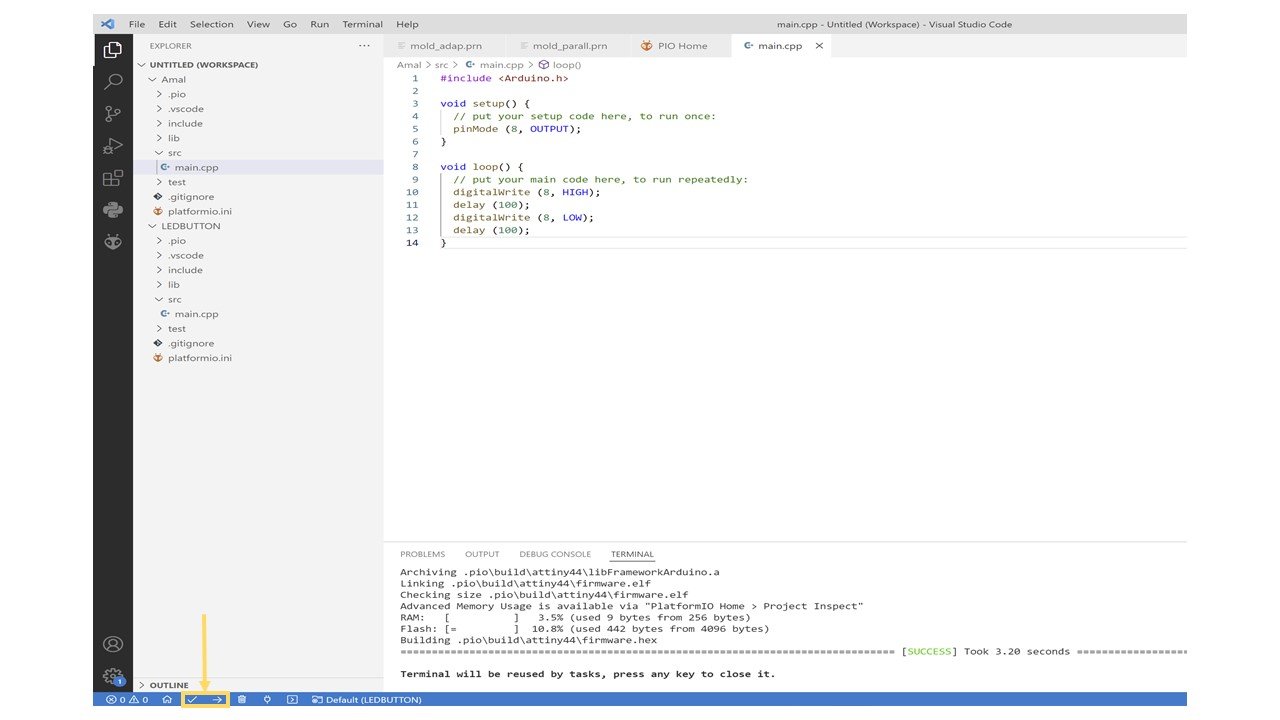
I used the same blinking code as the one in Arduino IDE software. After that, I pressed checkmark to compile the code then the arrow to upload the code to the board.
The video below is showing the impact of the blinking code.
Group Assignment
The link of the group assignment page is here.
# Goal:
Compare the performance and development workflows for other architectures.
# Tasks:
Document the advantages and disadvantages of Arduino IDE software, ArduBlock Tool, and PlatformIO IDE platform.
# Procedures:
I used three different tools that depend on the C++ programming language to program the board, as shown in the assignment page. These tools are Arduino IDE software, ArduBlock, and PlatformIO IDE, where their advantages and disadvantages stated in the table below.
| Software | Advantages | Disadvantages |
|---|---|---|
| Arduino IDE | 1. It is an open-source and cross-platform IDE. 2. Have a huge community and tutorials to learn from. 3. Easy to install and use. |
1. Doesn't include a debugger. |
| ArduBlock | 1. Easy to install and use. 2. No previous knowledge in coding needed. 3. Recommended to use by beginners. |
1. Doesn’t covers all the libraries in Arduino IDE. 2. Only used as a part of Arduino IDE. |
| PlatformIO IDE | 1. It is an open-source and cross-platform IDE. 2. Use different programming languages including java and C. 3. Has a huge community and tutorials to learn from. 4. Contains a serial monitor and a debugging channel. |
1. More Complex than Arduino IDE. |
# Challenges:
I did face a challenge during programming since the concept of programming a board and the used softwares were new to me.