Compare as many tool options as possible.....
Group Assignment 2022 (Raffaele Alone)
I am going to comment on something else about what I have been working on throughout this week. To begin with, the main works have been elaborated on the communication of the esp32 via bluetooth and via wifi.
Among the advantages of connecting a smartphone via bluetooth to a microprocessor we have:
- Security: The Bluetooth connection can be established securely without interference from unrecognized devices by entering an identification number for the connection. The user of the master device, the one who initiates the connection, can choose to enter a PIN code to create a secure use link.
- Control: Unless the device is already paired with your computer, you have the option to accept or reject the connection and file transfer. This prevents unnecessary or infected files from unknown users from being transferred to your device.
- Free access: Having access to a Bluetooth device does not cost any money; all you need is Bluetooth capability.
- Speed: Bluetooth has a negative point in terms of the speed of file transfer. Compared with the transfer speed rate of up to 4.0MBps of infrared, Bluetooth can only reach a speed of 1.0MBps, which means file transfer is slow. To transfer or share larger files over a short distance, it is better to use another type of technology, such as infrared.
- Internet: The use of Bluetooth to establish Internet connections is not recommended due to its limited transfer rate. A LAN connection is more efficient
Among the advantages and disadvantages of connecting a smartphone via Wi-Fi to a microprocessor we have:
- Wireless connectivity: we have the possibility of not wiring anything, and having a fairly acceptable speed
- Cero cables: There is no wiring as in the wifi solution
- Being able to connect anywhere: we can connect anywhere in the world, if the router has not fallen!
- Connection failure: how many times have we reacted to a bad data signal? it is not stable
- Ease of hacking of securities
- Fewer battery issues: We're also going to have more power issues. At the end of the day, a device connected by Wi-Fi is going to consume more resources, something that can be negative if we have a battery.
When I will make my lamp, I will do it with a bluetooth connection, I think it is the safest and most suitable for a lamp!
This week after having made an application for my smartphone, I have applied its functionality with my plate made in the previous weeks.
The process of designing and projecting the application has been very interesting. The work of MIT in this sense is commendable, the process is very friendly and functional.
Anyway, to complete the unit I'm going to post some connection examples between the Inventor app and the ESP32.
The name Bluetooth apart from communications technology has a very funny meaning. The technology is actually named after a Danish king who, long ago, worked to bring groups of people together, which is what Bluetooth does, interconnect different devices. The King's real name was "Harald", but he had a nickname that translates to "Bluetooth": no one knows for sure why he had this nickname, but one thought he had a dark tooth that may have appeared black or blue. And that is certainly an obscure way of choosing a name for new technologies!
Bluetooth establishes a very low power, short range (up to 10 meters) communications link between two devices. Bluetooth uses the same frequency band (2.4 Ghz) as Wi-Fi, but uses a different technology. Both Bluetooth and Wi-Fi use forms of spread spectrum radio links that result in signals moving within a wide band in ways that allow the spectrum to be shared by multiple devices. But the two technologies serve different purposes, are not identical, and cannot communicate with each other.

As we have already said on the individual page, for the arduino code to be able to interpret the signals in script form coming from the app, we need to include specific libraries, we can use the BluetoothSerial.zip library, if you want to download it you can do it by clicking here.
To be clearer, we are going to directly communicate the serial monitor with the inventor app. Unlike the individual practice where an application already created has been used to do a messaging service, in this case everything will be more direct, understanding what the basic elements of a bluethoot connection are.
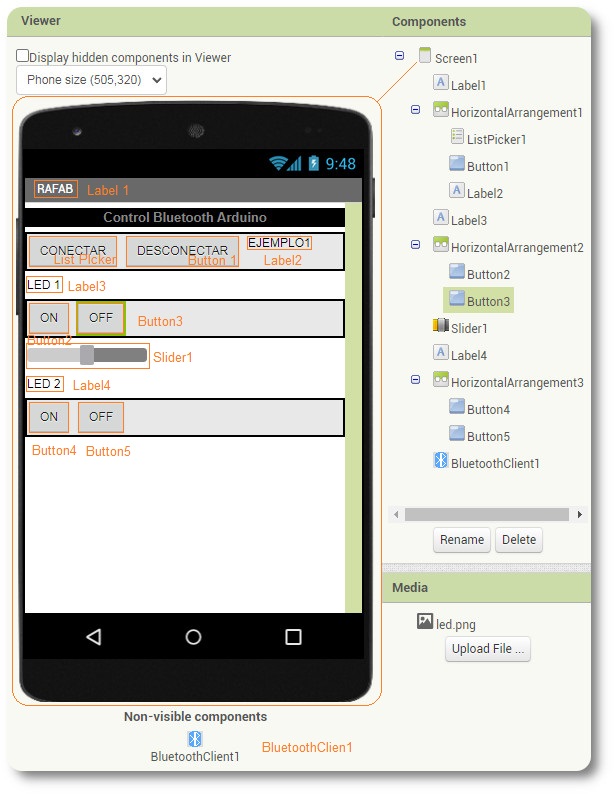
In App Inventor, we create an app with the following buttons
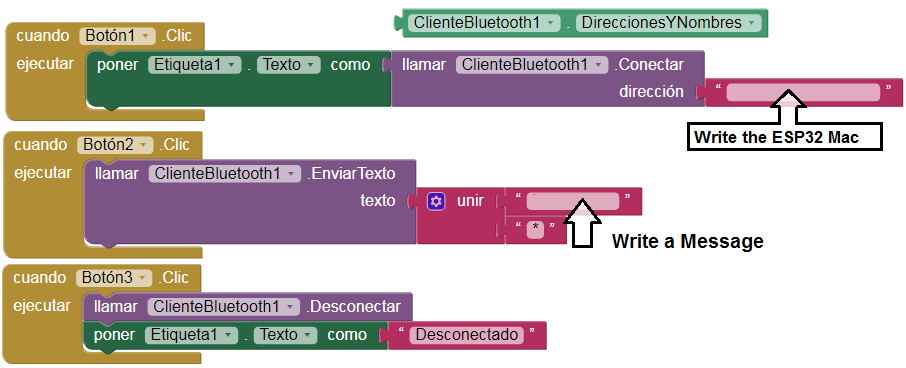
Ok, now we are going to write the code for Arduino
- BluetoothSerial SerialBT;
- char caracter;
- String palabra;
- void setup(){
- SerialBT.begin("ESP32test");
- Serial.begin(115200);
- }
- void loop(){
- if(SerialBT.available()) {
- caracter = SerialBT.read();
- palabra = palabra + caracter;
- if(caracter == '*') {
- palabra = palabra.substring(0, palabra.length() - 1);
- Serial.println(palabra);
- palabra = "";
- }
- delay(100);
- }
- }
With this code we will have a direct relationship between the monitor and the app created with Inventor!!!
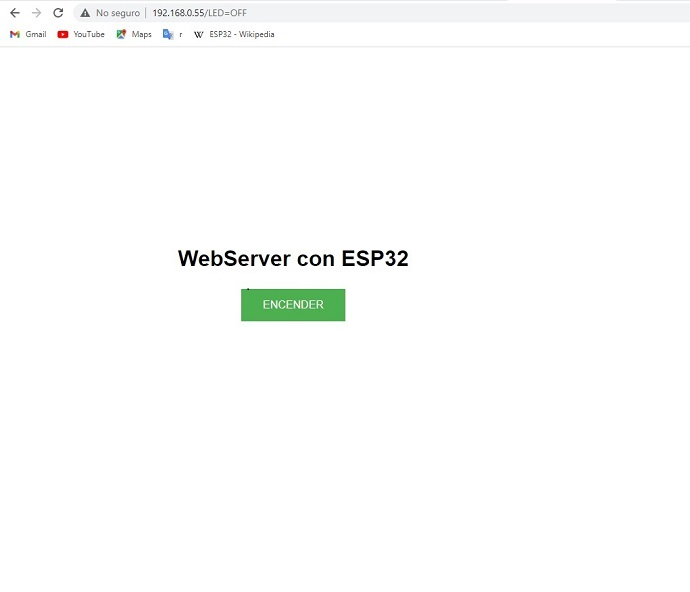
To perform the test between the serial monitor and the inventor app, we write a number and send it to a web page and to the inventor APP application.
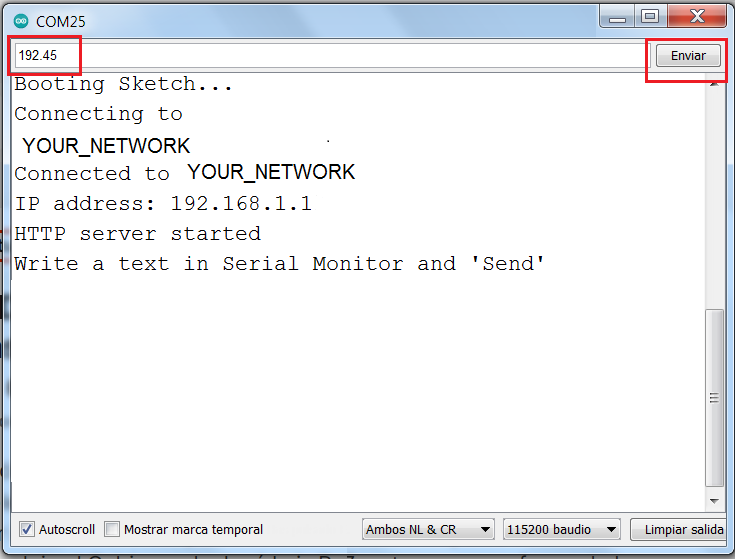
Ok, now we are going to write the code for Arduino
- #include <WiFi.h>
- #include <WiFiClient.h>
- #include <WebServer.h>
- #include "index.h"
- WebServer server(80);
- //Enter your SSID and PASSWORD
- const char* ssid = "YOUR_NETWORK";
- const char* password = "YOUR_PASSWORD";
- char caracter = '0';
- String texto = "";
- String texto_send = "";
- void handleRoot() {
- String s = MAIN_page;
- server.send(200, "text/html", s);
- }
- void handleADC() {
- String adcValue = texto_send;
- server.send(200, "text/plane", adcValue);
- }
- void setup(void){
- Serial.begin(115200);
- Serial.println();
- Serial.println("Booting Sketch...");
- WiFi.mode(WIFI_STA);
- WiFi.begin(ssid, password);
- Serial.println("Connecting to ");
- Serial.print(ssid);
- while(WiFi.waitForConnectResult() != WL_CONNECTED){
- Serial.print(".");
- }
- Serial.println("");
- Serial.print("Connected to ");
- Serial.println(ssid);
- Serial.print("IP address: ");
- Serial.println(WiFi.localIP());
- server.on("/", handleRoot);
- server.on("/readADC", handleADC);
- server.begin();
- Serial.println("HTTP server started");
- }
- void loop(void){
- server.handleClient();
- if (Serial.available() > 0) {
- caracter = Serial.read();
- texto += caracter;
- if (caracter == '\n') {
- texto_send = texto;
- Serial.println("Write a text in Serial Monitor and 'Send'");
- Serial.print(texto);
- texto = "";
- }
- }
- }
in app inventor, we have to create an application with the following codes
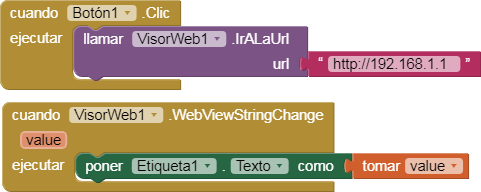
The result will appear in the application
