3D scanning and printing
Design and 3D print an object (small, few cm3, limited by printer time) that could not
be easily made subtractively
3D scan an object, try to prepare it for printing (and optionally print it)
Group
assignment:
Group Assignment
Here you can find the
group assignment.
3D scanning
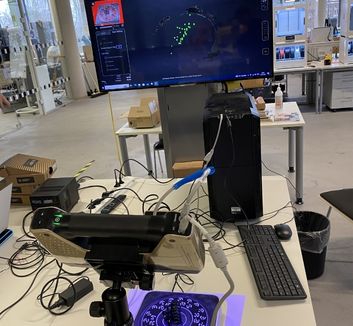
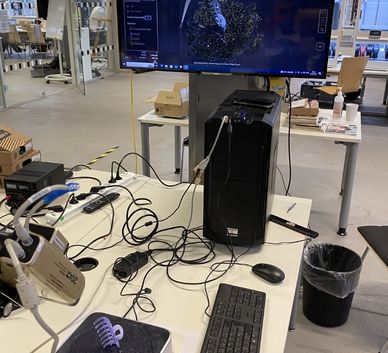
Setup
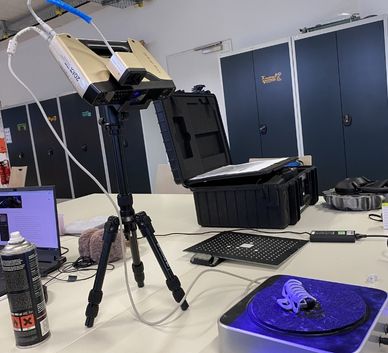
- Prepare the EinScanPro+: Mount it to the tripod (if you are doing a fixed scan and not a handheld one) and connect it to the PC. Other details are found in the manual
- We also set up the camera to the scanner, to capture the texture of the scanned object
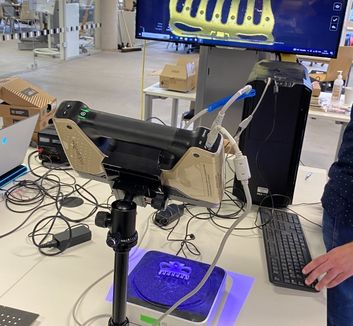 My instructor Ahmed helped me set up the scanner along with the
software. We are using the EinScanPro+ and its' respective software
My instructor Ahmed helped me set up the scanner along with the
software. We are using the EinScanPro+ and its' respective software 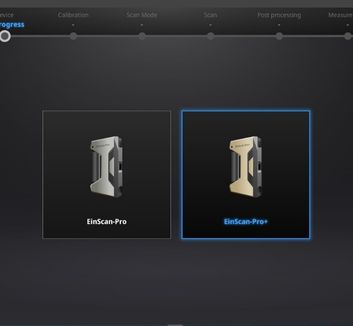 Select EinScanPro+
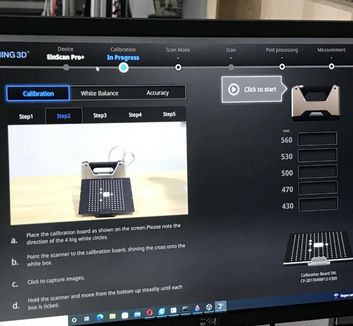 Follow the steps on the screen to calibrate the scanner
 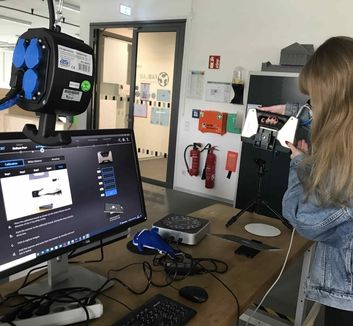 This has to be done after every new set-up
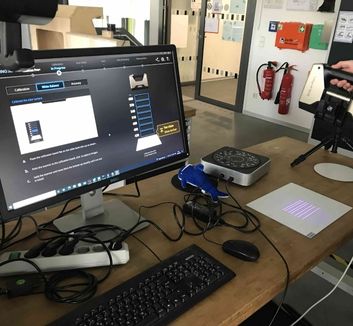 White balance as well. Put the scannerback on the tripod after you are
done
White balance as well. Put the scannerback on the tripod after you are
done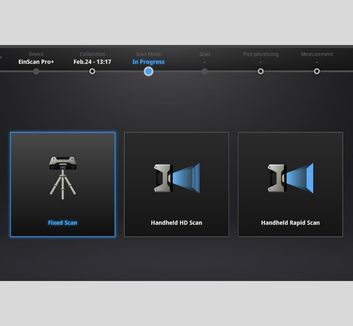 Select Fixed Scan (if you are scanning with the tripod)
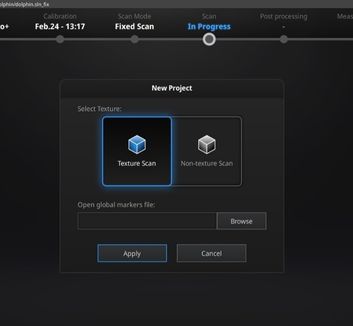 Select Texture Scan or Non-Texture Scan depending on if you need the
color of the object
Select Texture Scan or Non-Texture Scan depending on if you need the
color of the object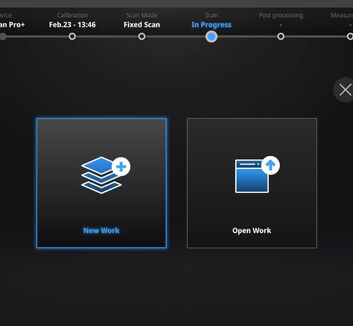 Select New Work
Settings
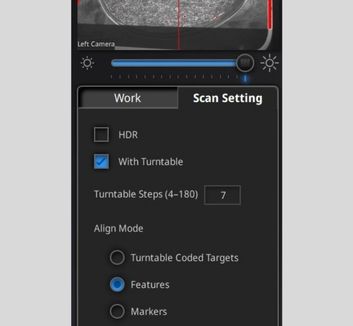
After putting the scanner back on the tripod, you now can start scanning your desired object. In my first attempt, I want to scan my hairclip, so I can alter the basic model to design my own version of it. Now it's important to get the settings right, there are a few options:- The very first thing to adjust is the brightness . It can be changed via the slider and changes what will be recognized by the scanner. Everything that is shown in red on the camera above will be scanned.
- HDR: The High Dynamic Range setting is used for objects with a high contrast in color (e.g. black and white). If HDR is checked, you will not be able to adjust the brightness by yourself, the program will do it for you so that all the bright and dark spots are scanned in the first go.
- "With Turntable" activates the turntable when checked, so that a fixed scan is possible and the model gets rotated on the turntable.
- The turntable steps determine in how many steps the turntable will rotate. During the process of scanning your object, you should at least once select an even and an odd number, to scan the object from every angle.
- The Align Modes: There are 3 different Align Modes to work with: Turntable Coded Targets, Features and Markers.
- Turntable Coded Targets uses the coded white targets on the turntable as markers for the orientation off the object. While using this mode, you cannot change the position of the object you want to scan.
- But after a few scans you can change to Features: Features does not use any premade markers, it detects features of the to-be-scanned object by itself.
- Markers recognizes little Marker stickers you can put on your object. (But I discourage from using it. At the place of the markers, holes will be left behind in the model , Marker Stickers also fall off easily.)
Scanning
In my first attempt I tried to scan the hairclip with Turntable Coded Targets and self adjusted the brightness.
 I put the hairclip on the turntable. It's black and reflective.
 We tried scanning it as it is with turntable coded targets, but the
scanner didnt pick it up.
We tried scanning it as it is with turntable coded targets, but the
scanner didnt pick it up.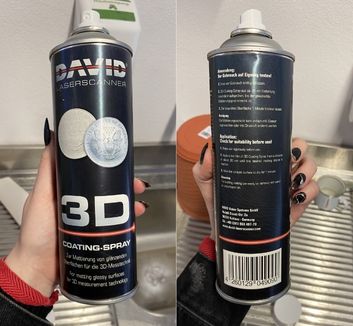 Therefore we sprayed it with coating-spray.
 Now scanning
again:
Now scanning
again: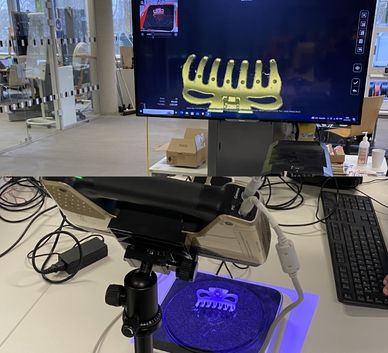 The first results are looking very good.
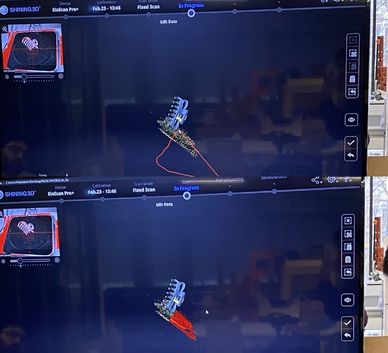 After every scan, you have to edit your data e.g. "cut" off the parts
that you don't want to keep. Press Shift+ Hold Left Mouse Button and circle the
unwanted areas. Press del/entf to remove it.
After every scan, you have to edit your data e.g. "cut" off the parts
that you don't want to keep. Press Shift+ Hold Left Mouse Button and circle the
unwanted areas. Press del/entf to remove it.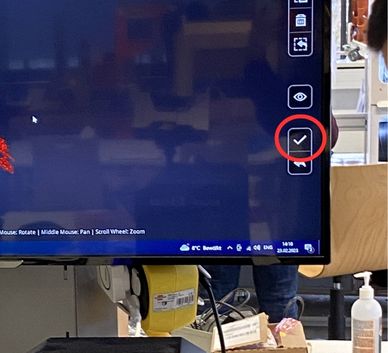 Press Apply when you are happy, and the current point cloud will be
added to the previous scans. The software detects the features of the scan an
automatically aligns it with any previous scans.
Press Apply when you are happy, and the current point cloud will be
added to the previous scans. The software detects the features of the scan an
automatically aligns it with any previous scans.We did a lot of scans. Features was the most used method. We variied between even and odd turntable steps and changed the position/rotation of the hairclip to scan every angle of it.
 Standing up.
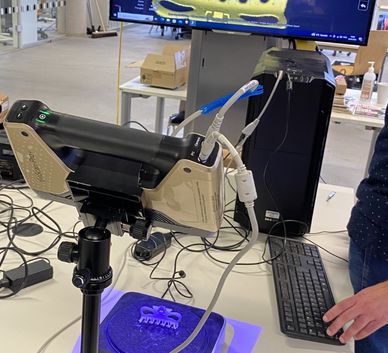 Facing up.
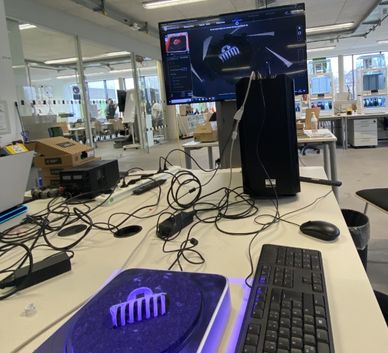 Facing down.
Once you are happy with the point cloud and every area seems to have been scanned, you can mesh your model:
- When meshing, choose Watertight model (this will make sure,that you don't have holes in the surface of your model.)
- I also chose High detail (Produces the highest resolution, but also the biggest file, choose what's best for you. You can always remesh it later e.g. in Blender.)
- If needed, you can make any last adjustments fter meshing. I didn't have to. So I saved.
- The program also shows you the dimensions of your model. It is very accurate to the dimension of my real hairclip.
I scanned all parts of my hairclip individually to get one model for every part.
Therefore I repeated the steps described above for the other side of the clip and for the
spring.
While the other side of the clip worked wonderfully just like the one before, the spring made
problems. It is very featureless and has no indicator which could show the program: "This is up,
and this is down" since it's very symmetrical.
Even though it is the much less complex object, it made the most problems. I had to scan it
from various angles to get the missing parts:
I helped myself with some coins to vary the angle just slightly.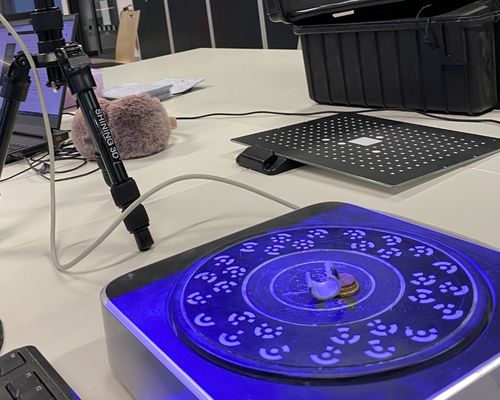
In the end, I managed to scan all parts successfully.
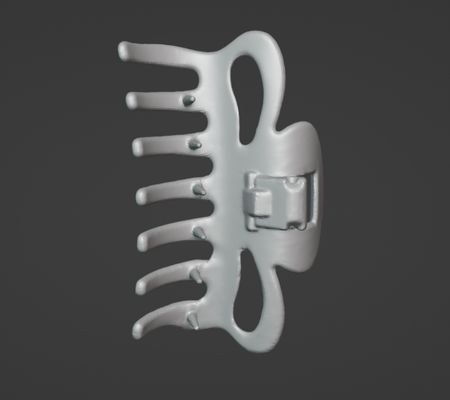 Left clip
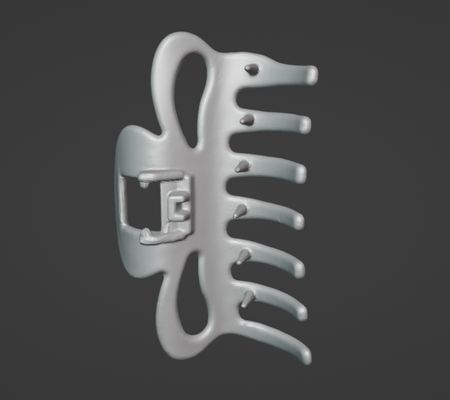 Right clip
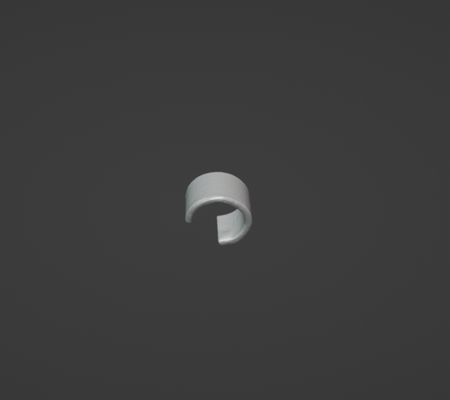 Spring
All parts together in Blender:
Editing in Blender
I want to create a butterfly hairclip. Now with the base model scanned, I will add the butterfly
part with Blender.
Tutorials I watched during the process:
Artistic trees in Blender |
Quad Remesh
Preparing the basic model
Steps: (Read from left to right)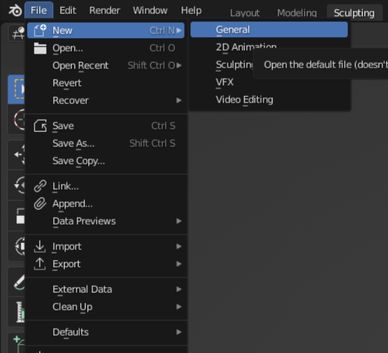 Open a new file in Blender.
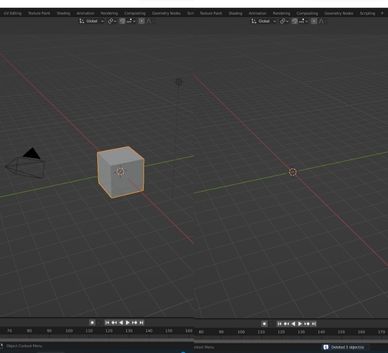 Remove everything in the scene: Select + del
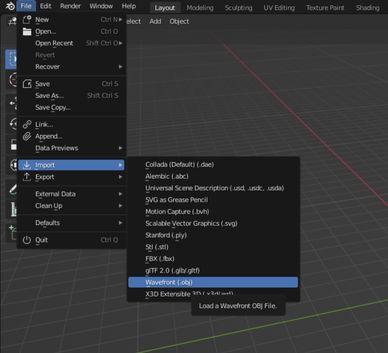 Import files as .obj
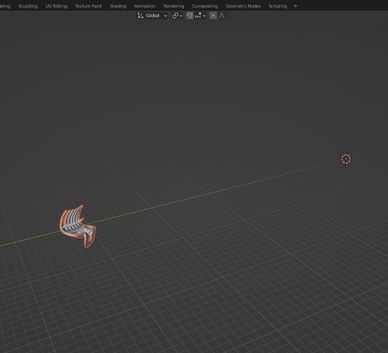 Very far from origin.
 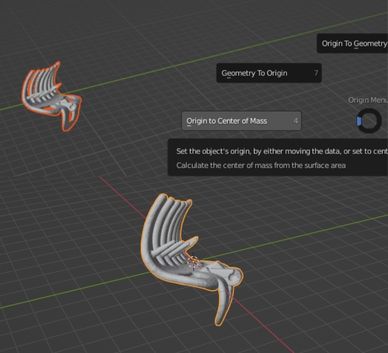 To fix this, select object in object mode and: Ctrl+Alt+X -> Origin to Center
of Mass | Then: Shift+S -> Selection to Cursor
To fix this, select object in object mode and: Ctrl+Alt+X -> Origin to Center
of Mass | Then: Shift+S -> Selection to Cursor This centers it.
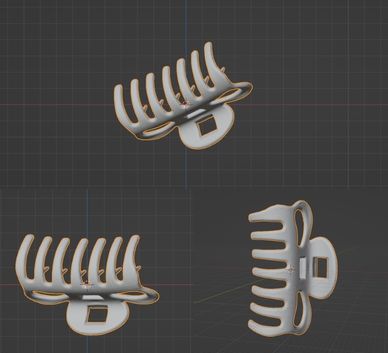 Use the 1 on numpad to go into frontal view and press R to
rotate and align your model with the x, y and z axes.
Use the rest of the numpad to change your perspective and use R until ready.
Use the 1 on numpad to go into frontal view and press R to
rotate and align your model with the x, y and z axes.
Use the rest of the numpad to change your perspective and use R until ready.
Other movement controls: G -> Grab & Move | Ctrl+M followed by X,Y or Z to mirror | S -> Scale
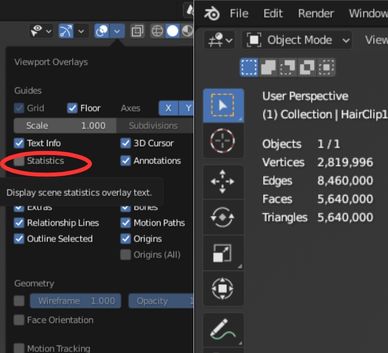 Activate the statistics overlay to see the amount of triangles your
object has. Since I saved my 3d scan model in high resolution, it has way too many
triangles. I need to remesh it.
Activate the statistics overlay to see the amount of triangles your
object has. Since I saved my 3d scan model in high resolution, it has way too many
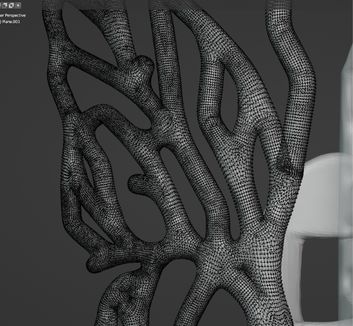
triangles. I need to remesh it.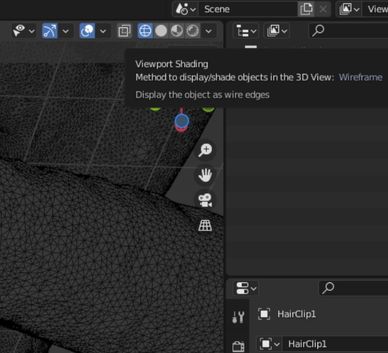 Activate the Wireframe Shading option to get a look at how dense your
triangle mesh is. Mine is very dense.
Activate the Wireframe Shading option to get a look at how dense your
triangle mesh is. Mine is very dense.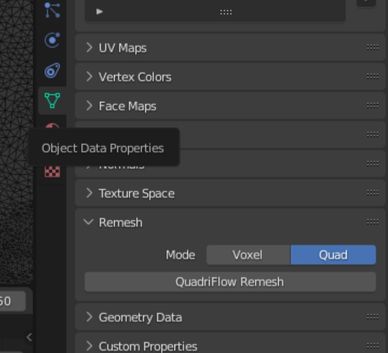 In the lower right, select Object Data Property and open the remesh
option dropdown.
Change from Voxel to Quad. Click on Quadiflow Remesh.
In the lower right, select Object Data Property and open the remesh
option dropdown.
Change from Voxel to Quad. Click on Quadiflow Remesh.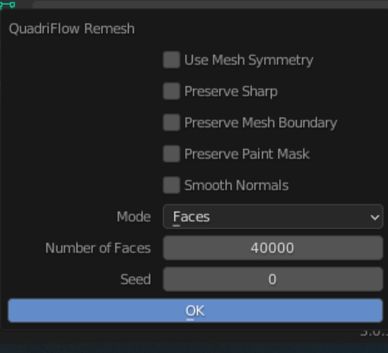 Uncheck all the checkmarks (unless you have a symmetric model and want
this to be considered). Choose a reasonable number of faces. And click OK.
Uncheck all the checkmarks (unless you have a symmetric model and want
this to be considered). Choose a reasonable number of faces. And click OK.
 This might take several minutes to compute.
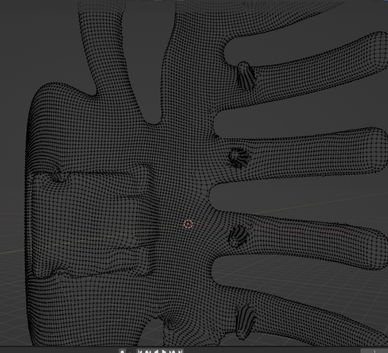 The resulting mesh has a
lot less triangles and reduces the file size drastically.
The resulting mesh has a
lot less triangles and reduces the file size drastically.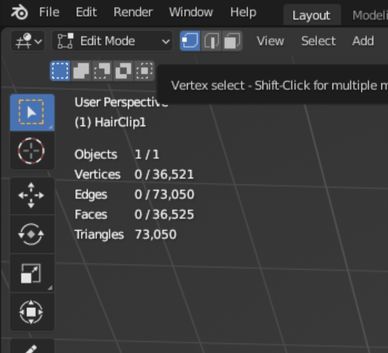 Now go into Edit
Mode and make sure Vertices is selected.
Now go into Edit
Mode and make sure Vertices is selected.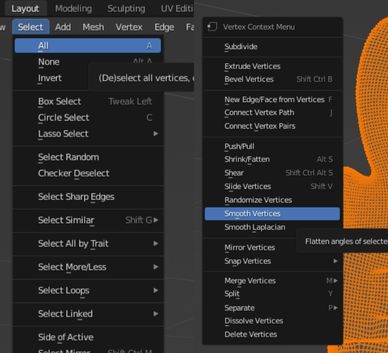 Make sure all vertices
are selected. Then Right click and "Smooth Vertices" . Shift+R ->
repeats the last action. Do this until you are happy with your mesh.
Make sure all vertices
are selected. Then Right click and "Smooth Vertices" . Shift+R ->
repeats the last action. Do this until you are happy with your mesh.
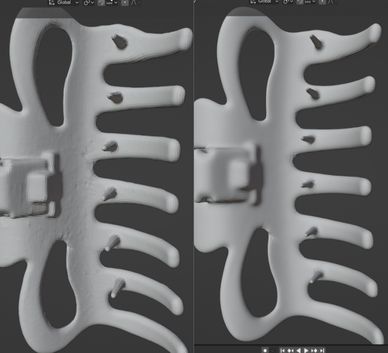 Before and after.
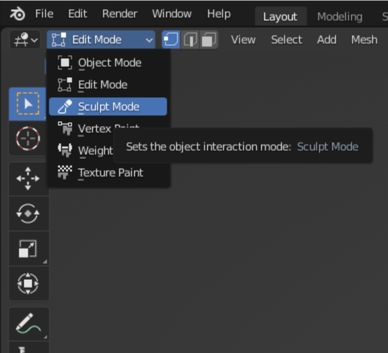 Now you can go into
Sculpt Mode
Now you can go into
Sculpt Mode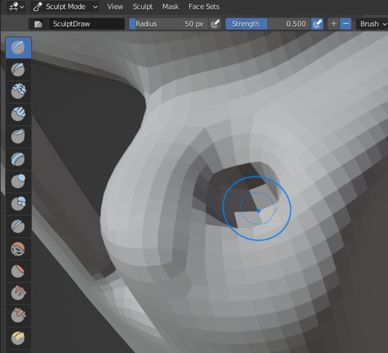 Make any adjustments you need. e.g smooth certain areas more or create
harder edges again.
For example: I used Draw (negative) to make to holes here deeper again.
Make any adjustments you need. e.g smooth certain areas more or create
harder edges again.
For example: I used Draw (negative) to make to holes here deeper again.Creating the butterfly
Inspo: (Picture from SHEIN website)

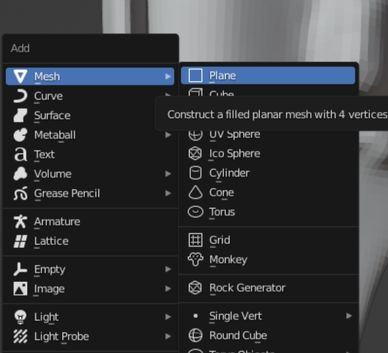 Go back into Object Mode. Then Shift + A and choose a Plane to
add.
Go back into Object Mode. Then Shift + A and choose a Plane to
add.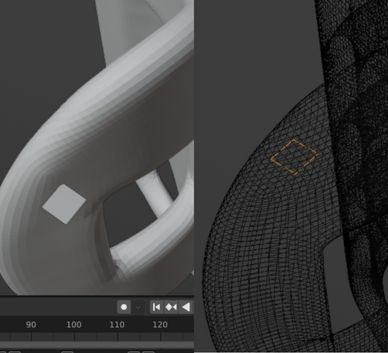 Select it and press G to move it where you want it to be. (You
can also move it later aain, if you dont know yet.)
Select it and press G to move it where you want it to be. (You
can also move it later aain, if you dont know yet.)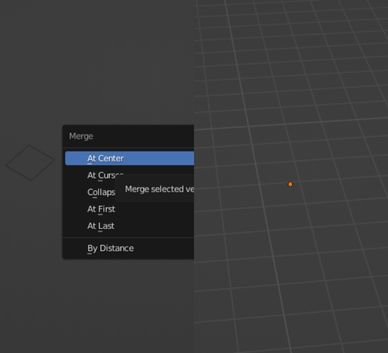 Switch to Edit Mode. Then press M and select Merge at center to
create single vertice.
Switch to Edit Mode. Then press M and select Merge at center to
create single vertice.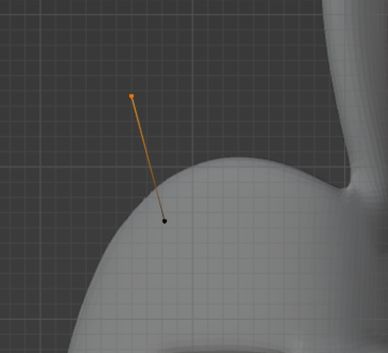 Press E to extrude the vertice
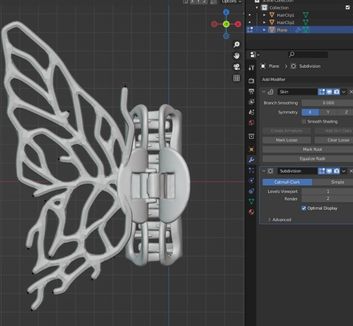
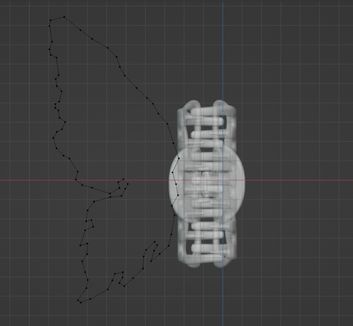 If needed, you can
make any last adjustments here. I didn't have
to.
If needed, you can
make any last adjustments here. I didn't have
to.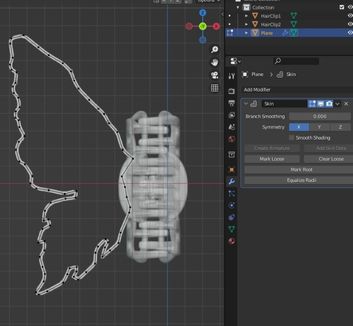 So click Save
 Here the program
shows you the dimensions of your model. It is very
accurate to the dimension of my real hairclip.
Here the program
shows you the dimensions of your model. It is very
accurate to the dimension of my real hairclip.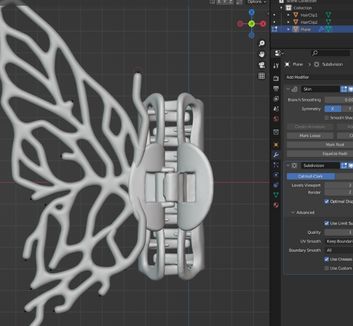 If needed, you can
make any last adjustments here. I didn't have
to.
If needed, you can
make any last adjustments here. I didn't have
to.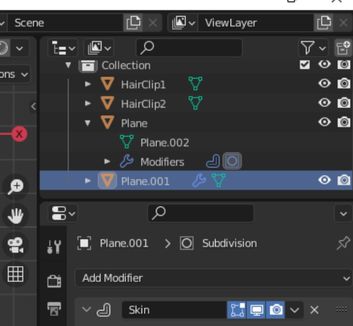 So click Save
 Here the program
shows you the dimensions of your model. It is very
accurate to the dimension of my real hairclip.
Here the program
shows you the dimensions of your model. It is very
accurate to the dimension of my real hairclip.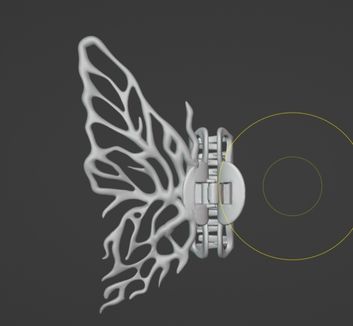 Here the program
shows you the dimensions of your model. It is very
accurate to the dimension of my real hairclip.
Here the program
shows you the dimensions of your model. It is very
accurate to the dimension of my real hairclip.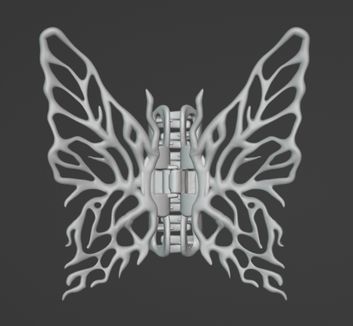 Here the program
shows you the dimensions of your model. It is very
accurate to the dimension of my real hairclip.
Here the program
shows you the dimensions of your model. It is very
accurate to the dimension of my real hairclip.3D printing
Formlabs resin printer
I want to print my butterfly hairclip with a resin printer, since the finish is a lot smoother and shinier and it's a bit faster. For this, open PreForm and prepare your resin printer.
Preparing the file
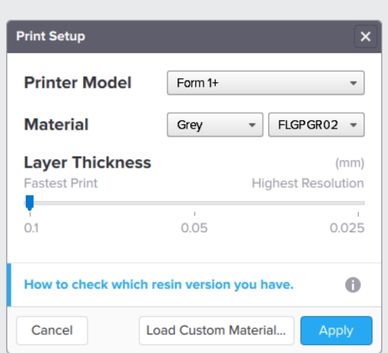 Choose yor Layer Thickness, your printer and your material
.
Choose yor Layer Thickness, your printer and your material
. This is the resin I
use.
This is the resin I
use.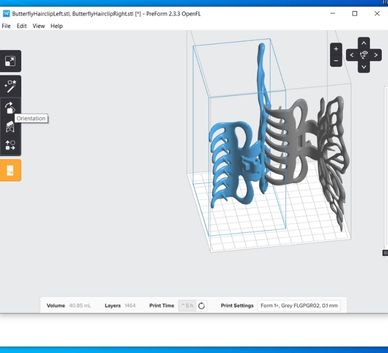 Import your 3d model into the software.
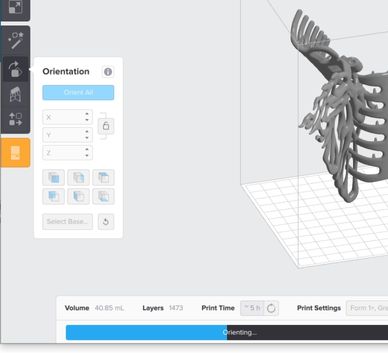 Use the Orient All feature, to align your models within the
buildvolume. Mine did not fit both, so I'm printing them seperately.
Use the Orient All feature, to align your models within the
buildvolume. Mine did not fit both, so I'm printing them seperately.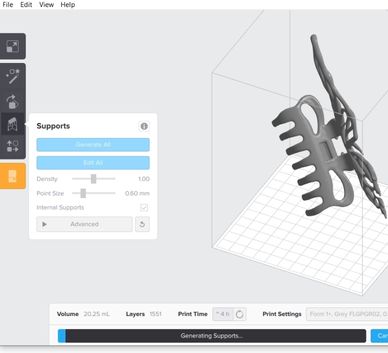 Use the Suppots
option to generate supports for the selected
model.
Use the Suppots
option to generate supports for the selected
model.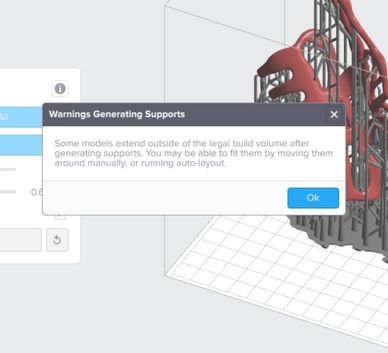 Support was generated, but some of it is outside of the
buildvolume.
Support was generated, but some of it is outside of the
buildvolume.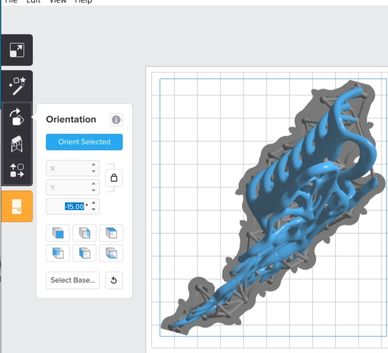 Therefore I rotate it around the Z axis.
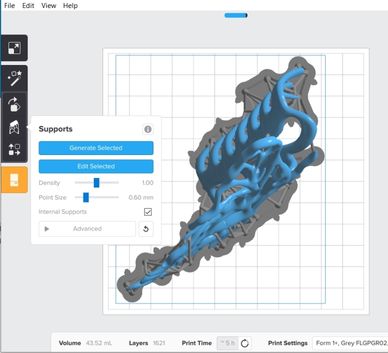 If you regenerate
the support now, everythings inside the
volume.
If you regenerate
the support now, everythings inside the
volume.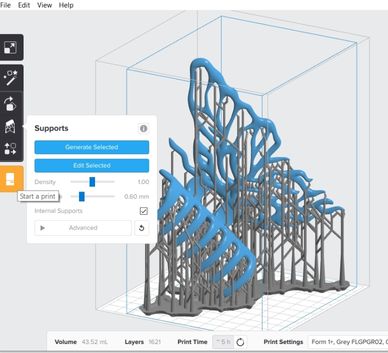 What the suport looks like. If you are happy, you can start the
print.
What the suport looks like. If you are happy, you can start the
print.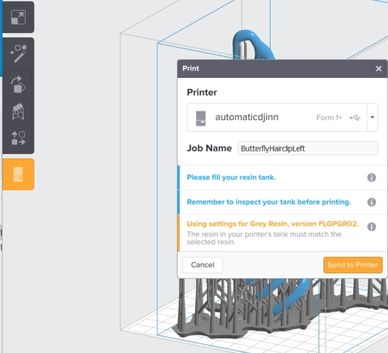 The program will ask you to check, if your resin tank is functioning
and filled. If you are sure everything is fine, you can Start the print.
The program will ask you to check, if your resin tank is functioning
and filled. If you are sure everything is fine, you can Start the print.
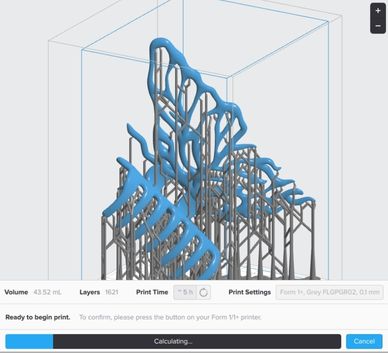 The program will
calculate a bit. Don't remove the connection from PC to printer during this
time.
The program will
calculate a bit. Don't remove the connection from PC to printer during this
time.Preparing the printer
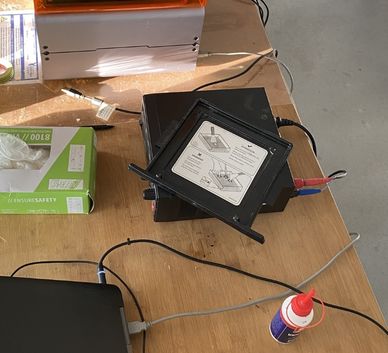 The grey cable connects PC and printer.
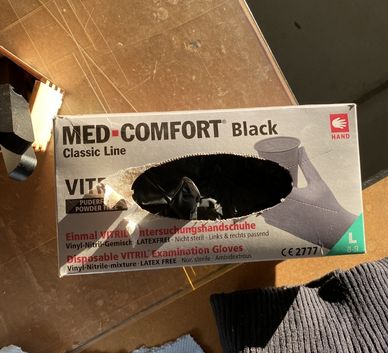 Put on gloves before you work with the printer and its' resin.
Use the Orient All feature, to align your models within the
buildvolume. Mine did not fit both, so I'm printing them seperately.Use the Suppots
option to generate supports for the selected
model.Support was generated, but some of it is outside of the
buildvolume.Therefore I rotate it around the Z axis.If you regenerate
the support now, everythings inside the
volume.What the suport looks like. If you are happy, you can start the
print.The program will ask you to check, if your resin tank is functioning
and filled. If you are sure everything is fine, you can Start the print.
The program will
calculate a bit. Don't remove the connection from PC to printer during this
time.
Put on gloves before you work with the printer and its' resin.
Use the Orient All feature, to align your models within the
buildvolume. Mine did not fit both, so I'm printing them seperately.Use the Suppots
option to generate supports for the selected
model.Support was generated, but some of it is outside of the
buildvolume.Therefore I rotate it around the Z axis.If you regenerate
the support now, everythings inside the
volume.What the suport looks like. If you are happy, you can start the
print.The program will ask you to check, if your resin tank is functioning
and filled. If you are sure everything is fine, you can Start the print.
The program will
calculate a bit. Don't remove the connection from PC to printer during this
time.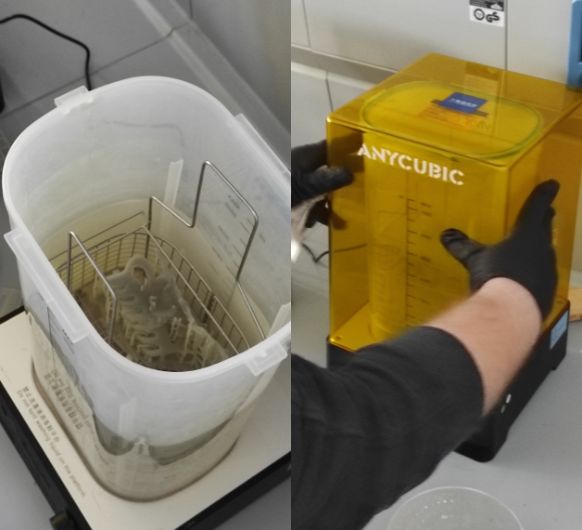 After your print
is done and removed from the build plate, you have to clean it with an ultrasonic
cleanser. This will help get rid of left over resin on your model.
After your print
is done and removed from the build plate, you have to clean it with an ultrasonic
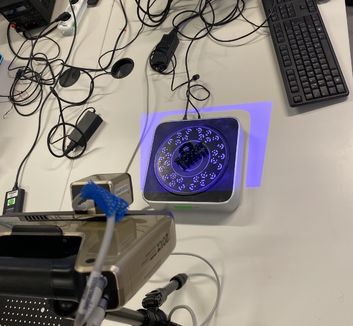
cleanser. This will help get rid of left over resin on your model.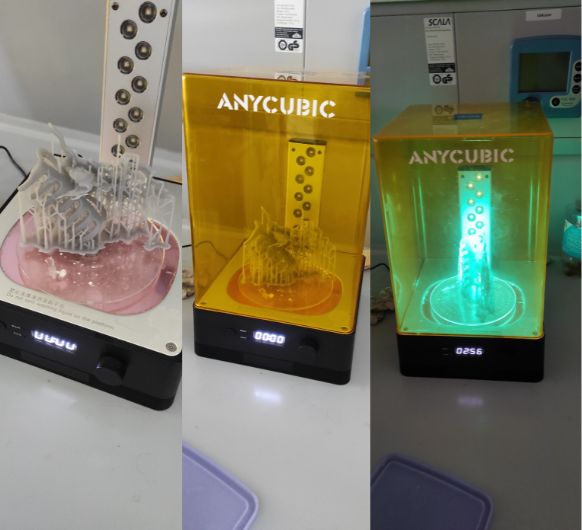 When it's clean, it's
time to let it fully harden. We have this UV lamp in the lab that helps with the
hardening.
When it's clean, it's
time to let it fully harden. We have this UV lamp in the lab that helps with the
hardening.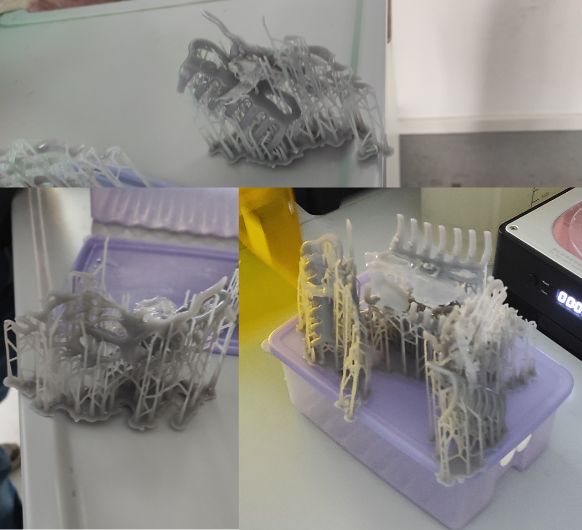 But as you can see, I did
a lot of different tries. Sadly the printers always failed. The resin printers in
the lab are older and not regularly maintained so they have a few problems.
But as you can see, I did
a lot of different tries. Sadly the printers always failed. The resin printers in
the lab are older and not regularly maintained so they have a few problems.
Ultimaker S5
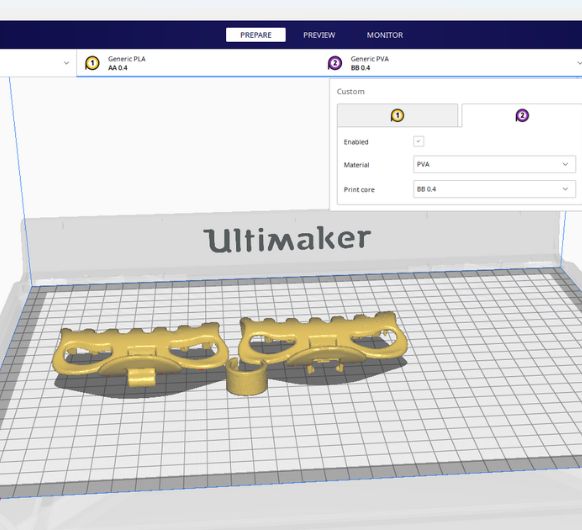 In the end I decided to
just 3D print the hairclip. I am using both extruders. One for PLA and one for PVA (support).
In the end I decided to
just 3D print the hairclip. I am using both extruders. One for PLA and one for PVA (support).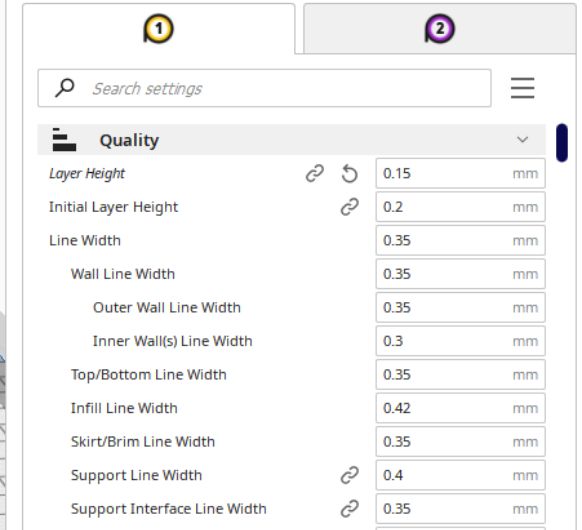 Quality settings.
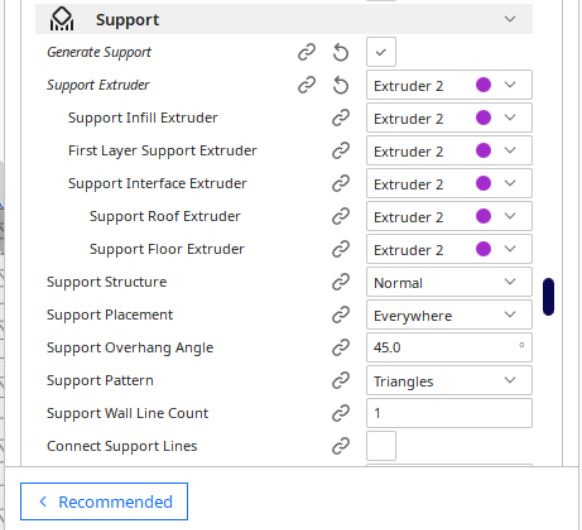 Extruder 2 doing the support.
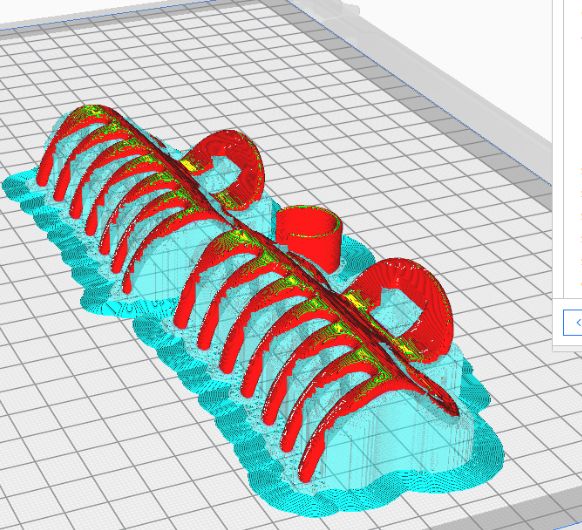 Sliced version
 Time
Time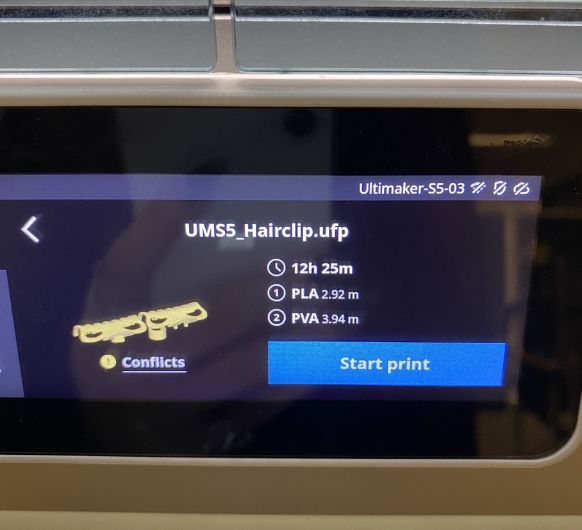 Printing. I later dissolved the PVA in water after the print was done. :)
(2022) Preparation in Blender
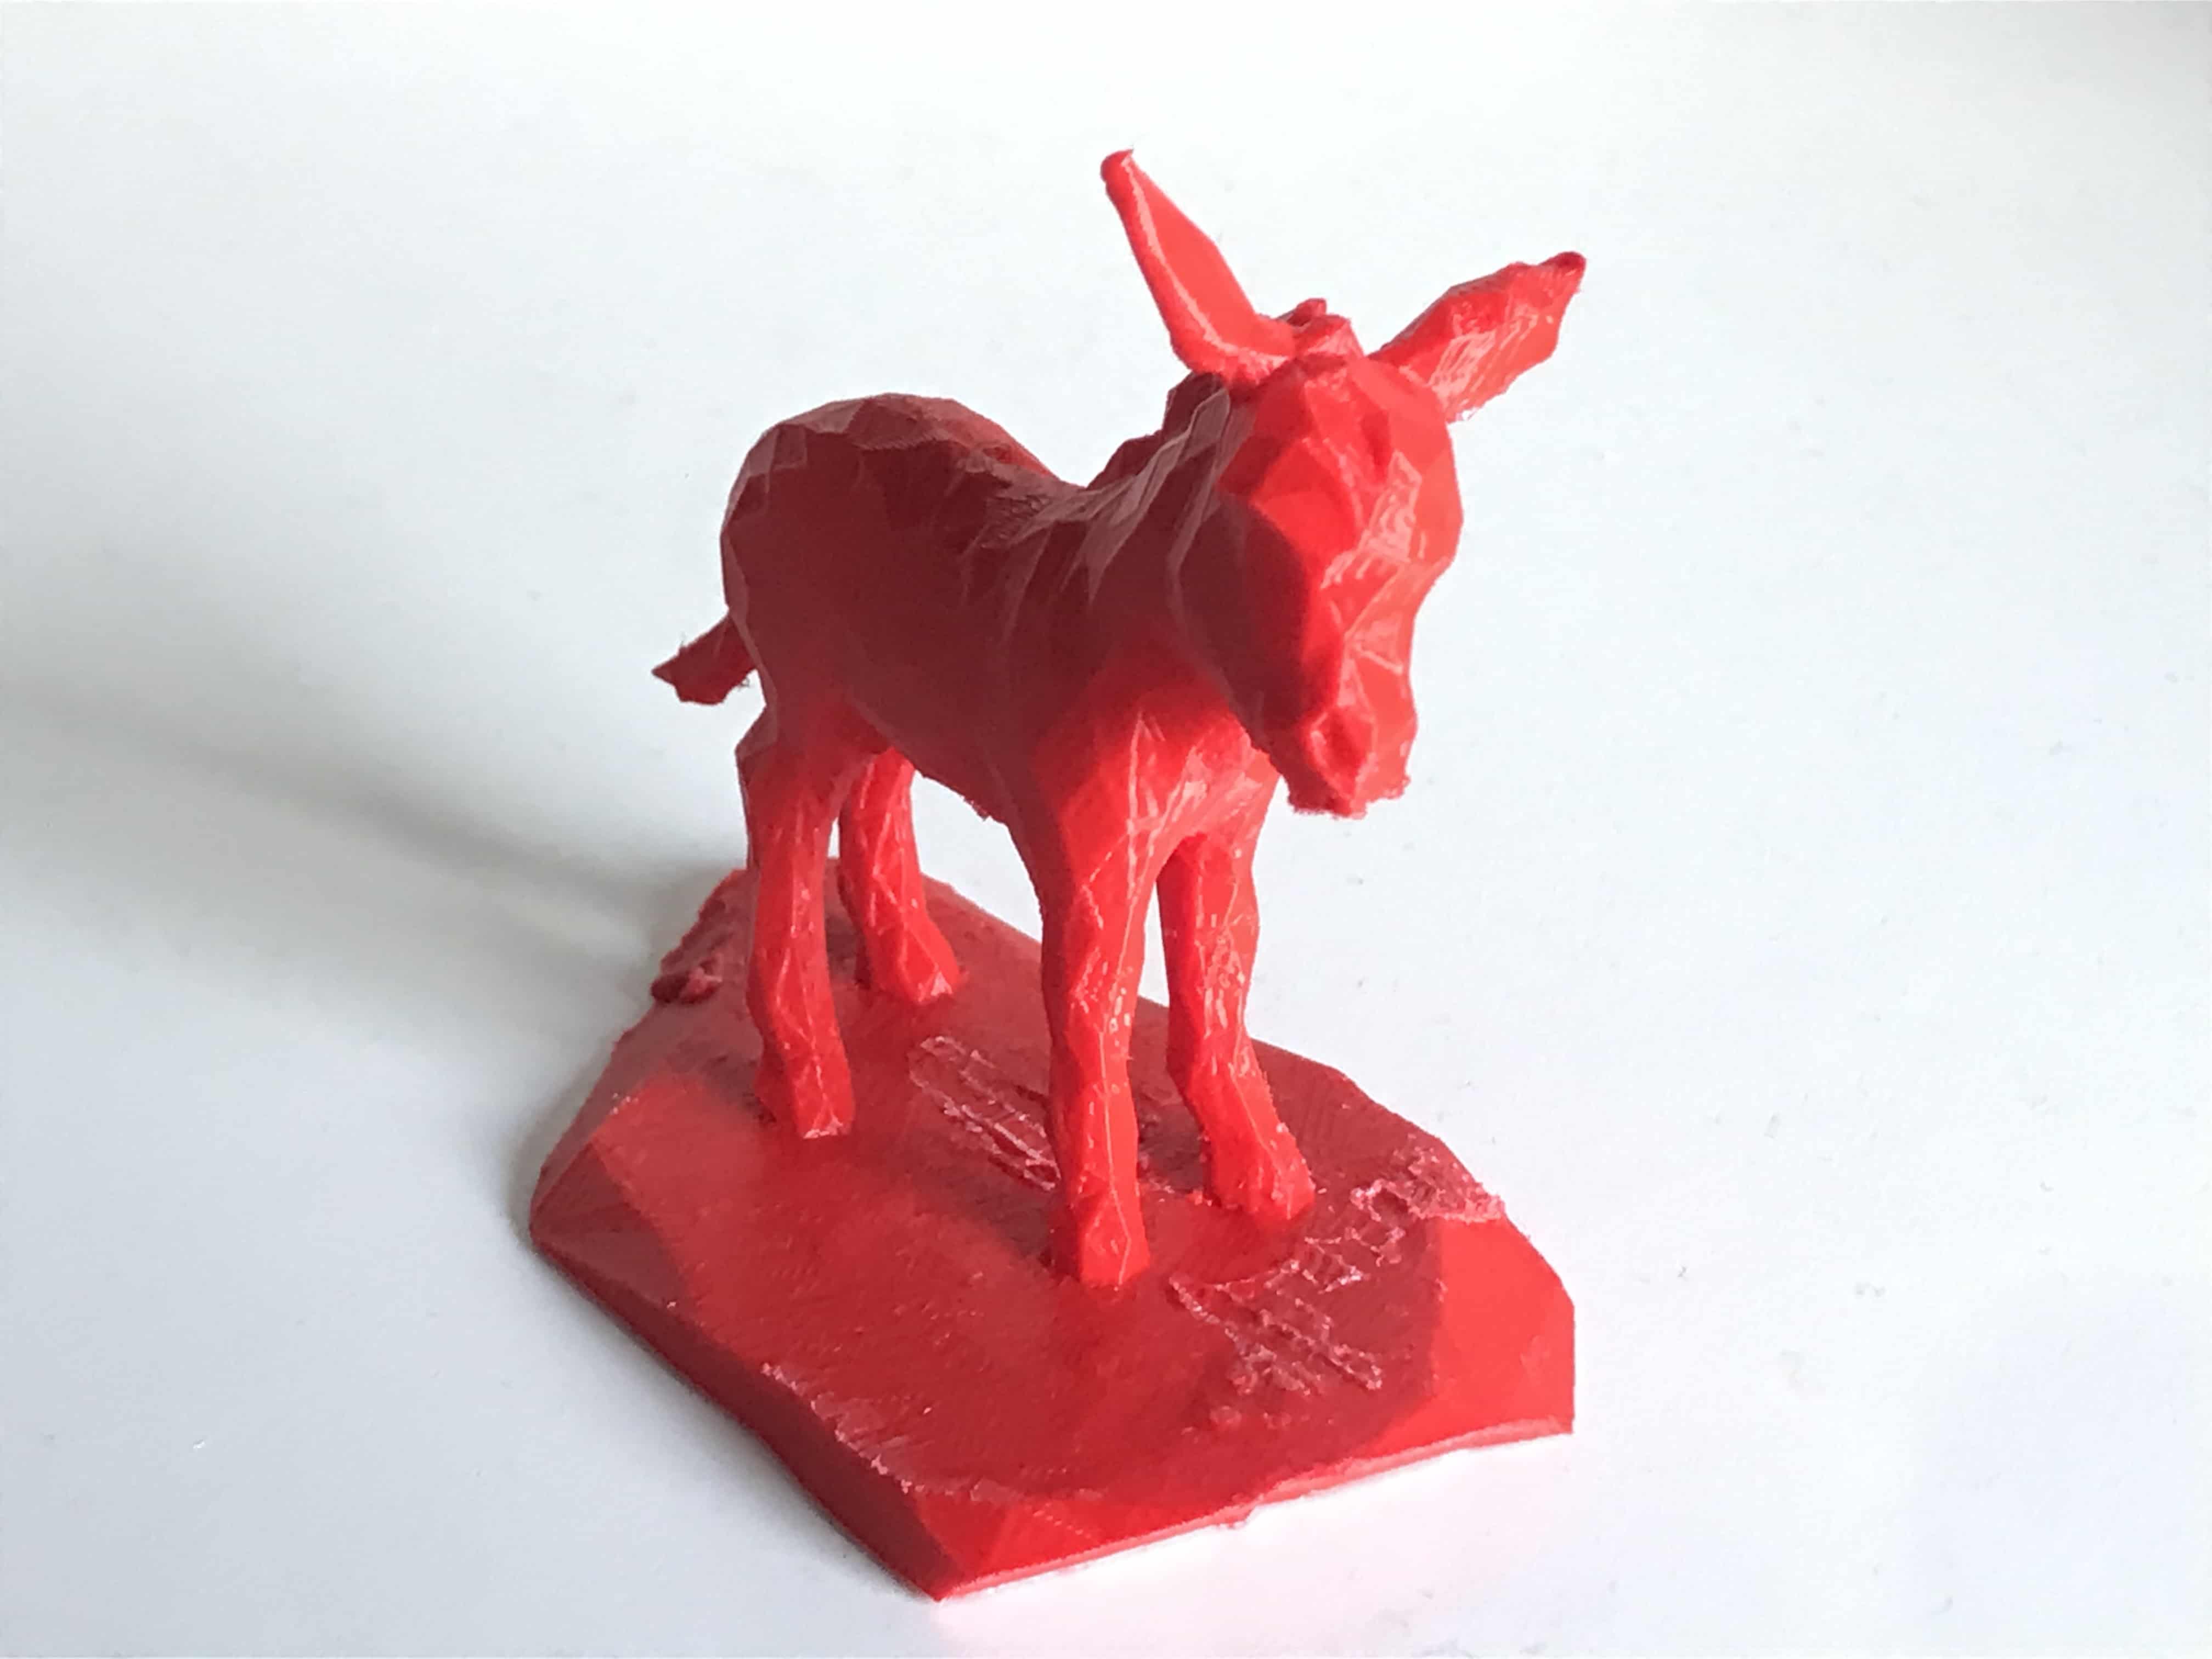
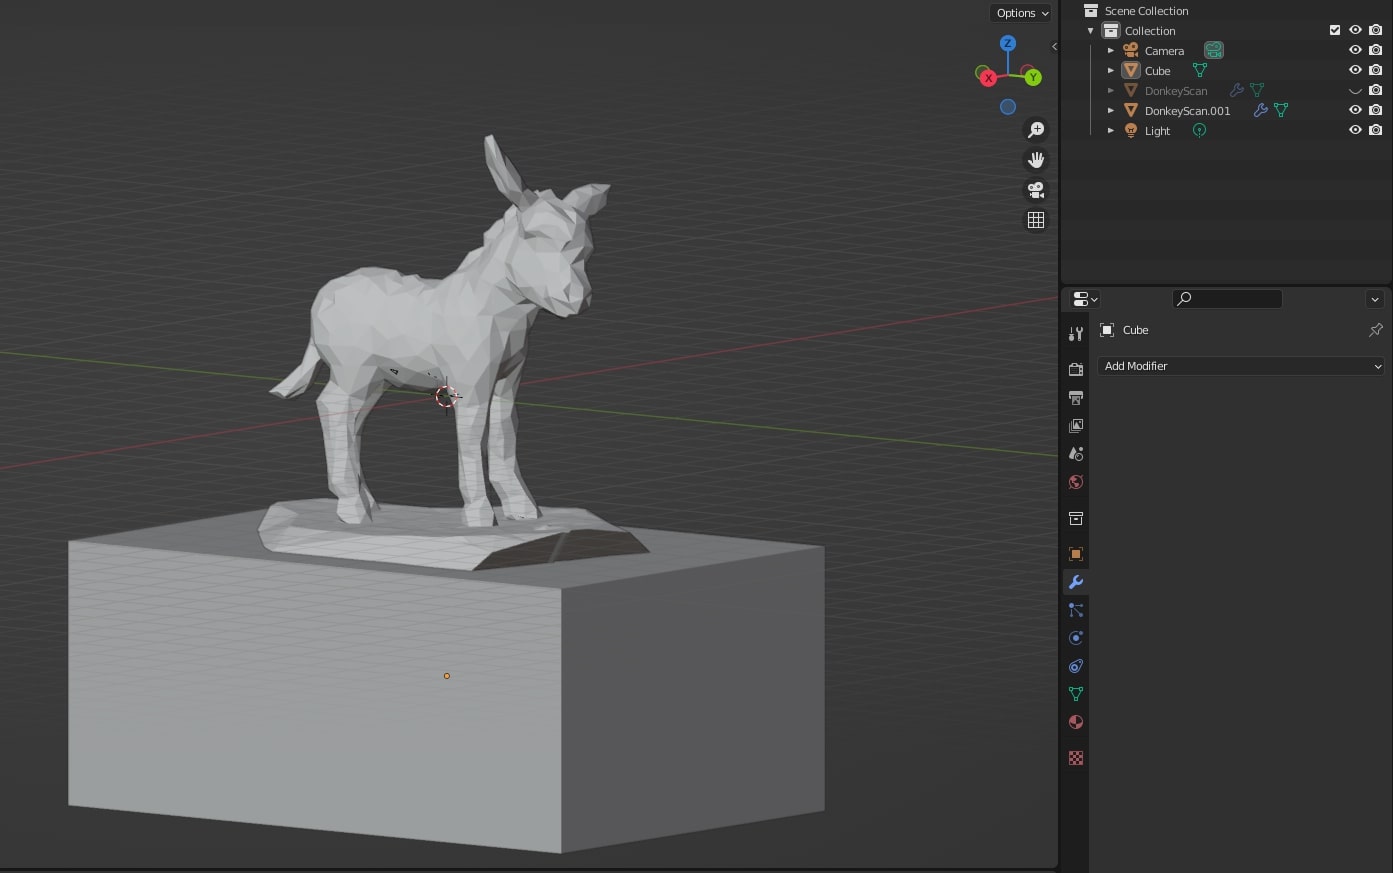
Last year I scanned this donkey using the same method as with the hairclip.
Since I wanted to use the 3D scanned donkey as my 3D print object, I first had to import the
.obj file into Blender, to adjust the size of vertices/polys (reduces size of the enormous
file):
(A fellow Fab Academy student showed me how to do this, but this tutorial is also very helpful)
- Import the .obj
- Add Modifier > Decimate
- I reduced the ratio from 1.0 to 0.001. This gave the donkey a nice low-poly look and got rid details that would be too much for the 3D printer (reduced the face count from 2299602 to 2298).
- Now the unnecessary platform underneath had to be removed to create a flat ground. This can be done with Boolean operations, that can also be added via the Modifier tab. See tutorial.
- Simply add a box (Shift+A) of the needed size and place it where the donkey model should be cut.
- Now add the "Boolean" Modifier (it needs to be applied to the object that is being cut):
- Choose the cube as the cut "tool"
- Et voilà :D

.jpg)
.jpg)
.jpg)
.jpg)
Preparation in Ultimaker Cura
-min.png) The sliced object
in preview mode with supports
The sliced object
in preview mode with supports-min.png) A look inside the
model
A look inside the
modelPrinting with the Ultimaker S5
The final print: (some of the remaining support still has to be sanded down)