Assignment 16 - Wildcard Week
Assignments
Individual
- Design and produce something with a digital fabrication process (incorporating computer-aided design and manufacturing) not covered in another assignment, documenting the requirements that your assignment meets, and including everything necessary to reproduce it.
My Wildcard Week
Since the electronics production week, I knew exactly what I wanted to try and test out during the Wildcard week. Since I am still very much behind my final project, I did not test around too much and only did what I wanted to do in the first place: Vacuum forming!
My Idea was to try and Vacuum form one of the planting pots I would need for my final project. For this I went ahead and looked at the Wood we had available at the lab. The wood we had readily available was 12mm plywood. With this Information I went ahead and got the dimensions I would need for the planting pot from my final project CAD. With the dimensions noted, I opened a new project and modeled a planting pot. From reading up about vacuum forming, I knew, that I had a few limitations I had to comply with in Order to be successfull. What I found on the internet were suggestions to user as many fillets as possible and to ha an tapering angle of between four to six degrees for the male mold I was about to make. With this in mind I went ahead and designed this planting pot:
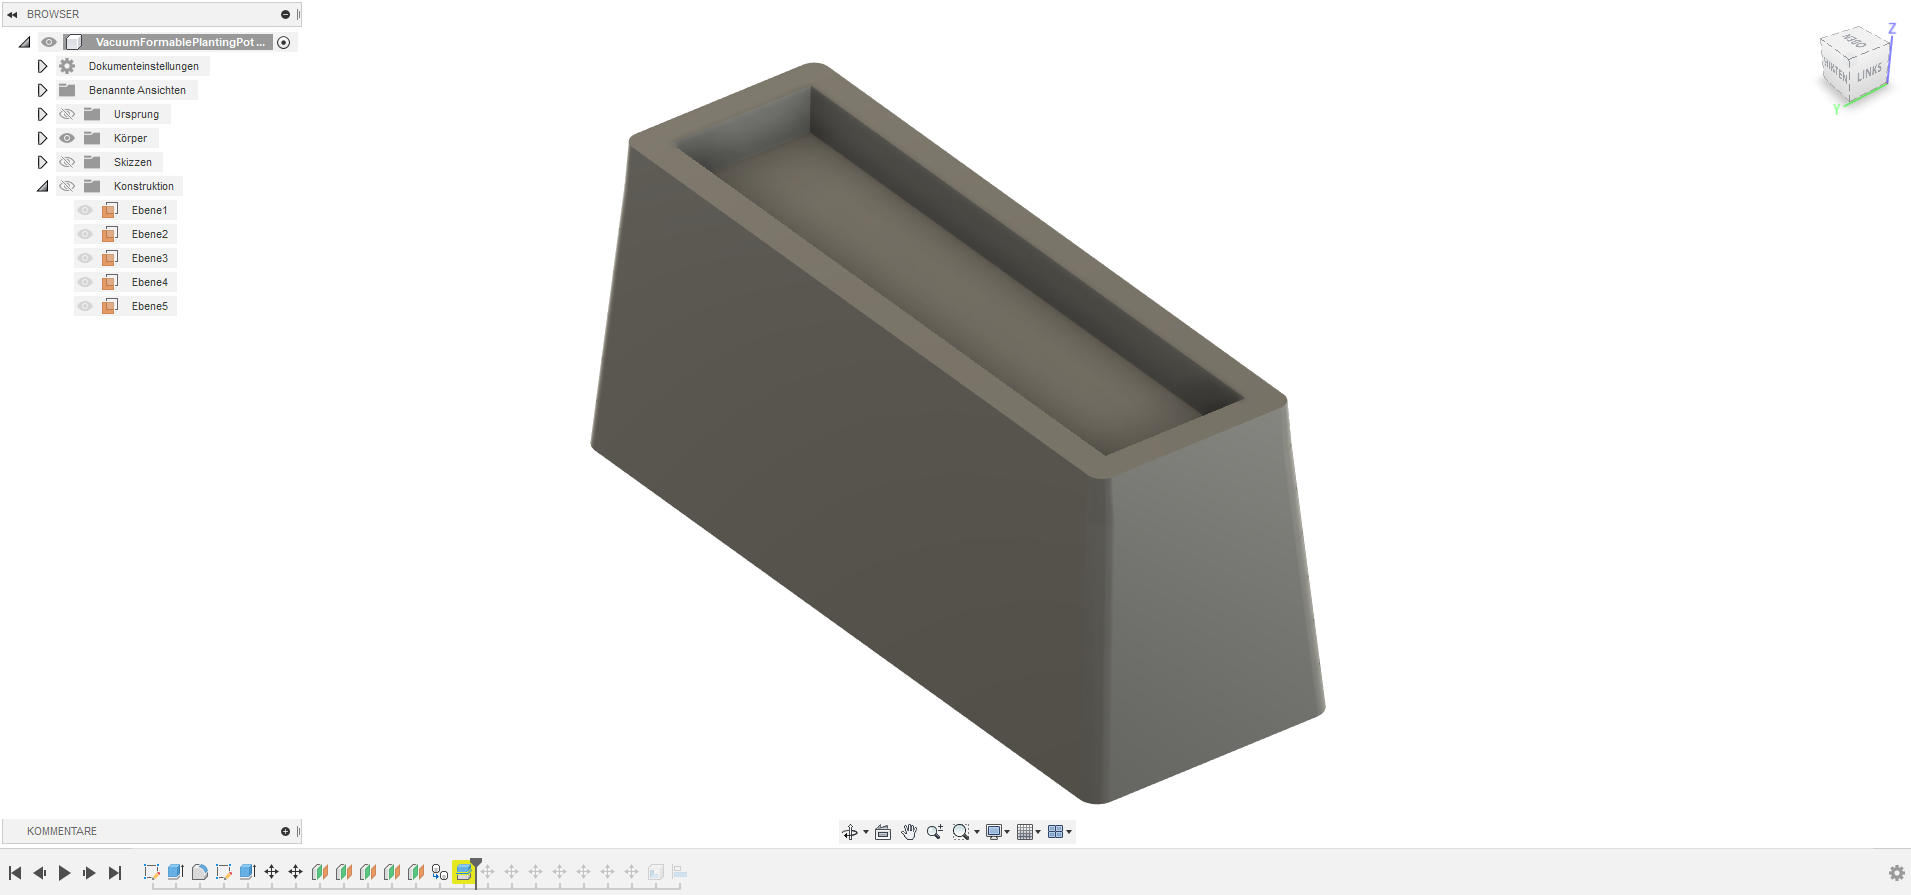
Since I now had my model, my plan was to cut it every 12mm in the z axis to be able to mill the individual pieces with the big CNC at our lab using the 12mm plywood. For this I created new planes which were 12mm apart of each other until I reached the top of the model. I of course thought about making the Height of the model dividable by 12 without rest.
With the new planes now in place, I went ahead and used the "Split Body" feature of Fusion360. I selected the planes I created as cutting planes and selected the planting pot as the model to be cut! After the operation I had 12mm thick pieces which, when stuck together were forming the planting pot. All I had to do now, was laying all of the pieces flat and create the Toolpath for cutting the Pieces with the CNC!

For processing the plywood I chose 2D contouring for the Cutout of the pieces and afterwards ramping to achieve the tapering angle of about five degrees I set up on the 3D model beforehand. The only problem here was, that the ramping would completely ignore the tabs craeted by the 2D contour. It was not possible to tell the ramping, that it should avoid tabs. This is why I let the ramping stop at a Height of 0.5mm instead of 0mm, in Order to preserve the tabs. I would need some sanding to allign the pieces this way, but atleast they would not fly away in the worst case (In the case that the vacuum would not hold the tabless pieces to the milling table). With the toolpath generated in the same way I used to generate it back in Make something Big Week. With the toolpath generated I headed to the CNC downstairs, grabbed the plywood, and started the milling process after setting everything up.
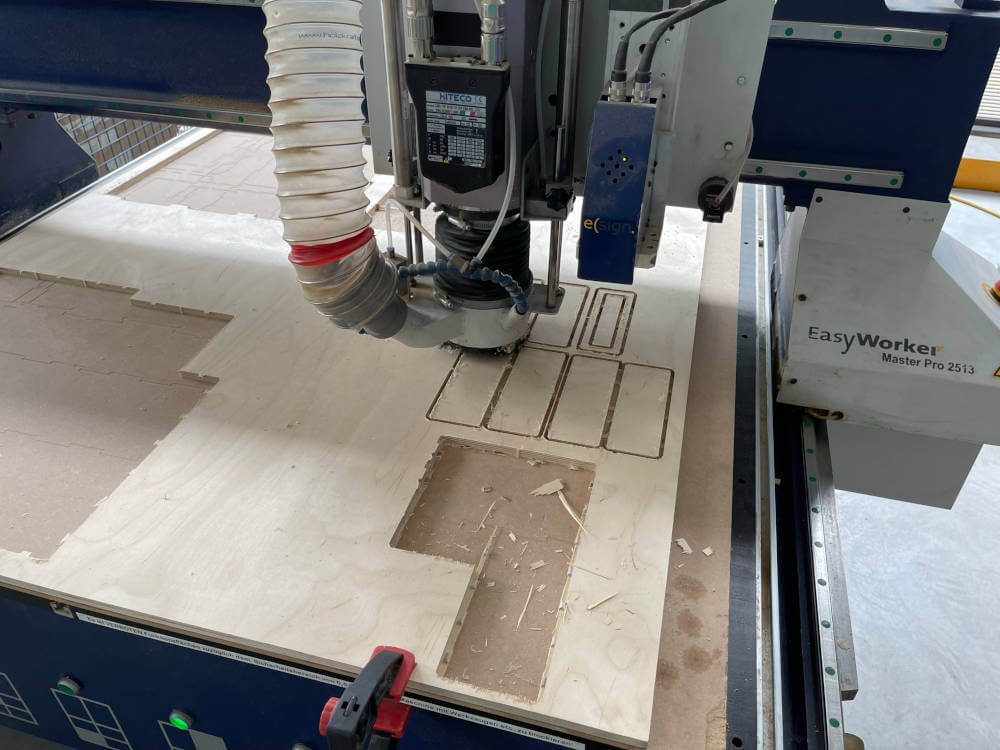
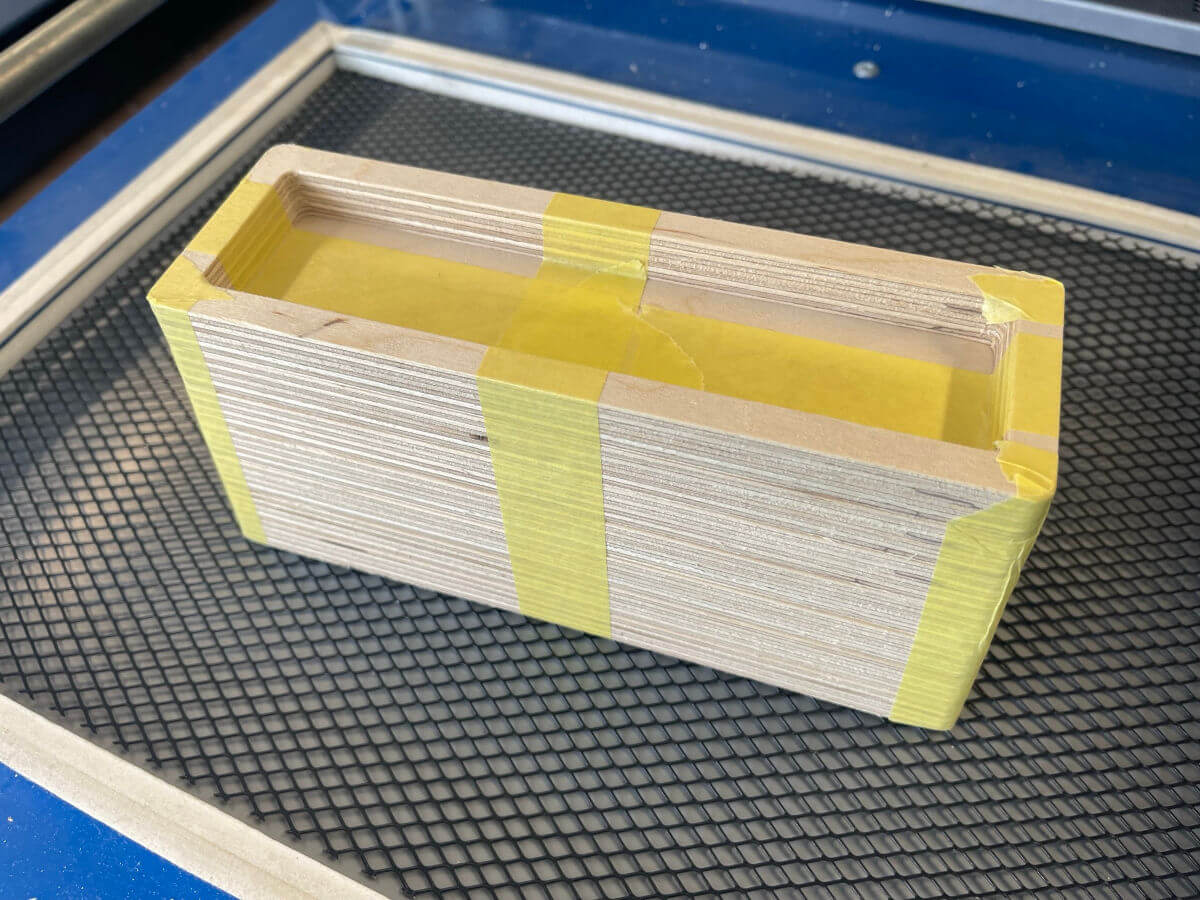
The milling took about one hour and afterwards I freed the pieces from the stock with a chisel and a hammer. I went to our wood working station with the pieces and started sanding them thourougly. This also took one to two hours. In order to just prototype and safe time, Ahmed suggested to me to just use paper tape to stick the pieces together for now, to test functionality and usability of the mold. We did this and the wooden Block looked like this:
Now it was onto the vaccumn forming machine. Most of the plastic pieces we have here at the lab for this machine were PLA, which I also used. The Vacuum former at the lab is a FORMECH 300XQ which is apparently not sold anymore by FORMECH directly as it cannot be found on their webpage anymore. The manual can be found online however, and we also had the manual on the machine in the lab.
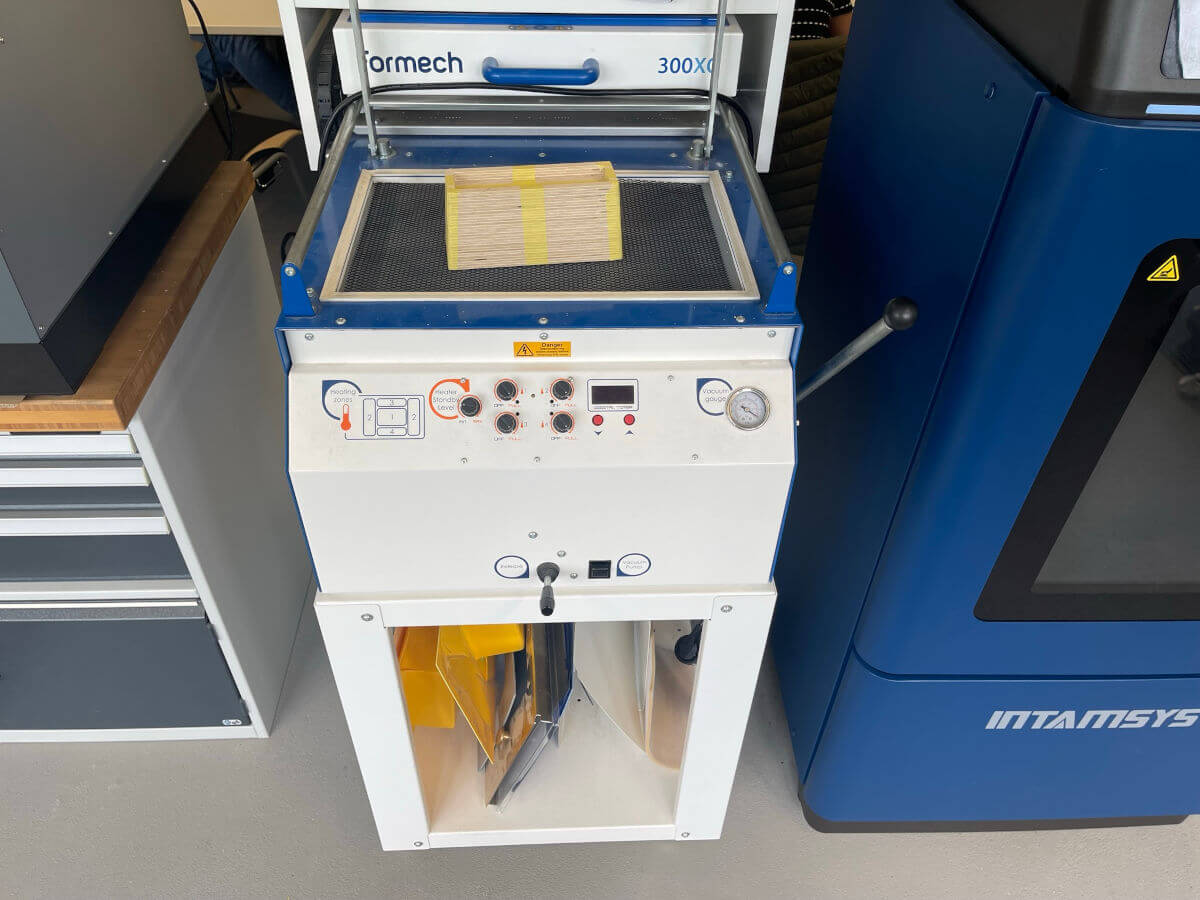
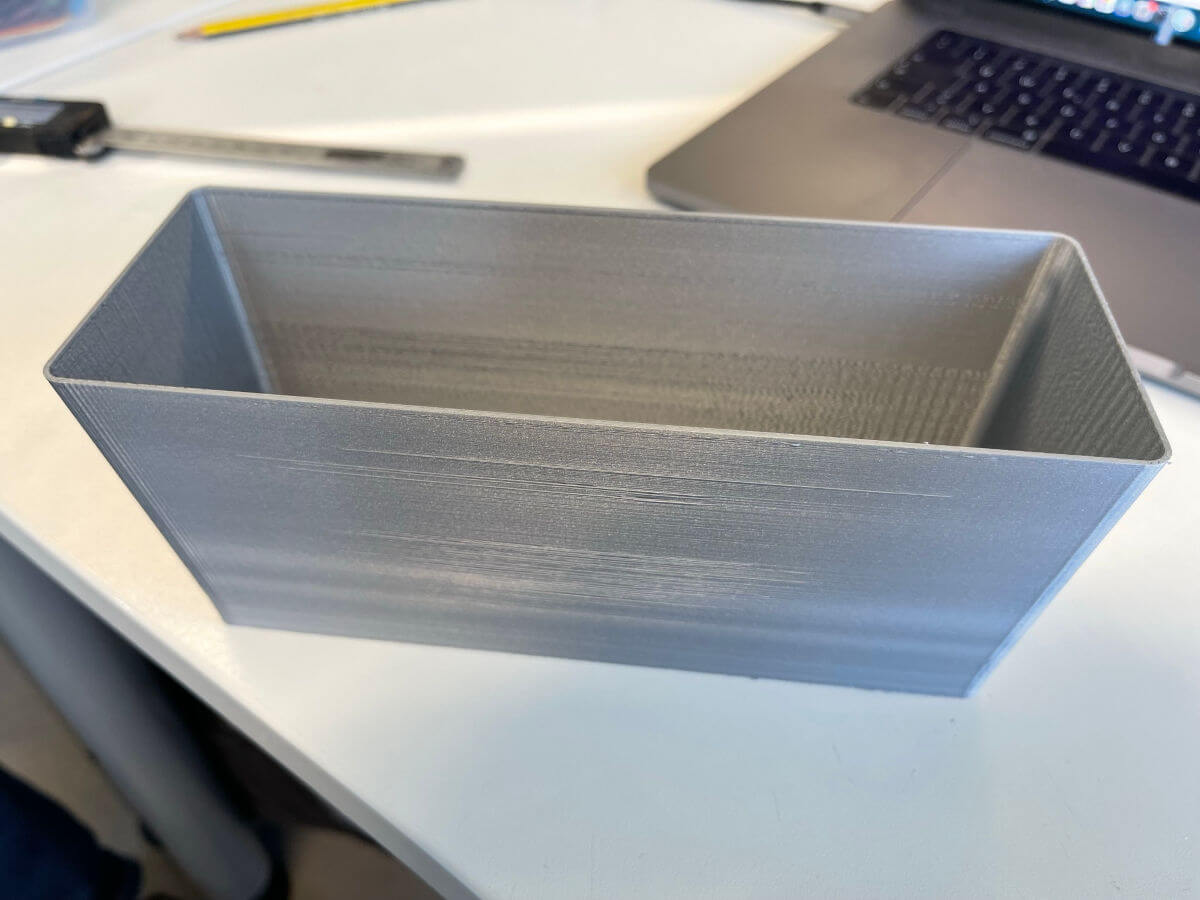
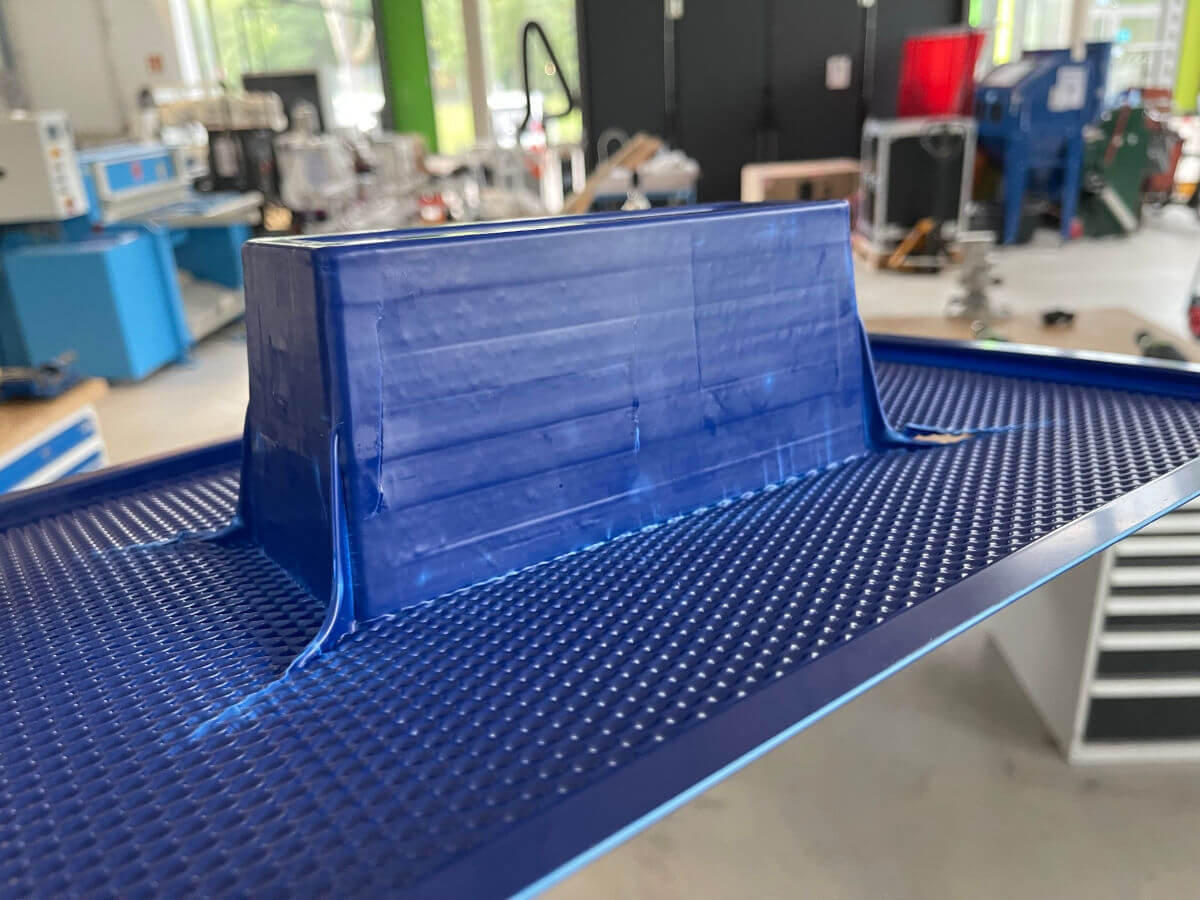
The usage of this machine is quite simple and just needs good timing. You start by placing the Mold onto the movebale table of the machine. You then use the right lever of the machine to lower the table with the mold to its lowest position. After that you insert the plastic and clamp it down with the center contrraption. After that you move the heating element ontop of the plastic and start heating. With the time the plastic gets softer and softer. When the plastic has formed a kind of tear drop, it is ready to be formed. Now one has to be kind of quick. First, the user has to remove the heating element. Then you have to use the lever to the right on the machine to press the mold into the soft PLA. Once this is done, you quickly activate the Vaccuum which then pulls the plastic onto the mold. Sadly for me, even with my precautions, I still got webbing on all four corners sadly. To prevent this (I learned afterwards), I could have used an elevated platform to rest the mold on. The webbing would then affect the platform below the mold but not the mold directly. Since this was only for prototyping though, I did not want to waste any more PLA sheets, as the resulting planting pot would be too small for my final project anyway. The next problem I faced was removing the mold from the plastic. This turned out to be a major chore. I tried it with prying, with pressured air, even with WD40. In the end this was a two man job to release the mold. My assumption is, that I for one, used the PLA sheet the wrong way around (protective film on side of the mold and not on the outside) and on top of that the Wood was not sanded well enough. If I had used a Beltsander and wood glue to make the mold perfectly flat, I would have had much less problems in the end. At the end the released vacuum formed piece looked like this:
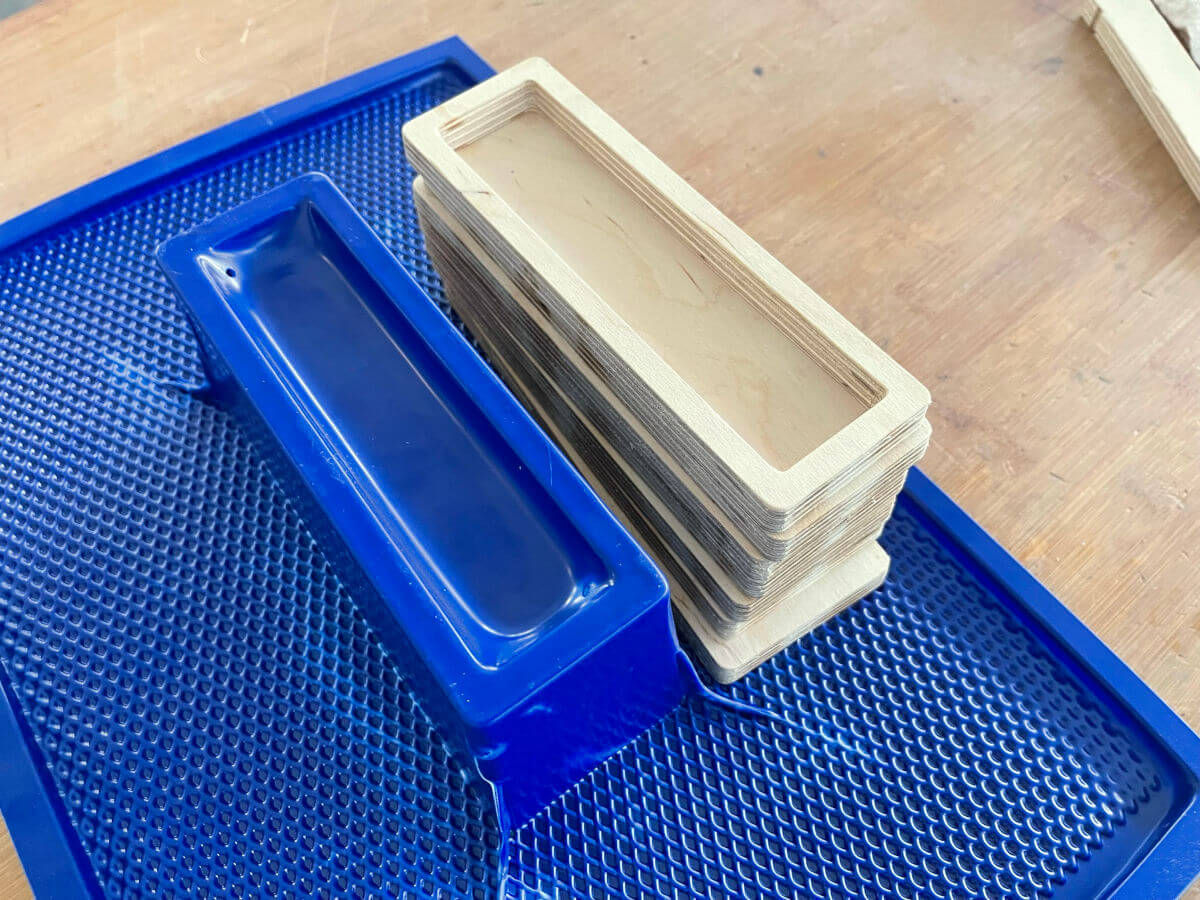
I was very happy with the result, despite all the problems I had. For comparison I also wanted to 3D print the 3D model. I hollowed out the 3D model and printed it on one of our Ultimaker S5s. Just for comparisons sake: The whole process from making the model until the vacuum formed part was done, took about 2 hours of machining time and another 4 or so hours of manual labor. The 3D print itself took almost 9 hours. This goes to show that vacuum forming has the advantage of even faster prototyping (ofcourse depending on the model), since 3D printing time does not scale linearly with size. Also once the mold is done and released easily after usage, new vacuum formed parts can be craeted every few minutes. When 3D printing, I would need to wait the full 9 hours every time (Atleast for FDM printers). At the end these were my two pieces: