
Assignment 10 - Molding and Casting
Assignments
Group Assignments
- Review the safety data sheets for each of your molding and casting materials, then make and compare test casts with each of them
- Extra credit: try other molding and casting processes
Individual Assignments
- Design a mold around the stock and tooling that you'll be using
- Mill it (rough cut + three-axis finish cut) and use it to cast parts
- extra credit: use more then two mold parts
Group Assignment
The page to our Group Assignemtn can be found here.
Individual Assignment
My First idea was to cast a piece which I already used in the weeks before. I wanted to reprint my Solaire figurine and then set the proint inside the mold. I wanted to do this, because I thought it would be next to impossible to mill out the shape of the figurine. This idea however was plagued by multiple mistakes and failures. Anyway, this was the first sketch/plan i came up with:
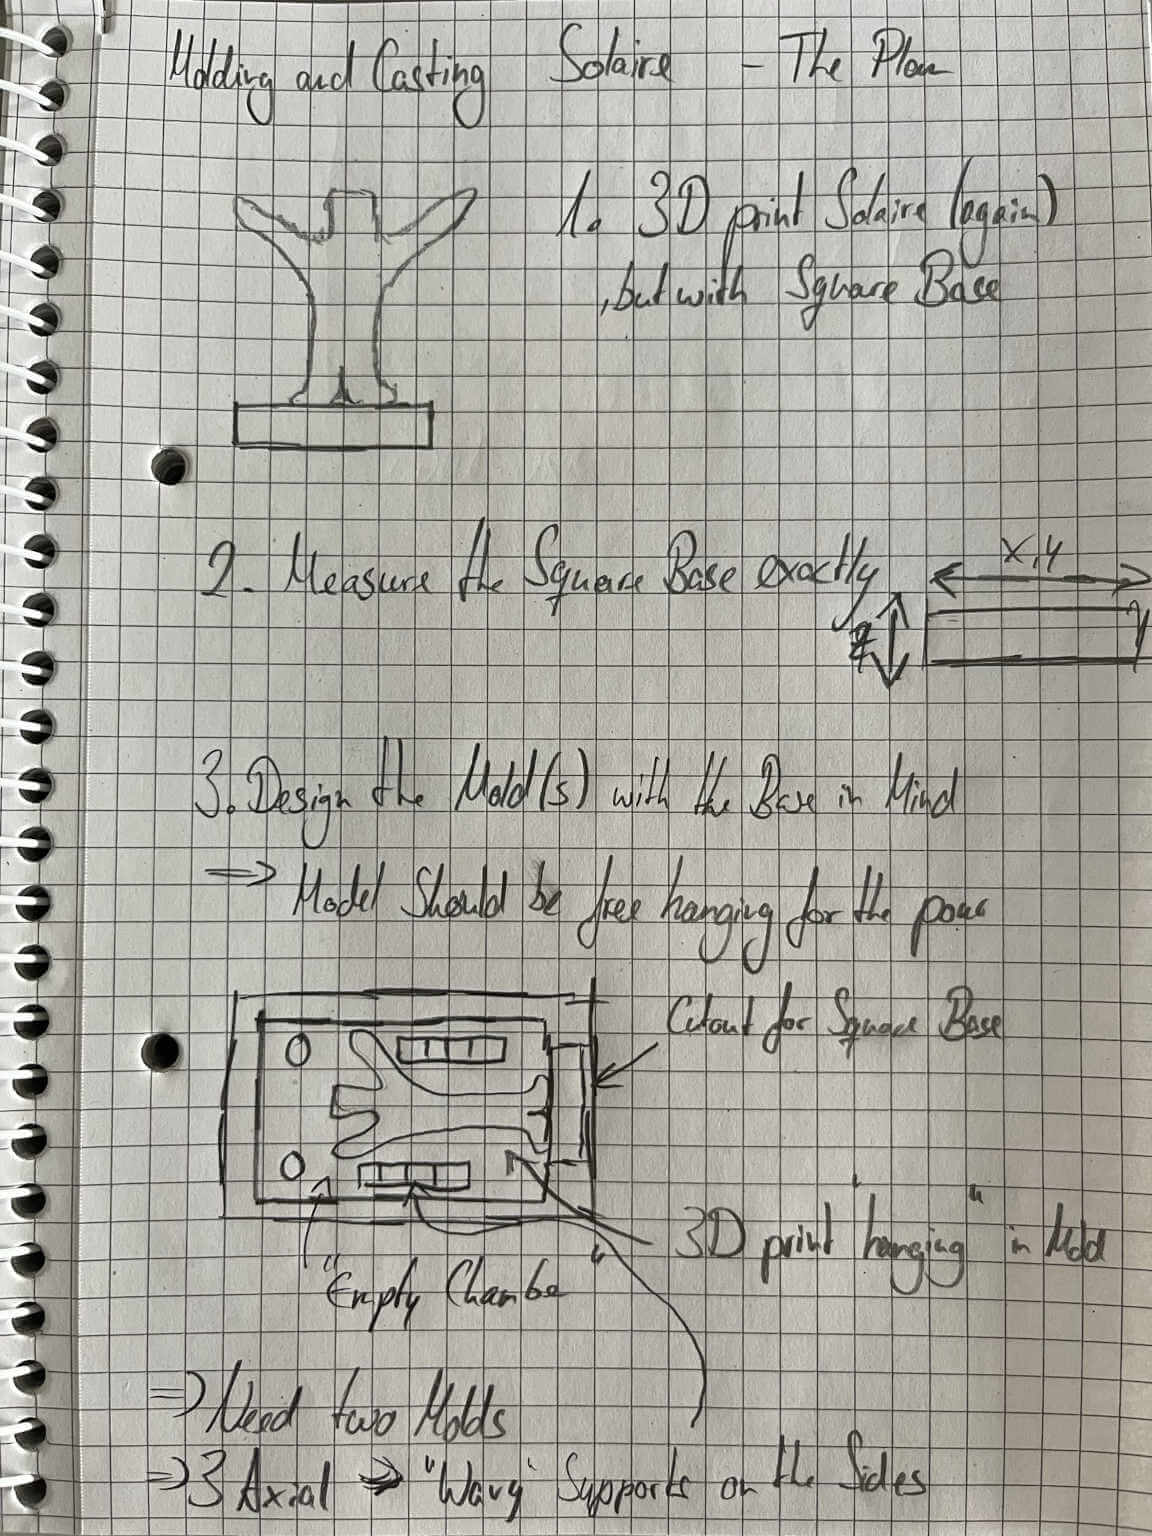
I first decided to reprint the figurine in whole and recess it half way into the machined wax. This would however result in having the top side of the silicon as the meeting point of the two molds, which does not really make for a good connection and does not have any articulating features at all.
After this I tried to cut the model in half. Since it was 3D-scanned, this turned out to be very hard. I started with blender and did not achieve a result i was happy with. All i wanted was a clean cut in half, where the resulting opening would then be covered by a simple plane. After going through multiple programs to check if they were able to do this, the only program that achieved this was the standard 3D-Builder from Windows. With the model cut in half, the prints failed multiple times however. This was compleetely my fault as the model did not seem to be watertght, which lead cura to strange behaviour while slicing which I did not see at all sadly.
After this I tried to redo the modelling porcess with Blender in order to achieve a watertught
model. As I was majorly time contrained however, I did not want to sink too much time into this.
After a bit of manual fidgeting, I almost gave up because nothing seemed to help me fill this
hole at the bottom of the model. After one last google search I found my solution however.
Insdide Blender there is the Addon 3D-Print Toolbox which offers a model cleanup
and makes sure the model is watertight. This worked like a charme! Now i had to recut the model
in half. Since I was in the lab at the time and did not have a windows pc in sight, I had to
rethink how to cut the model. After googling again, i saw someone commending the Prusa
Slicer for cutting models in half. This also worked very well. With the
two new stl files I went to Cura, sliced them again and the resulting preview looked much more
promising than the old one. Since it was already monday, and the print would need 10 hours
however, I went with the print solution for this week, as well as another idea I made, which
would be made entirely by machining the wax.
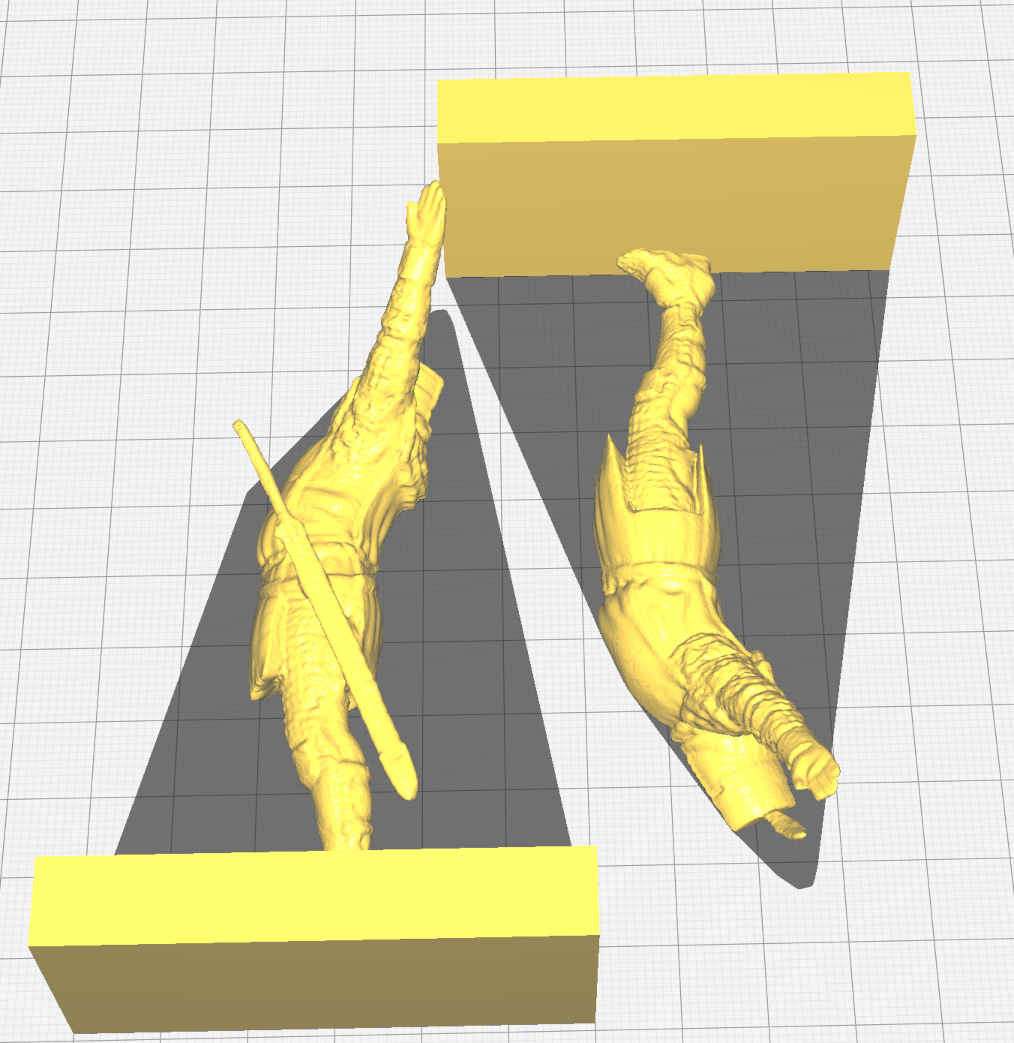
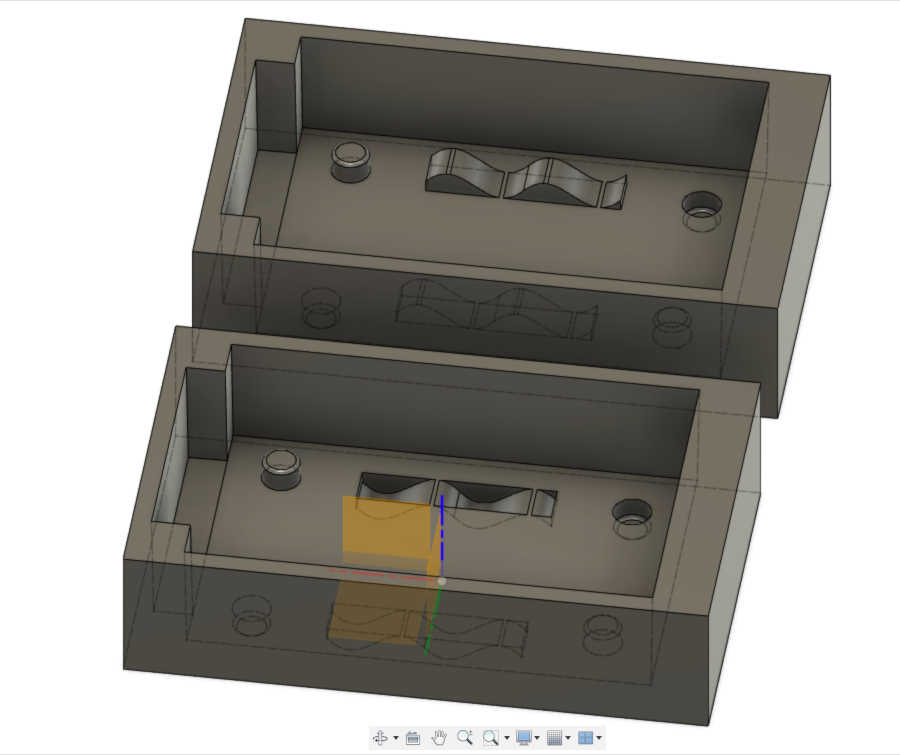
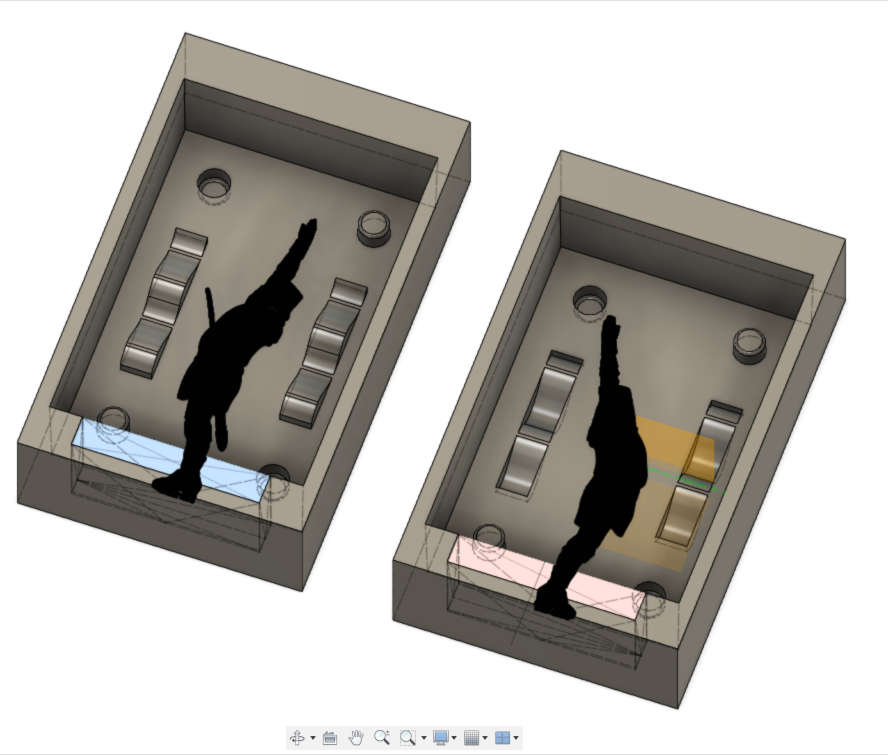
With the now fixed model, I went to the 3D printer in our lab and started the Job, that was estimated at around 10 hours. While the print job was running I started designing the wax mold around the two halved figurine parts. Since I would lay the two parts on the "ground" of the mold, I needed a special sort of combining mechanism in order to comply with the asssignment of this week to use three axis milling. After talking with my instructor about this, he recommended some sort of "wave" where both parts would meet. This was such a hard task for me. More often than I want to admit, did I just not get the positive to negative to positive workflow right in my head. After many revisions and a good bit of frustration after many mistakes, I finally was able to create the two molds! One for each side. Since the Model is quite large I needed to mill two seperate pieces of wax in order to fit the pieces correctly. The rest of the mold designing was very straight forward. I mostly used Extrusions and for the pins and the main extrusion down into the wax I used tapering angles to have an easier time when removing the silicone later on.
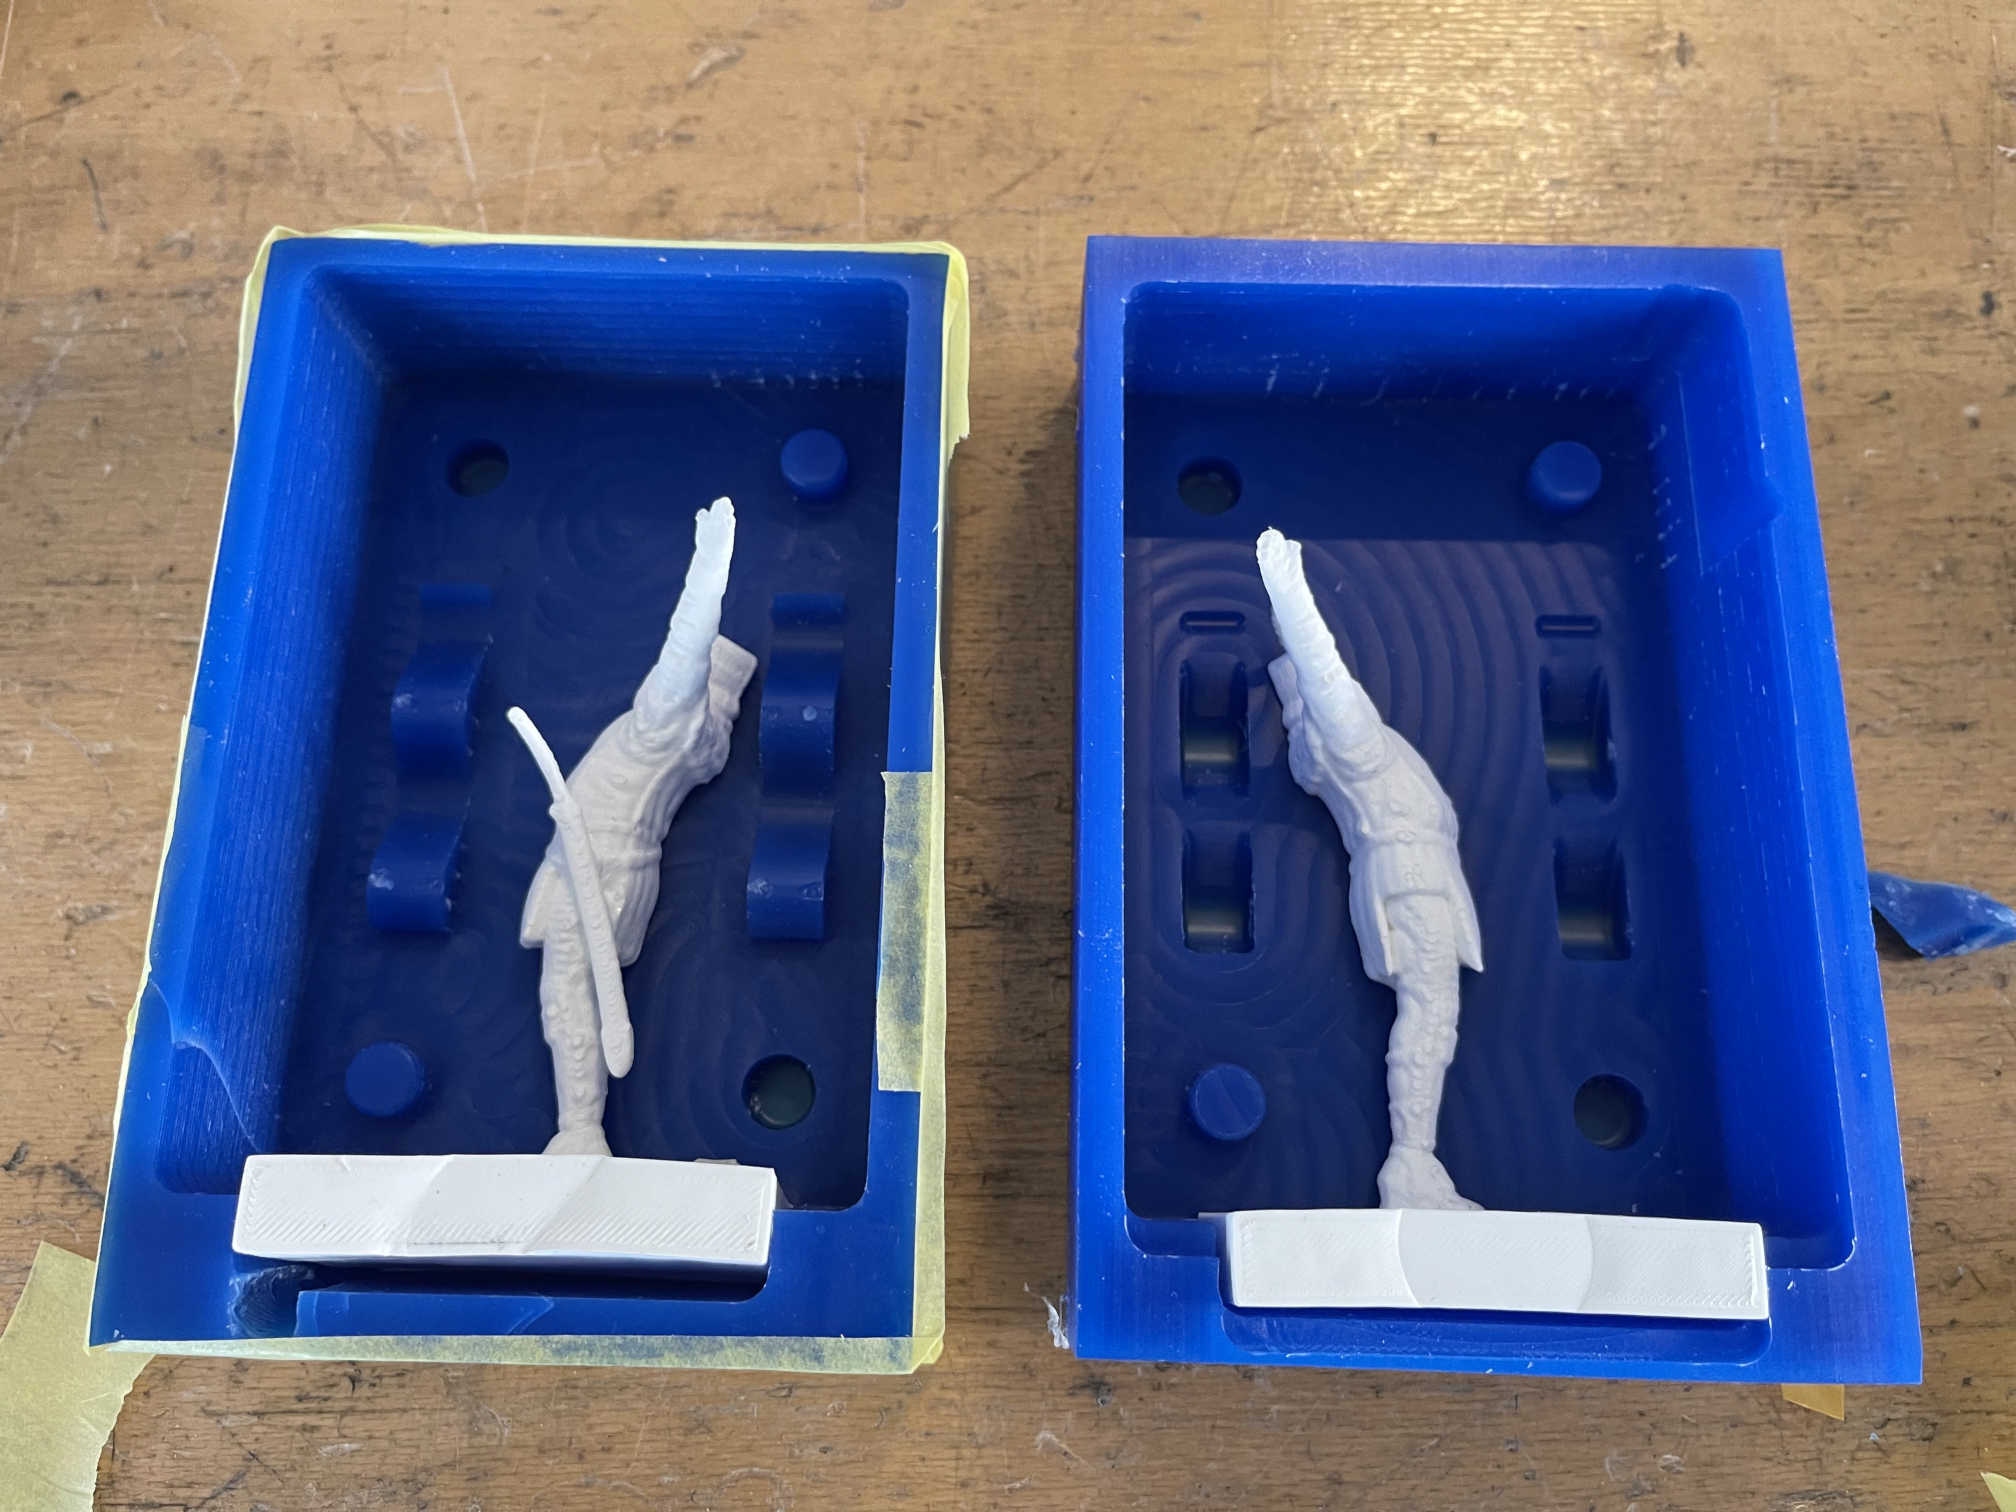
After Modelling the Mold(s) in Fusion360 and making sure that the resulting casts would fit together, I had these two halves:
The next day, I came back to a now finished and well functioning print. But even with this print that went very well I made a huge mistake. To clean of the PVA supports, I used one of the ultrasonic cleaners in our lab. I set its temeprature to 45 degrees and let it run for a few hours. Coming back to the print after a few hours, the PVA was almost completely gone! But what also happened was, that both models changed their shape. They were now slightly tilted. I guess, that I just had too high of a temperature for too long of a time for these figurines. I did my best to rearticualte them. For the time being I will use them either way to create the silicone mold. But since the wax can be used multiple times, I can just reprint the figurine halves and use normal supports and recast a new silicon mold.
Back to Fusion360, I started the CAM process. I started by creating a new setup and adding the bopth tools I wanted to use inside the library:
- 6mm, 3-Flute, Flatend mill for the rough cuts
- 3mm, 2-Flute, Bullnose mill for the fine cut
- 6mm, 1-Flute, Flatend mill (Used for the rough cut after failure with 3-Flute mill)
I then setup two jobs: Adaptive clearing for the rough cut, as well as a morphed spiral cut for the fine cut. For both Jobs i adjusted the stock to fit the wax block i designed with the exact dimensions of the real world wax block. Afterwards I played around alot with the pass and link settings. At the end I stuck with the following Settings for the rough cut:
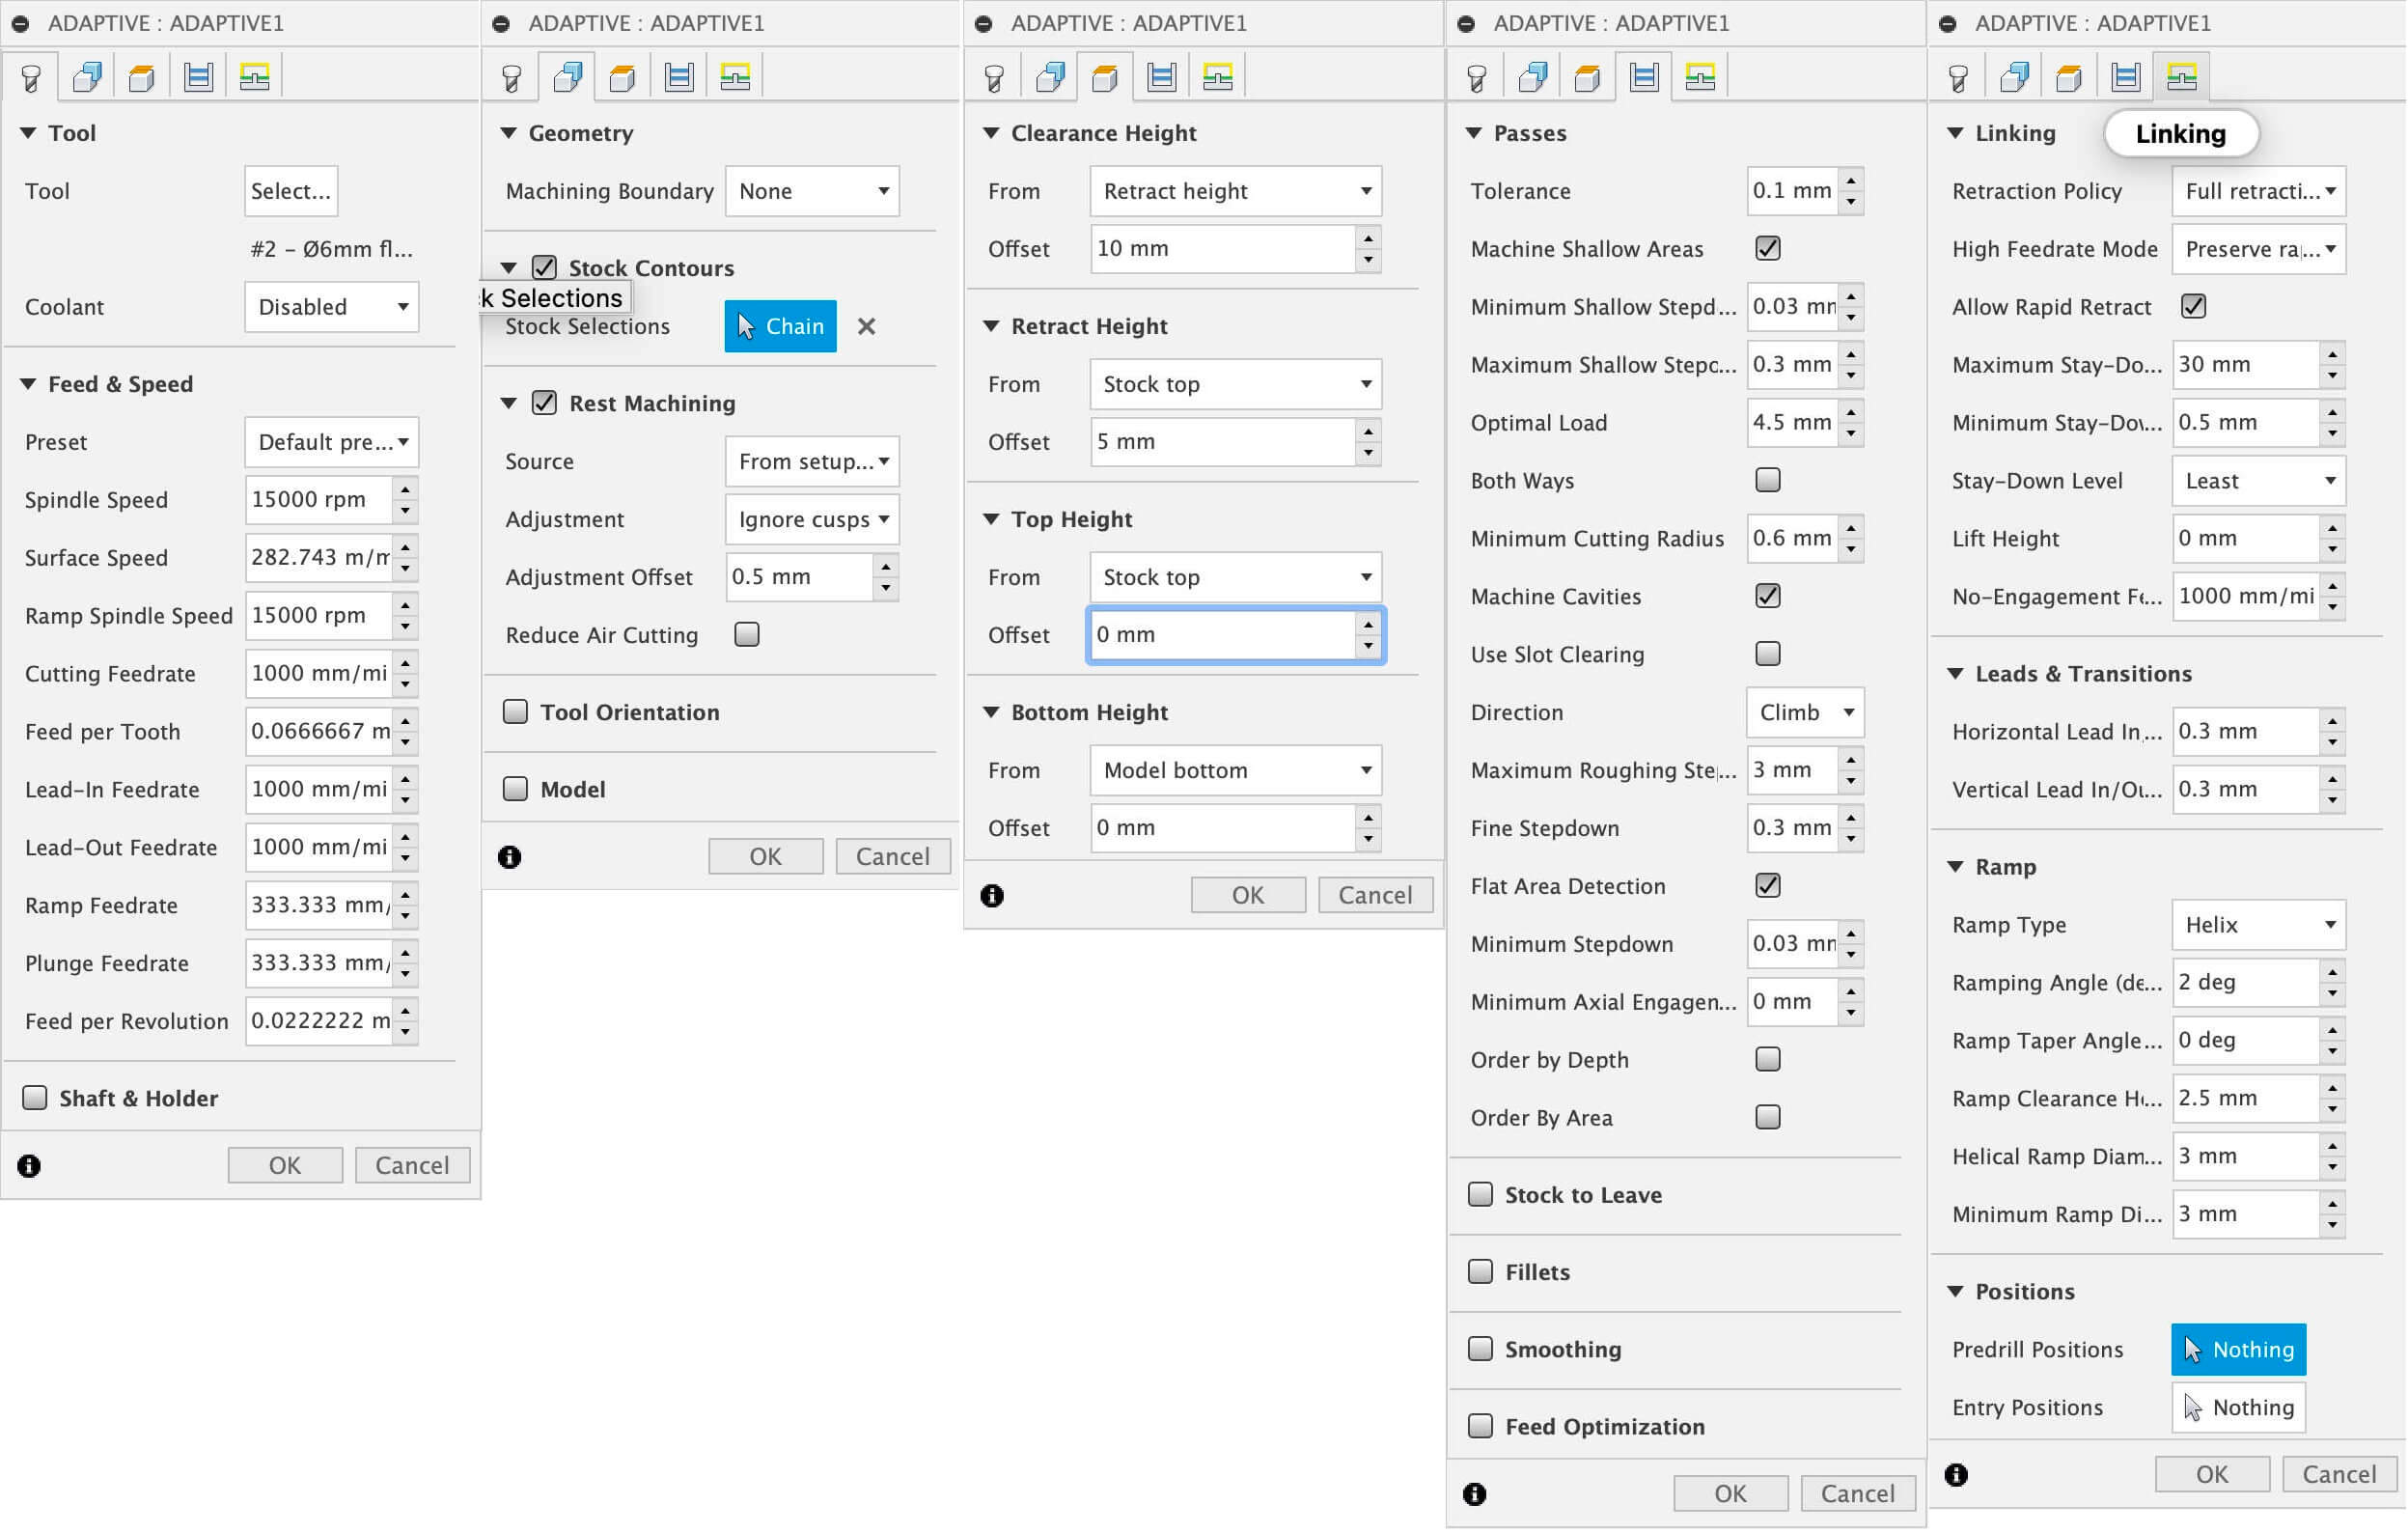
And the following settings for the fine cut:
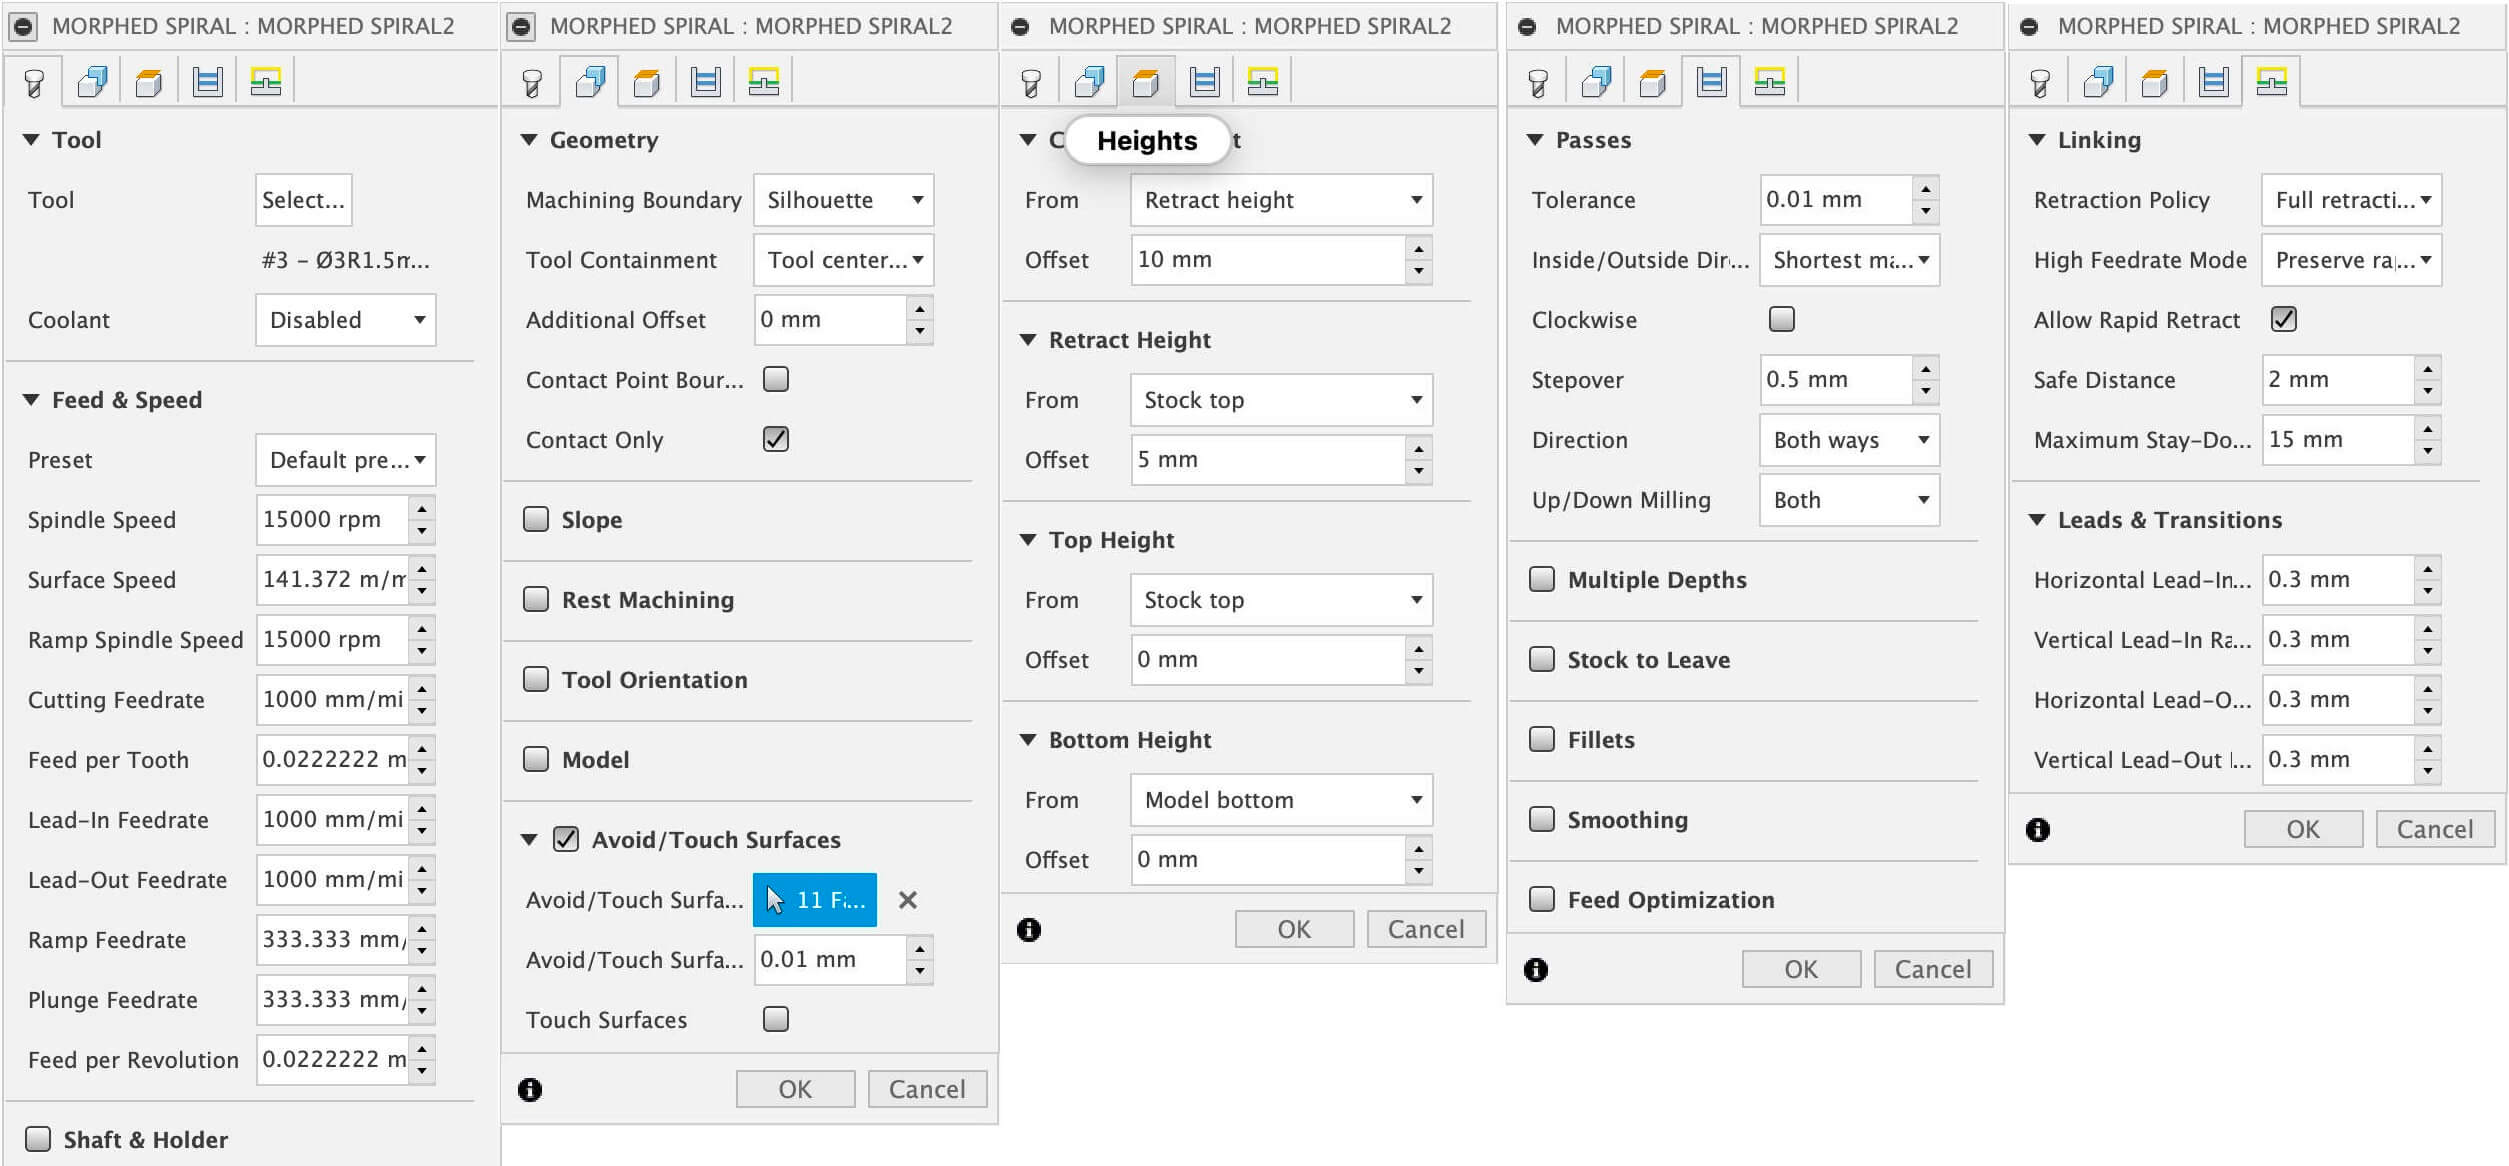
I then simulated both cuts and was happy with the result. The Cam toolpath for both milling processes looks like this:

I post processed the cuts with this post processor and went to our Roland MDX40 to mill the wax. I fastened the block of wax with the double sided tape and put it on the flat milled wooden block in the back of the machine, as the sacrificial layer for the pcb milling would be too high up to mill the wax. I zeroed the machine for all axes and started cutting. While the plunging seemed fine at first, the machine made a very very unpleasant and loud noise while cutting into the wax from its plunging point to the sides. I imeeditaly stopped the machine and asked for help. What happened was, that my speed settings combined with the 3-Flute mill were to much for the mill/wax to handle. At this point it was suggested to me to stick to a one flute mill and slow down the spindle. I changed the tool isnide Fusion360, posted the process again and just set the spindle speed to 70% inside of Roland V-Panel. This resulted in a much much smoother milling process. I find it quite mesmerizing to watch the small bits of wax that are being shot out of the block of wax:
After the rough cut was done, I swapped the collet for the bull nose mill and started the morphed spiral milling. Here everything went super smooth. It was also very fun to watch the wax get very smooth while the fine cut operation was running:
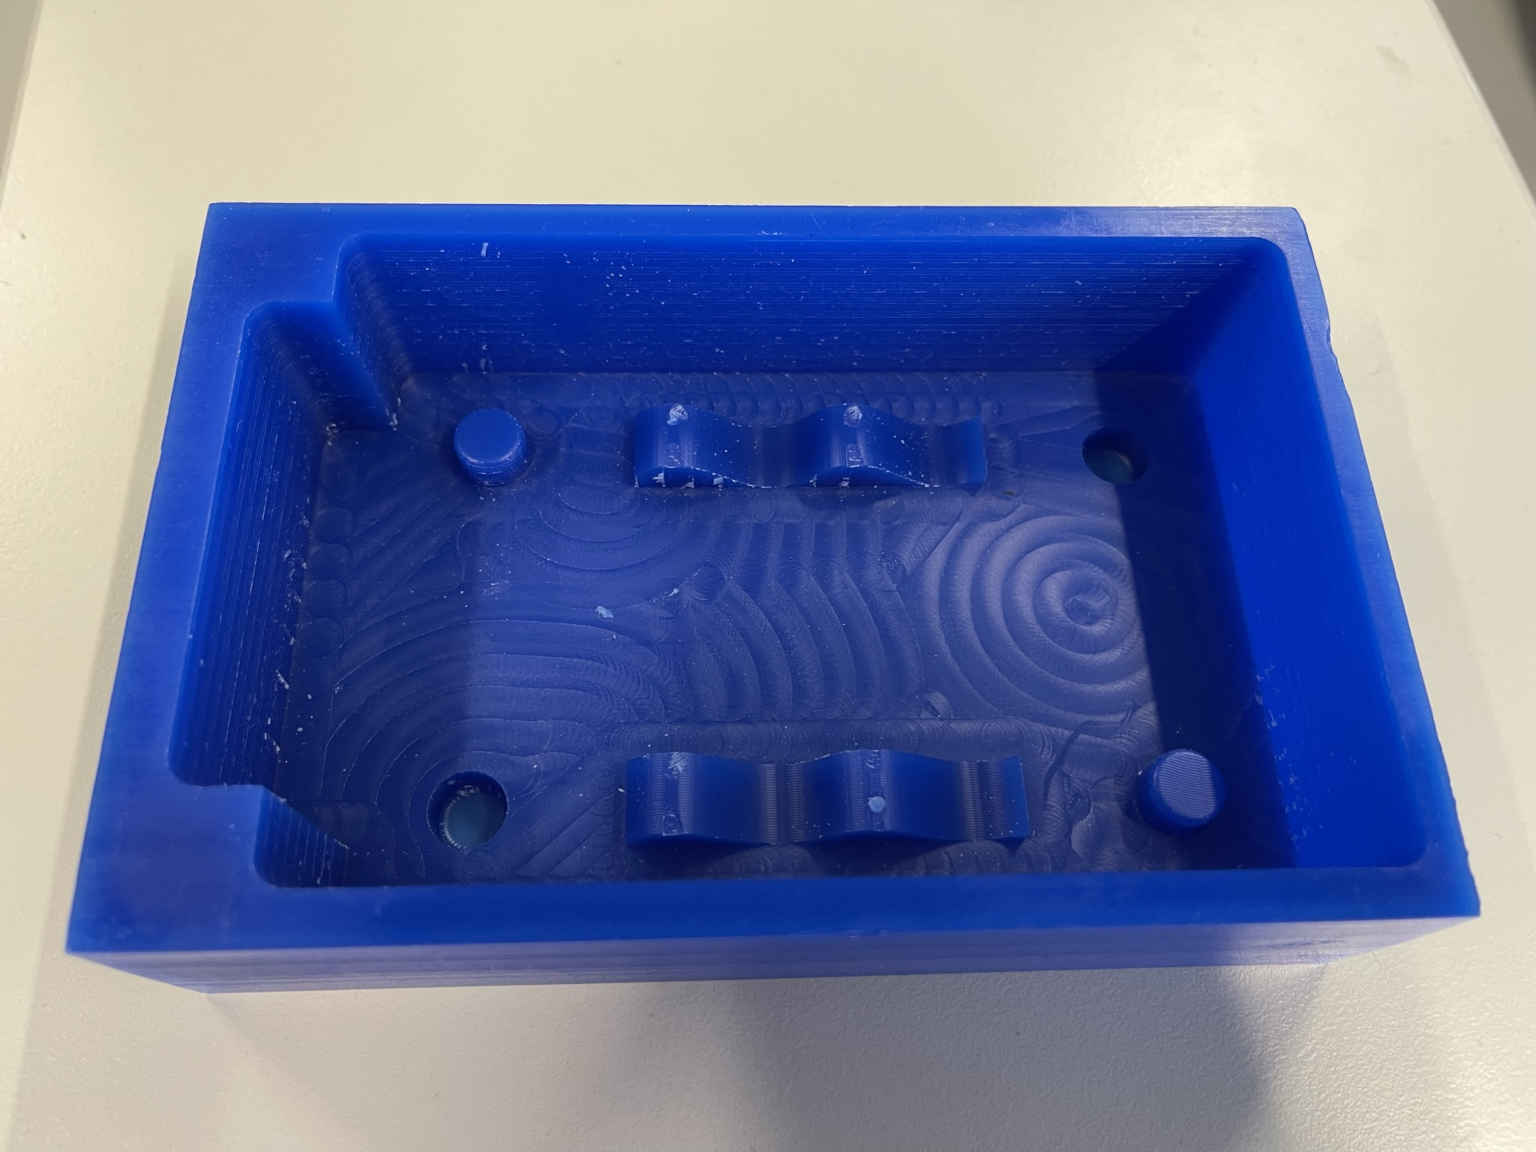
In the end my first block looked like this:
One would think that the second block would just go as smoothely of not smoother than the first one. This, sadly was not the case. Since I had a very low tolerance for the wax block towards the bottom (only about 1mm of stock left), I had to be very very carefull while removing the block. I used a ton of alcohol for this. This was on one side good, beacause i could get the block out easily, on the other side, the wooden block was now covered in alcohol. I waited for a few minutes for the alcohol to just dissepate, but It sadly wasnt enough. While the second block felt very firm in place, it got moved during milling. Thankfully I noticed this very quickly and stopped the machine. Together with Ahmed I tried my best to reallign the block and was lucky. I was just off by a hairs width at the end, which Ahemd said, was no problem at all, since the milling processed hasnt reached the important features at the bottom yet. Since I used the Estop to stop the machine quickly, we measured the already cut depth and I just redid the milling job in Fusion with the depth we already milled in mind. With this done and with the waxblock now being secured by hot glue, the milling could continue successfully.
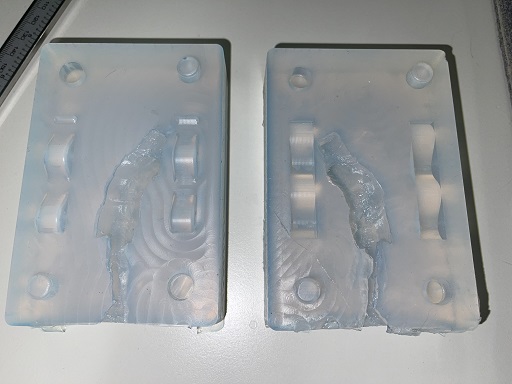
The fine milling process went very smooth again and so I had both blocks finished and was ready to start casting the silicone:
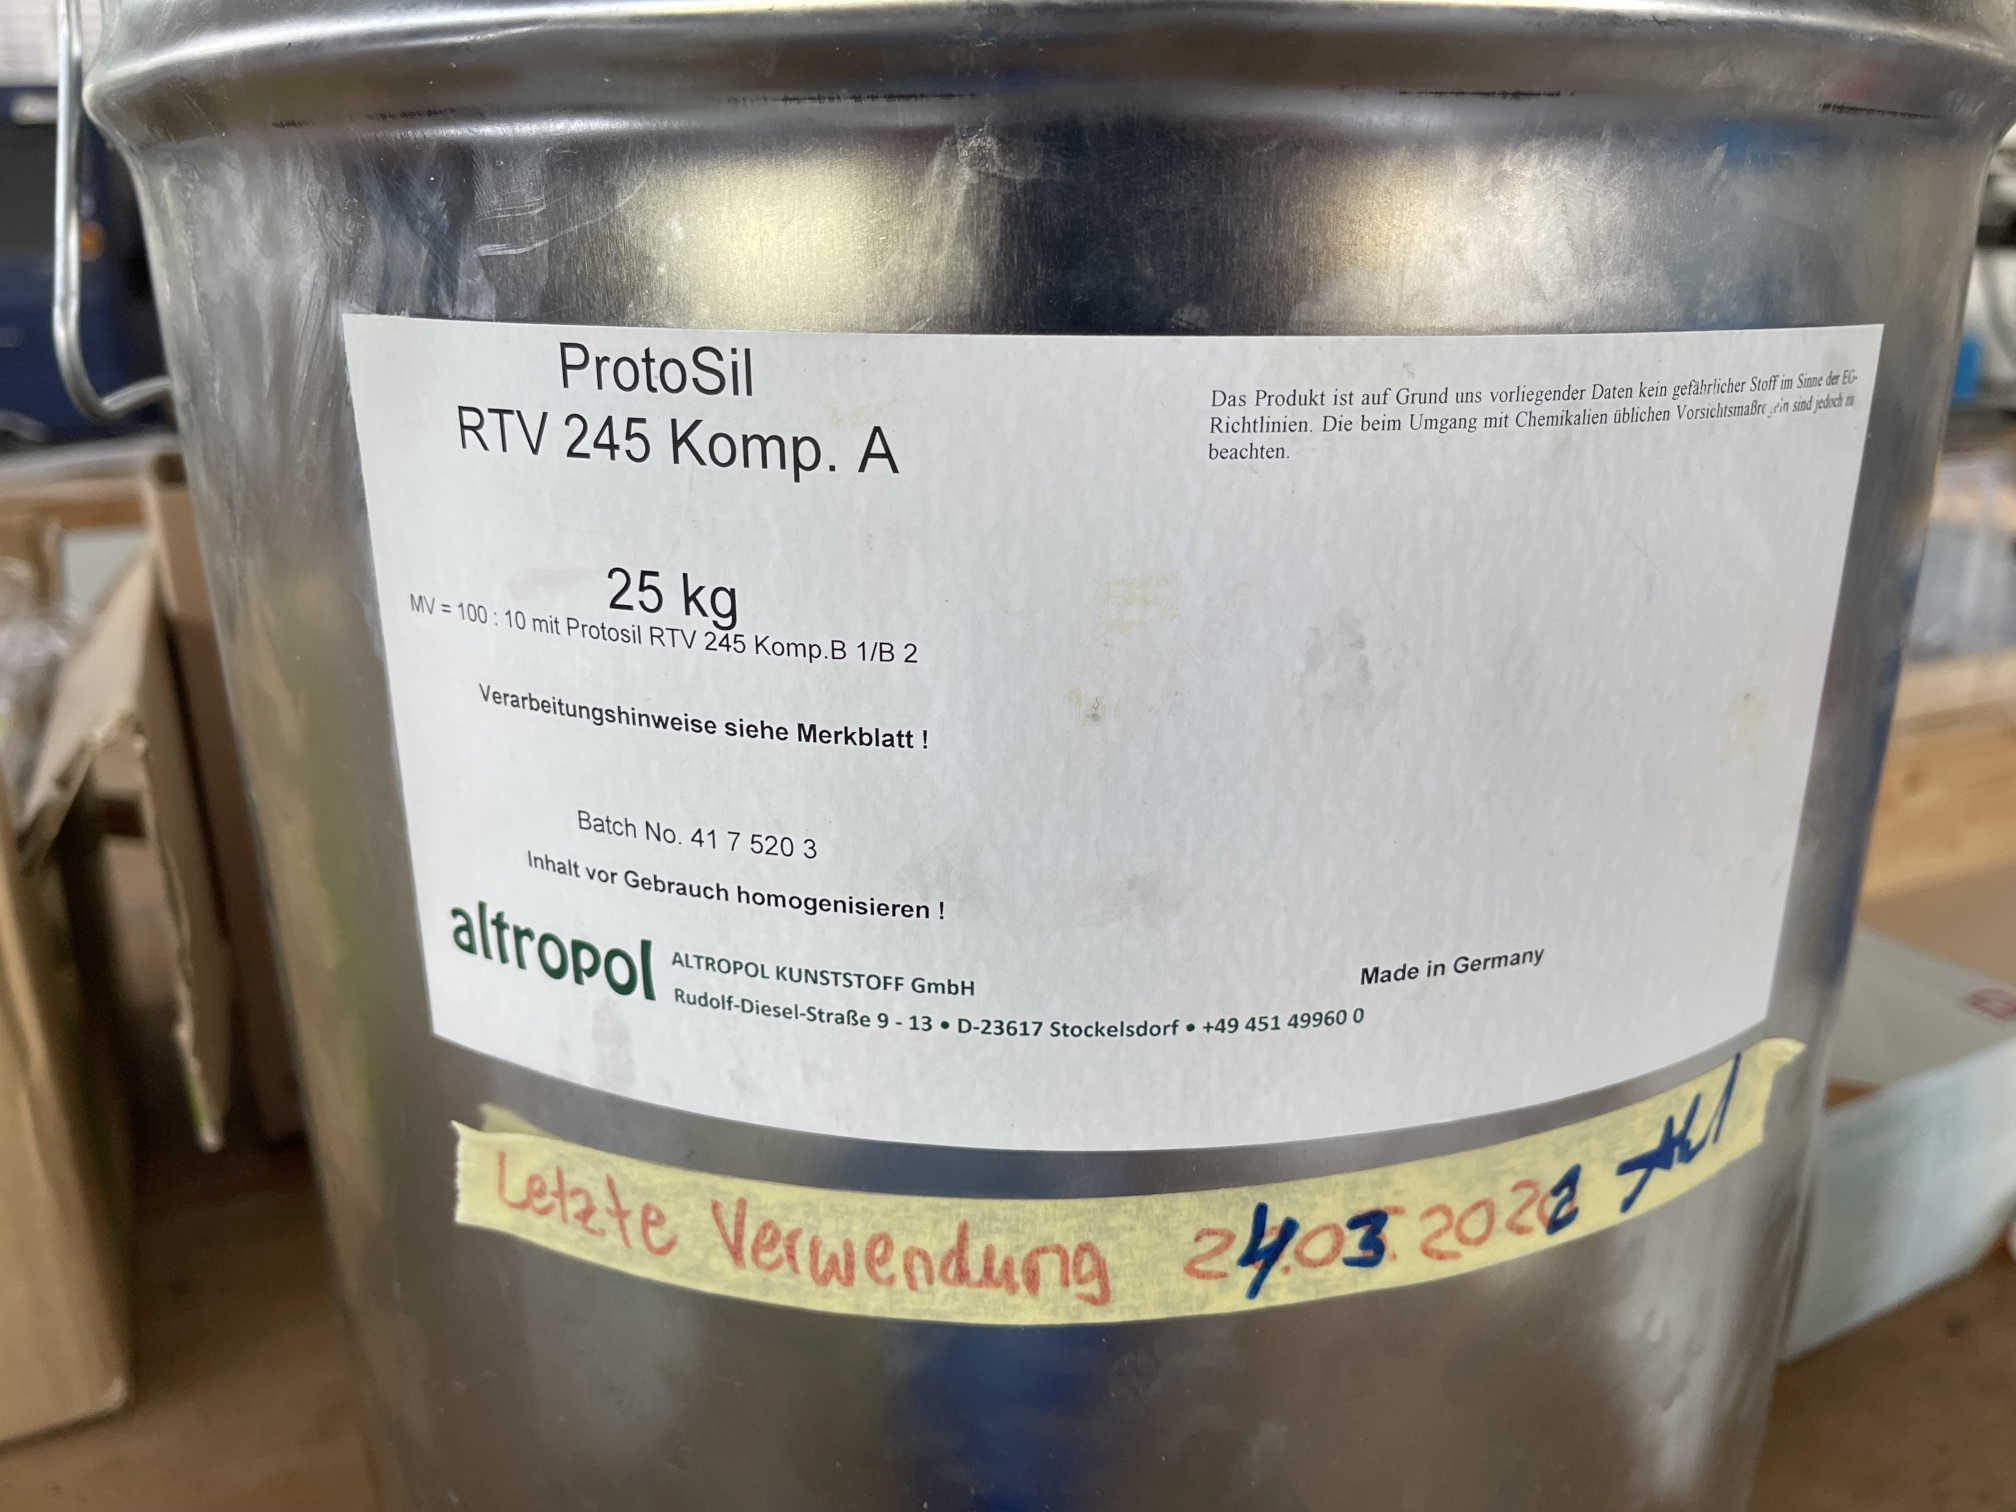
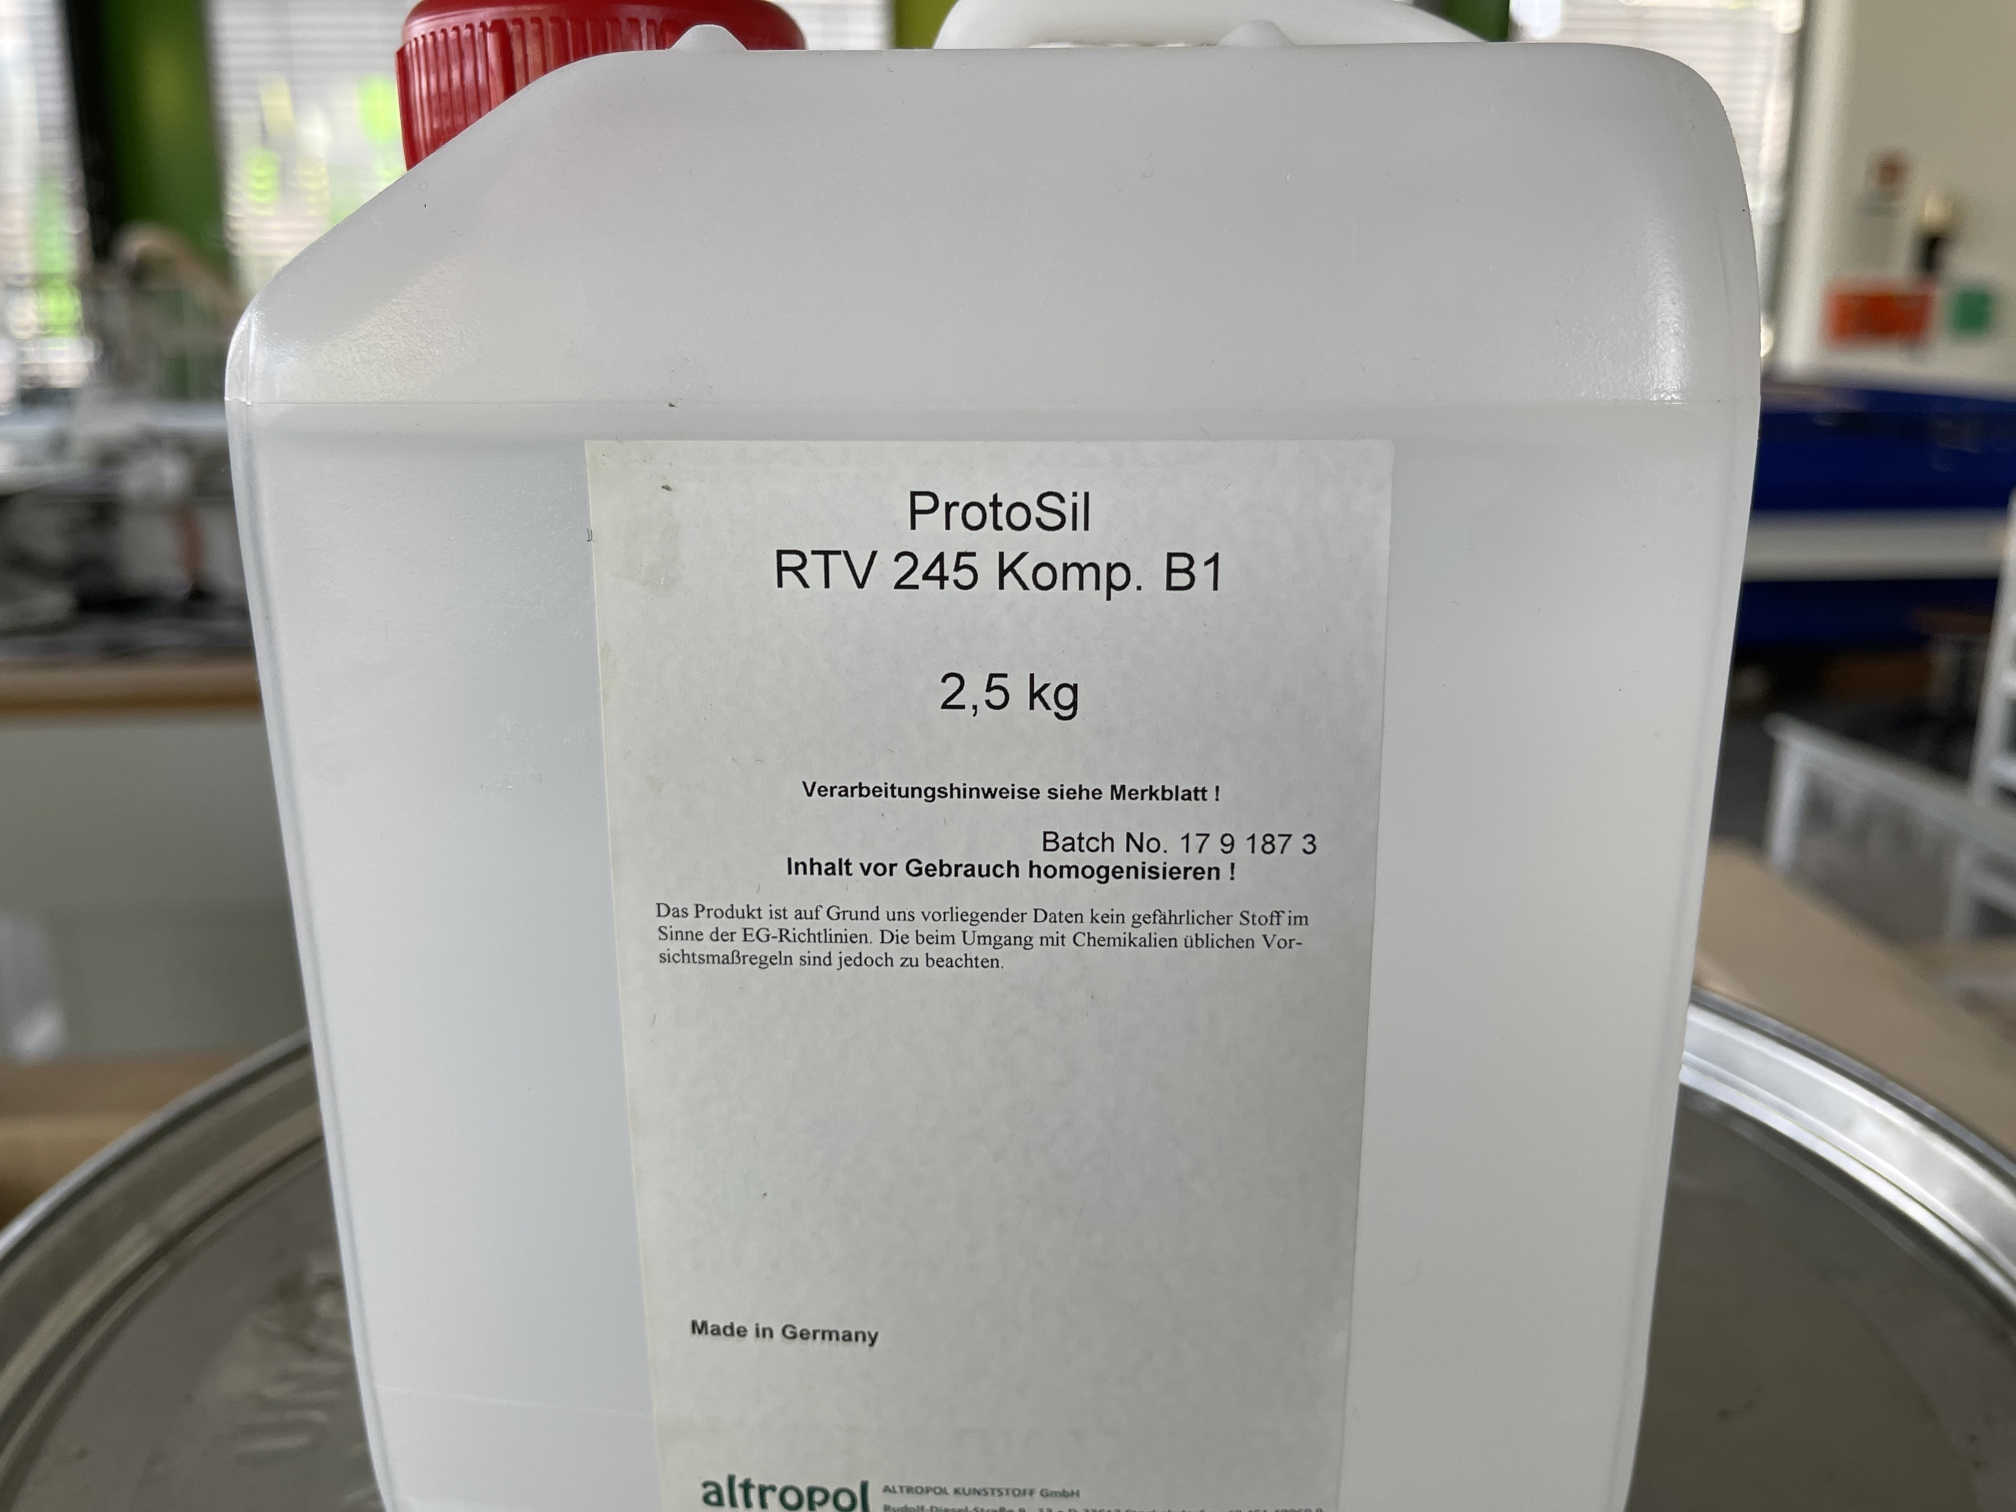
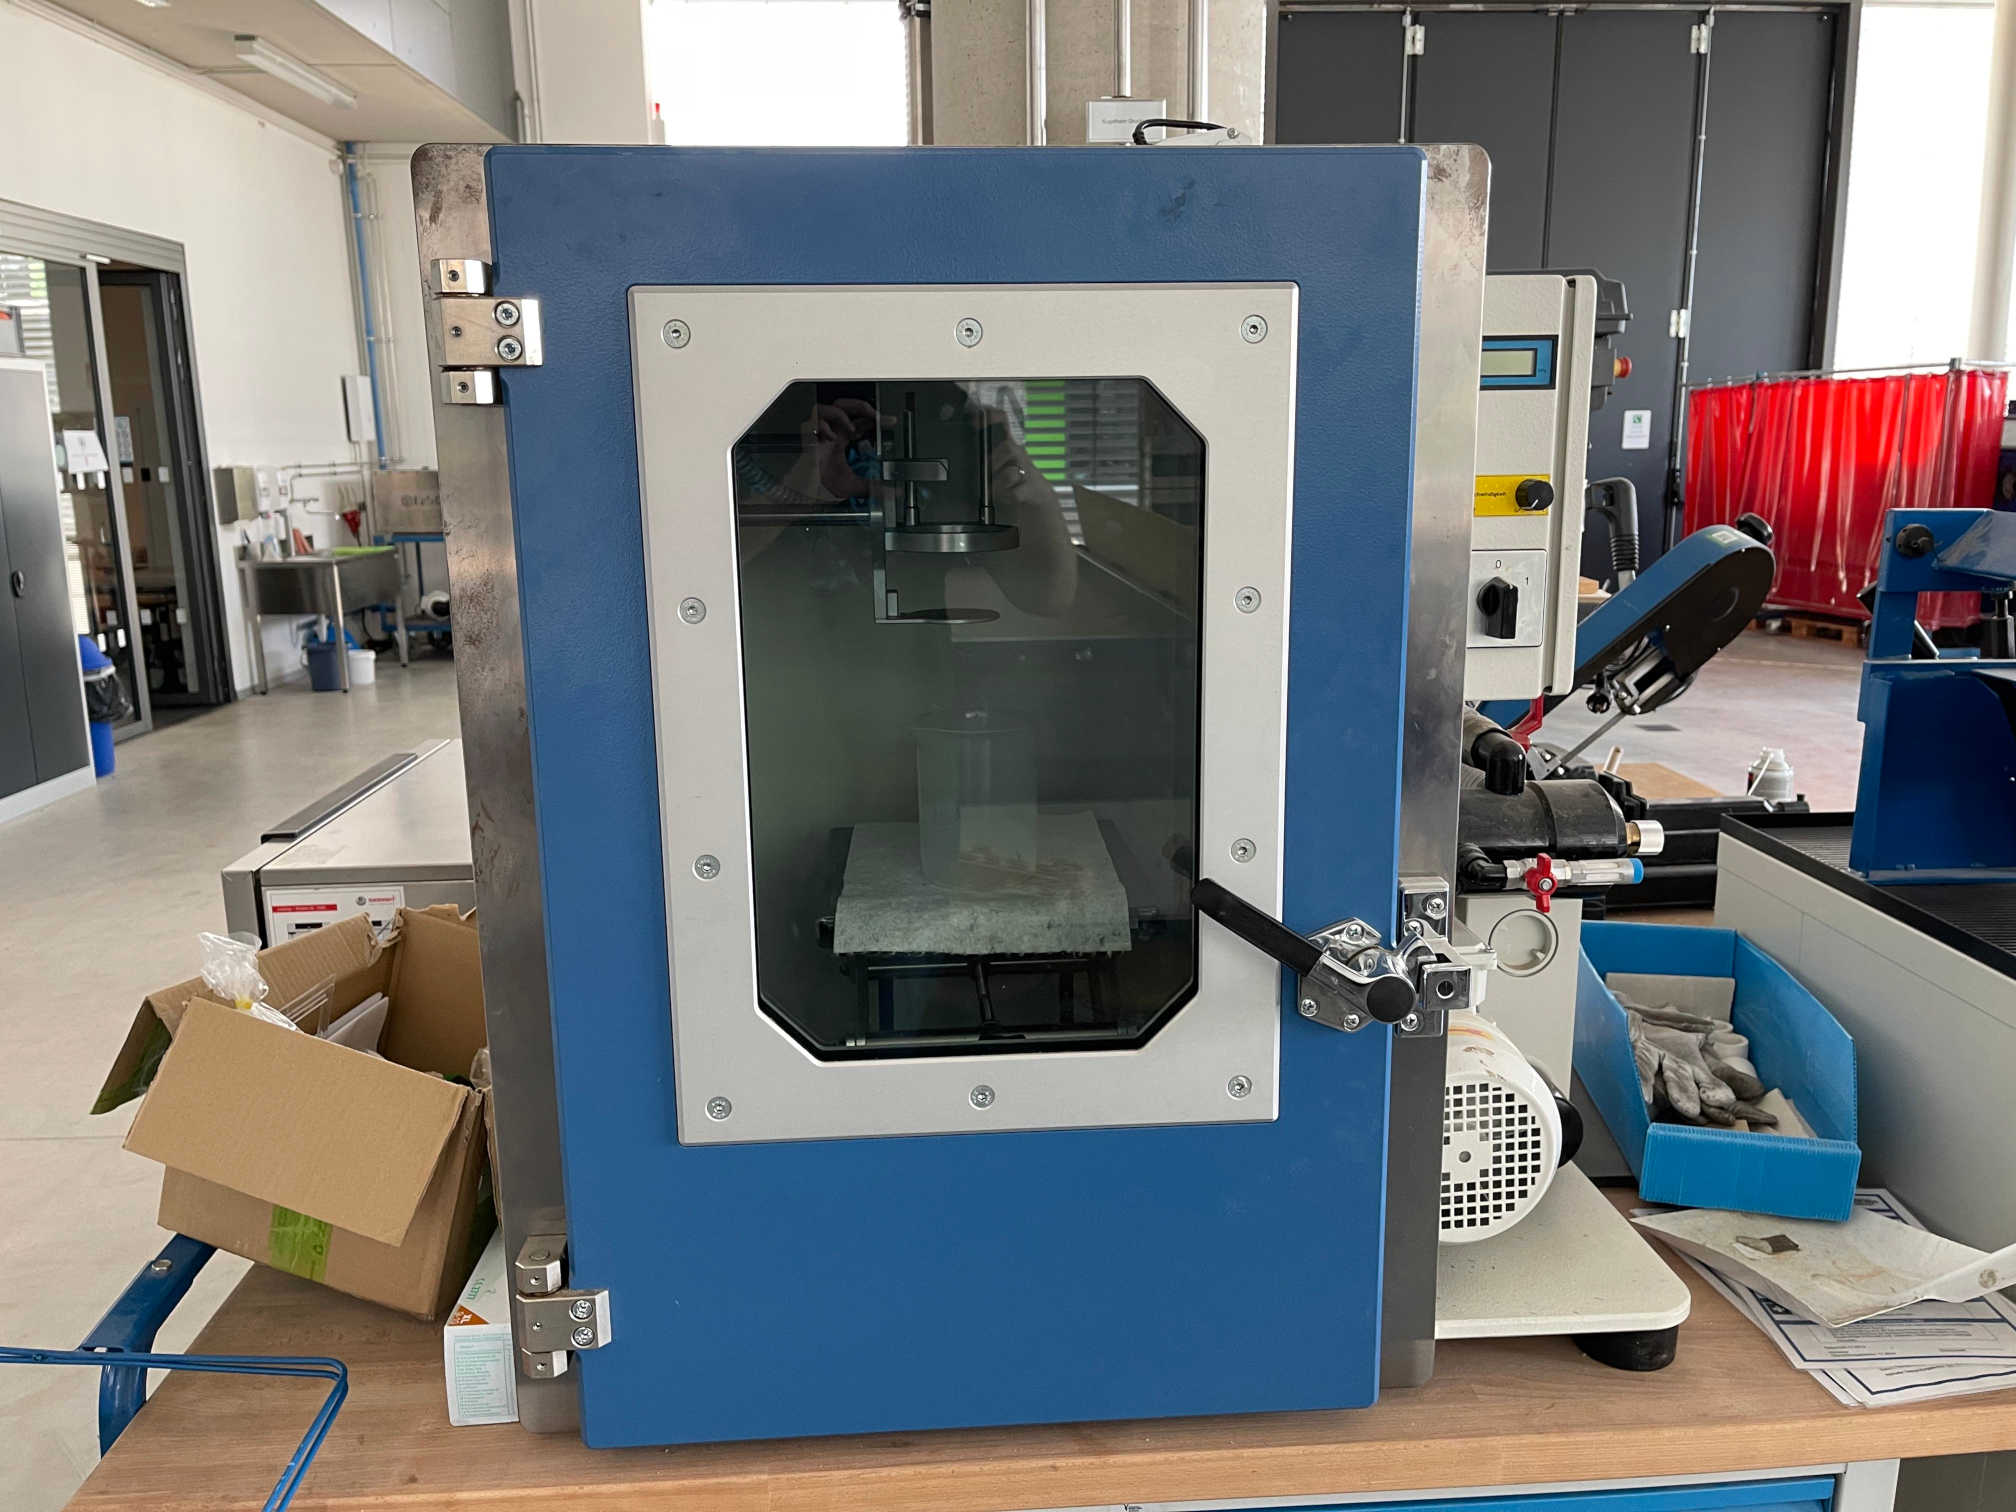
The silicone we use at the Lab is Protosil 245. It comes in two components A and B which have to be combined in a mixture of 100A to 10B. The datasheet for the silicone can be found here. Measuring the volume of the soon to be wax molds by using boolean operations inside Fusion360 I calculated that I would need about 620 grams of silicone for the molds. Since the silicone is processed by 100 parts of part A and 10 parts of part B, it was suggested to me to just use 600A:60B as my mixture. Per the manual of the silicone, I used our vacuumchamber to vaccumize the two parts and stired them and put the two components together within the chamber. While regulating the stirring speed and the vacuum at all times as to not overflow the beakers holding the components.
Sadly from now on everything that could have gone wrong basically did go wrong. In order to clean the molds for casting, Ahmed and I used the pressured air we have at the fablab. While doing this we were too careless and just ended up flinging one of the molds from the table, of course resulting in the mold being shattered on the ground. Since I did not have time at all to just go ahead and mill a new mold, we just taped together what we could. On top of that we realized that the 3D-printed parts were also shifted along other axes and did not fit properly inside the mold. After bending the print a little bit, we managed to allign everything and I began casting.
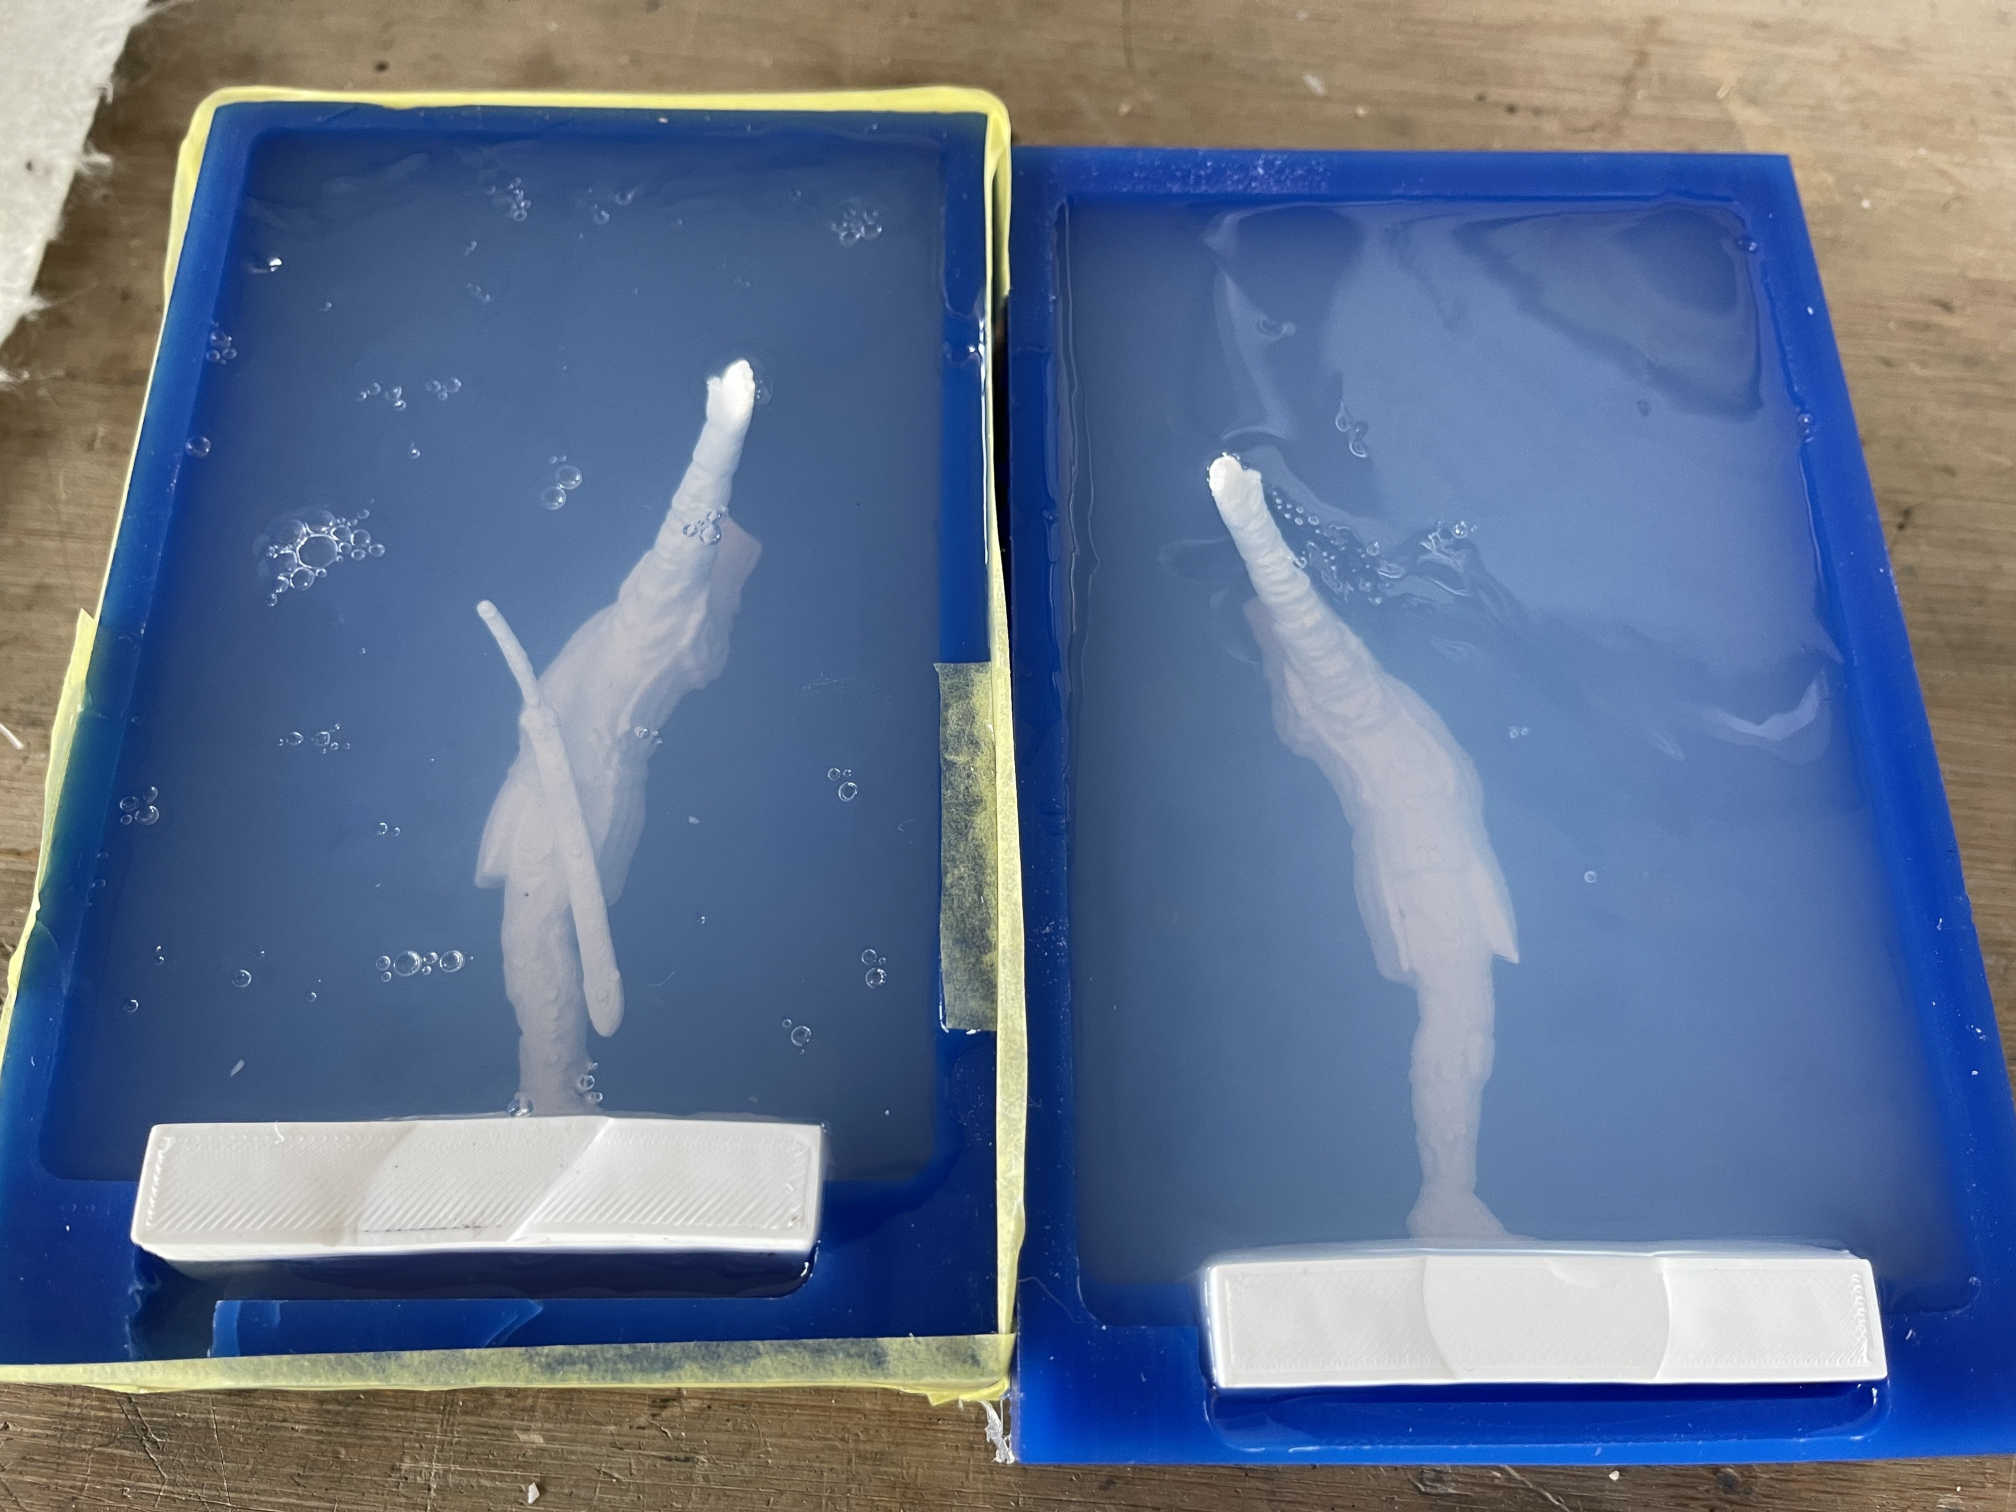
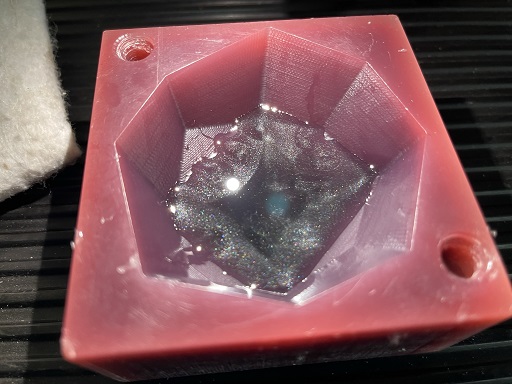
Sadly I do not have a steady hand at all and on multiple occasions dropped far too much of the silicone into the mold, resulting in many bubbles. The next morning, I went directly to the molds and found this:
Sadly this is were I stand now. I had so many problems getting the figurine to work in two parts and designing and cutting the mold, that I just did not have enough time to cast resin just yet. My plan is to reprint the figurine with non PVA support to just be able to cut away the supports the normal way, so I dont have to worry about the heat deforming my print. With this new print I will then recast the silicone with a much much steadier hand and will then cast it in resin. I do it this way because I am not at all happy with the current results, so Updates will follow!
Update
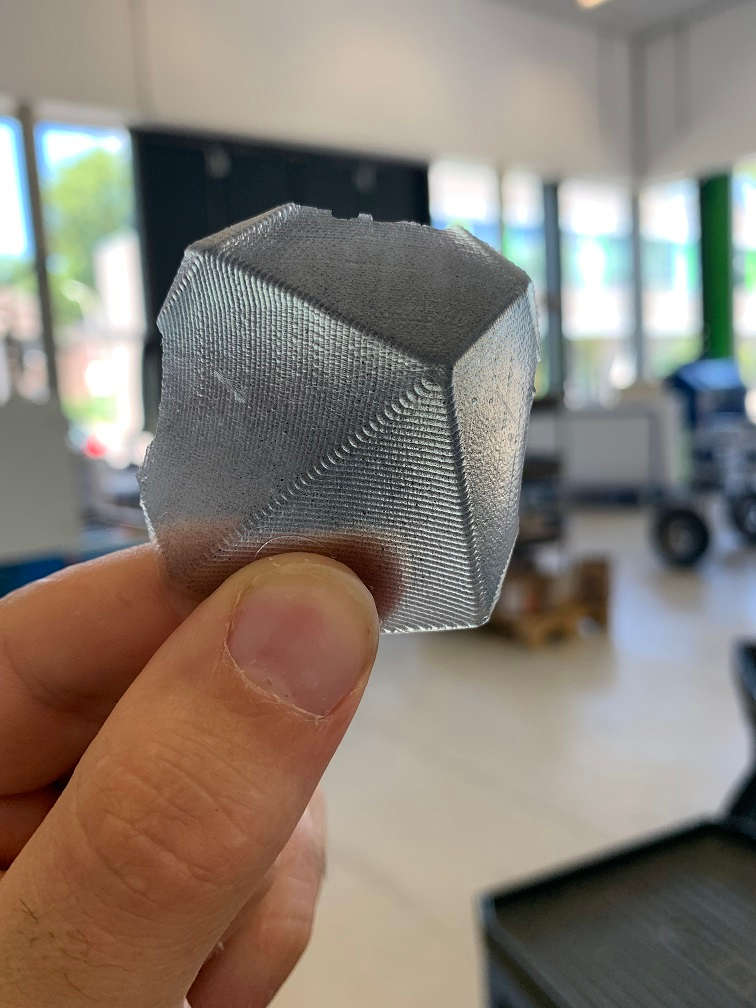
I managed to cast the resin finally! The outcome is somewhat skewed and not as detailed as I would have liked, but maybe later on I will reprint the main figure and redo the pour. Anyways, here is what the final procedure of casting the resin looked like.
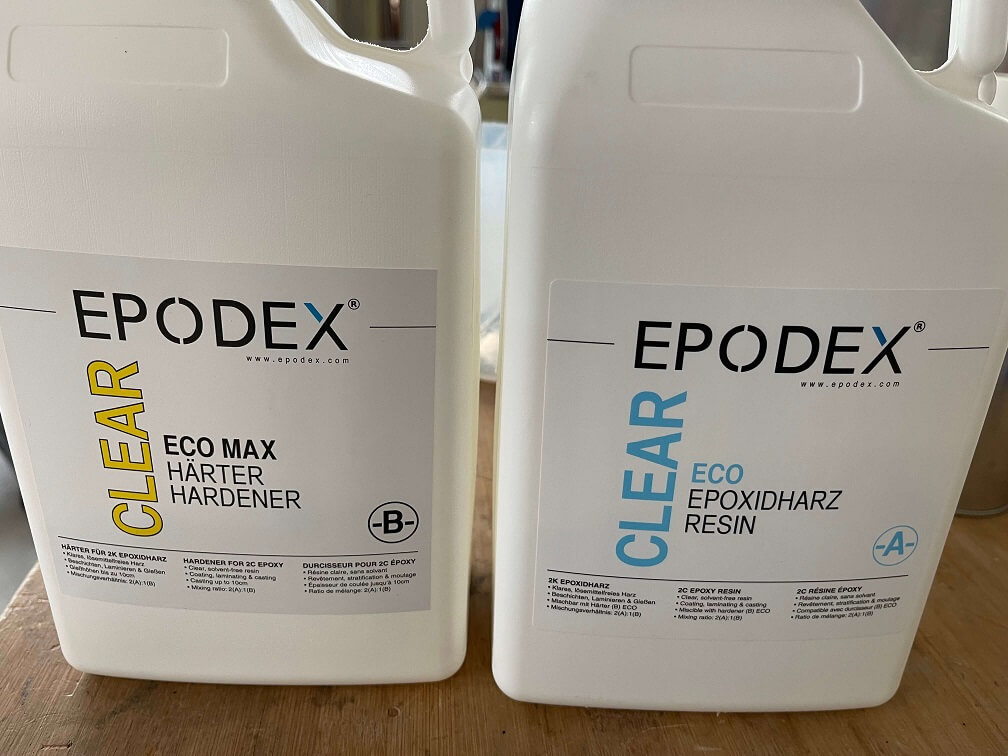
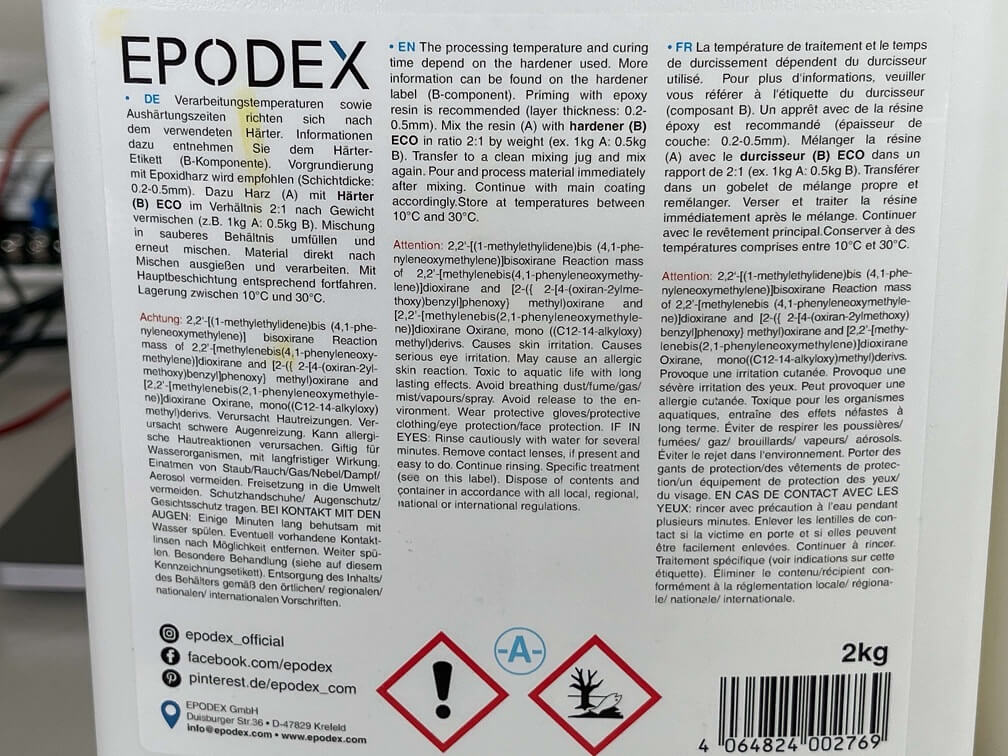
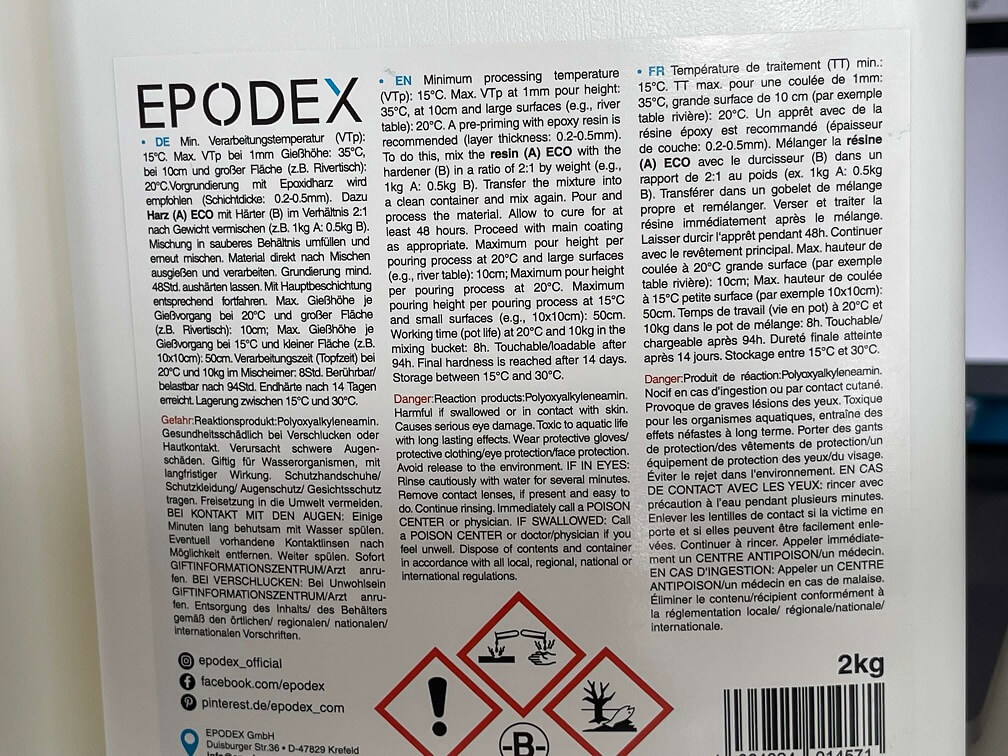
First things first is the Resin. I used EPODEX CLEAR ECO Resin and the EPODEX CLEAR MAX hardener, which is a resin we sourced from a local vendor here in Germany. On top of the Resin itself, I also used metallic colouring pigments that are mixed together with the two components to change the clear resins colour. The resin itself is mainly advertised as being used for river tables, which one day I also want to do, because they are really cool. However, the resin can also be used to cast smaller parts, which I am doing. Since the resin is sourced locally there is nothing like a hazard pdf or something like that. I have however put all of the important information together on our Group Assignment Page at the top of this page. There is everything listed from pot life to safety instructions!
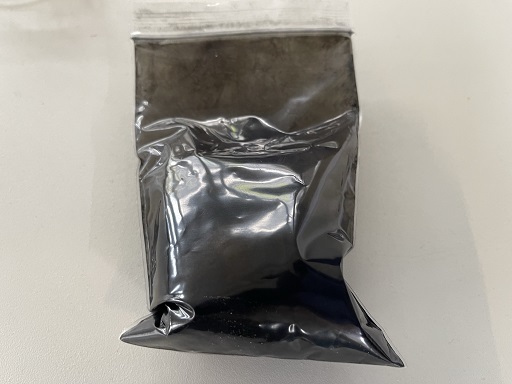

Before casting my final piece, I went ahead an cast a test piece with the colouring pigments also in the mixture to have a look at what the final figure could look like. For this I used a simple Mould that was lying around in the lab from one of the previous cycles. The result of this test cast was this piece here:
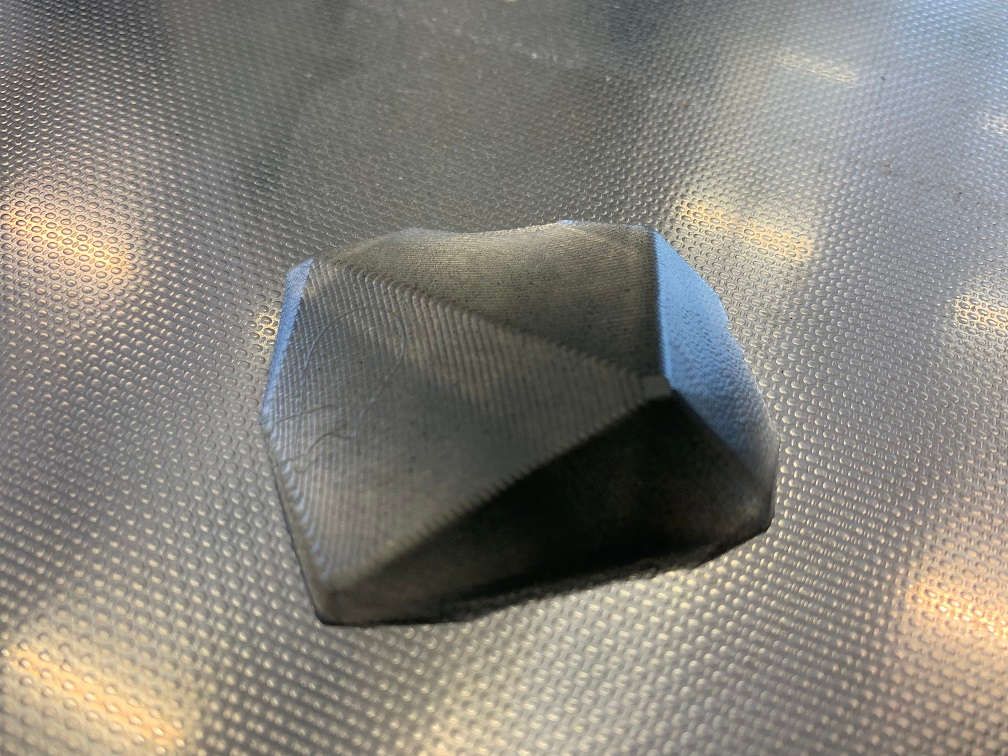

From this Testcast I learned that I had used too little of the pigments, so I knew I had to up the amount later on.
Now for the real cast. Sadly many stupidn things hapened during the cast process. First of, I broke one of the wax moulds. I used presurred Air to get between the cast and the wax mould and ended up getting the mould out. However, after the mould was freed, the way itself was so light that it got pushed of the table by the pressured air and hence broke in the process of landing on the ground :(
Apart from this, the rest went kind of smooth though! With both Moulds in my hand, I used a sharp knife to cut away excess resin that went over the 3D printed models, so both Moulds together would develop a single "Hole". With this step done, I had my two Moulds ready to accept the coloured resin:
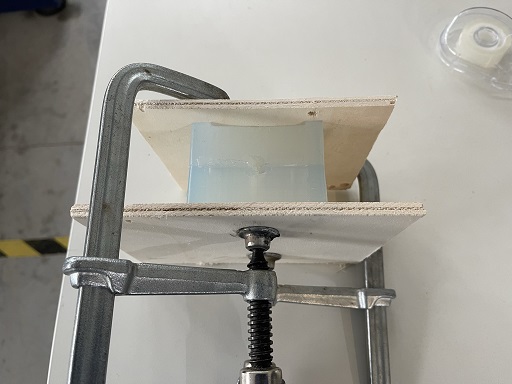
In order to be able to cast the resin inside the Vaccum Chamber, I clamped both Mould halves together with wooden plates and two clamps:
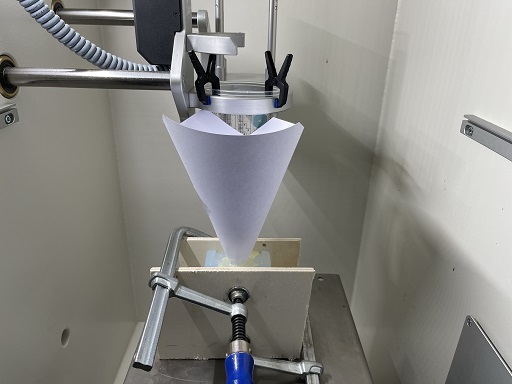
After that I also added a paper funnel to the Mould in order to pour the resin inside the vacuum chamber more precisely:
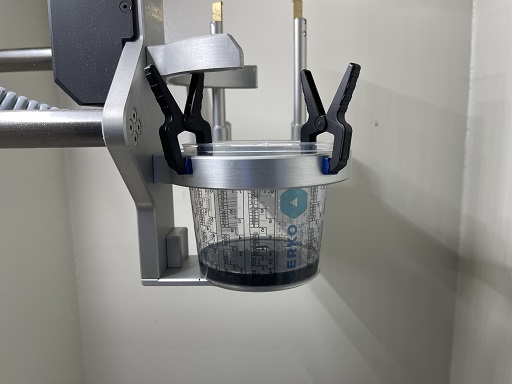
After everything was set up, I mixed the resin, hardener and pigments according to the packaging they came with. For me this meant that I had to mix two parts of resin (Component A) with one part of the hardener (Component B), while adding one to two small heaps of the pigment (Far less than what you would first think). After mixing carefully for a few minutes, I put the Mould as well as the resin mixture inside the Vaccum chamber and turned it on:
With the help of Ahemd I could even record myself pouring the resin into the Mould:
As you can read up about on the Group assignment page, I did not have to hurry very much while pouring this resin, as its pot life is around 8 hours. With such a high pot life however, also comes a high Curing time. Full vulcanization needs 7 days and the final hardening stage is only completet after 14 days, so two weeks. With this in Mind, I let the cast sit inside the Mould for a week. Sadly I was ill at home when the time came to demould the figure, so Ahmed did me the favor of demoulding the figure and sending me a picture to showcase on this page:
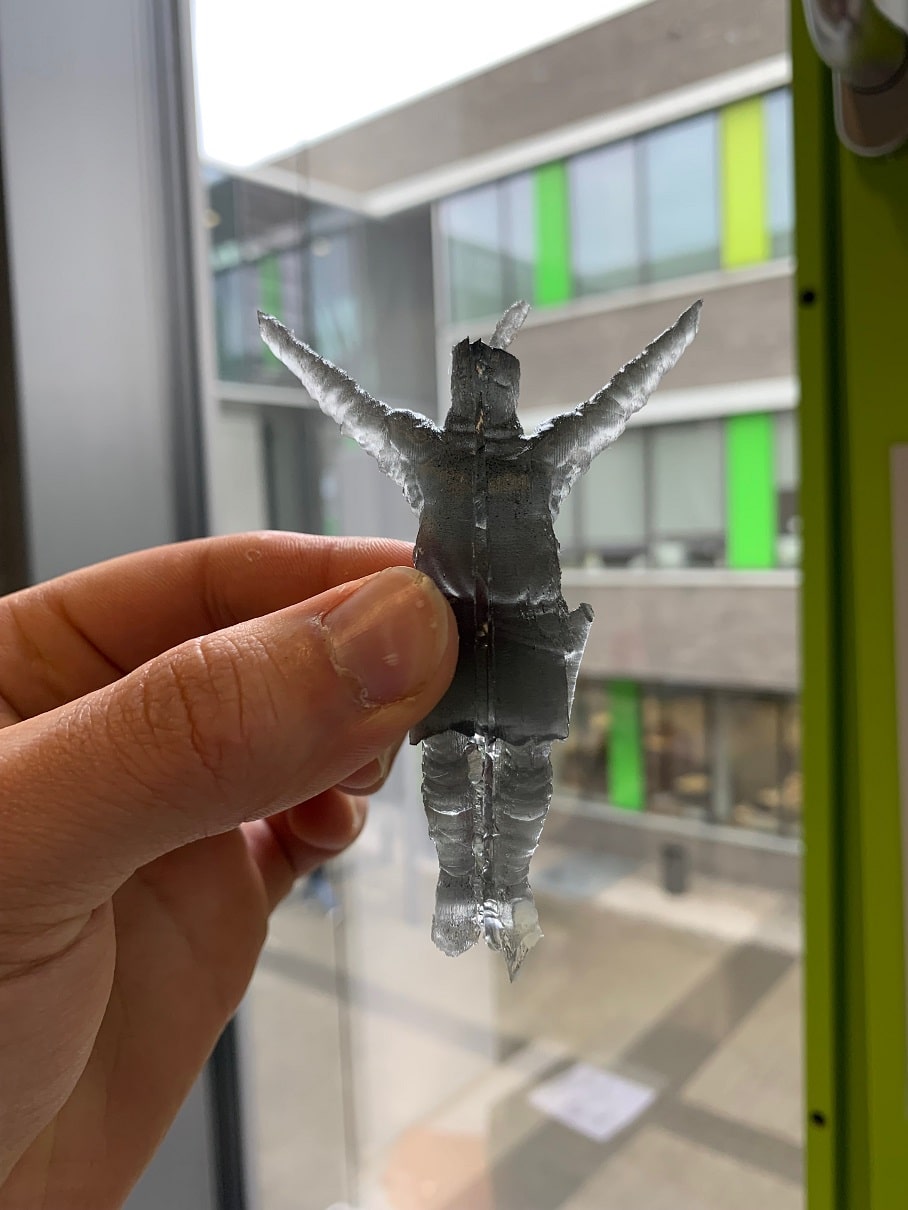
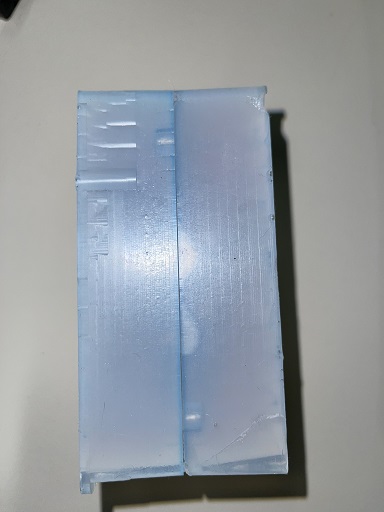
As you can see both halves do not line up perfectly, which is due to the figure halves being immensly warped in the process of removing the PVA. Maybe later on Ill try and make a new Mold, or even try making a Version that makes smaller figures and uses one Block of wax. With a new Block of wax, I would also change the way I treated the 3D print. I would just let the PVA dissolve over a couple of days in room temperature water. I did not make my life easier at all, when I used hot water, as you can see with the skewed final result. In the end Im happy nonetheless! I managed to create a Mould where different Figures can be loaded into for creating negatives for casting resin! Quite neat :D