CAD - computer aided design


Comparison of raster programs

As I understand that raster programs can also be great for designing parts of my possible final project, at the time I was doing this comparison I wasn't sure about my final project, so I decided to test all by making the same modifications for 2 images on each program.

Original image of FabAcademy logo with background

Programs to be tested


Process using Gimp

Using Gimp was a great experience, the user interface is clear, and also is similar to other programs.

I first open up the program it take a while but it was faster than photoshop, I started to explore the how you can move the view of the image. Using the space+mouse to pan around, ctrl+mousewheel to zoom.

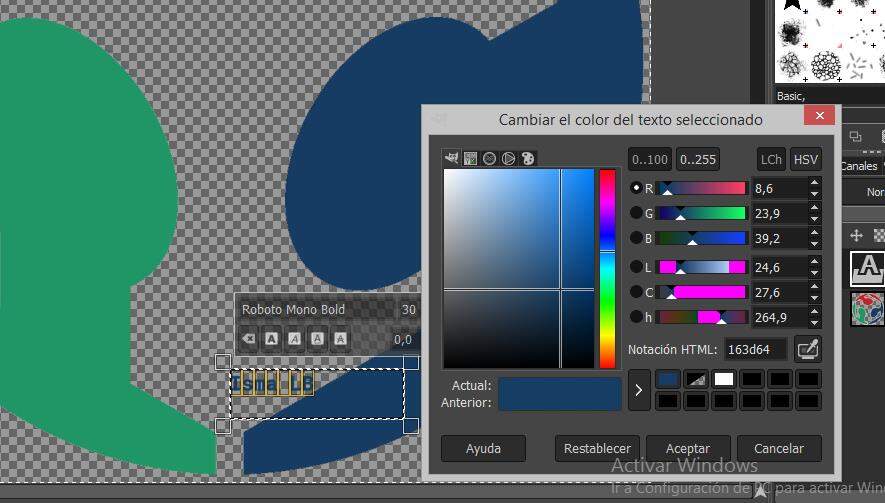
I found that the color picker of Gimp has also a different aspect but seems useful. This color picker feels less intuitive than the one on photoshop, but I like it more.

Screenshot of Gimp color picker Screenshot of Gimp Settings to select a color

Workflow to delete the background

  1. Open up the image using the file menu.
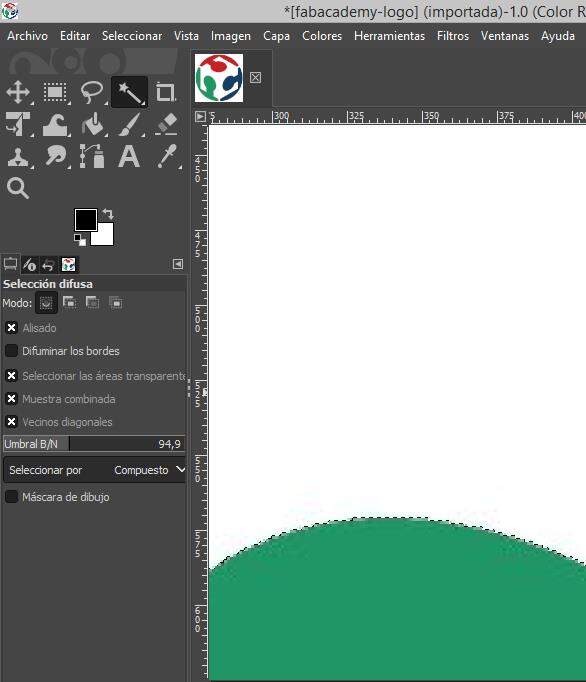
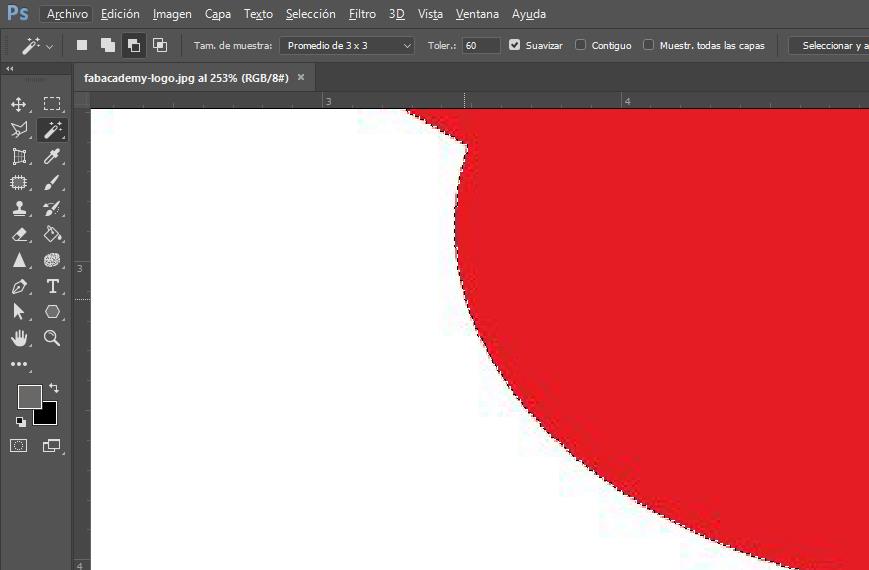
  2. Select the white background using the diffuse selection tool, I have to play with the settings to get better results on the edges.
  3. Add an alpha channel by right-clicking the layer, use the clear option (supr).
  4. Add Text using the text tool, which allows you to pick font, color, and size.
  5. Rotate the text using the transform tool.
  6. Save the file as .xcf (Gimp editable format), and also export as .png.

Workflow to crop image

  1. Open the image using the file menu.
  2. Use the crop tool to get a smaller version of the image, you can set a specific pixel size, and frame it using different reference grids.
  3. Export the image as .jpg open up a menu to choose quality setting and compression


Screenshot of Photoshop color picker Screenshot of Photoshop settings to select a color

Process using Photoshop

Photoshop is a well-known photo editing program that has a lot of tutorials and courses. Is a really powerful to make complex image composing but it requires a license and also can be slow on low-end computers

It has the same moving control, use the space+mouse to pan around, and ctrl+mousewheel to zoom.


Workflow to delete background

  1. Open up the image using the file menu.
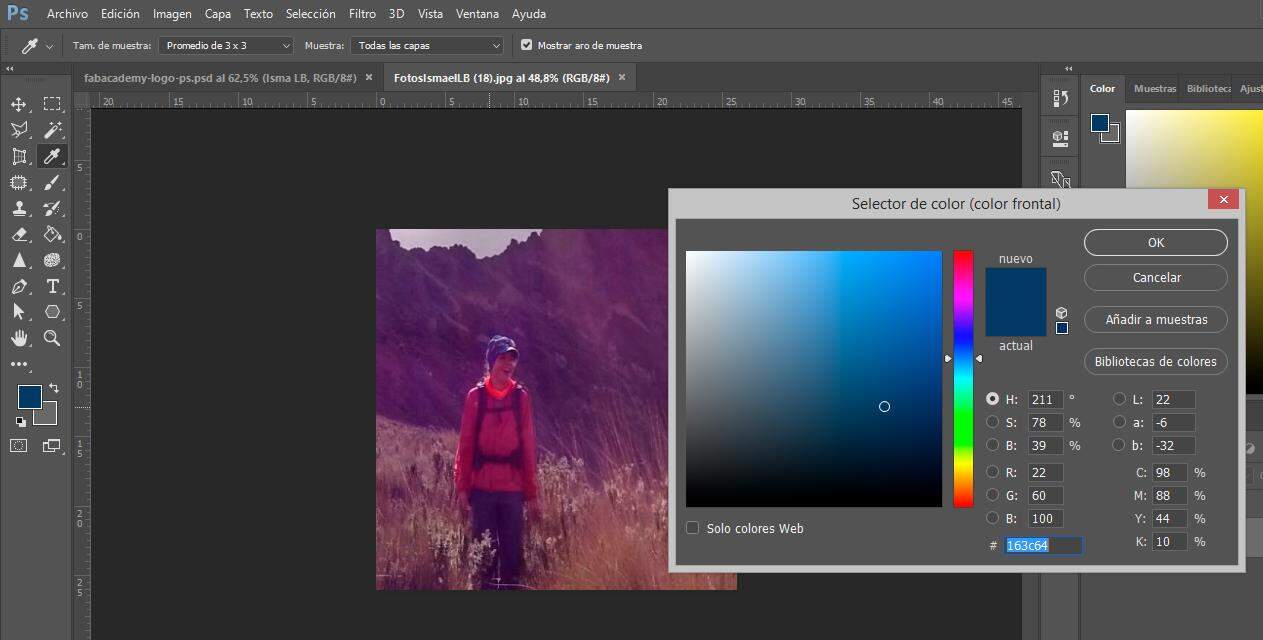
  2. Select the white background using the Magic Wand tool, The default settings work great on the edges, although you can modify if that's not the case.
  3. Right-click to invert the selection, make a new layer by cutting. delete the base layer.
  4. Add text using the text tool, change the font size and color, rotate from there.
  5. Save the file as .psd (Photoshop editable format), and also export as .png.

Workflow to crop image

  1. Open the image
  2. Use the crop tool to get a smaller version of the image, setting the pixel size was a bit complex
  3. export the image as .jpg open up a menu to choose quality setting and compression


Process using ImageMagick

ImageMagick is a terminal program, to make this example I used it on the Cmder terminal.

Super powerful but not that easy to use, you need a lot of flags on each command to place the text where it should be.

Screenshot of ImageMagick command to place the text
Screenshot of ImageMagick command to remove the background text Screenshot of ImageMagick command to crop image

Workflow to delete the background

  1. Open the terminal and move to the image directory using cd
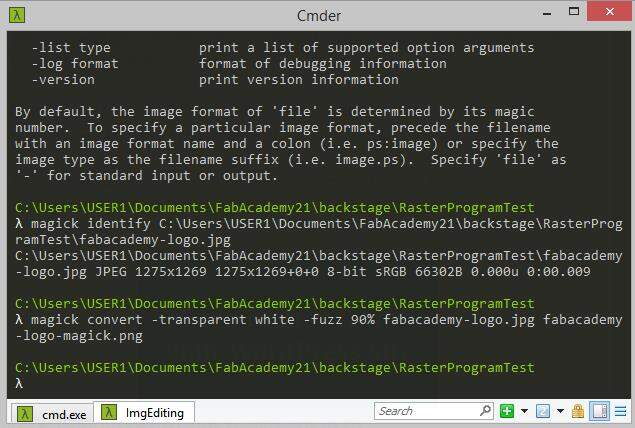
  2. Use magick convert -transparent white -fuzz 90% < input image> < output image> this command can eliminate the white background.
  3. Add a text using magick convert -draw "0,0 'Isma LB'"
  4. Then move the text to the corresponding place adding the tags: -gravity south -draw "translate 100,200 rotate -32 text 0,0 'Isma LB'"
  5. To modify the aspect of the text I added: -pointsize 30 -font Roboto-Mono-Bold -fill #0A3359

Workflow to crop image

  1. Move the terminal to the image directory using cd
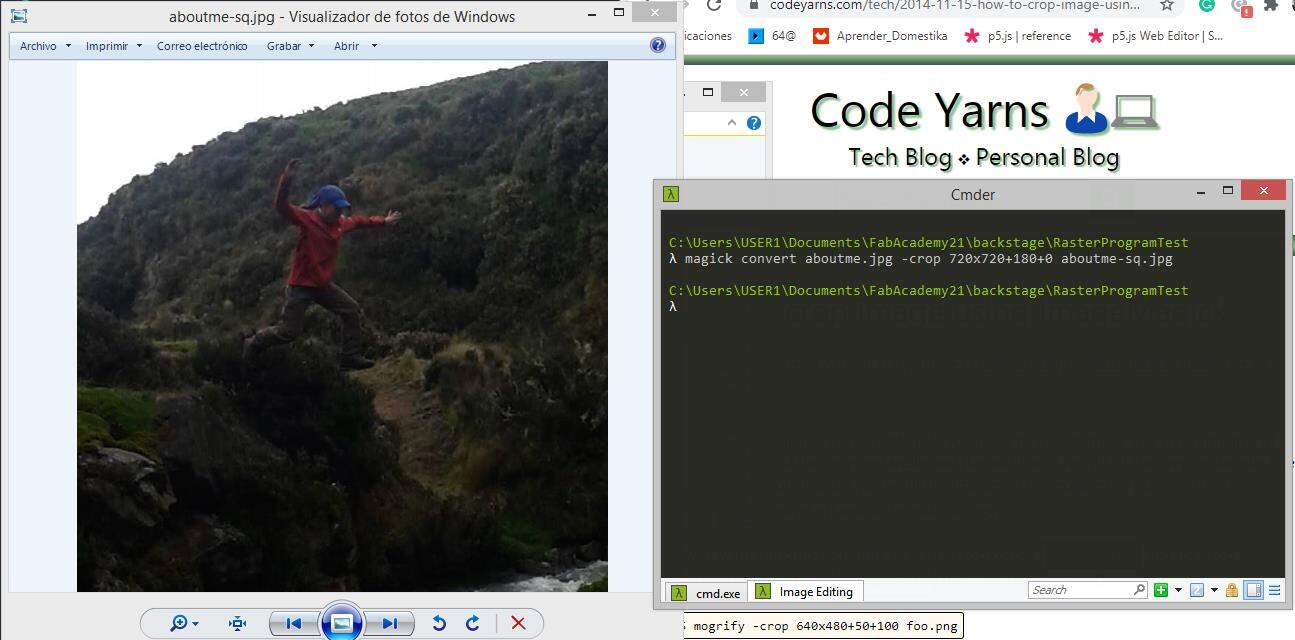
  2. Use the crop command, takes the size WxH+offsetX+offsetY: magick convert < input img> -crop 720x720+180+0 < output img>
  3. You may need to test with the offset to make the crop fit

Comparison of vector programs

This will help me familiarize myself with the vector programs and learn how to use and when to use each one, this can be helpful when is need no manipulate any vector data or make simple info illustrations

Programs to be tested

Learning Sketchpad

This tool of vector drawing was unknown to me, it has a downloadable app you should pay $4.95 to use. But I use the free version that is completely web-based.

At first, I think that the app was too simple, but after a while of using it I realize that being simple is what make it strong, I didn't use any tutorial to learn it, only by playing on the interface I was able to make an illustration that shows my potential final project.

First I use only the pen tool, changing the fill and stroke colors, then I added the labels using the text tool, you can change the font and color easily. As more options inside the pen tool was an arrow generator, that makes it easier to specify elements with labels.

At the end I exported the illustration as .sketchpad file for later editing, and as a plain .jpg to use it on the web

Get the .sketchpad design file!
Project drawing made on sketchpad Adding labels and arrows Finished illustration


Line drawings on Illustrator Adding colors to the logo design
Adding colors to the logo design Adding colors to the logo design
Final project

Practice on Illustrator

This was a program I have used before, so I try to make a logo for my potential final project in order to test out the interface and tools, this will allow me to compare with new programs.

The idea was to sketch a possible logo, I use the Pan tool, then as I like how it ended I decided to go further and fill it with colors.

To fill with colors I used the border and fill with the shapes make with the pen tool. I have to fix some issues with the shape and close some of the paths to display the colors properly.

In order to pick colors I use Adobe color, also I added some plants growing inside the logo to add more detail. To finish I add also text elements but the result was not as good as I expected.

Get the project file here.

2D design

The programs to be tested are also 3D programs, but both have a 2D workspace that I will be testing here.


Learning Free CAD

This was a new program to me, the idea of it being open source is something that I really like. But sadly I have never used it before

To start with it I watch a Tutorial, it was a good introduction to Free CAD.

But I really struggle with the programs because the project tree and history are combined, and that was kind of confusing, I even chased the program once. It was hard to learn but also I was motivated to learn new software, the process of getting comfortable using it took a while.

I experimented with the sketch workspace and it was really easy to use, the only thing I miss o don't figure it out yet are some keyboard commands to select the tools easily

Get the Free Cad .FCStd file
First steps of a sketch on Free CAD Sketch fully constrained on Free CAD


Practicing Fusion 360

First steps of the sketch on Fusion 360 Sketch fully constrained on Fusion 360

This was a program that I already know about, so I started a parametric design of a pattern to bend the wood using a laser cutter.

The sketch workspace is great and the keyboard shortcuts make it faster, for example, l activate the line tool, r the rectangle, d for distance, and a lot more.

To start I created a rectangle and cut some parts for a later press-fit joint, in the central part the start of the pattern was created and constrained, after a rectangle pattern help to repeated along the horizontal axis.

Get the Fusion 360 .f3d file

3D design

The programs to be tested where also tested to make 2D design


Practicing 3D with Fusion 360

The idea with this practice was to make a cube with some holes on it, to test how to create solids form sketch, and use sketches to modify even more.

I started like any Fusion 360 project with a base sketch, and then use extrusions and creating sketches on the created faces. In the end, I use the fillet tool to make features on the edges.

Get the Fusion 360 .f3d file
Base sketch on Fusion 360 fully constrained Final 3D body on Fusion 360

3D with Free CAD

Base sketch on Free CAD fully constrained Final 3D body on FreeCad

The idea was to recreate what was done on Fusion 360 in order to adapt me to the Free Cad workflow<, and also to understand the differences between the two software.

The sketching part was easier, the practice on the 2D design was useful, make it a 3d was harder especially when I have to understand how the bodes relate one to the other and also, that you can project one sketch into a face and the change the geometry. I fusion this is easily done by creating the sketch on the face you need it.

Get the FreeCad .FCstd file

Conclusions

Learn and test this programs was a fun experience trying to find the balance between make something complex or with value for the project but also saving time to make have time to test out the other programs

As a summary I will make some charts that compare each software, pros and cons.

Raster

Software Uses Licence
Gimp Great for quick editing, very capful of dealing with text and layers Free
Photoshop Super powerful, great for advanced image editing and compositing Paid
ImageMagick Terminal application, useful for quick compression and resizing, tedious to preform more complex editions or to add text Free

Vector

Software Uses Licence
SketchPad The browser application is simple but also very useful, not recommended for advanced drownings Free
Illustrator Super powerful, great for advanced vector drawings Paid
Inkscape Not tested yet, sound very interesting, coming soon... Free

2D

Software Uses Licence
Fusion 360 The 2D sketching tools are super powerful, easy to constrain and set dimension, keyboard shortcuts that help a lot Paid
Free CAD Very complete sketch workspace, did not fins how tu use keyboard, constraints solving is sometimes hard free-cad-2d

3D

Software Uses Licence
Fusion 360 Super powerful, multiple body editing and operations are supported Paid
Free CAD May be easy to get lost in so many workspaces, hard to modify bodies and place sketches for modifications Free

Design files

Have you?


Prev Next