Task to be Perform for this week
This week our task is to test the Design rule for 3D Printer's and Print the 3D object (small, few cm3, limited by printer time), could not be made subtractively - 3D scan an object (and optionally print it)
Above task is to perform by Group assignment and Individual assignment
What is 3D Printing and scaning:
3D printing or additive manufacturing is a process of making three dimensional solid objects from a digital file. The creation of a 3D printed object is achieved using additive processes. In an additive process an object is created by laying down successive layers of material until the object is created. Each of these layers can be seen as a thinly sliced horizontal cross-section of the eventual object. 3D printing is the opposite of subtractive manufacturing which is cutting out / hollowing out a piece of metal or plastic with for instance a milling machine. 3D printing enables you to produce complex shapes using less material than traditional manufacturing methods.
3D scanning is the process of analyzing and capturing a real object or environment and creating a virtual 3D model with the help of the collected data. A 3D scanner, then, is the tool responsible for executing this capturing.
Source:https://3dprinting.com/what-is-3d-printing/
Group Assignment:-Test the design rules for your printer's
Document your work and explain what are the limits of your printer(s) (in a group or individually)
The task for this week is to characterize the design rule for 3D Printer, The Fabacademy provide some jpg image for test the printer like Support( Over hang ,Clearance and Unsupport (angle, ovehang,Briding,wall thickness , Dimenssions and so on...).
We have characterize 3D printer availble in our Fablab at Vigyan Ashram by performing above test on it.
Individual Assignment: In case of individual assignment the task for this to design the object and 3D Print it.but one condition in that your object could not be processed by subtractive methoed.
Learning outcomes
1) Identify the advantages and limitations of 3D printing
2) Apply design methods and production processes to show your understanding of 3D printing.
3) Demonstrate how scanning technology can be used to digitize object(s)
About Fracktal Work 3D Printing Machine
The 3D printer availble in our lab has following Specifications
Make: Fracktal Work 3D printer
1) Build Volume: 200x200x200mm
2) Nozzle: 0.25, 0.4(Default), 0.6, 0.8mm(Direct Drive Extruder with E3D V6 Hotend)
3) Build Surface: Flexible PEI (AC Heated Bed)
4) SD Card input wild LCD Display (Stand alone printing)
5) Power Failure ressurection - Never lose a print to power failures again.
6) Multi Filament Capability: PLA, ABS, Flexible, Composite Materials (Wood Fill, Bronze Fill, etc), Nylon 618

My part and analysis in Group Assignment :-
In group Assignment we have divided the object given by fabacademy and I have printed and analyzed the Wallthickness file.
i had used material for the Printing is ABS i.e. (acrylonitrile-butadlene-styrene)
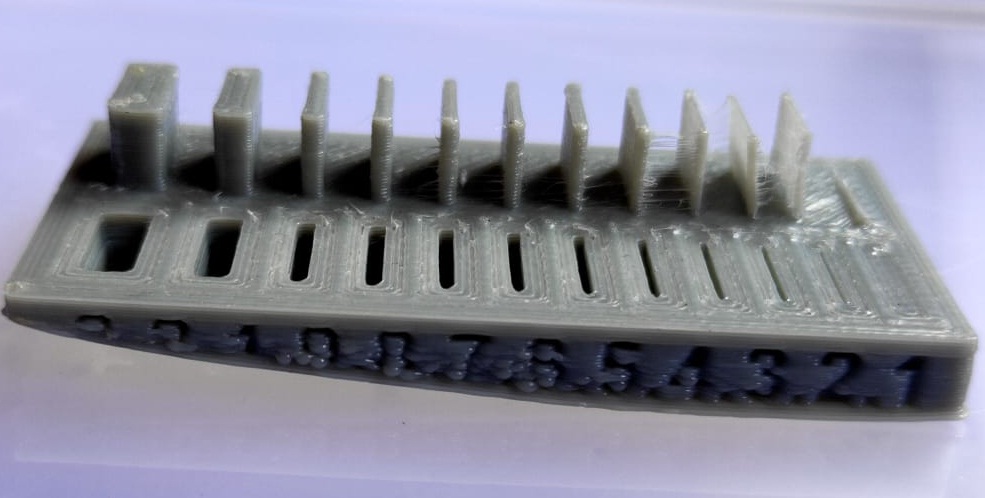
WALL THICKNESS:- In 3D Printing wall thick is nothing but the distance between surface of your model and its opposite sheer surface.Wall thickness is defined as the minimum thickness your model should have at any time. It’s important that every surface of your 3D model has been assigned a wall thickness. The wall Thickness Test: so In group assignment I have carred out the Wall thick ness test
First I have download the Wall thickness file .jpg from fabacedemy websites and export the file into Fractory Software as a STL file format Keep the parameter as recommended for Print setup .

About Fackotry Software
Then In fractory software i have set various the parameters.
Fractory is the 3D printer slicing application.
You can use this software with 3D printers.
It is compatible with most desktop 3D printers and can work with most files in the most common 3D formats such as .STL, .OBJ (as well as image file formats such as BMP, GIF, JPG and PNG).
Some features include:
showing a toolpath, estimating printing time and material usage. Experienced users can use third-party plugins.
What is Slicer Software:-
The slicer, also called slicing software acts as the middleman between the 3D model and the 3D printer.
Once you have modelled the object you would like to 3D print, you will have it in an STL file. The slicer converts the model into a series of thin layers and produces a G-code file containing instructions tailored to a specific type of printer.
In other words, it is dividing the object into a stack of flat layers and describing these layers as linear movements of the 3D printer extruder, fixation laser or equivalent.
Observations
In wall thickness test it observed that when wall thickness is gretter that 0.3 mm it will print propely on 3D printing machine.
But in this case I didnt understood that , The Nozzel Diameter of given printer is 0.4mm so how is it possible to print the wallthickness of 0.1mm,0.2mm,0.3mm
it is also observed that while printing the object, the figure i.e. 0.8 mm to 3mm will not print because of unproper fixing.
We have analyize the different object in Same way
The details about Group Assignment is given on our , Vigyan Ashram Fablab -0 page
Click here to detail about Group Assignment
Individual Assignment:-
In case of individual Assignment I had to design 3D object using 3D designing software which can be only made by addetive method.
What is actually meaning of additive and subtractive method.
Additive method:-Additive manufacturing is defined as a material joining process, whereby a object can be directly fabricated from its 3D model, usually layer upon layer. Comparing to traditional manufacturing technologies such as CNC machining or casting, AM processes have several unique capabilities.
Subtractive Method:-Subtractive process is a process by which 3D objects are constructed by successively cutting material away from a solid block of material. Subtractive process can be done by manually cutting the material but is most typically done with a CNC Machine.
Initially i have tried to develop the some basic 3D object like whistle, vase shape which can be easily print by 3D printer
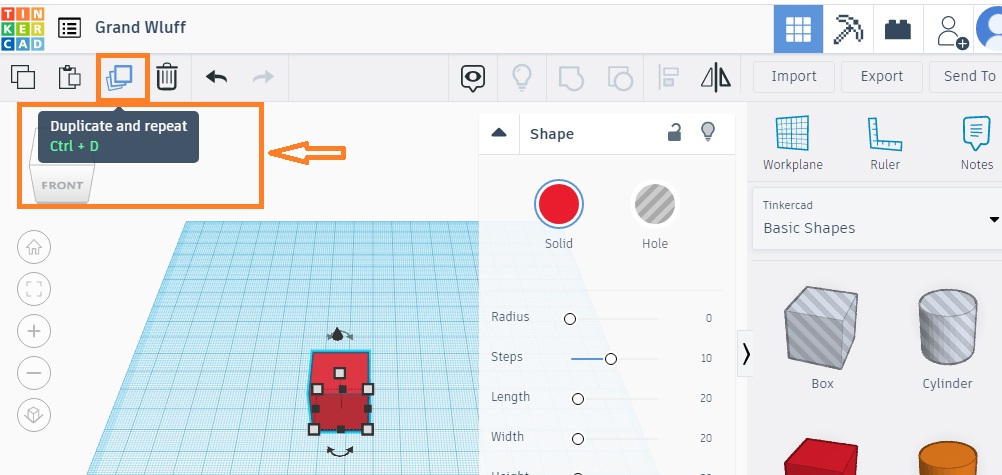
I have used tinker cad software first to make the design
In this software we found one good feature using that we can Easily make some kind of shape that can be used to 3D printing.
Here i had experienced that, for beginers TinkerCad is very useful software and we can make any complicated object/design in very easiest way.
This is I had tried some shape By using duplciate and repeat command it can be done easily.
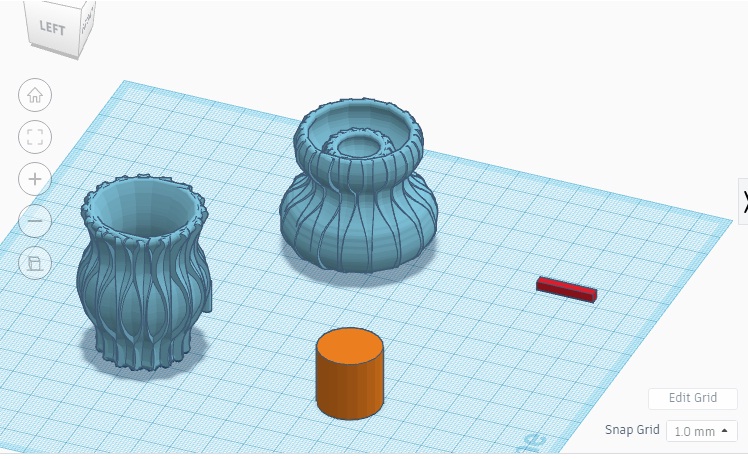
This is how i made the whistal in Tinker CAD
Then For designing my object i have reffered tutorial of freedcad, Rhino software and by following them tried 3D designs.
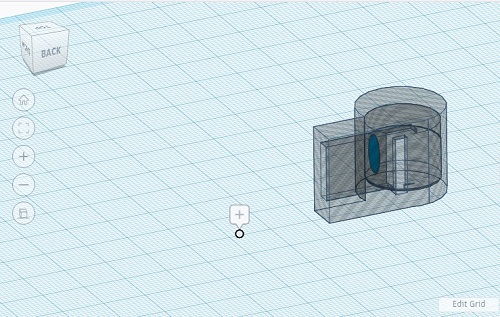
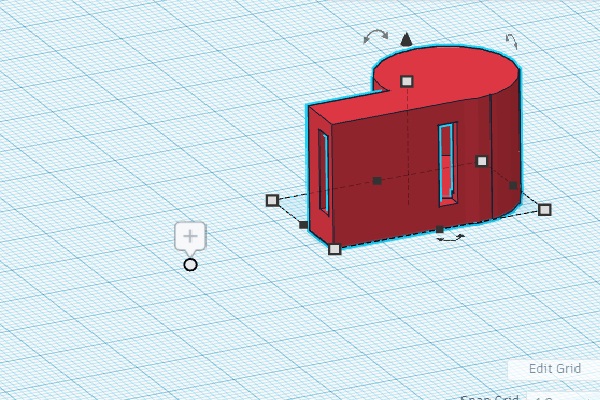
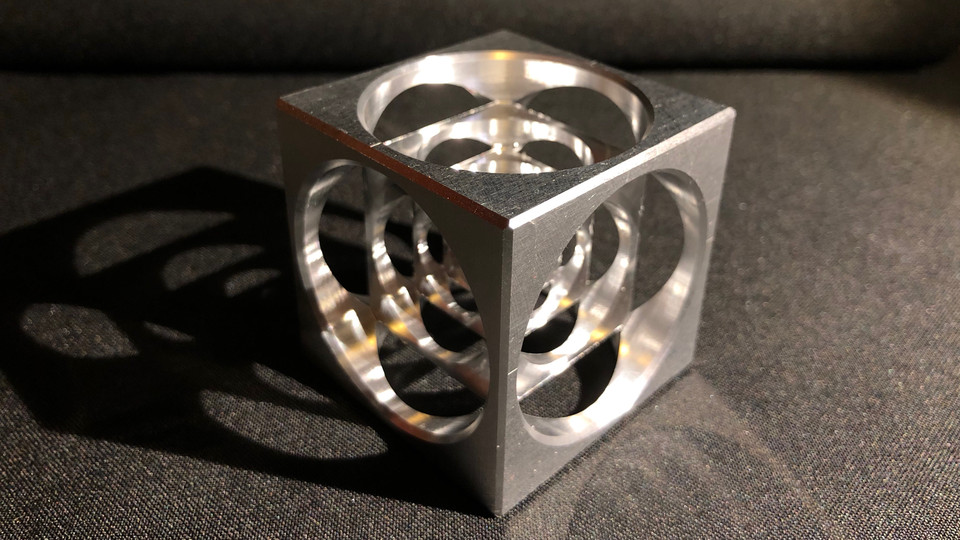
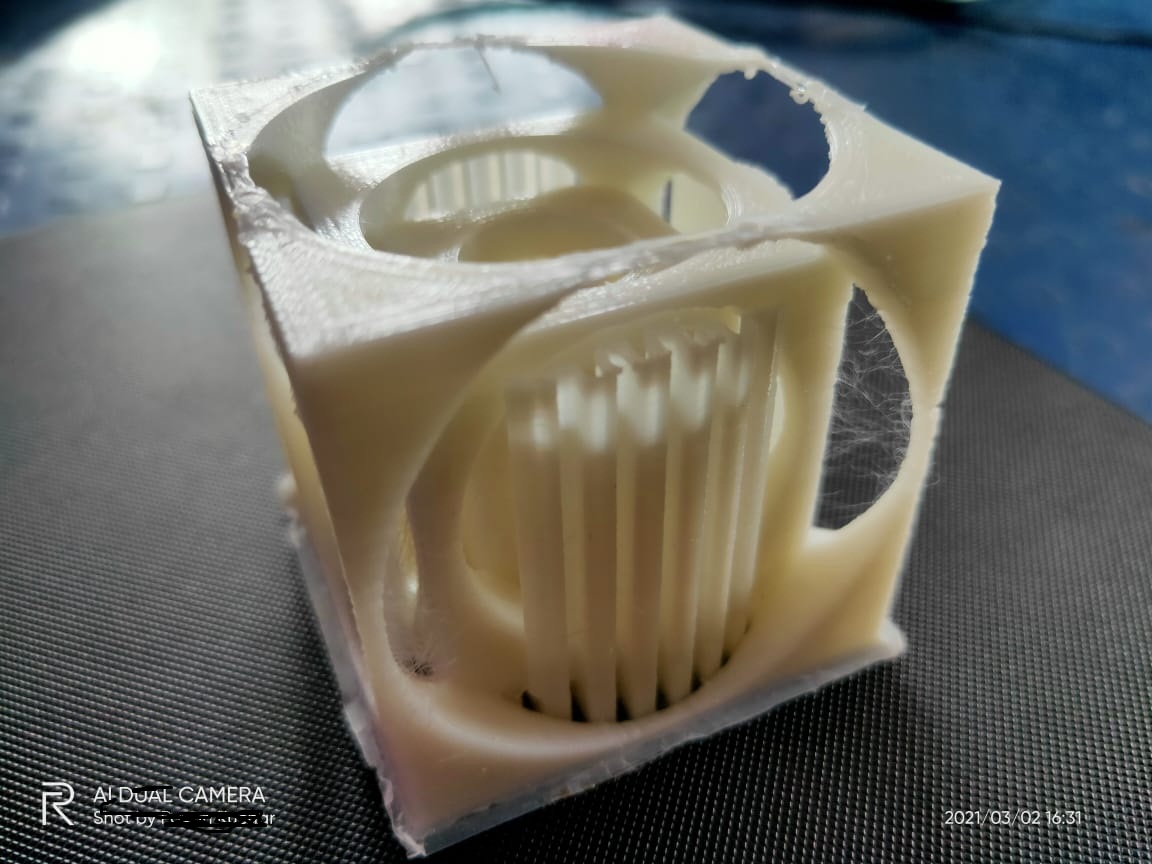
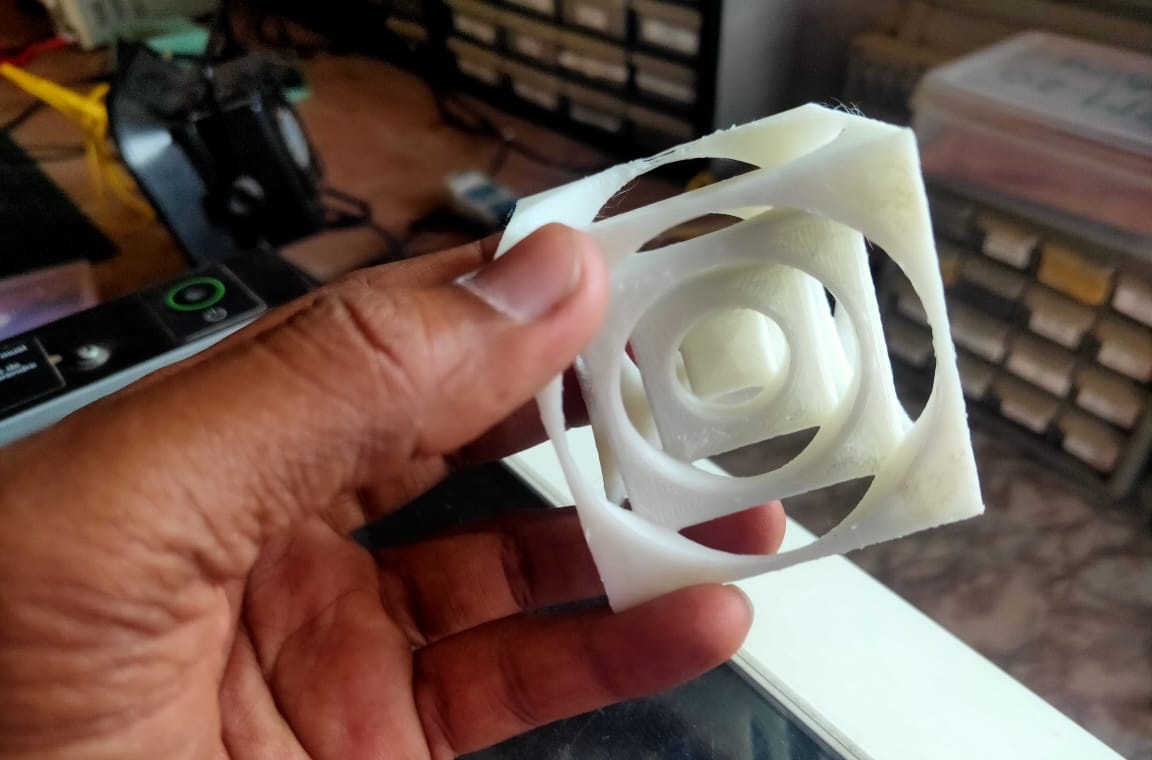
finally i decided to design the 3D object called Turner Cube which can not easily made by subtractive method
For Designing of this turner Cube I have used FreeCad Software.
To make a proper turner cube it is necessary to focus on Dimession so i followed the steps
Step to deign the object in Free CAD
1 ) Open the free CAD software and go to part design workbench
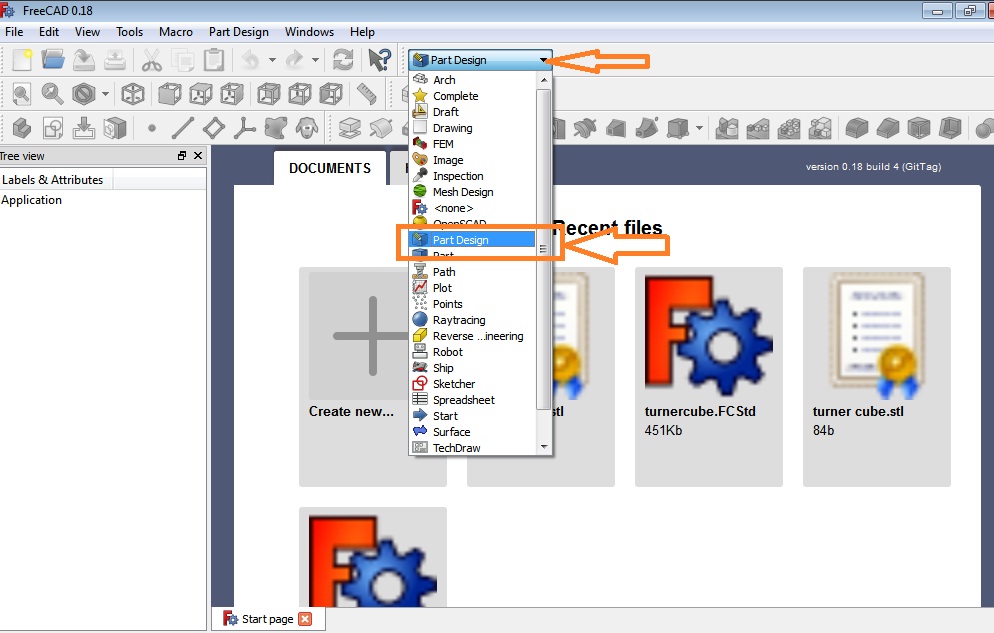
2) Then Click on New file ->> click on Sketcher ->>> Select X-Y Plane
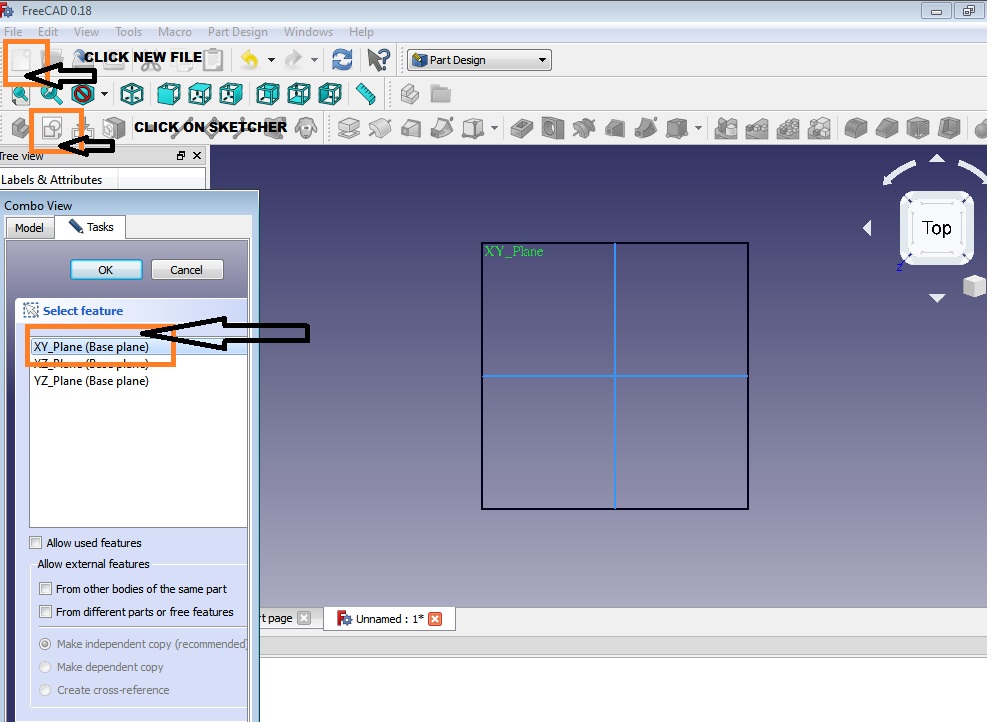
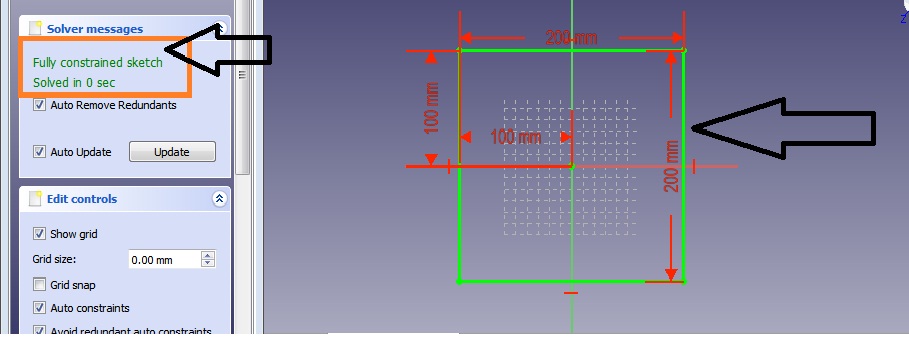
3) Then I had drawn one rectangle and fully constraints it means while showing the message "fully constraints the sketch solve in 0 sec."
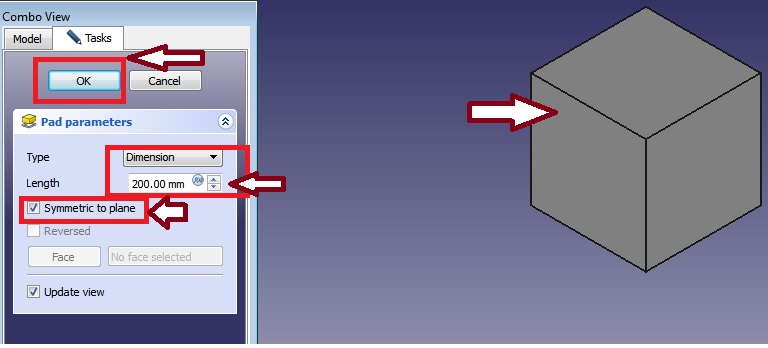
4) After that closed the skecher window->>> click on pad ->>>set the height ->> tick symmetry about the plane and go to isometric view it will looks like a cube
5) then Click on ok
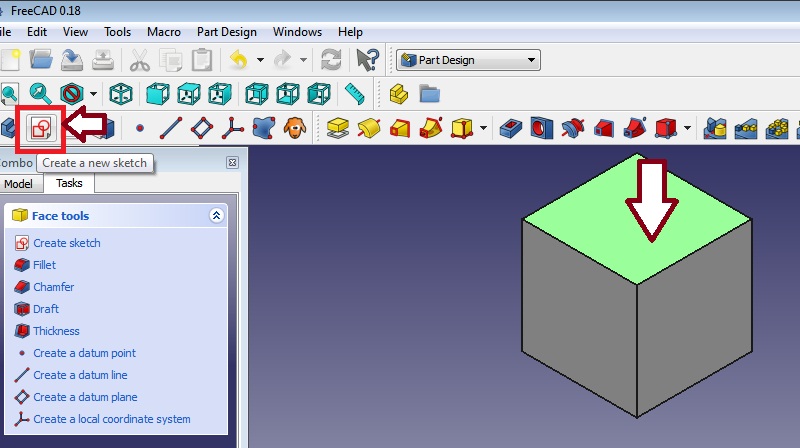
6) Then select any one surface of the cube and click on skecher workbench
7) In skecher plot one circle and fully constraints it -->> then close skecher ->>click on create a pokket with selected sketch
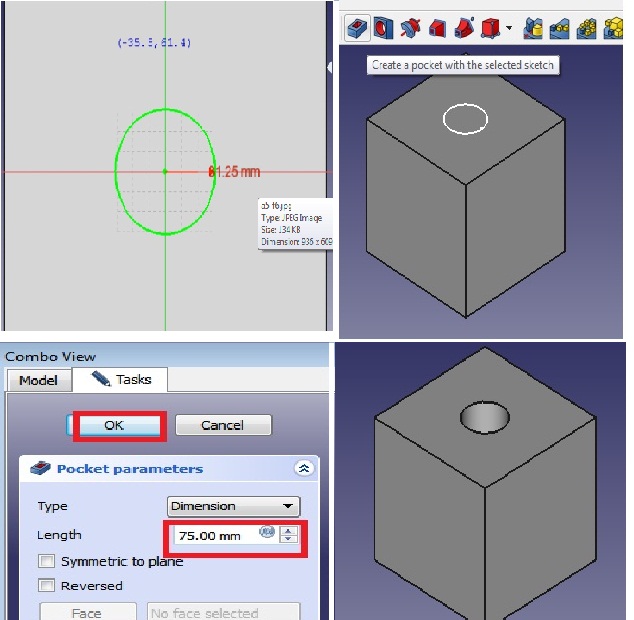
8) Then make a sencond circle with diamession and same way create anther pocket
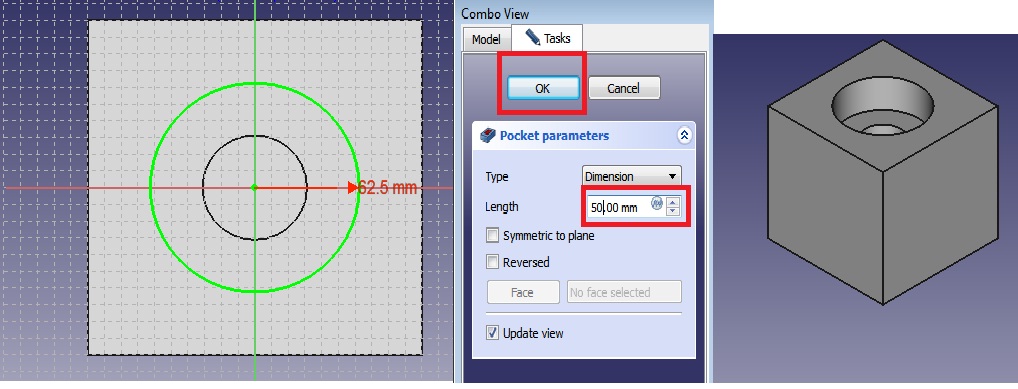
Then follow the above steps for Creating the third pocket
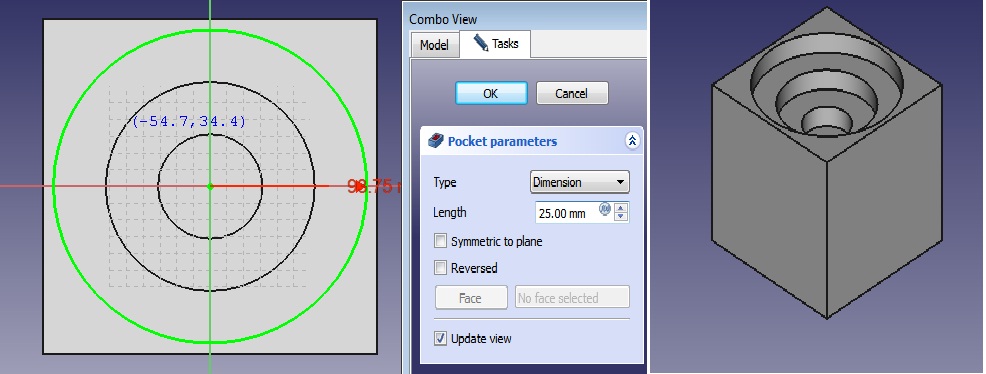
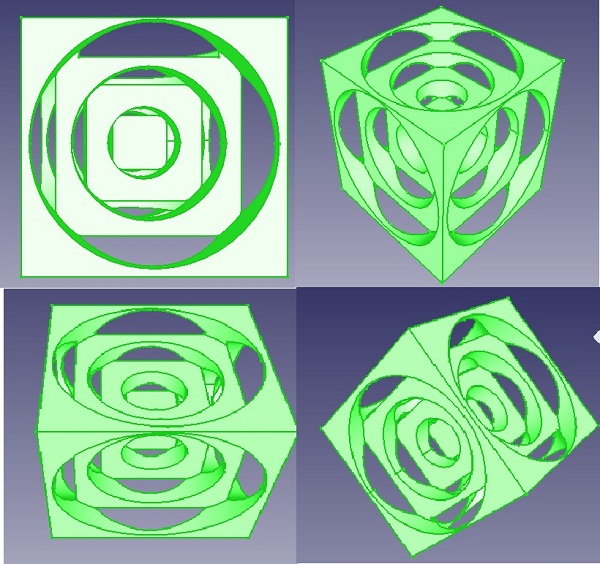
After That I follow the same steps for creating the pocket on other surface with equal dimessions
Finally I made turner cube
Once this object is ready, i had save the file
Now, I need to make a G-code of this file so, export file and save it with the extention .stl format

What is G-code :-
G-codes, also called preparatory codes, are any word in a CNC program that begins with the letter G. Generally it is a code telling the machine tool what type of action to perform, such as: Rapid movement (transport the tool as quickly as possible in between cuts) Controlled feed in a straight line or arc.(Ref:Wikipedia)
Simply converting the 3D Object into programming language
In our fab lab 3D printer support the Facktory Software
So Here, I have used the Fractory Software
First need to download this Software from this link Facktory Sofware
Then select the 3D printer from the list before importing the design file
As we have the"Extended Version of Julia" so, i select it and click on Add printer option
Afterthat, this kind of window will open in your system.
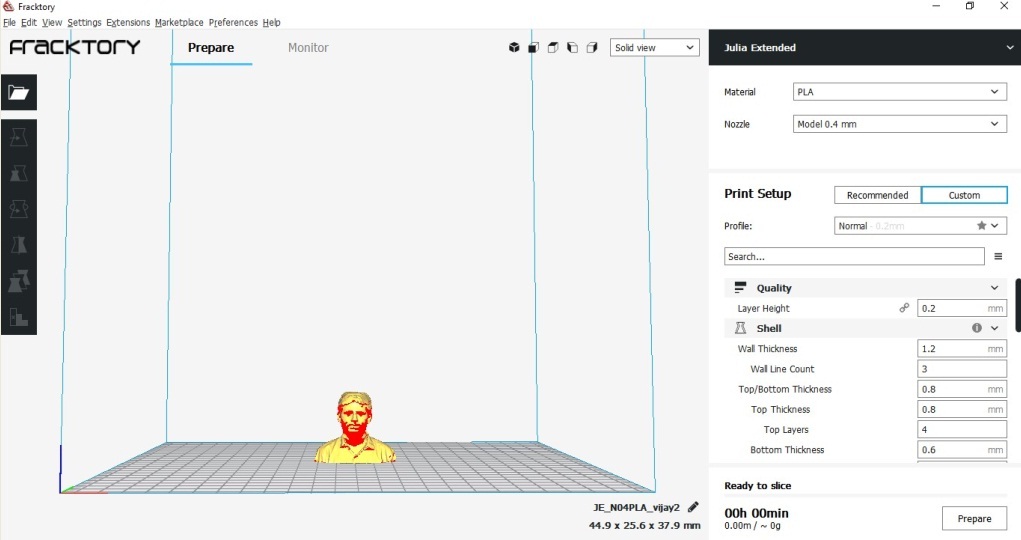
In the below image we can select file to print ( Here I have select the .stl file which exported form free cad software), this option is left top of the window.
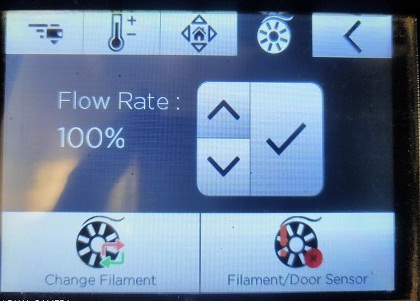
Then in right side of the window we can select the view, Nozzel Diameter, and the Material you want to used, So Here I have used the PLC material for 3D printing my object.
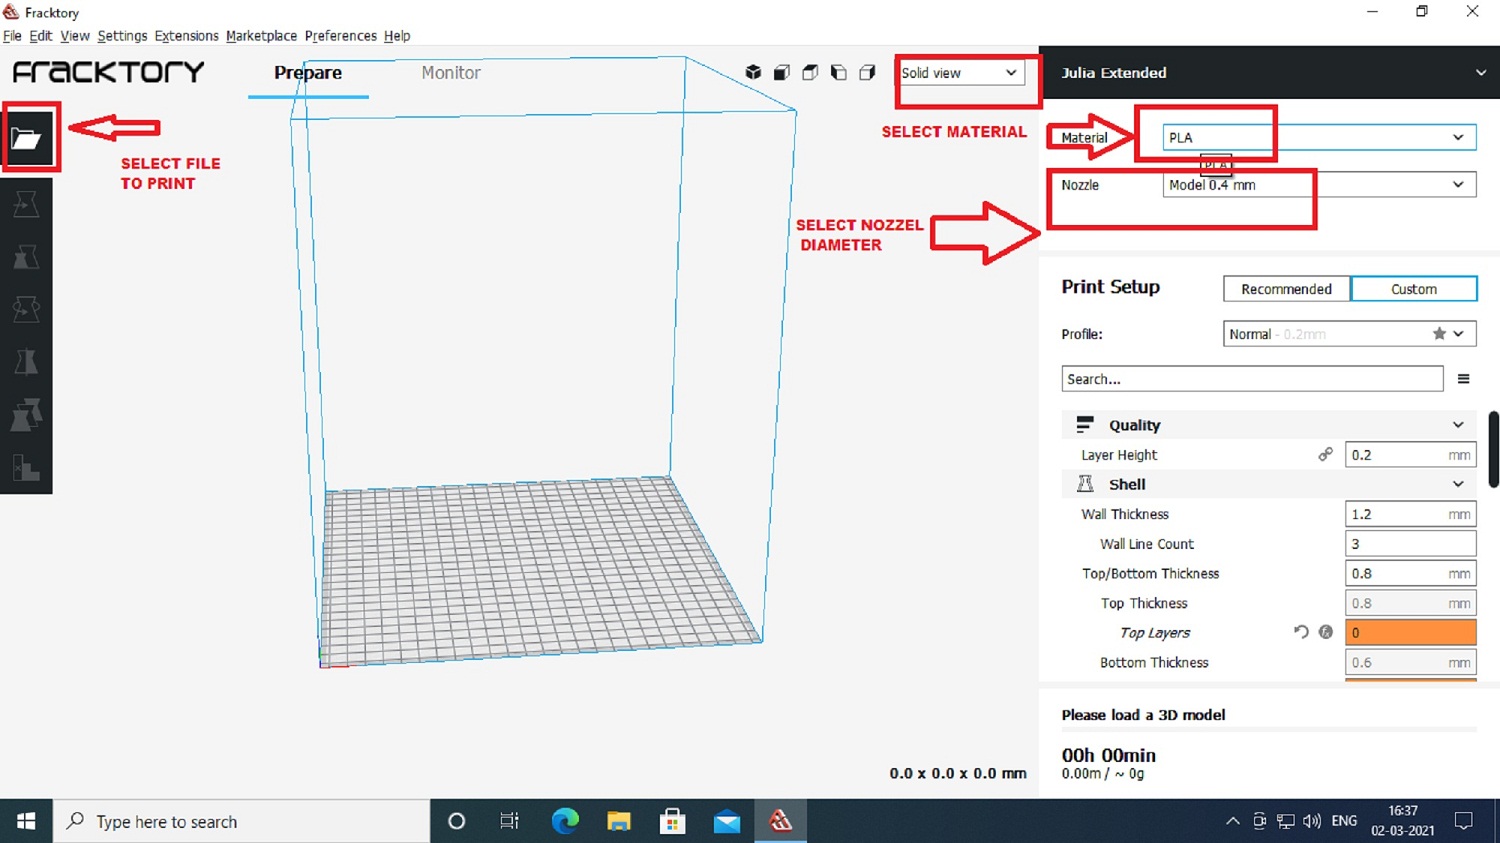
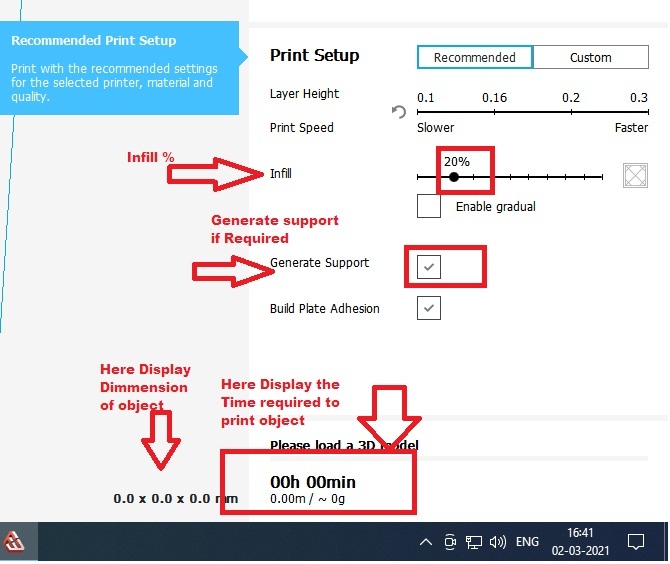
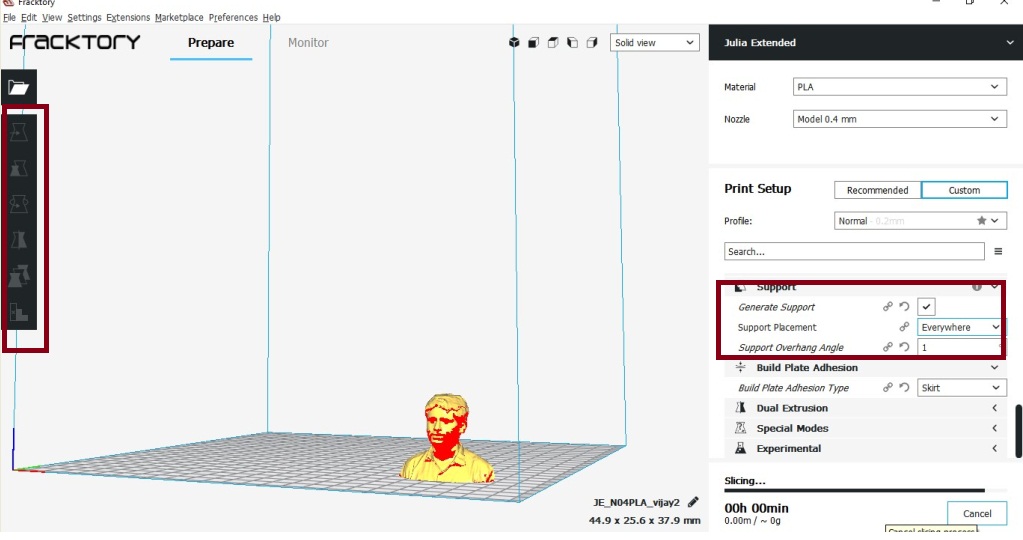
select whether the support is required or not,percentage of infill, Display the Dimmesion of object , Time required to print your object
Now open the .stl file of object in factory software.
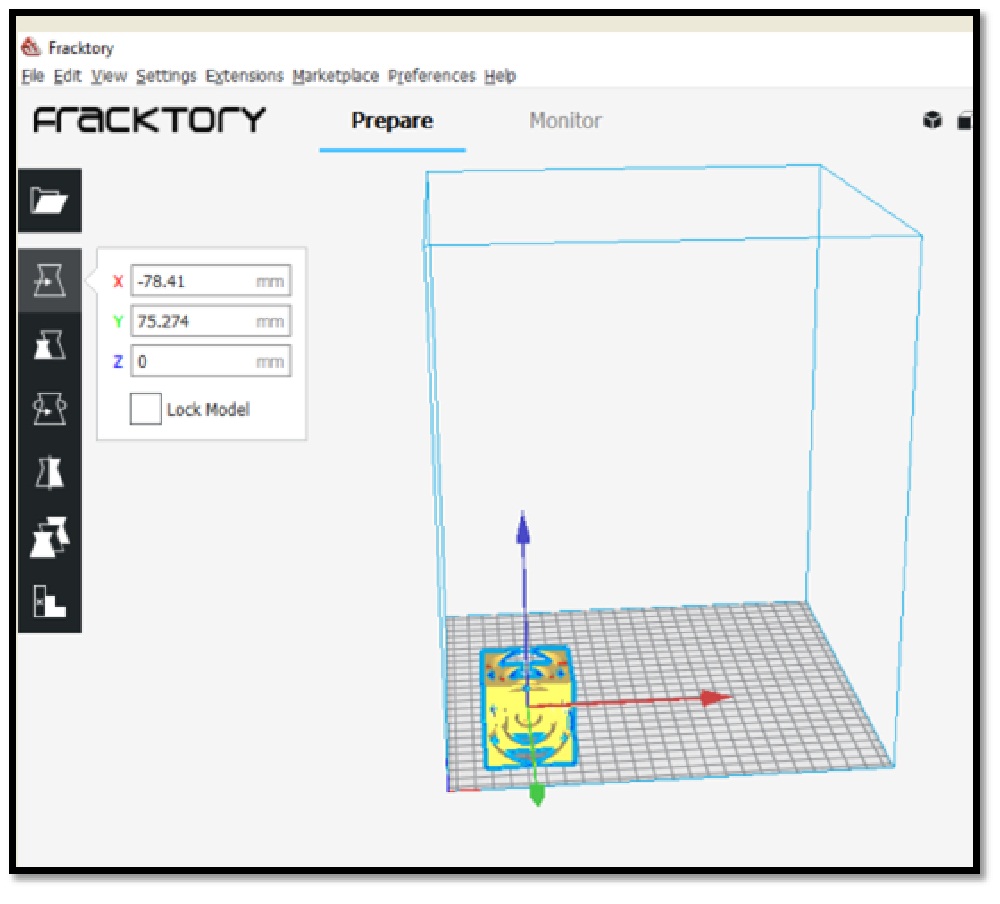
I have set the posotion and the dimeesion of my object
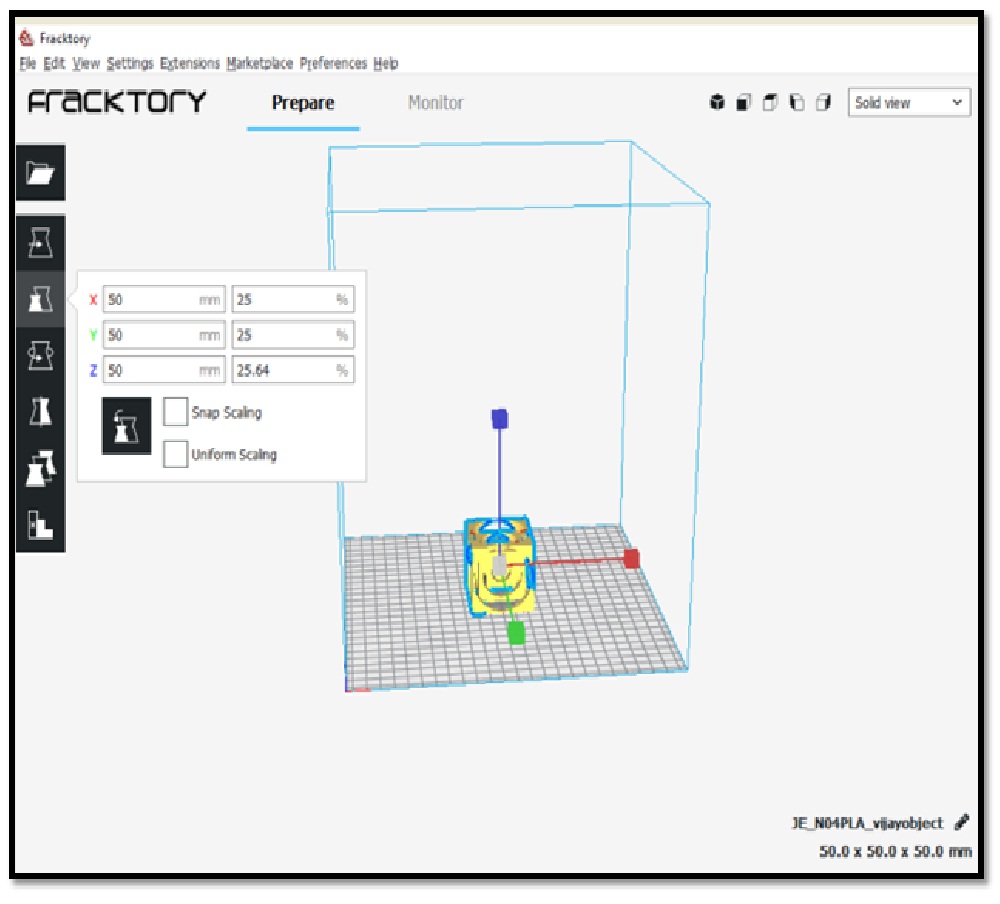
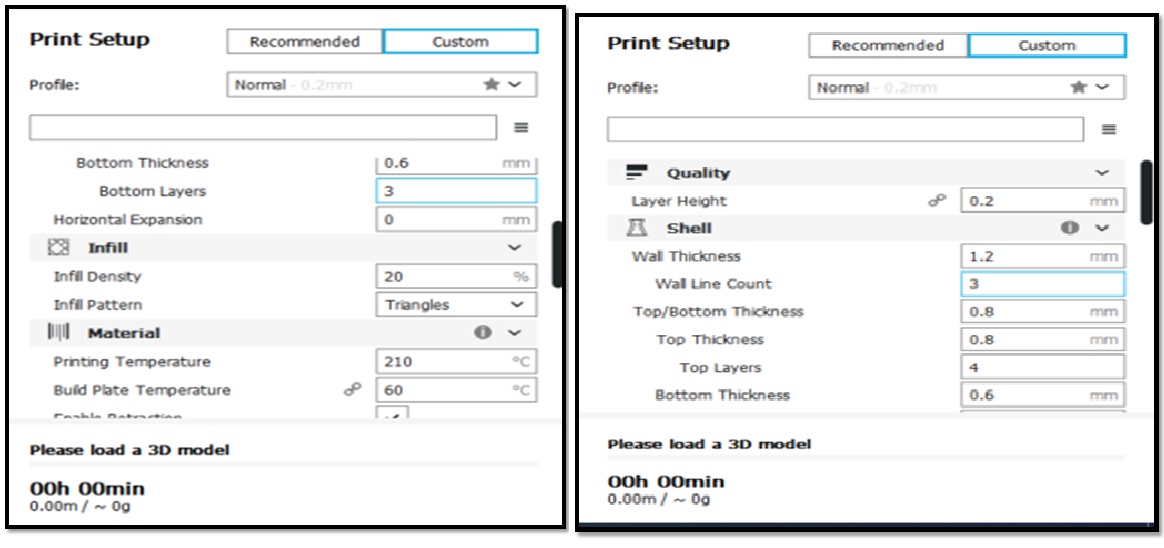
Now, i had set some key parameters for object to be print
1. Layer Height:0.2 mm
2. Nozzle Temperature: 210 °C.
3. Nozzle Diameter: 0.4 mm
4. Bed Temperature:60 °C.
5. Print Speed: Optimum
6. Percentage Infill: 20 %
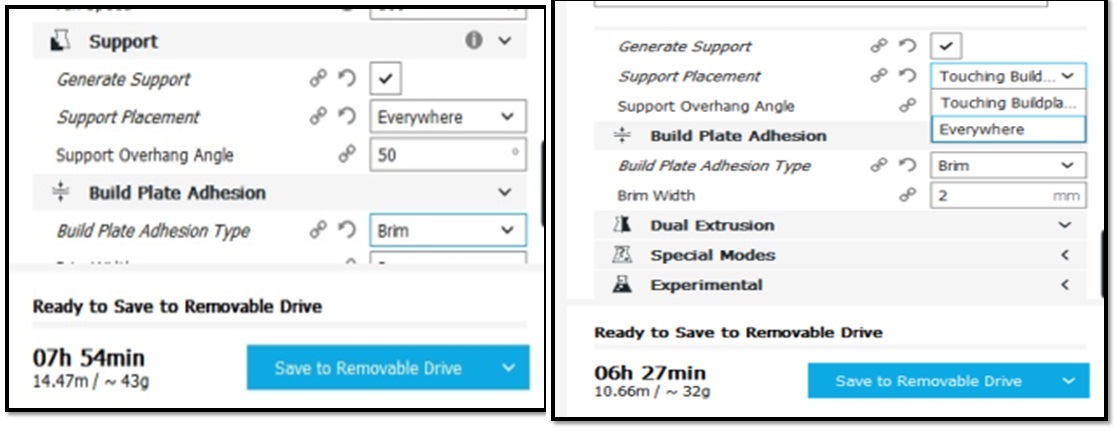
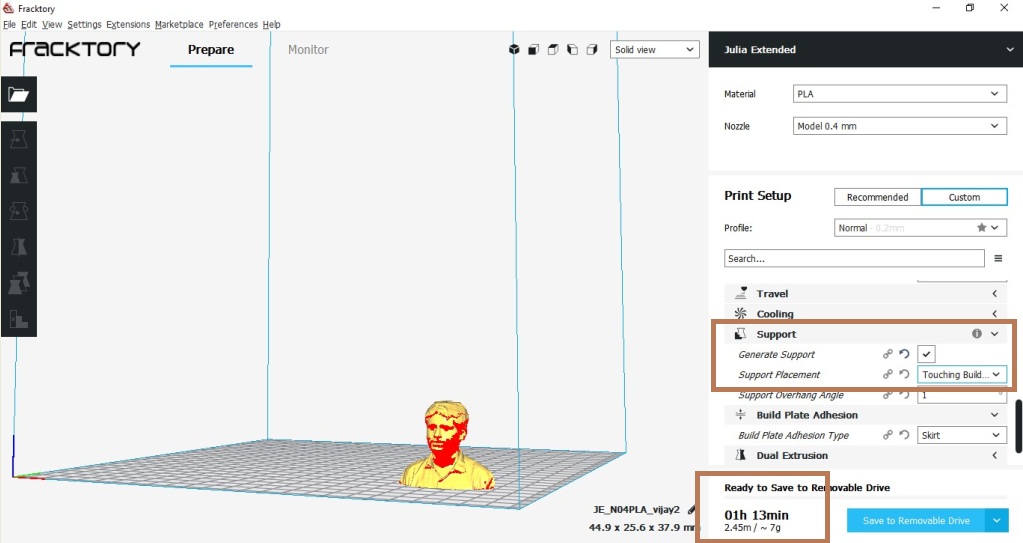
After that when i prepare the object for print by giving suport everywhere it shows the time required to print the object is "7h 45min", Then i had change the setting instead of everywhen select Touching Build Plate it will be complited in "6h 27min"
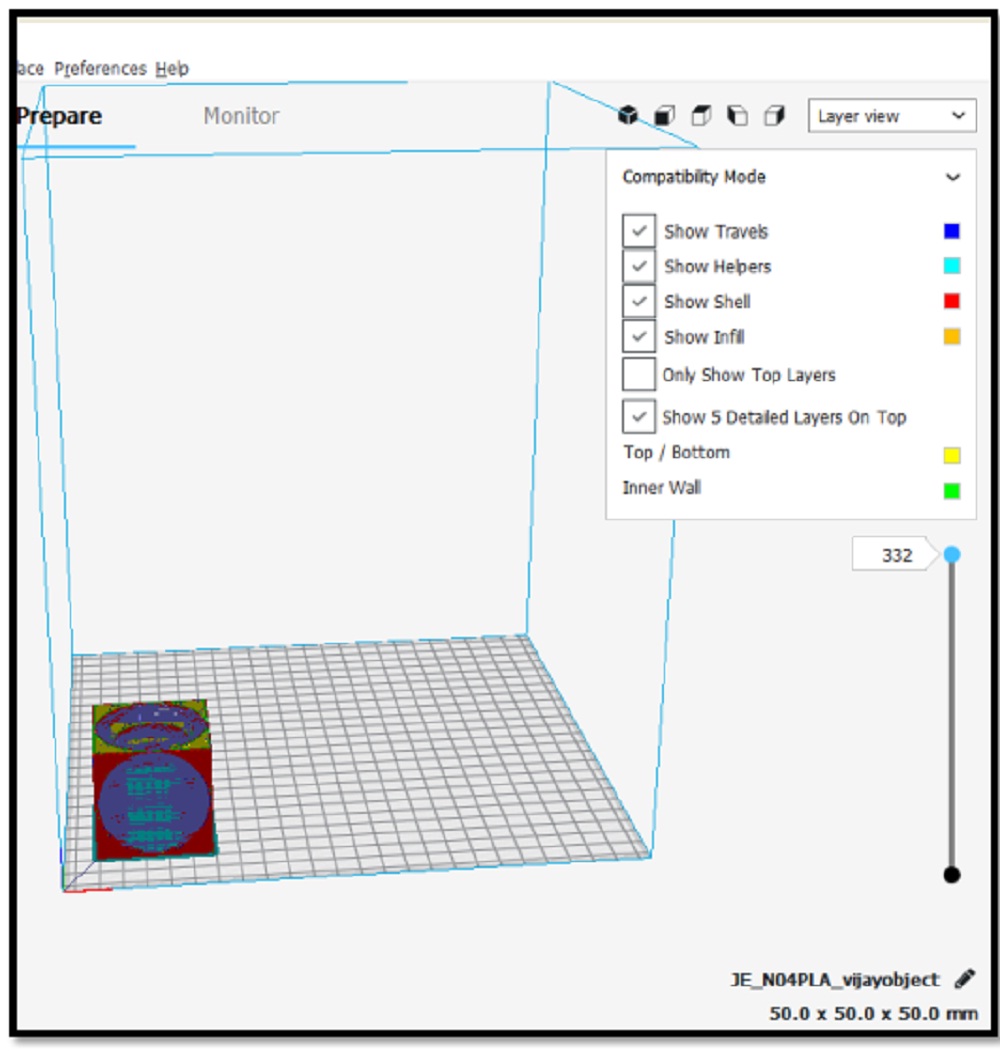
This the layer view of my object
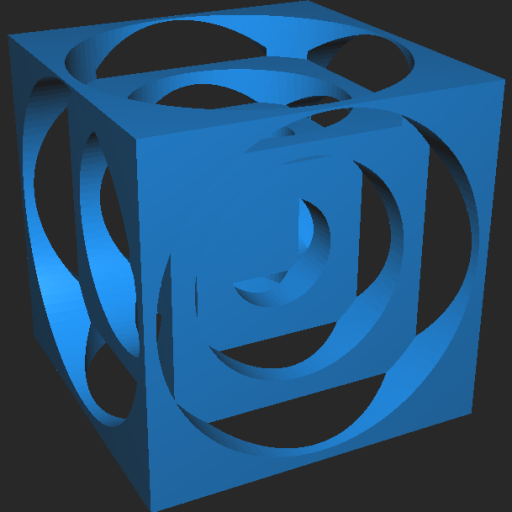
This is the png Image of my object
Now switch on the 3D Printer and set it
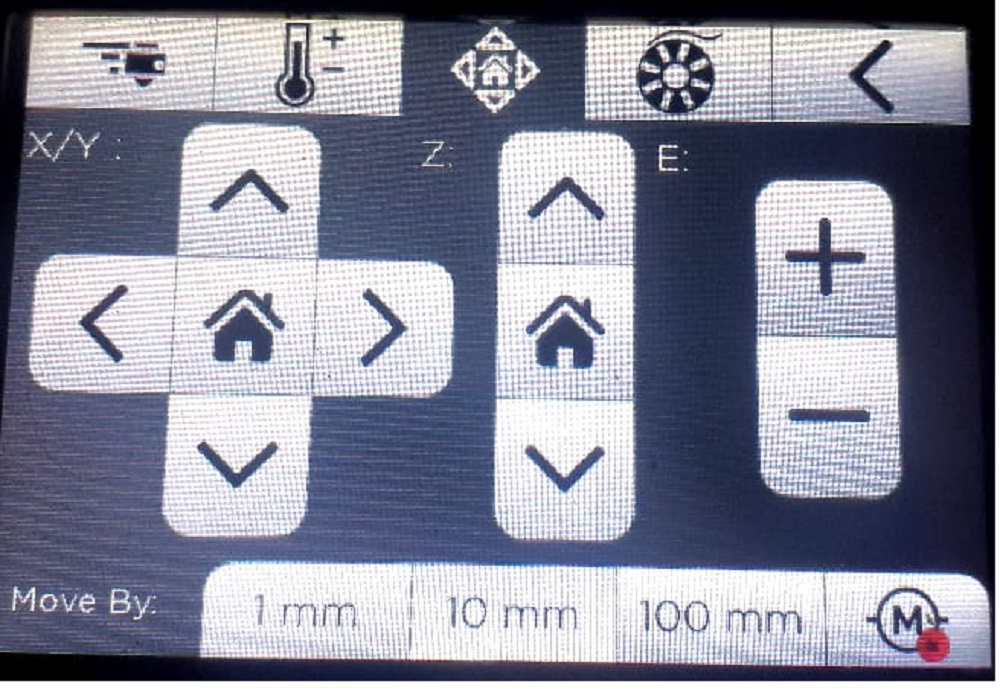
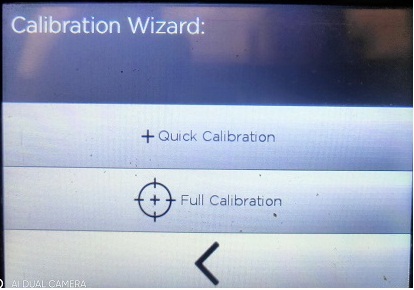
Set the bed leveling either by Full calibration or Quick Calibration
Connect your USB device to printer
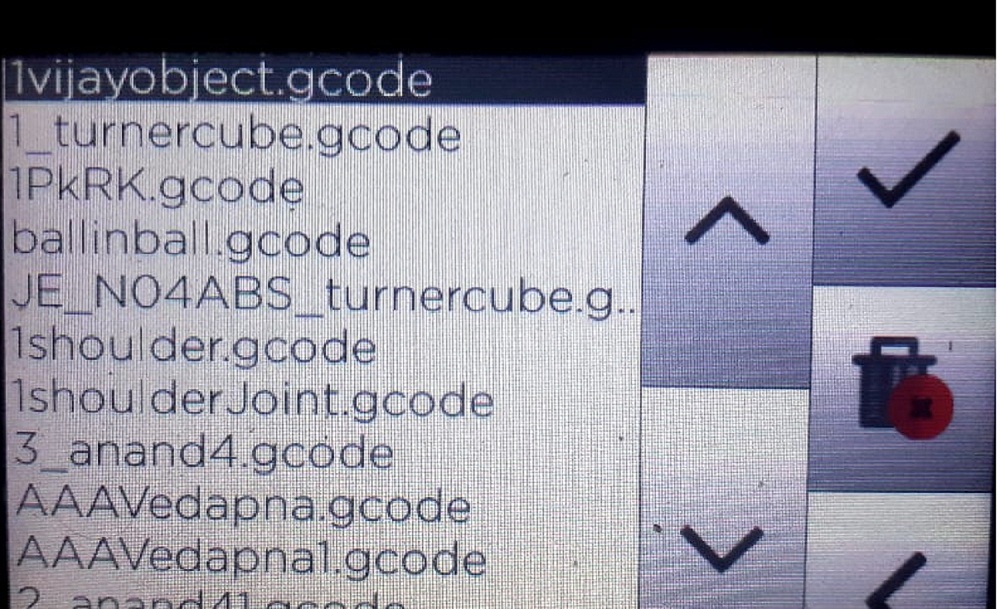
Select your file to print
On touch screen of 3D printer you can see the time bed tempreture and nozzel tempreture
The Nozzel and bed temperature is vary as per material selection. As I Have used the PLA material In my individual assignment, for 3D printing the required Nozzel tempreture 200-215 Degree Celcius and the Required bed tempreture in the range of 60-75 Degree Celcius.
For group Assignmeng as I used the ABS material, so the bed and nozzel temperature is required for this material nozzel temperature is in the range of 230-245 Degree Celcius and bed temperature is in the range of 105-115 Degree Celcius.
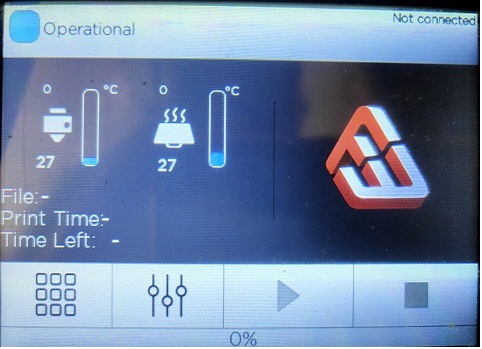
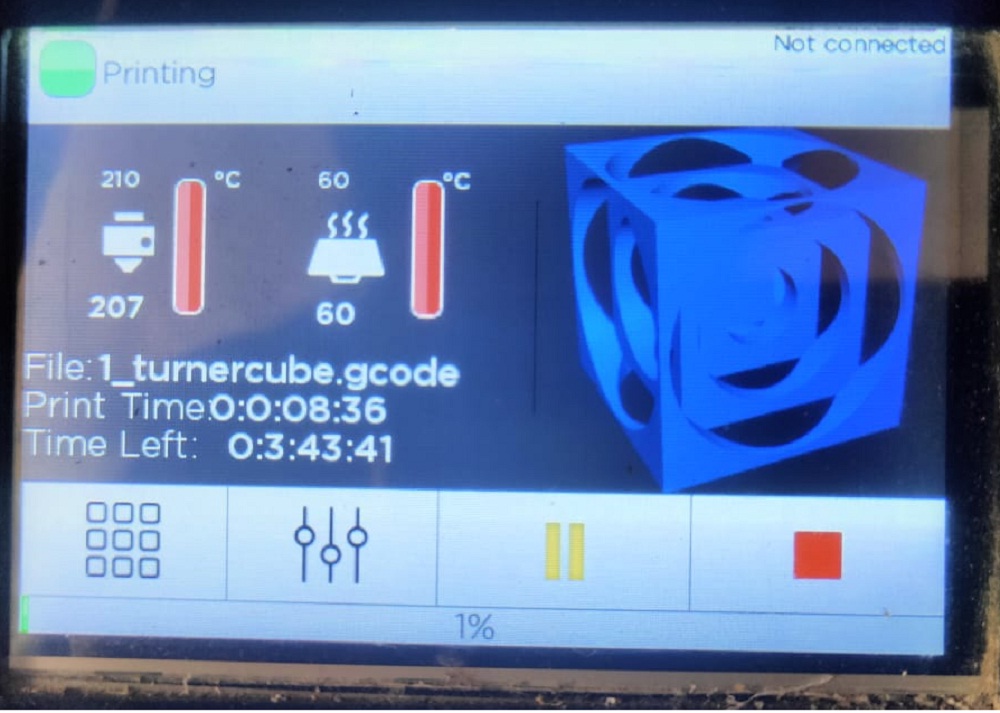
Printing is strated Now, After some time status of my object looks like below images
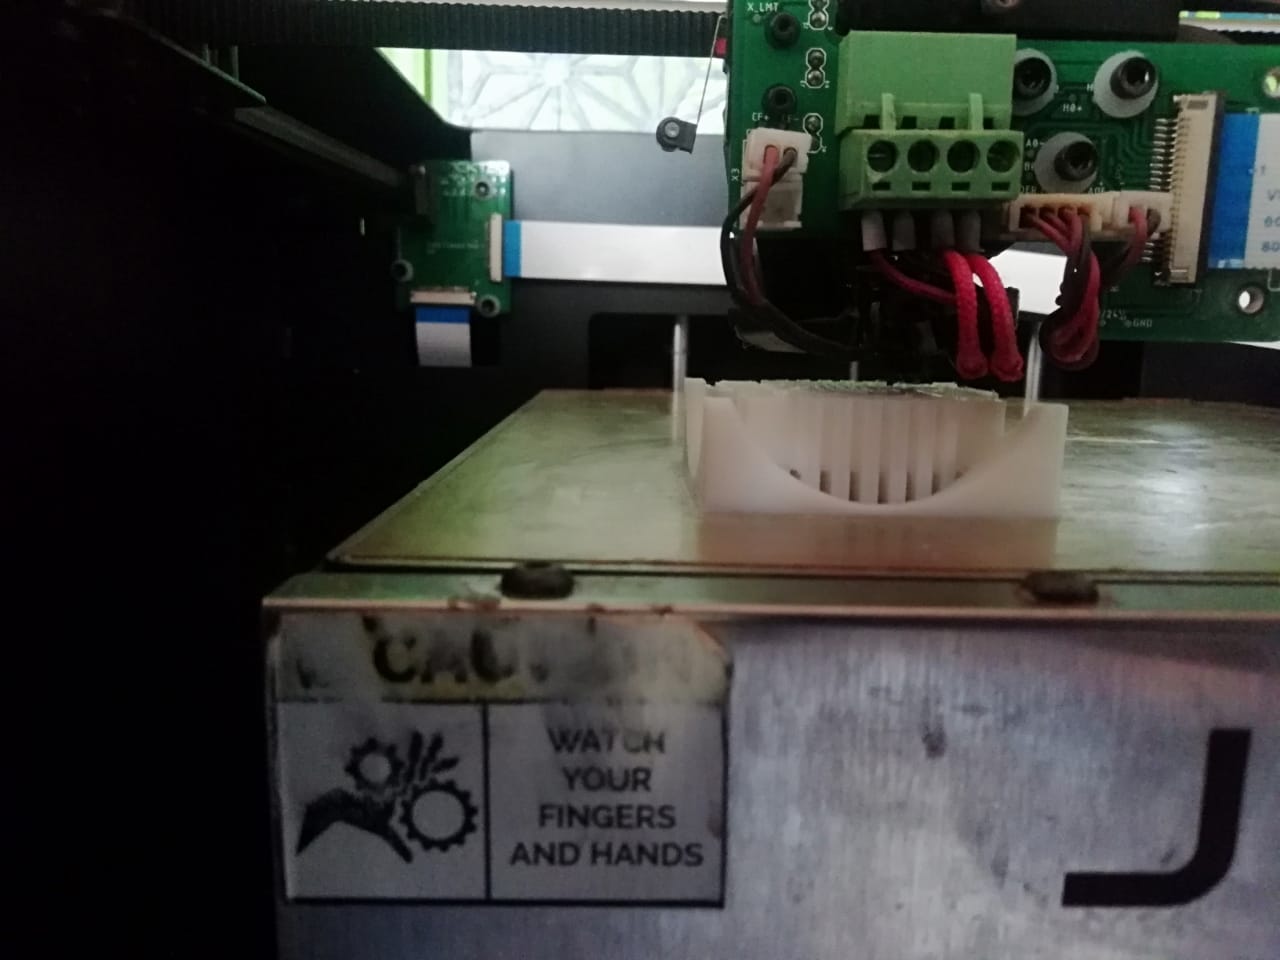
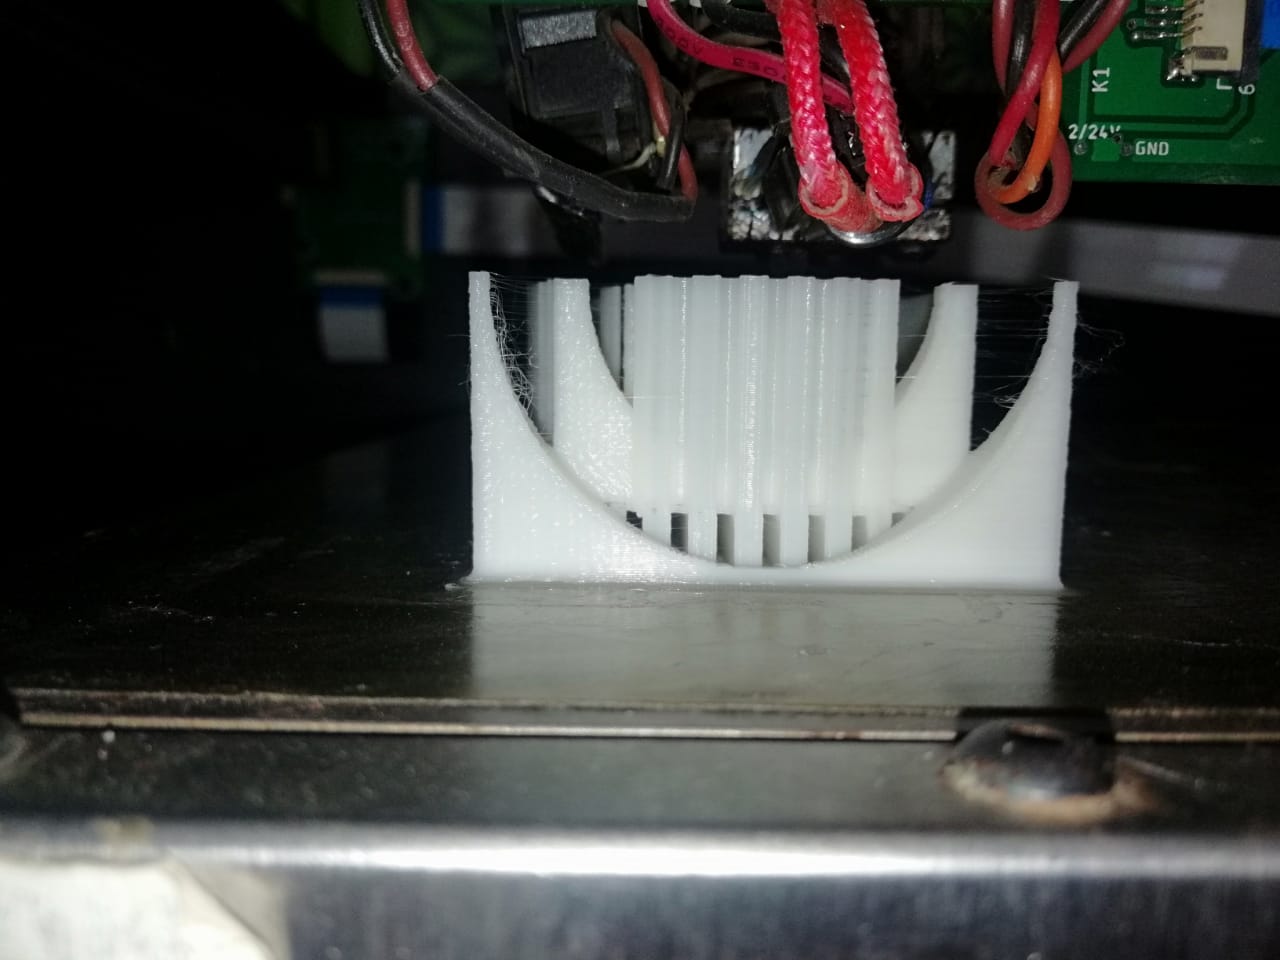
Here, I have obseved that, some stringing appear on the object while printing This is typically due to plastic oozing out of the nozzle while the extruder is moving to a new location.
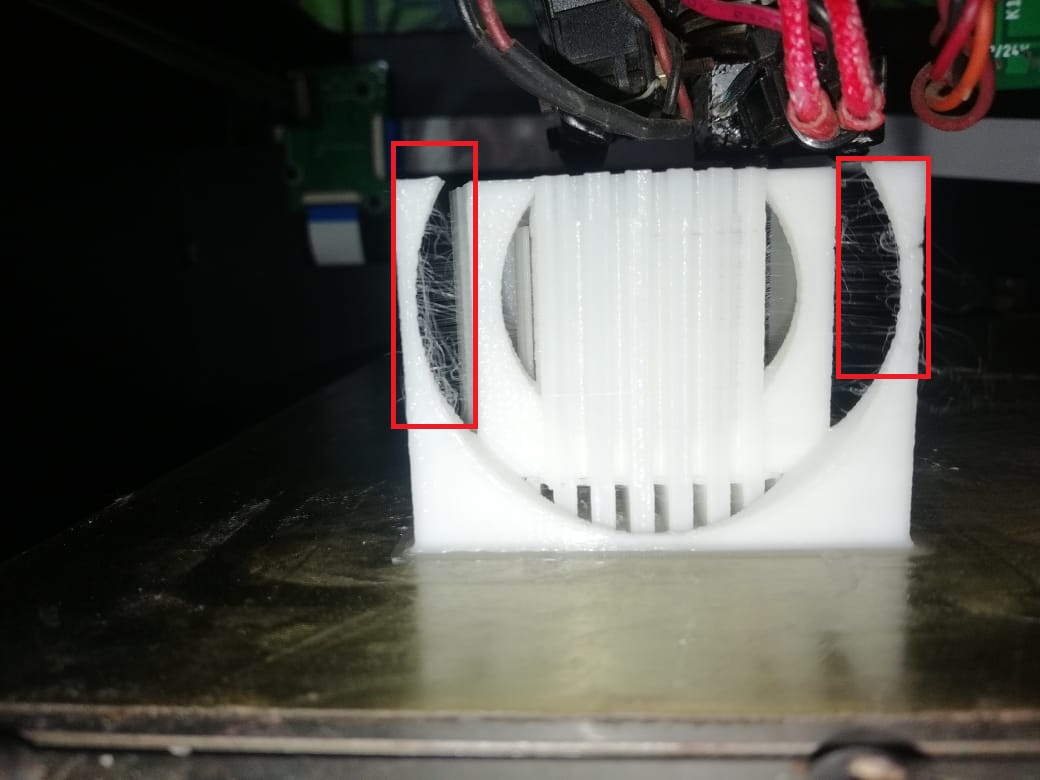
Here, while priting the outer layer of object not priting propely
This is because of in generate support setting i had selected "Touching Build plate" option , So instead of this i had to select the Support Everywhere option , But in this case time required to print the object is increase.
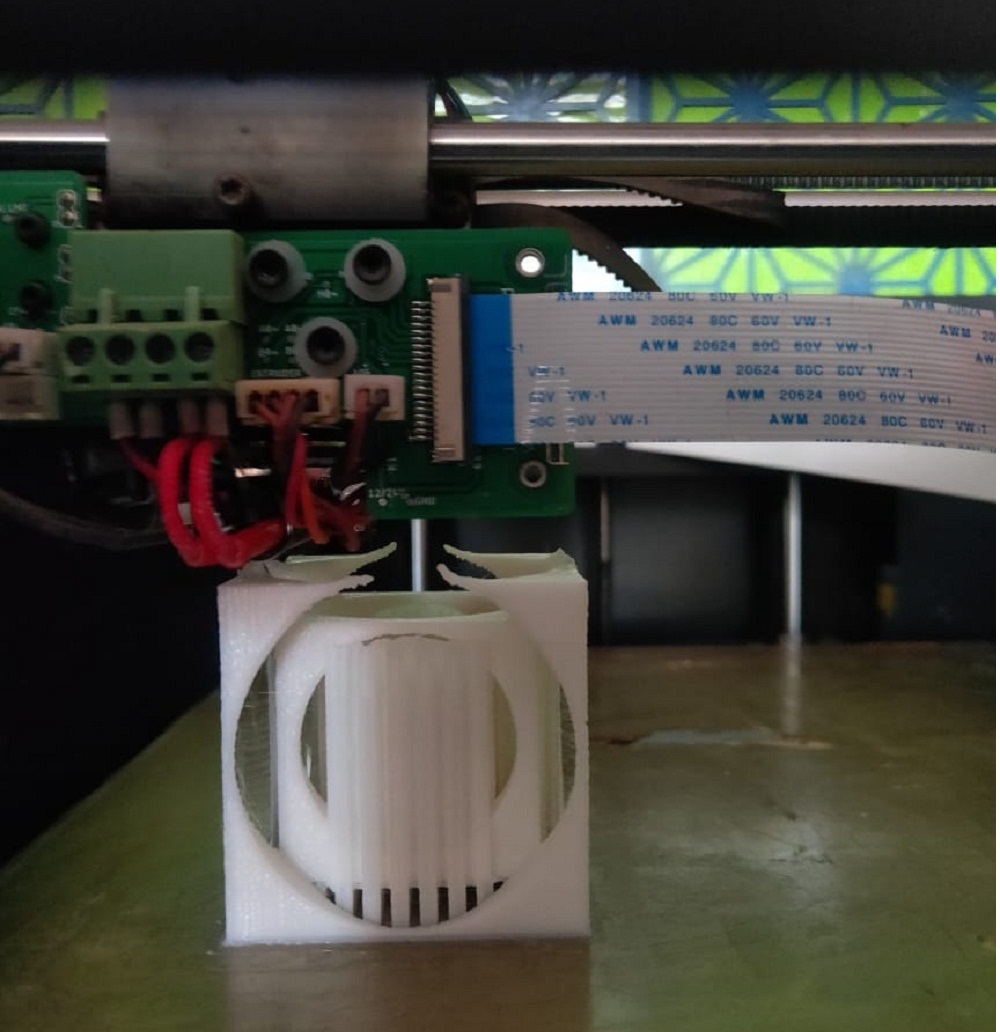
This is when printing is complited with Touching build plate
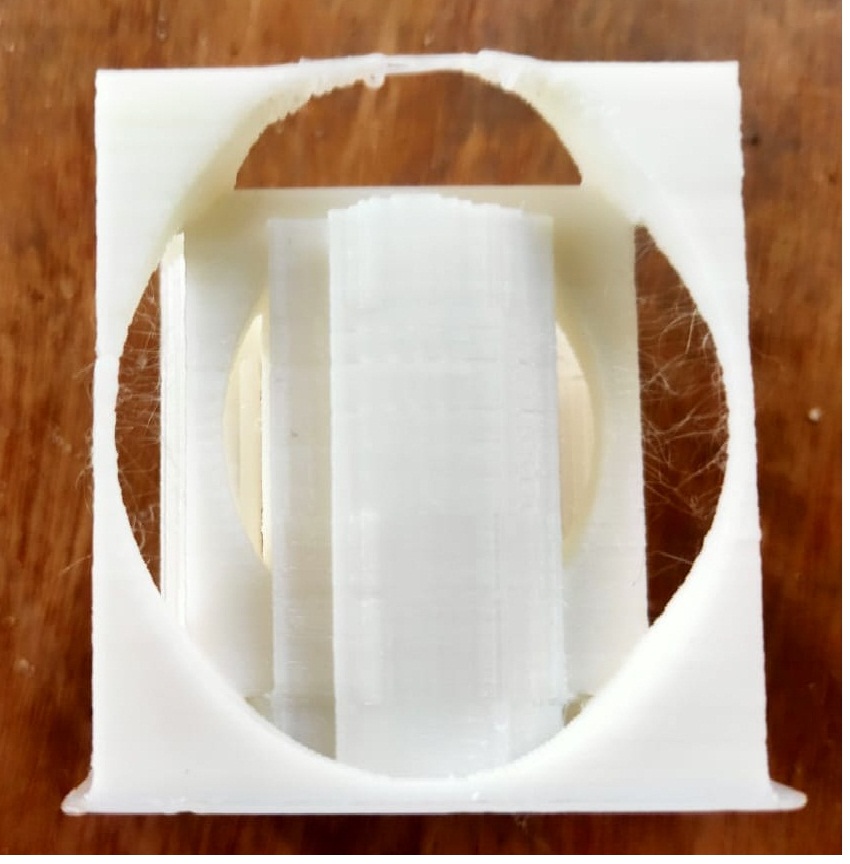
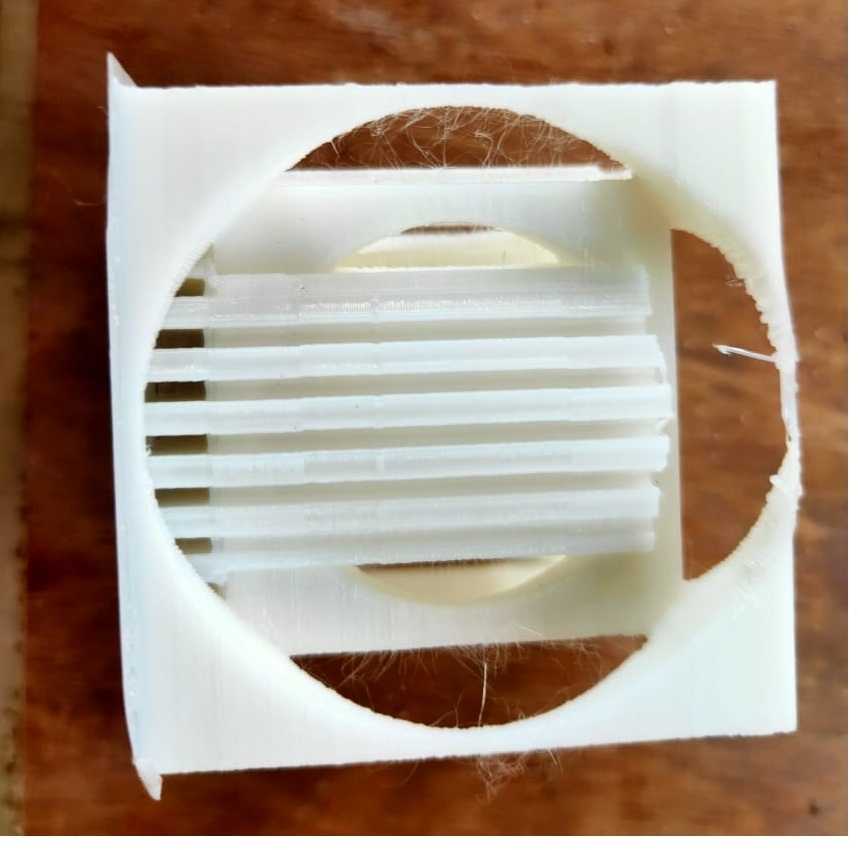
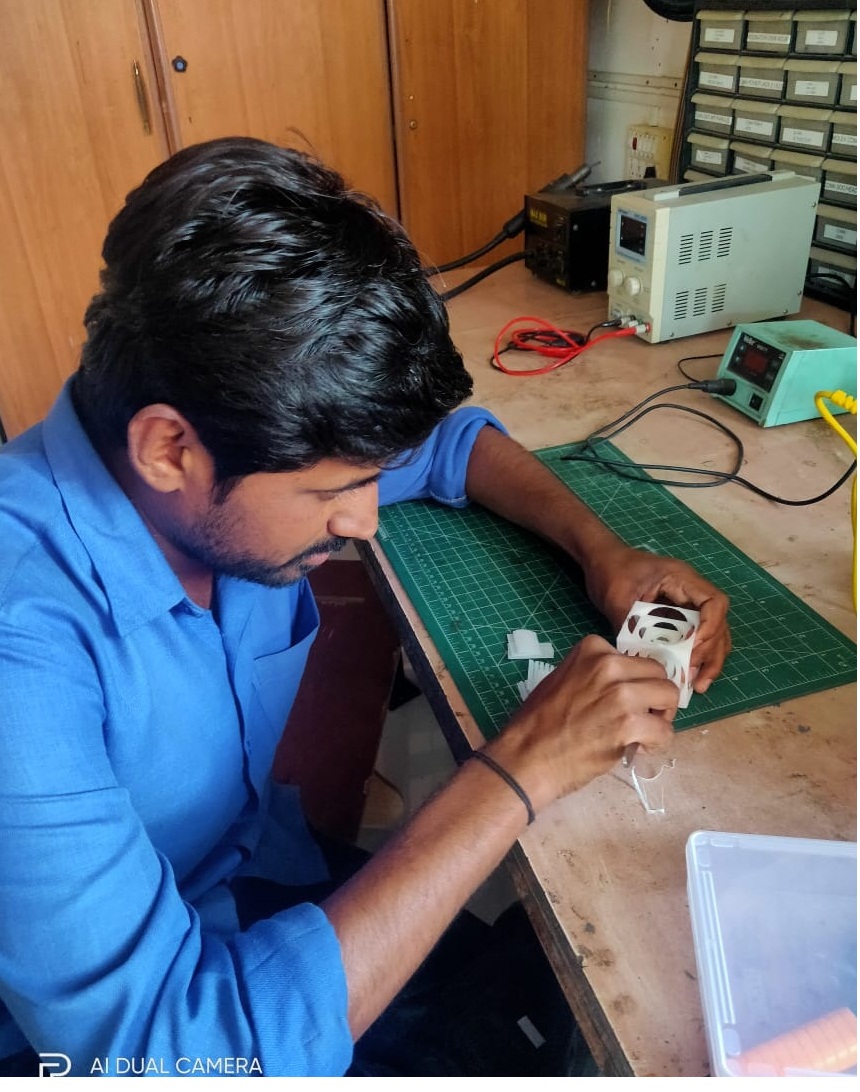
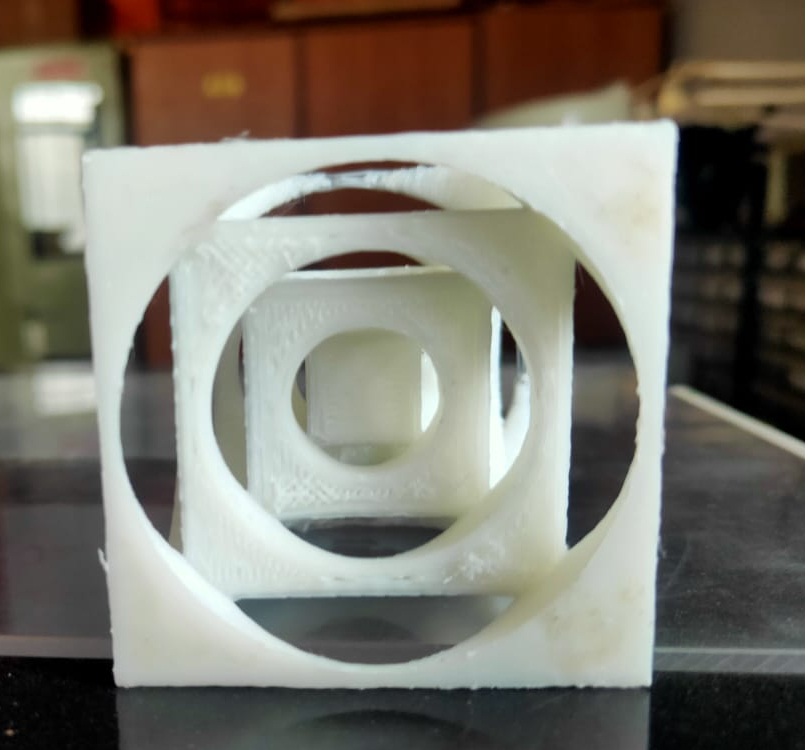
Now, i had to remove the support from all sides of turner cube
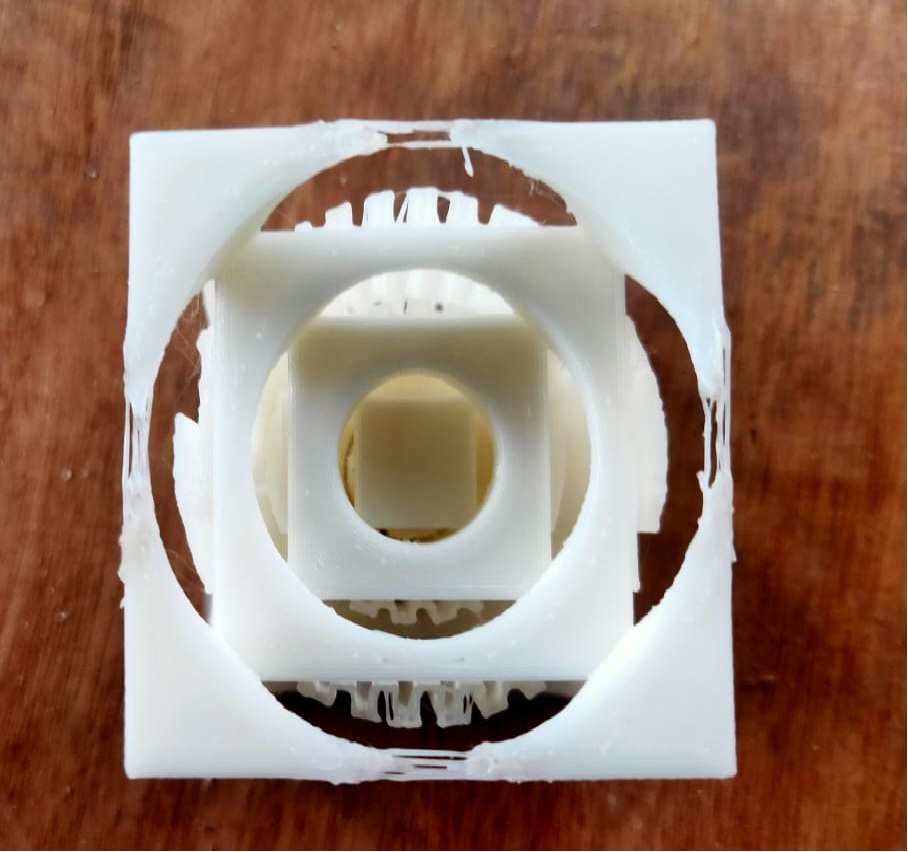
Now finally, Turner cube looks like
Explaination about why the object is easily not made subtractively:-
This turner cube only made by addetive method because, the shape of this object is concentric the it is not possible to made by subrative method , if you want to make it by subtractive method there is lot's of material loss and In subtractive method we have to make it with different part's and then joint them,
This is made by additive manufacturing, because:
By manufacturing the model by additive it has consumed only about 18 gms of material approx
while in case of subtractive it needs to have more material.
Also, if we go on mass production the main aspects is time. To create such intricate products, need less time.
As time factor increases, it is directly proportional to the electricity consumption and cost of production.
Hence, additive manufacturuig is suitable for my product
This turner cube is internally connected so it's very difficult to make it by subtractive method because of the shape is like cube inside the cube
3D Scaning:
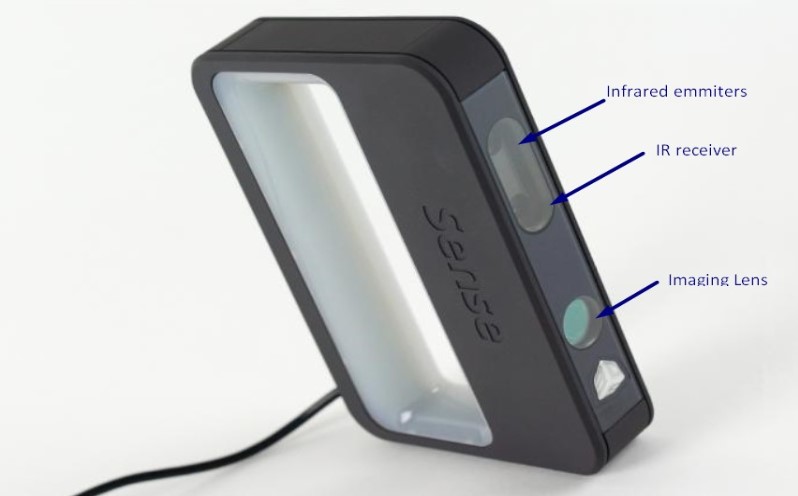
About 3D Sense
Scan the object
Use of Factory Software
Object Printing
3D scanning is the process of analyzing a real-world object or environment to collect data on its shape and possibly its appearance (e.g. colour). The collected data can then be used to construct digital
A 3D scanner can be based on many different technologies, each with its own limitations, advantages and costs. Many limitations in the kind of objects that can be digitised are still present. For example, optical technology may encounter many difficulties with shiny, reflective or transparent objects.
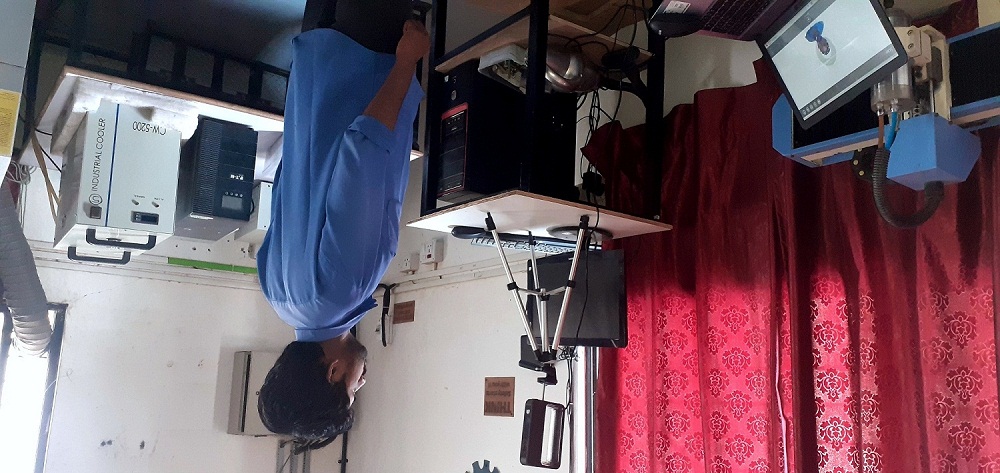
For 3D scanning, the Sense software is available with camerain our lab at vigyan ashram.
First i need to installed the Software is installed in the Laptop and then the USB cable of camera is connected to laptop.
In front of camera, the 3D object is placed on the 360 degree rotating stand for scanning.
Now the sense software is opened,
selecte the option what i have to scan, person or object

If we have selected the object then it will ask us tha which we have to select small, medium or large object.
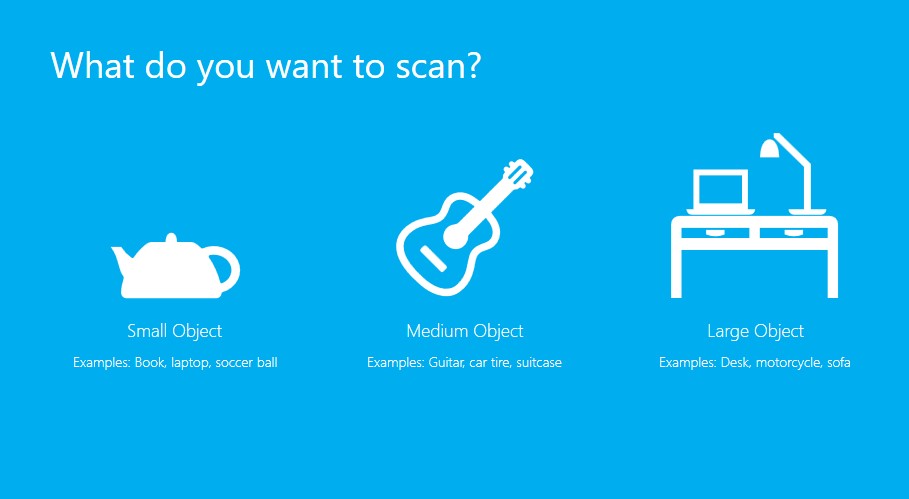
suppose we have selected human,then the next question is whether we want scan a full body or a head only.
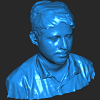
After that For scanning my object I have choose the head option.

Now the camera image is open in laptop-->>set the image properly and then start 360 degree scanning so here for 360 degree scanning, i have to rotate the object slowly.
This image shows the preparation of sacning

while scaning the any object the direction is not proper or the object is out of zone it shows the message " loss the tracking "
Once scaning is complited properly , we need to go for preparation of G-code file of your object as like 3D printing steps.
Now 3D printing from 3D scaning
1)Firstly the object scan from sense software and I have saved my file saved in .obj format , (Note:- You can save the by here .stl or .obj format.)
2)Then open the file in 3D printing software (Slicer) i.e. Here we have used Facktory.
Then I Have prepare my object using support and set infill % is 20% , set the various parameters.
Here I have import the scan file of my object in Facktory software and reduce the size as per requirement
Here, I have set the X, Y and Z.
Here time required to print the object as per given size and the with setting, support everywhere is 1 hr.33 min

Now, I have changed the setting of support everywhere into Touching build plate so the time required for printing is reduce into 1 hr. 13 Min.
After that I have to click on save this file into removable disk, This is how G-code of the object is prepared
This shows the g-code PNG image
Now, the scaning object is ready for the printing.
Now, I had to print my object by 3D printer:-
Again as in i need to prapare the 3D Printer as per design rule as we studied in group assignment
Advantages and Limitations of 3D Printer:
1) 3D printing is a single step manufacturing process, it save the cost and required less material, also save the time.
2) We can print any complex design than other manifacturing processes using 3D Printer
3)We can print any flexible design on 3D printer.
4) 3D is cost effective,minimising the waste of material fast design and production.
5) The use of 3D printing equipment has increased in recent years due to increased accessibility
Some Limitation's of 3D Printers:-
1) The material avaibility for 3D Printer is limited and the material have low heat deflection tempratures and low strength.
2) 3D printing material price are far too high restricting the growth of the market
3) For Manufacturing complex parts or organic parts required a lot of 3D modeling training.
Due to its new technology it required trial and error method while printing the object.
Advantages and Limitations of 3D Scaning :
1) Save time in designing the model.
2) Quickly capture physical measurement of any object
Limitation of 3D Scaning
1) It required good light while scaning the object
2) Due to its unstability while scaning rotating object is required for good quality of scaning
Download my original file here