Embedded Programming
Coding and Uploading
Intro.
Hello! world. This week we have to learn embedded programming using different languages on different chip as possible. I have started my embedded programming with avr chip ATmega32 around year 2010 using USBasp programmer. I done many thing and later explore many other chips. Using arduino for my project was new thing and after all that experience I is not difficult thing to do. I never tried Raspberry pie before so I will try it in this week But I have worked with BeagleBoneBlack before. I liked it.
Week Task:
Individual assignment:read a microcontroller data sheet program your board to do something, with as many different programming languages and programming environments as possible
Group assignment:
compare the performance and development workflows for other architectures
Group assigment: summary
Raspberry pi 4
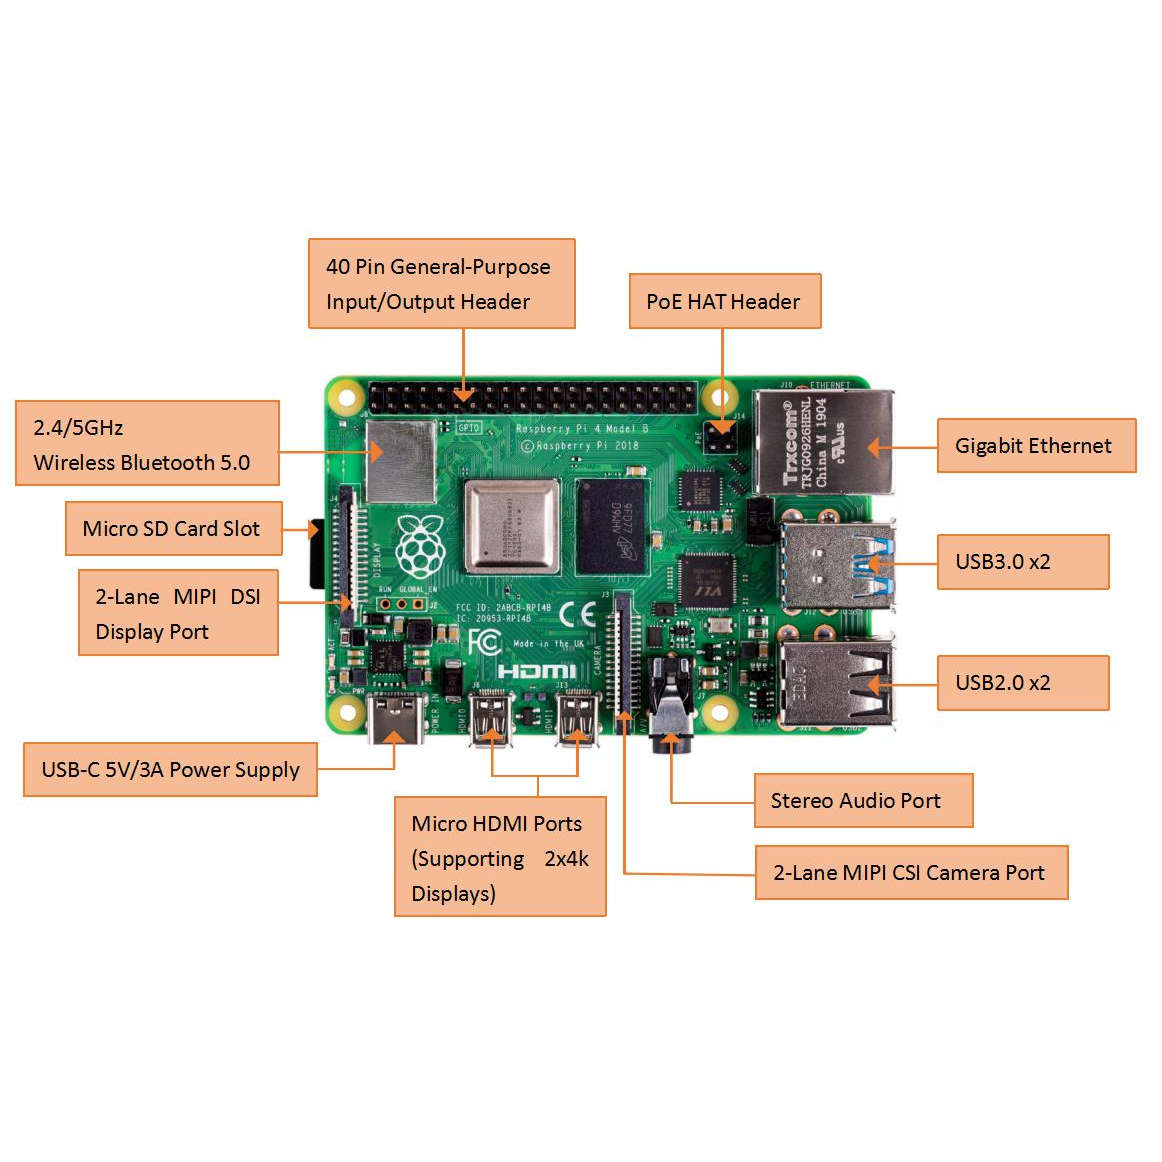

Raspberry pi 4 is single-board computer with Broadcom BCM2711, Quad core Cortex-A72 (ARM v8) 64-bit SoC @ 1.5GHz
It available in 2GB, 4GB, and 8GB RAM versions
The one we got to use was 4GB one brought by one of our group member Mohit and He introduce us how to use it
We tested led blinking and button example given in inbuilt tutorial and That was all done through Python Language
You can find out more on our Group assigment page
BeagleBone Black
I have not used this board in this week but since I have used it before so sharing some experience here

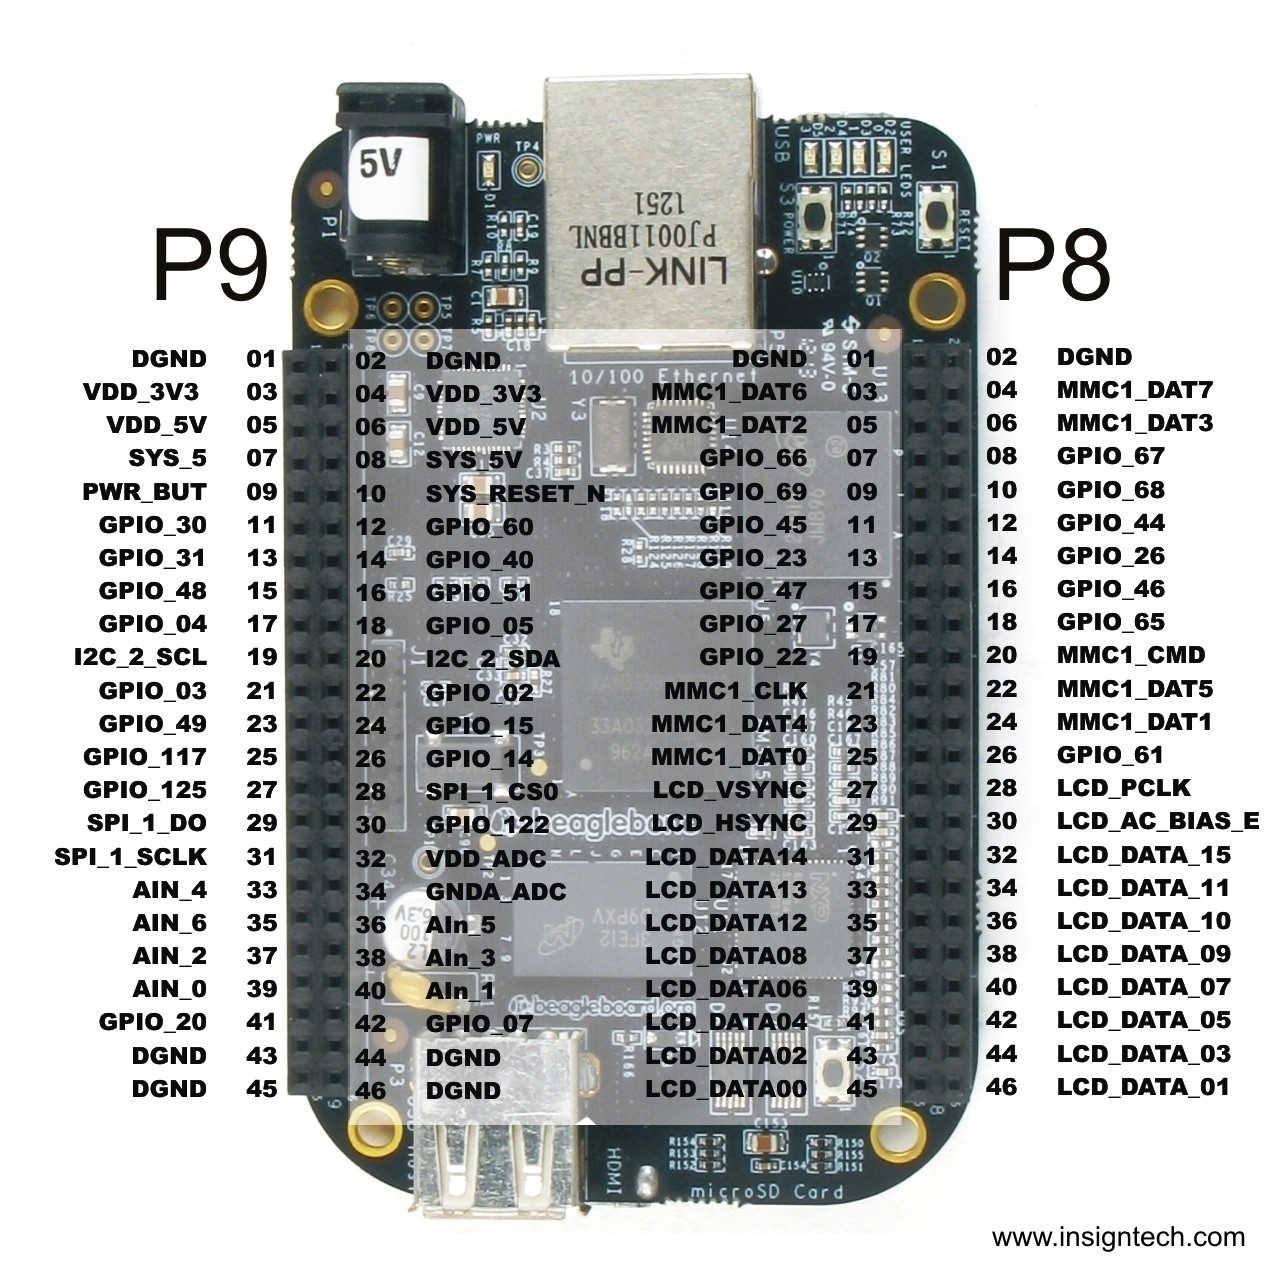
since here I will not compare Raspberry Pi and BeagleBone Black I feel both have it place but on a tech spec you can search what suit your project
BeagleBoneBlack have more pins available to experiment with and One thing that I found after doing a mistake of buying OV7670 camera module. since this device was very raw it need system to make it work. Since this camera share image data very fast I need microcontroller which work even more faster that this. In BeagleBoneBlack there is option of using programmable real-time unit (PRU). This is like inbuilt 32-bit microcontroller work on 200MHz which is good with fast communicating devices
Individual assignment:
Arduino
Arduino is an brand name developes open-source electronics platform based on easy-to-use hardware and software.
Arduino board is been program using Arduino IDE with have it own Arduino language which is kind of modified C language
It have multiple boards options to buy here now I going to use the one called Arduino Uno.

In above pinout image for arduino uno you can see which pin means what easily. This pinout diagram or image is useful while working with arduino uno.
I not mentioning tech specs since you can find it all on arduino official websites. Since it use ATmega328 IC in UNO board let move on it Datasheet and dicuss some useful information needed while working with this chip
ATmega328
You can find Datasheet here
On very beginning I found that atmega328 is CMOS 8-bit microcontroller.
CMOS stand for Complementary metal–oxide–semiconductor and 8-bit microcontroller is a size of Data register and Data bus.
Second thing to dicuss is about RISC (Reduced Instruction Set Computer) and CISC (Complex Instruction Set Computer). Both are computer architecture
Since I don't need to go on details but I found some example may help to visualize some bit of it for now
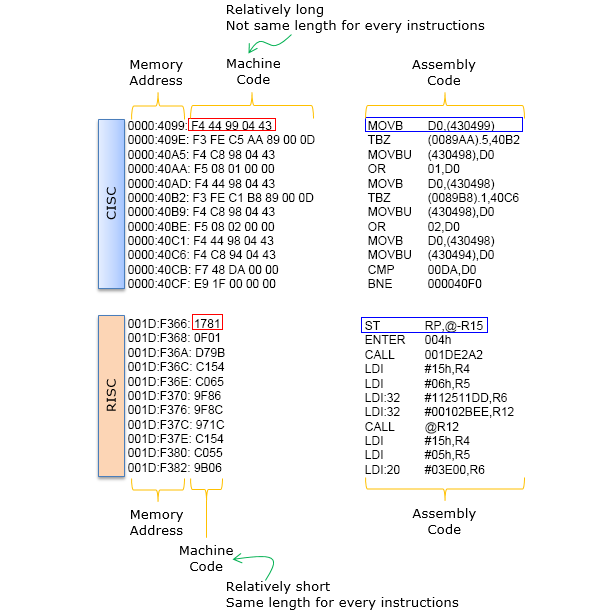
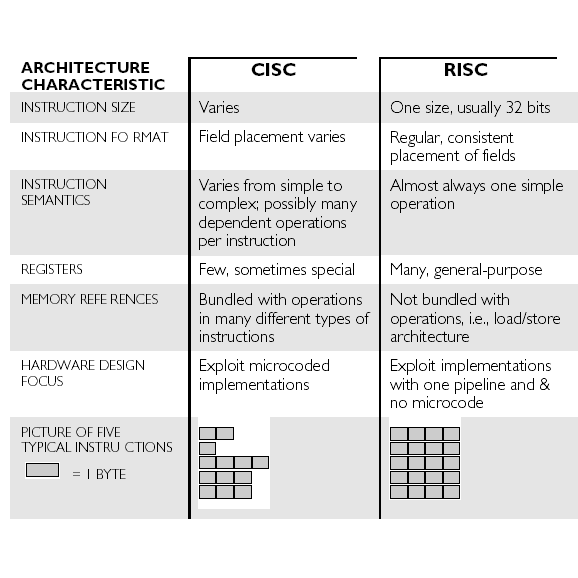
In Datasheet as mentioned ATmega328 have advanced RISC architecture. To figure out why they used word advanced I need to do little more research maybe it is some kind of hybrid architecture but for now let move ahead.
Now lets begin with coding. I want to learn to integrate Arduino and Python because I plan to use this for my work later
So let get start
Since just blinking board led is already done many time so let turn it on and off using python through serial communicating using PySerial
Requirements:
- Arduino UNO and USB connecting cable
- Install arduino IDE
- Install Python latest version and install PySerial
After Completing all that lets begin with writing a code
Code for arduino.
*Copy the given code and upload it in your arduino UNO board
const int Builtin = 13; // the pin that the LED is attached to
int incomingByte;      // a variable to read incoming serial data into

void setup() {
  // initialize serial communication:
  Serial.begin(9600);
  // initialize the LED pin as an output:
  pinMode(Builtin, OUTPUT);
 }

void loop() {
  // see if there's incoming serial data:
  if (Serial.available() > 0) {
    // read the oldest byte in the serial buffer:
    incomingByte = Serial.read();
    // if it's a capital H (ASCII 72), turn on the LED:
    if (incomingByte == 'H') {
      digitalWrite(Builtin, HIGH);
    }
    // if it's an L (ASCII 76) turn off the LED:
    if (incomingByte == 'L') {
      digitalWrite(Builtin, LOW);
    }
  }
}
Code for Python
*Copy the given code in text and save it as .py extension
import serial
import time

# Define the serial port and baud rate.
ser = serial.Serial('COM14', 9600)

def led_on_off():
    user_input = input("\n Type on / off / quit : ")
    if user_input =="on":
        print("LED is on...")
        time.sleep(0.1)
        ser.write(b'H')
        led_on_off()
    elif user_input =="off":
        print("LED is off...")
        time.sleep(0.1)
        ser.write(b'L')
        led_on_off()
    elif user_input =="quit" or user_input == "q":
        print("Program Exiting")
        time.sleep(0.1)
        ser.write(b'L')
        ser.close()
    else:
        print("Invalid input. Type on / off / quit.")
        led_on_off()

time.sleep(2) # wait for the serial connection to initialize

led_on_off()
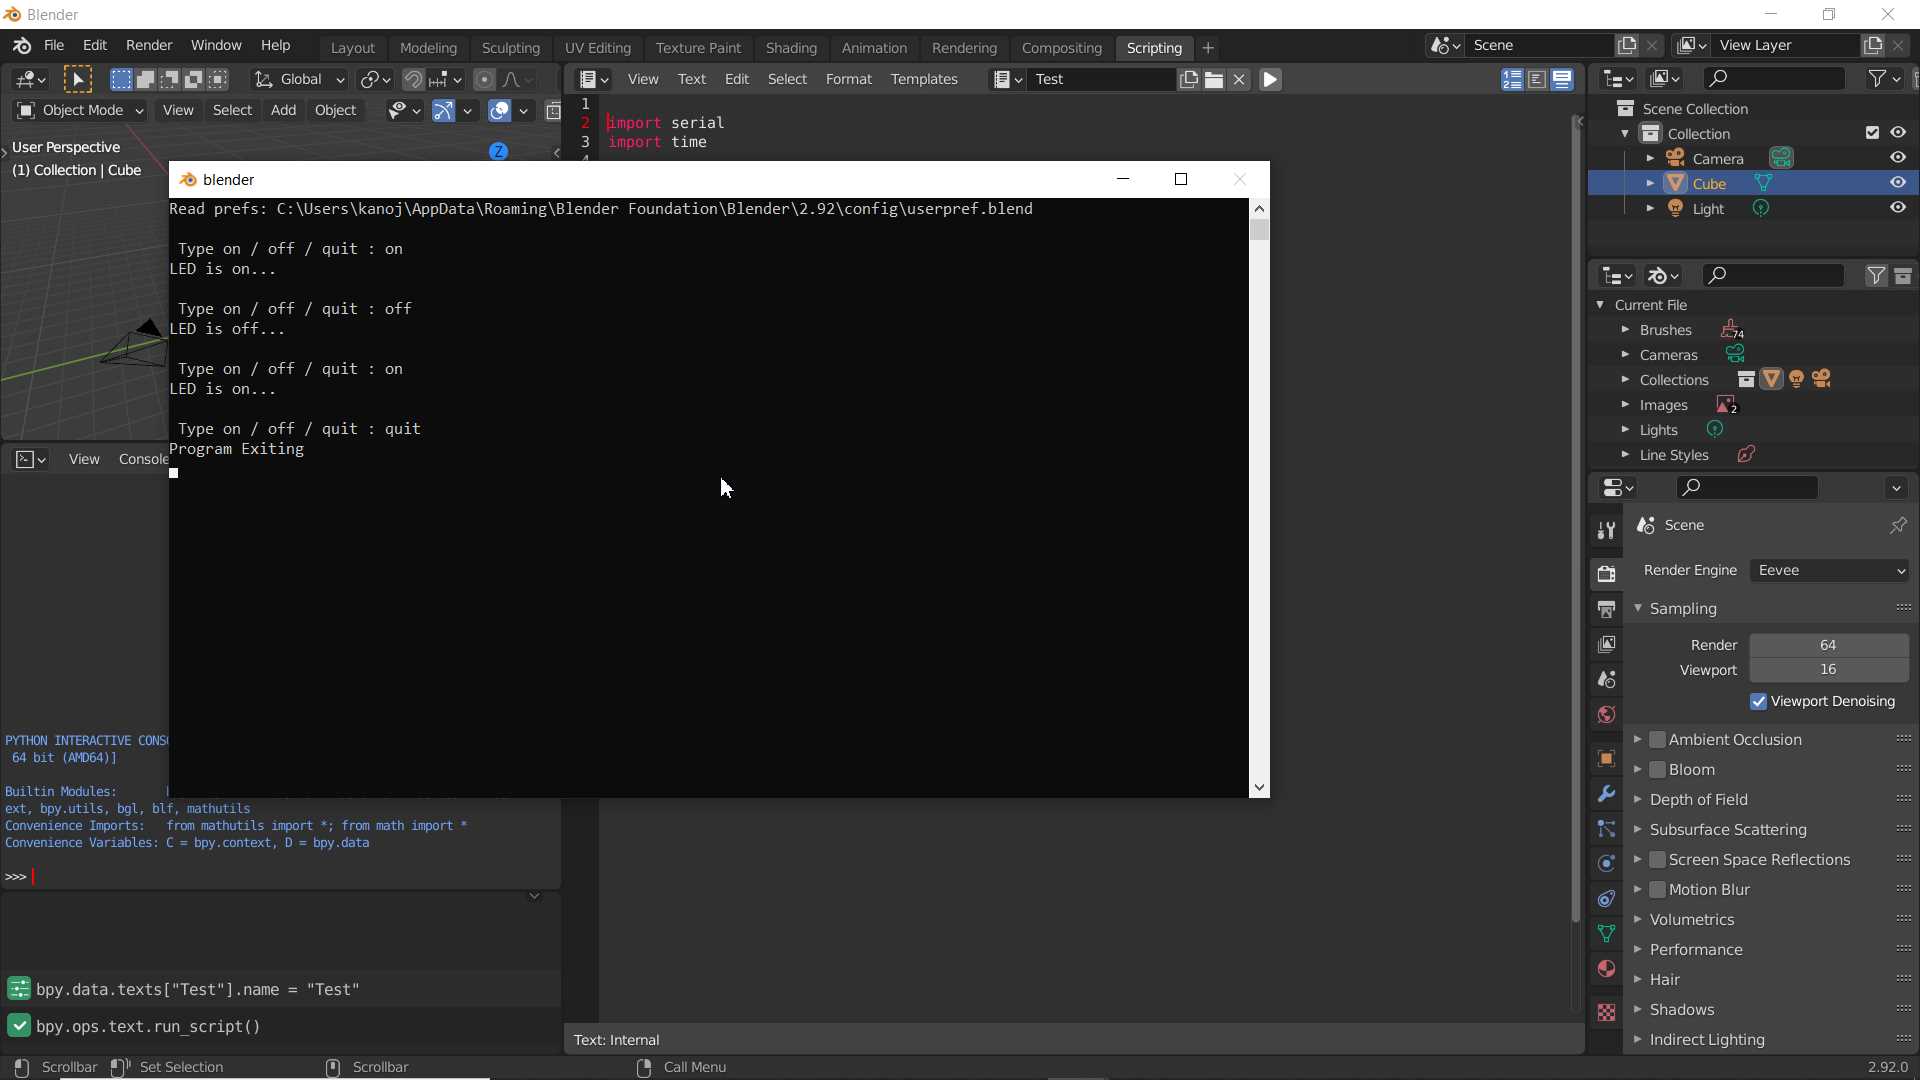
you can see in video that how it work. since I learned through web example now want to do it again with some chanllege and modification.
This time I will use same example in blender python script
In first attempt it have gave error on word 'serial' this because python used in blender is different and even different in version so we need to install pyserial manually in blender itself.
For that download files and copy the serial folder to
C:\Program Files\Blender Foundation\Blender 2.92\2.92\scripts\modules
Before running script you may need to keep the System Console on because still this is
kind of console program

But what I found when we run script in loop the UI of blender get freeze and only system console works
After Few research I found we have to use modal operator which is still not clear to me
yet perfectly
So in very begining I refer the given modal operator script in template and modified it with my serial communication code
*given code in blender
import bpy
from bpy.props import IntProperty, FloatProperty


class ModalOperator(bpy.types.Operator):
    """Move an object with the mouse, example"""
    bl_idname = "object.modal_operator"
    bl_label = "Simple Modal Operator"

    first_mouse_x: IntProperty()
    first_value: FloatProperty()

    def modal(self, context, event):
        if event.type == 'MOUSEMOVE':
            delta = self.first_mouse_x - event.mouse_x
            context.object.location.x = self.first_value + delta * 0.01

        elif event.type == 'LEFTMOUSE':
        return {'FINISHED'}

    elif event.type in {'RIGHTMOUSE', 'ESC'}:
        context.object.location.x = self.first_value
        return {'CANCELLED'}

    return {'RUNNING_MODAL'}

    def invoke(self, context, event):
        if context.object:
            self.first_mouse_x = event.mouse_x
            self.first_value = context.object.location.x

            context.window_manager.modal_handler_add(self)
            return {'RUNNING_MODAL'}
        else:
            self.report({'WARNING'}, "No active object, could not finish")
            return {'CANCELLED'}


def register():
    bpy.utils.register_class(ModalOperator)


def unregister():
    bpy.utils.unregister_class(ModalOperator)


if __name__ == "__main__":
    register()

    # test call
    bpy.ops.object.modal_operator('INVOKE_DEFAULT')
This script work well in blender and It interact with object in viewport without freezing UI but limit it use
Here to see events like MOUSEMOVE, LEFTMOUSE and RIGHTMOUSE which get trigger so I put my code In that to see how it work
So next I mix pyserial and blender script to see how it will work
import bpy
from bpy.props import IntProperty, FloatProperty
import serial
import time

# Define the serial port and baud rate.
ser = serial.Serial('COM14', 9600)

class ModalOperator(bpy.types.Operator):
    """Move an object with the mouse, example"""
    bl_idname = "object.modal_operator"
    bl_label = "Simple Modal Operator"

    first_mouse_x: IntProperty()
    first_value: FloatProperty()

    def modal(self, context, event):
        if event.type == 'MOUSEMOVE':

            delta = self.first_mouse_x - event.mouse_x

            context.object.location.x = self.first_value + delta * 0.01

        elif event.type == 'LEFTMOUSE':
            if context.object.location.x >=3:
                ser.write(b'H')
            else:
                ser.write(b'L')

                return {'RUNNING_MODAL'}

        elif event.type in {'RIGHTMOUSE', 'ESC'}:
            context.object.location.x = self.first_value
            ser.close()
            return {'CANCELLED'}

        return {'RUNNING_MODAL'}

        def invoke(self, context, event):
            if context.object:
                self.first_mouse_x = event.mouse_x
                self.first_value = context.object.location.x

                context.window_manager.modal_handler_add(self)
                return {'RUNNING_MODAL'}
            else:
                self.report({'WARNING'}, "No active object, could not finish")
                return {'CANCELLED'}


def register():
            bpy.utils.register_class(ModalOperator)


def unregister():
            bpy.utils.unregister_class(ModalOperator)


if __name__ == "__main__":
    register()

    # test call
    bpy.ops.object.modal_operator('INVOKE_DEFAULT')
Here in video you see It work well. On mouse momemt object move on x axis and on Leftclick it look on position if it is less or greater than 3 it toggle leds on and off accordingly.
after solving something it seem easy but coming to here was struggle and still some part of code is not clear yet
but learning will be continue because I have to use it for my machine week project to make interface
Embedded C Programming
Okay! so now I will program my arduino uno board using c language, since what we were using till now that was also same but modified one
let start with on board led blinking on Arduino using C code
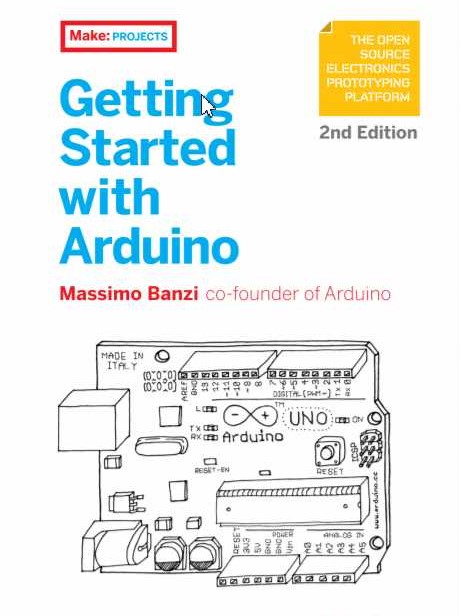
Before going ahead I share two interesting book that been suggested by our one group member Mohit Ahuja and after looking on it I found it interesting and helpful.

So let try some code example from books and dicuss how it work
// ------- Preamble -------- //
#include <avr/io.h> /* Defines pins, ports, etc */
#include <util/delay.h> /* Functions to pause time */

int main(void) {
 // -------- Inits --------- //
 DDRB = 0b00100000; /* Data Direction Register B:
 writing a one to the bit
 enables output. */
 // ------ Event loop ------ //
 while (1) {
 PORTB = 0b00100000; /* Turn on first LED bit/pin in PORTB */
 _delay_ms(1000); /* wait */
 PORTB = 0b00000000; /* Turn off all B pins, including LED */
 _delay_ms(1000); /* wait */
 } /* End event loop */
 return (0); /* This line is never reached */
}
so it is not far different from arduino language example in arduino you already get to ready
functions setup and loop. Here you see in all C code program start with int main()
function
while (1) loop act same like loop() function of arduino language
we need include avr/io.h which give the definition for word PORTB and DDRB in code
util/delay.h use to use delay function
Inbuilt LED on arduino uno is connect on pin 13 which is pin 5 of PORTB in ATmega328
Quick look on Datasheet to find and use feature are avialable in ATmega328 like Timer, interrupt, external clock, UART, I2C etc
ATtiny1614
You can find Datasheet here
So I had used ATtiny1614 In my electronics design week for making of Hello board
This avr chip support UPDI communication hence I have used my UPDI programmer that I made in electronic production week to program my Hello Board
I have used Arduino IDE and Arduino Language to code my Hello board
So this is old testing code from electronic design week I wrote to see if board work well or not
int x=100;

void setup() {
  pinMode(9, OUTPUT);
  pinMode(5, OUTPUT);
  pinMode(4, OUTPUT);
  pinMode(3, OUTPUT);
  pinMode(7, OUTPUT);
  pinMode(1, OUTPUT);
  pinMode(0, OUTPUT);
  pinMode(2, OUTPUT);
  pinMode(6, OUTPUT);
  pinMode(10, OUTPUT);
  pinMode(8,INPUT_PULLUP);
}

void loop() {
  int y = digitalRead(8);
  if(y==0)
  {
    x=10;
     digitalWrite(9, HIGH);
  }
  else
  {
    x=100;
    digitalWrite(9, LOW);
  }
  digitalWrite(5, LOW);
  delay(x);
  digitalWrite(5, HIGH);
  delay(x);
  digitalWrite(4, LOW);
  delay(x);
  digitalWrite(4, HIGH);
  delay(x);
  digitalWrite(3, LOW);
  delay(x);
  digitalWrite(3, HIGH);
  delay(x);
  digitalWrite(7, LOW);
  delay(x);
  digitalWrite(7, HIGH);
  delay(x);
  digitalWrite(1, LOW);
  delay(x);
  digitalWrite(1, HIGH);
  delay(x);
  digitalWrite(6, LOW);
  delay(x);
  digitalWrite(6, HIGH);
  delay(x);
  digitalWrite(10, LOW);
  delay(x);
  digitalWrite(10, HIGH);
  delay(x);
  digitalWrite(0, LOW);
  delay(x);
  digitalWrite(0, HIGH);
  delay(x);
  digitalWrite(2, LOW);
  delay(x);
  digitalWrite(2, HIGH);
  delay(x);
}
So this is kind of boring code with no comments that explain about it
So when I designed my Hello board I designed leds extension to attach it with and later planned to use this as a cpu and process indicator for my laptop
for a while searching online I found python library psutil that can help me in this task.
Helpful functions that I going to use from this library are psutil.cpu_percent() and psutil.virtual_memory().percent

It give out float value indicate usage percentage.
So idea was to combine use python and it library pyserial and psutil which will give cpu and ram usage information to my electronic and electronic is been program to response to incoming data.
But one issue that halt all planning is that my electronic is connected to my pc through it updi pin which I found only can use for programming and debuging and I have put no other option to make comminucation between pc and my electronic hence I drop this idea...
.jpg)
Learning Outcomes:
I am Happy to try different thing here like blender script was new for me I have planning to take it forward in our machine week assigment. Another good thing I found two useful book to refer.