

3D Scanning and Printing:
In this fifth week of Fab Academy, we had room to explore our creativity and bring our lucid thoughts to reality by 3D Printing.
We had used Sense 3D Scanner for scanning Objects and Persons. We had also 3D printed designs which could be made by additive manufacturing.
We had also used the slicer fractory (software) for generating gcode for communication with the machine.
Objective:
1. Group assignment:
This week is having the following Objectives for the Group-
- Test the design rules for your printer(s)
- Document your work and explain what are the limits of your printer(s) (in a group or individually)
2. Individual assignment:
Design and 3D print an object (small, few cm3, limited by printer time) that could not be easily made subtractively
3D scan an object, try to prepare it for printing (and optionally print it)
Learning Outcomes:
- Identify the advantages and limitations of 3D printing
- Apply design methods and production processes to show your understanding of 3D printing.
- Demonstrate how scanning technology can be used to digitize object(s)
Checklist:
Linked to the group assignment page ✔
Explained what you learned from testing the 3D printers ✔
Documented how you designed and made your object and explained why it could not be easily made subtractively ✔
Documented how you scanned and prepared an object (for 3D printing) ✔
Included your original design files for 3D printing (both CAD and common format for 3D printing) ✔
Included your hero shots ✔
Opening Quotes:
- 3D Printing turns digital files into Physical objects by building them up layer by layer……It gives everyday users the power of manufacturing.
- I wanted to develop my lucid dreams tridimensionally……Joshua Harker
- Forget Shopping, soon we will be able to download and print our clothes.
- Everyone is a maker only I am a Printer. -----Joseph Prusa
- 3D Printing is already shaking our age-old notions of what can and can’t be made. ------Hod Lipson
3D Scanning and Printing:
The task of this week included assignments to be done in group and individually. We have to test our 3D Printer for its limits and understanding its characteristics. We also had to design a 3D object which could be made by additive manufacturing process only. Again, we had to scan an object or person and optionally print it.
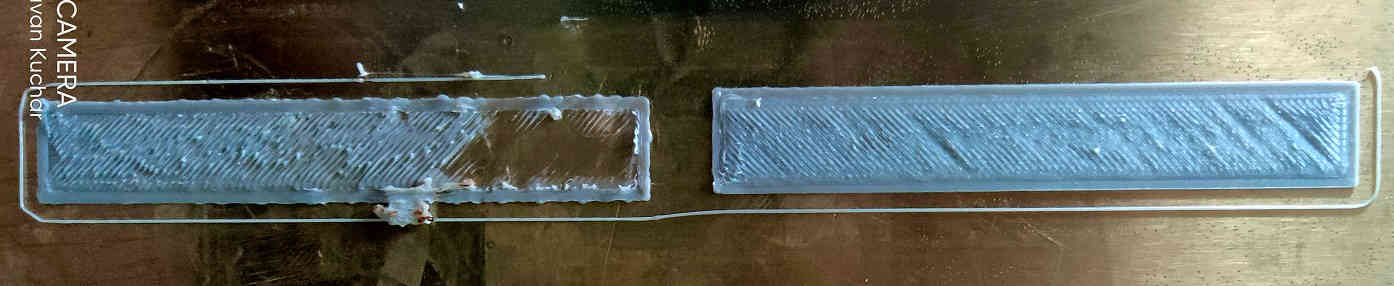
We divided the tasks amongst us for 3D Printing. We had divided the test shapes to be 3D printed amongst us and then printed it on our fractal works printer. I have selected two shapes namely "Overhang without Support" and "Angles from zero-0 to 90 degrees" to be 3D printed as a part of Group Assignment. The details of the Group assignment could be found here.
Analysis of My part of Group Assignment:
After the Introduction to our 3D Printer, I downloaded the test file from the Fab Academy Schedule and opened it with fractory where I changed the settings mentioned as below and gave command of printing.
Two Jobs were already printed on the machine so I thought that the bed leveliing is OK. But it resulted in improper printing and the ABS material was not sticking to the bed.
Then I did the Quick Calibration of the bed by going through the Wizard. For this, I followed the instructions prompted by the machine. This is how the bed was levelled and I was able to 3D print the test objects.
For the 3D printing of Angles, the angles from 90 degress to 40 degrees have been printed flawless. The angles zer-0 to 30 degree have the ABS material hanging a bit in the bottom. The edges are not smooth. The angles were printed without any support. So, it could be concluded that the objects to be 3D printed having angles more than 30 degrees inclination could be printed better without any lumps hanging using fractal works 3D printer Julia Extended version with the following Settings.
The Settings of the machine for both the Angles and Overhangs without Support - Job are as given below:
- Name of the 3D Printing Machine: fractal works
- Name of the Slicer Software: fractory
- Based on Marlin
- Version: Julia Extended
- Material used for 3D Printing: ABS (Acrylonitrile Butadiene Styrene)
- Nozzle diameter: 0.4 mm.
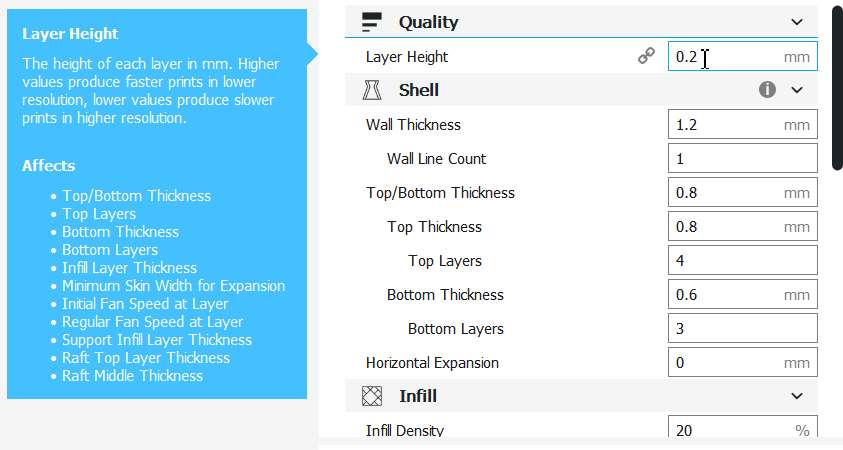
- Profile: 0.2 mm (Normal)
- Layer Height: 0.2 mm
- Wall Thickness: 1.2 mm
- Wall Line Count: 3 (as the Nozzle diameter is 0.4 mm So, 0.4 x 3 = 1.2)
- Top and Bottom Thickness: 0.8 mm
- Top Layers: 4
- Generate Support: was disabled so the Support overhang angle and Placement was also disabled automatically
- Buils Plate Adhesion: Skirt instead of Brim and Raft
Observations for Angles:
After 3D printing the angles file, the angles from 90 to 60 degree were printed without flaw. The lesser angles has some flaws like lumps at the bottom (majorly for the angles from zero-0 degrees to 20 degrees); little slicing (from angles 20 to 50 degrees.)

Conclusions:
It could be concluded that, with the above mentioned parameters of 3D printing on fractal works Julia Extended machine,
- the overhangs of the angles 90 to 60 degrees could be printed without any flaw.
- the overhangs of the angles 50 to 20 degrees show the slicing of the edges with less lumps of the ABS material hanging at the bottom.
- the overhangs of the angles 20 to zero-0 degrees show the lumps of the material hanging at the bottom and little slicing of the edges.
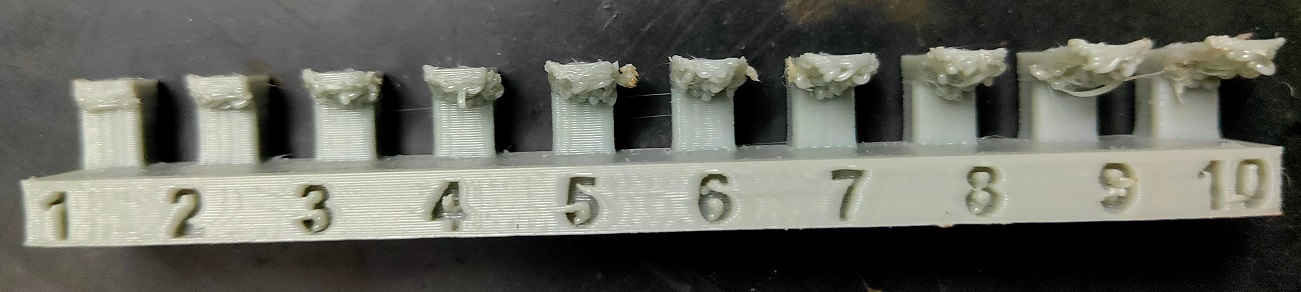
Observations for Overhangs:
After 3D printing the Overhangs file, all the 10 overhangs had the flaws and could not be printed properly.
Conclusions:
It could be concluded that, with the above mentioned parameters of 3D printing on fractal works Julia Extended machine,
- ALL the overhangs of the angles zero-0 could not be printed as designed. The top layer is not printed fully. The printing is tapered from the center to the outer edge.
- Also, the lumps are hanging at the bootom of all the Overhangs.
Original Test Print Files (GCode) can be downloaded here.
Individual Assignment:
In this week, I had to-
- Design and 3D print an object (small, few cm3, limited by printer time) that could not be easily made subtractively
- 3D scan an object, try to prepare it for printing (and optionally print it)
3D Printing:
3D printing or additive manufacturing is a process of making three dimensional solid objects from a digital file.
The creation of a 3D printed object is achieved using additive processes. In an additive process an object is created by laying down successive layers of material until the object is created. Each of these layers can be seen as a thinly sliced cross-section of the object.
3D printing is the opposite of subtractive manufacturing which is cutting out / hollowing out a piece of metal or plastic with for instance a milling machine.
3D printing enables you to produce complex shapes using less material than traditional manufacturing methods. (Source: 3DPrinting.com)
3D printing encompasses many forms of technologies and materials as 3D printing is being used in almost all industries you could think of. It’s important to see it as a cluster of diverse industries with a myriad of different applications.
A few examples:
- consumer products (eyewear, footwear, design, furniture)
- industrial products (manufacturing tools, prototypes, functional end-use parts)
- dental products
- prosthetics
- architectural scale models & maquettes
- reconstructing fossils
- replicating ancient artefacts
- reconstructing evidence in forensic pathology
- movie props
A. Introduction to Fractal Works 3D Printer at FabLab-0 at Vigyan Ashram, Pabal:
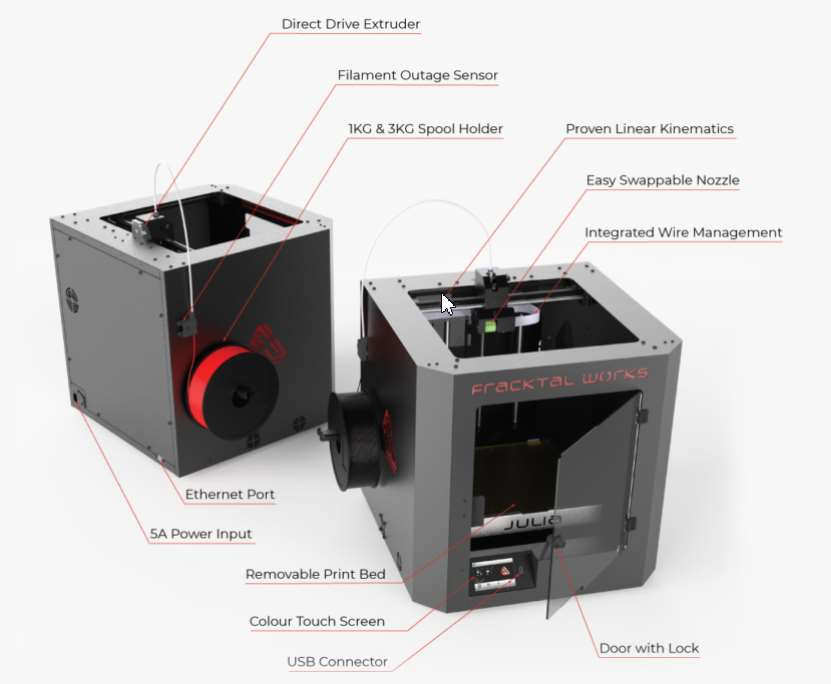
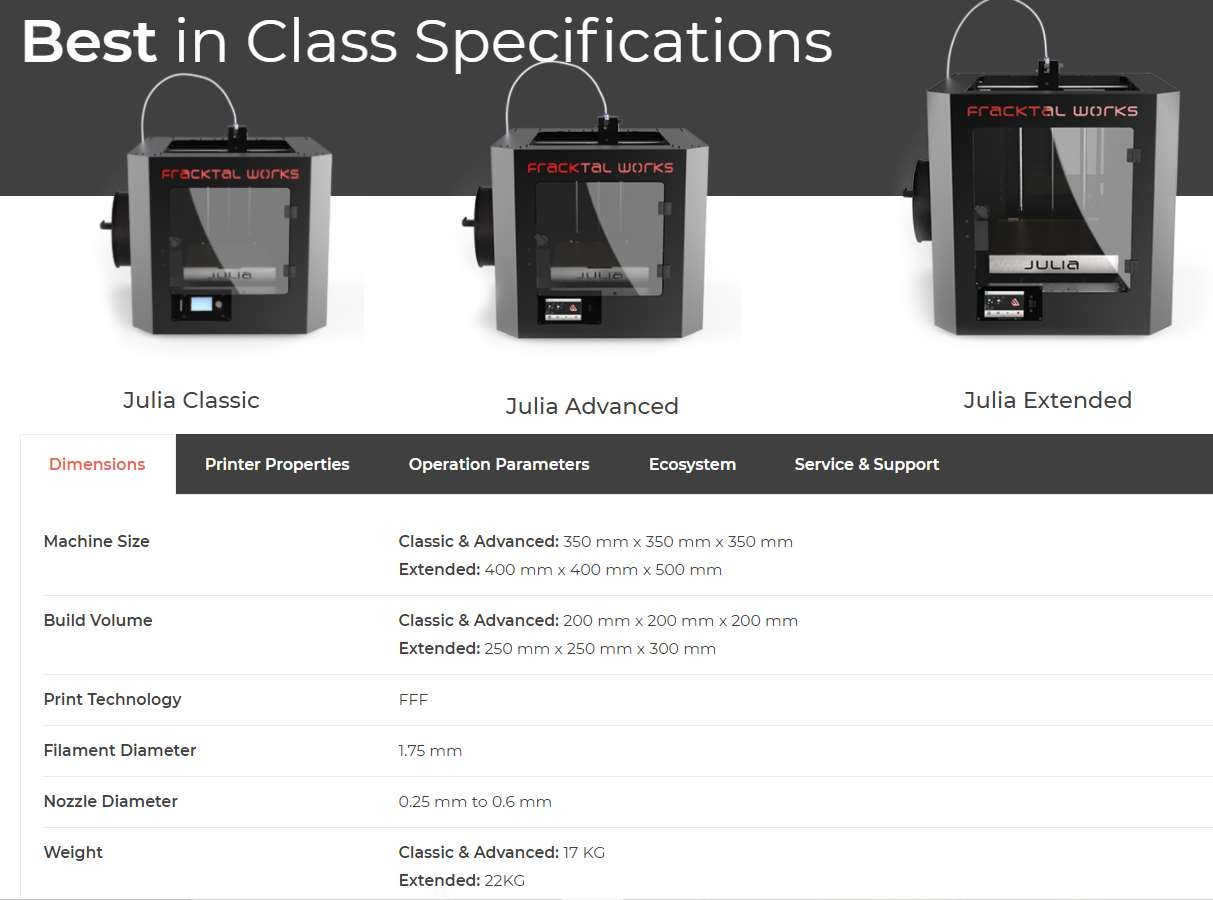
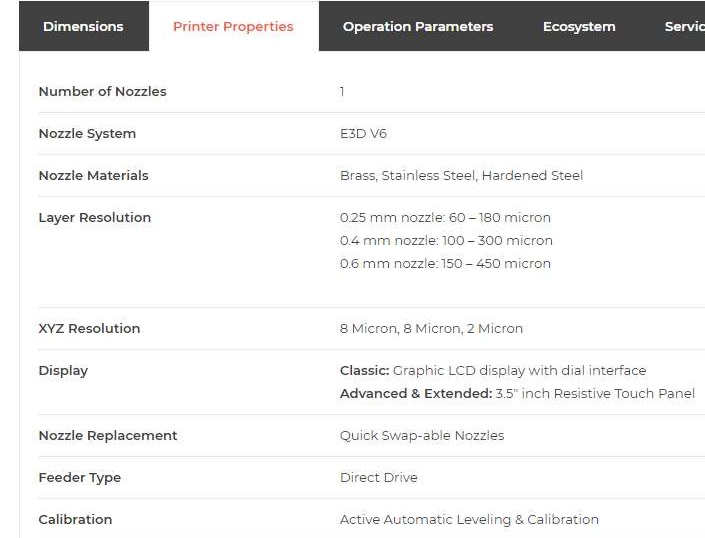
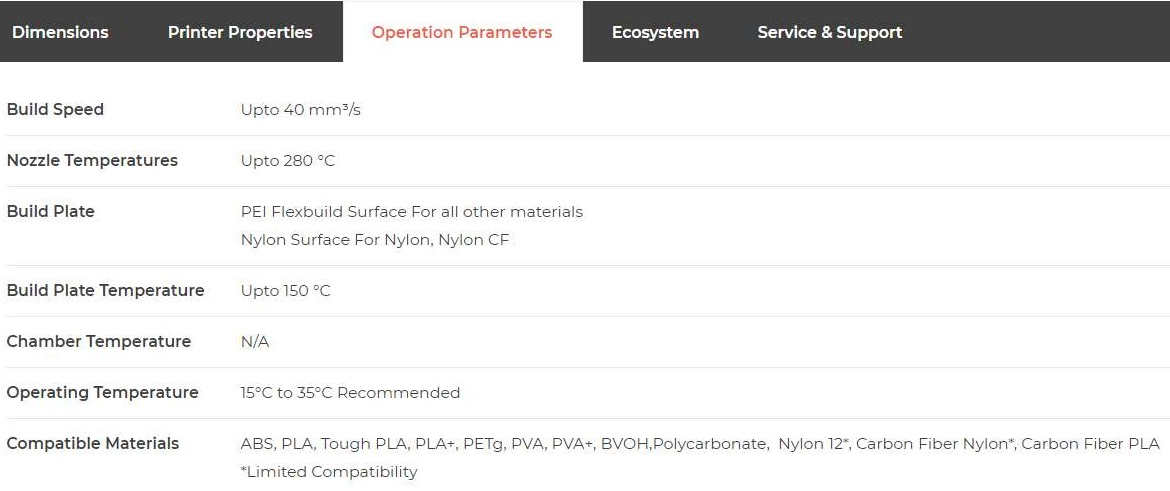
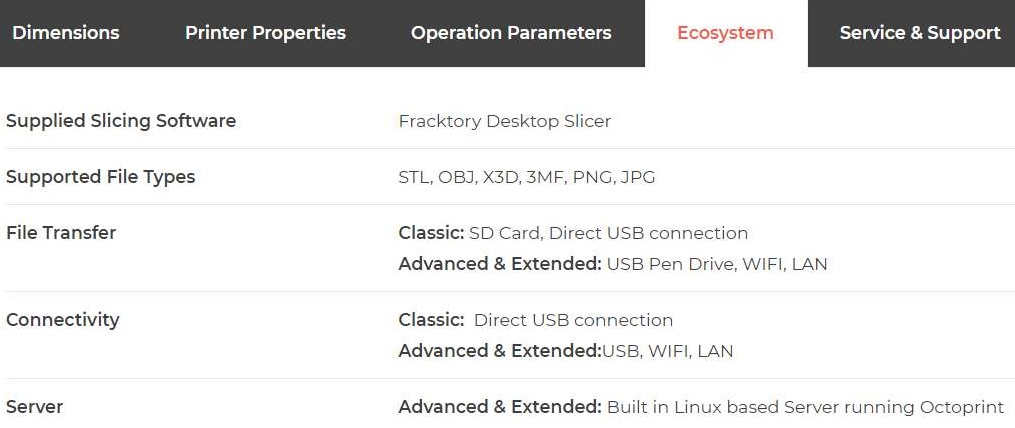
3D Printer (Fractal Works Julia Extended) Machine Specifications:
The specifications of the as specified by the company on their website are as:
| Parameter | Specification/Description |
|---|---|
| Bed Size: | 250 mm x 250 mm x 300 mm |
| Print Technology: | Fused Deposition Modelling (FDM) |
| Filament Diameter: | 1.75 mm |
| Nozzle Diameter: | 0.40 mm |
| Nozzle Temperature: | Upto 280°C |
| Bed Temperature: | Upto 110°C |
| Compatible Materials: | ABS, PLA, Tough PLA, PLA+, PETg, PVA, PVA+, BVOH, Polycarbonate, Nylon 12*, Carbon Fiber Nylon*, Carbon Fiber PLA |
| Supported File Types: | .STL, .OBJ |
| File Transfer: | USB Pen Drive, WIFI, LAN |
Additive Method:
Additive method is actually a synonym for 3D printing and/or any process by which 3D objects are constructed by successively depositing material in layers such that it becomes a predesigned shape. In an additive process, an object is created by laying down successive layers of material until the object is created. Each of these layers can be seen as a thinly sliced horizontal cross-section of the eventual object.
Substractive Method:
Subtractive process is a process by which 3D objects are constructed by successively cutting material away from a solid block of material. Subtractive process can be done by manually cutting the material but is most typically done with a CNC Machine.
3D Design in Rhino-6
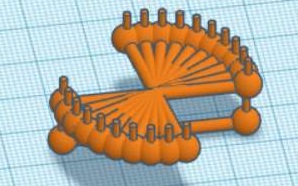
I have initially designed various objects like Self Watering Pot, Vase, Rings in Ring etc. in Tinkercad as it is simple to handle and understand what is to be done.
 |
 |
|---|---|
.jpg) |
.jpg) |
.jpg) |
.jpg) |
.jpg) |
.jpg) |
.jpg) |
.jpg) |
.jpg) |
.jpg) |
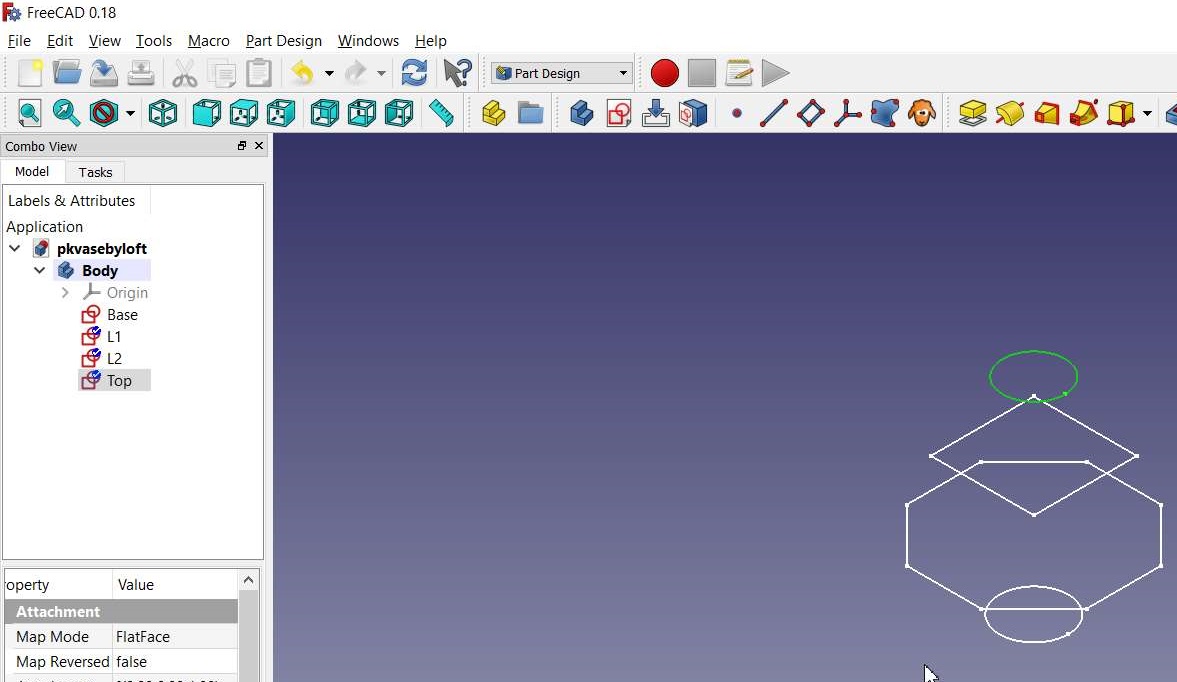
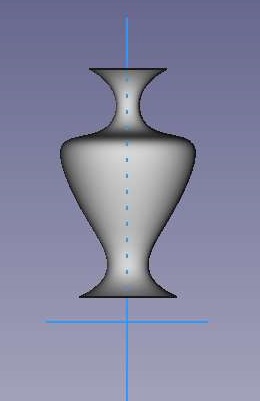
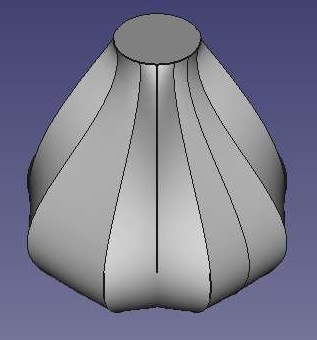
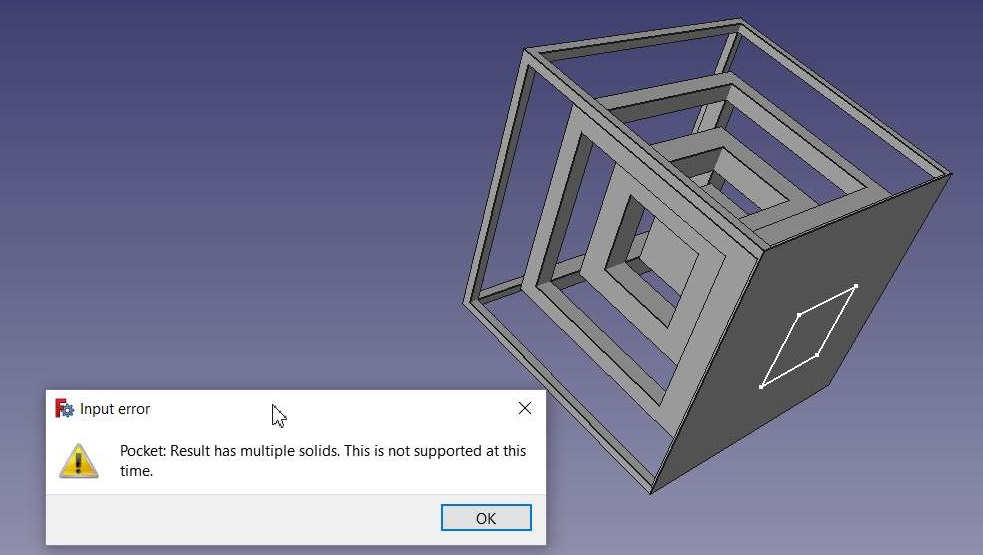
Then, I tried my hands on FreeCAD in designing Turners Cube, Vase. I was not able to add offset to the object. Also, the object was solid and I was unable to make it hollow. When I tried to slice the object usine fractory s/w, it showed that only the outer wall will be printed.
 |
 |
 |
|---|
FreeCAD Design by Loft
 |
 |
|---|
Turner's Cube:
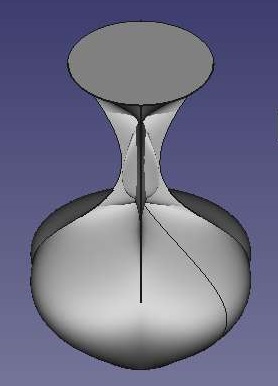
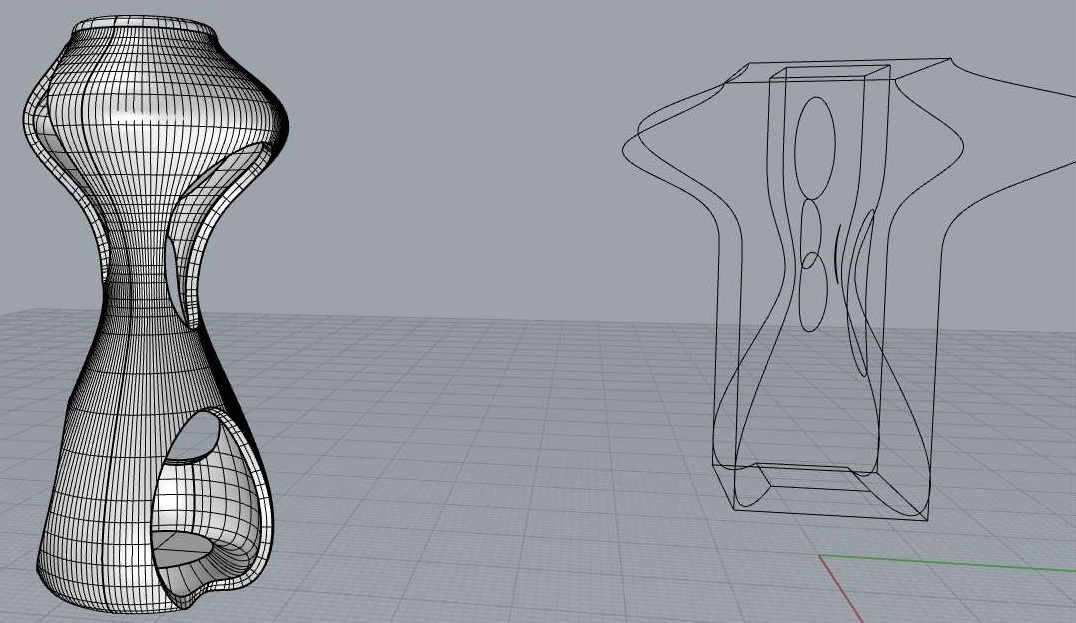
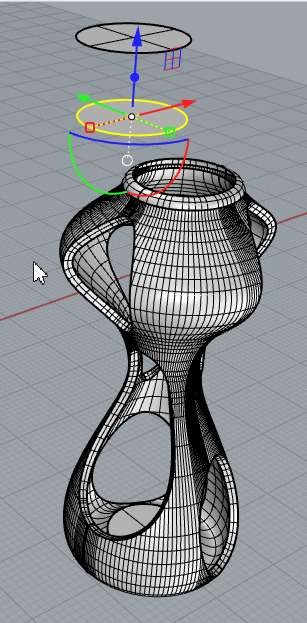
Then I moved to Rhino-6 for designing the object. With the help of our fellow fabacademian Mohit Ahuja, I designed the Self Watering Pot.
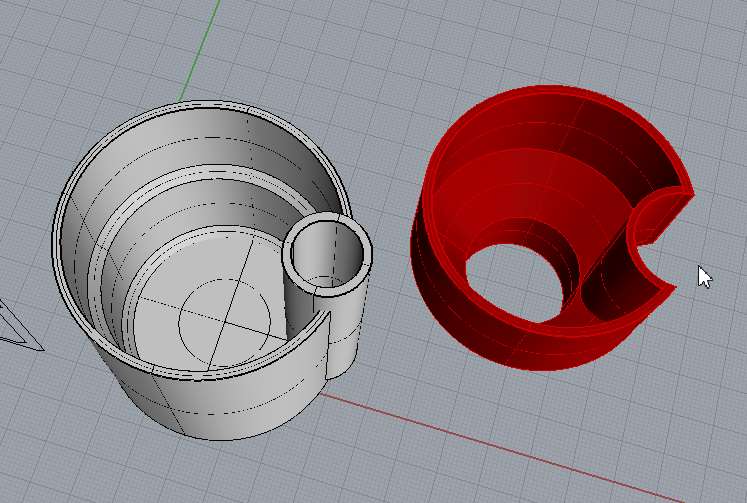
I wanted to design on my own and it would take more time so I switched to designing a candle pot. I referred the tutorial on You Tube by Rhino Tutorials of Kubasek Krzysztof.
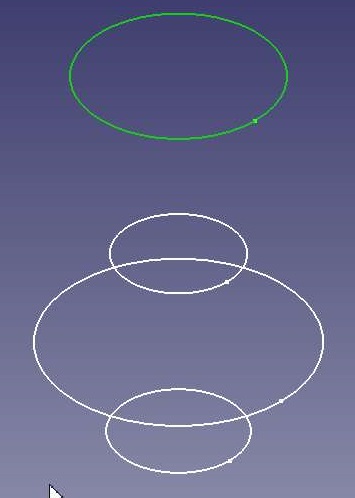
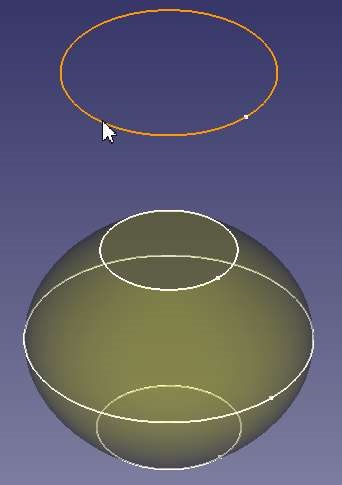
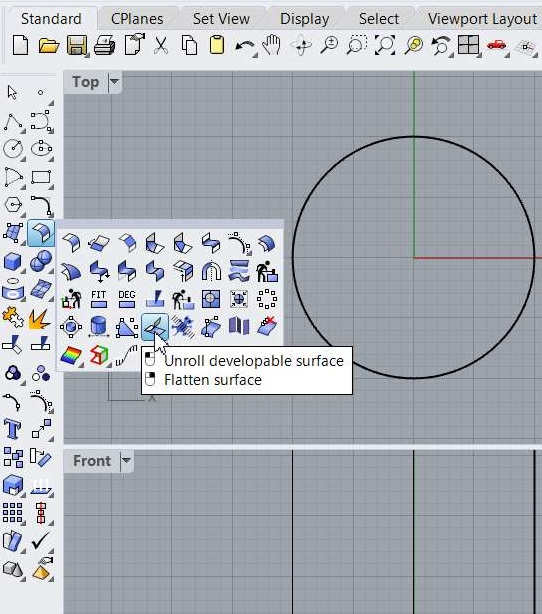
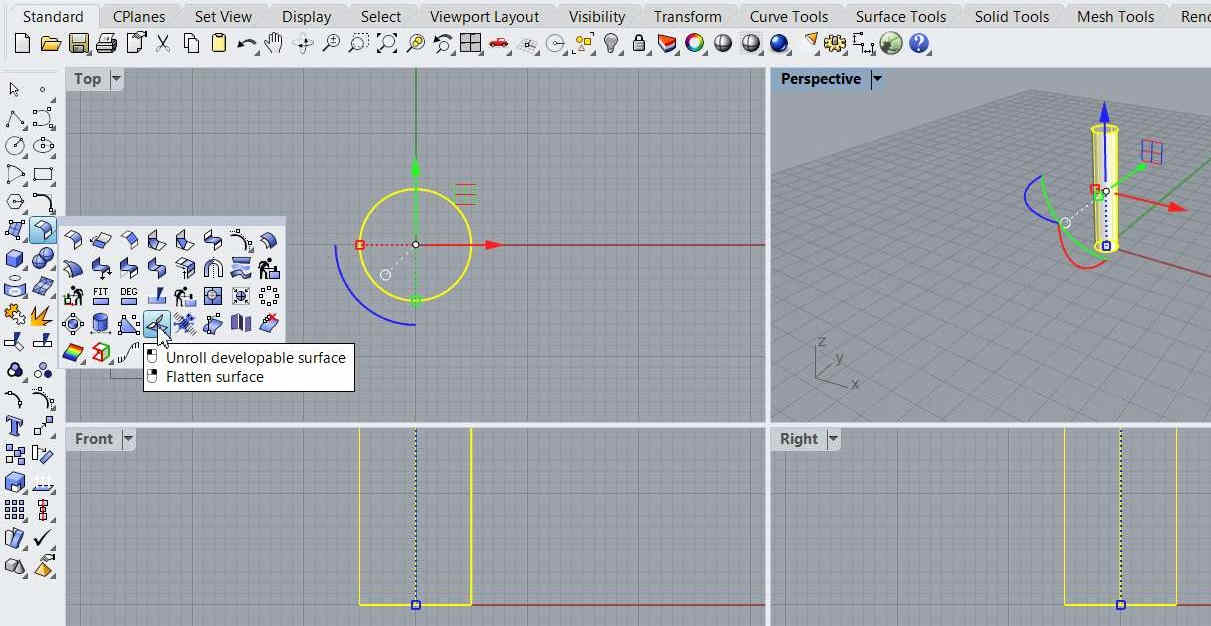
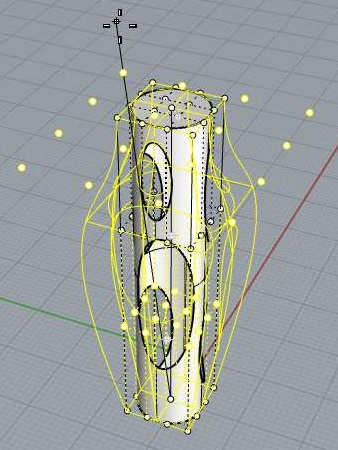
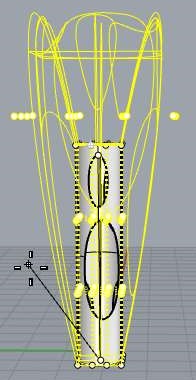
3D Design Steps:
- Open the Rhino-6 Software
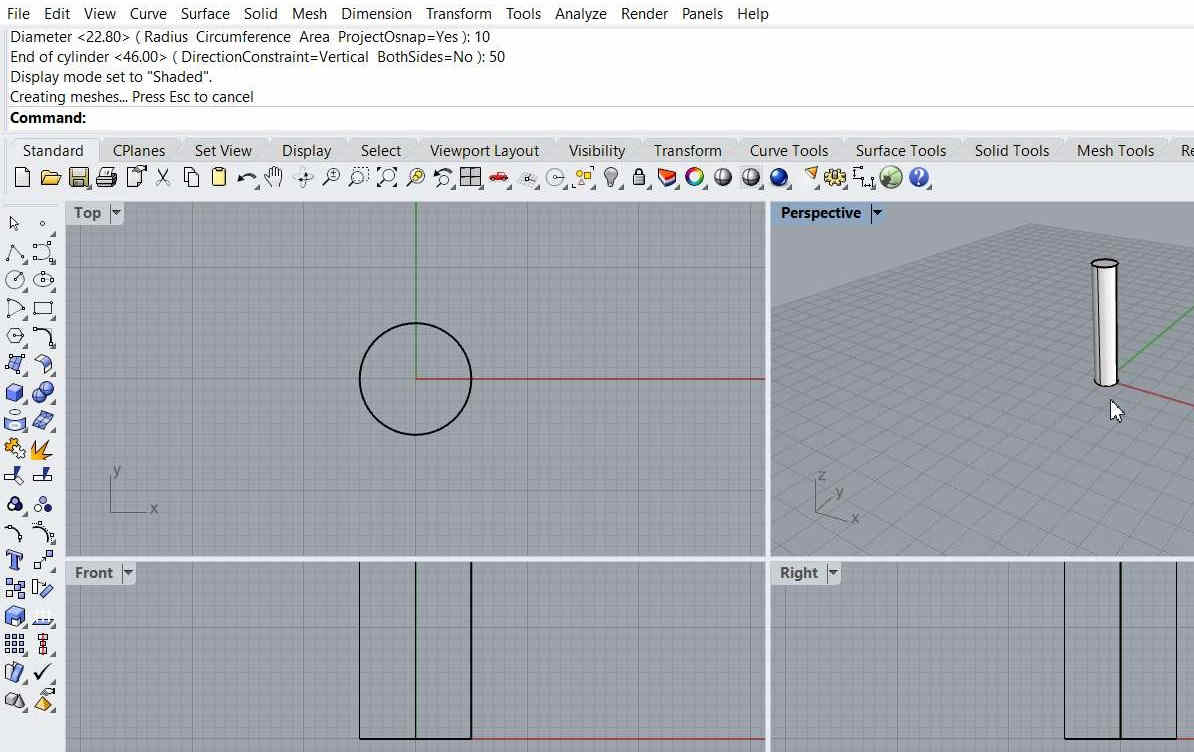
- Select the 3D Shape of Cylinder from the Side Bar
- Build a Cylinder of 10 mm radius and 50 mm height
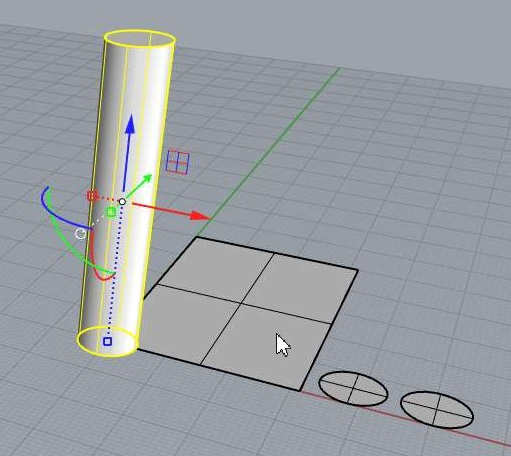
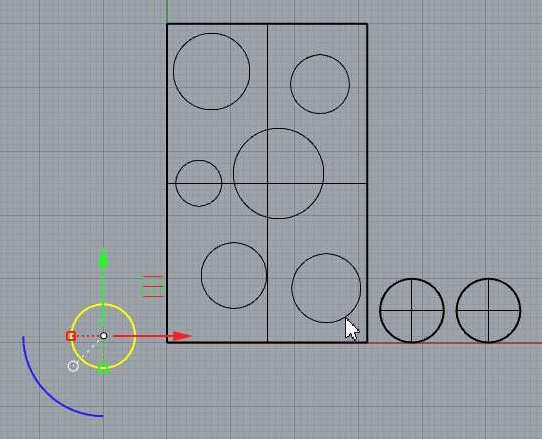
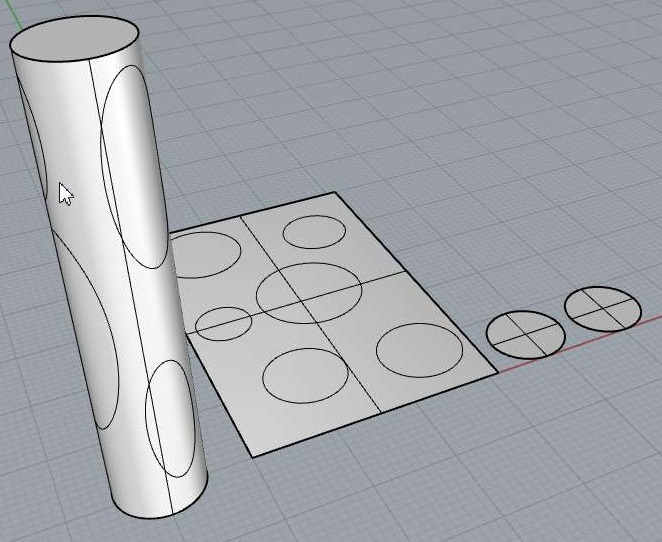
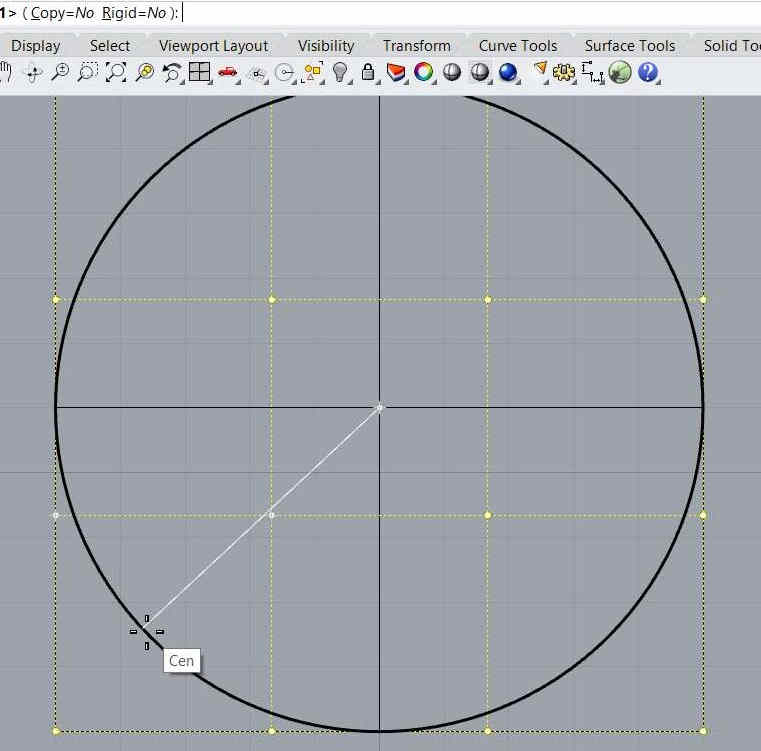
- Select Unroll Developable Surface along Y axis. Draw circles on the unrolled surface.
- Select the drawn circles, base and let them Flow along the selected surface (Cylinder) by selecting the edge.
- Trim the edges (circles) that appear on the cylinder
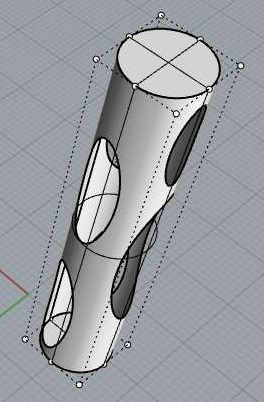
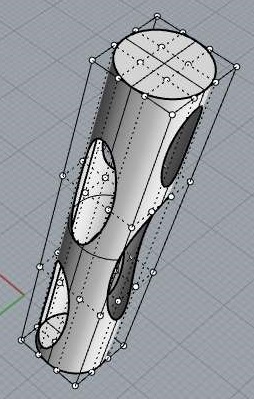
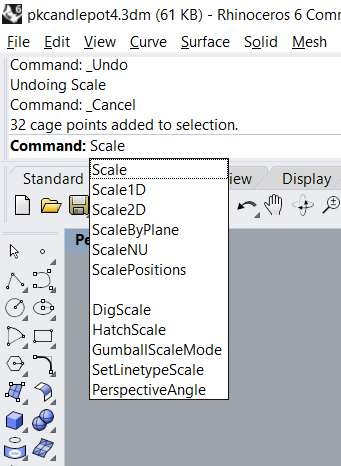
- Use Command Cage edit to create a cage around the cylinder. Give proper instructions to develop number of cage points for editing
- Use Scale command to shape the cylinder inward or outward by selecting the desired cage points and selecting the reference points
- Apply offset and join all surfaces
- This is how a 3D design is created using Rhino-6
 |
 |
|---|
 |
 |
 |
|---|
 |
 |
|---|

 |
 |
|---|---|
 |
 |
 |
 |
|---|
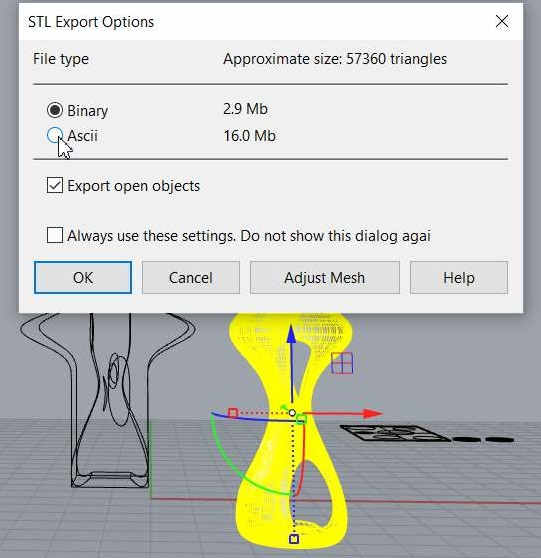
Saving the .3dm (Rhino File) in .stl format (compatible with fractory s/w for 3D printing)
- Once the object is ready, select the object go to file menu click on Export selected
- Enter the file name and select save type *.stl, click on save button
- Enter tolerance 0.01mm (default), click ok
- Select file type Binary, click ok.
- Rhino file is converted into .stl file

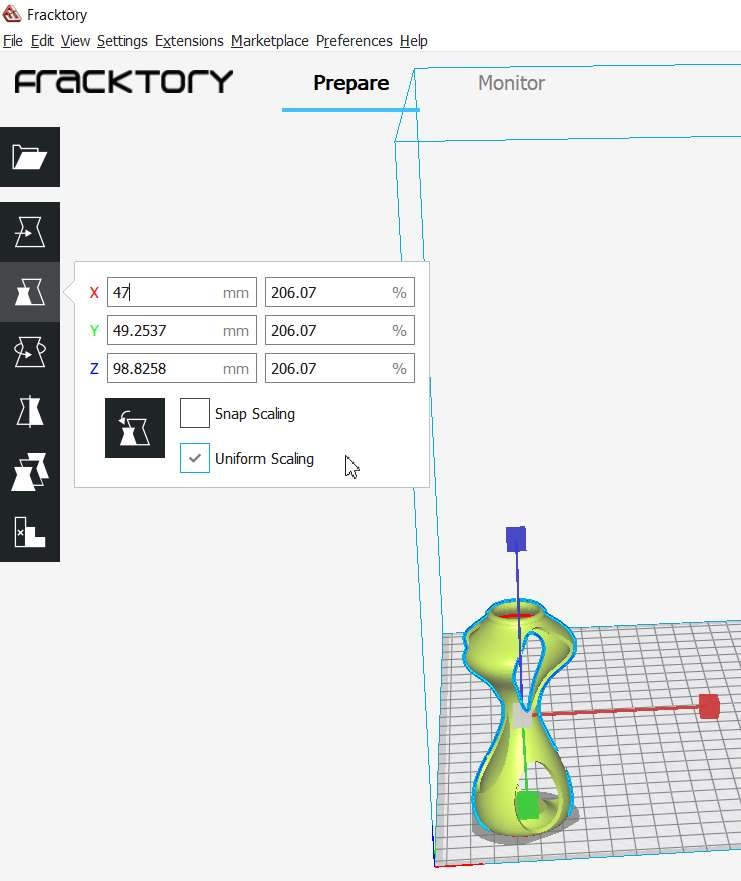
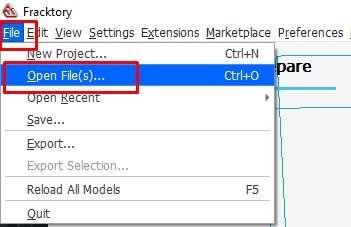
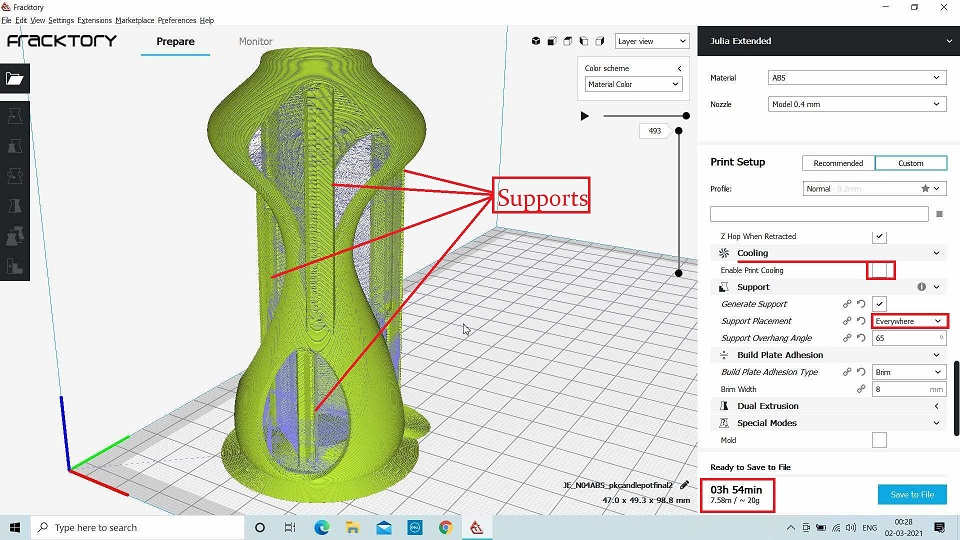
Use of Fractory Software for 3D Printing:
Fracktory S/W is open source s/w. It converts the .stl file in to G-code. For 3D printing machine only G-code is required. This is how the computer communicates and directs the machine about the parameters for 3D printing. I downloaded the fractory software, installed it in my laptop. This fractory s/w is compatible with the Fractal Works (Julia Extended) 3D Printer.
G Code:G-code stands for “Geometric Code”. Its main function is to instruct a machine head how to move geometrically in 3 dimensions. However, it can also instruct a machine to do non-geometric things. For example, G-code commands can tell a 3D printer to extrude material at a specified extrusion rate or change its bed temperature.
G-Code is the control language generated by your slicer software when it converts an STL design file into a G-Code control file for the printer. The slicer will combine movement, extrusion, heating and sensing commands together in a sequence that, when interpreted by your 3d printer, will produce a 3d model. This process is known as ‘slicing’ the STL file, and is an intermediate step. It is this .GCODE file that you will load into your 3d printer.
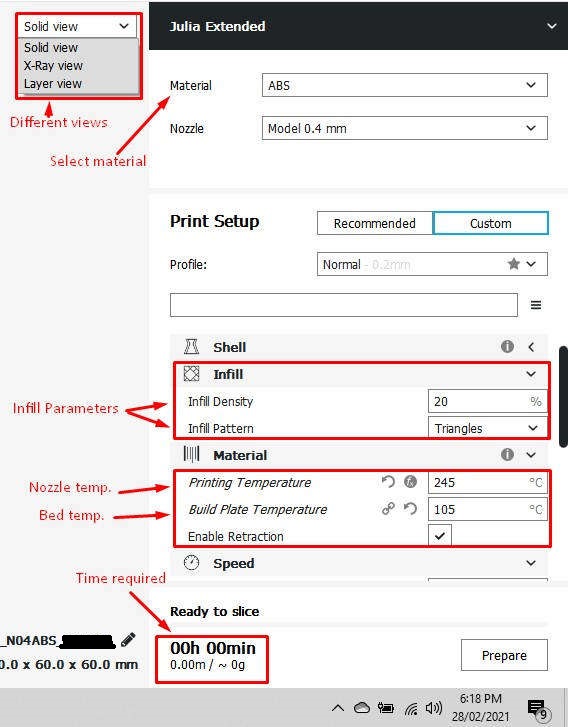
- Import the stl file to be 3D printed.
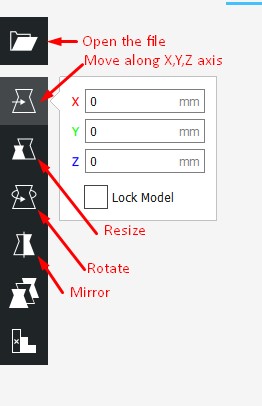
- Set the different parmeters like move, scale etc. for placing design perfectly on the surface
- Select material type ABS, PLA etc. We selected ABS material
- Select infill density 20%, infill pattern - Tringle etc. as shown in image
- Click on prepare, slicing will be started
 |
 |
|---|
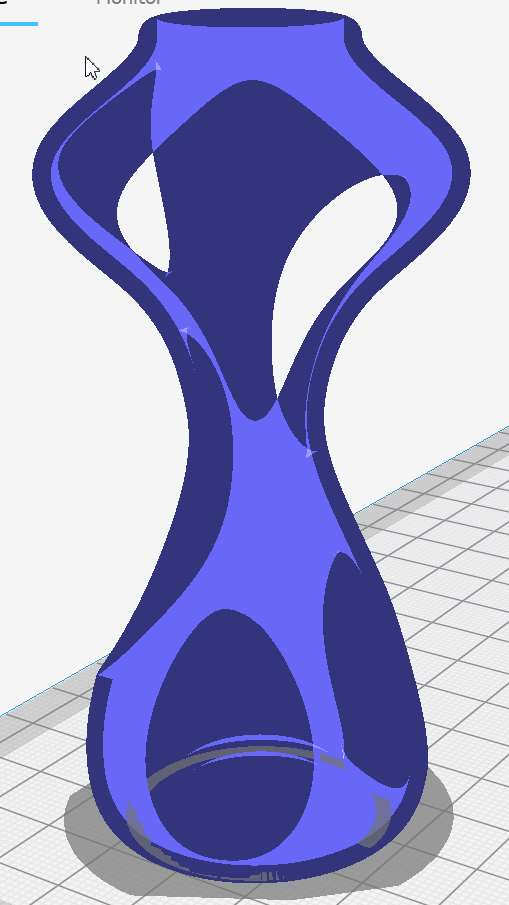
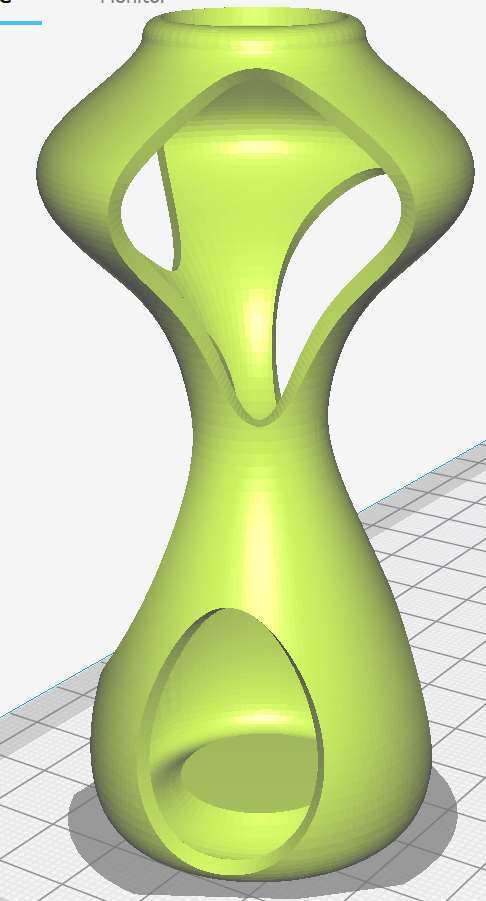 Solid View Solid View |
 X-Ray View X-Ray View |
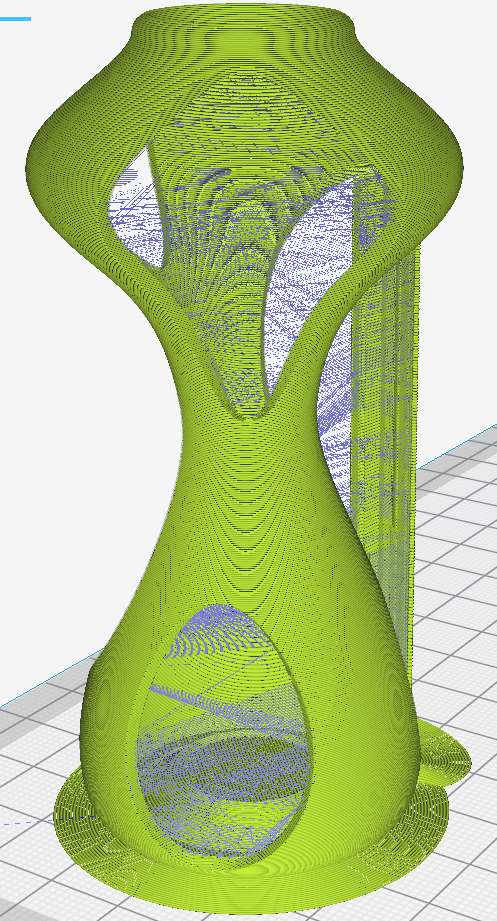 Layer View Layer View |
|---|
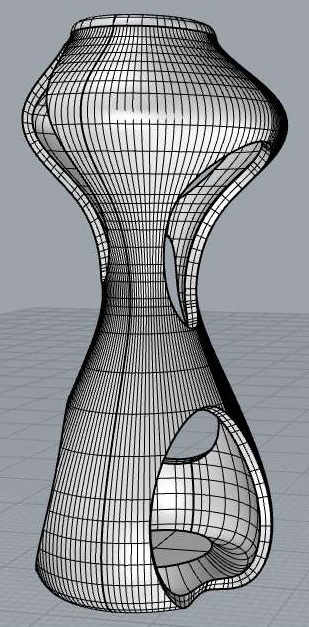
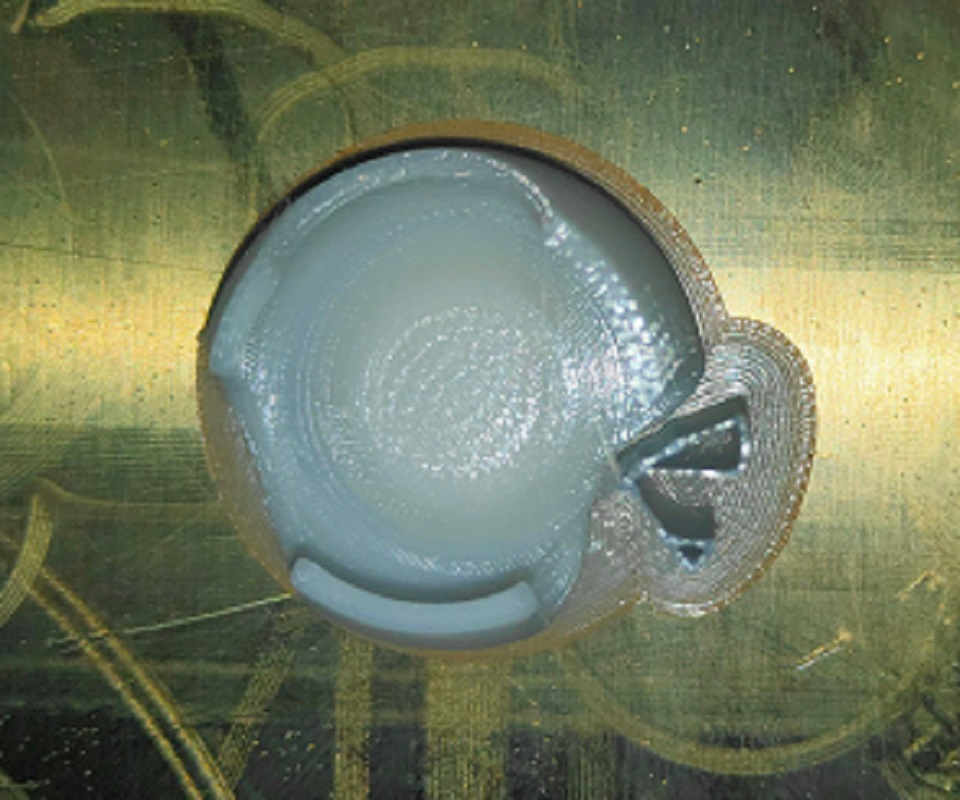
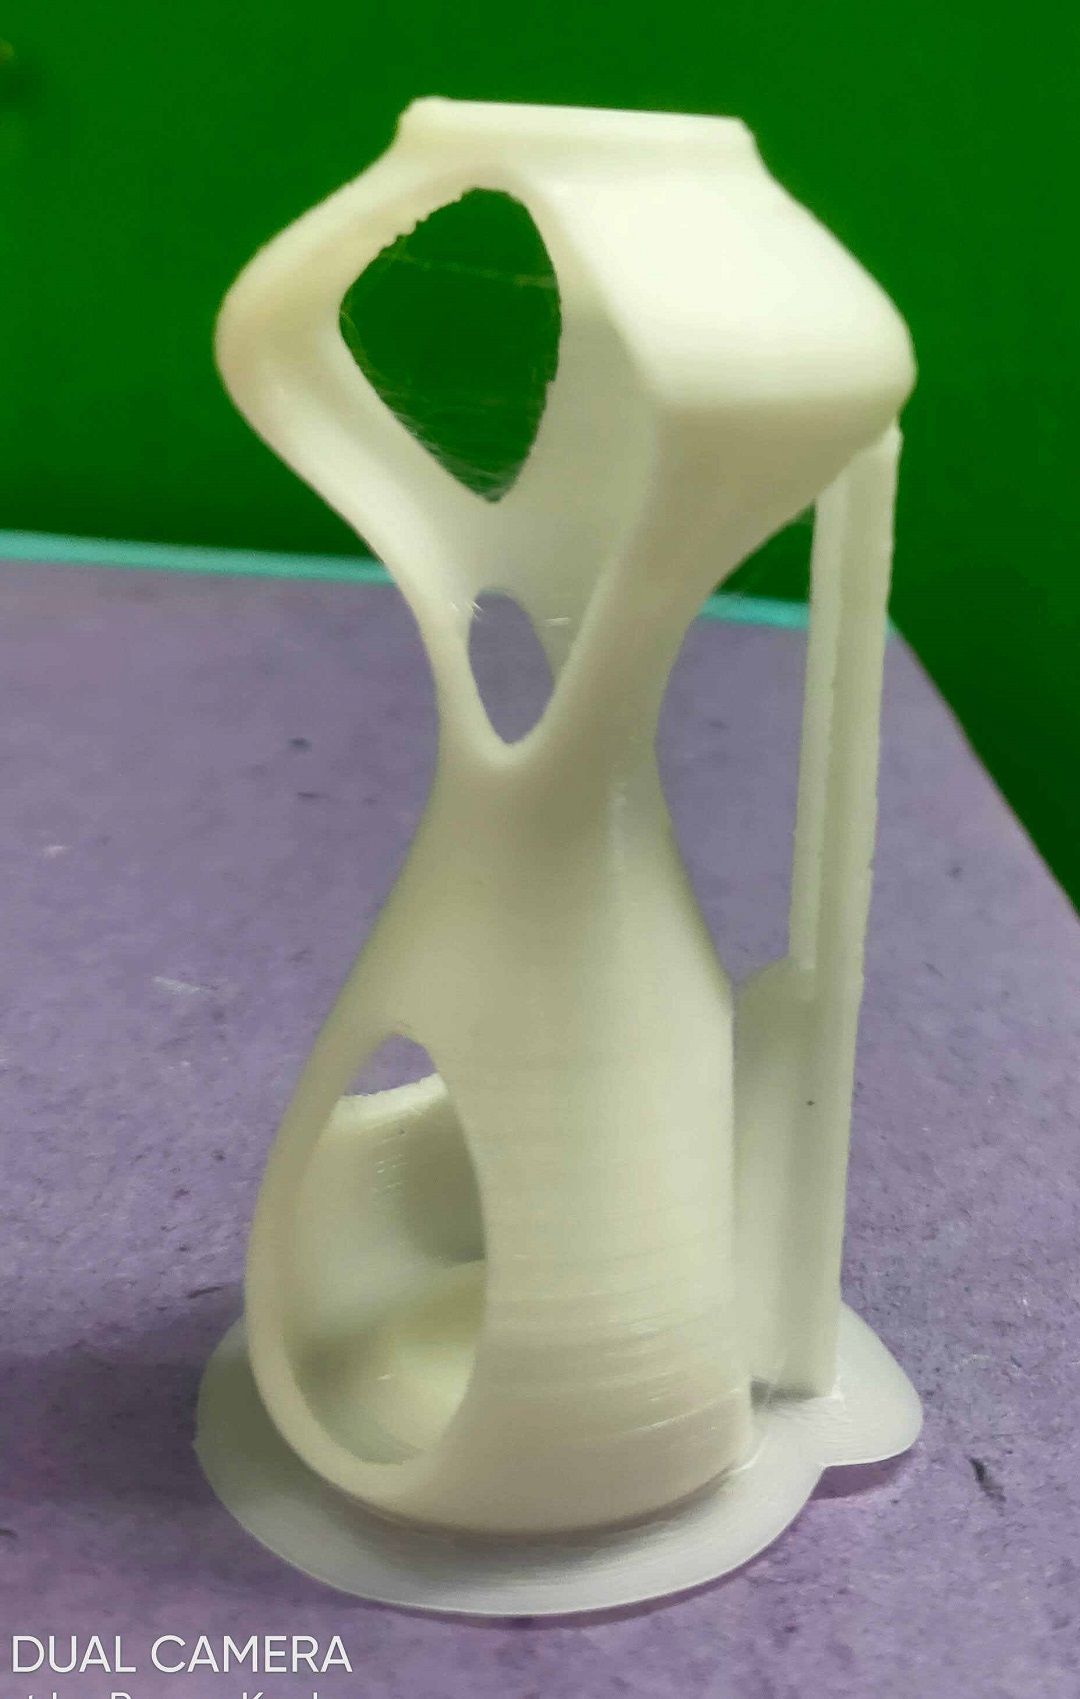
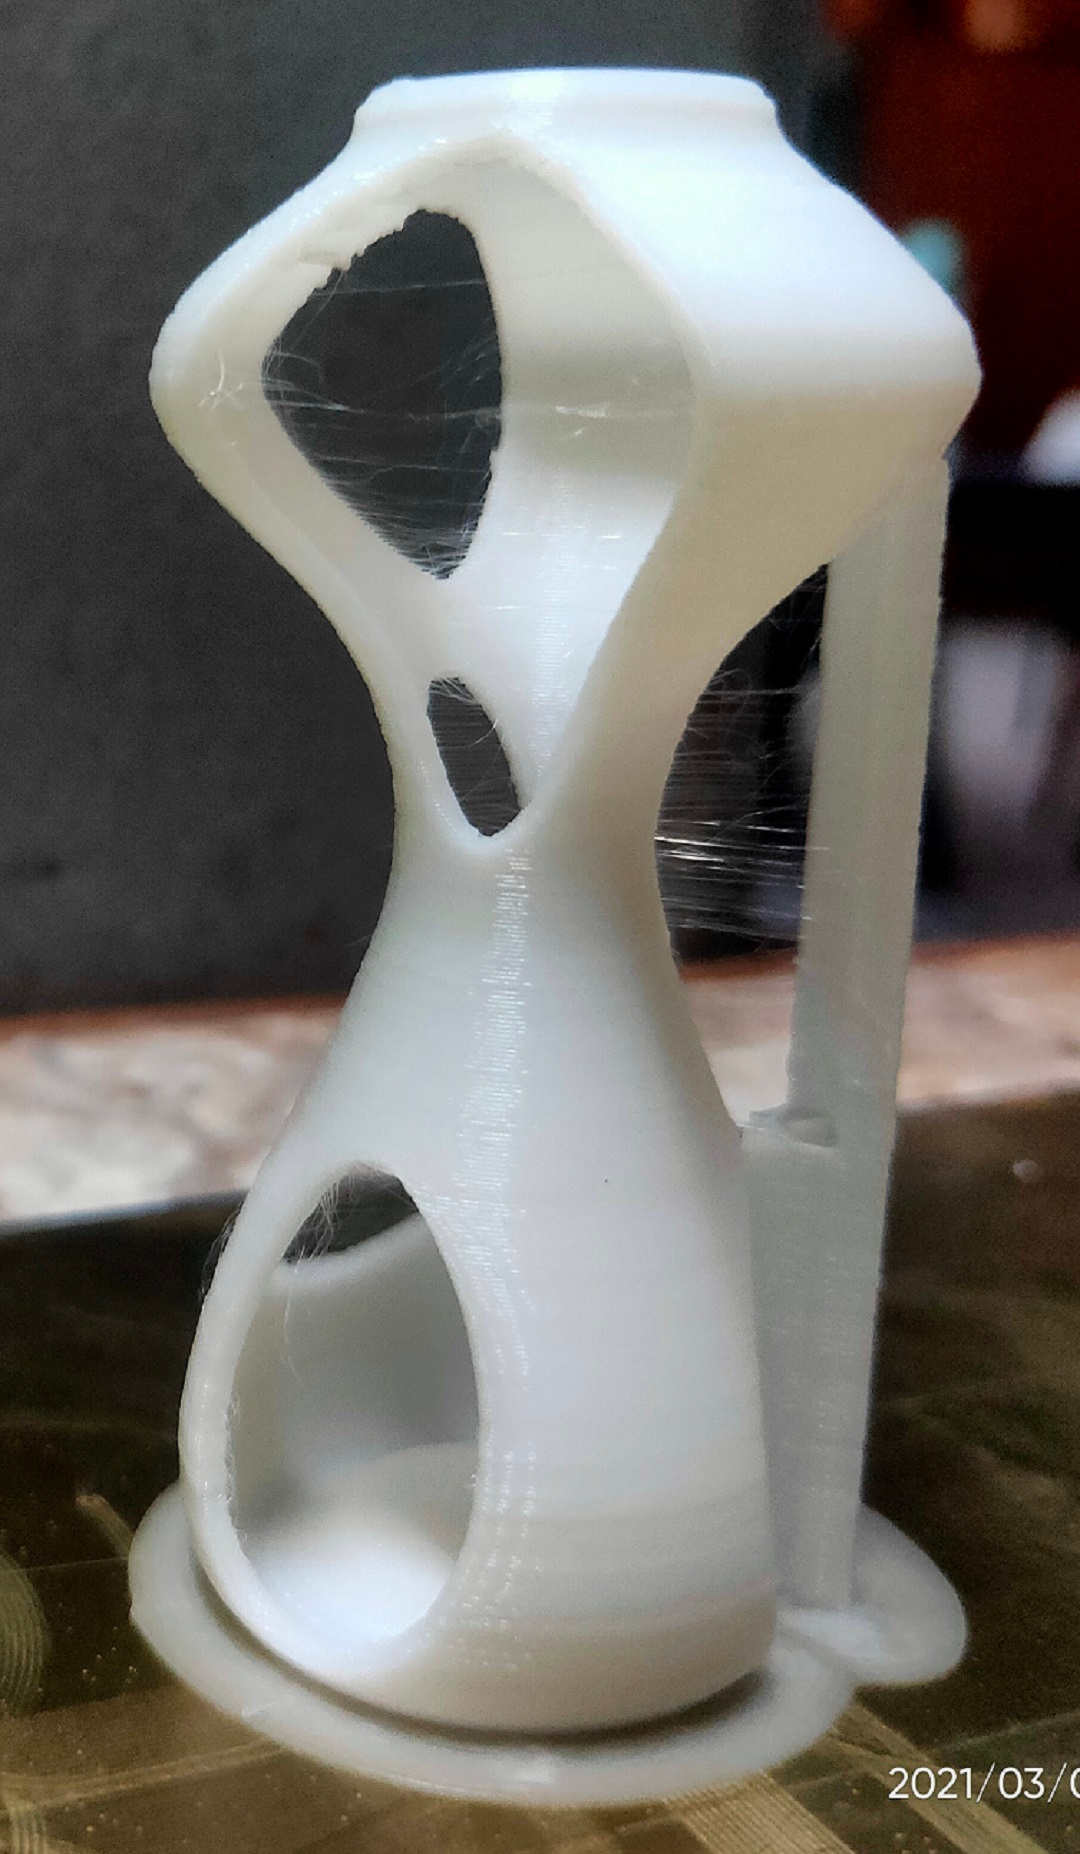
Why this Design could not be made easily by Subtractive Method?
This Design of a Candle Pot / Stand could be made by Additive method because:
- The shape is very Organic and has various angles where it is inclined.
- It has many Non-Linear Holes which make cutting at one angle difficult.
- The shape is internally hollow with bulges (expanded) and constricted at places.
3D Design Printing (Object Printing)
- Turn the printer on.
- Check the bed leveling properly.
- Select G-code design file.
- Start the print command.
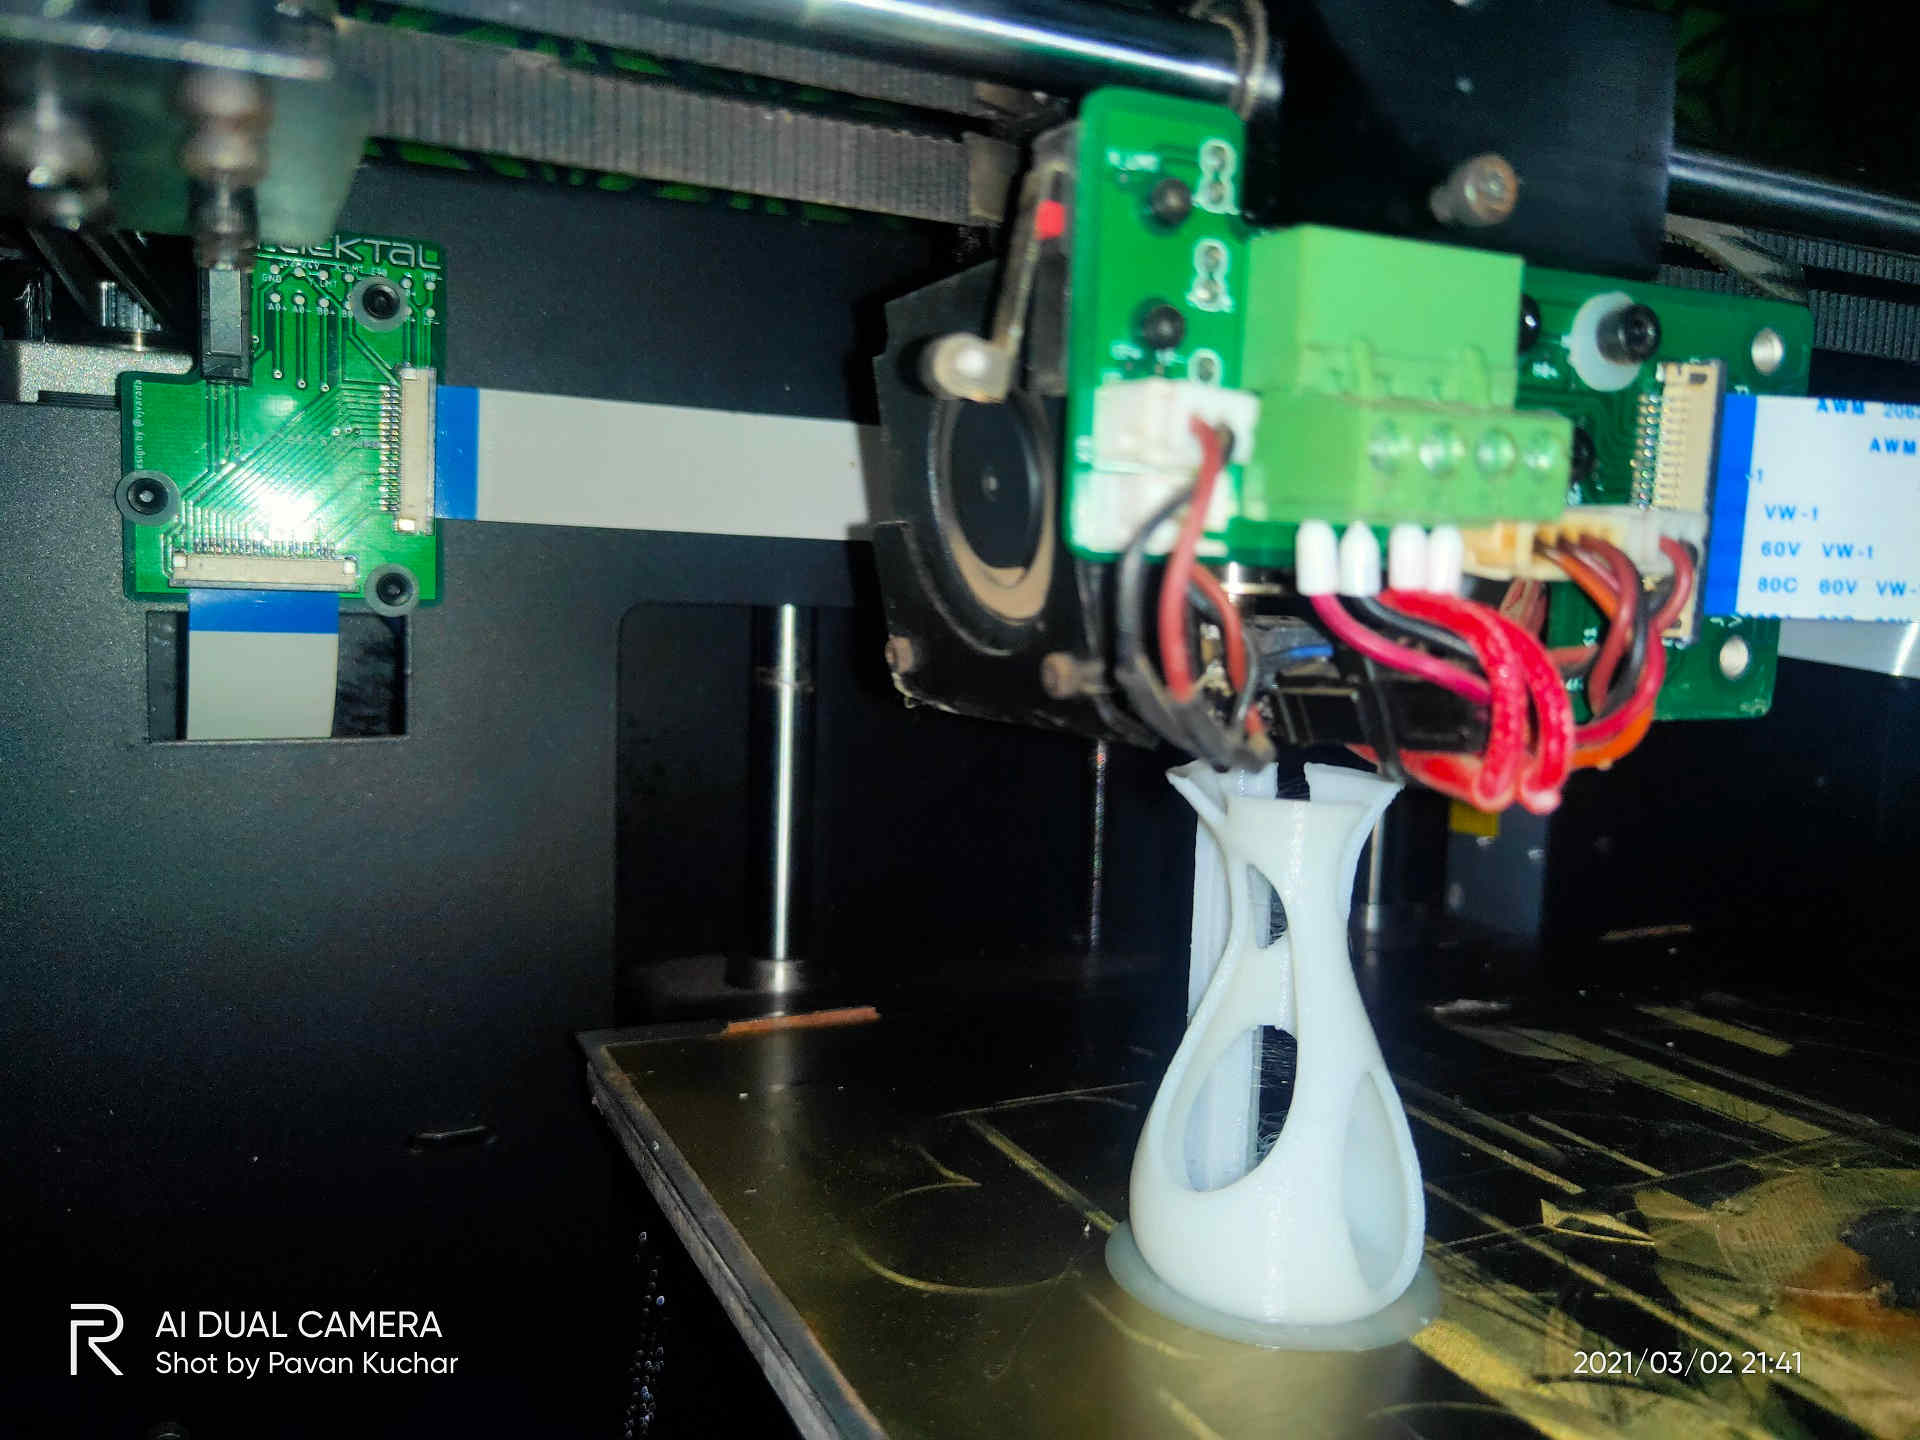
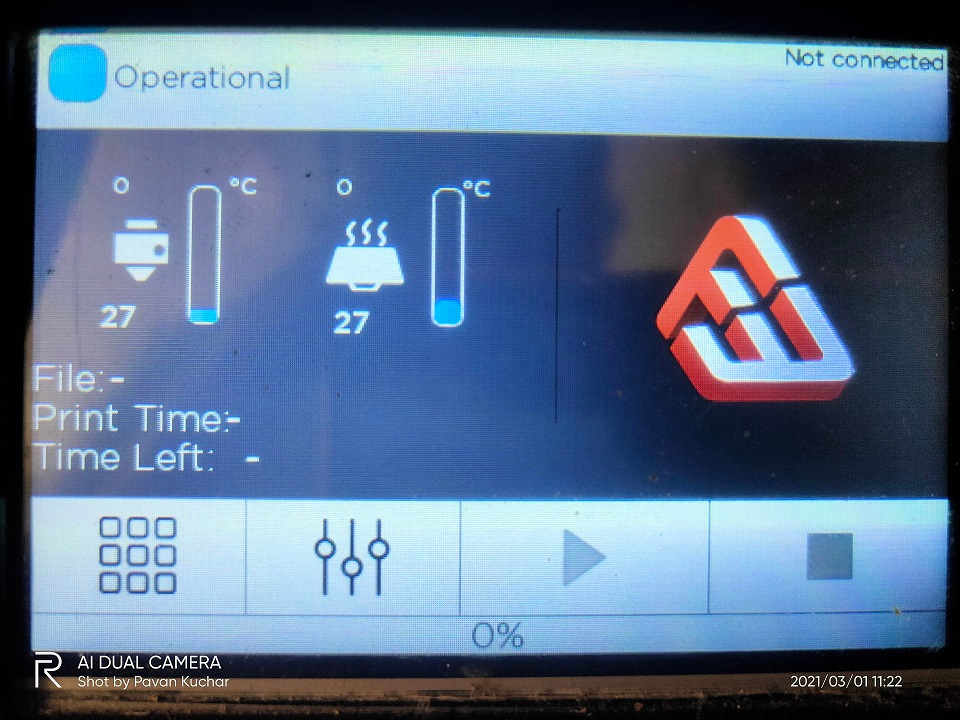 Print Command initiated and Machine started heating the Bed and Nozzle |
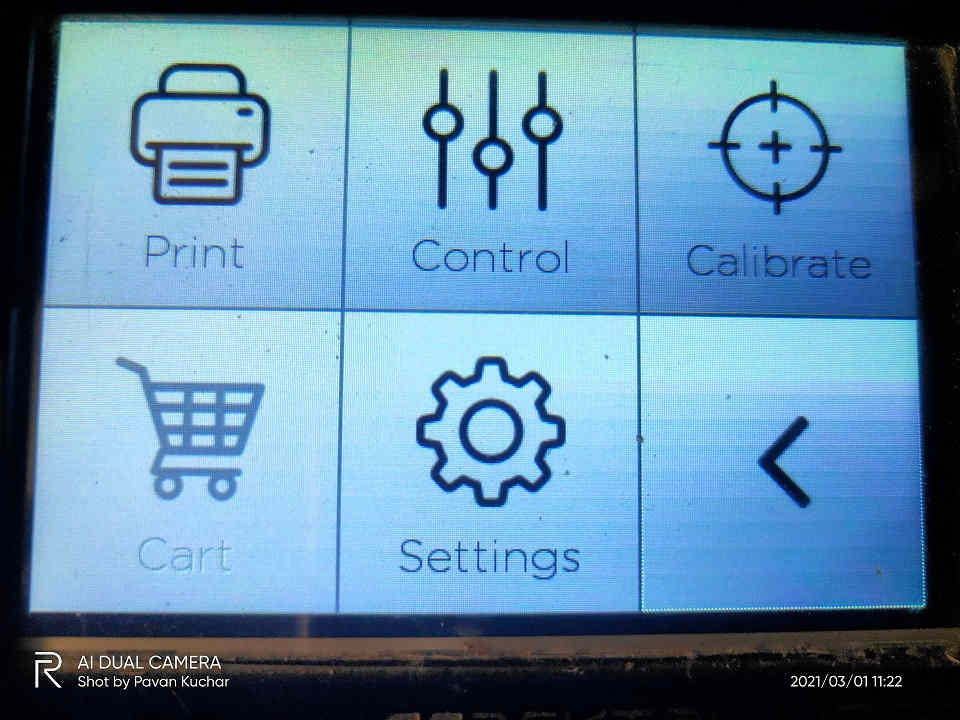 Navigation Bar in 3D Printer; Various Options for 3D Printing |
|---|---|
 Initial Temperature Readings of 3D Printer |
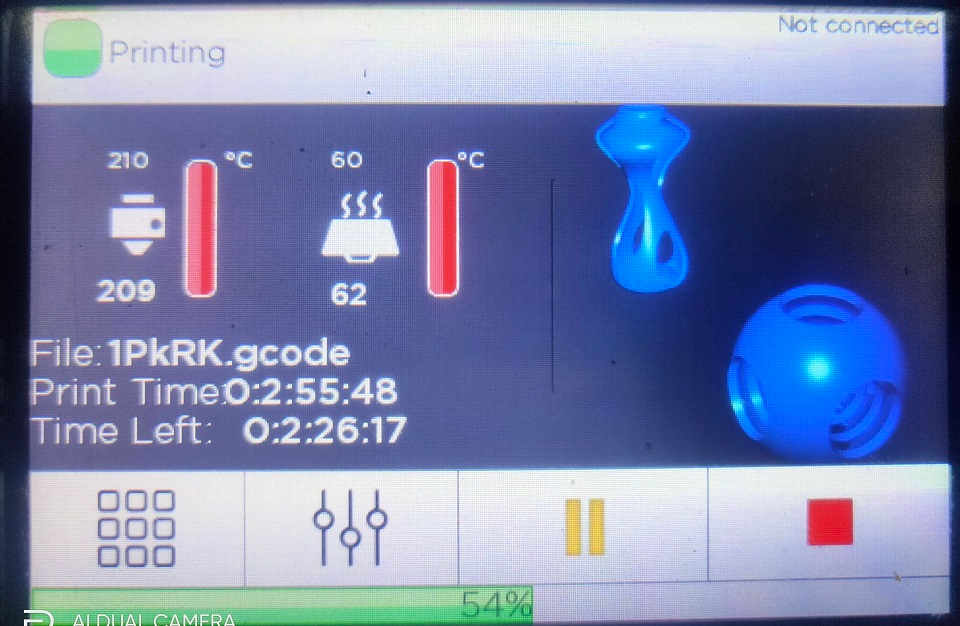 3D Printing Ongoing and Screen showing Time left for Printing |
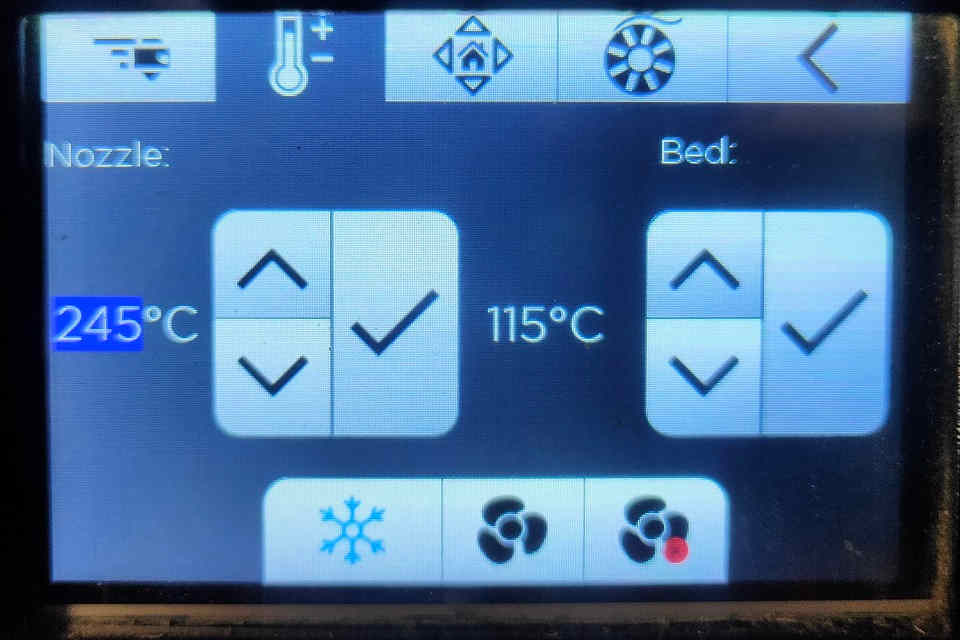
The Temperature of the Bed and Nozzle varies as per the Material used for 3D Printing. The temperature for ABS material is 245 degree Celsius for Nozzle and 105 degree Celsius for Build Plate (Bed) whereas the Nozzle temperature for PLA material is 210 degree Celsius and 60 to 65 degree Celsius for the Build Plate (Bed).
I have used ABS material for the 3D Printing of Test Objects in Group Assignment and PLA material for Printing my Individual Design.
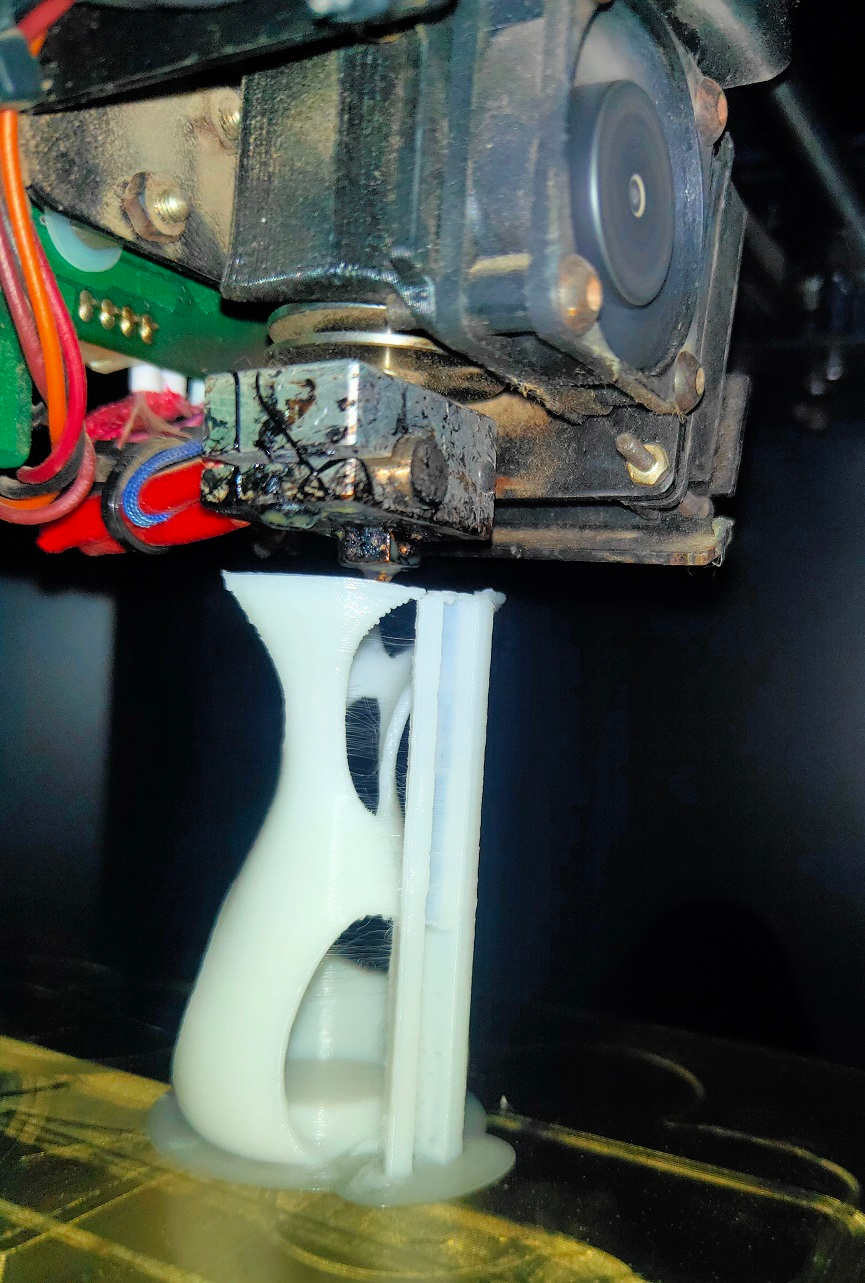
3D Object Printing Ongoing:
 |
 |
|---|
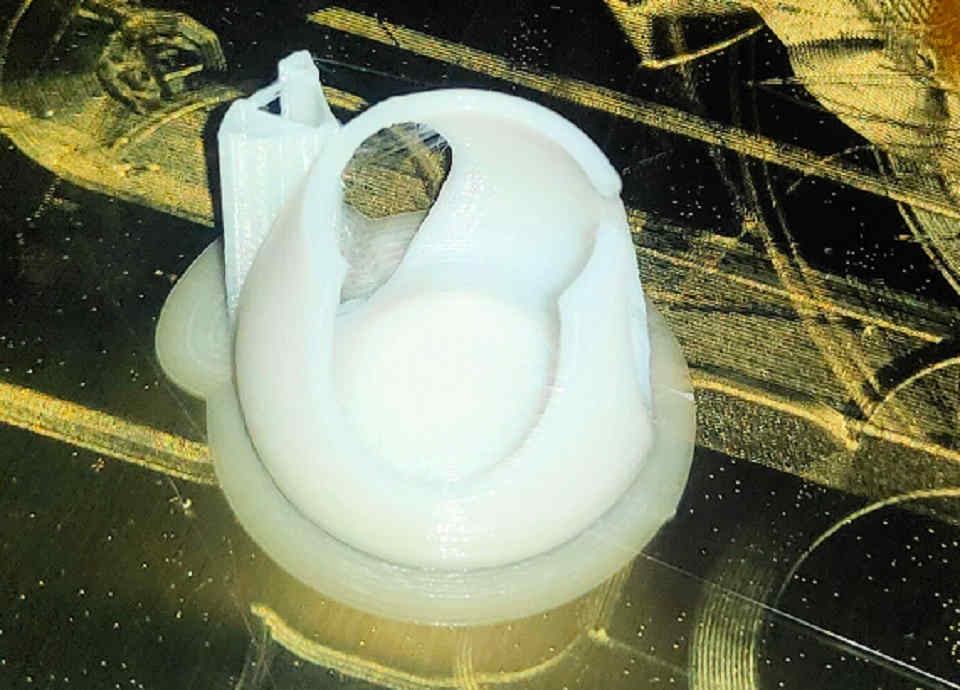
3D Object After Printing:
 |
 |
 |
|---|
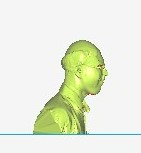
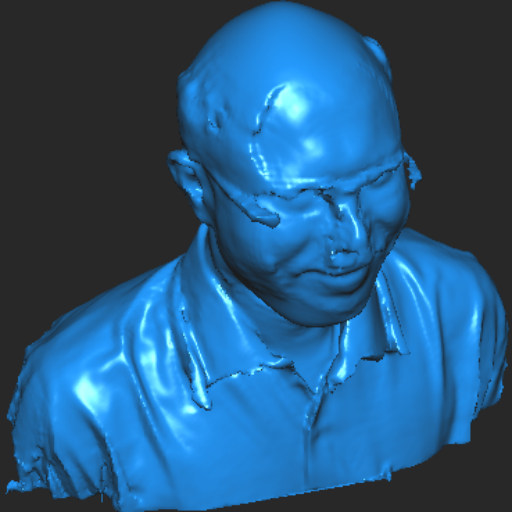
3D Scanning:
3D scanning is a process of analyzing an object from the real world, to collect all the data in order to recreate its shape and appearance, digitally. Few important 3D Scanning methods are Laser 3D scanning, photogrammetry, and structured light scanning.(Source: Sculpteo.com)
About Sense 3D Scanner:
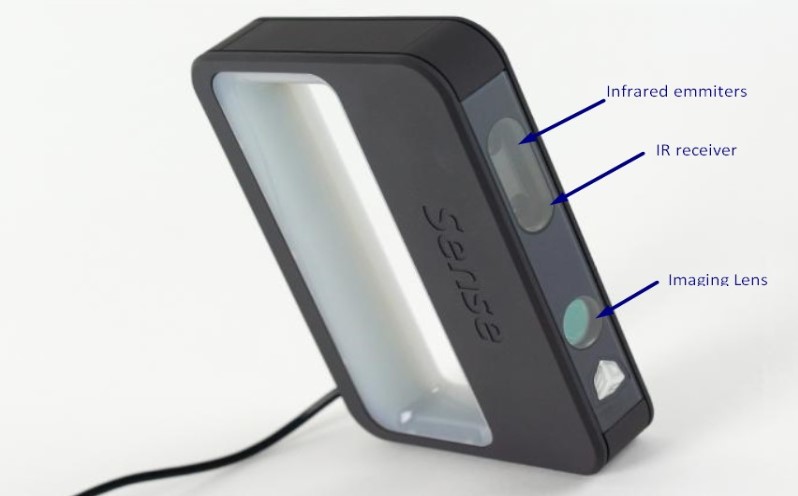
For scanning, we used 3D sense software. This software is open source. We can download it from its website. Company has already discontinued this scanner and the support will also end soon.
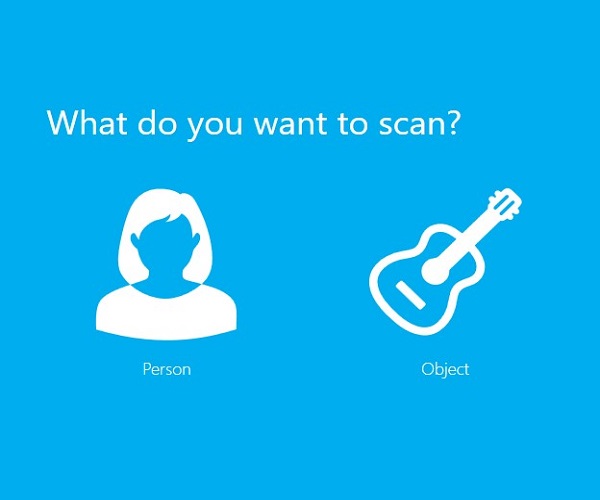
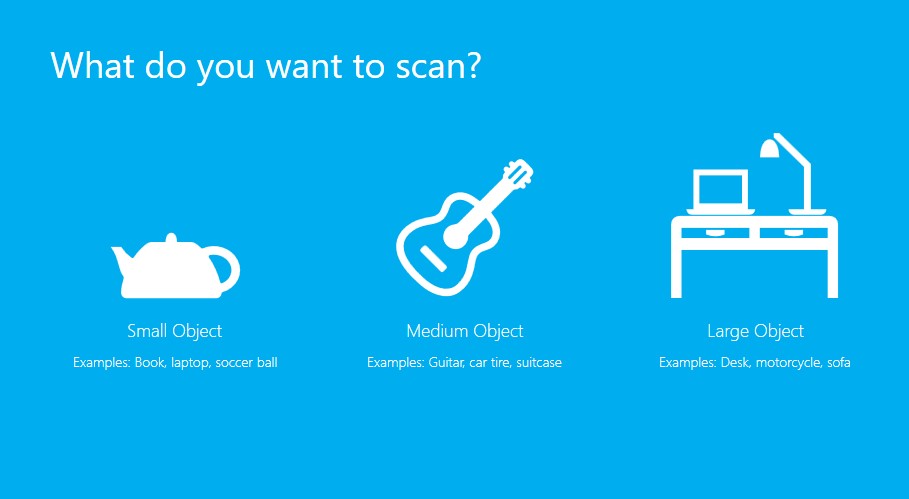
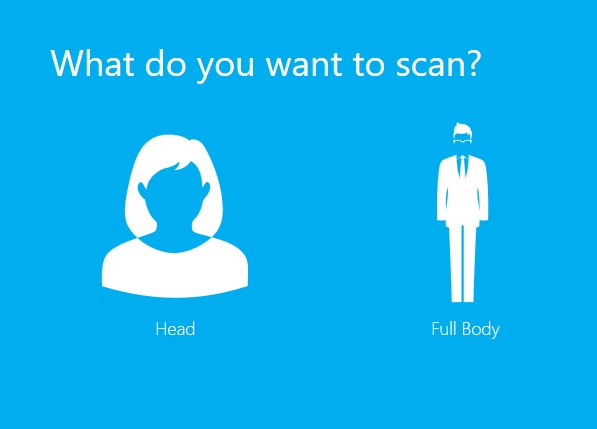
For scanning always connect scanner to computer. By using this we can scan person or object. If you want to scan person, click on person. In this software we can solidify our object or we can change color. Save file in .stl or .obj format.
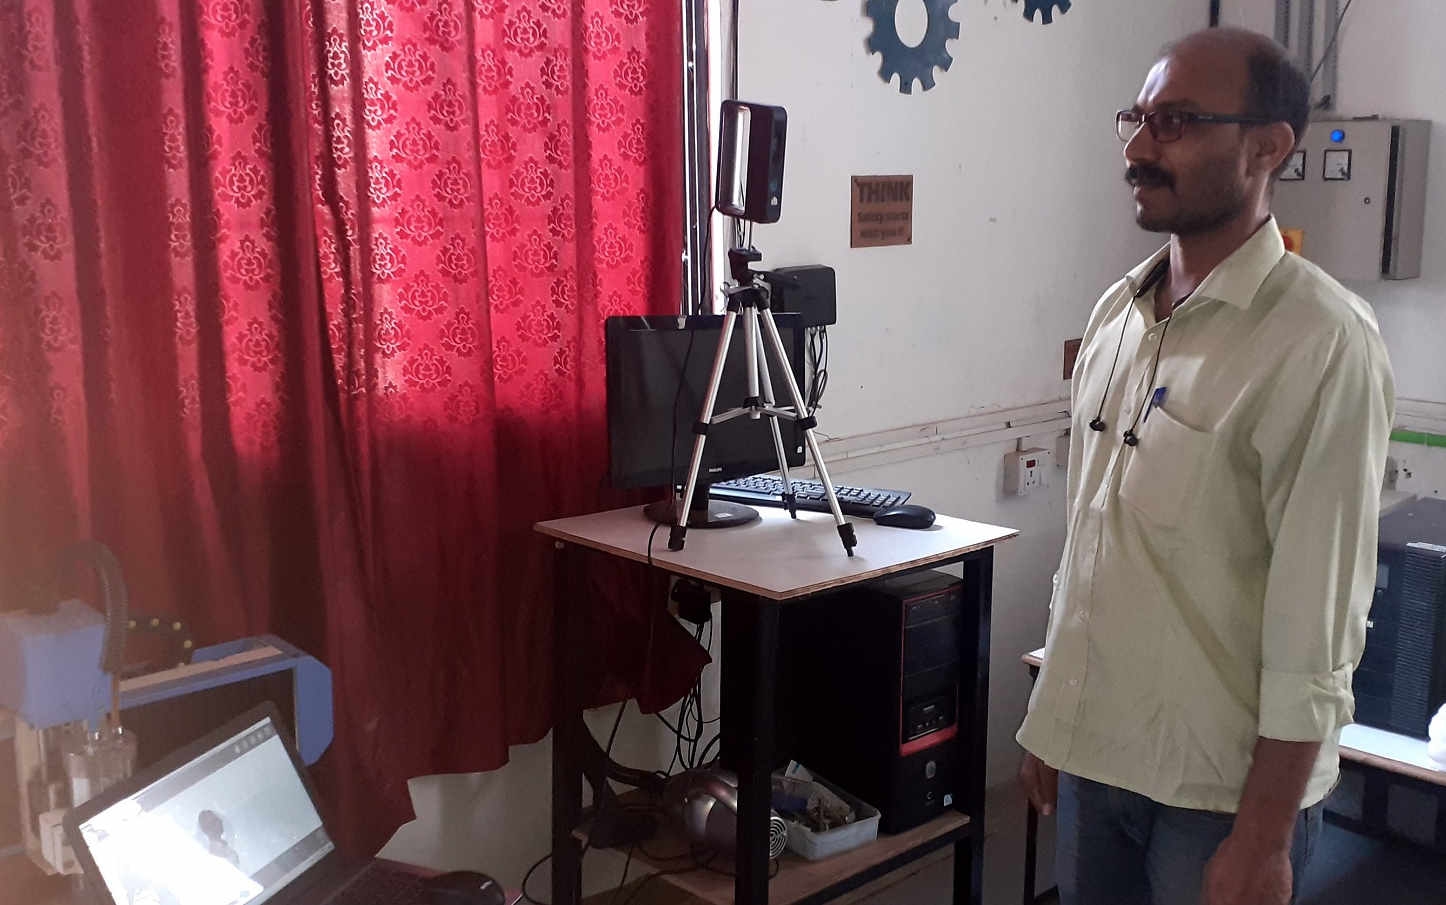
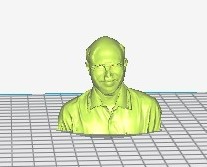
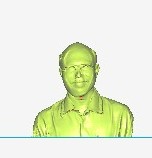
Scanning the object
Start scanning the object through sense 3D scanner, rotate the object 360 degree smoothly (otherwise object lost will be displayed and the error of lost tracking) with the fixed position of scanner. Once the scanning is completed, save the file in .obj or .stl format.
After Scanning, I have saved the file in .OBJ file format. Then I imported this file in the Fractory Software for creating the GCode or Slicing. We will come to know about the Time required for 3D Printing and also the quantity of printing material required.
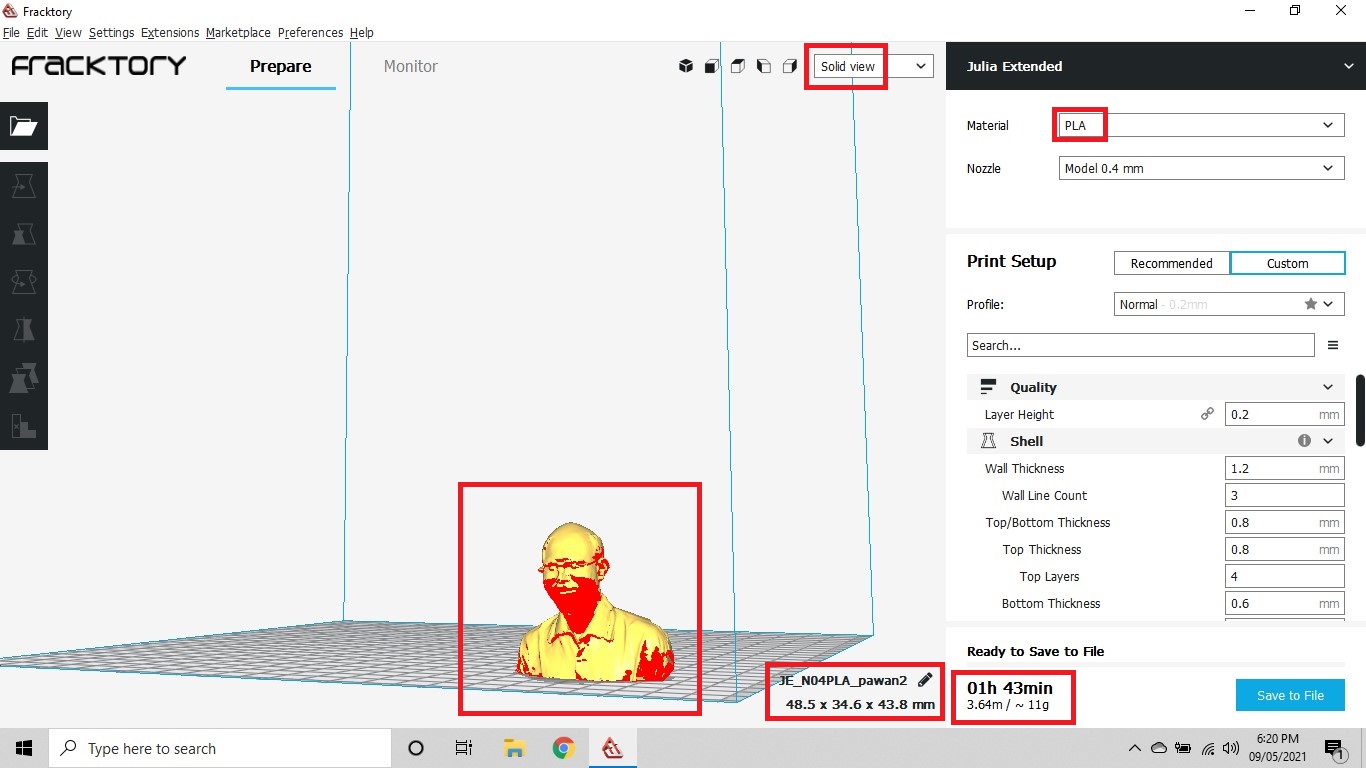
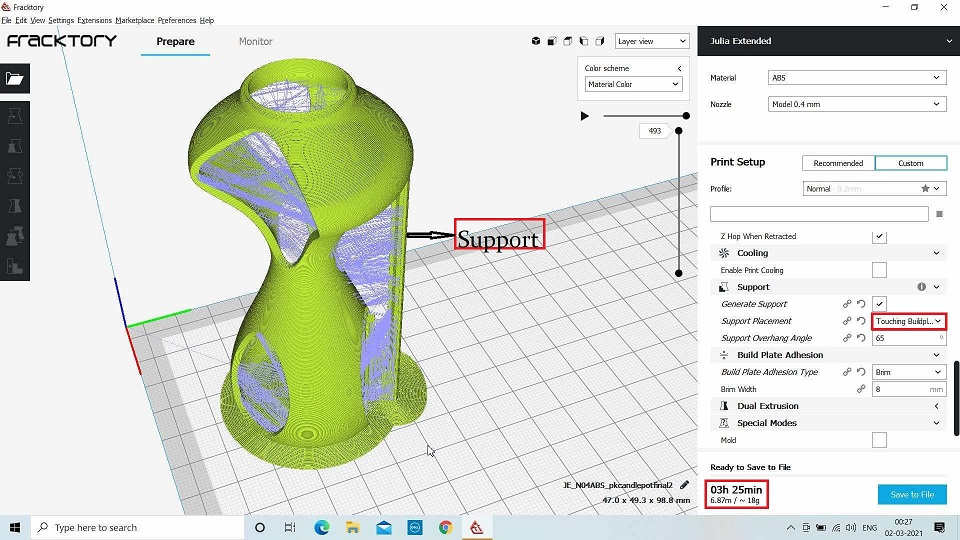
Solid View of Scanned Object in Fractory or Slicing
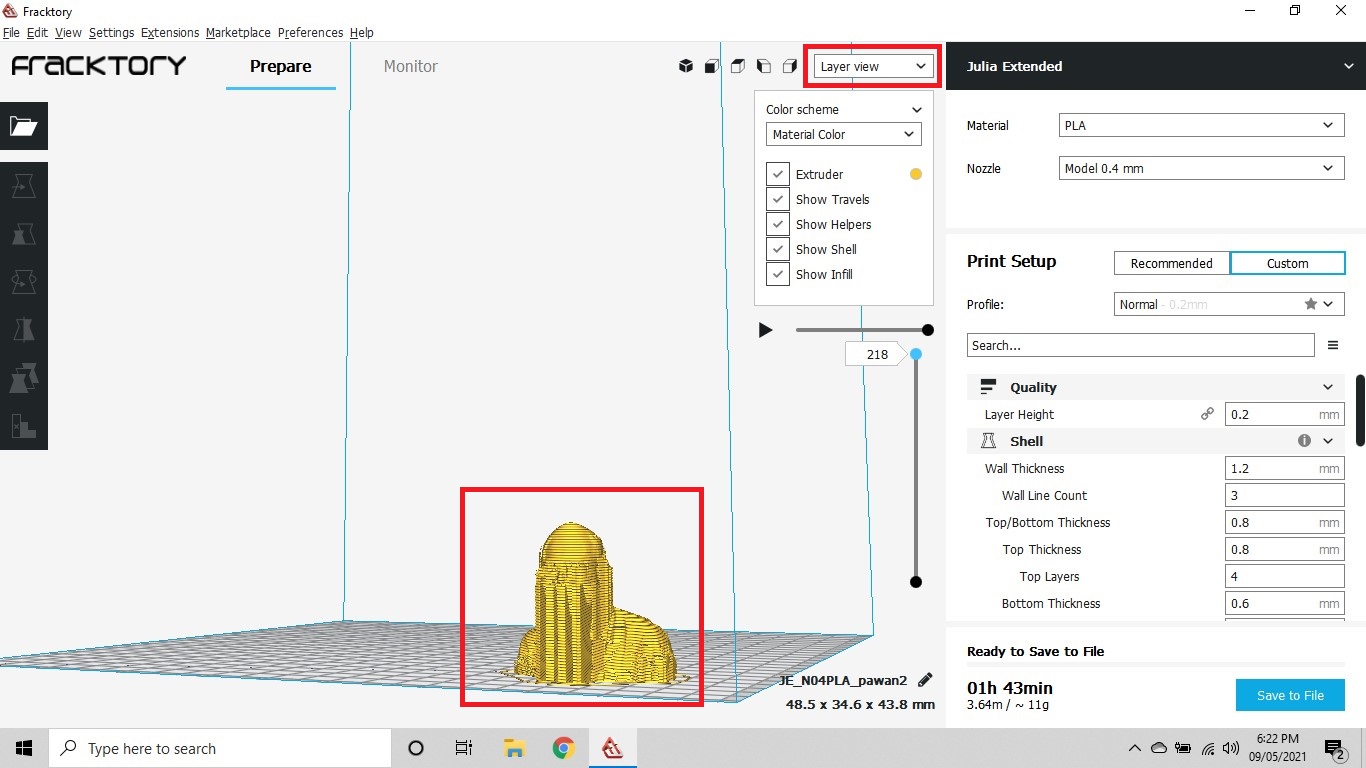
Layer View of Scanned Object with Support in Fractory or Slicing
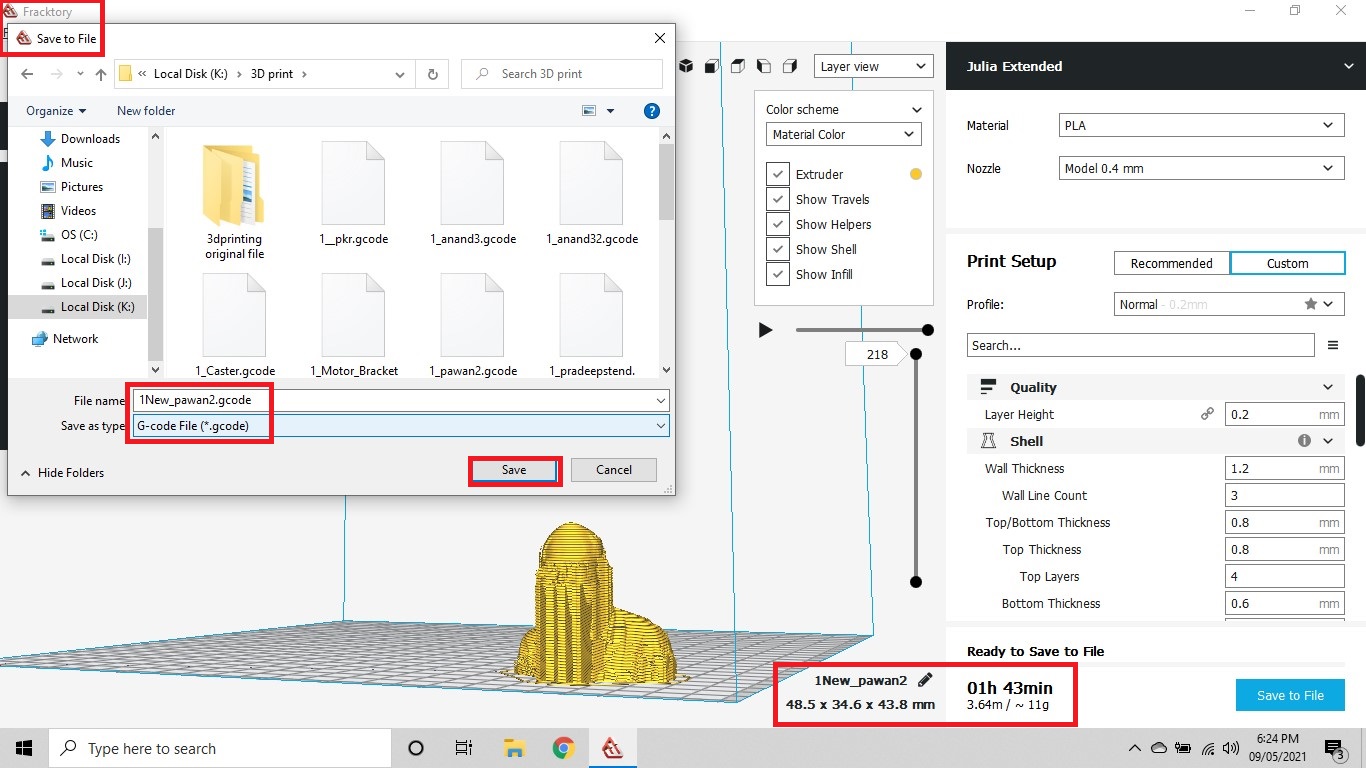
Saved the File
 Perspective View Perspective View |
 Front View Front View |
 Side View Side View |
|---|
.png image generated by the GCode
Advantages of 3D Printing:
- We can print even complex object designs using 3D printer.
- create prototype in couple of hours which increase the designing process speed.
- Basic material used for 3D printing is plastics thus the object printed by this one are much lighter than traditional one. reduces the quantity of waste materials created during the production process.
Disadvantages of 3D Printing:
- Since the dimensions integrated into 3D printers is relatively small, which restricting the part sizes
- Though its new technology it offen reqquires trial and error method when creating parts on a 3D printer
- Very few materials are available for printing in 3D printing technology
Summary:
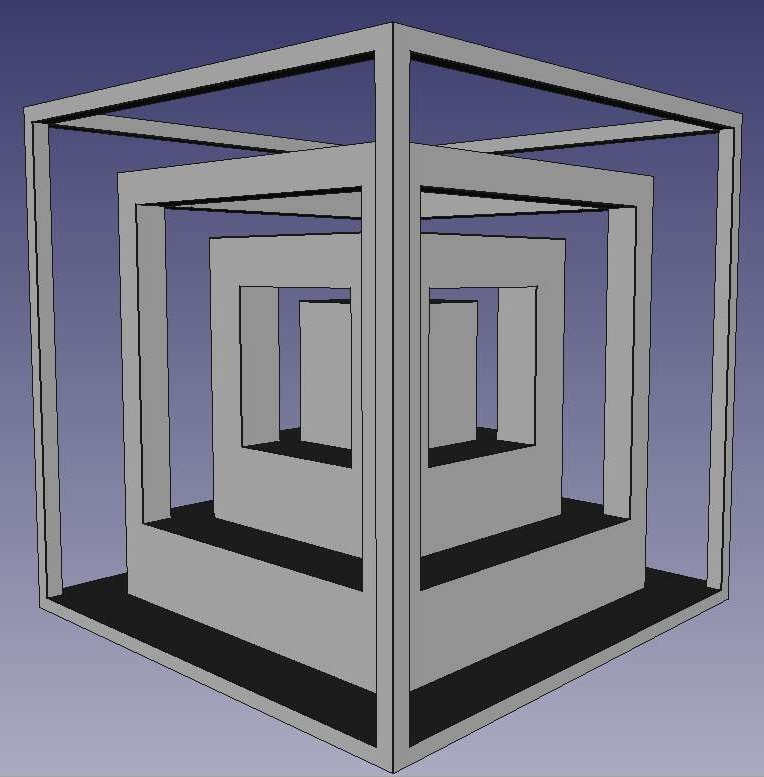
We had to understand the Characteristics of our 3D printer and design accordingly a shape which could not be made easily by Substractive method. This was a week to showcase the creativity and experience the extent of 3D printing. A Robot, Lizard, Turners Cube, Concentric Circles with ball inside and a Candle stand were 3D printed by us.
- I have learnt about the DOs and DONTs of handling the 3D printing machine.
- To some extent, I understood the impact of Bed and Nozzle Temperature, Feed rate, Infill pattern and Density, Shell properties, Bed Calibration, Material Qualities on the Time and Material required for 3D printing a design.
- Also, the Supports used for 3D printing have an impact on the finishing of the object. If the supports are more, the object will have a steady structure. But, it will take more time to remove the supports.
- Finishing of the object will depend on the supports, material used.
- Changes in the parameters could significantly affect the Time, Quality, Aesthetic appeal and Extent of 3D Design.
Downloads:
All the Original Files of the Designs tried in this week could be downloaded from here.
The Original Design File of Candle Pot can be downloaded from here.
Original Design File of Candle Pot has been also uploaded on SketchFab. It could be downloaded from here. or here.