Review the safety data sheets for each of your molding and casting materials,
then make and compare test casts with each of them.
Extra credit: try other molding and casting processes
Design a mold around the stock and tooling that you'll be using,
Mill it (rough cut + three-axis finish cut),
and use it to cast parts.
Extra credit: use more then two mold parts
Assignment Requirement
Status
Linked to the group assignment page and reflected on your individual page what you have learned
Completed
Reviewed the safety data sheets for each of your molding and casting materials, then made and compared test casts with each of them
Completed
Documented how you designed your 3D mold and created your rough and finish toolpaths for machining, including machine settings
Completed
Shown how you made your mold and cast the parts
Completed
Described problems and how you fixed them
Completed
Included your design files and ‘hero shot’ of the mold and the final object
Completed
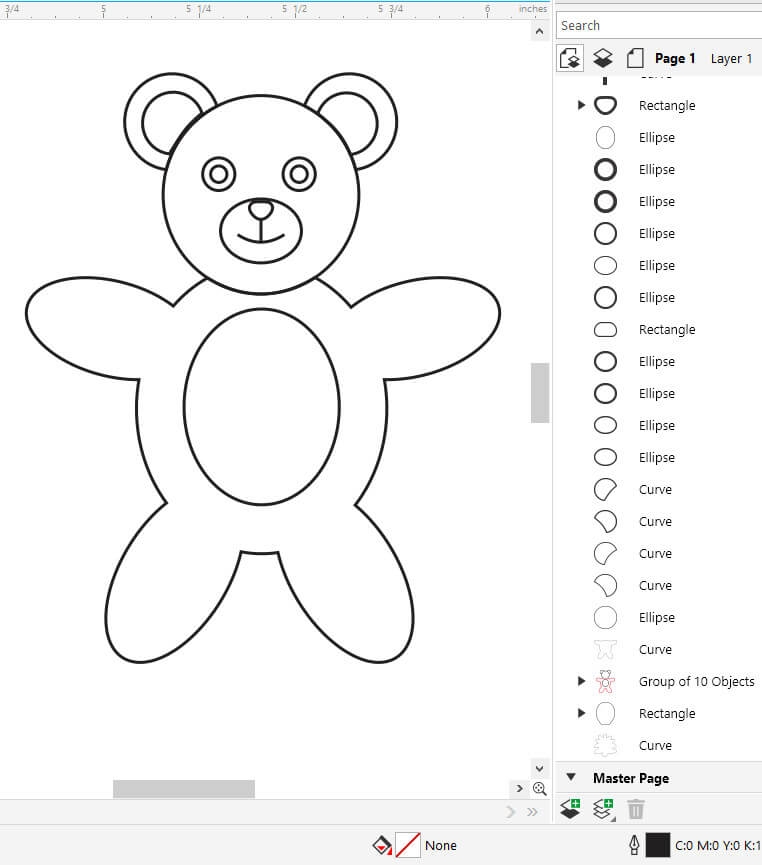
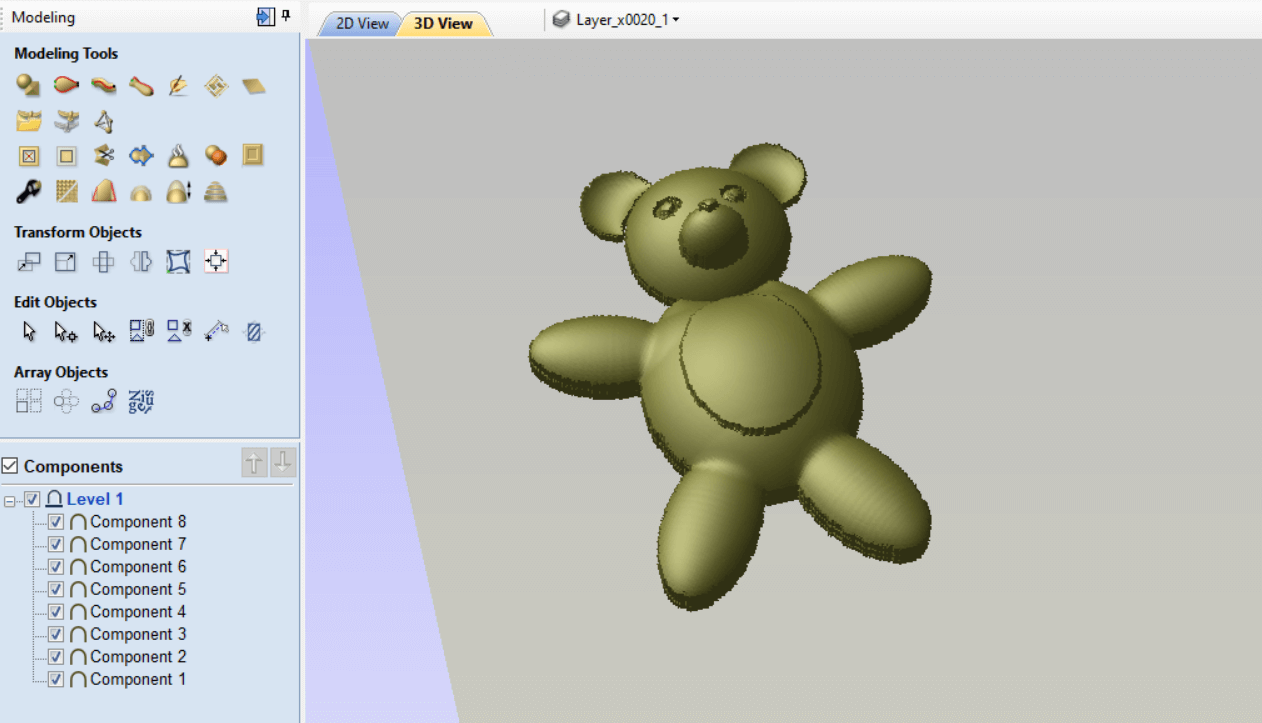
For my molding and Casting project I wanted to create some edible Teddy bears. First I used CorelDraw to draw my Teddy bear vector which I exported as a .svg file.

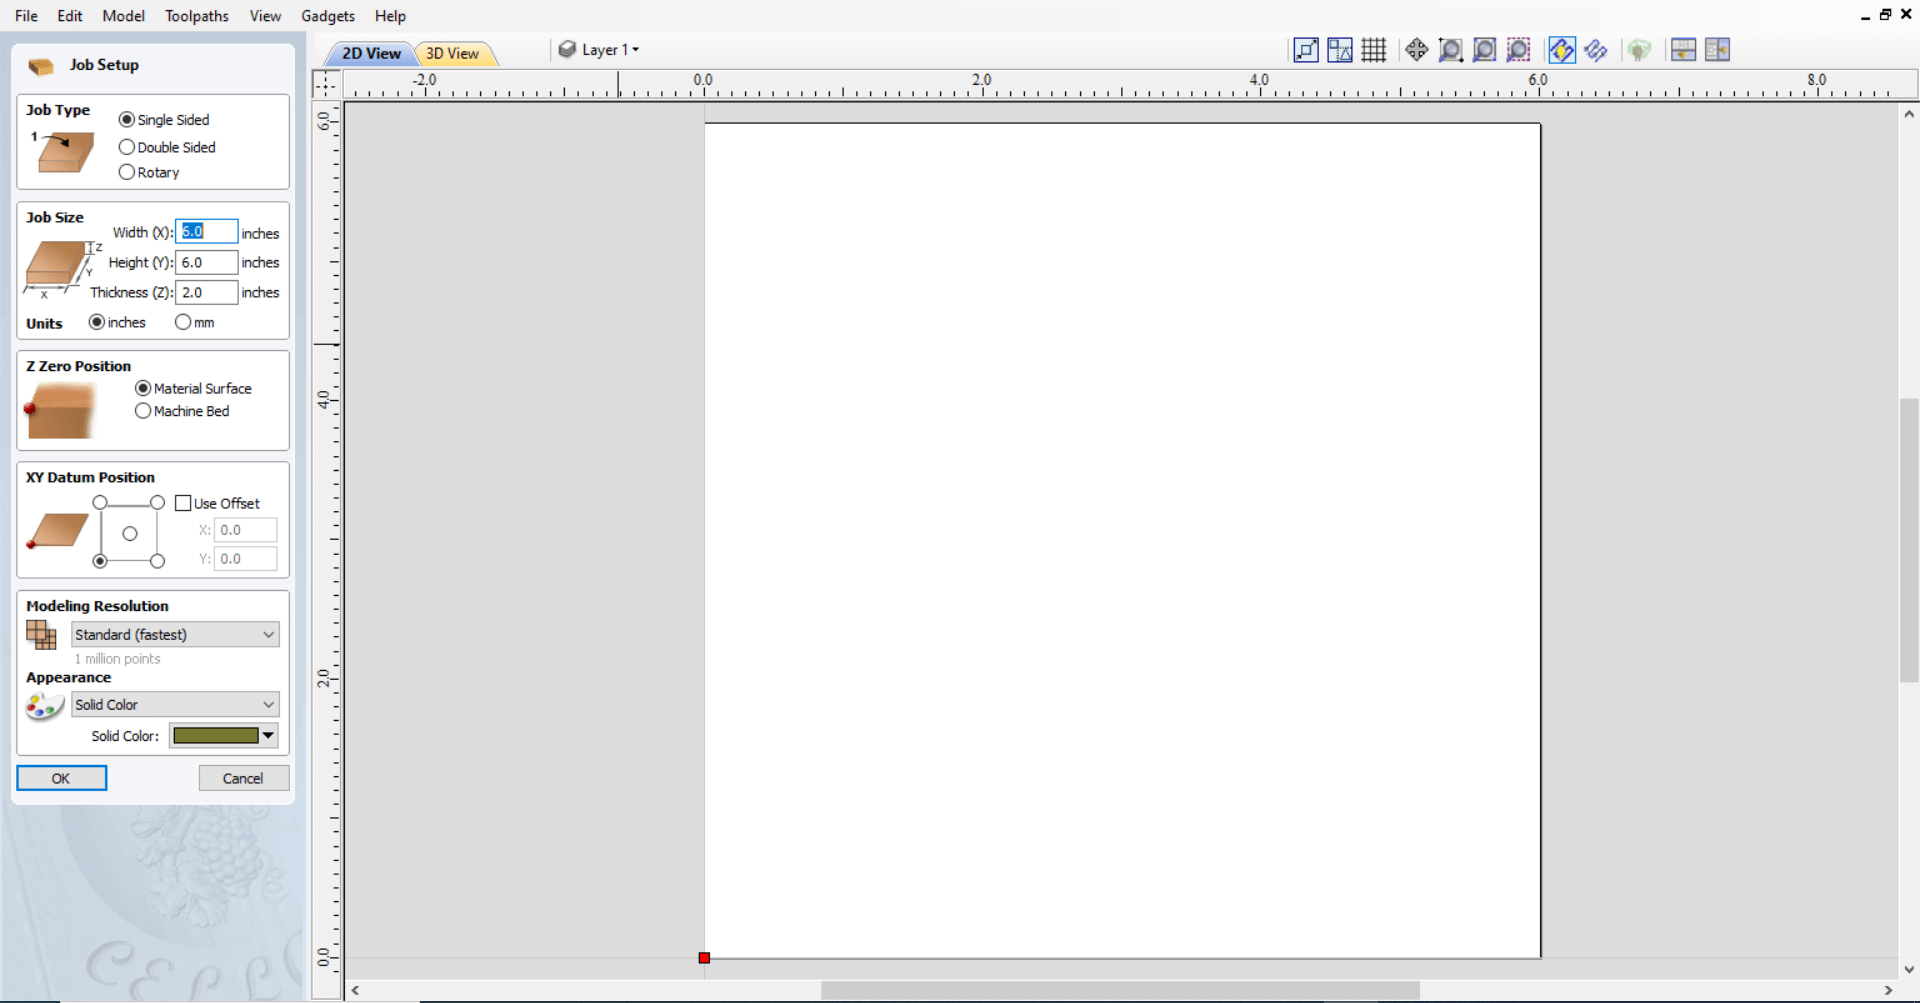
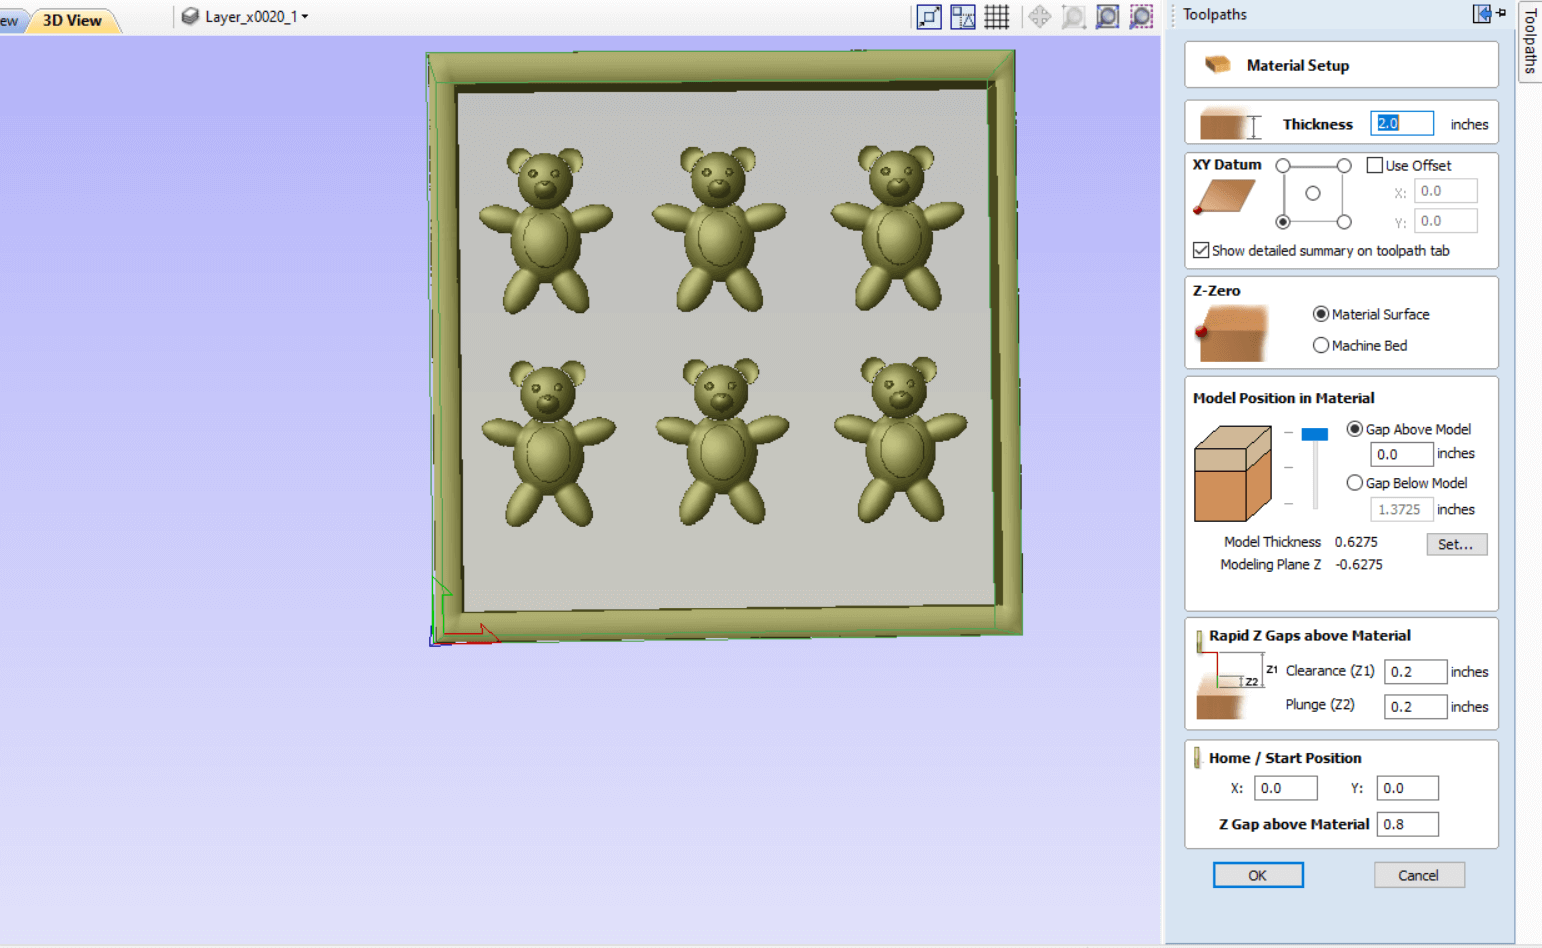
I used Vectric Aspire to create my milling toolpaths. I opened Aspire and was required to setup my material/job size. I entered parameters to match the 6"x 6"x 2" block of wax I was going to use to mill.
I then imported the .svg file onto the canvas. To the left of the canvas was the Tool panel.
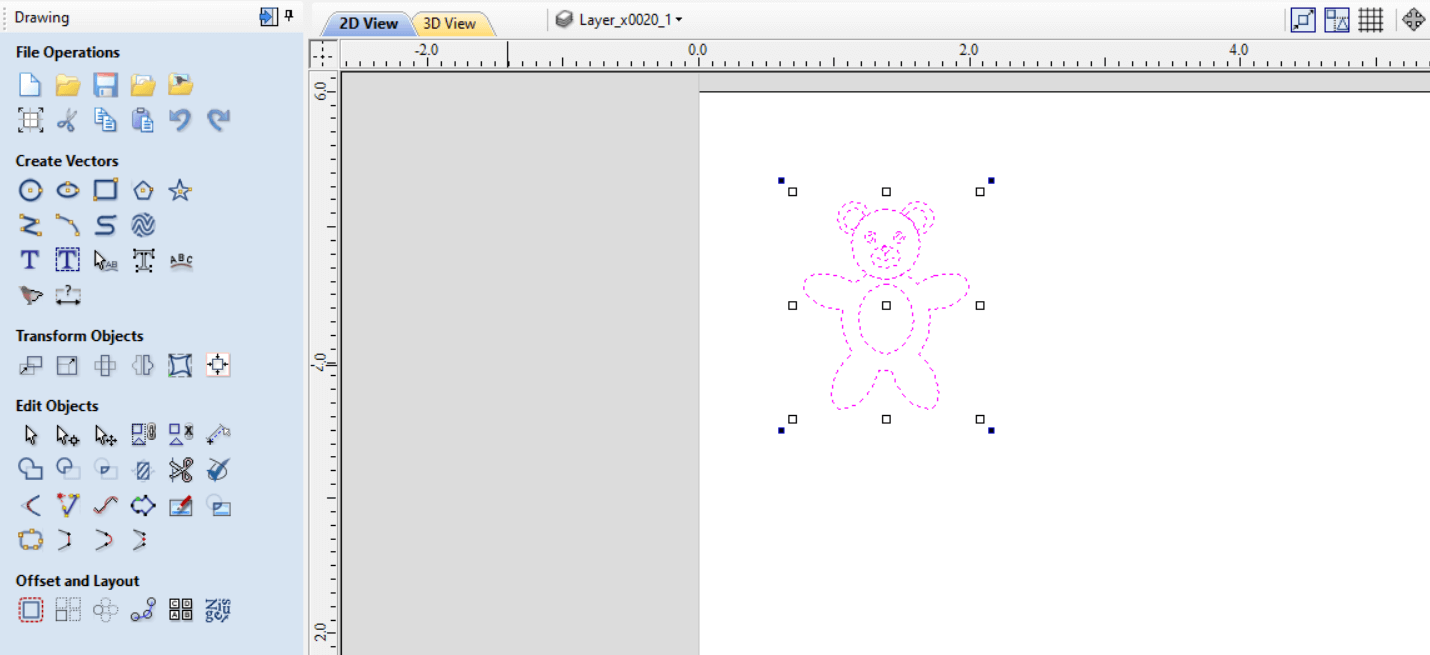
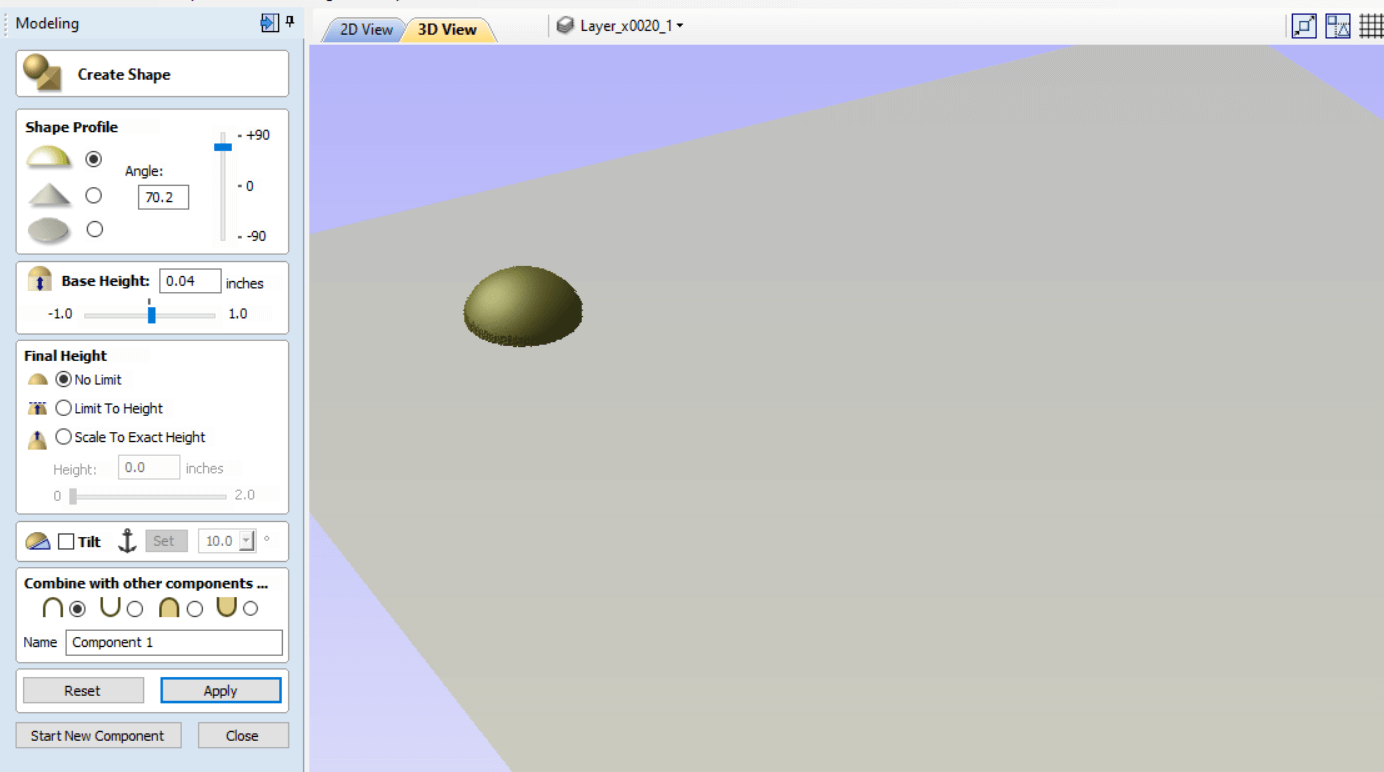
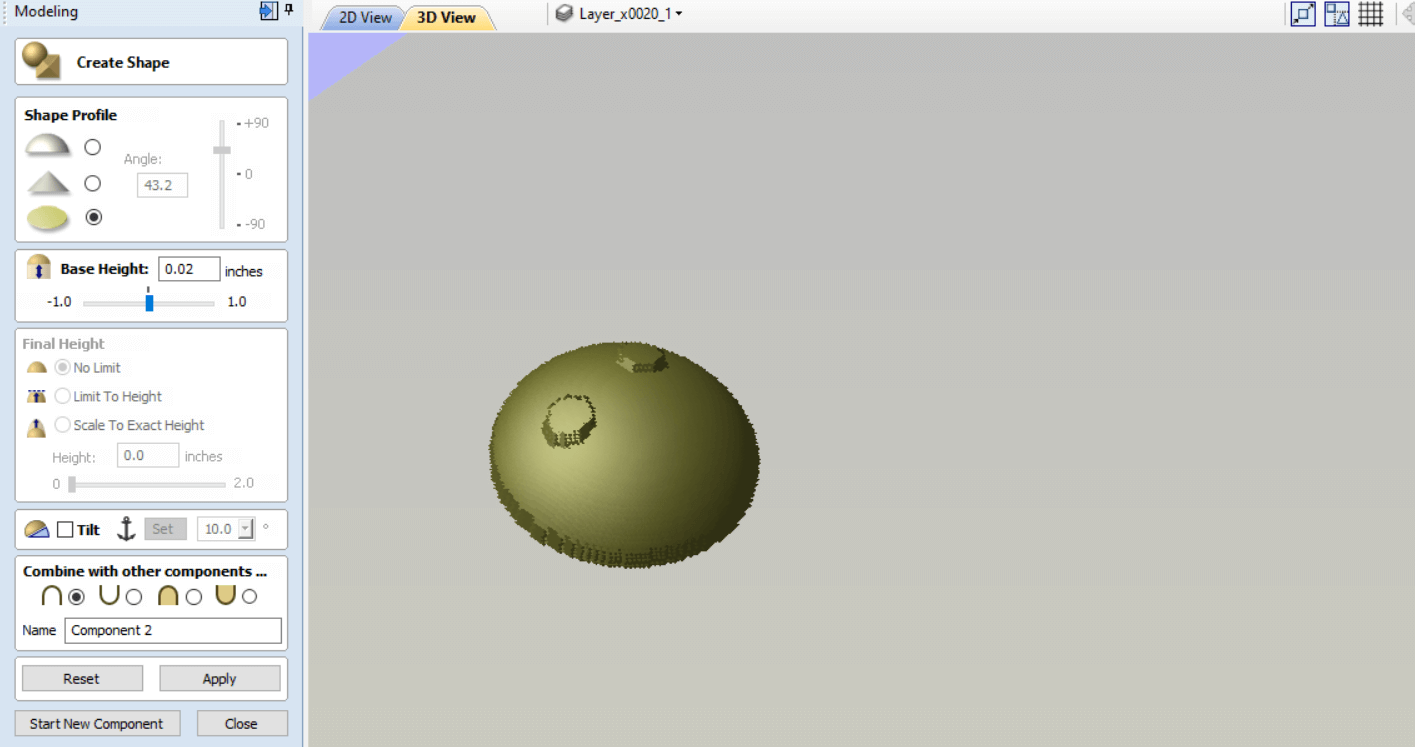
To the bottom of the Tool panel there is a tab to switch between Drawing, Modelling, Clipart and Layers. I selected Modelling so that I was able to change my 2D image to 3D. I selected the first tool in the panel that says Create a shape from vector outlines.

I selected the rounded top profile. These options allows you to adjust the top shape of the object. I was allowed to set the angle, height and base height (These were set differently for each part of my drawing).

I adjusted to a shape and size I was satisfied with and then clicked apply.
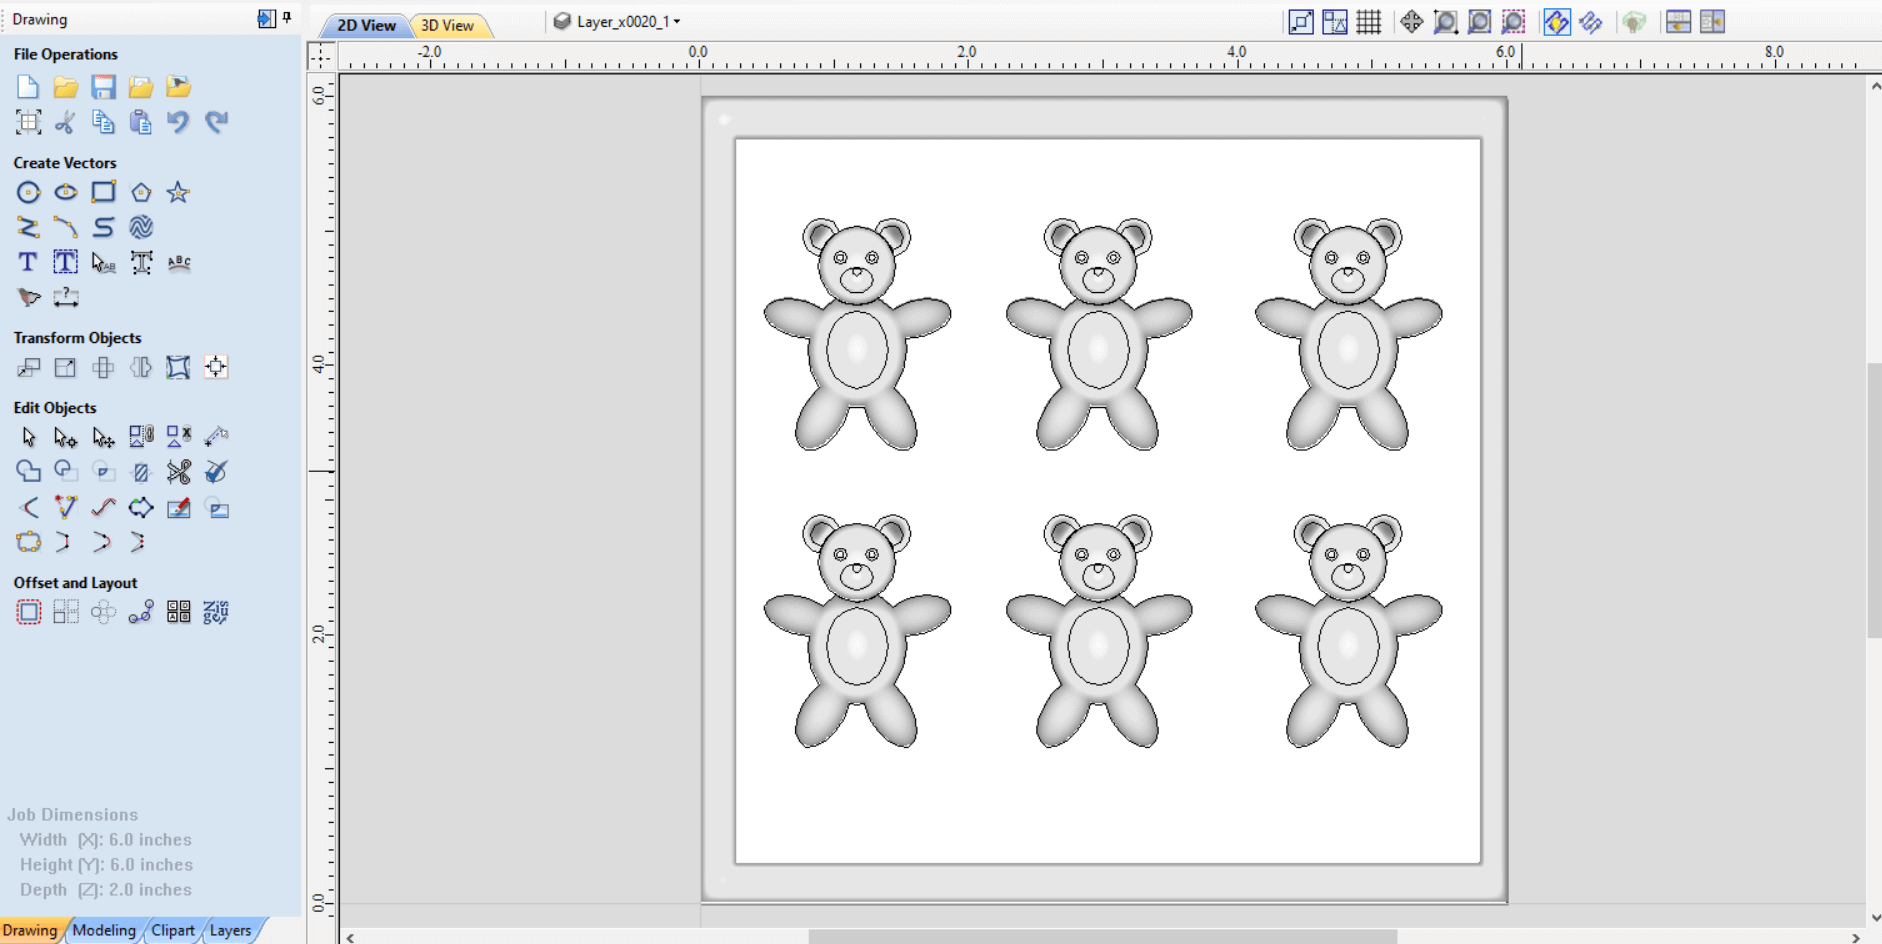
At the top of the canvas there is a tab that can switch between 2D view and 3D view. I switched to 2D view and notice that the part of the vector I modelled now had a gradient fill indicating that the object now has depth and height. This was my first Component. So every part that is modelled in 3D became a component.
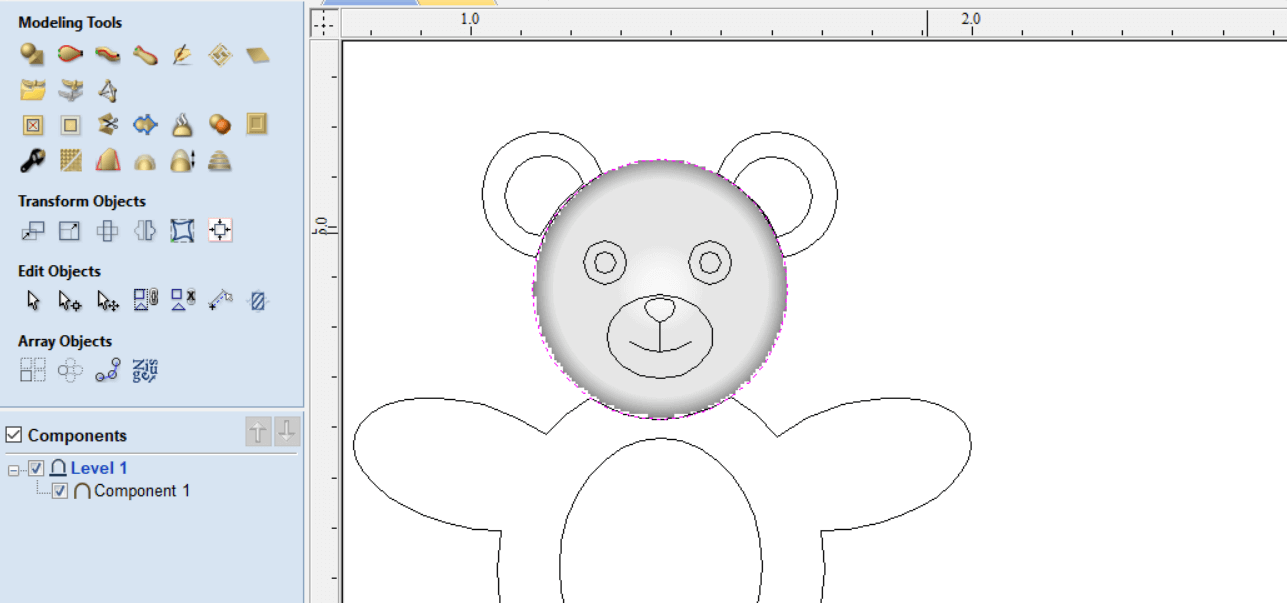
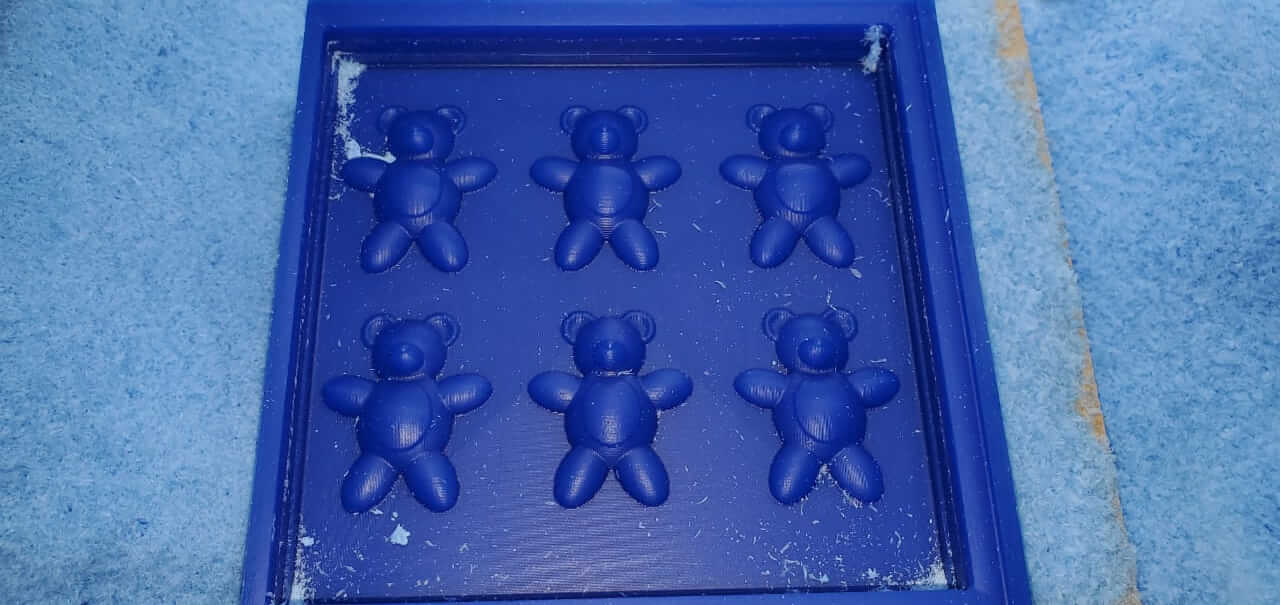
I repeated the steps for each body part until I turned the entire Teddy Bear into 3D.
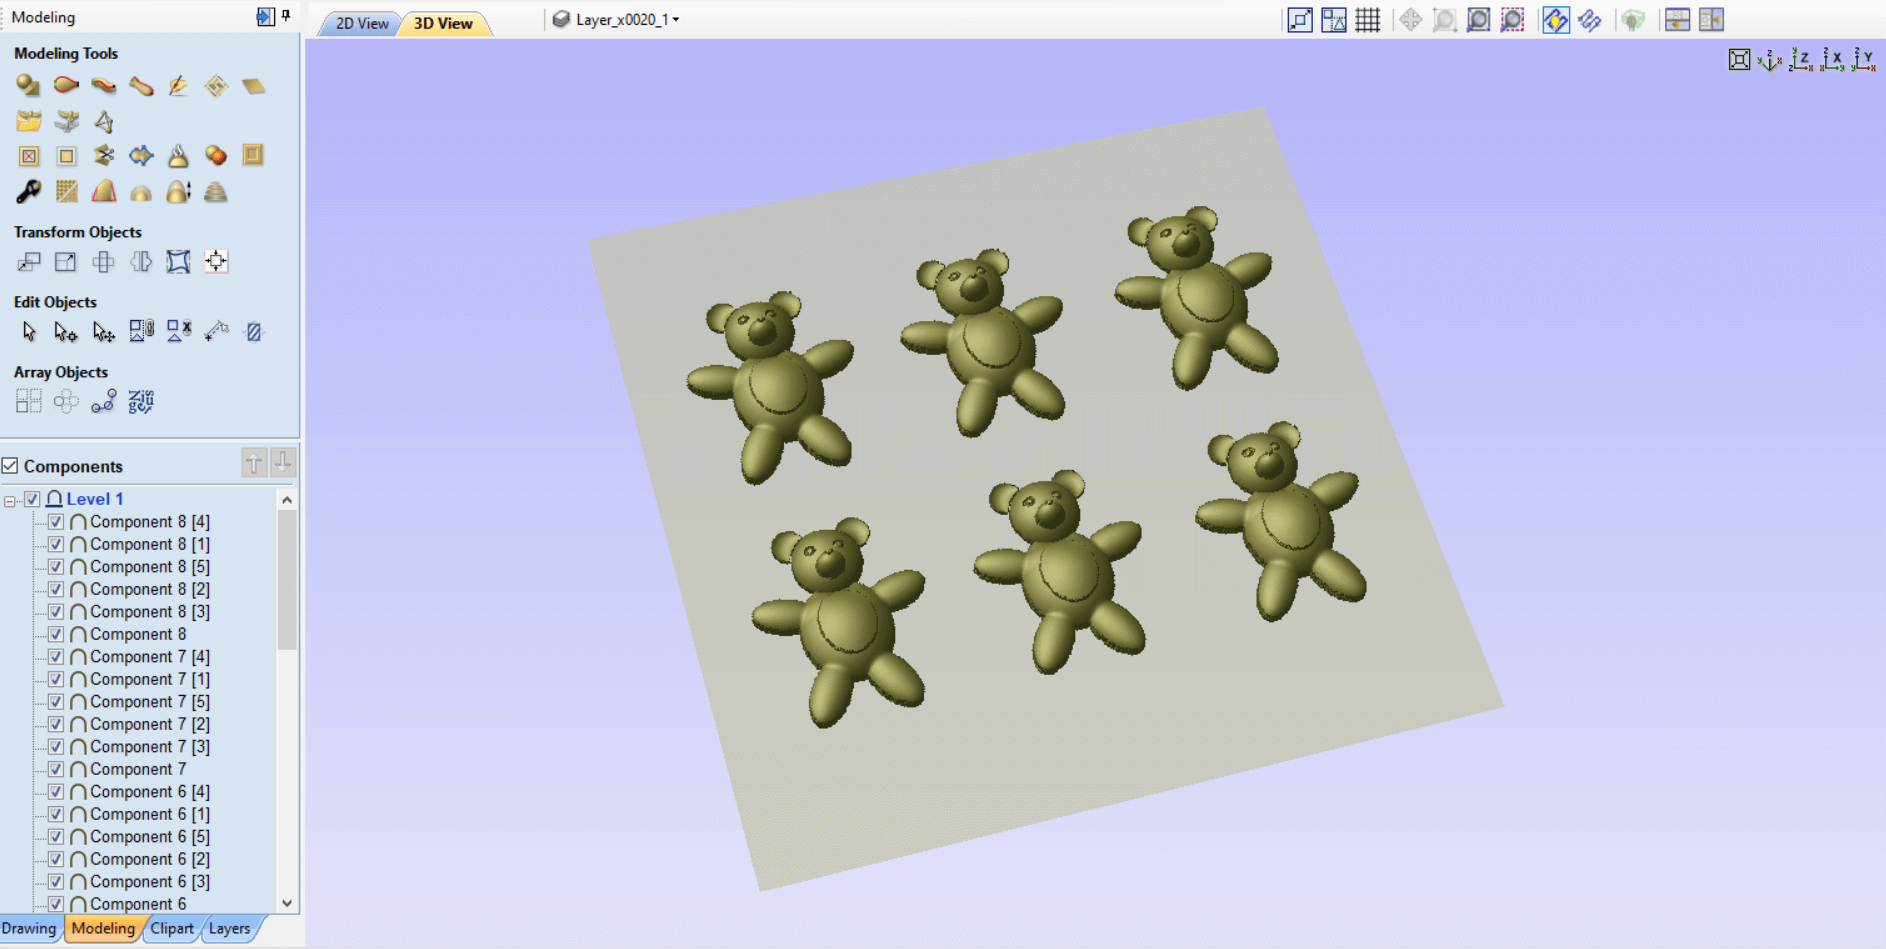
I then made 5 more copies and spaced them out.
I switched to the Drawing tab and drew two squares bordering the Bears. The squares were one inside the other. By selecting both squares I was able to model a wall around the bears.
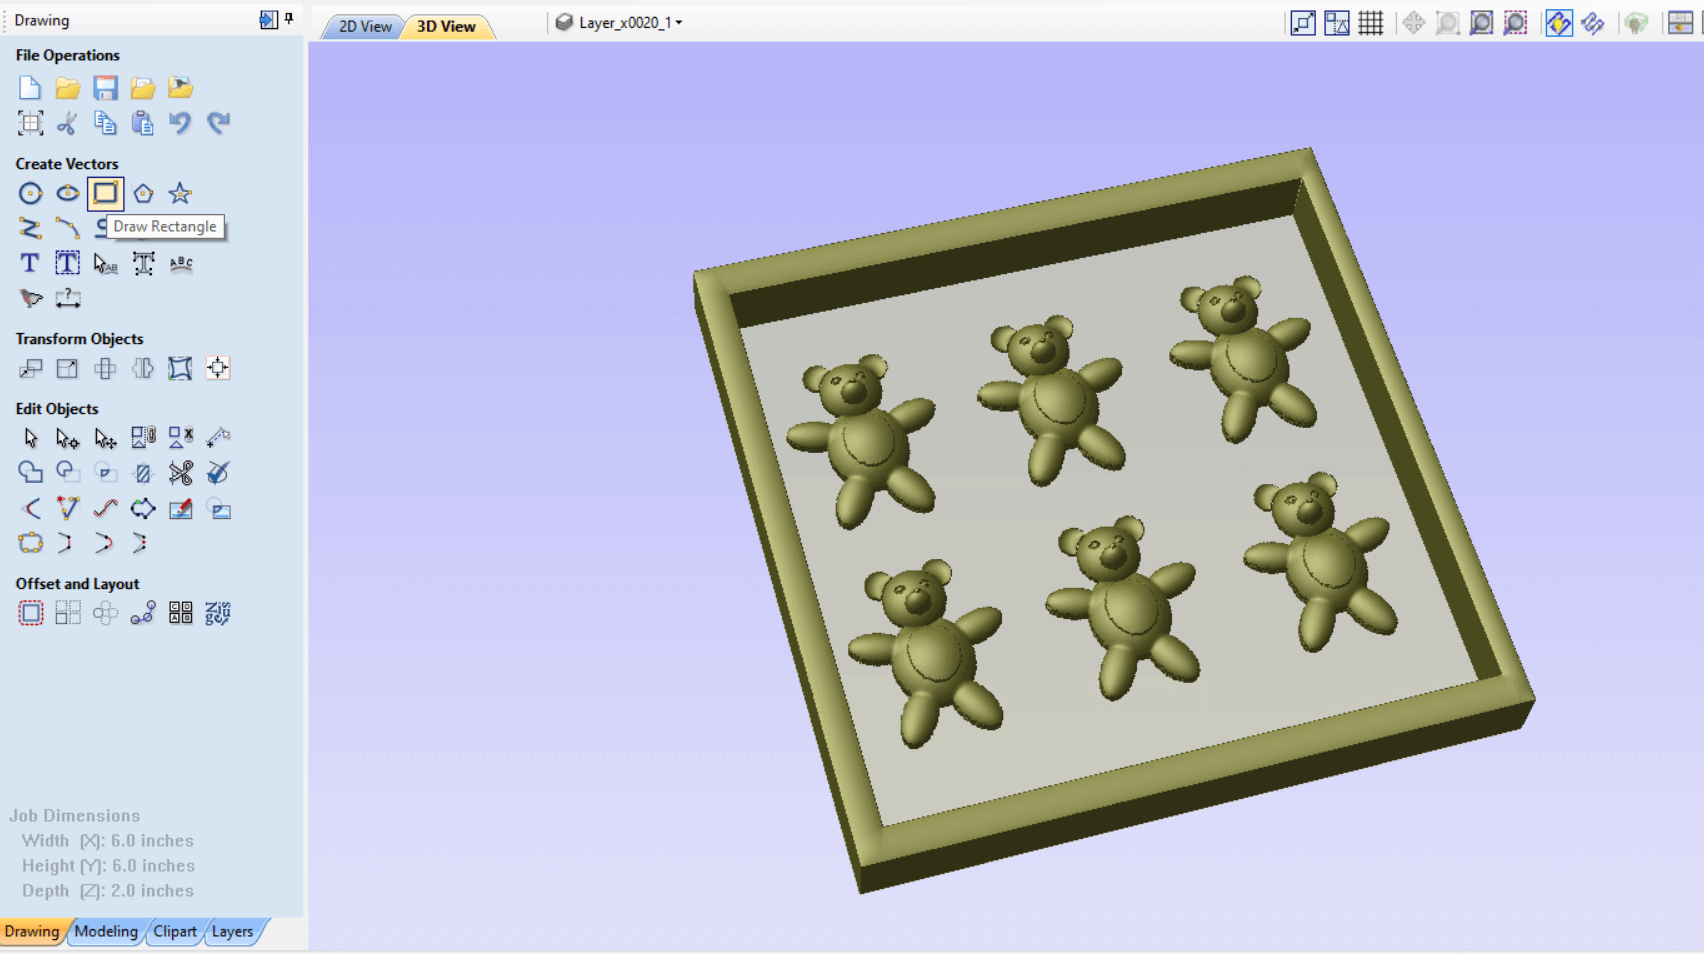
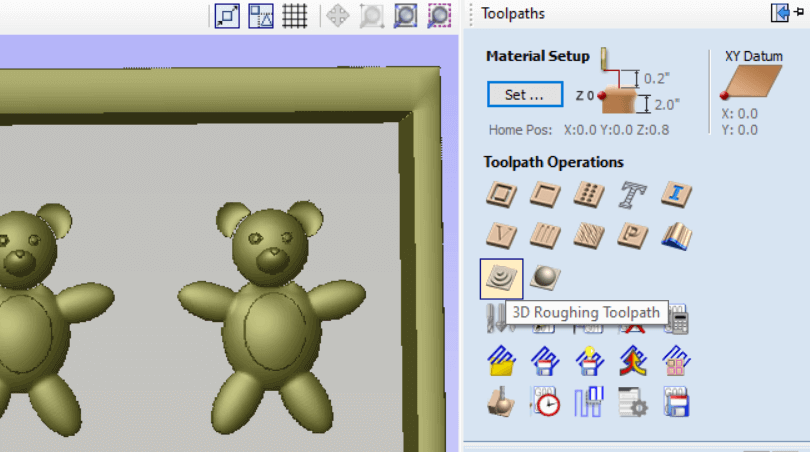
My model was now ready to add toolpaths.
I opened the toolpaths tab to the extreme right. I was required to setup the material settings. This is where I set the Z-axis start point. For this I used the Material Surface.
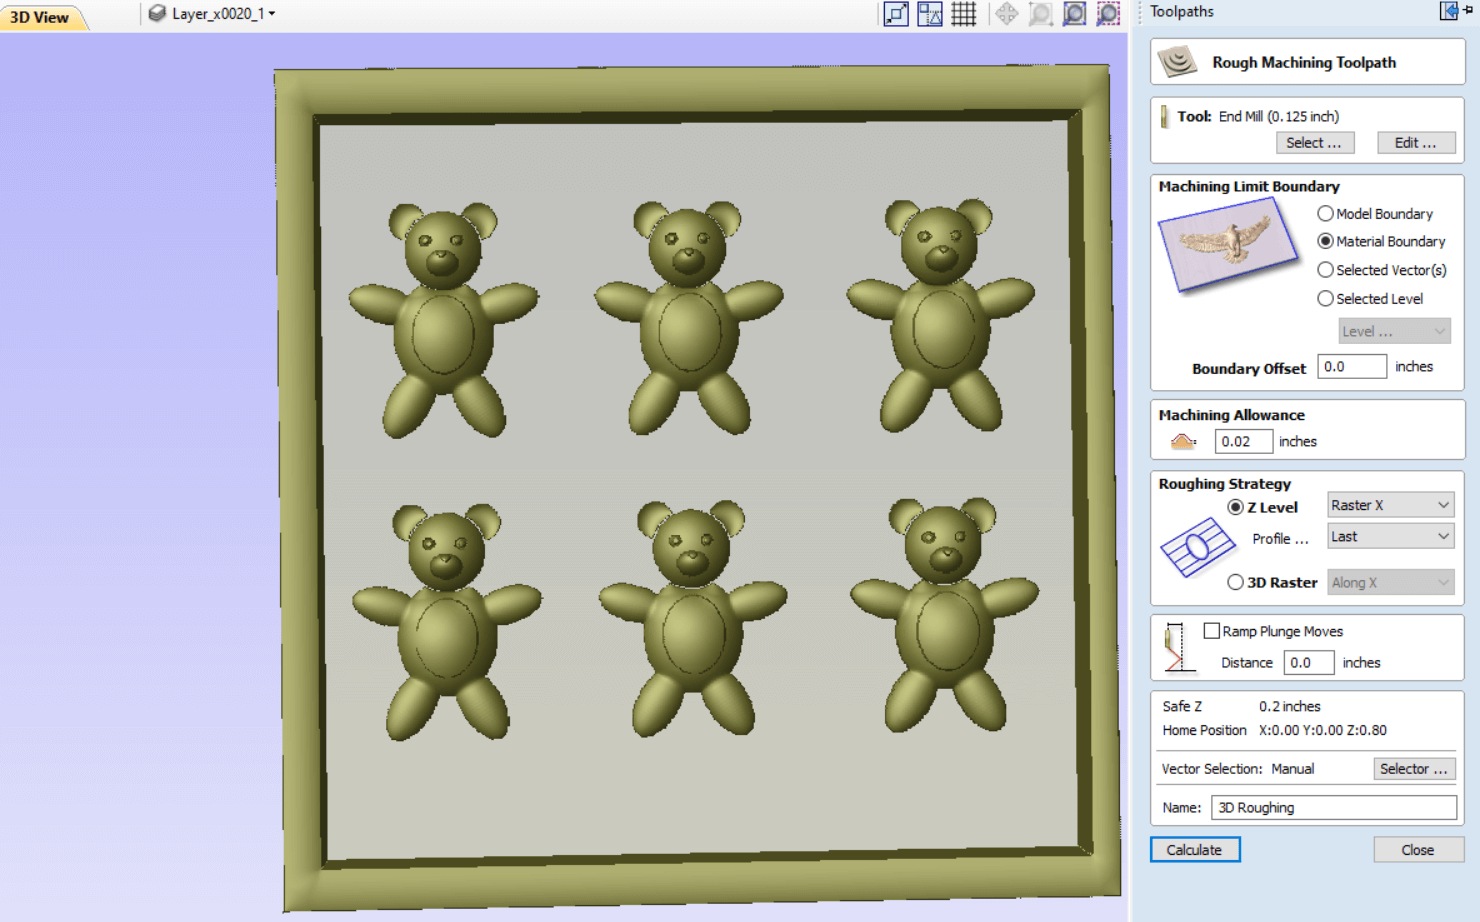
I then went on to add the toolpaths. First I selected the Roughing Toolpath. This Toolpath would allow the machine to remove the majority of material surrounding the actual objects.
I used a 1/8" end mill bit for the roughing with machine allowance of 0.02"
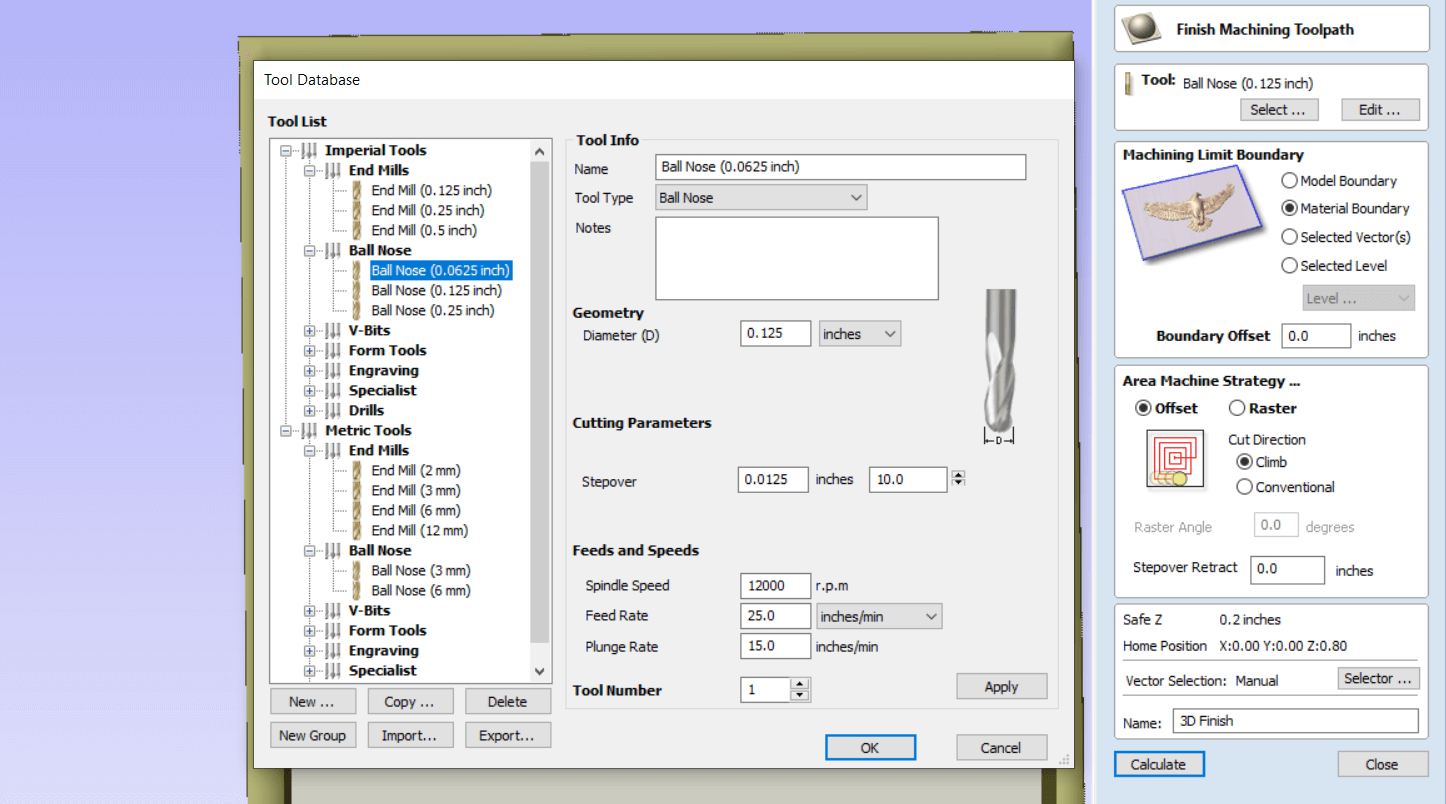
I then added a Finishing (smoothing) toolpath. This toolpath would add the finishing touches to the object. I used a Ball nose 1/16" bit with a 1/8" shank. I set Machine strategy to Climb so that the bit would move along the surface of the object.
I then opened the Preview Toolpaths to see if the toolpaths are working the way that I wanted.

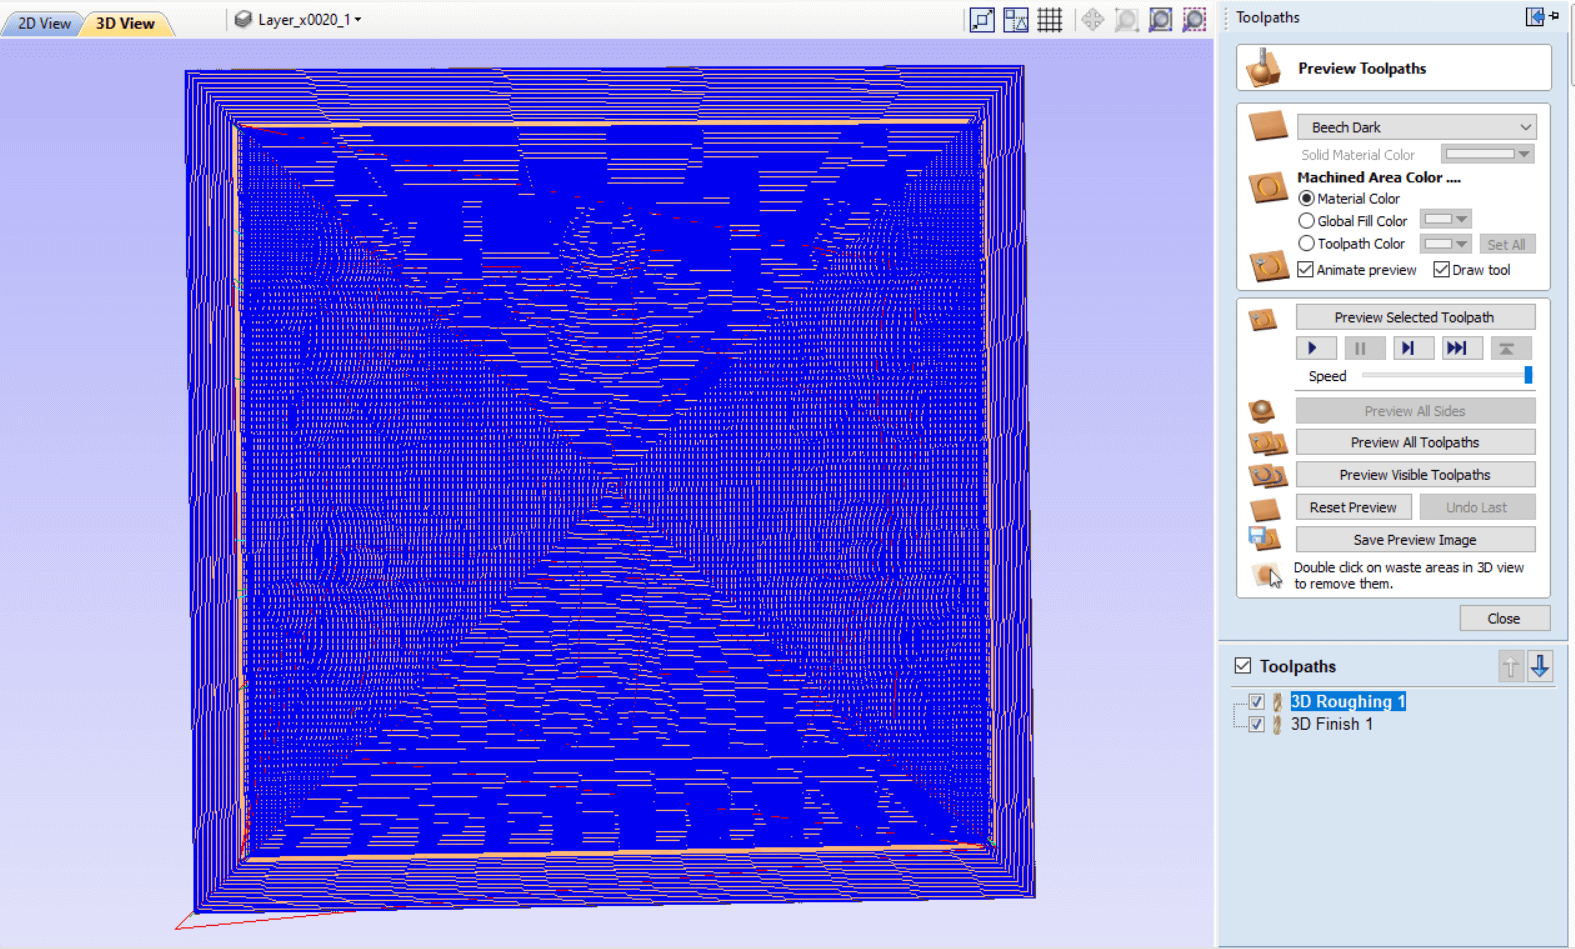
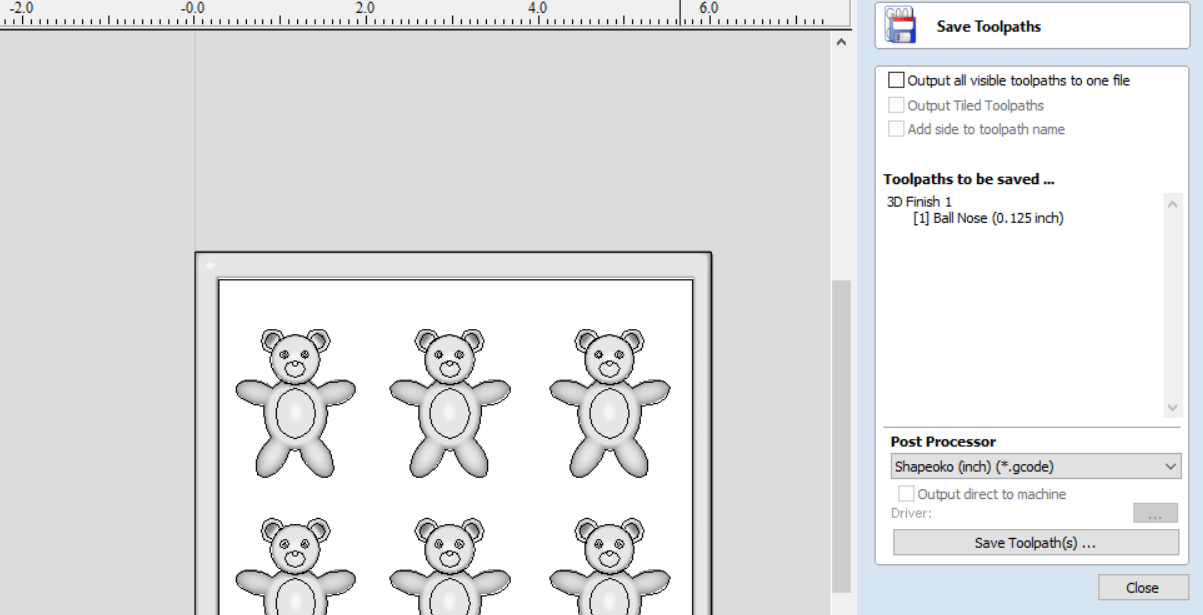
I was satisfied with the toolpaths so I went on to save them. This created the G-Codes to send to the machine. In order to save to G-Codes I had to add a Post Processor. A Post Processor allows the file to be read and translated by a specific machine.
Now the machine I was using to mill is the Nomad3 Carbide Destop Mill but the version of Aspire I used didn't have a Post Processor for this machine. I tried using the Shapeoko (inches) g-code (since it was the same manufacturer) as the Nomad3 Carbide. I did a test first and it worked.
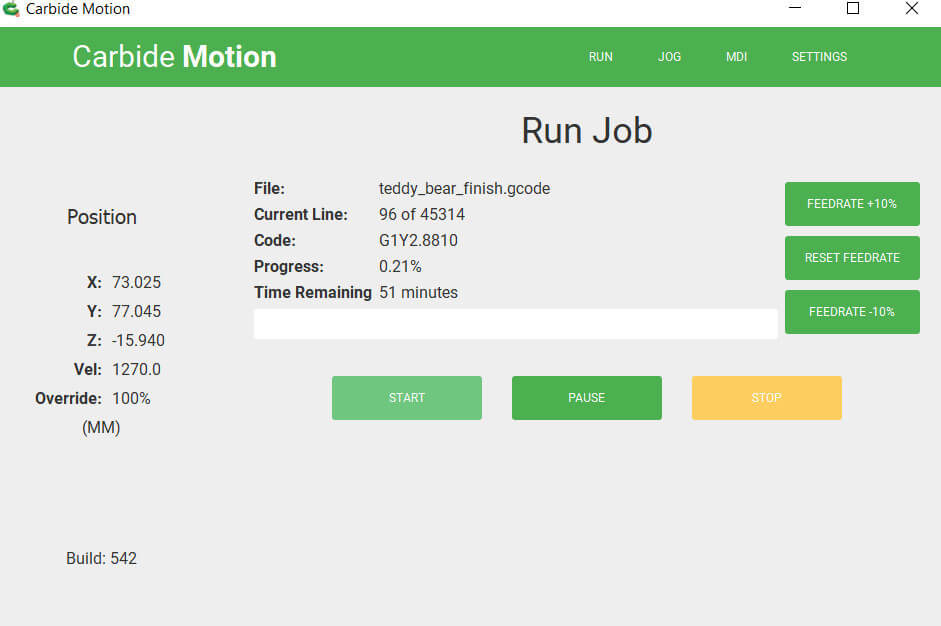
I now had two G-code files which I sent to the milling machine via Carbide Motion. I sent the Roughing Toolpath first.

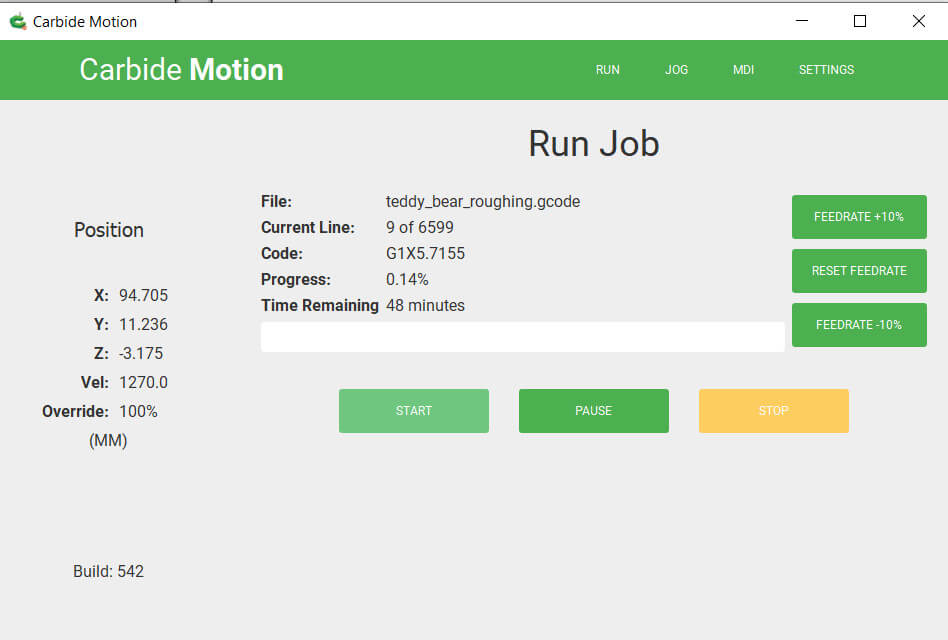
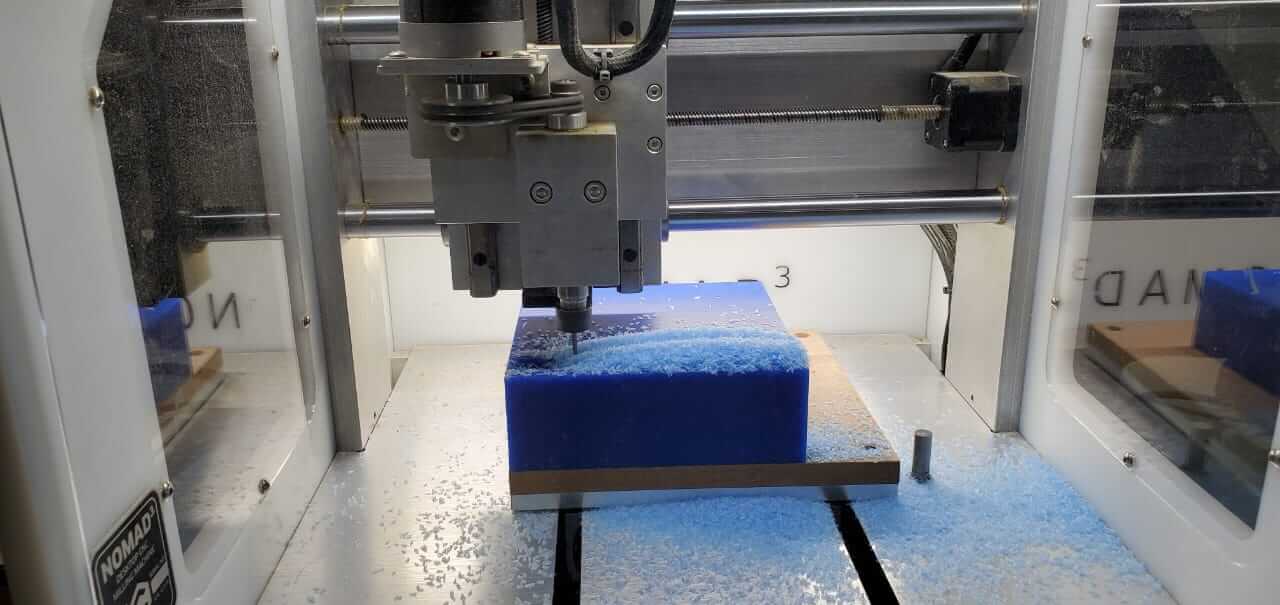
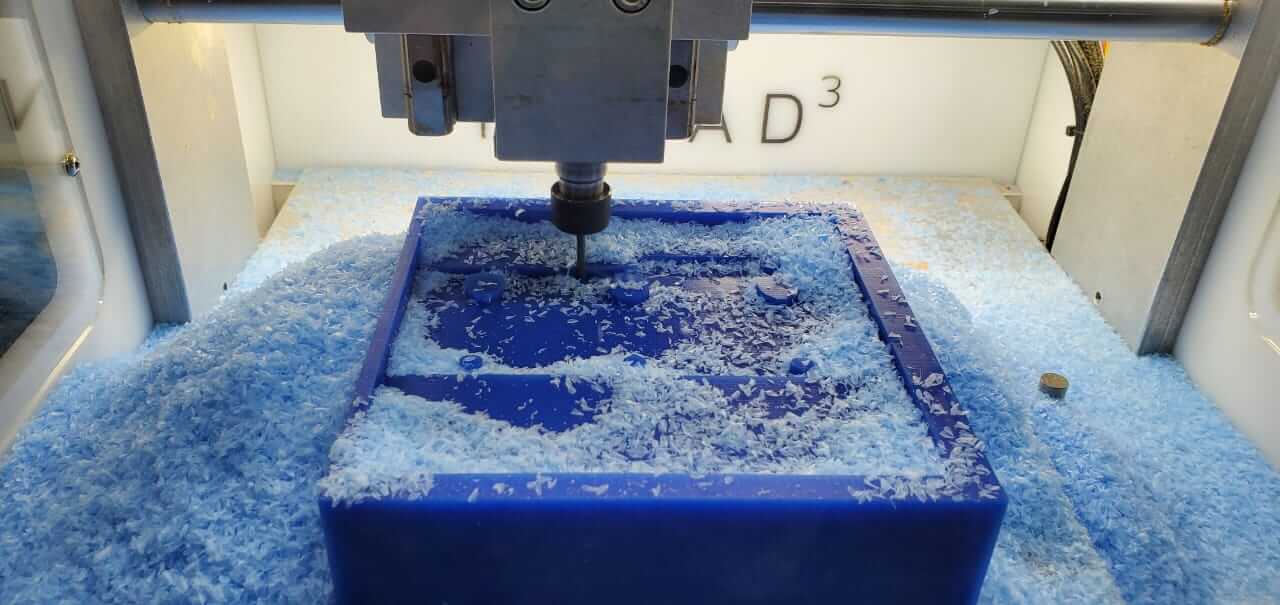
The Roughing Toolpath removed the majority of material surrounding the Bears.
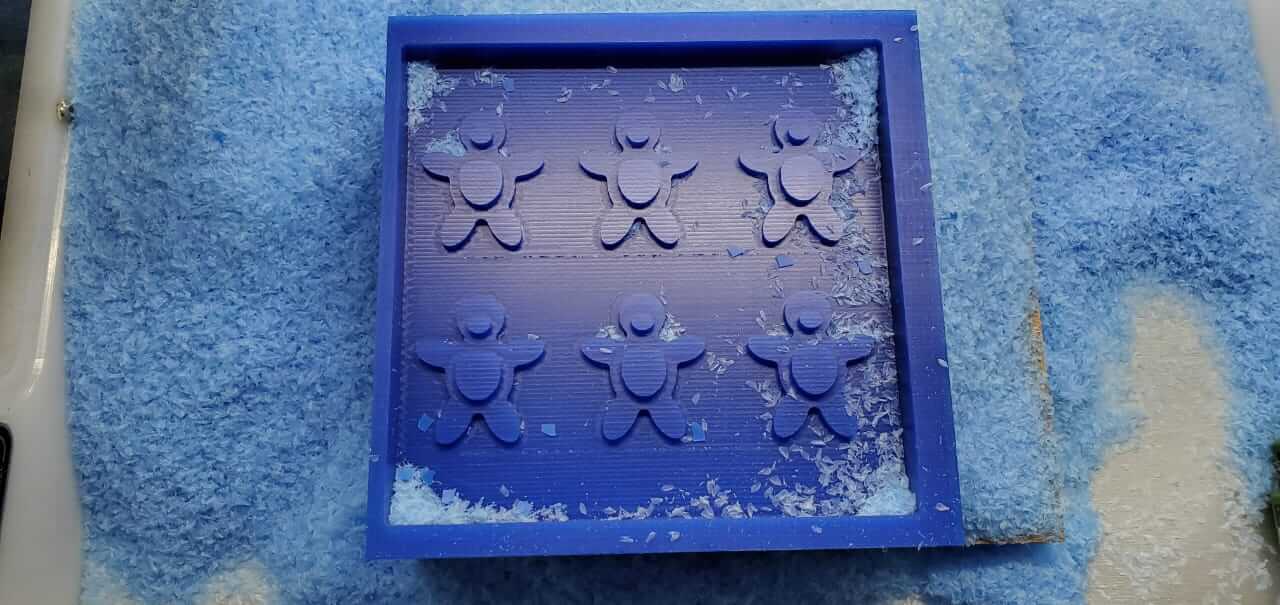
I then sent the Finishing Toolpath to the machine.
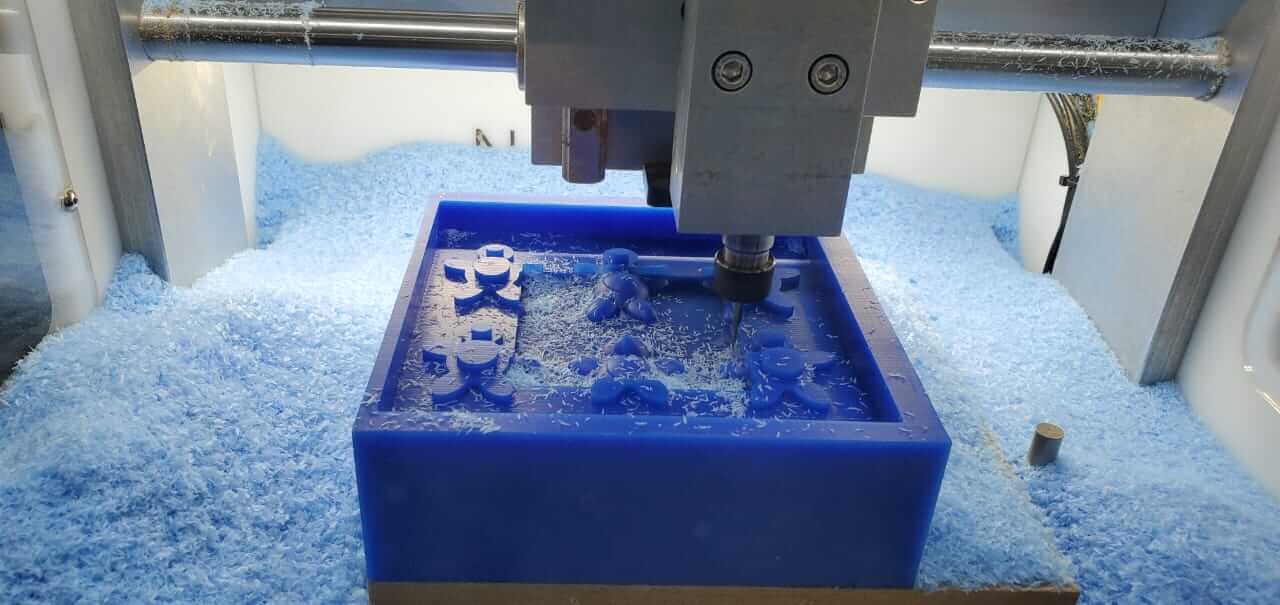
The Finishing Toolpath added the smoothing touches to the Bears. One issue I noticed is that I should have made a step down on the inside of the borders. The 1/8" shank rubbed against the edges because the 1/16" tip was trying to cut the edges. The borders were thick and the difference from the bit shank to tip was very small so it wasn't any big issue this time.
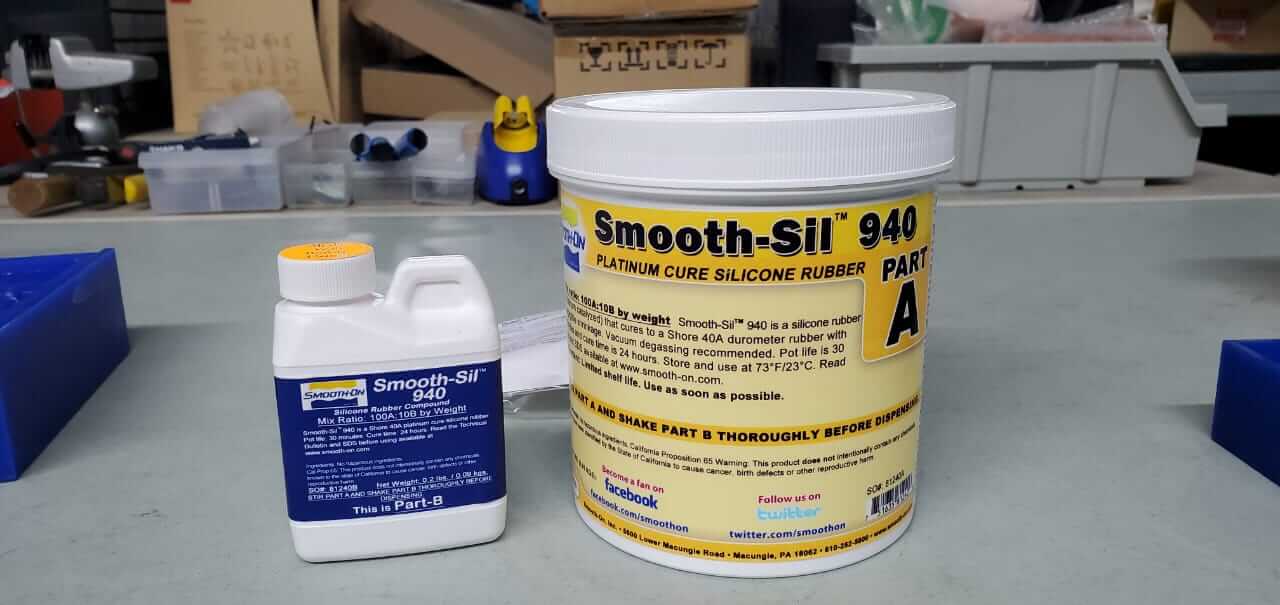
For the mold making I used the Smooth-Sil 940 (part A and B) silicon mix. I used this in particular because it is a food-safe material and as I mentioned in the begining I wanted to make edibles. I had a small issue with this, due to a lack of proper storage and the long period of time we had these items, the part A was beginning to harden just a bit but was good enough to still use just a little stiff to mix.
Just as a precaution, disposable gloves and a mask should be worn when mixing. The mixture does not carry a strong scent but its still chemicals and should be handled with care. It should be mixed thoroughly but gently.
The mixture for this by weight was 100 parts Part A to 10 parts Part Bwith a pot life of 30 mins and cure time of 24 hrs.
I filled my milled wax with water so that I would know exactly how much of the mix I needed although I mixed extra because of the state of silicon.
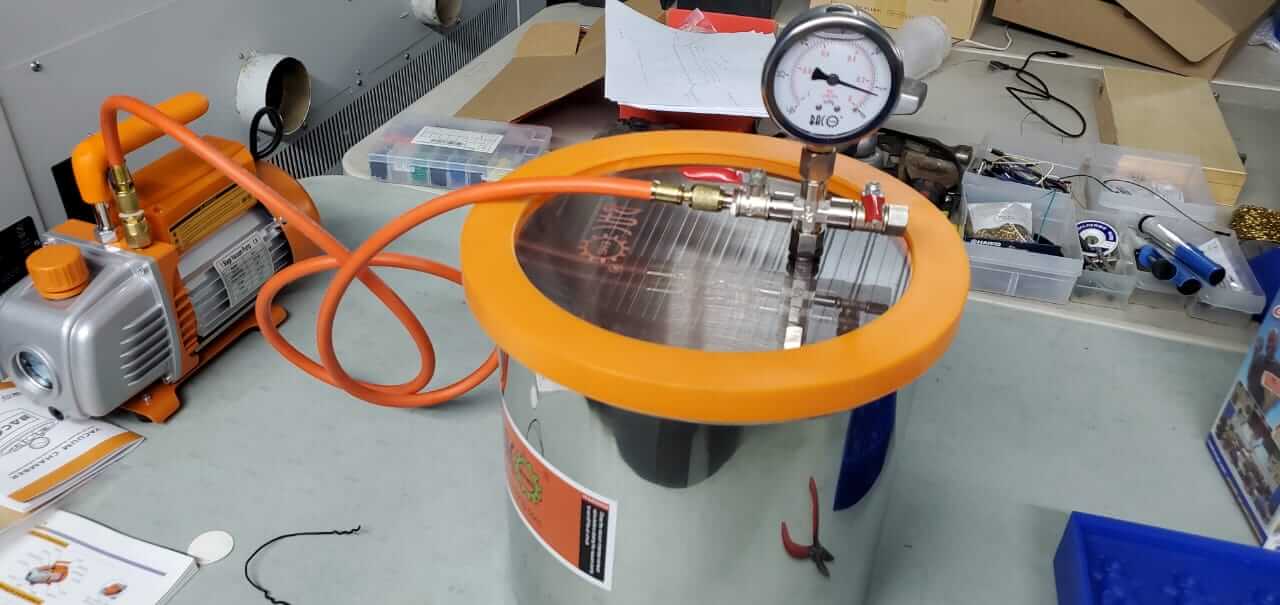
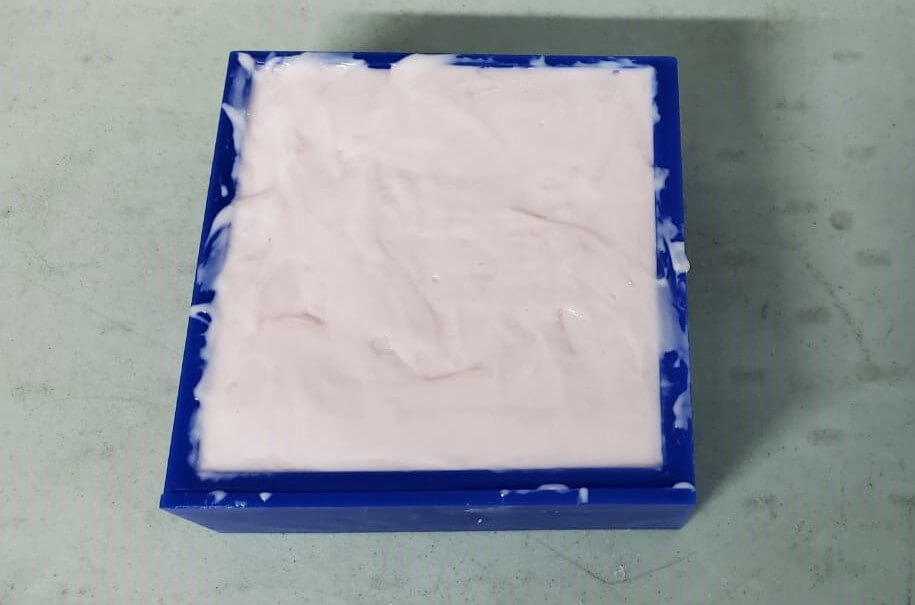
I placed the mix into a degassing chamber to remove all air particles.
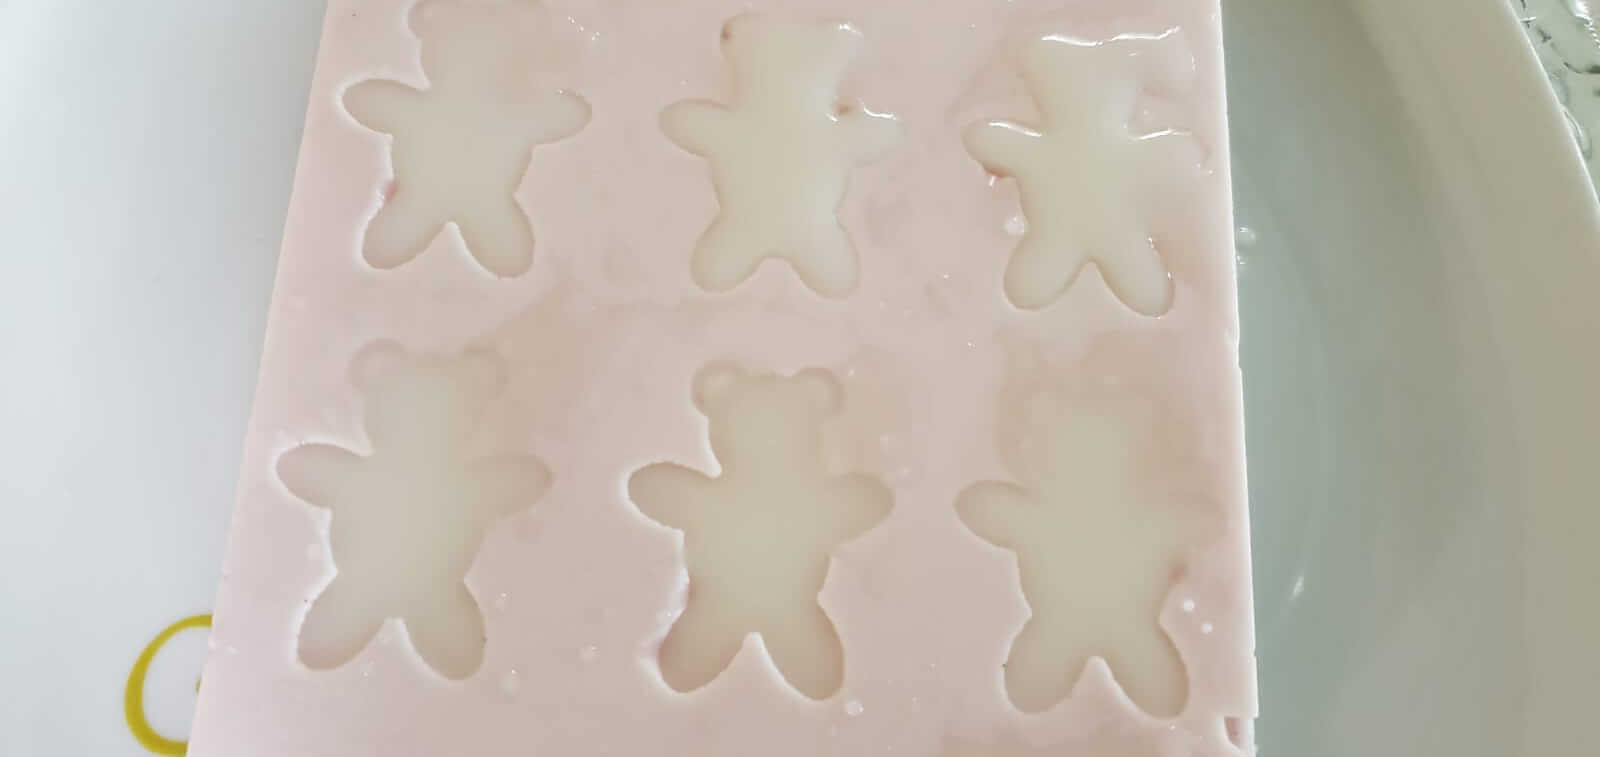
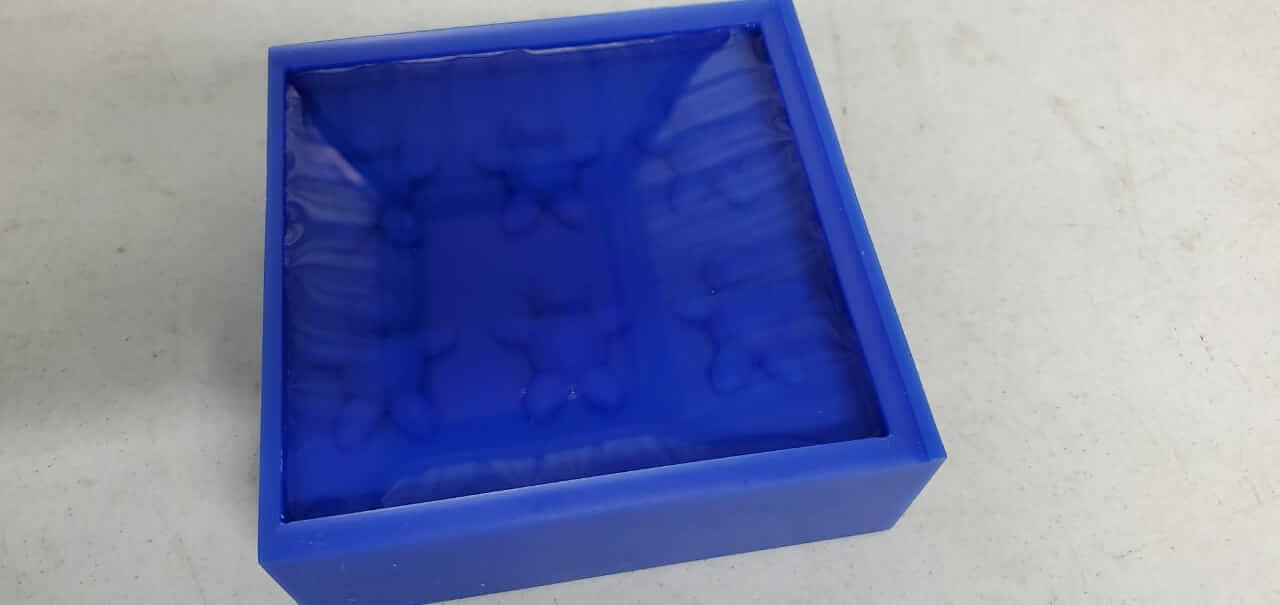
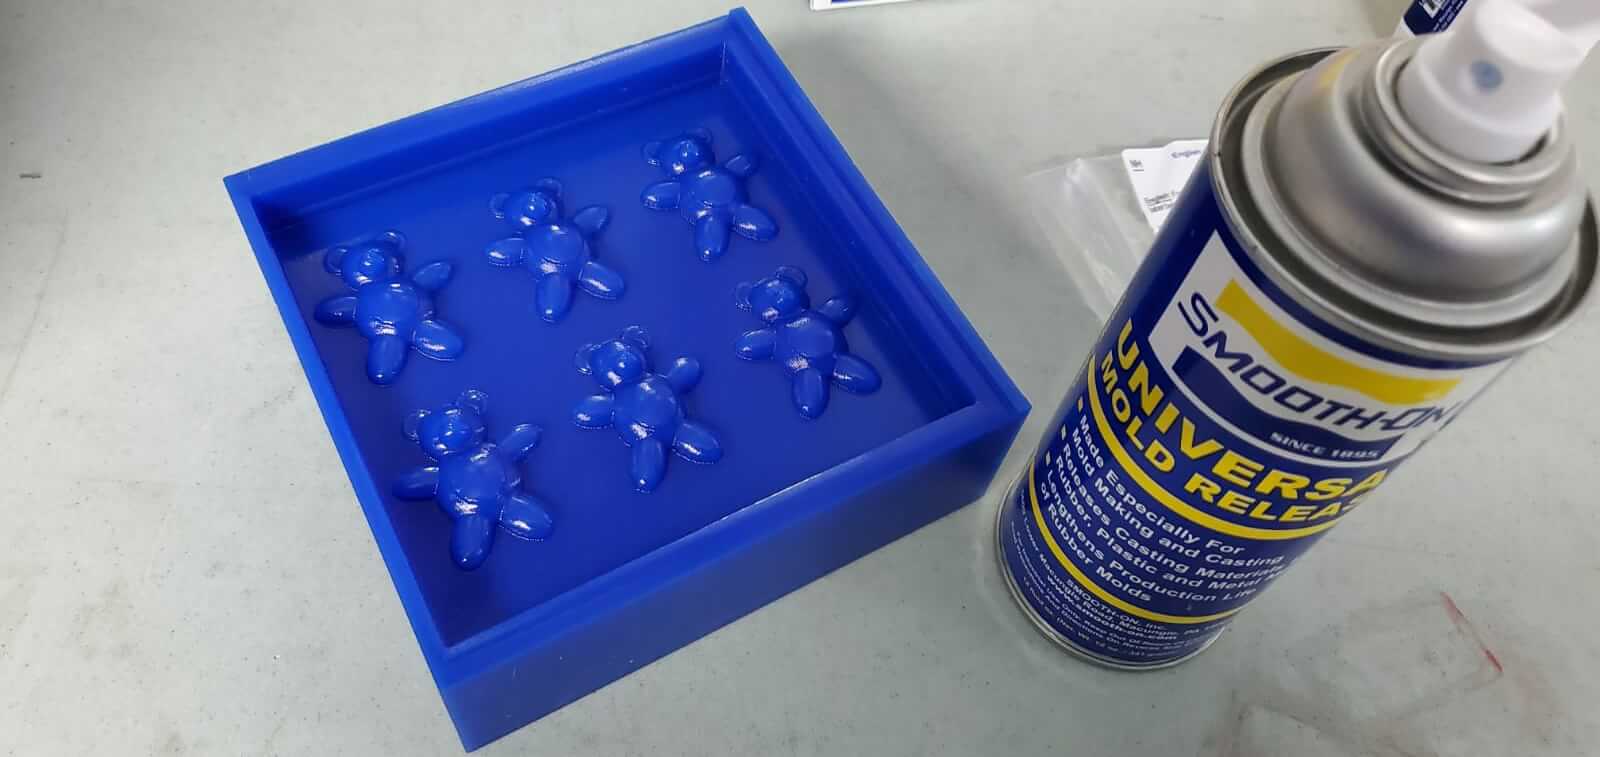
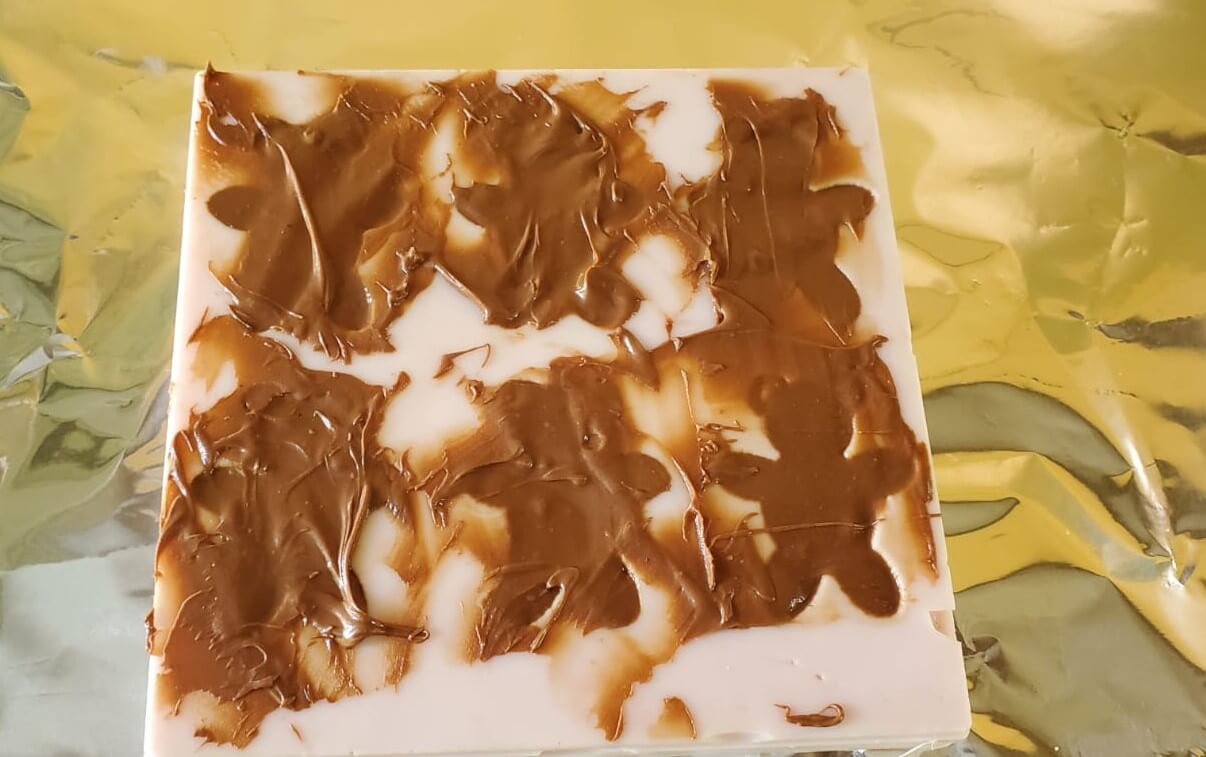
I sprayed the wax positive with Smooth-On Mold Release so that the silicon can be removed easily when dried. I then filled the wax with the silicon mix and left it over night to dry to allow it 24hrs cure time.
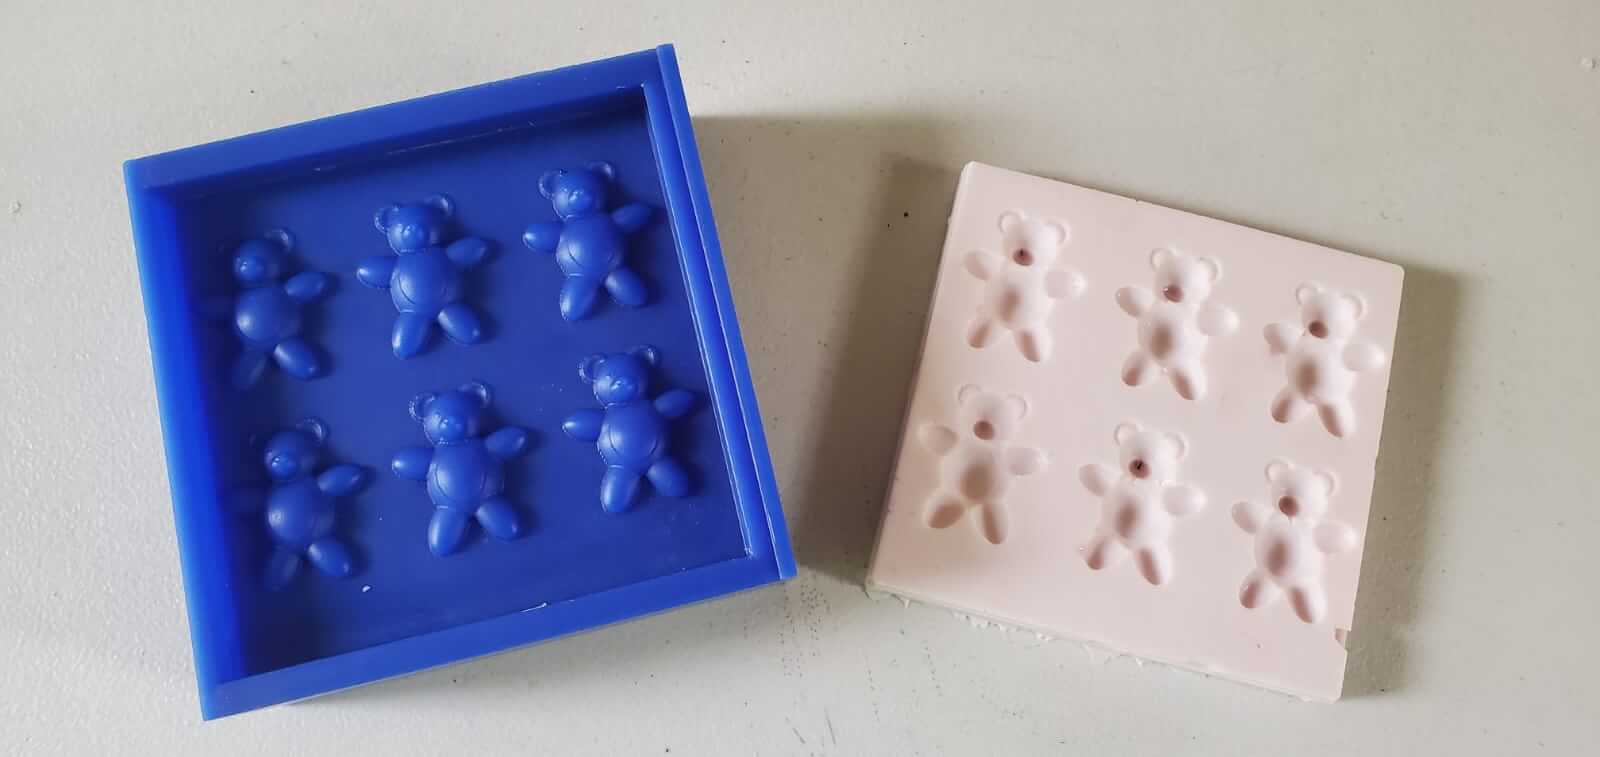
My finished mold. The dark stuff in the noses are because of the camera lighting.
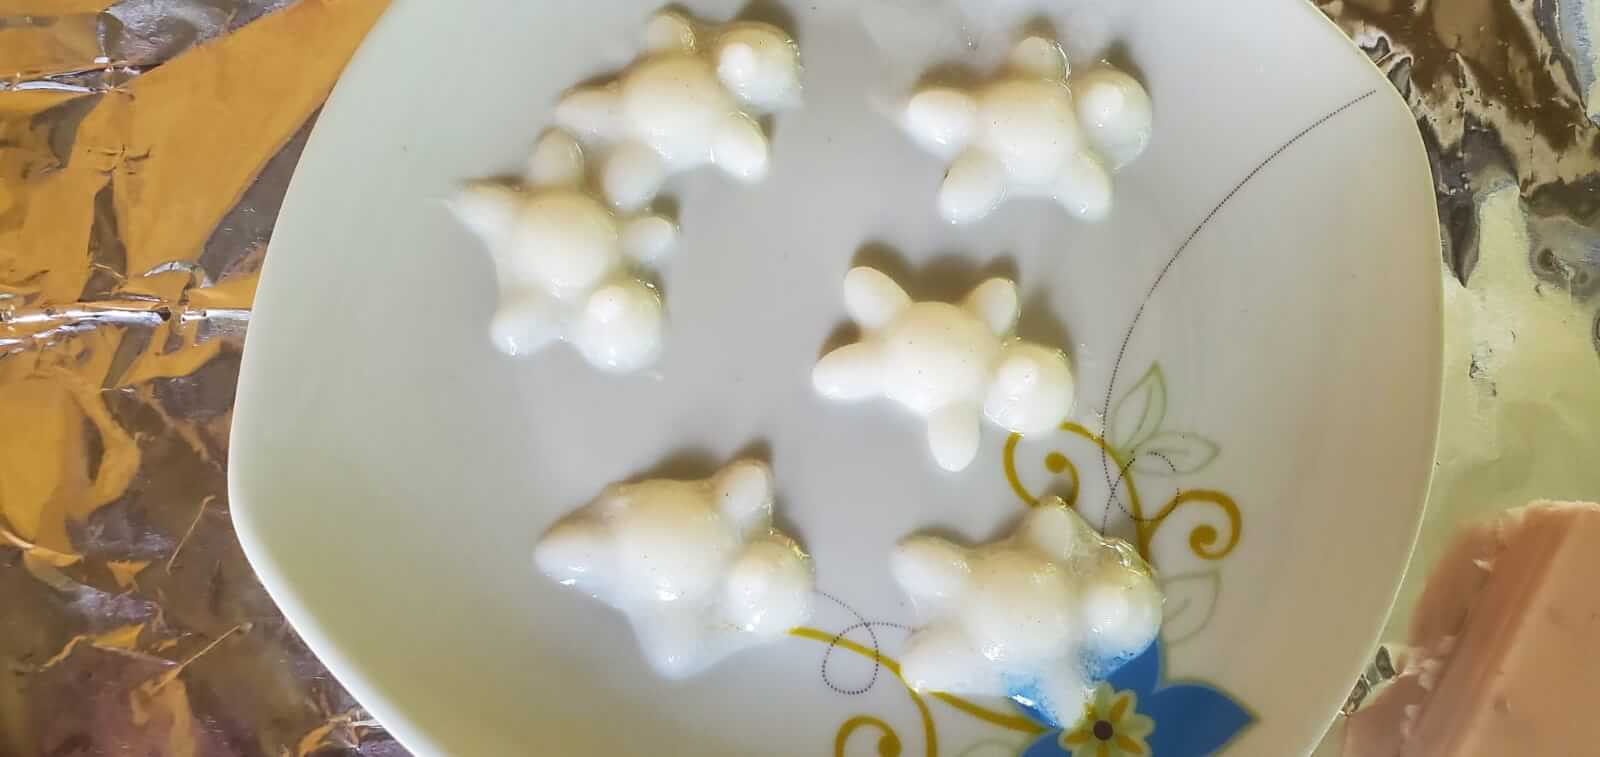
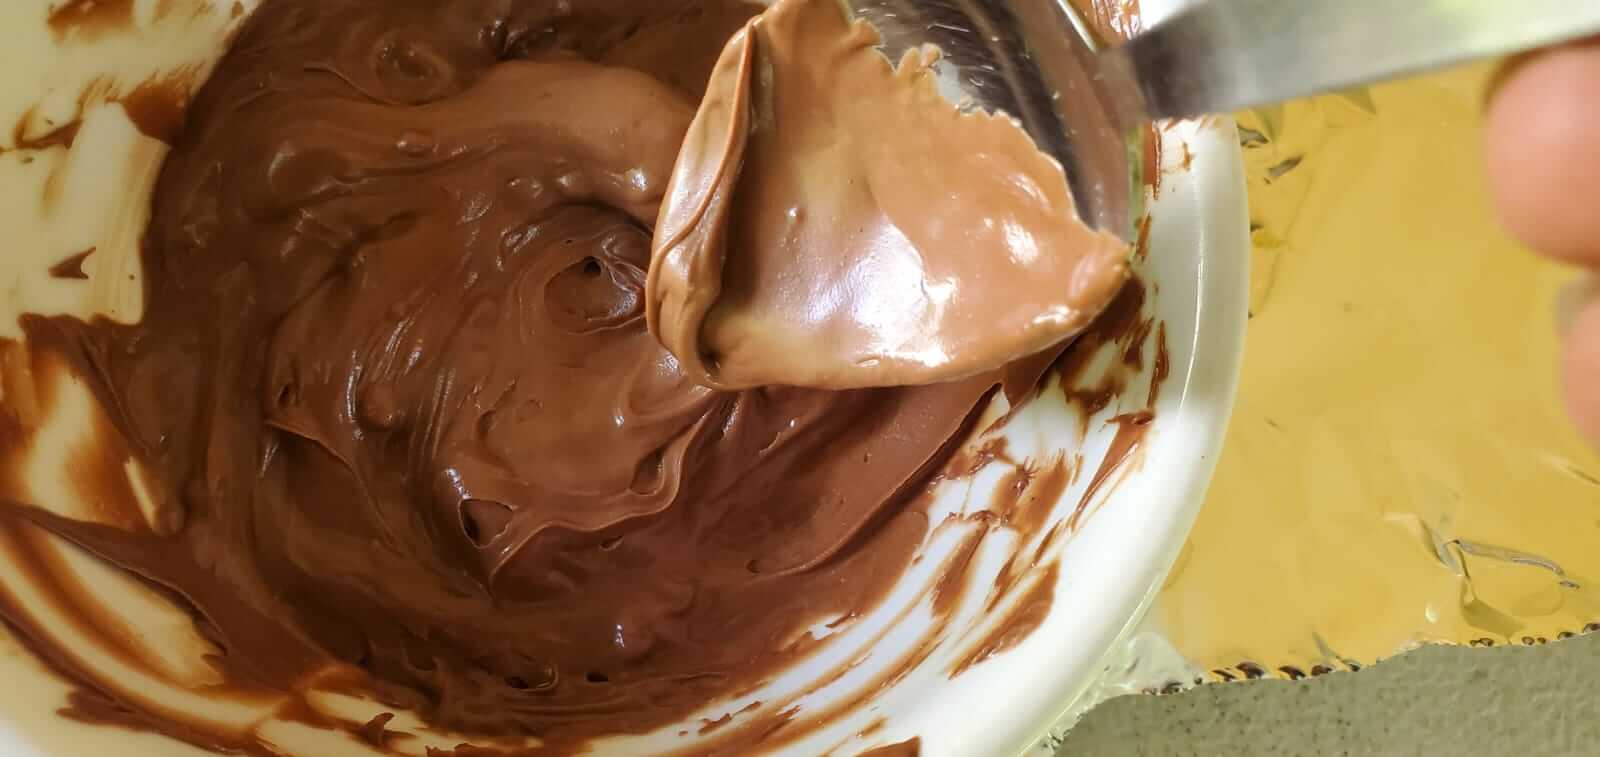
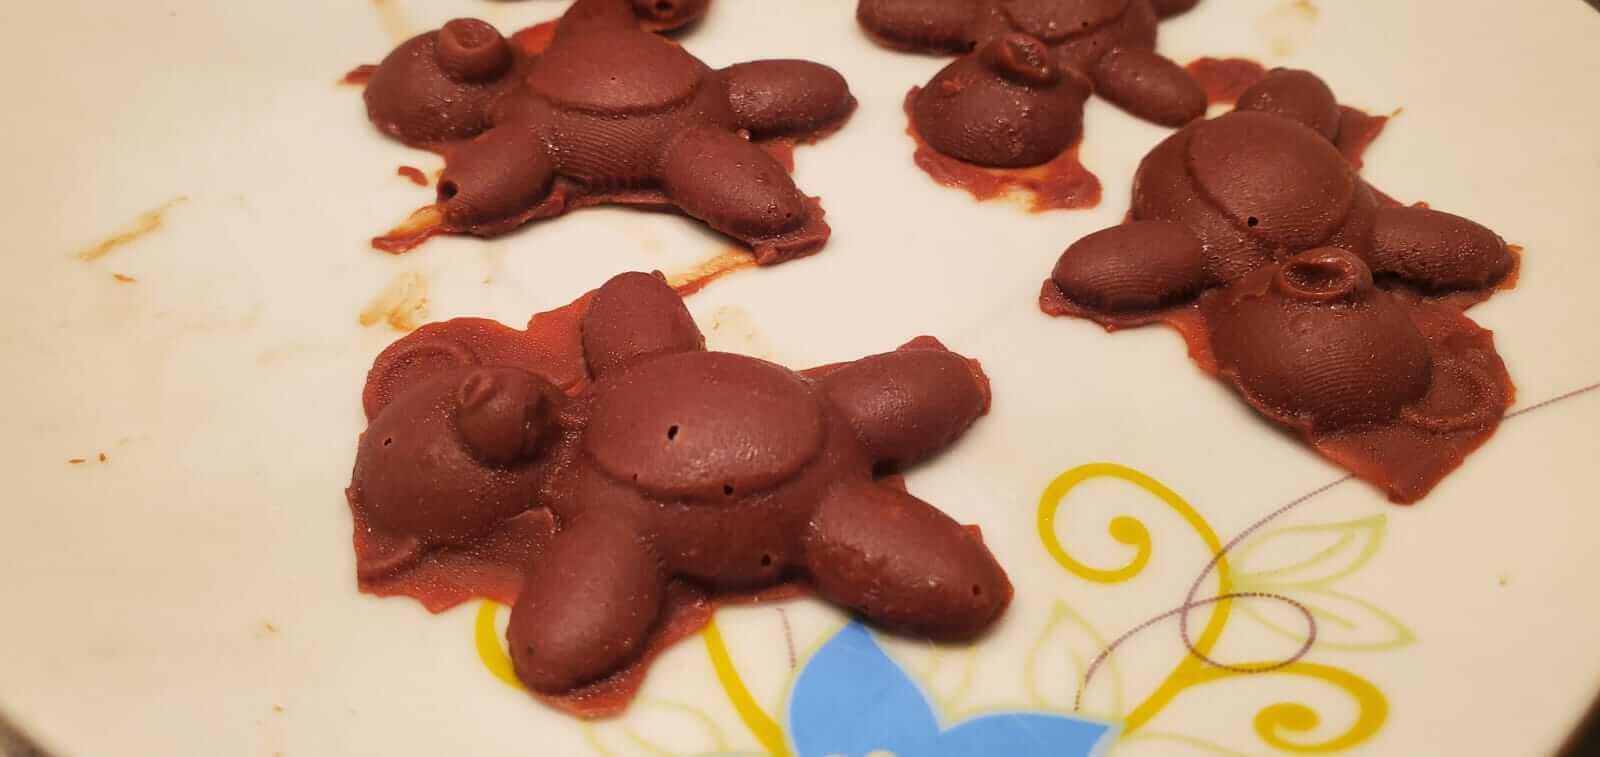
For my first cast I tempered chocolate in the microwave. I placed in the microwave for 30 secs at a power of 5 then I gave it a little mix and repeated this for 3 mins. The chocolate was fairly soft, not liquid but soft enough to paste. I filled the bears with the chocolate and then I placed the mold in the fridge for about 30 mins.
The bears came out with some air pockets but that was because the chocolate should have melted a bit more. Also the ears didn't come so well but that was a design issue so next time I will add a little more height or depth to the ears. Anyways they still tasted really good.
I also tried freezing sour sop juice which I left for about an hour. They casted really good but melted so fast so I didn't get a good photo but again tasted really good.