4. Computer controlled cutting
Group assignment
This time, I work my colleagues together to characterize our lasercutter's focus, power, speed, rate, kerf, and joint clearance.
I hear all lasercutter for a very long time. To be honest, I didn't operate lasercutter and make lasercutter product before. It is very challenge for me this time. German is more familiar with lasercutter becasuse he is the first one bought lasercutter in our school. Therefore, he is a one of the expert in our school.
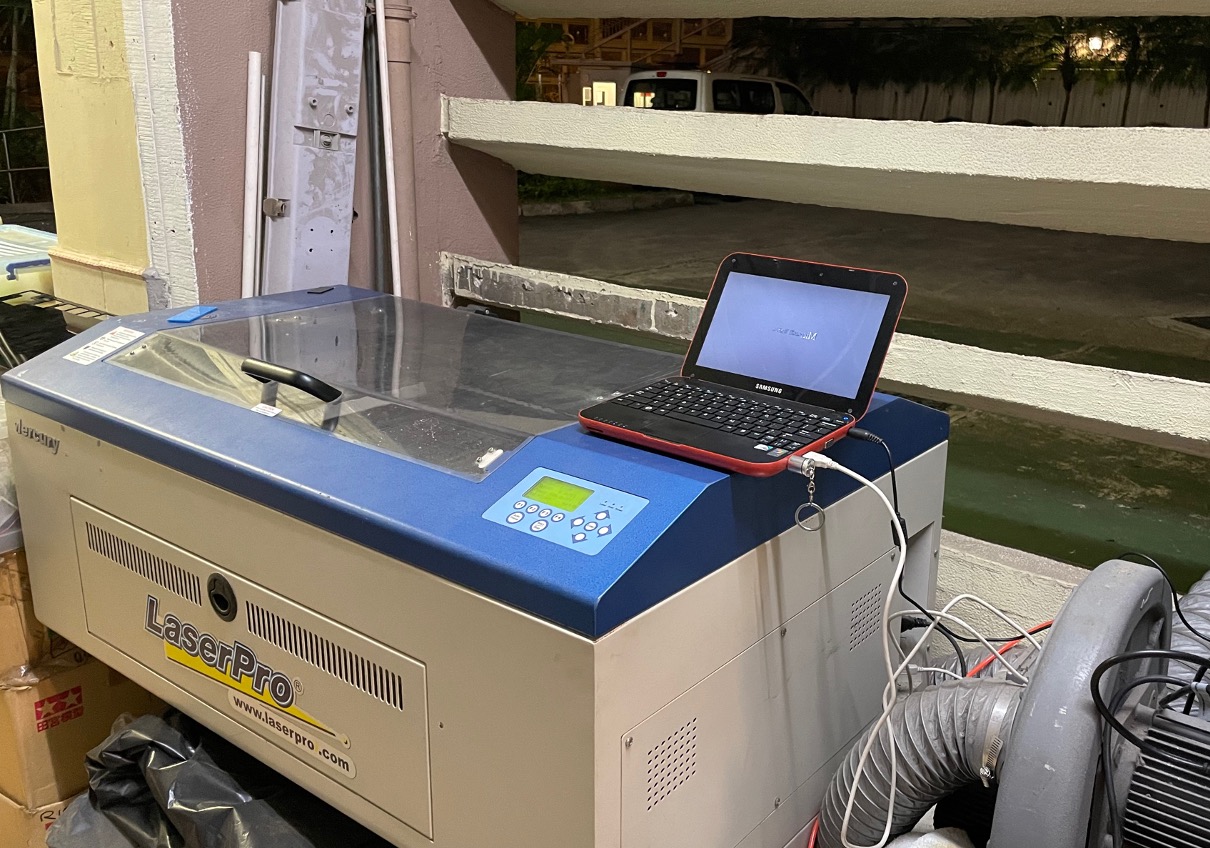
For our lab, the leasercutter was purchased in 2008. This is a GCC of LaserPro Laser Engraving Machine Mercury II. Here is detail and User Manual of the leasercuter.
|Working Area|635 x 458 x 165mm|
|----|----|
|Tube Type| Metal CO2|
|Power Options| 25 Watt|
Here are some materials setting data since collected from 2008. German always suggest students or users need to record the setting for further used. It helps users understanding the leasercuter setting and saving time.
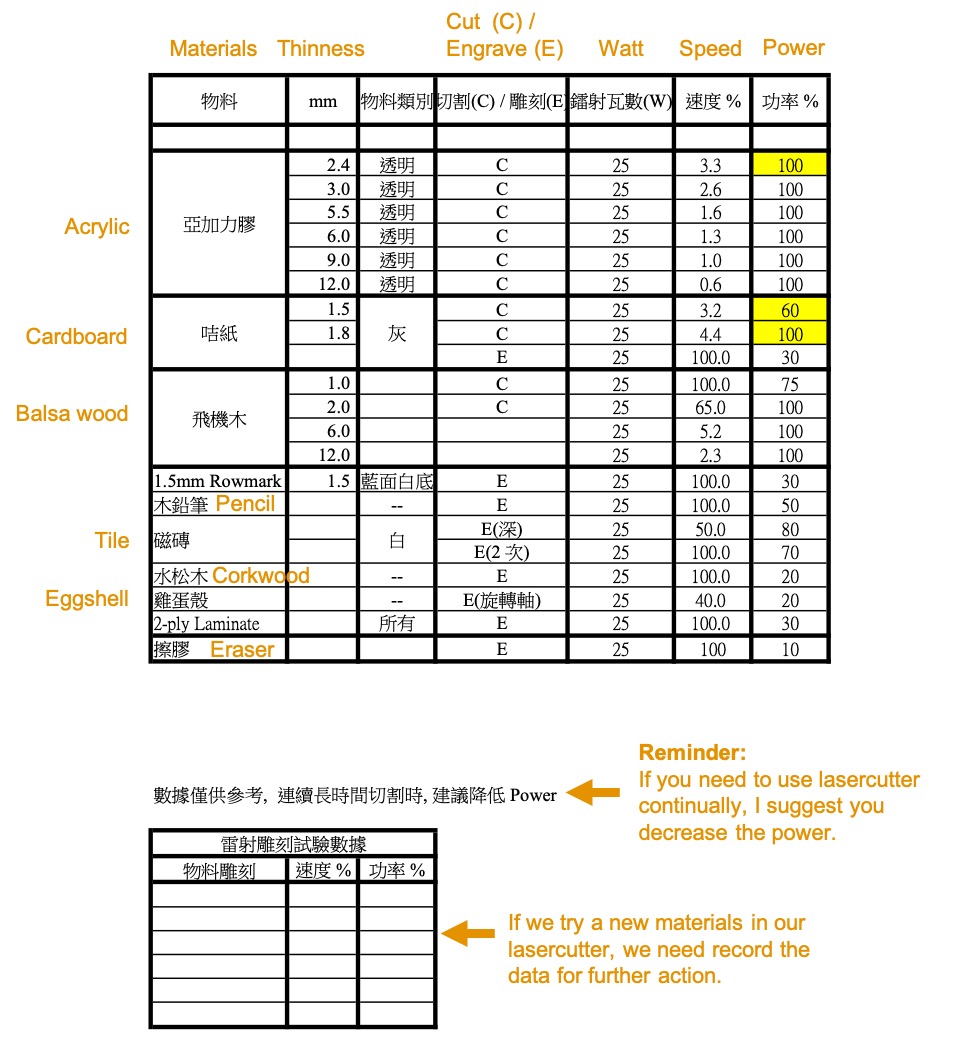
For now, since the leasercutter already has been used for 12 years, so the the performance has been decreased 30% and depreciate of the tube.
| Years | 2008 | 2021 |
|---|---|---|
| Power setting | 100% | 70% |
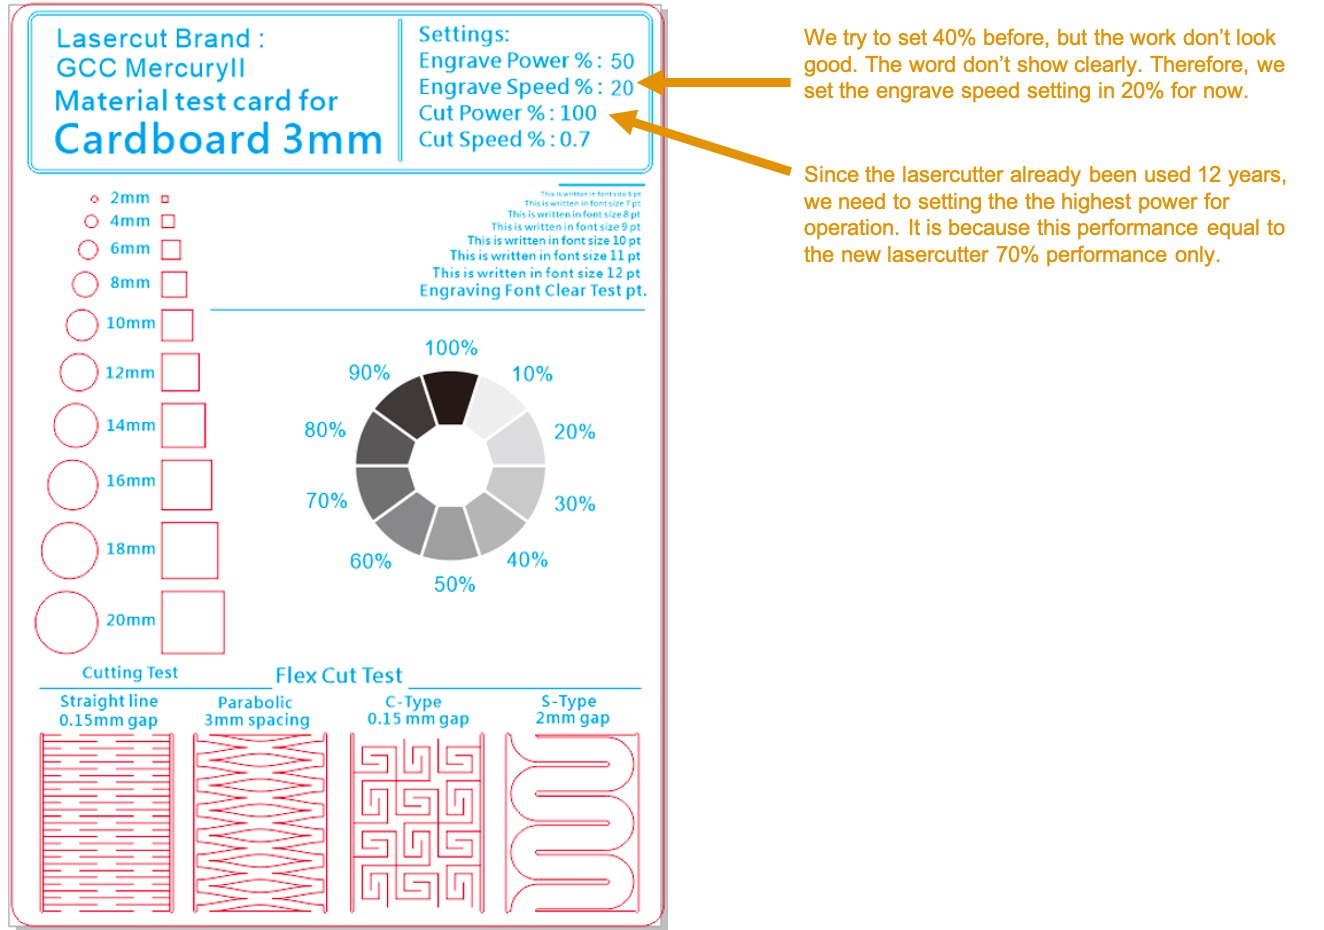
Therefore, we make a Materials Testing Card for different materials and testing our leasercuter focus, power, speed, rate, kerf, and joint clearance. German uses CorelDRAW for drawing the Materials Testing Card.
We try to set the engrave speed 40% before, but the work don’t look good. The word don’t show clearly. Therefore, we set the engrave speed setting in 20% for now for engraving the clear wording. Since the lasercutter already been used 12 years, we need to setting the the highest power for operation. It is because this performance equal to the new lasercutter 70% performance only.
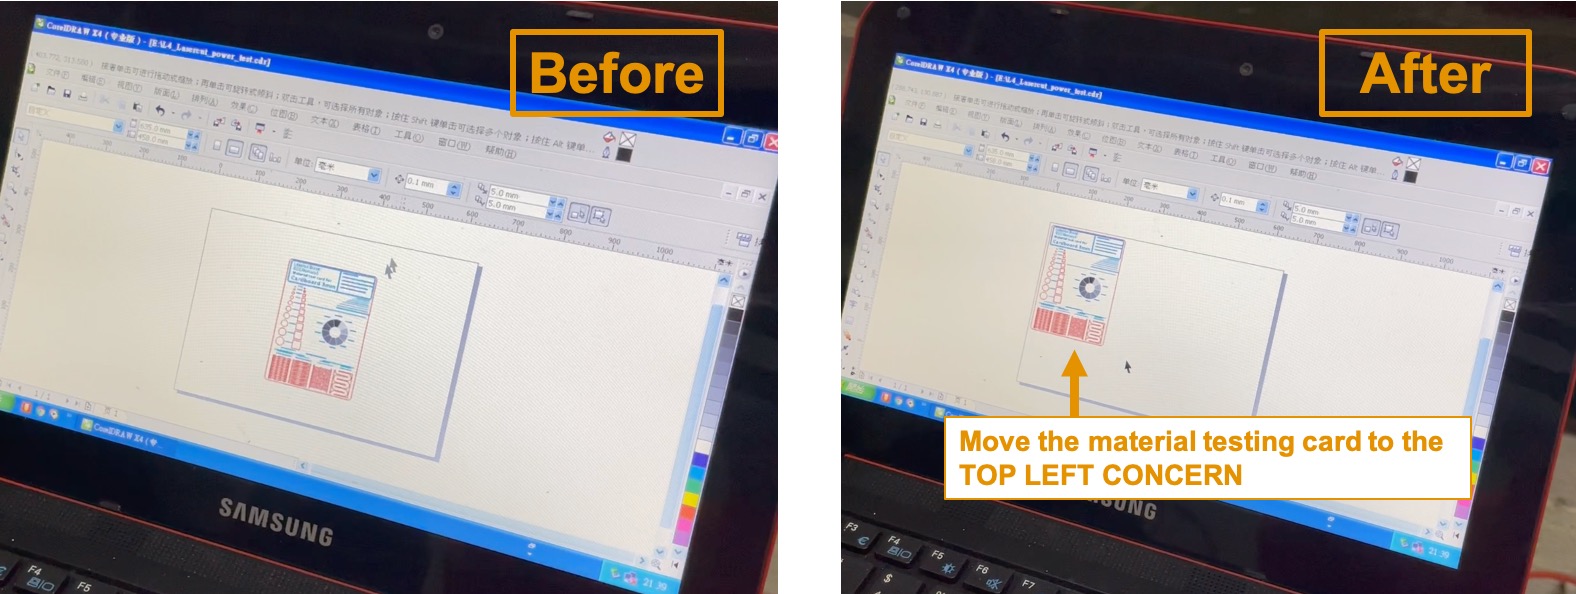
After finishing the design of Materials Testing Card, we import the CRD file into the lasercutter's computer. At first, go to layout > layout setting for setting your lasercutter workspace area and material direction.
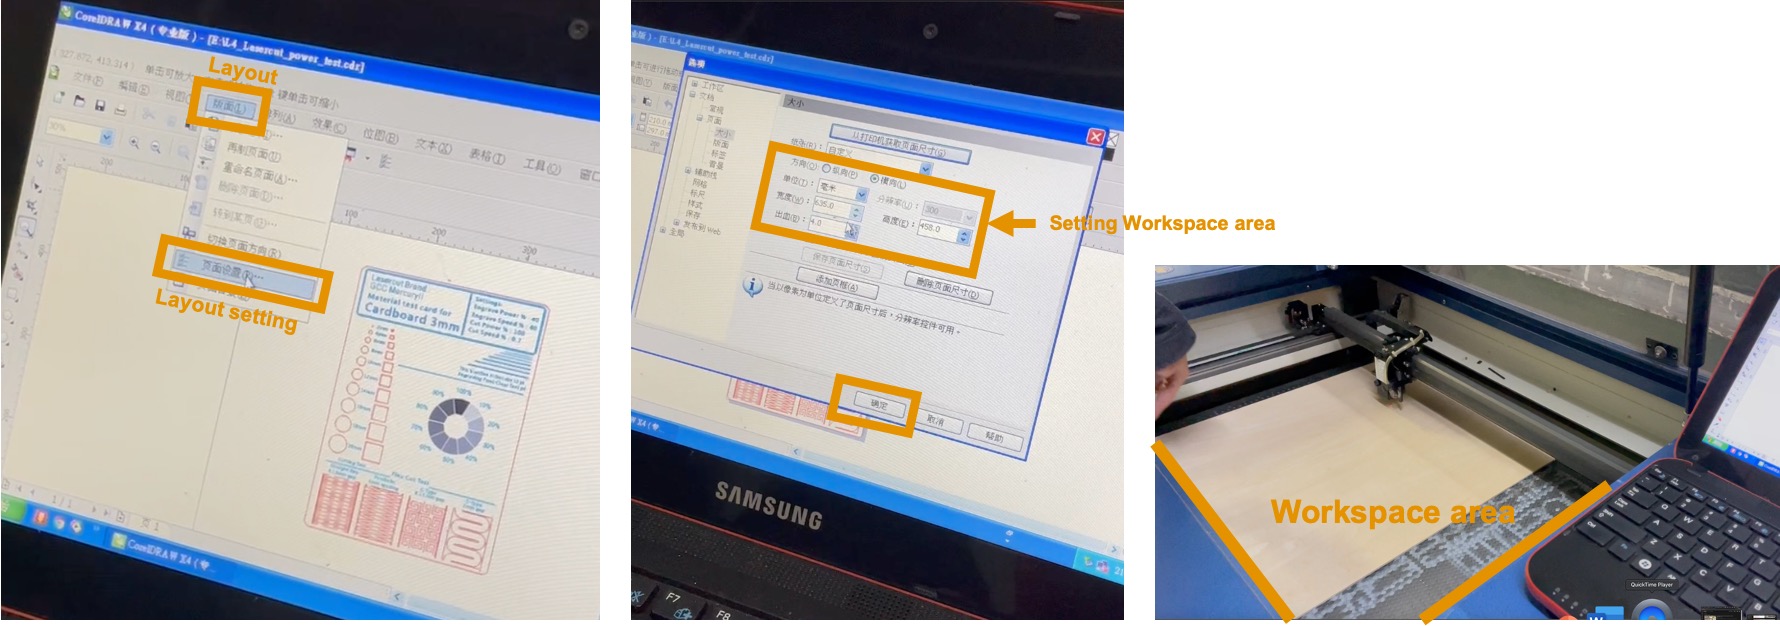
Since the the starting position of the lasercutter is TOP LEFT CONCERN, so move the file position to the TOP LEFT CONCERN. It saves the time for the laser path and economize the materials.
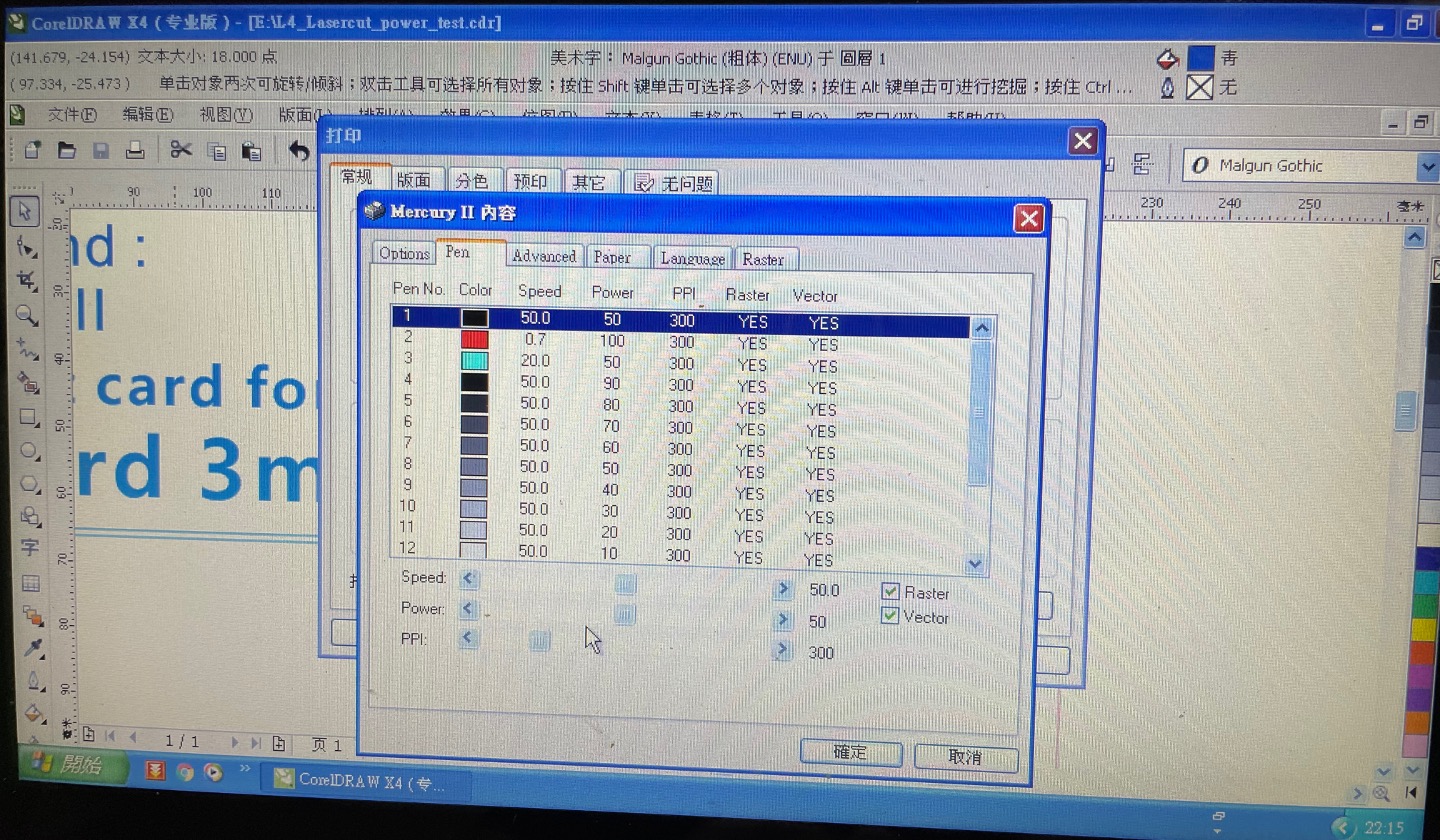
Next, go to Printing. Choose your lasercutter (For me, I choose Mercury II) --> click Property --> click Pen. As you can see different pen color means different power and power for cutting or engraving.

However, the pen setting only show Black and Red. Red for cutting out. Black for engraving the drakest one.

Since I use different Grayscale for different level of engraving and blue for engraving the words. Therefore, I need to recognize other color by RBG for pen setting.

Here is the final pen setting before operation.
Video shows the lasercutter making Materials Testing Card.
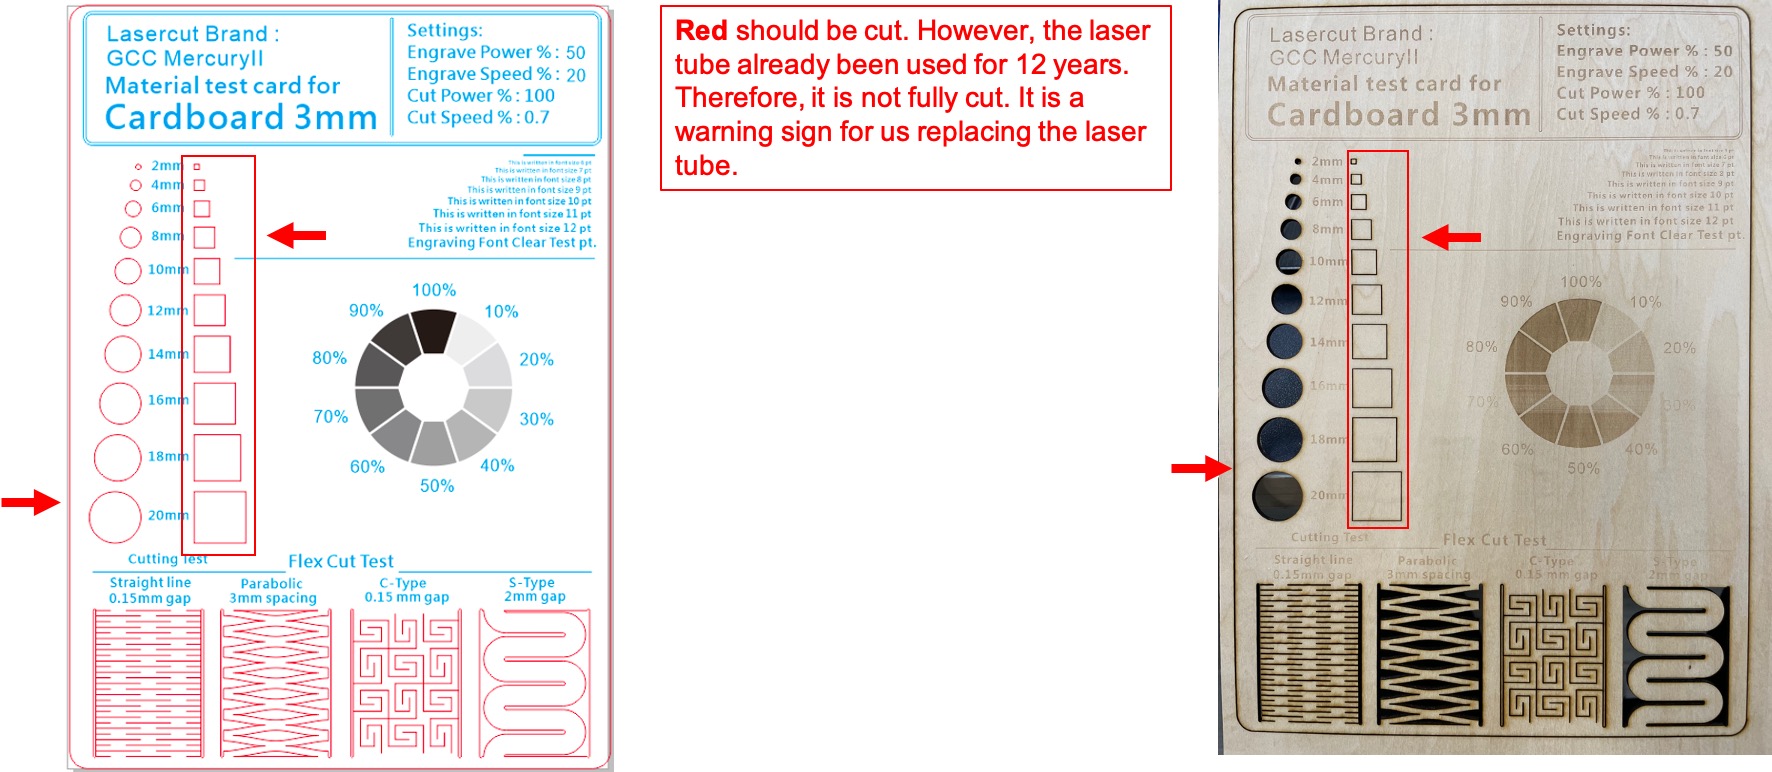
Here is the Materials Testing Card. Red should be cut. However, the laser tube already been used for 12 years. Therefore, it is not fully cut. It is a warning sign for us replacing the laser tube.
The Laser Cutting Kerf from 2.81mm to 3.10mm(Left Photo). We made by 3mm acrylic. I checked the thickness of a acrylic. The thickness was 3.7mm (Right Photo). It is less than 10% difference.
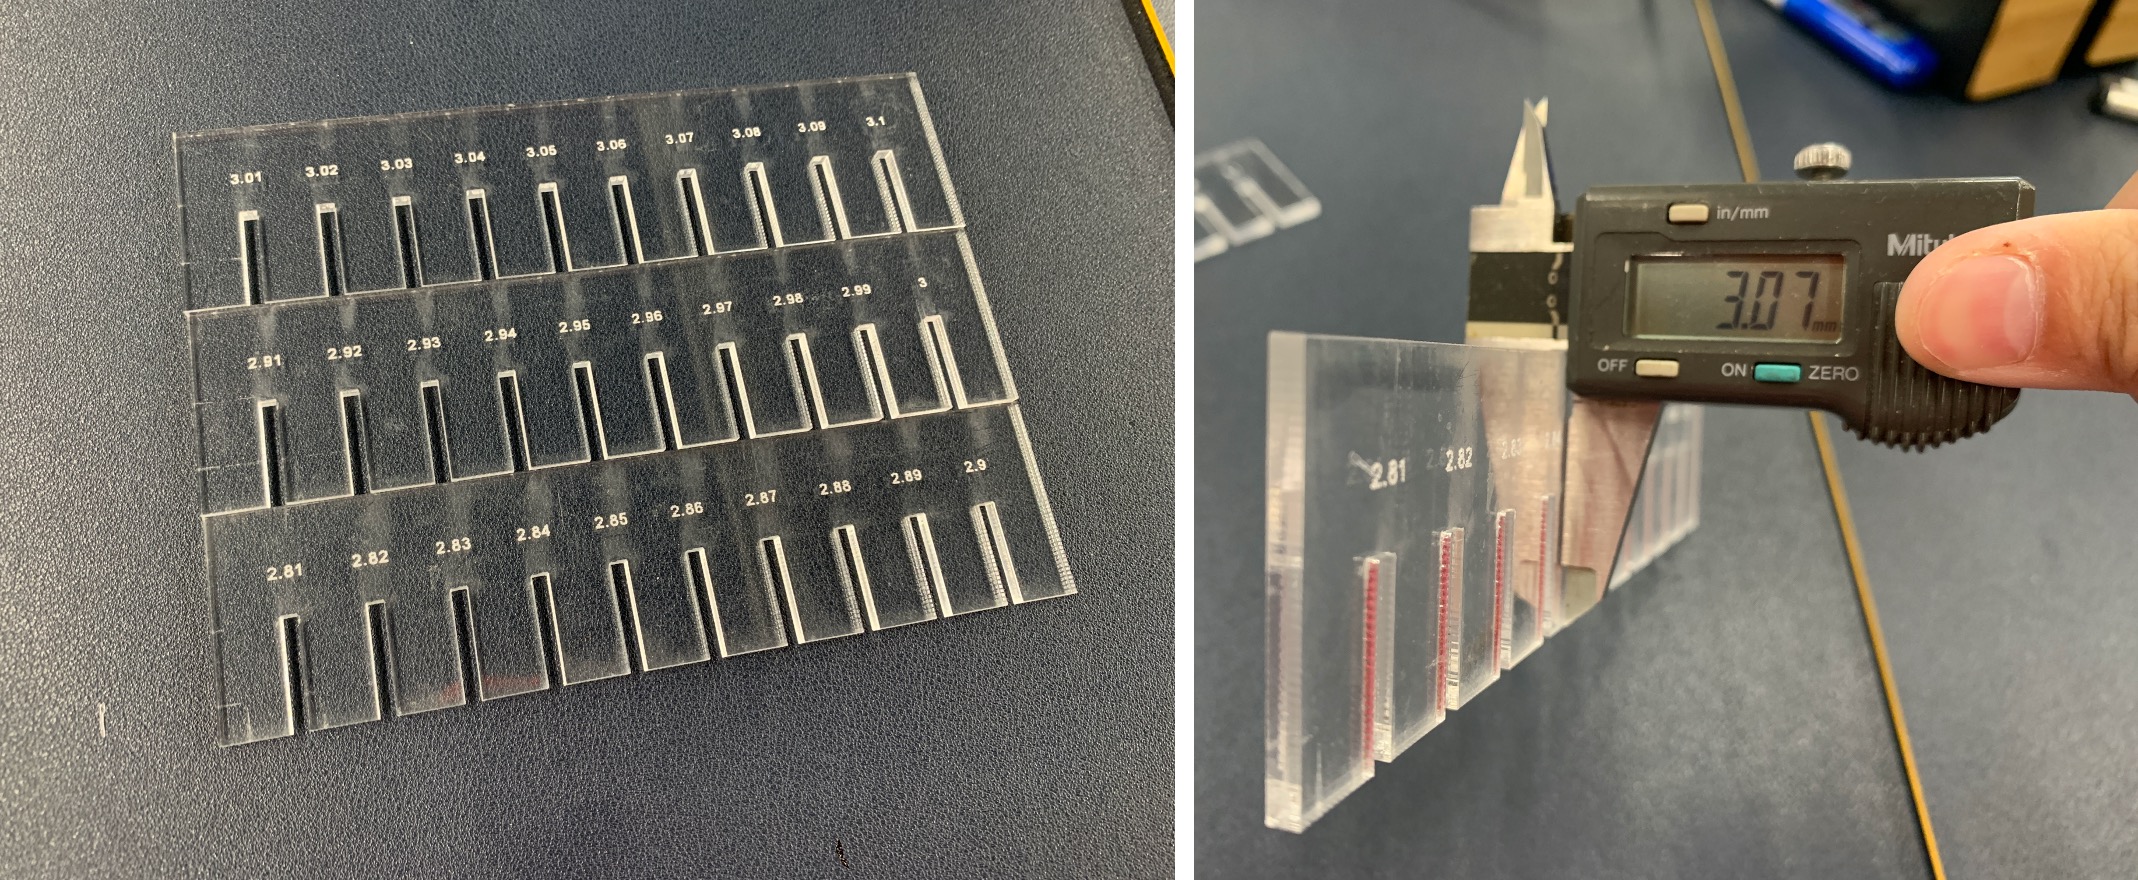
As you can see the video, the kerf from 2.81mm to 2.9mm, it is too tight and can not fit with the 3mm acrylic. For 2.91mm, the kerf start to match with the 3mm acrylic, but it is a little bit tight. For 2.92mm, the kerf is first result for fitting with 3mm acrylic. For 3mm, the kerf is too loose. Therefore, 2.92mm is the perfect fit for 3mm acrylic.
File Download
Materials Testing Card: CorelDRAW_Material_Tesing_Card_CDR
Laser Cutting Kerf:
2.81mm to 2.90mm
2.91mm to 3.00mm
3.00mm to 3.10mm