Computer-aided Design
WEEK 02
(04/02/2021 10:23 a.m.) After our second class with Neil, on Thursday mornings we have a review class with Adrián + Nuria + Pablo. This review is "lighter" than last week. We have to try to experiment with different raster, 2D and 3D softwares and design "something" relative to our possible project.
Adrián told us to try to enjoy and test as much software as possible.
After I finished my work on the architecture competition and Neil's last class, I felt like a person again (not like a zombie 👾). As an architect, I have worked with different CAD softwares, so I feel a bit "relaxed". The little challenge I face is I have to looking for the best software for develop my first idea of creating a wearable as a final project. I need to find the best software that can mix soft surfaces and rigid volumes.
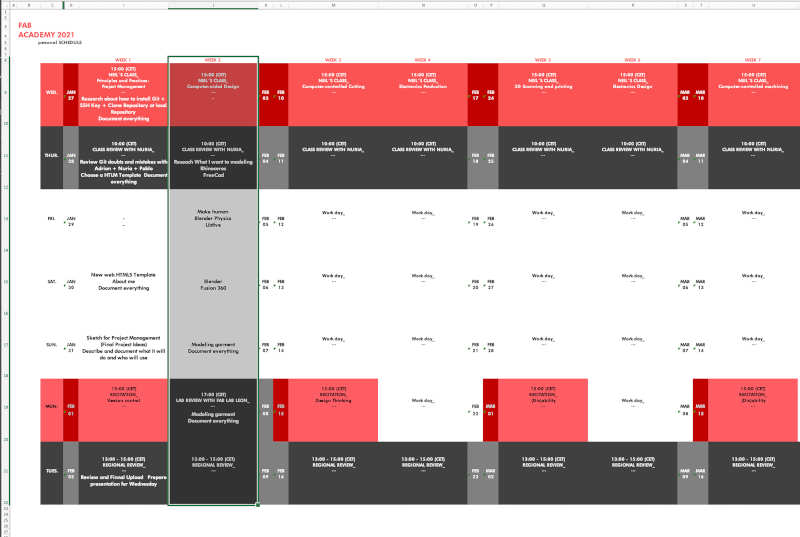
Organizing tasks
This week we have an exercise. So, as I was doing last week, I am going to review here the following Evaluation Criteria that we have to approach to complete the Assignment:
- ✓ Model parts/elements/objects of a possible final project with 2D and 3D softwares.
- ✓ Narrate with images, screenshots, videos, animations, etc. What we have did
- ✓ Upload our original design files
I am excited to start this new challenge. This week the song I have inside my head is Inmigrant Song by Led Zeppelin. "Valhalla, I am coming" . 🙅
To this exercise I want to try different softwares to create a human, animate it and apply some parts of my possible wearable project, designed in 2D and 3D.
2D Design
GIMP
From the beginning of this course, our instructors advised us to use GIMP to compress the images that we were going to upload on this website. Following the Fab Academy tutorial, How to realize Images GIMP, it was quite easy to compress all the images used.
For this exercise I have used a 2D pattern from the Aguahoja project by Mediated Matter Group. With GIMP, I have delimited the area that interested me in the image, and scaled to work with it in the next 2D softwares and export it as a .jpg or .png.

INKSCAPE vs ILLUSTRATOR
- INKSCAPE
Inkscape is an easy vectorial drawing software. Its a very simple tools to draw, modify and raster photograhs and handmade drawings to vectorial files. Into this section, I am going to compare this new tool with other vectorial software I usually use, to raster the pattern I have modified in GIMP and convert to vectorial lines. With command: MAYUS+ ALT+ B, we access to path fuction "Trace Bitmaps".
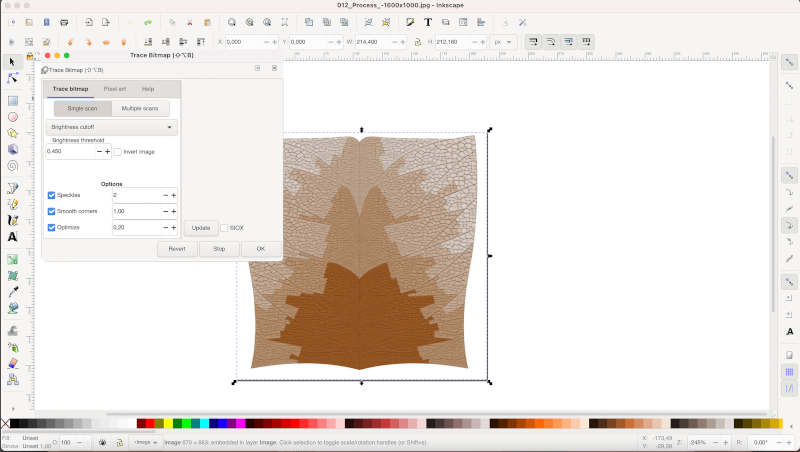
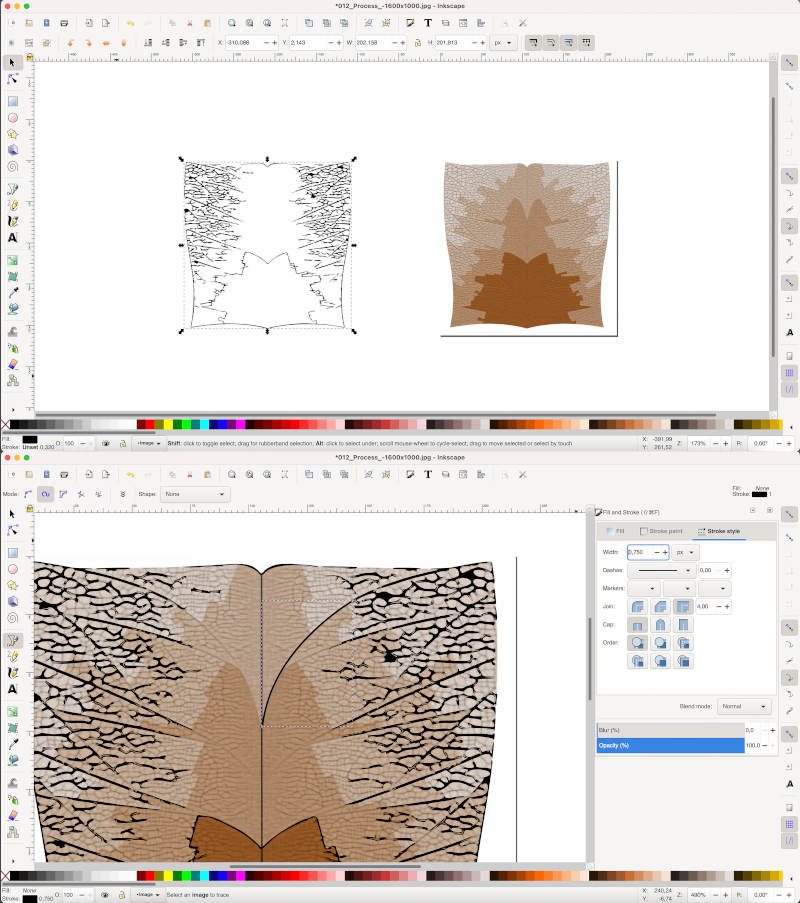
Here we can map the image using brightness, color or border. By moving the threshold intensity we see how many vector lines it recognizes from the drawing until we get the desired definition. After defining the maximum vector threshold, we draw with the pen the channels that the program could not draw. This is the final result Organic Leaf Inkscape.
- ILLUSTRATOR
Illustrator is a popular vector drawing software. As a designer and architect, I use it mostly to design architecture projects slides and modify vector colors. I like it because is a program whose color palette and composition does not change when the drawings are exported in RGB (web images) or CMYK (images for printing).
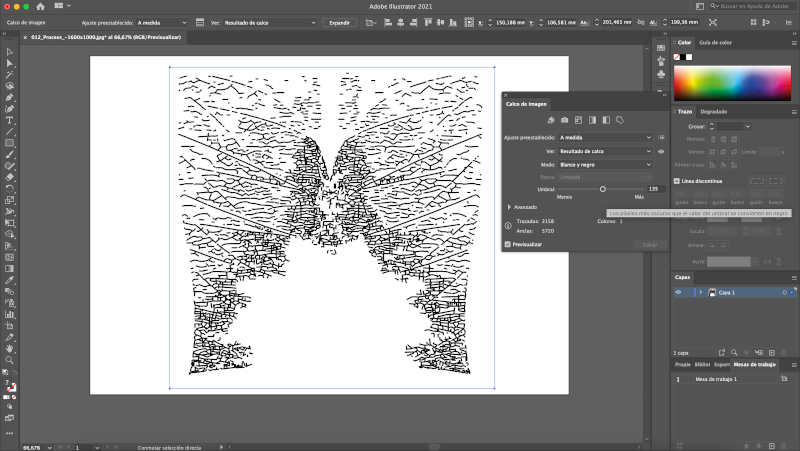
This tool, as Inkscape, also offers an option to rasterize images and convert them into editable vector drawings. With the same pattern, we follow the path OBJECT > IMAGE TRACING > CREATE. In the properties window, we have a wide range of tracing options that we can modify by adding more or less threshold to the image. Here, you can see the final result Organic Leaf Illustrator.
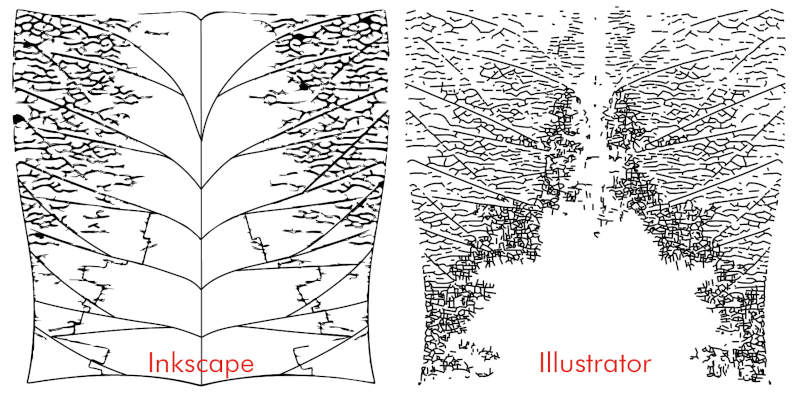
Comparing the two results from Inkscapes and Illustrator, we see one tool offers more precision in the sharpest vector lines, and other is very precise finding every possible vector lines in the image. I think inkscapes is an intuitive and simple tool, with time and dedication, it could be exploited more and offer vector drawings with a lot of potential.
VECTORIZER
Vectorizer is an online tool that allows you to convert images into exportable vector drawings. (05/02/2021 17:01 p.m.) Using the same pattern, I wanted to compare in this section three digital vectorization tools (Inkscape, Illustrator and Vectorizer). But! As I navigated and modified my pattern online, I didn't realize that for every movement and time elapsed I was penalized to be able to export the image later! When I decided to my drawing was correct, the platform dont give me permisses to export it because my usage time was over !! And I had to wait an hour to be able to continue using it. 😱😱😱
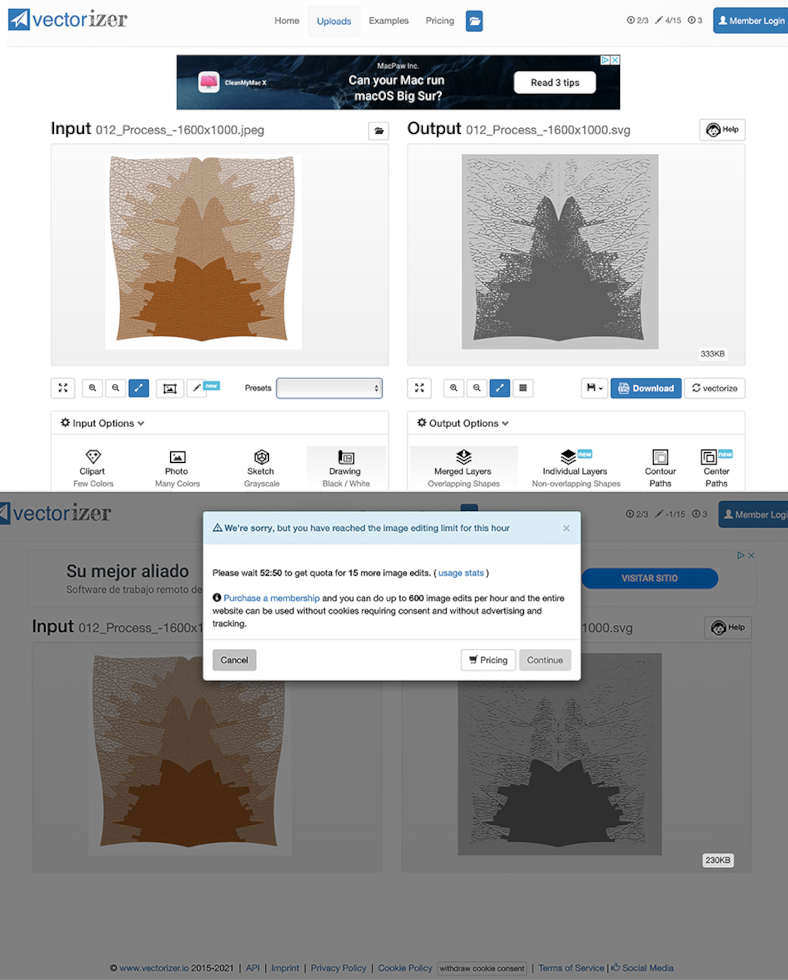
At the end, I gave up to continue using the software, and focused on local softwares.
3D Design
As I anticipated, my goal as a possible final project would be to make an autonomous wearable. Therefore, I need to work and learn about 3D tools that allow me to create, modify and animate human figures.
MAKE HUMAN
Make Human is a software that allows you to model, configure postures and render human figures of various characteristics, ages and gender.
In my case, I have modeled a figure based on my own body measurements with a normal base posture. To draw on my 3D human figure, just export our human model in .obj or .dae format.
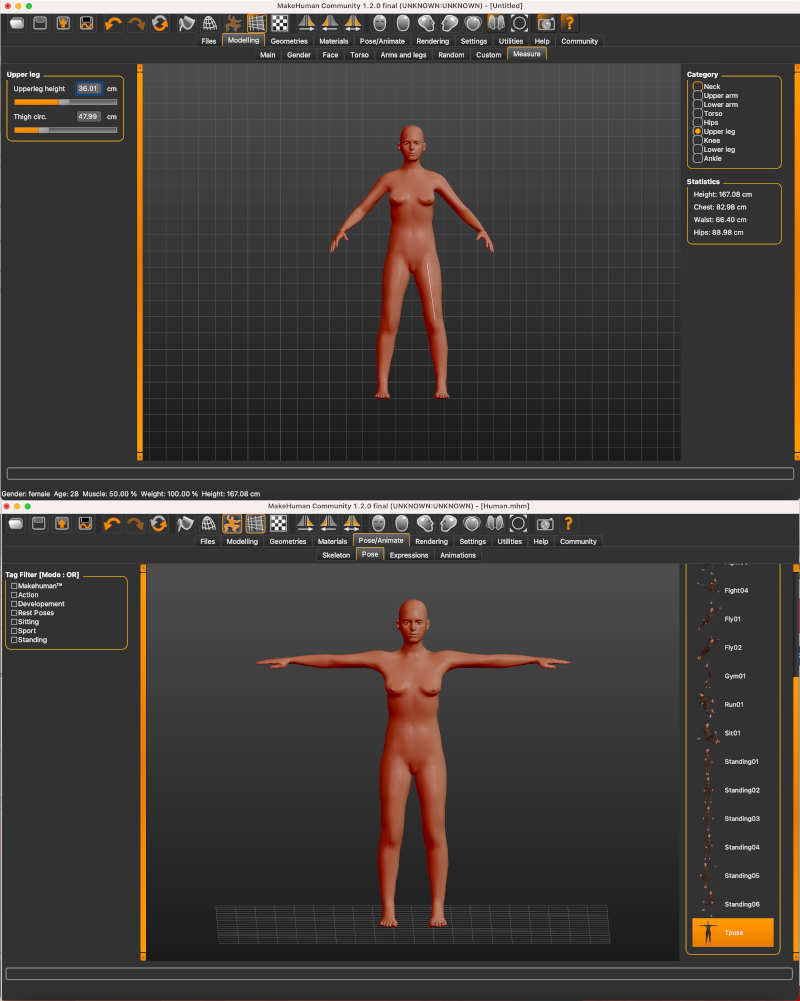
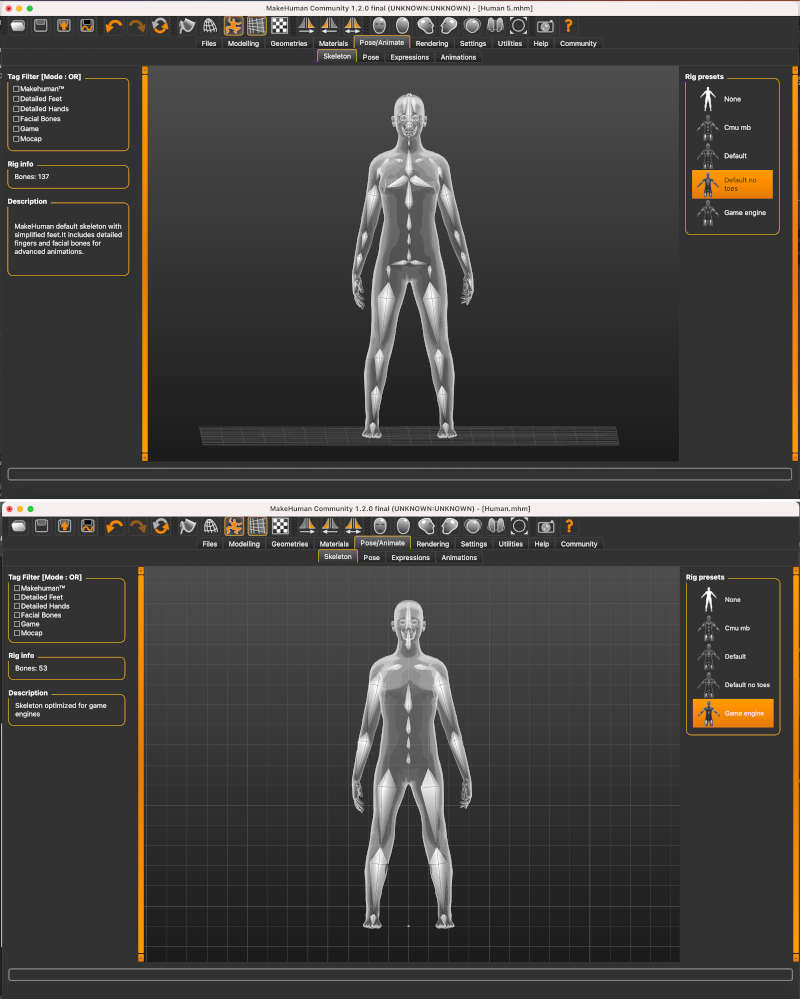
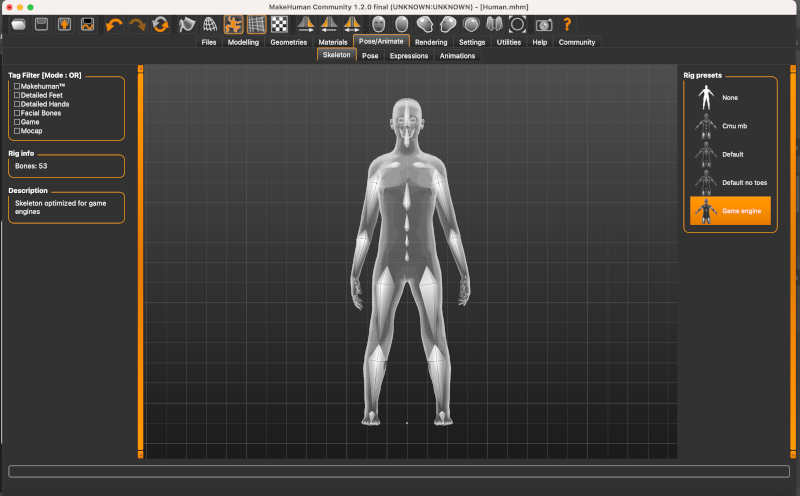
However, to animate my human figure, I need to set the type of skeleton I want to work with. There are several kind of skeletons we can use, but in my case I am going to choose two possible types (in Animation I will tell you why): the Default model (it is a more complete and complex skeleton) and the Game Engine model (more simple skeleton). Both skeletons (with my base figure) should be saved as separate files for later animations.
Here you can download Human + Default Skeleton and Human + Game Engine Skeleton.
RHINOCEROS
Rhinoceros is a complete 2D and 3D modeling software, similar to Autocad about command line and design organization windows. Using Grasshopper pluging allows you to model very diverse parametric figures and configure the necessary parameters to print 3D figures later.
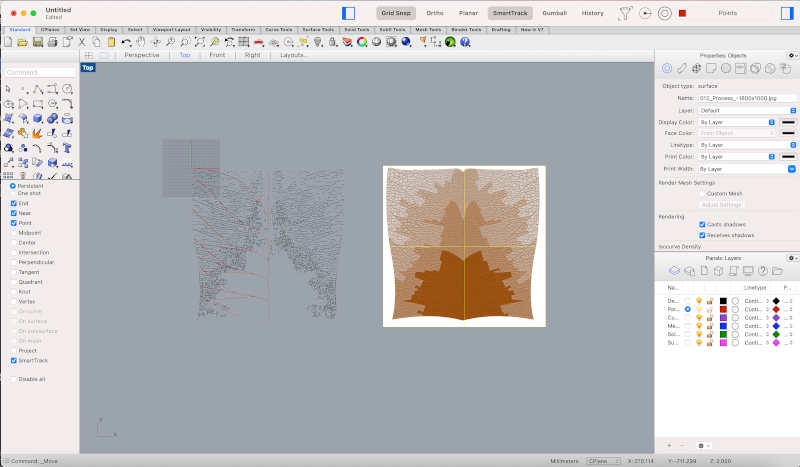
To test 3D programs, I want to transform the vector drawing obtained in Inkscape or Illustrator into a 3D model applied to the Make Human figure that I have created.
To begin with, I have decided to design some bracer that I have achieved by creating sections on the human surface and making a "loft" to create a base surface of my possible model.
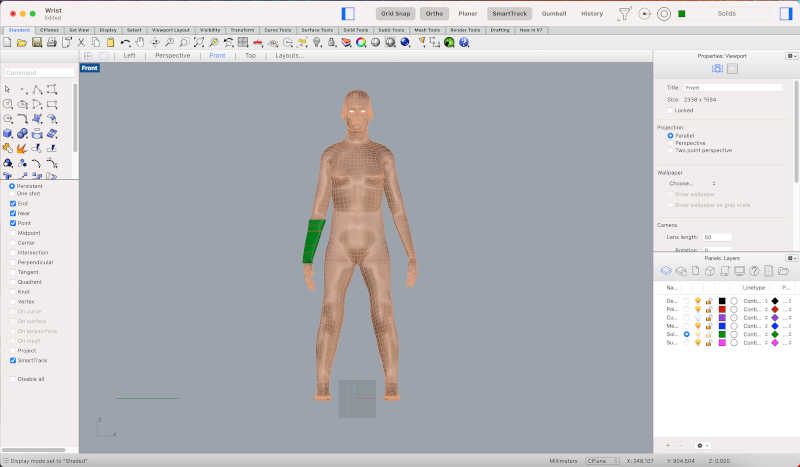
Following this tutorial, I have learned how to unwrap organic and double-curved three-dimensional surfaces in order to apply shapes or polylines on extruded shapes. with the "Unroll" command we can unwrap poligonal figures, and with the "Smash" command we will unwrap our double curvature figures.
.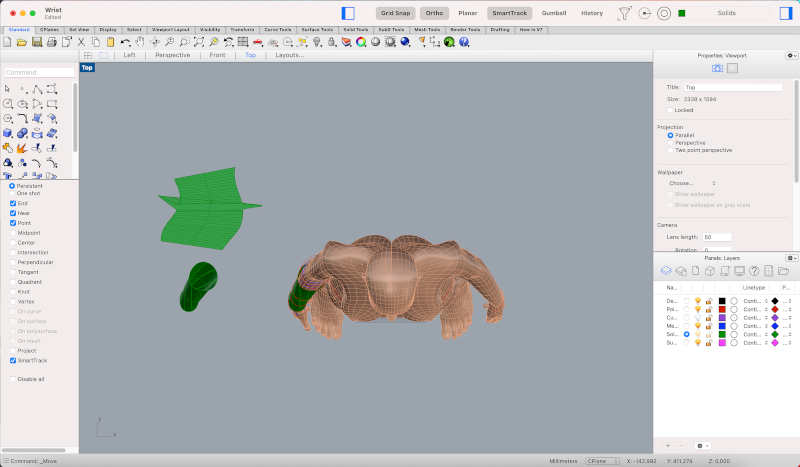
After redrawing the unwrapped surface, I put the 2D pattern (made in the previous processes) on the surface. With the command "FlowAlongSurf" I translate the 2D pattern from the top of the flat surface to the 3D surface.
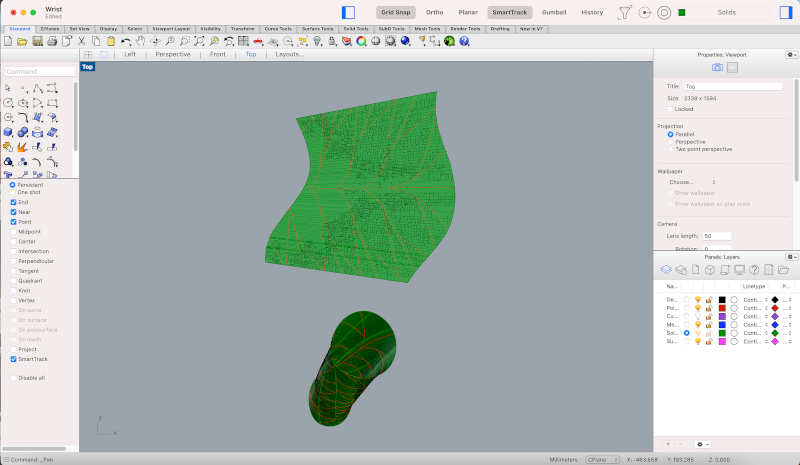
With the drawing lines adapted to the three-dimensional surface, we give them section and obtain this result. 😍
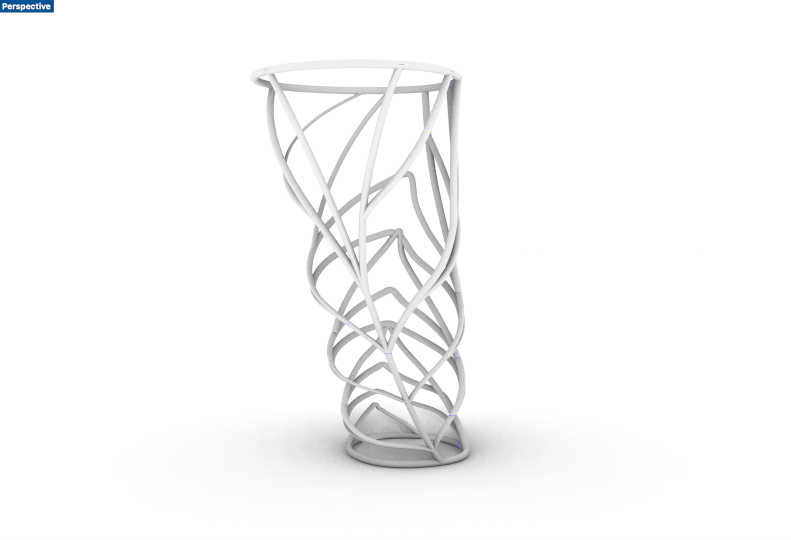
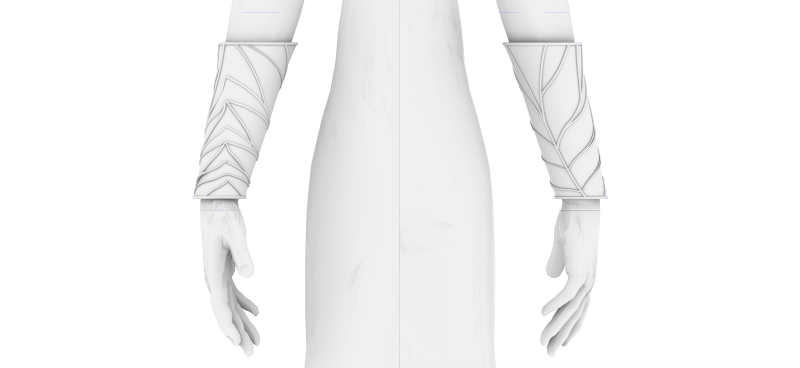
Here you can download the process files of the bracer model and the final human model with the bracers. Also, you can navegate on this model simulation uploaded at Sketchlab.
FUSION 360
Fusion 360 is a different 3D modeling tool than ones I have used before. Its use method is more intuitive to creating and modifying volumes freely.
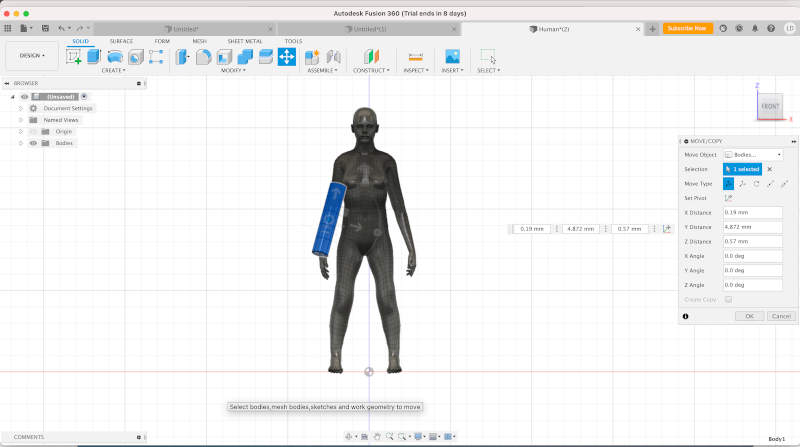
My goal with Fusion is to try and create organic shapes around the body. For that I started to watch tutorials to see how I could modeling that. In this tutorial, I began to understand how to create editable surfaces and how to "sculpt" through the "Edit Form".
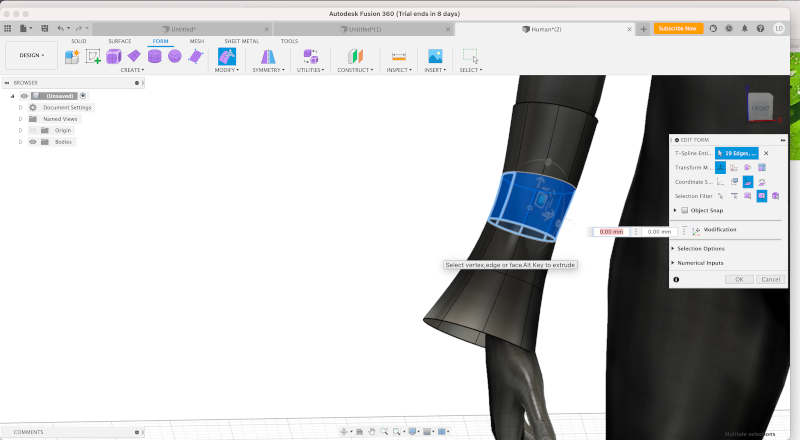
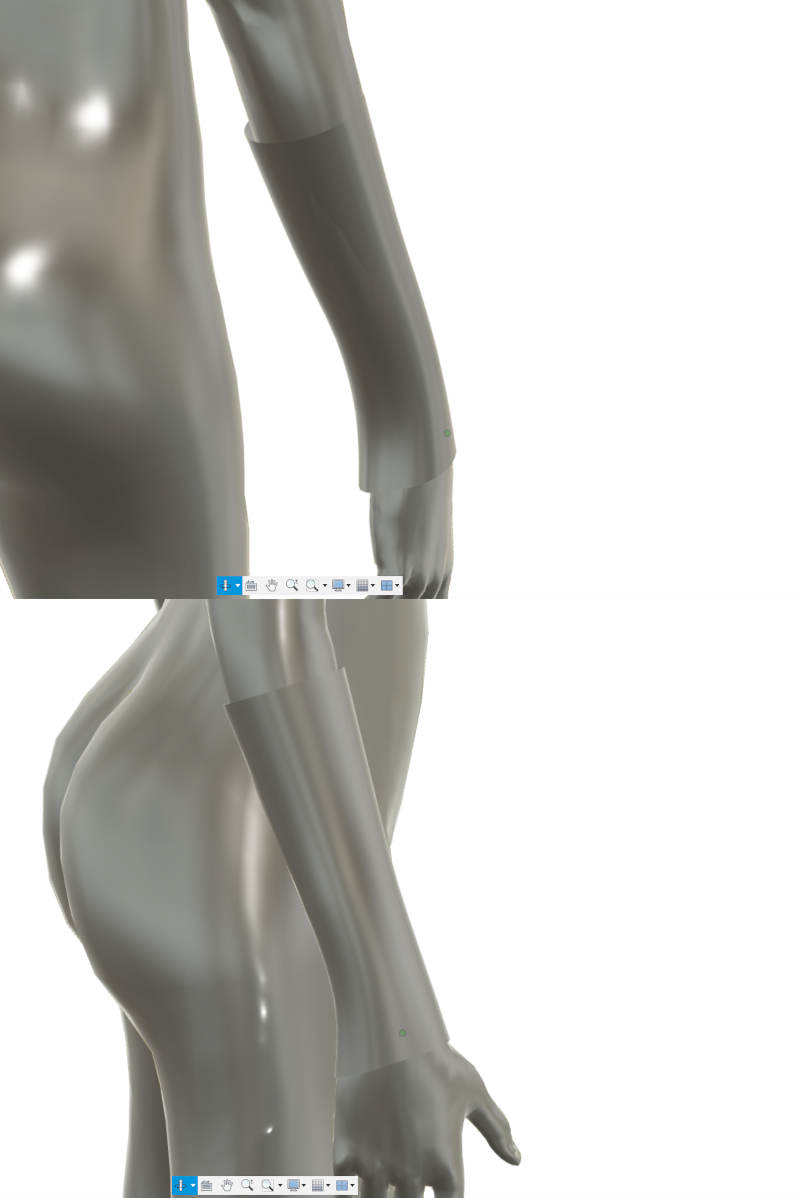
When I adapted the mesh to my model, I see the surface molds itself very naturally to the arm. Until you get this result!😍. I still have to domane the program and some of its commands better. But although it takes a little more time to create and sculpt the desired design, I think it has a lot of potential and I will try to use it to create the initial base of my hypothetical garment.💪💪
FREECAD
Animation
BLENDER
For my final project, one of the things I would have to get is a way to record the data of the body movements (that I want to work ) to program the final inputs and outputs of the garmet.
(07/02/2021 22:48 p.m.) This was my first time working with Blender, so it took me a time to get used to the way for navigate through the drawing and modifying tabs 😅. There are many ways to navigation and animation human models. Around the years, I saw in the tutorials have improved or degraded certain very useful options for animating.
After I watched every kind of videos, I decided on two ways to animate at Blender and record data with my human model:
- CREATING MY OWN HUMAN ANIMATION
From this tutorial I have managed to create a more "manual" but personal animation of the movements that I wanted to perform with my human model. To do this, first I had to create a Default Skeleton on my Make Human model, and export it as a Collada file (.dae).
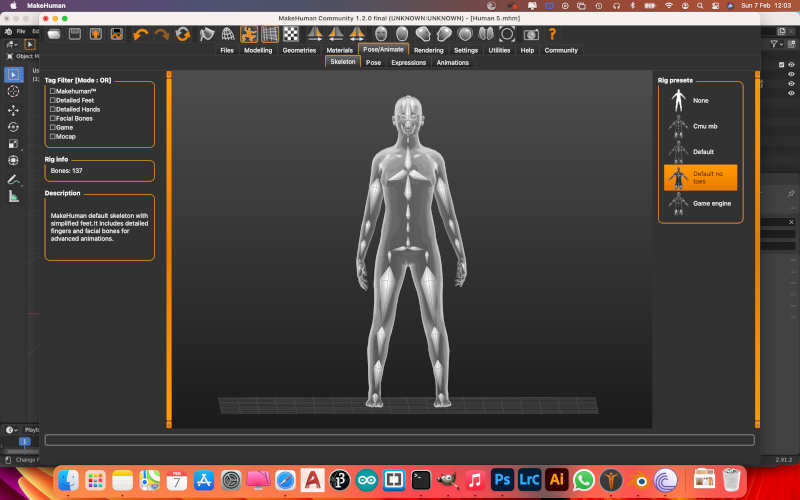
Once the file has been imported into Blender, to modify the poses of our model, we have to position it on "Pose Mode". With the 3D rotation tool, `we can select the joints of the human model and rotate them to our liking.
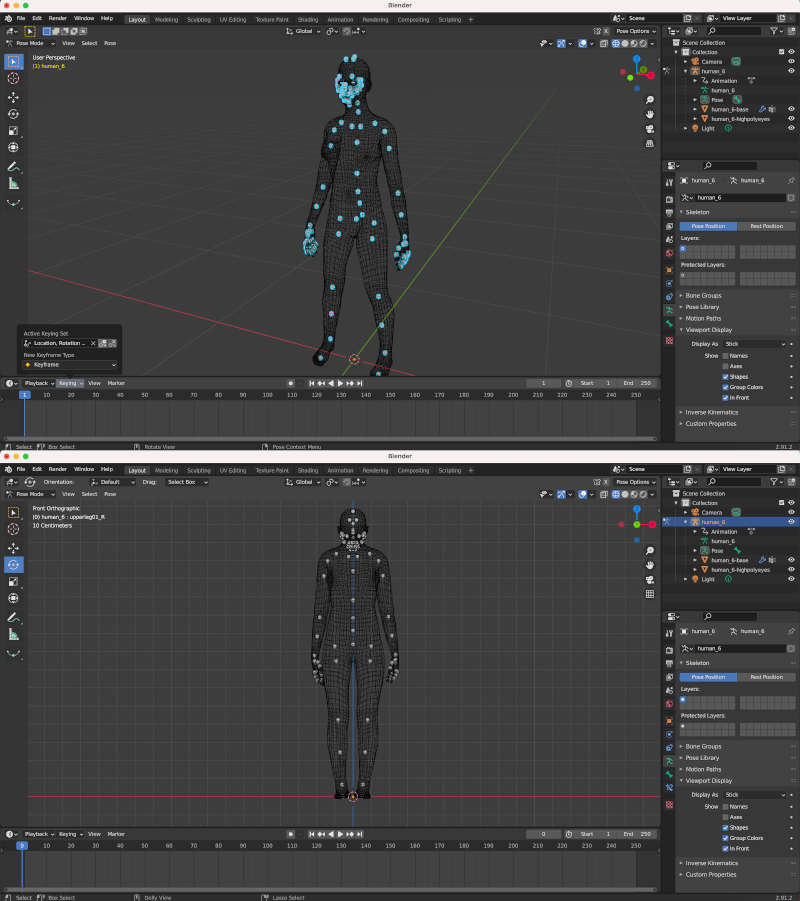
To make an animation, it is important to save the position of each one of the sequences. We just have to select the skeleton by pressing "A" and Activate a Key Set of Location, Rotation and Scale to fix the position on the timeline.
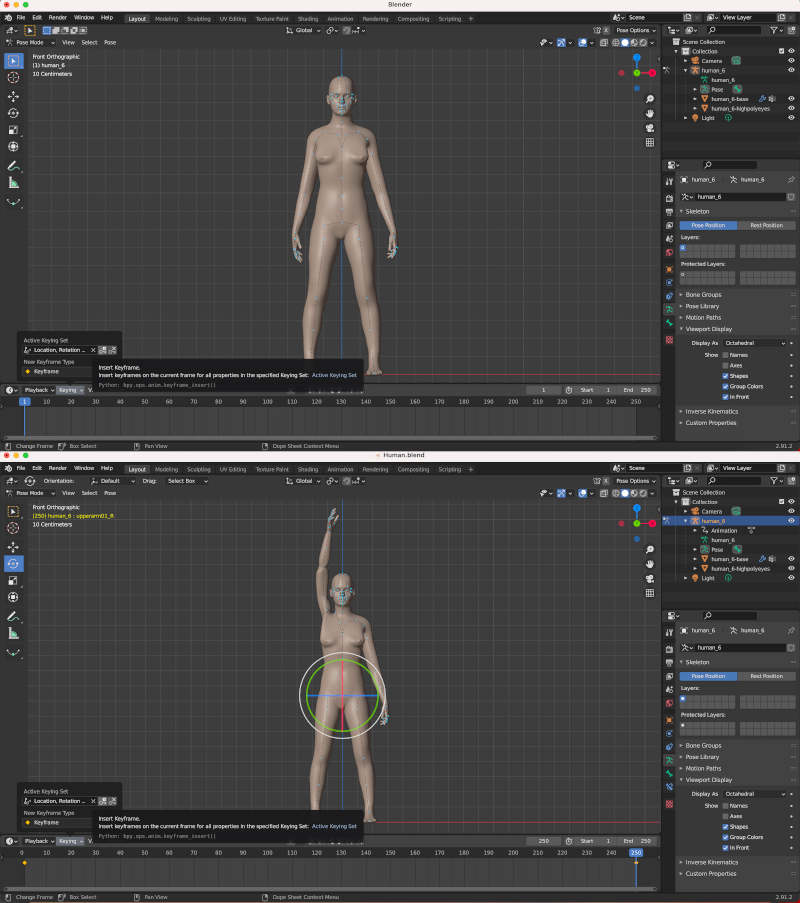
Here you can see the first simulation I made an arm movement. 😍
- CREATING MIXAMO ANIMATION
Following this other tutorial, I can obtain more professional but a bit standardized motion simulations. To do this, first I have to export our Make human model again but with a Game Engine Skeleton, and export it as a .FBX file.
I import it into Blender as a .FBX file and you see that, the difference from the first skeleton, this one is simpler for "slightly rigid" movements but optimal. From here, we could animate our model as the first animation option, but I am going to to use a different online application is called Mixamo. We close and keep the file in the .FBX format.
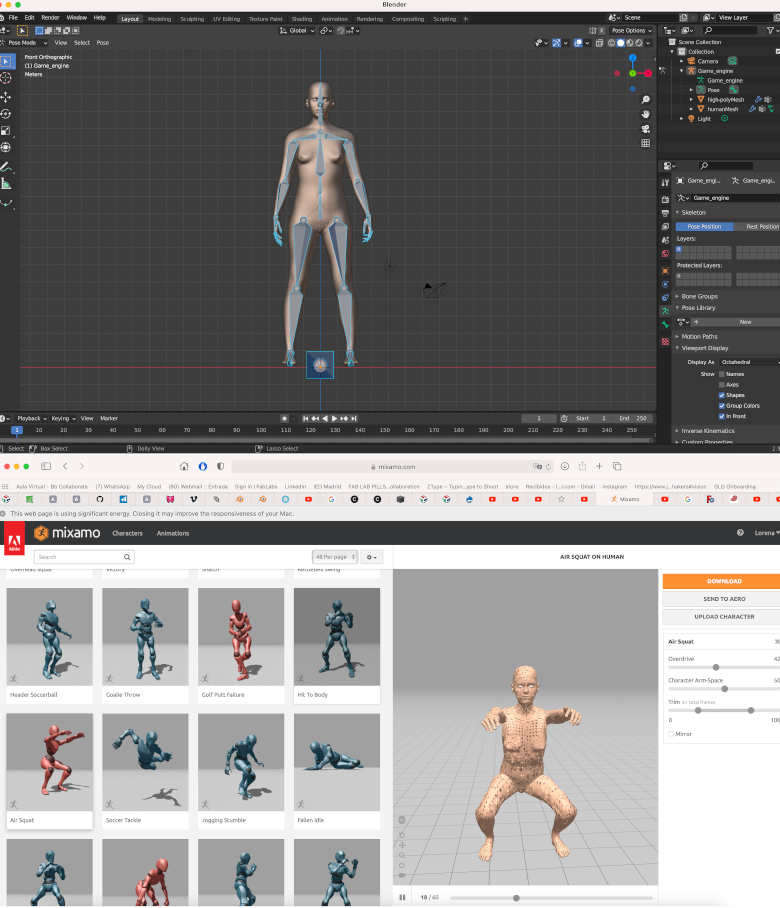
Mixamo is an official Adobe page where you can upload and download moving models upload and download moving models for your humanoid models. When you upload a human model (with its skeleton incorporated), the program, automatically, recognizes the body joints and allows you to: rendering postures or download one of the prestablished online movements. Here, you can see on this video how is the type of navigation and download from the movement.
Once the desired movement has been selected and downloaded, we open Blender again and import the Mixamo .FBX file. We will automatically see that when we click "Play", the movement sequence will be activated by performing this selected movement. 😍
This online application can help me to quickly capture the data of some meditation movements that are usually performed.Unfortunately, I didn't find many moves that would serve my final project purpose, but they can probably useful to me for the future.😊
