Molding and Casting
week 11 Group assignment is to review the safety data sheets for each of Our molding and casting materials, then make and compare test casts with each of them
Molding
In our daily life we uses many awesome products created by our own Kind using many engineering processes which is advanced through centuries.So Molding is one of them Early we made molds for making products out of Clays and sand to make homes and other necessary things.
To day our molding technology is quite impressive and advanced to get to produce whatever things we needs to make especially in the Plastic injunction molding industry.
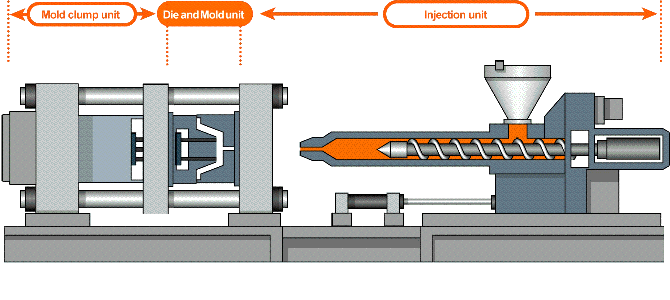
Here is an gif image which gave us an idea of plastic injunction molding. Usually the plastic comes in solid pellets adn then they loads in to the machine , the compression and heating mechanism of the mold heats up the plastic and push through a hole to the Metal mold which has carved the shape we need using CNC milling. The injunction happens in high pressure and also allows to cool according to the behavior of the plastic.
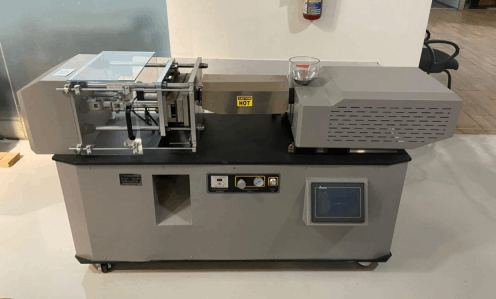
This is the Mini automatic injunction molding machine we had in our lab. right now it's not functional due to some maintenance error.
Silicon Molding
Unlike the injunction molding or any other methods silicon molding is one of the cheapest method which we can take care of with less machineries and some skills with some safety precocious.It's mostly like a chemical experiment doing it in a chemical Lab.
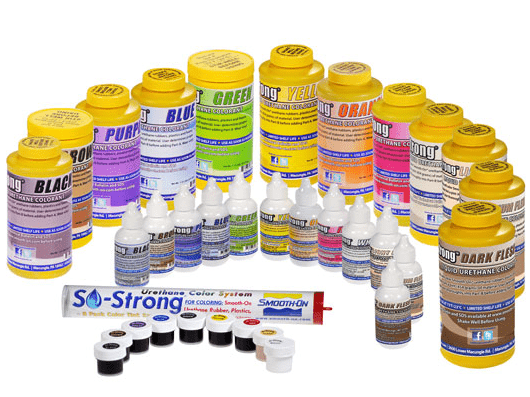
Molding Material
In order to make new parts and components material choosing is one of the important thing that we don't want to miss out in the process. So for proceeding with the molding options of this week in our lab we started to explore the materials and it's safety, and other parameters with the help of out instructor.
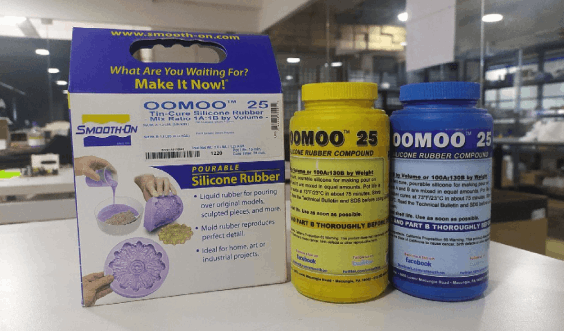
Smooth - on's OOMOO™ 25
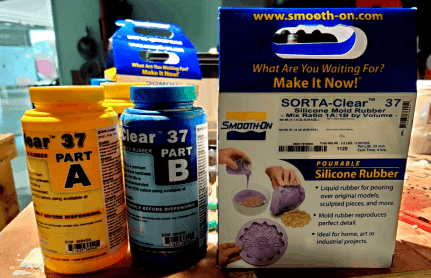
Smooth - on's SORTA-CLEAR™ 37
Like OOMOO™ 25 This is also a 2 part silicon molding kit from Smooth - on which
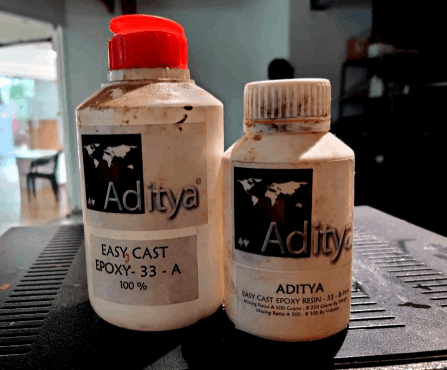
Aditya Ultra Clear Cast Epoxy – 37
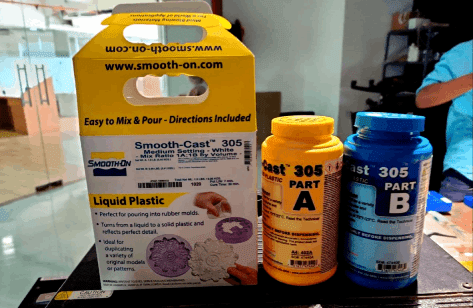
Smooth-on's Smooth-Cast™ 305
Smooth-on's SO-Strong™
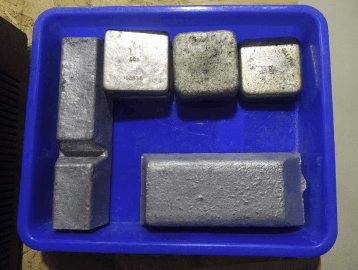
Machinable Wax
Test Casting and learning Process
Metal Casting

Milling tools
week 11 assignment is to design a mold around the stock and tooling that I'll be using, mill it (rough cut + (at least) three-axis finish cut), and use it to cast parts
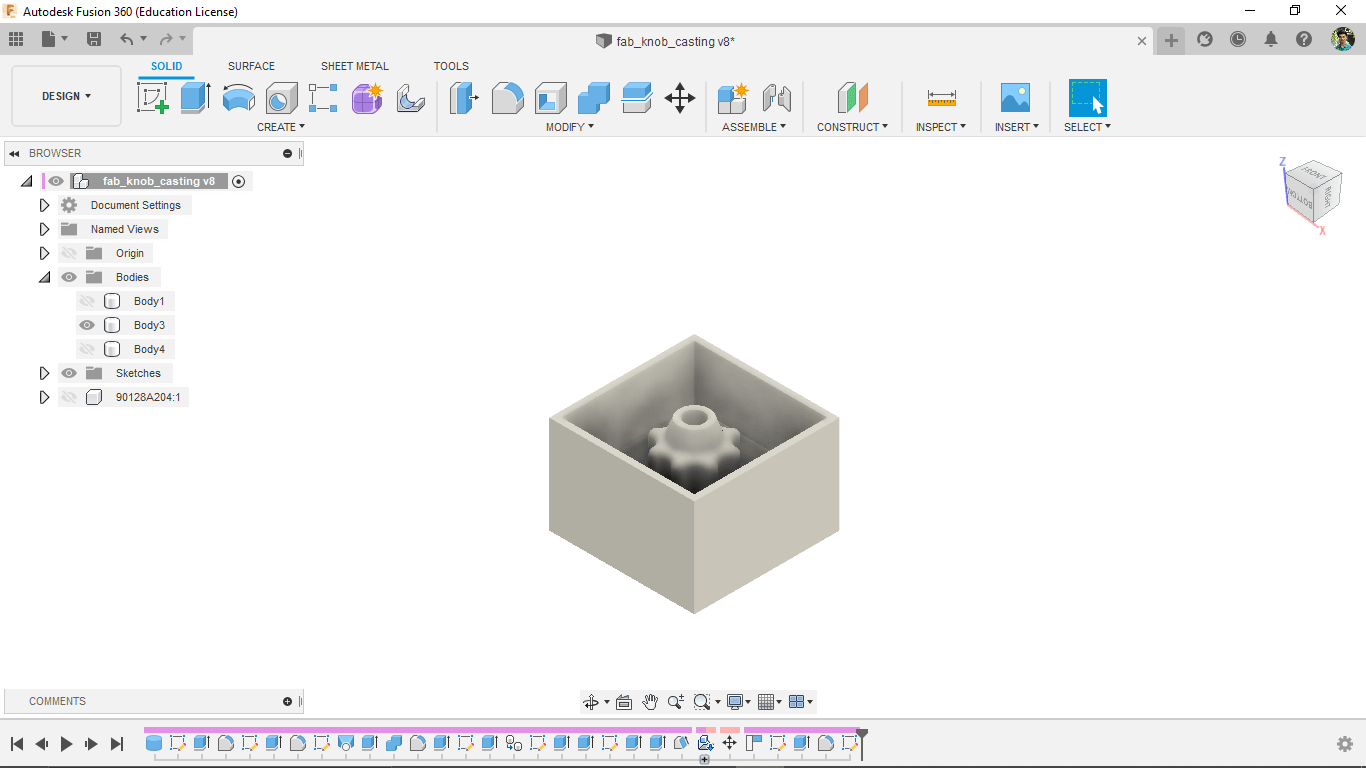
The Model
I wanted to cast a simple knob for our cnc's end effector which we made during the machine week,for holding the pen mechanism. Earlier we use a 20 mm screw instead. so I created a model of a simple knob in fusion 360 which is not larger than the cutting tool length that it can provide after placing on the holder
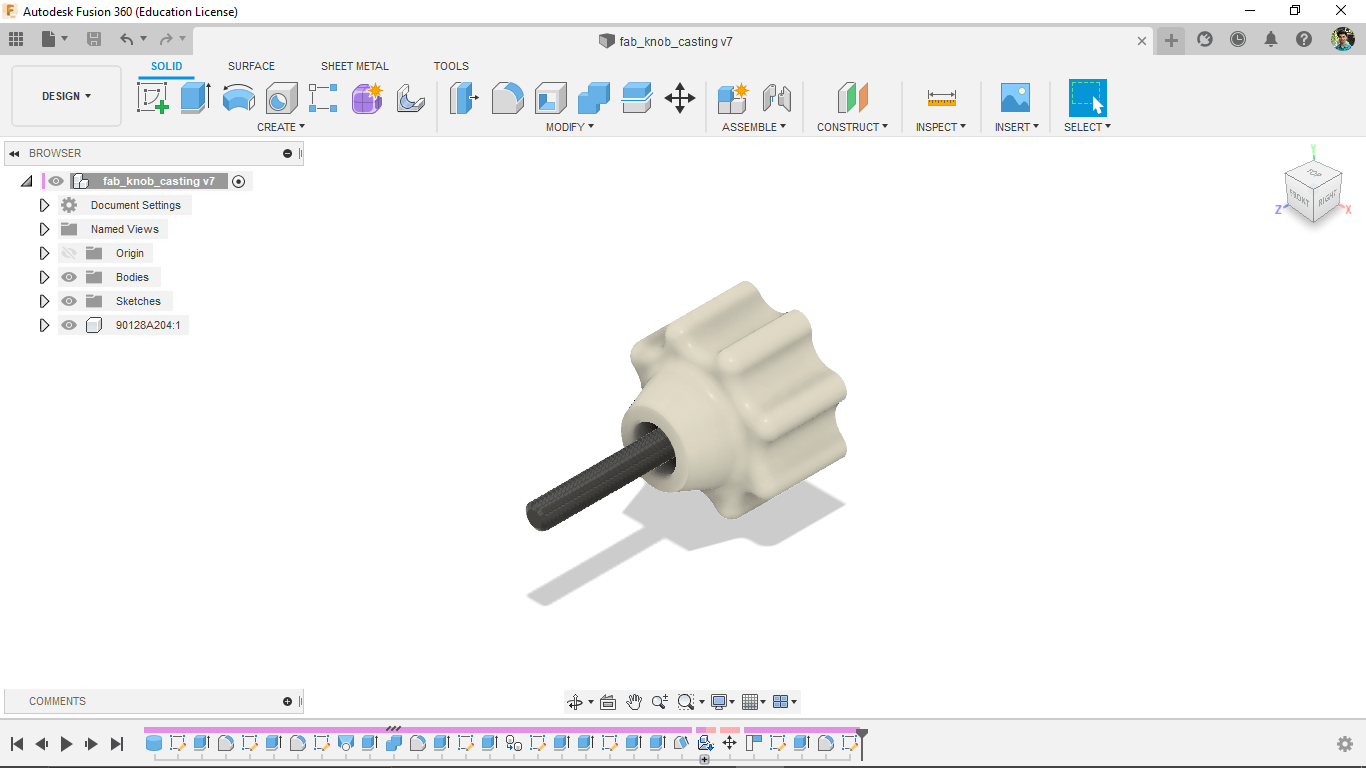
I designed a model of a simple knob in fusion 360
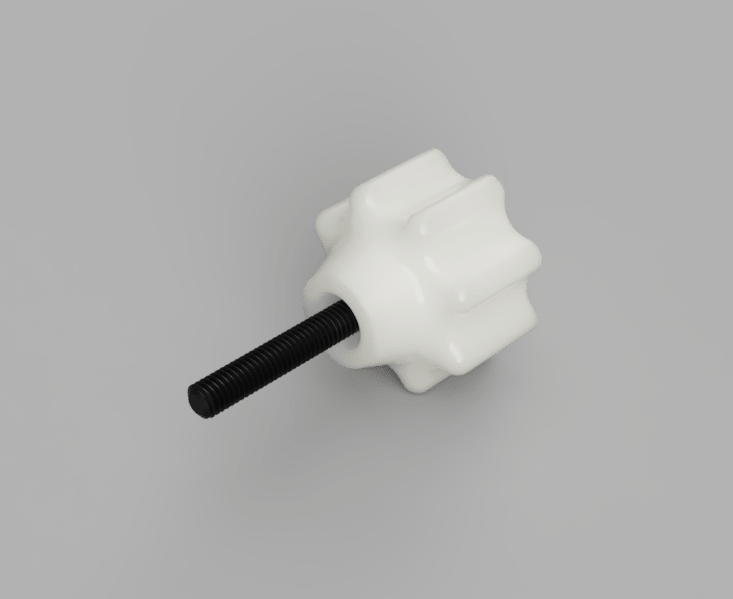
I'm also using a M3x20 mm hexagonal screw for the knob and planning attache during casting so the screw can be embed inside the knob . This will be the final results look like
Modeling the Positive mold
To make the silicon mold required a positive mold of the model,which will be mills on a wax block later. for making the mold i have to consider some measurements.I will mill the mold using a 3 axis milling machine so the model and the mold are must be compatible for machining on the 3 axis cnc.
with some effort and calculations I designed the Positive Mold for machining the wax
Preparing the Tool path
For machining the wax I can either use the Modella MDX-20 cnc milling machine or the ShoBot CNC machine. I chose ShopBot to mill my positive mold. The Modella was busy doing of other teammate's works
So,Fusion 360 supports CAM environment to generate G-code tool paths for CNC machines. Switching the environment is easy in the all in one software for manufacturing
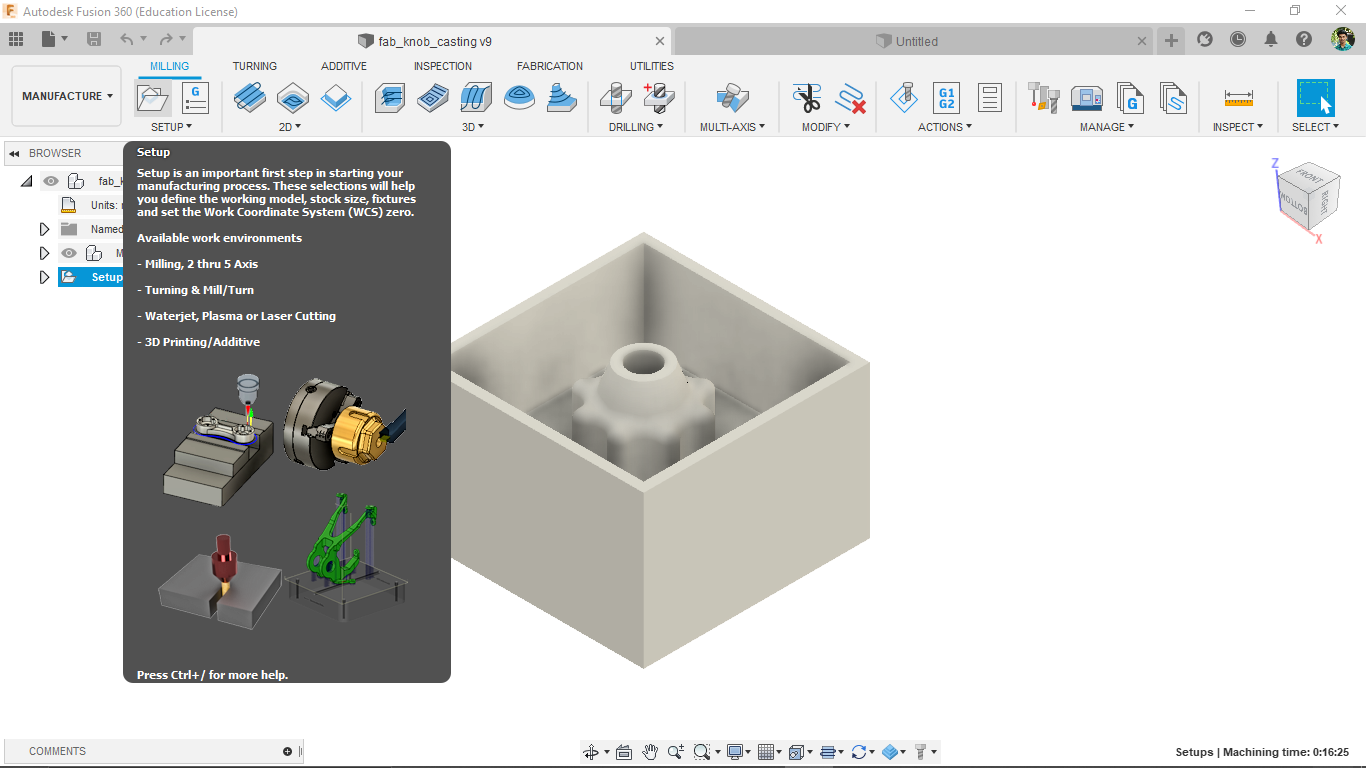
Then I clicked the setup tool for setting up the stock and model details
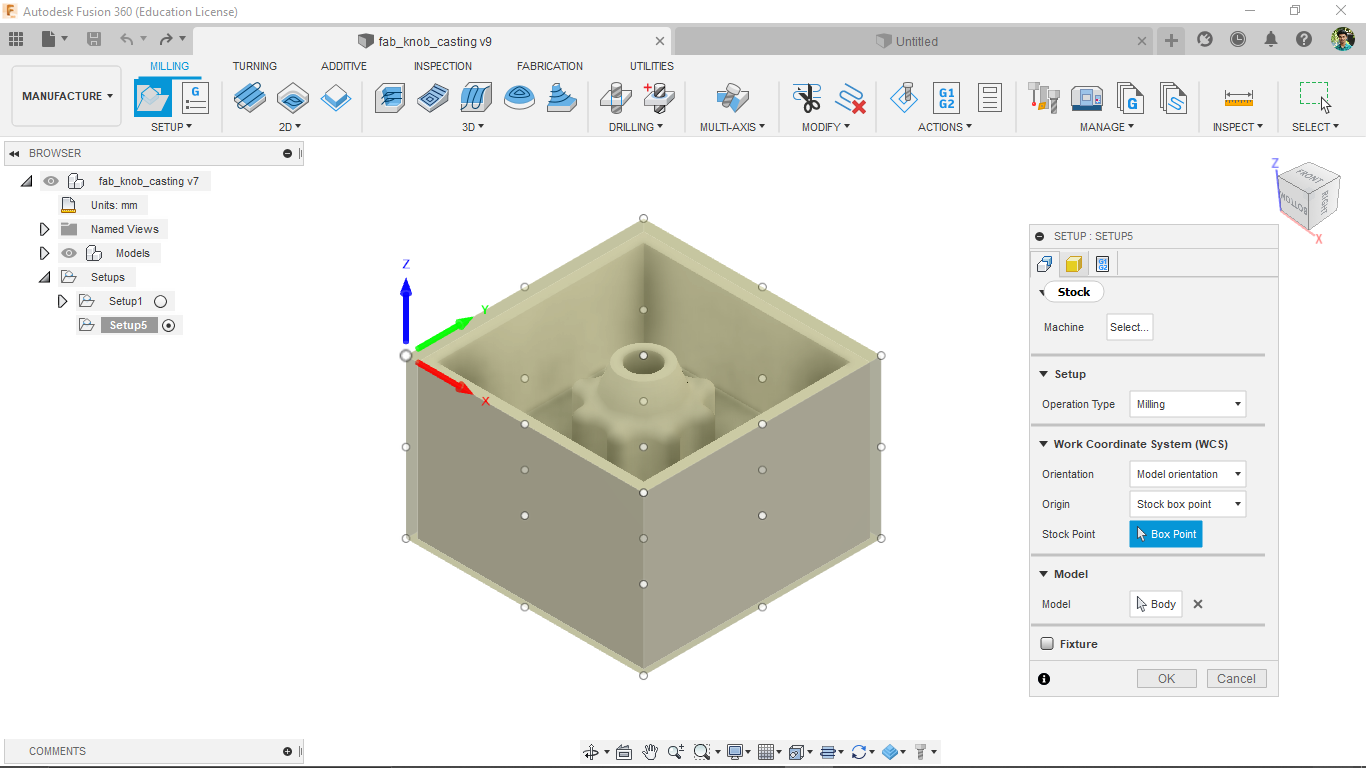
Here I selected the stock and origin point at its top corner and operation type set to milling
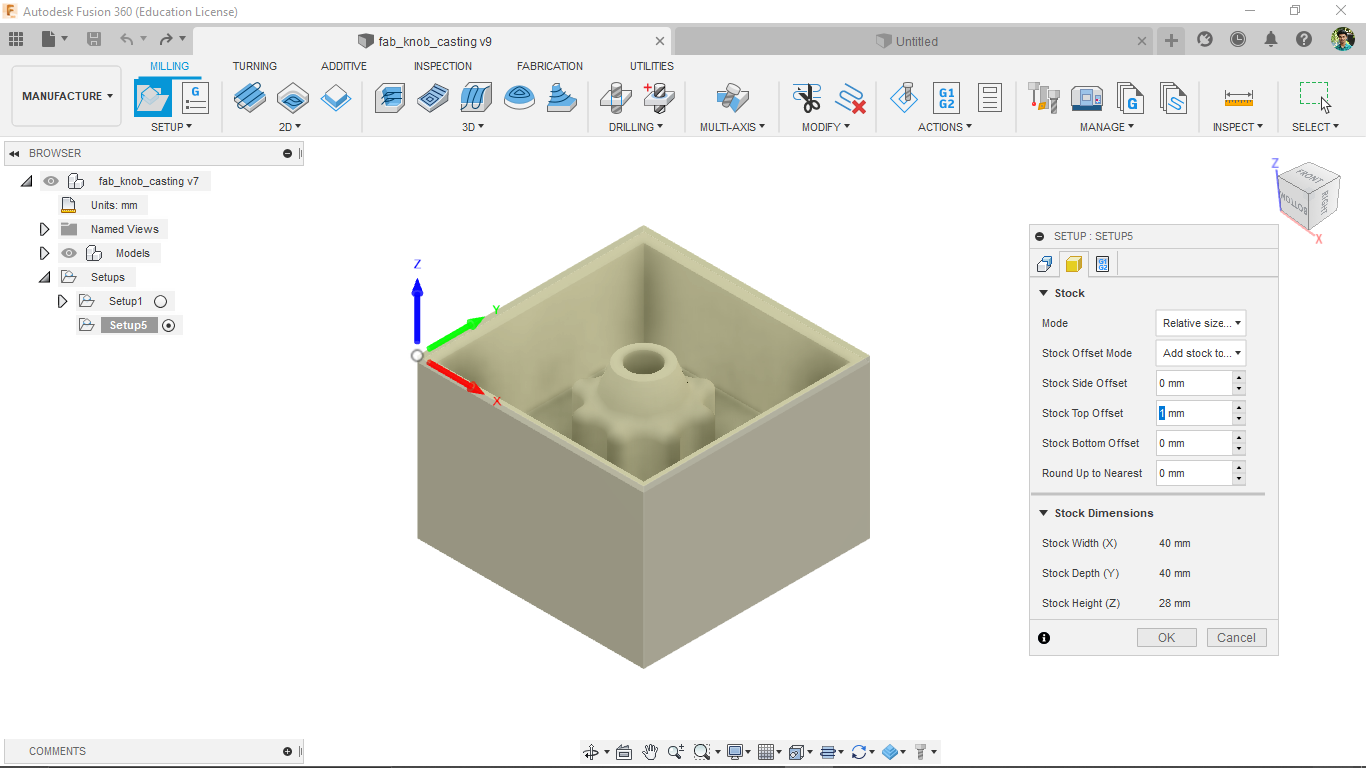
Then cleared all the offset values.I don't want any offset stock material so I can place the origin with less accurate
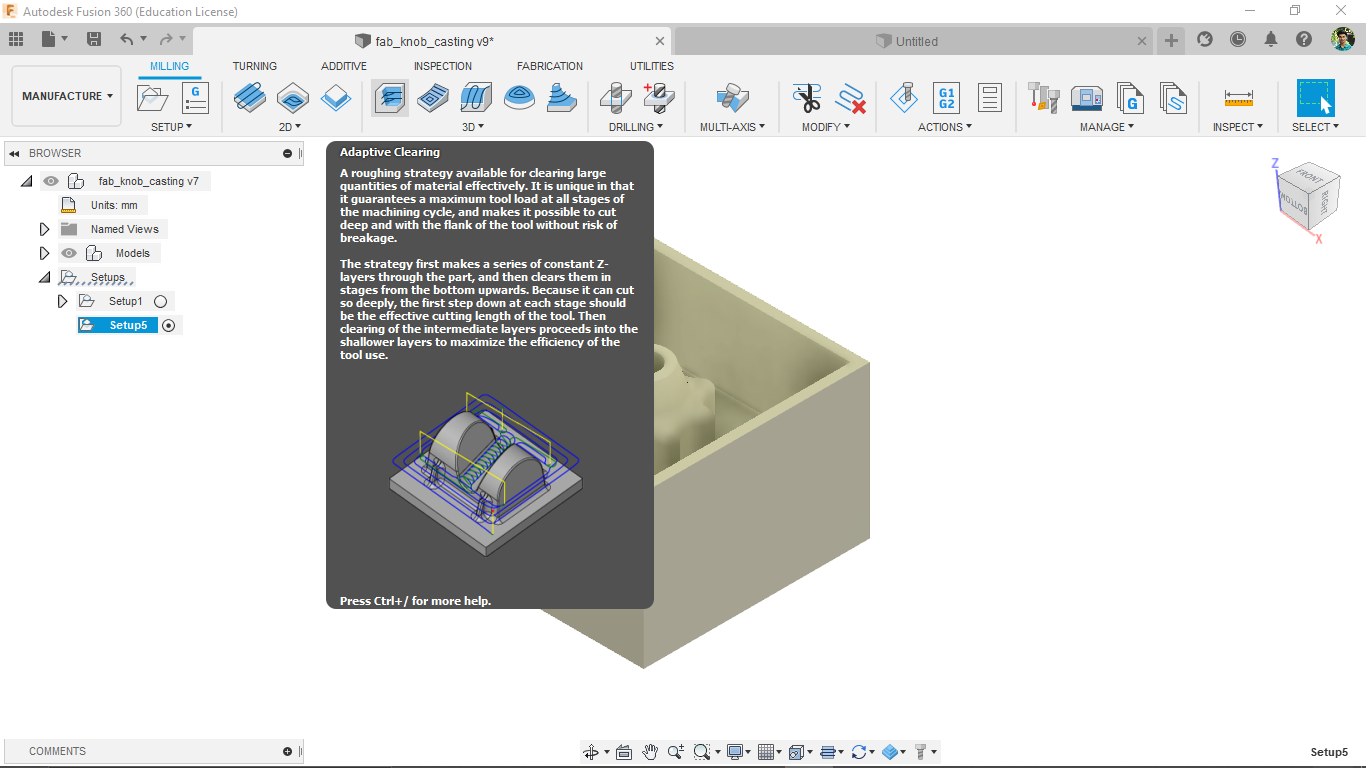
Then I opened the 3D adaptive clearing tool from the tool tab for clearing the unwanted material as possible
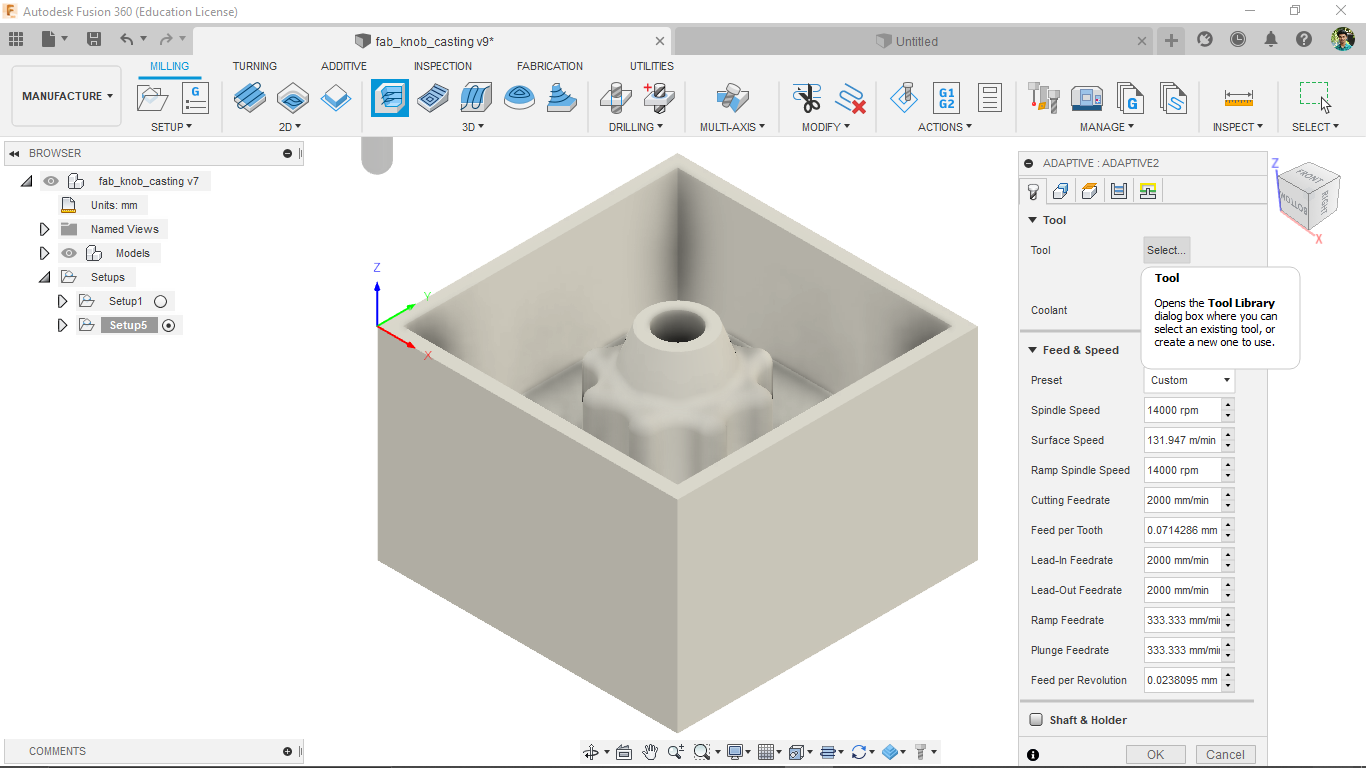
It required the tool information for milling so, by selecting the tool opens up the tool library
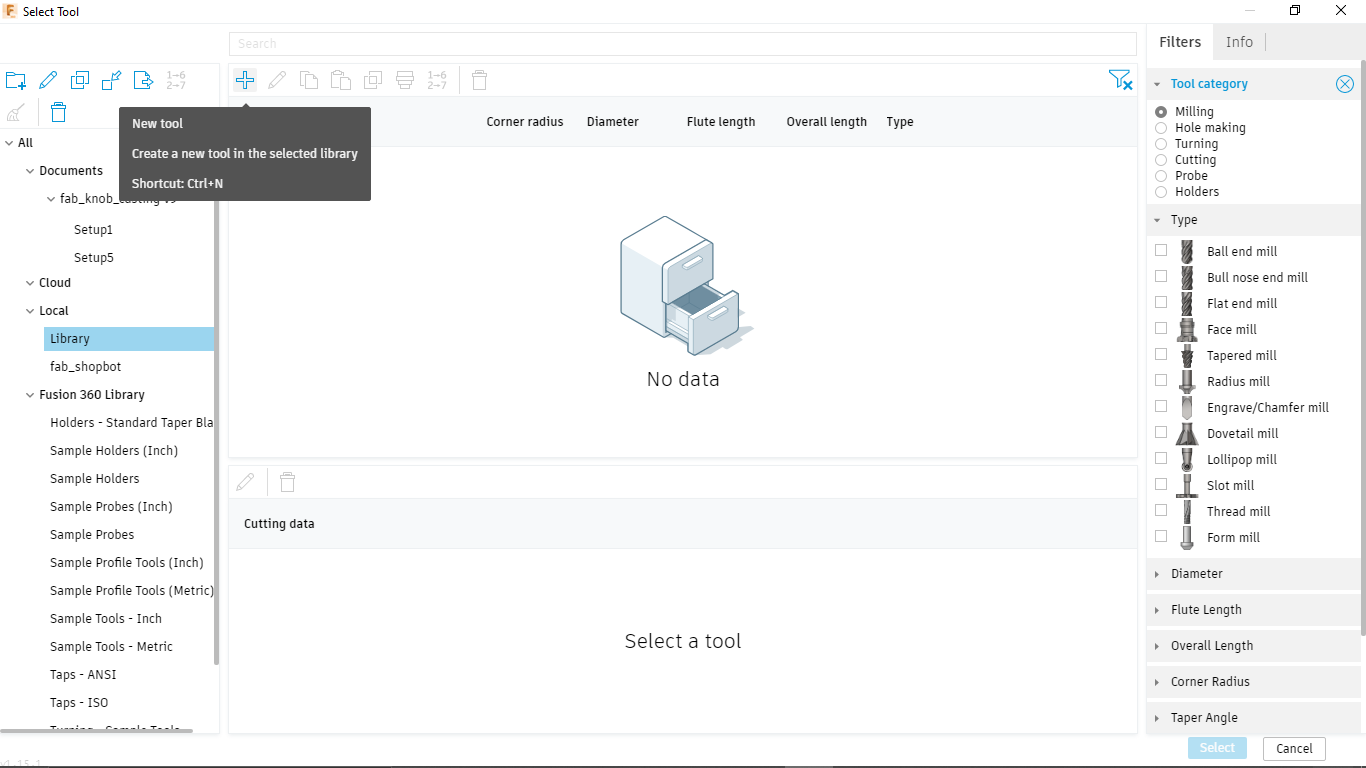
I don't have any tool so I have to create the tool in the library as per the tool available the lab
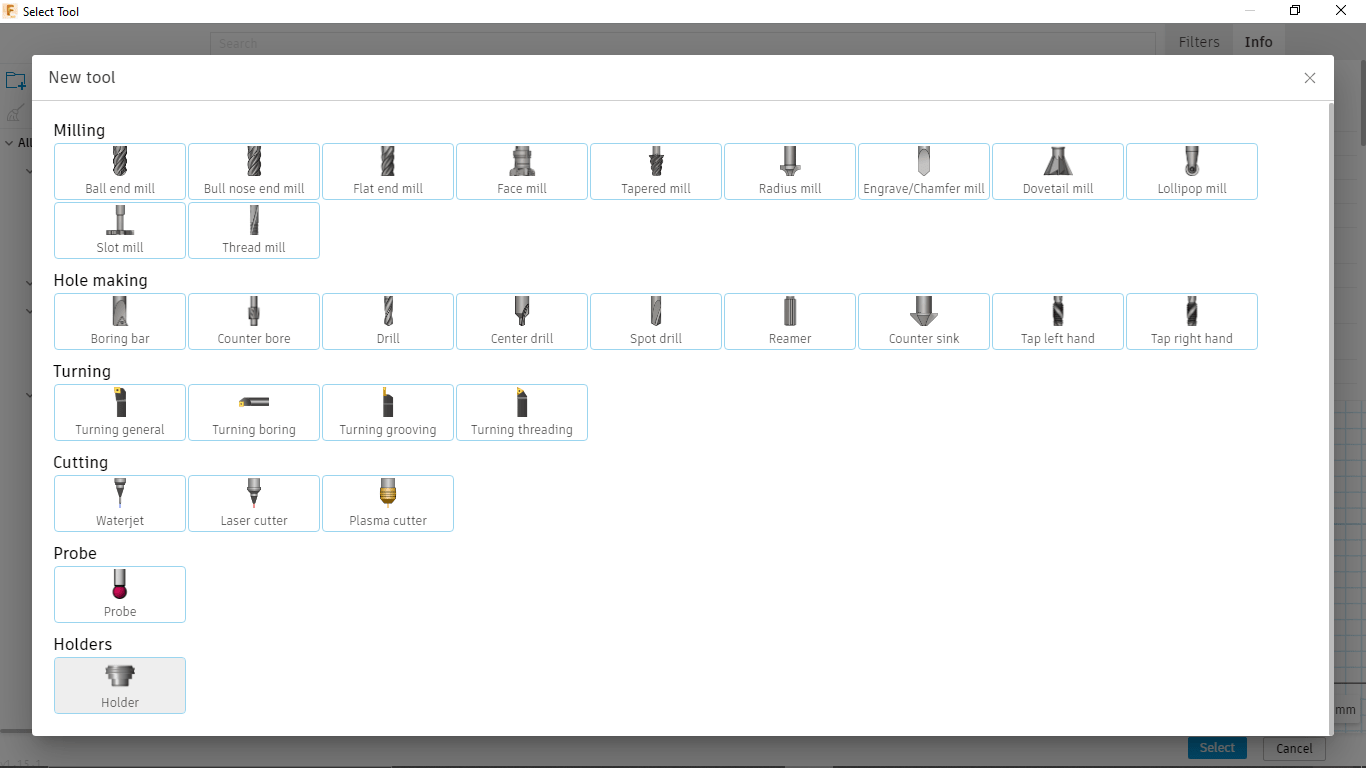
Before creating the tool (flat end mill) I created the new holder library for our FAB ER26 collet chuck of the ShopBot. By clicking new it opens a window to select the tool type, selected tool type as holder.
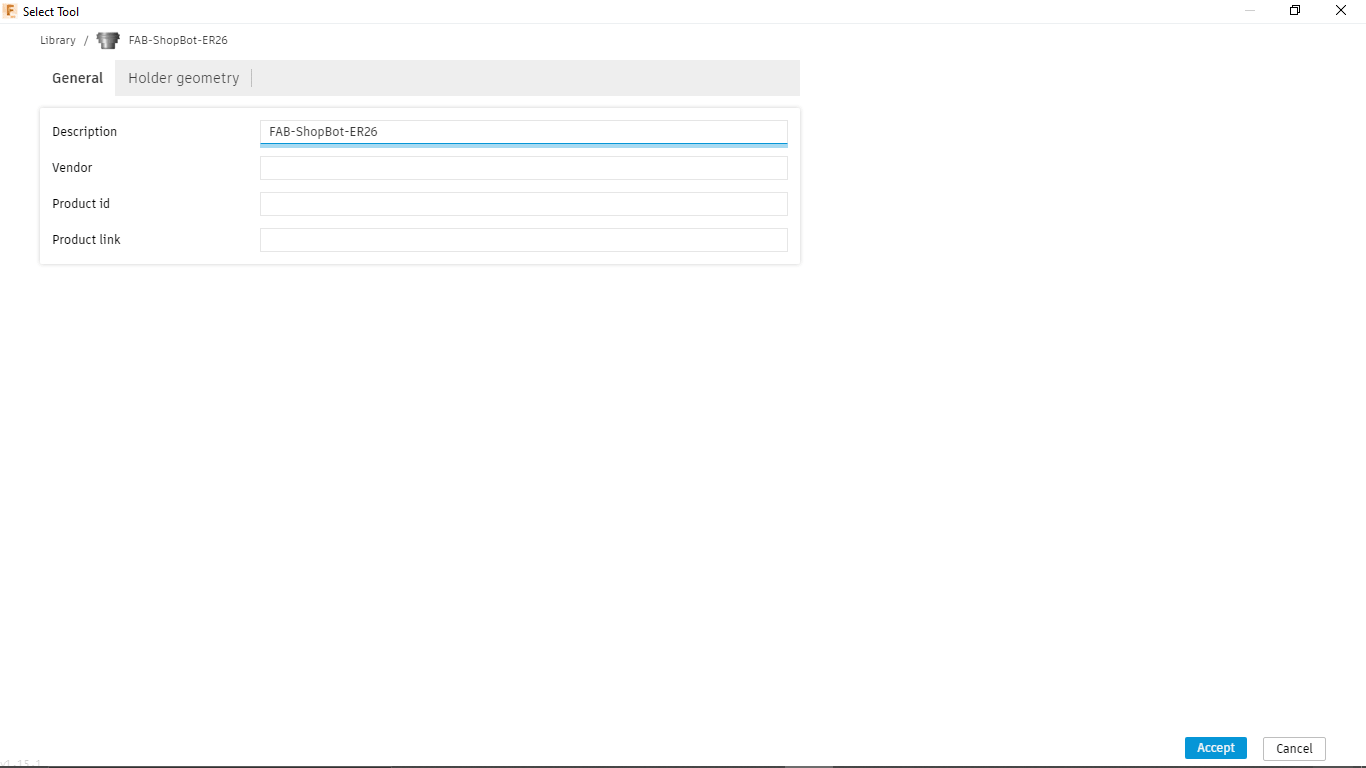
Then gave the name and descriptions and also the dimensions details in the Holder geometry tab.
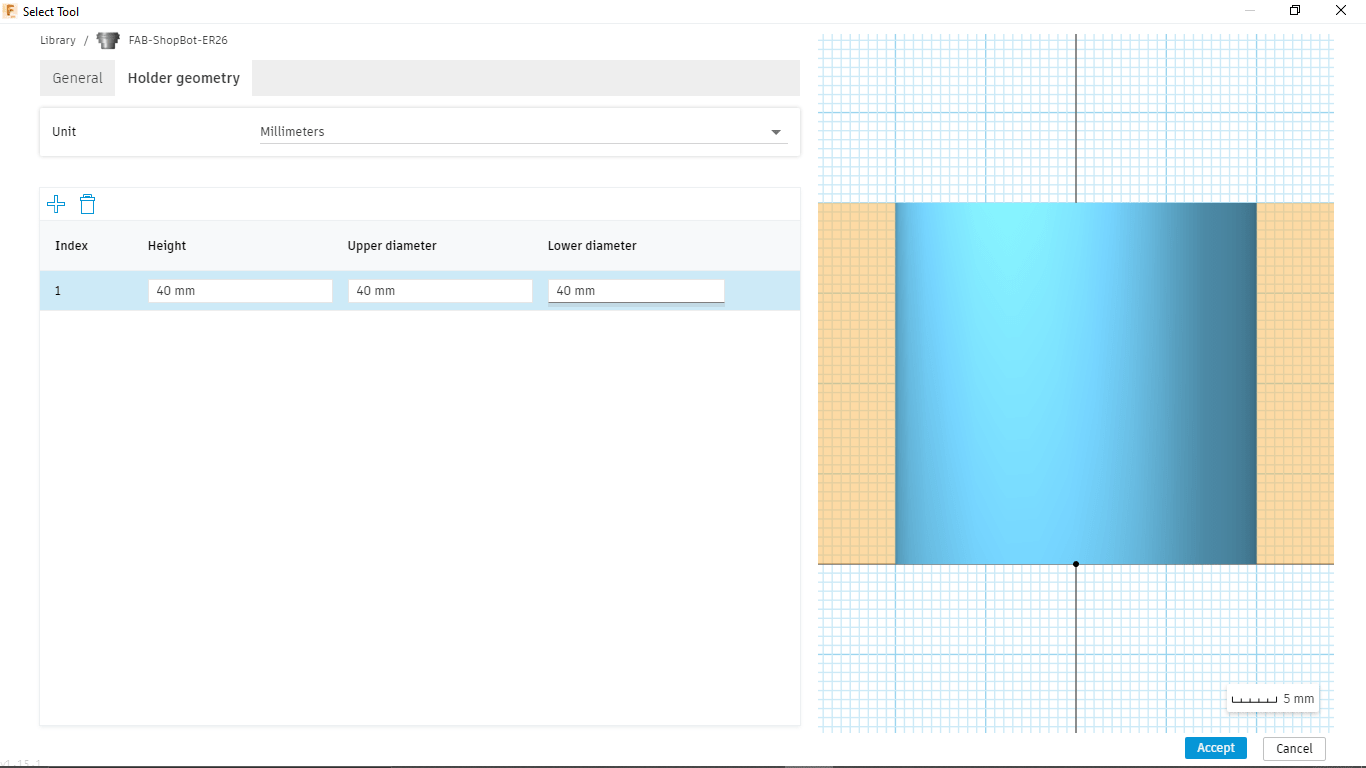
After entering the information required clicked 'Accept' and it stores as ER26 Holder tool in the tool library.
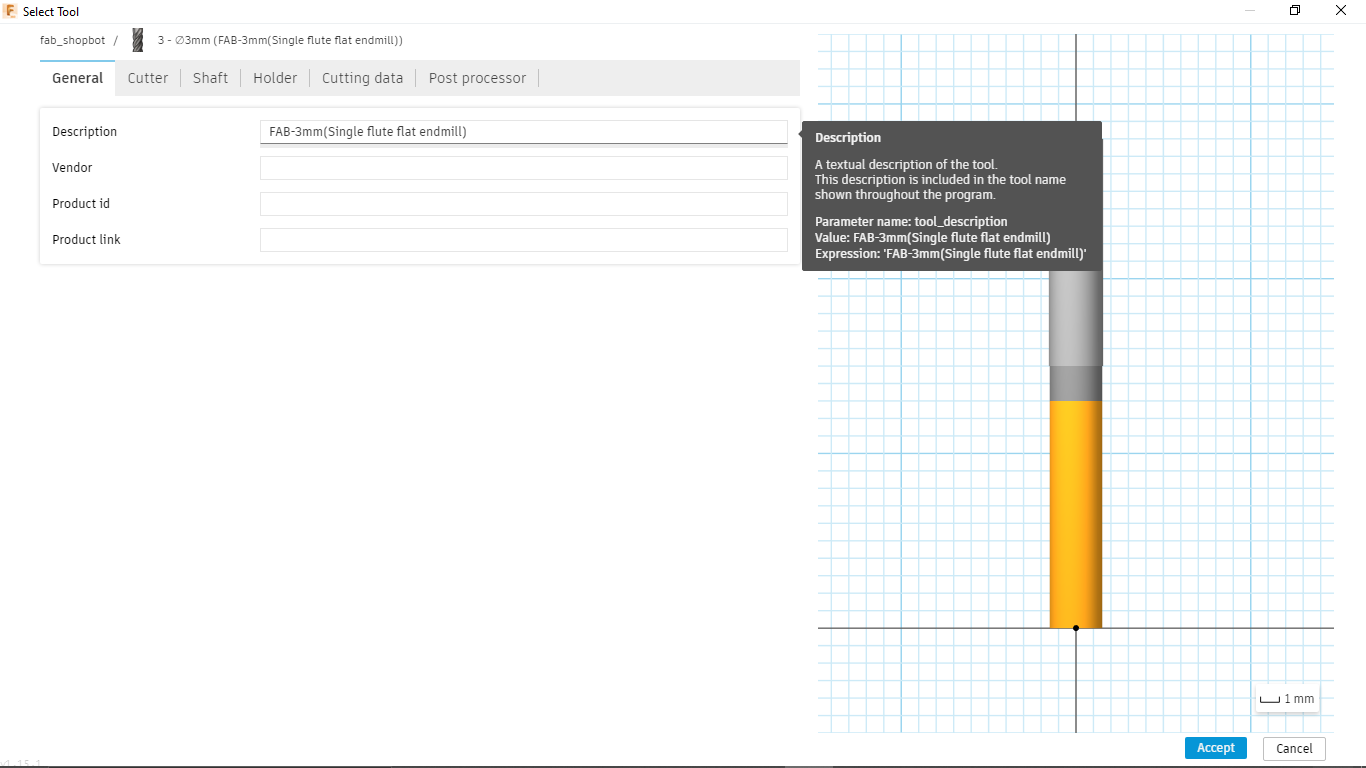
And then I created a new library for the End mill selected the tool type as 'Flat end mill' and gave the name as 'FAB-3mm(single flute flat end mill)'.
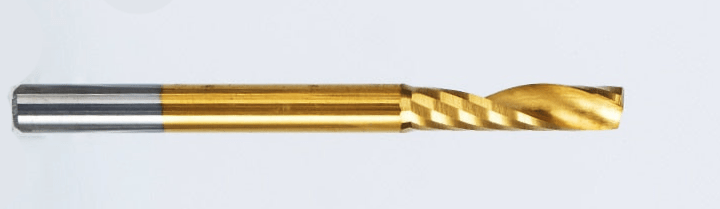
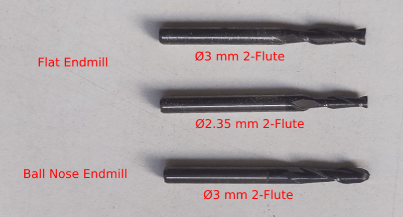
Here is the picture of the Single flute Flat Endmill we are using in the Lab as our Instructors suggestions this is enough to do the job in properly.I measured the flute dimensions of the flute length ,diameter and shank diameter of the Endmill.
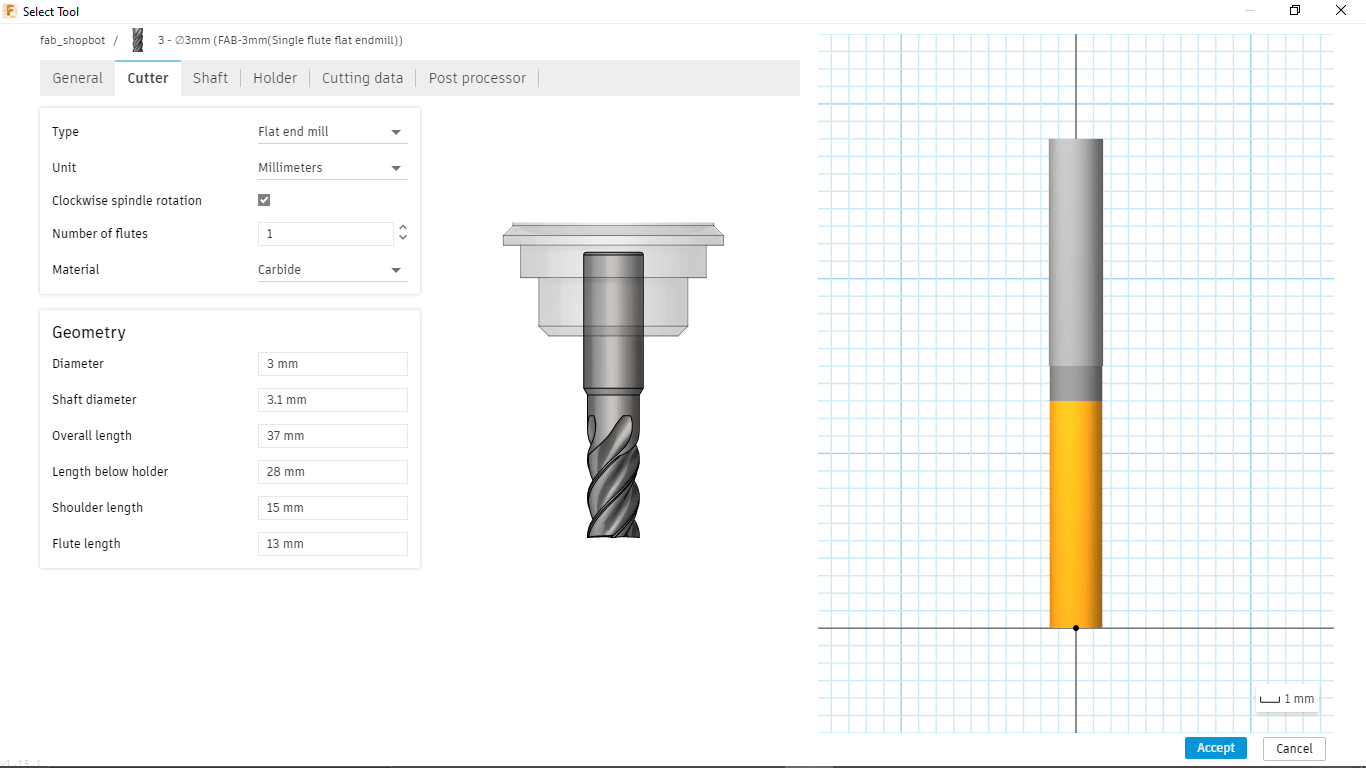
In the cutter tab entered geometry and type as shown in the figure as per the measured data from the end mill.
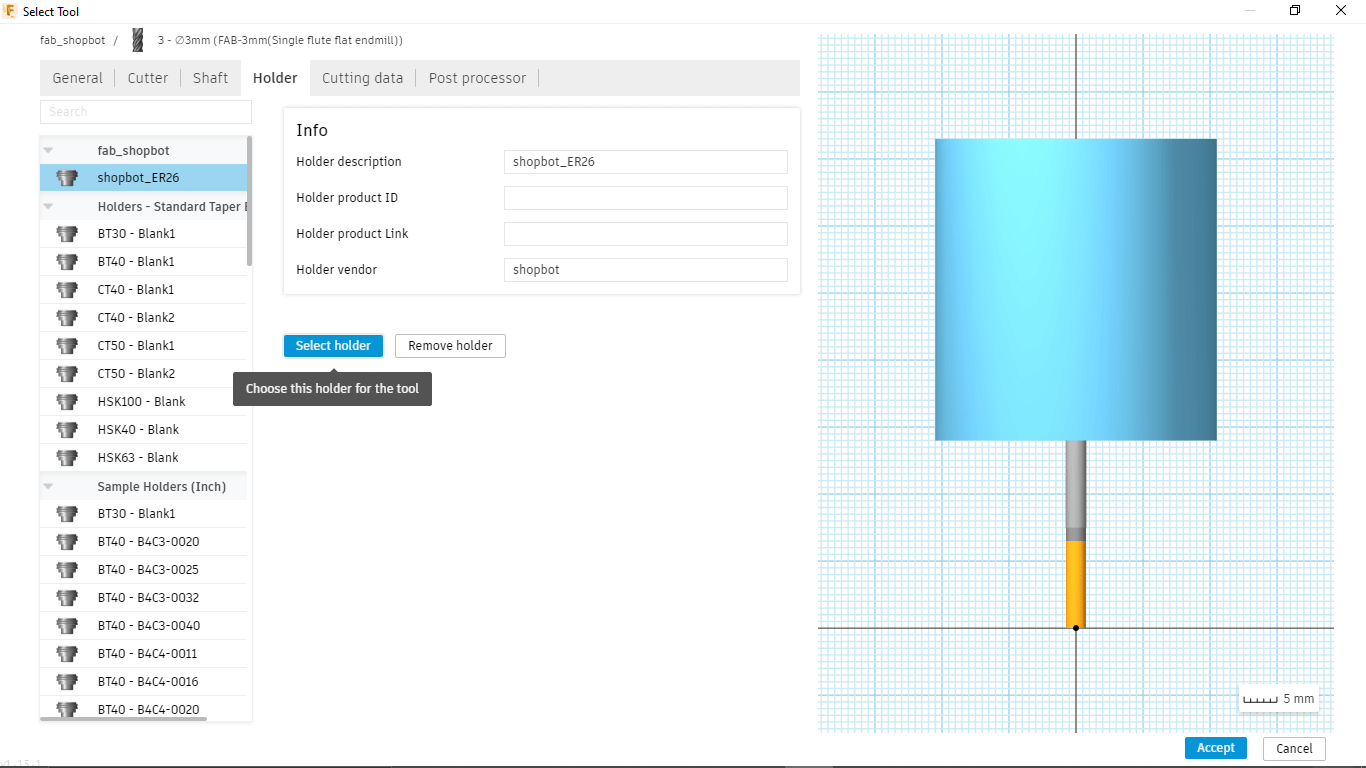
Then I selected the holder type as FAB-ER26 from the library which was created Earlier. We can see the tool shape changes in the right while adding information about the tool
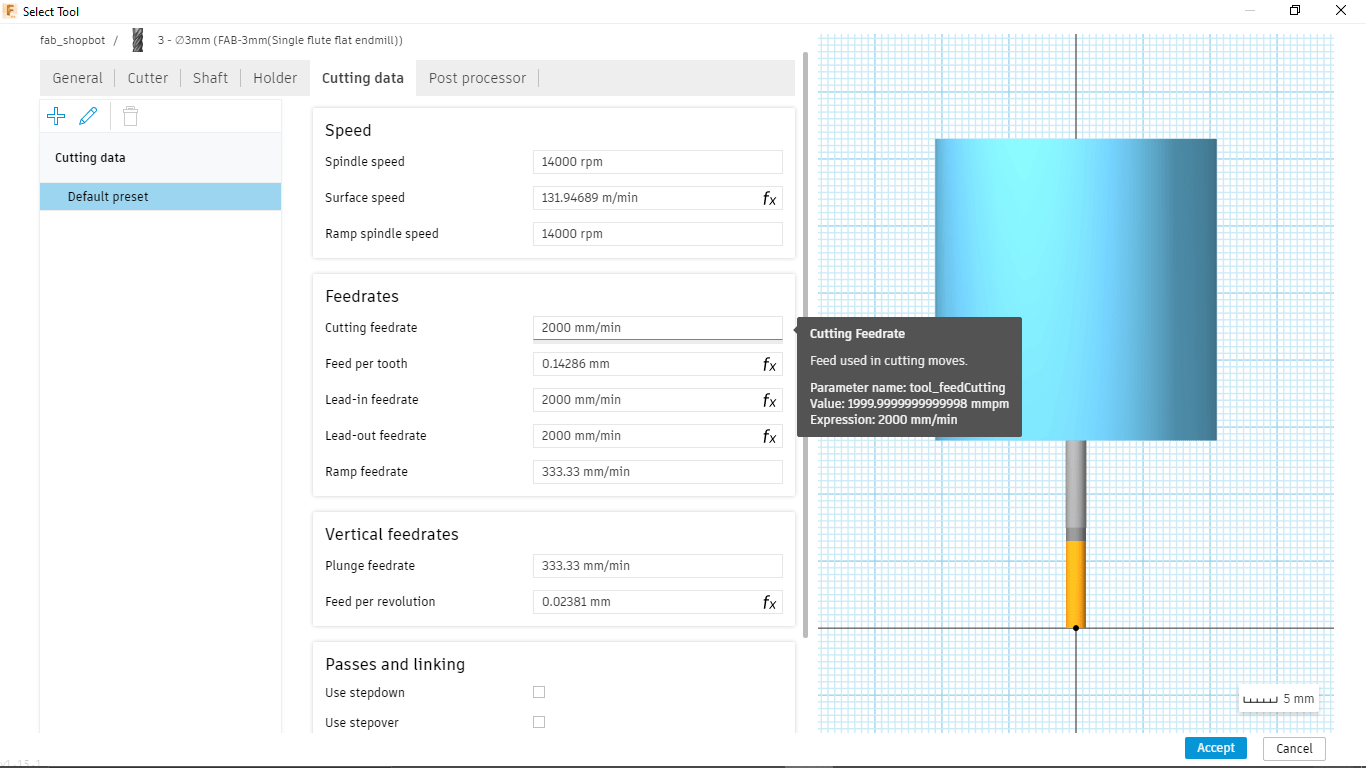
And then in the Cutting data sets the feed rates and spindle speed with the help of fab instructors Jogin Francis and Rahul S Rajan as shown above
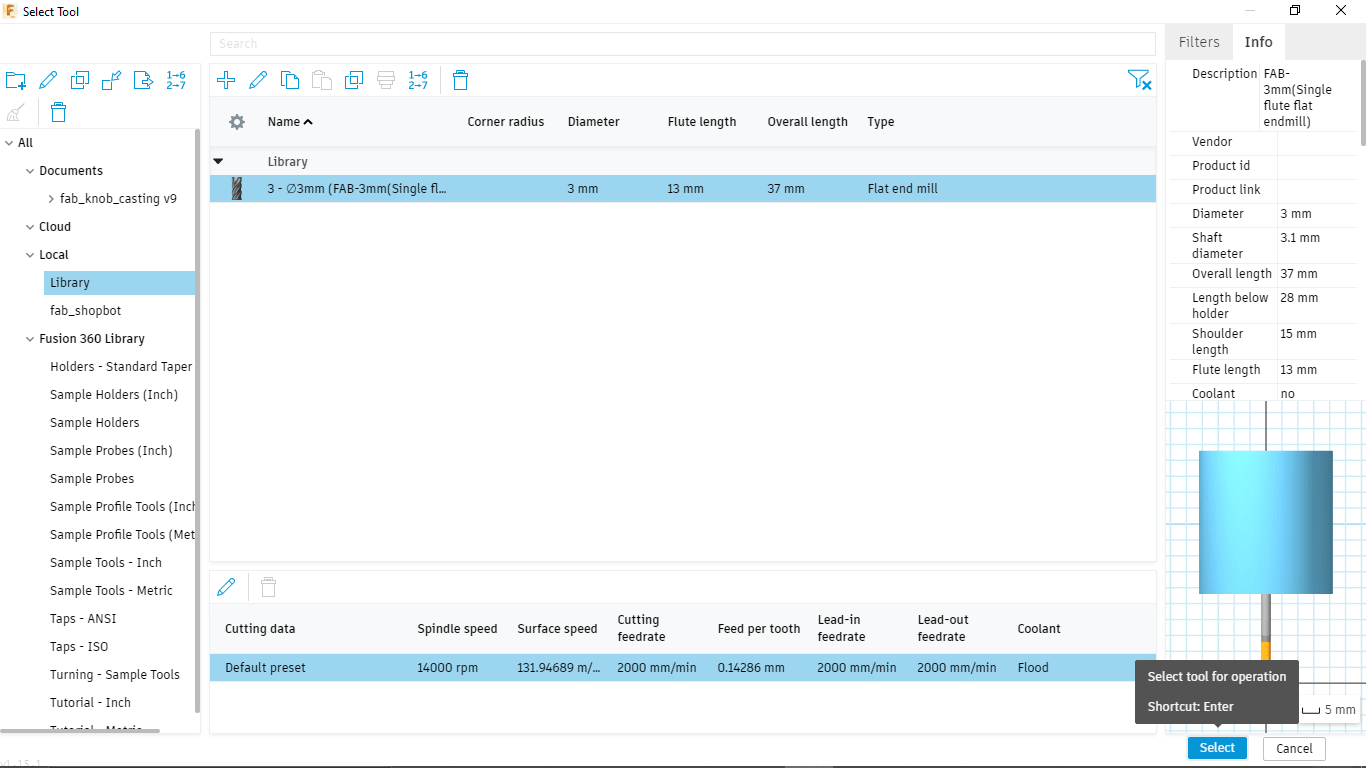
After creating the tool I selected the tool from the library which 3mm(single flute flat end mill) for 3D adaptive clearing.
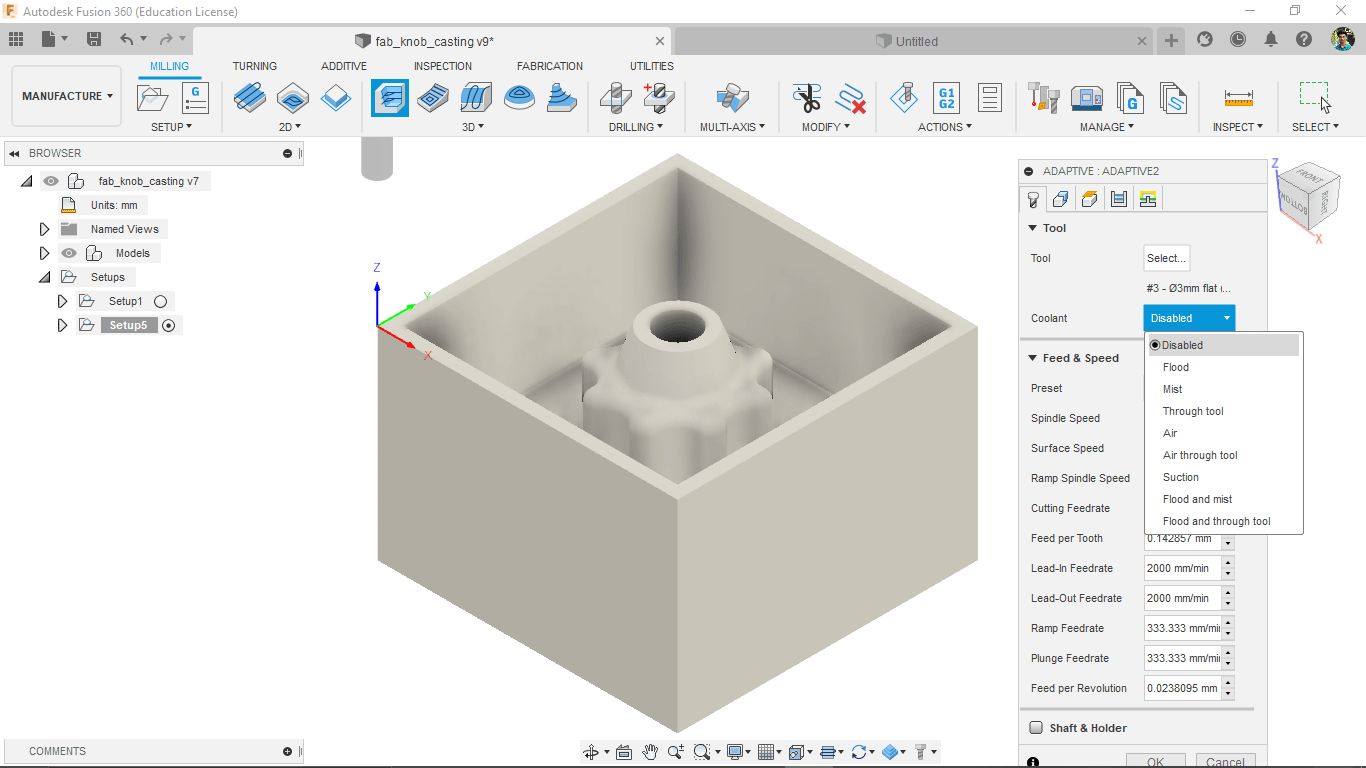
Then disabled the cool end option because ShopBot doesn't have any cool end support with g code not required while cutting wax.
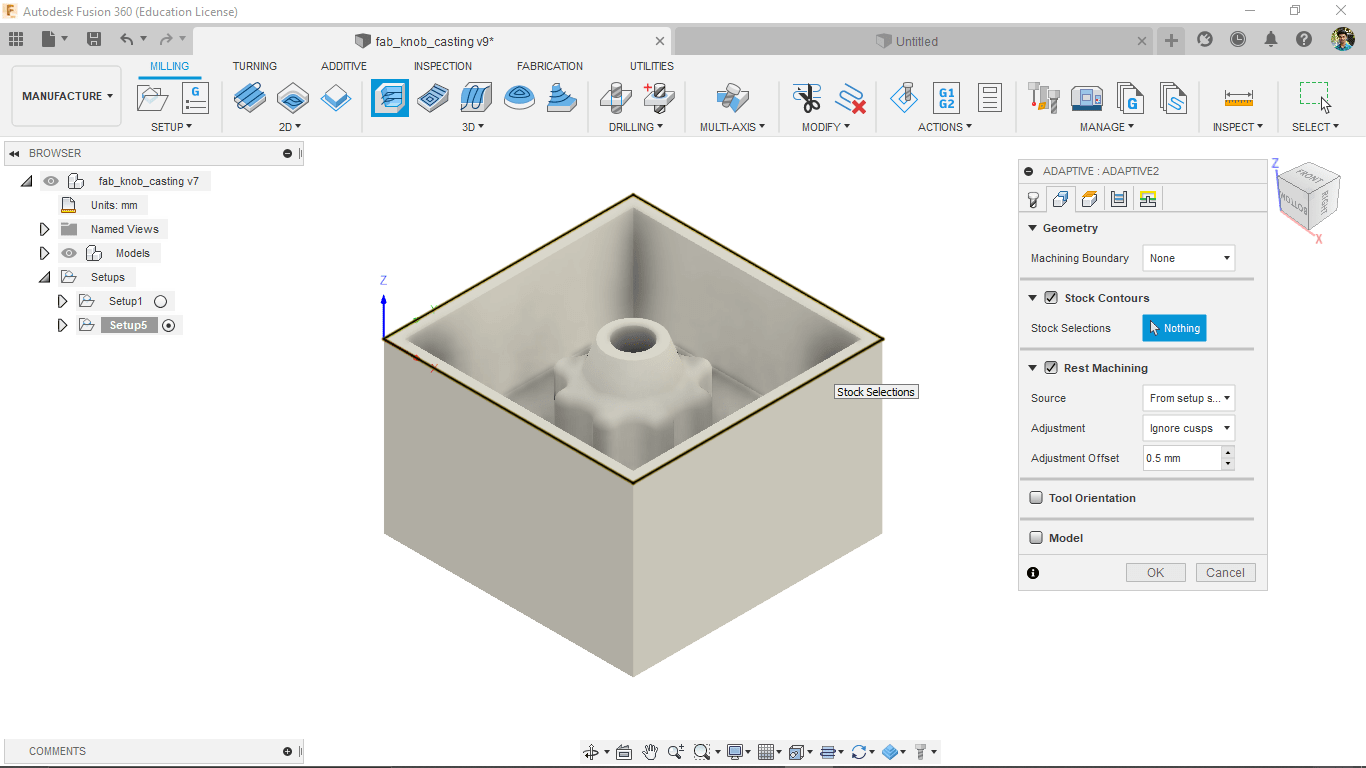
And in the next tab I selected the model boundary for adaptive clearing it gonna start clearing from where we selected.
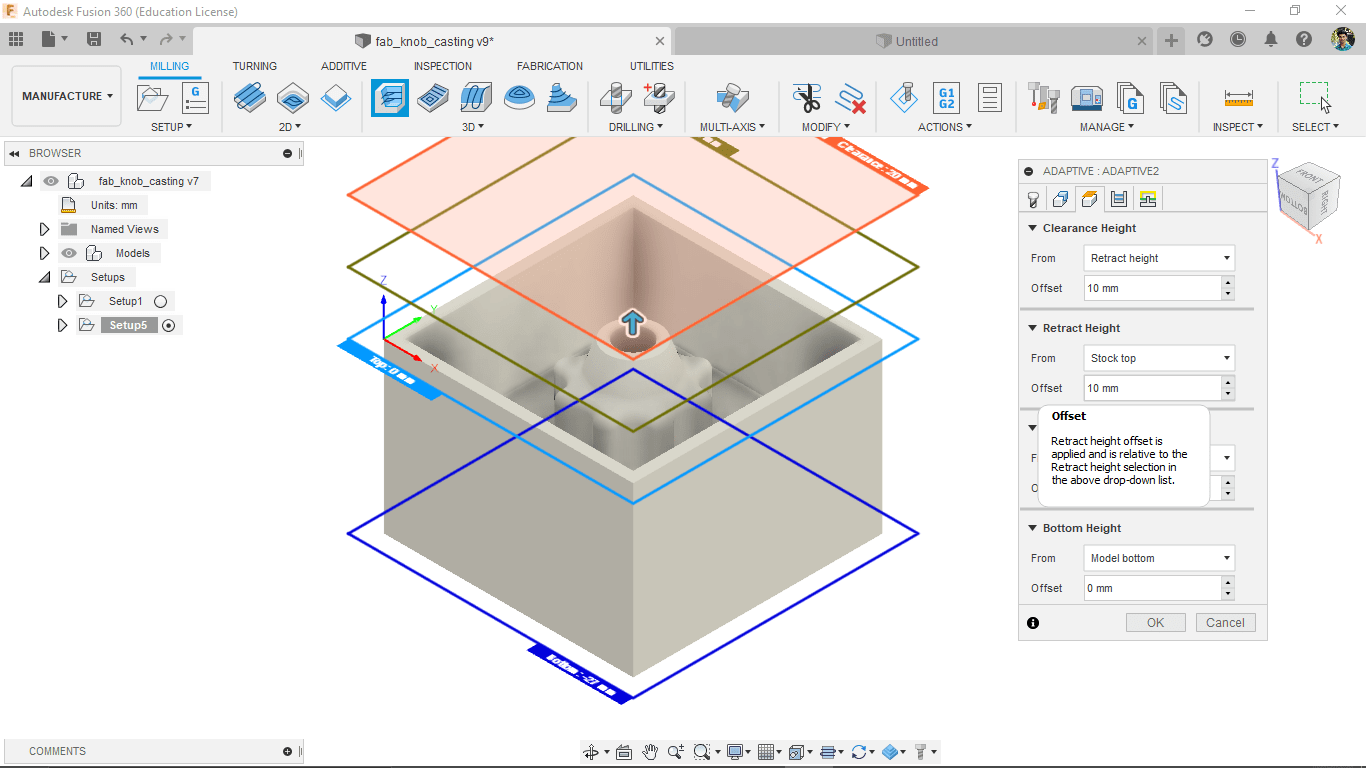
Then added some safety offset height about 10 mm . It make sure not gonna hit the material while retracting and moving to next position.
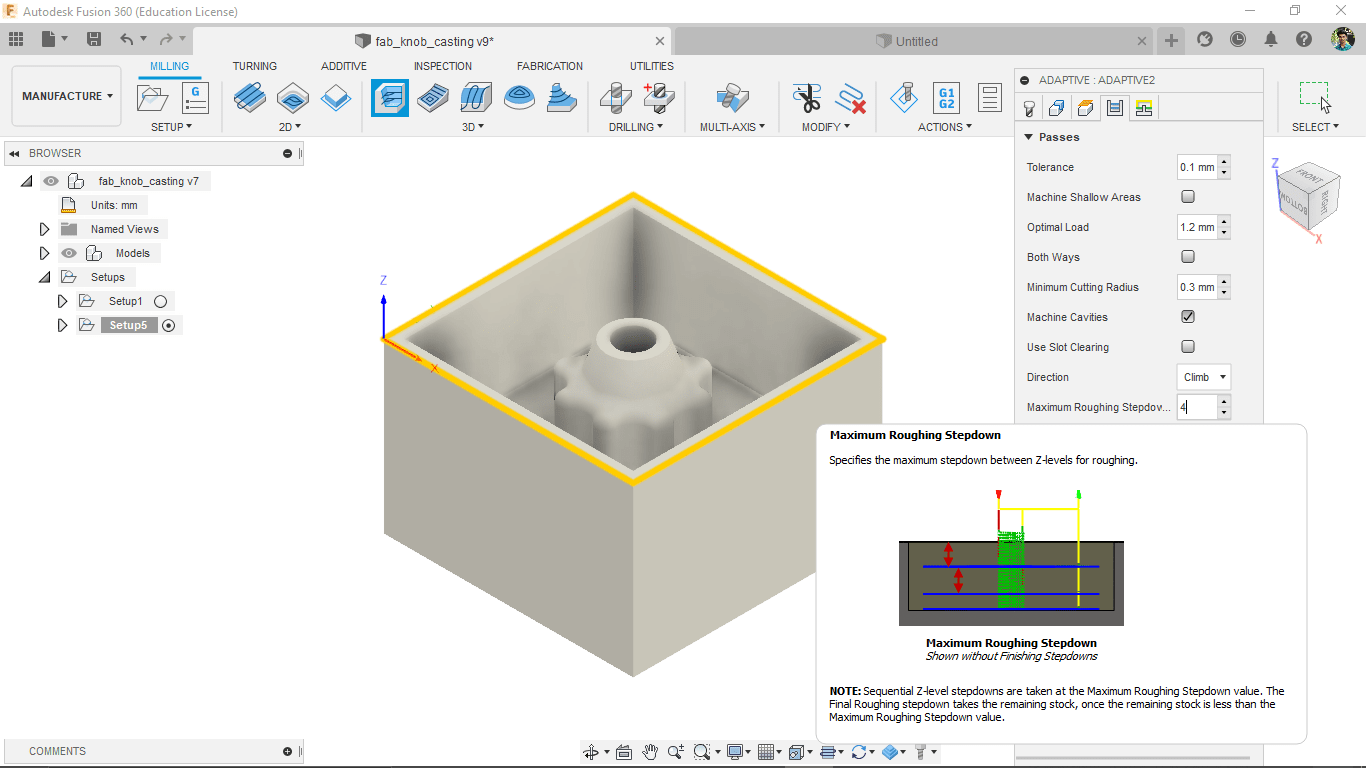
Next set the maximum rough cut step over as 4 step to complete the rough cut in adaptive clearing. So it
gonna clear the material in 4 step./p>
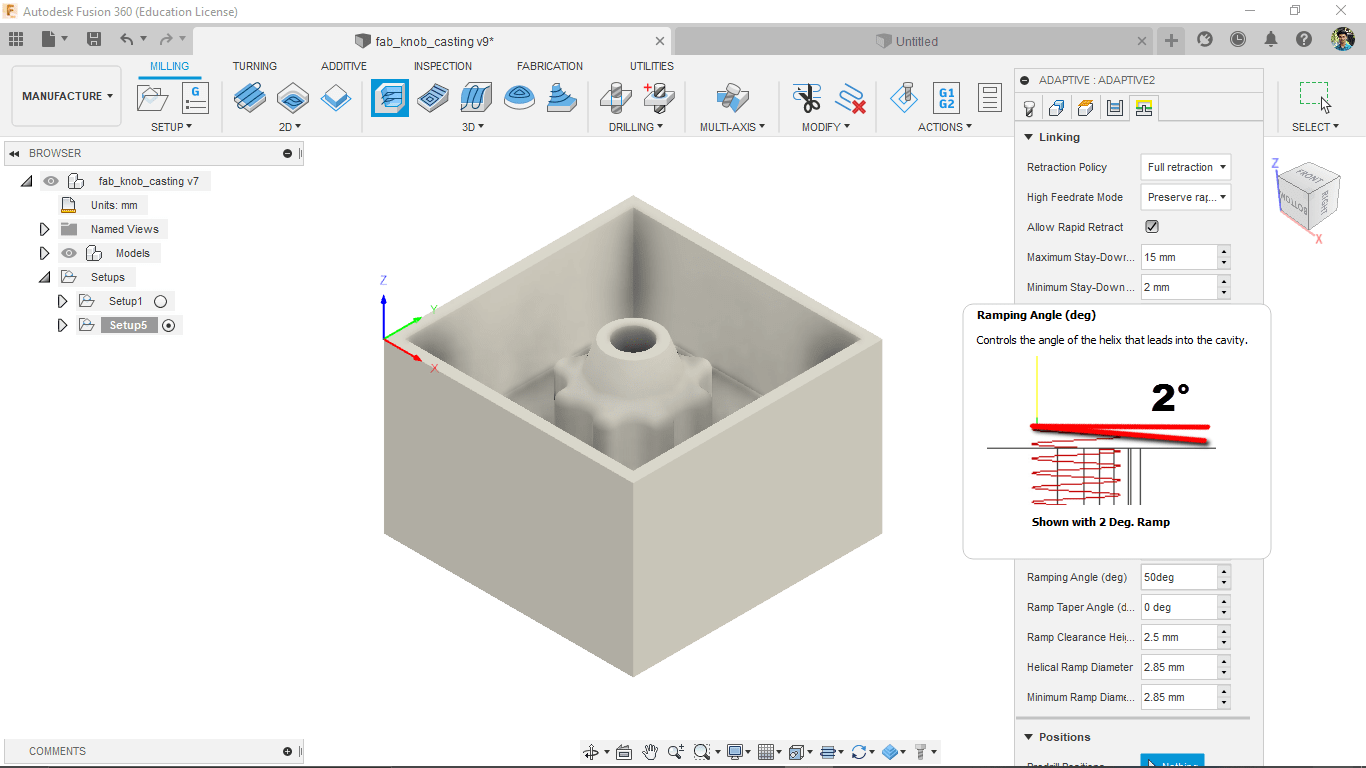
Then added te ramping angle about 10 degree this helps the end mill slow entry to the material
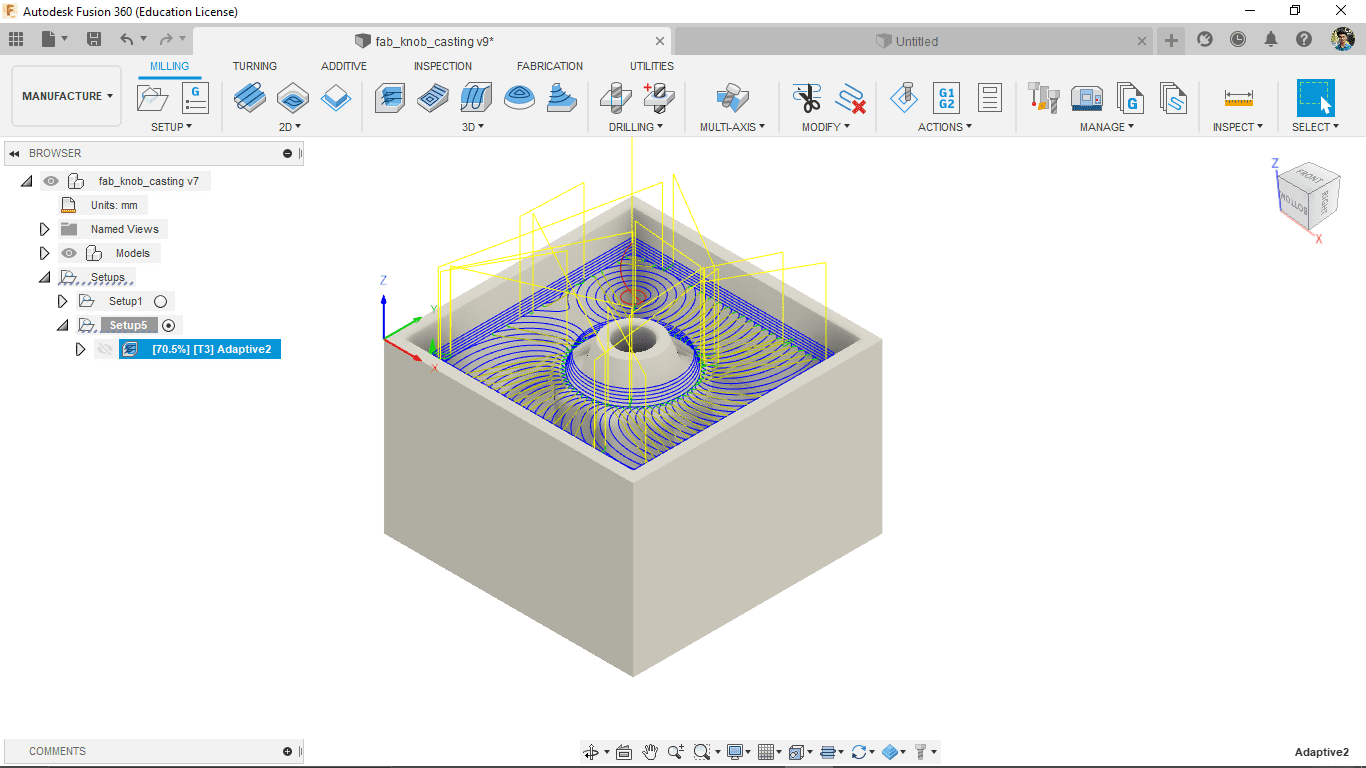
After clicking 'ok' it started to calculate the tool path we can see the progress in percentage under the design library on left.
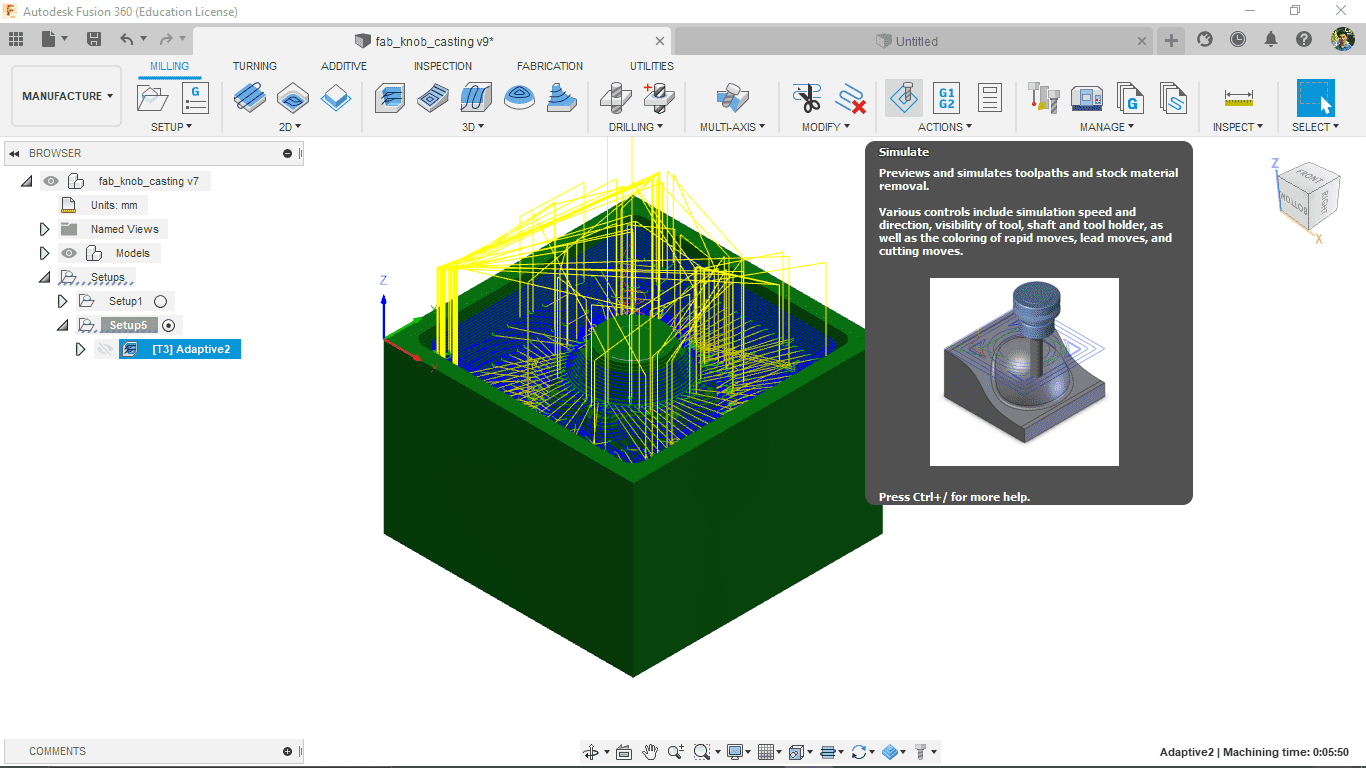
Then I clciked the simulate option in the menu in order to see the animation of the simulated tool path. The simulation shows in the video bellow.
It shows how much material gone while rough cut and also is there any spindle holder hitting edges will show as red.But mine is fine no holder hitting because of the obtained design.
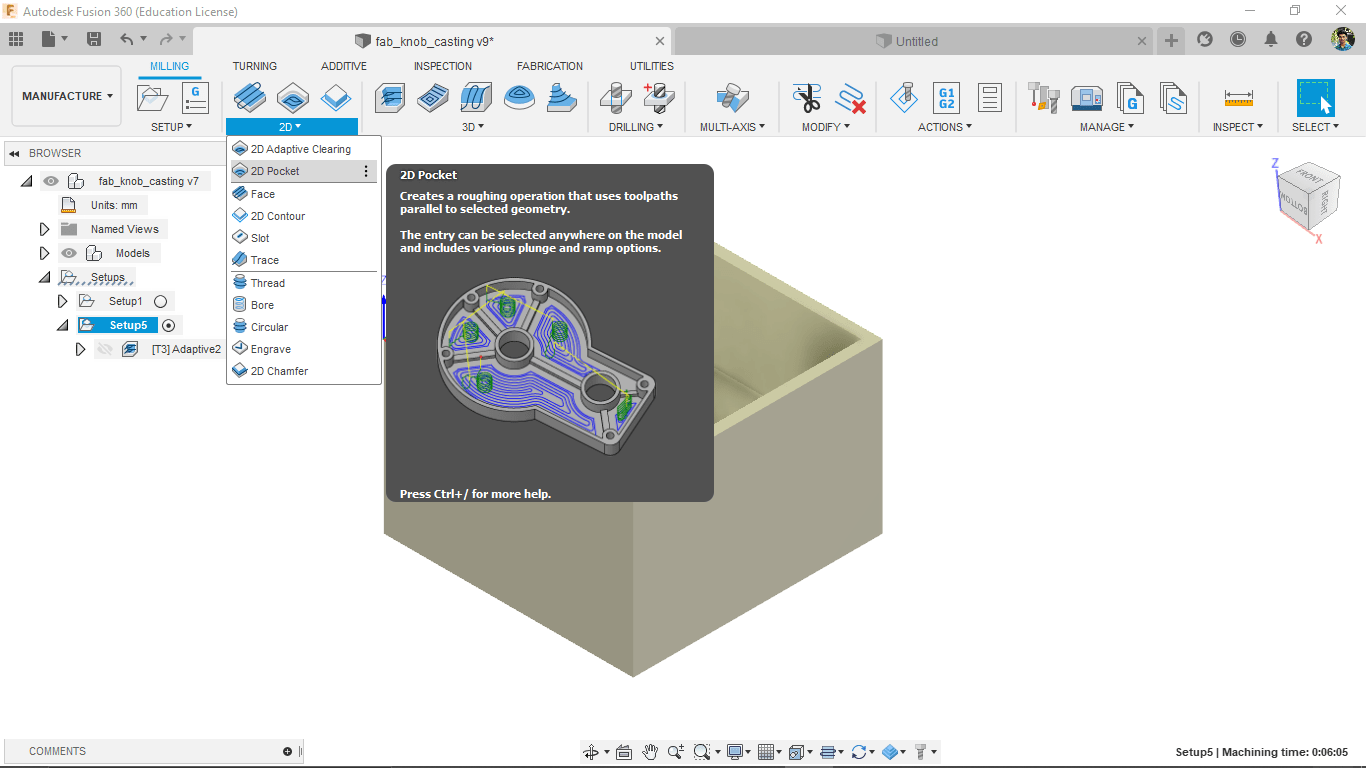
Then I created 2D pocket clearing tool path for my knob's screw hole at the center of the design. the tool can be found under the 2D tab menu above left corner side.
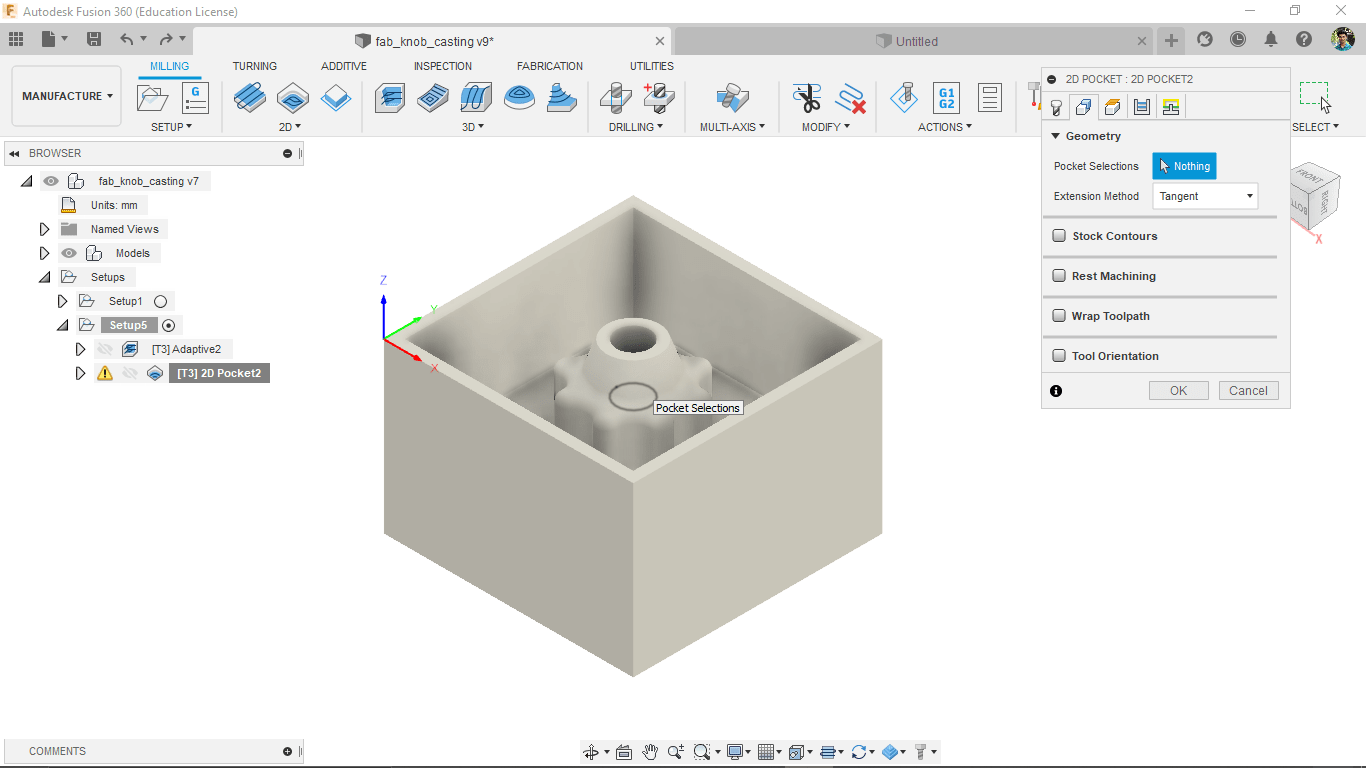
And then selected the same tool and also selected the pocket bottom for creating tool paths.
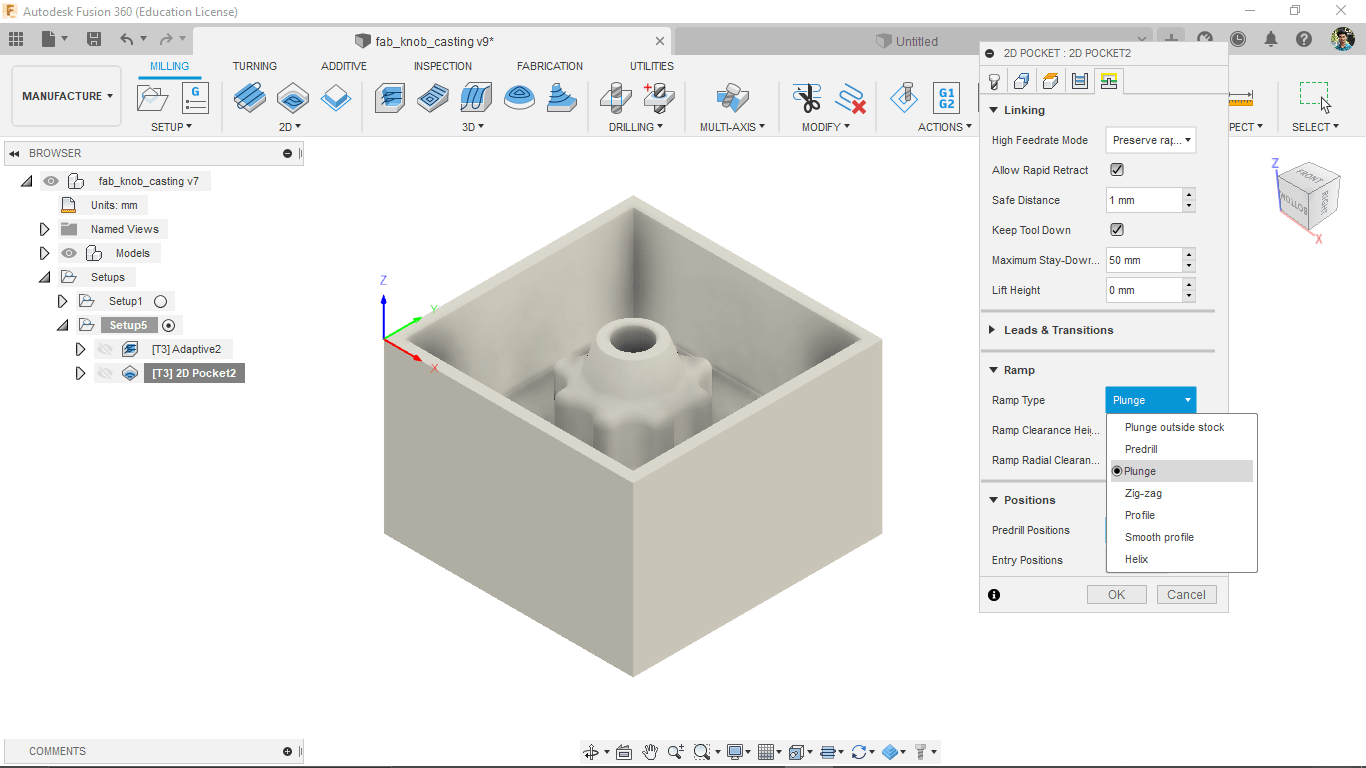
Next I selected the Ramp type as 'Plunge' so it gonna start rounding the pocket from center.Then clicked 'ok' to create the tool path.
After creating I ran the simulation which is shows in the video above .It's just few second tool path.
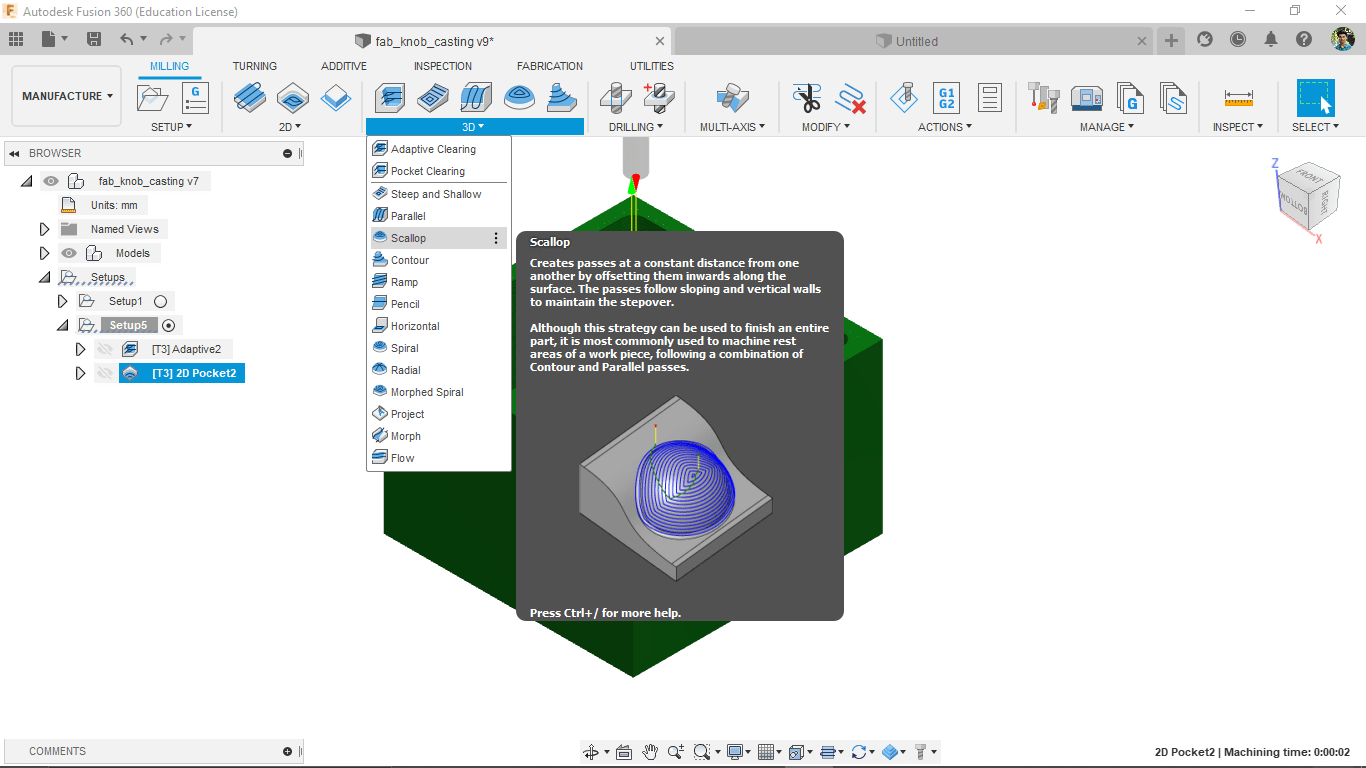
Then I wanted to create the finish cut tool path and I opted the 'Scallop' finish cut option from the menu tab.
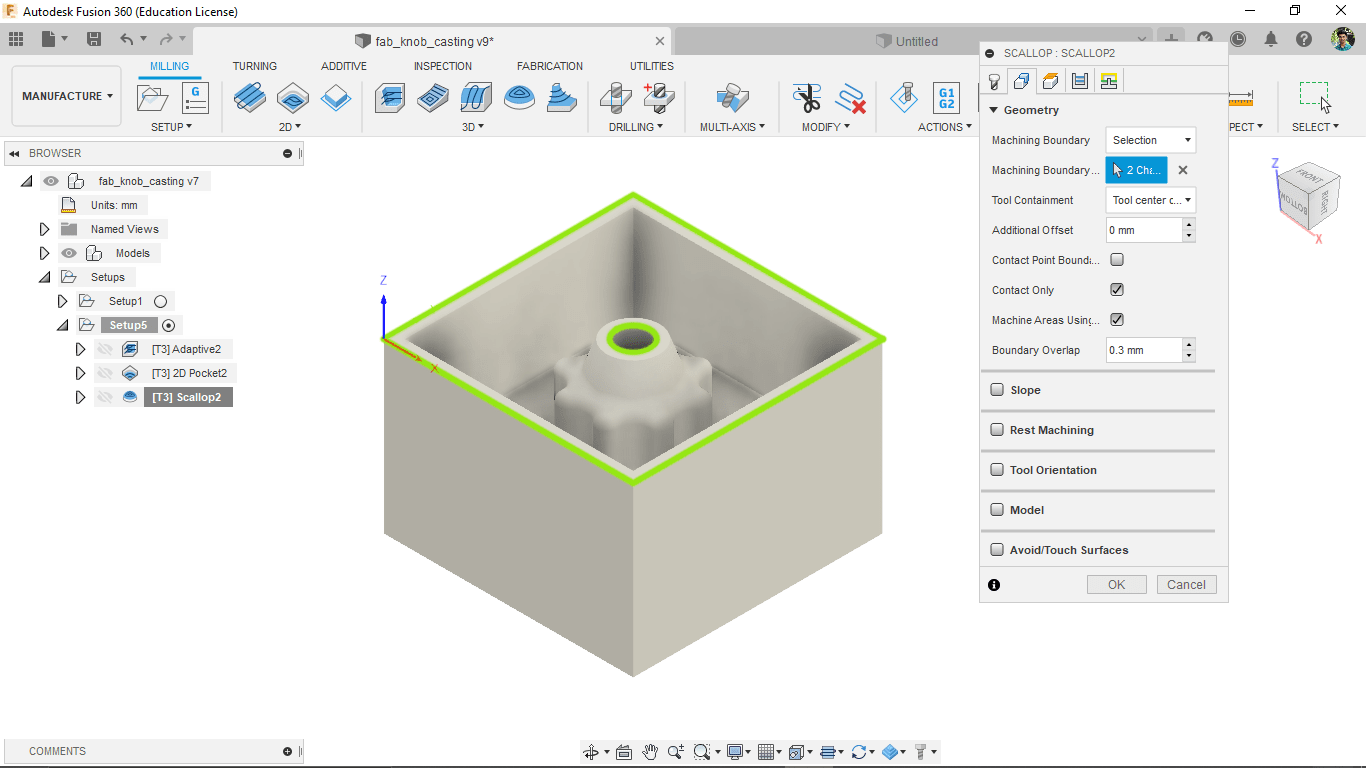
And then I selected the boundaries for the Scallop operation I don't want the scallop every where especially in the pocket. It's time consuming and unnecessary.
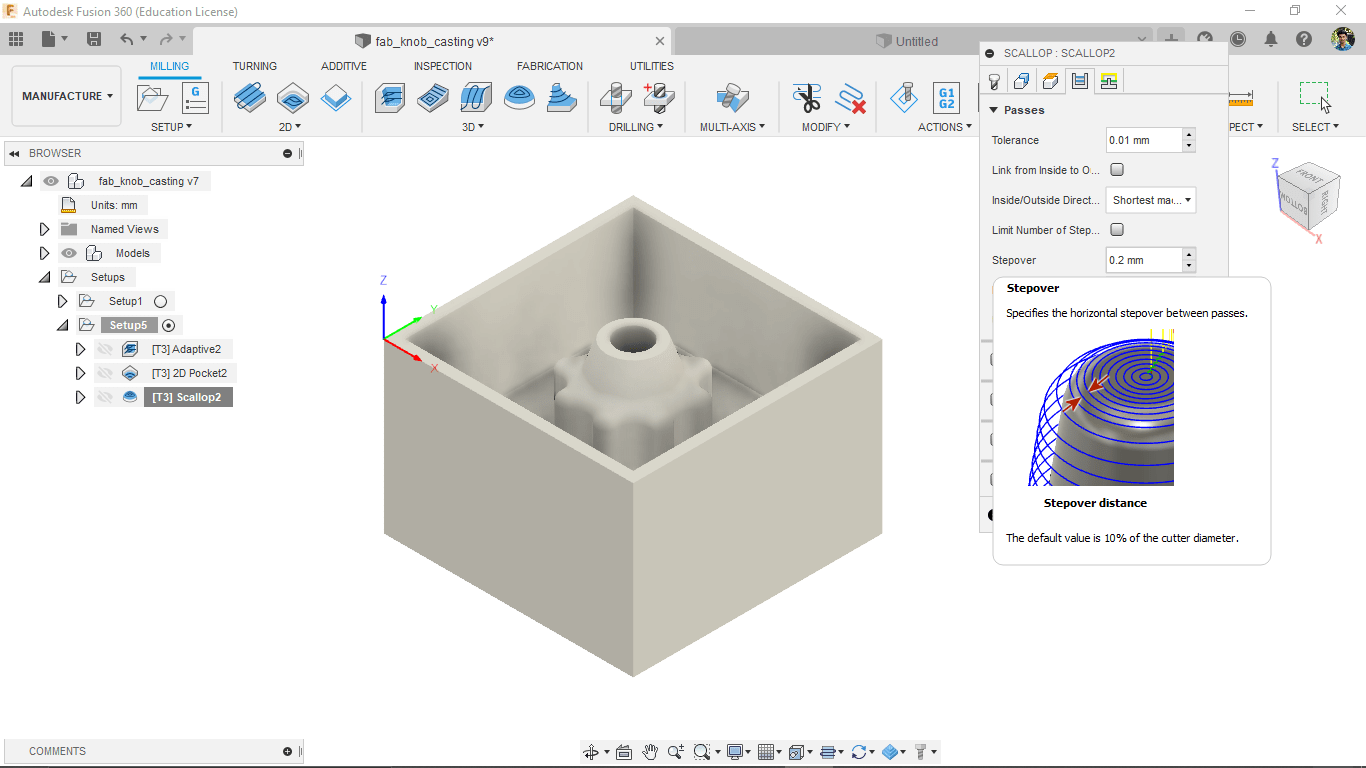
On next I added the step over as 0.2 mm to making it super smooth after the scallop process. Giving step over will increase the time but we get more smooth finish cut.
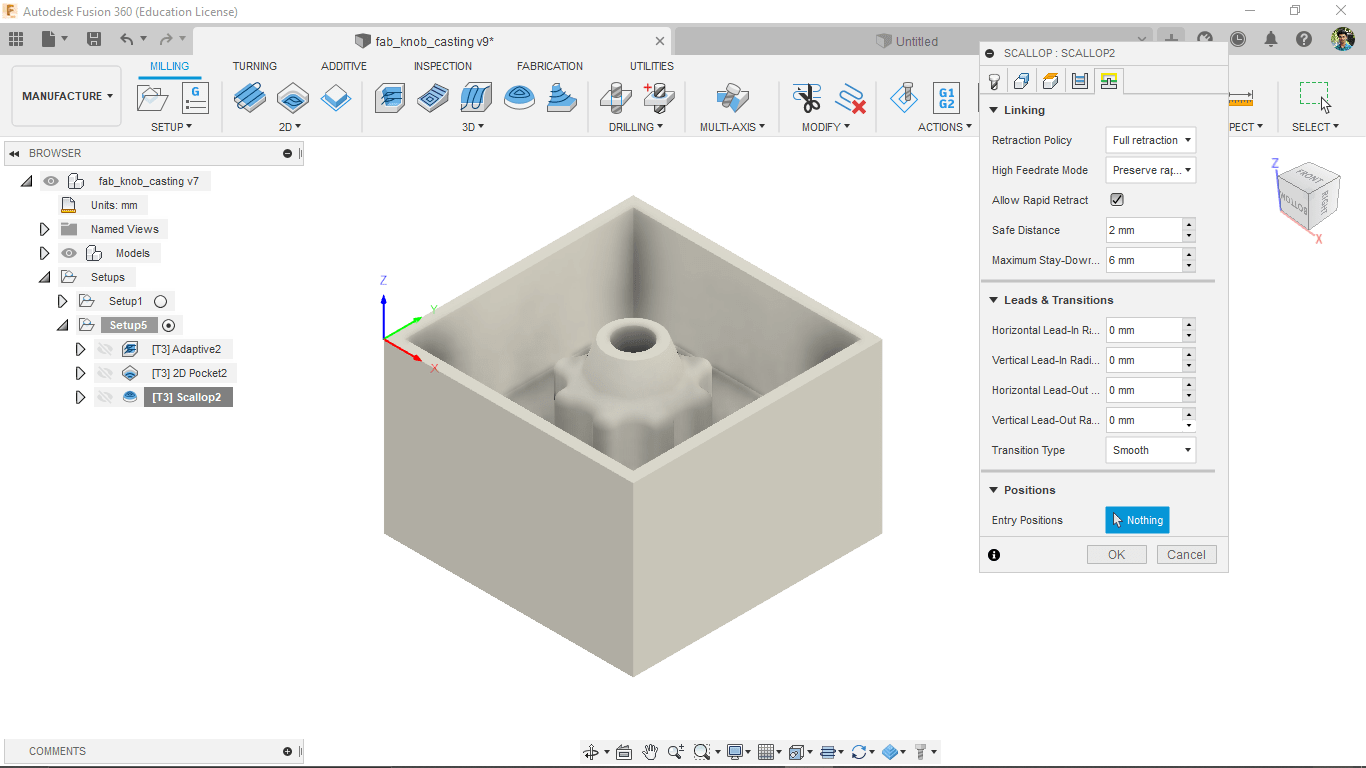
Then finally selected the retraction policy setups for the scallop then ran the generated the tool path.
In the simulation it is satisfies that I'll get the my mold as designed after machining.The scallop tool path simulation shows in the above video
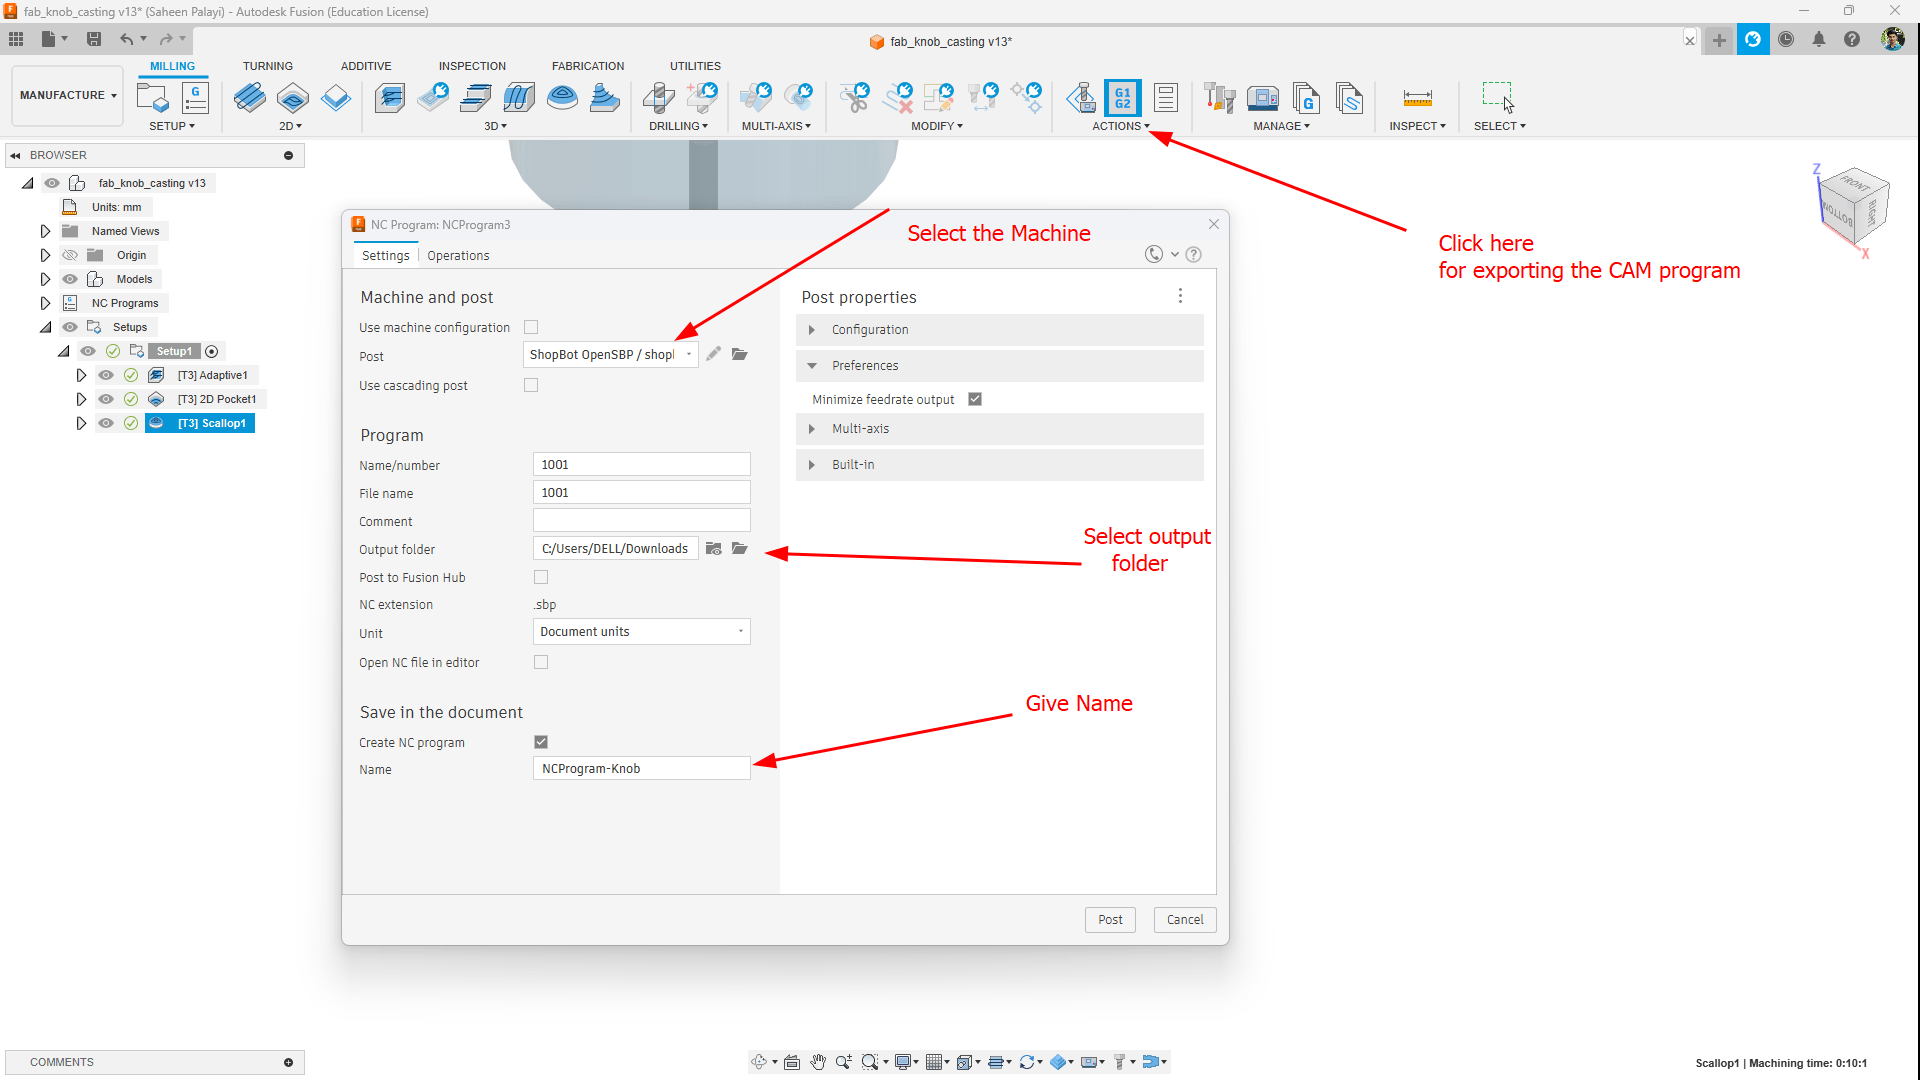
After creating all the tool paths I selected all the operations and then clicked the post process option to generate the g code for the ShopBot CNC machine. I selected the ShopBot post processor from the list and clicked 'Post' to save the file.
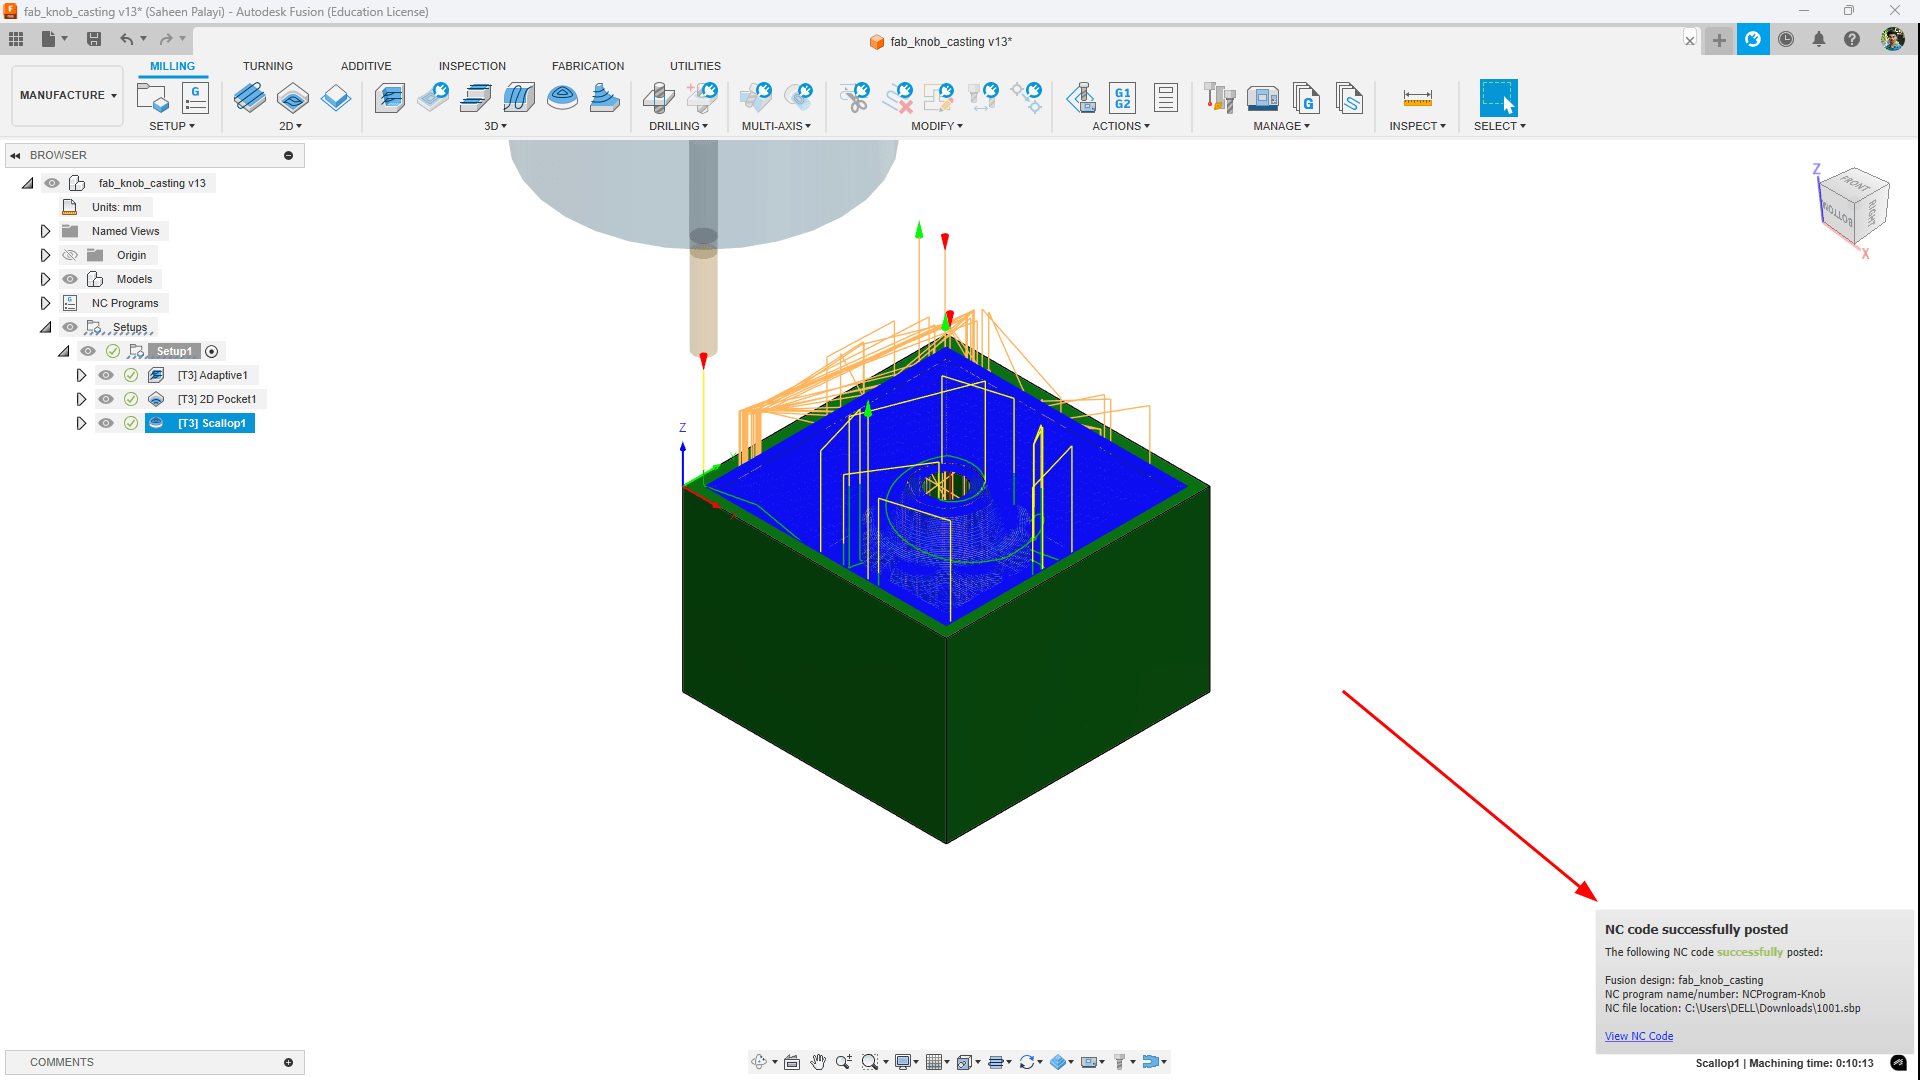
After posting the file I got a .spb file which is the g code for the ShopBot CNC machine. I saved the file in my PC, so I can Later open in the shopbot Software.
Machining The wax
For machining the wax like I mentioned above I used the ShopBot CNC machine. The machine is a 3 axis CNC machine which is capable of milling and cutting the material with the help of a spindle. I've used the same machine during the CNC week for milling the wooden chair I've made during the week.
Setting Up the shopbot
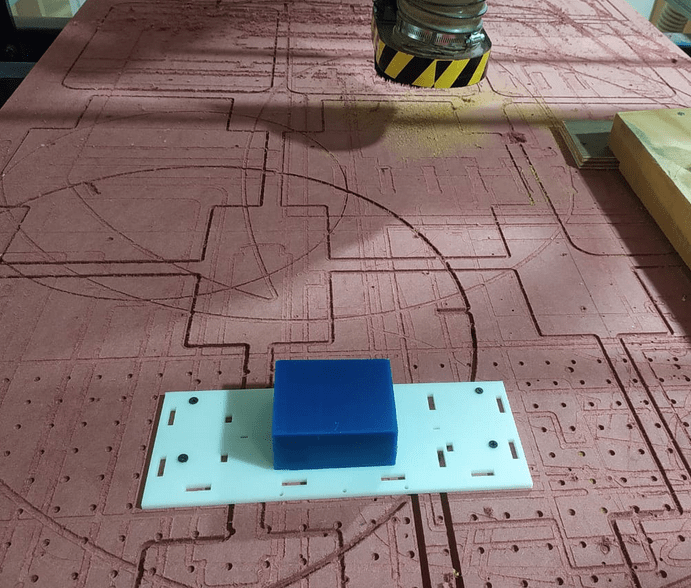
To start machining I screwed a pice of acrylic on the sacrificial layer then I glued the wax on top of it with the help of double sided tape. This setup give a good grip on the wax over the sacrificial layer, it's not necessary to have the sacrificial layer for this operation because the depth of the mould not going to reach at the bottom of the mould and cut through
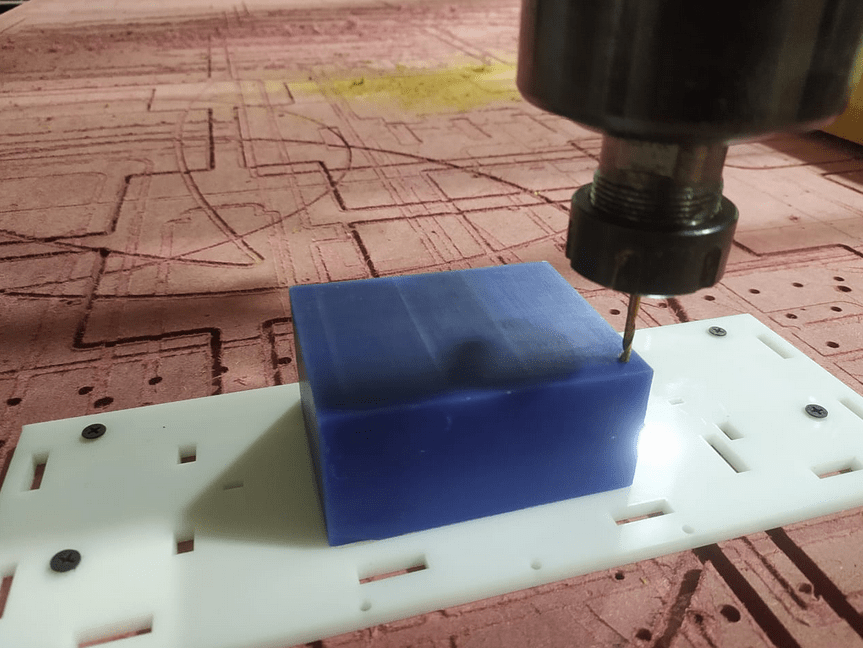
Then I set the x,y origin then z origin as well.here for the z origin not used the auto probing I did it manually.Now all set to start the milling
Loaded the post processed 1001.spb file Exported from the fusion 360 cam earlier to the ShopBot controller software then started the spindle and it start doing the thing!.
Here is the video of the machining process of the wax mold. The machining process took about 30 mins to complete the whole process. I used a 3mm single flute flat end mill for the machining
there is a problem with the 1001.spb file while exporting from the fusion 360 cam. I've exported all the toolpatch together instead of exporting them separately. So i coudn't do the scallop operation with the ball nose end mill. I've decide to do the scallop operation with the same 3mm single flute flat end mill. and see the result.
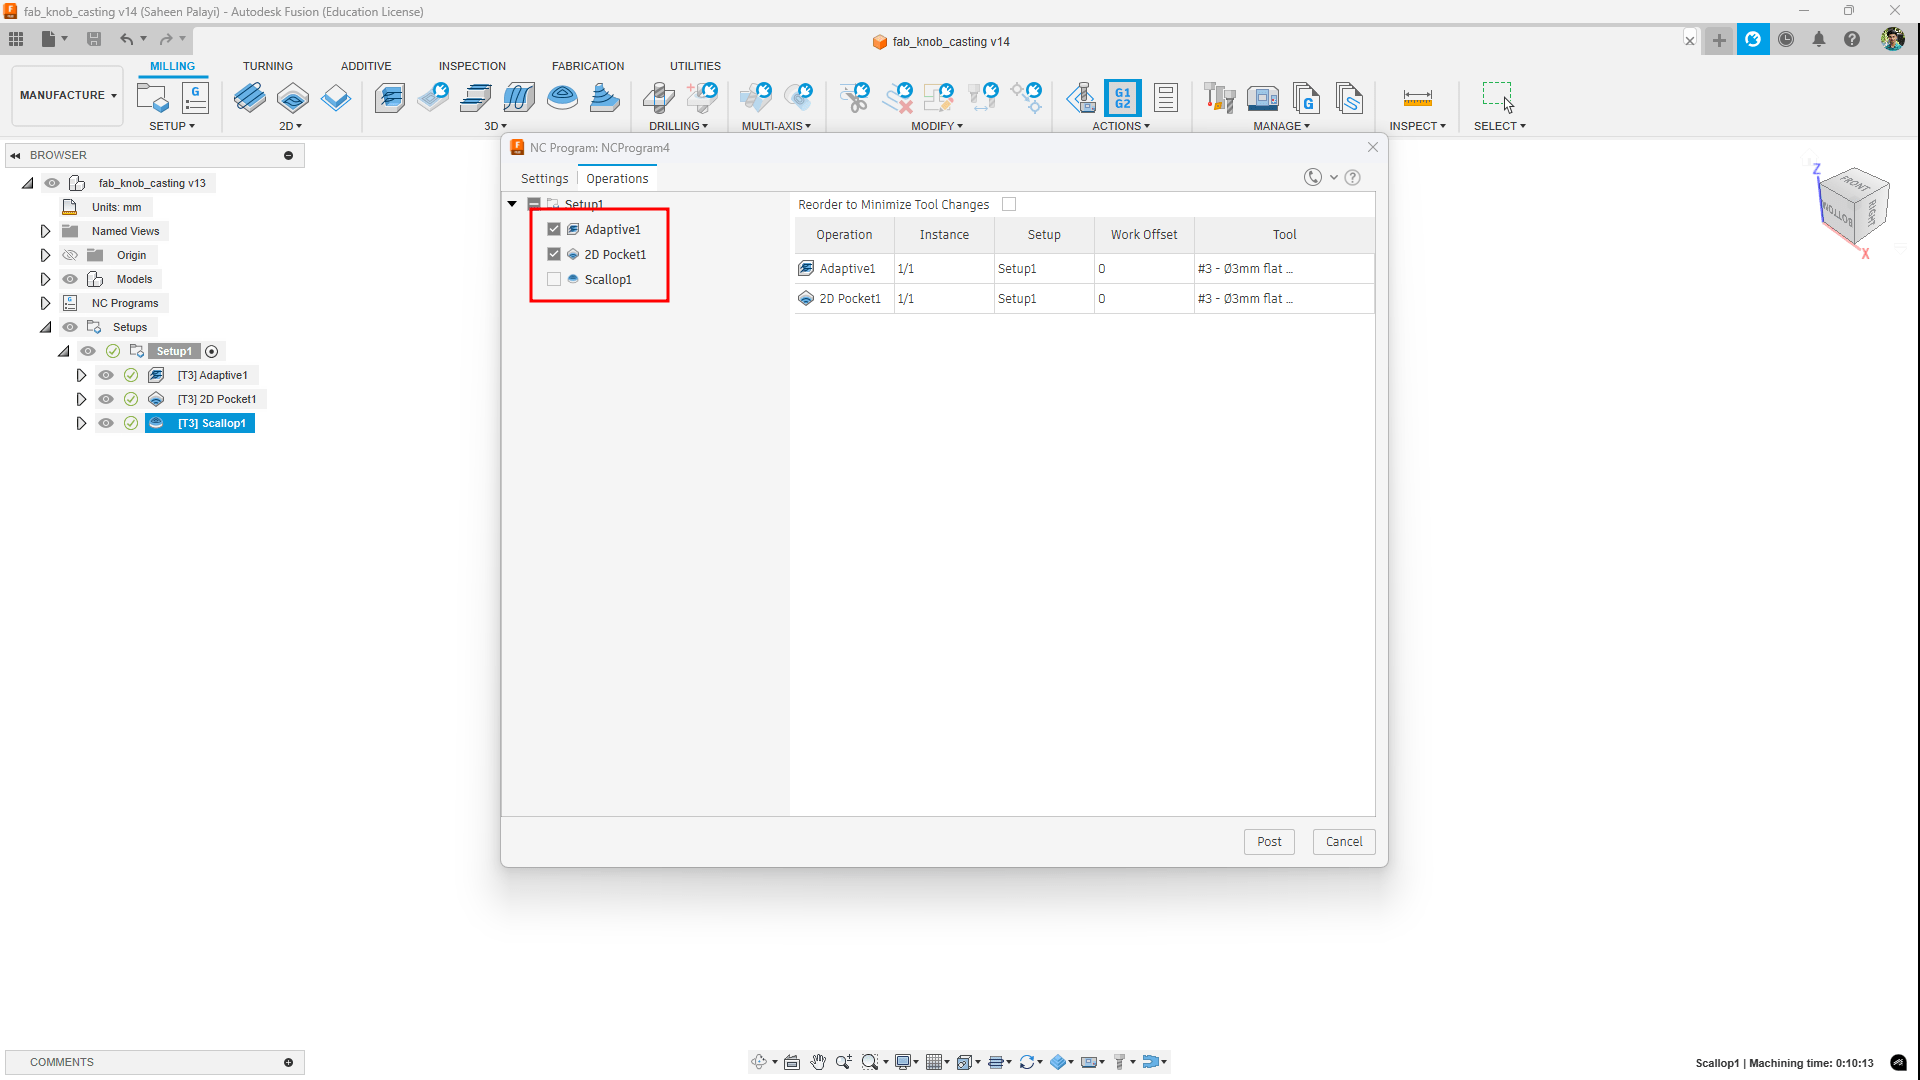
The above screenshot shows where I should be apply the selection to export the tool path separately. I should have selected the scallop operation and then post process it separately. But I didn't do that. So I ended up with a wrong post output file.
After the machining I taken out the mold and inspected myself.It was quite smooth finished than I expected!. So the positive mold is ready!
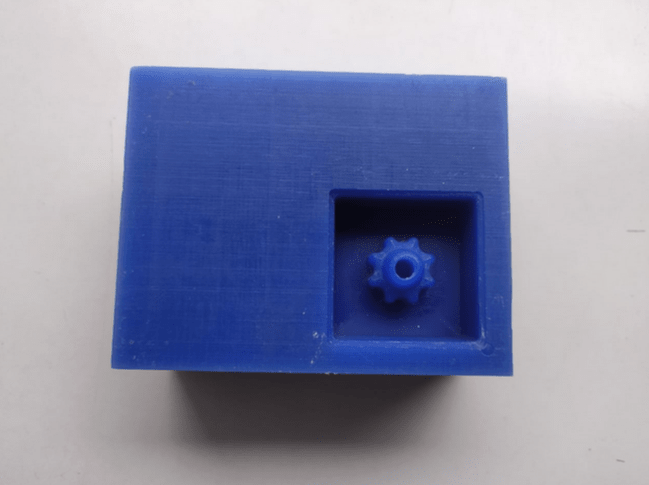
But,there is a problem that I made on this mold,the knob's end and the wax-mold surface are on same surface level.To clear that I did laser cut a rectangular pice and glued on top of the mold
Silicon Molding..
to start to making silicon mold making I prepared every tools and material required. Alfia m joining me as well to do it together
so from our group assignment we noticed all the oomoo 25 silicon casting kit are outdated so lucky for us we got new unopened SORTA-CLEAR 37 silicon kit from smooth-on
I placed a 3x32 mm M3 hexagonal screw inside positive wax mold to make the orientation hole of the screw in the silicon mold.After that I filled the mold with water to measure the total volume of the negative side of the wax mold
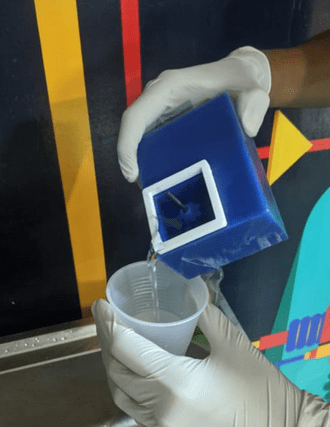
we poured the water into a cup then we splits half of it into another cup and marked the level on the cup by a permanent marker.because the ratio of the silicon PartA and PartB mixing is 1:1 by volume
Then we cleaned the plastic cups and mold using compressed air and made sure all wet
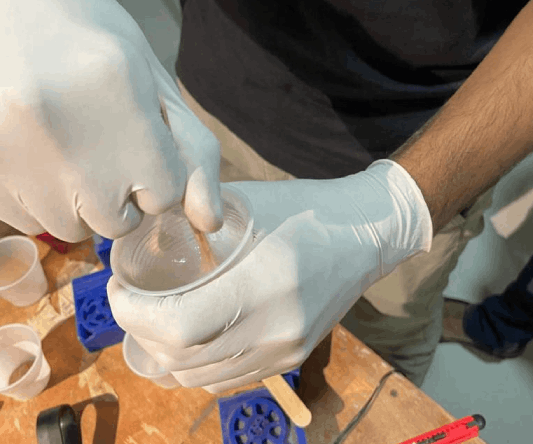
we poured the sorta-clear-37 resin part A into a plastic cup up to the level and mixed with a pop stick well.It is very viscous
Then we poured the sorta-clear-37 part B harder into another cup and we mixed that as well.it wasn't that viscous as like the part A
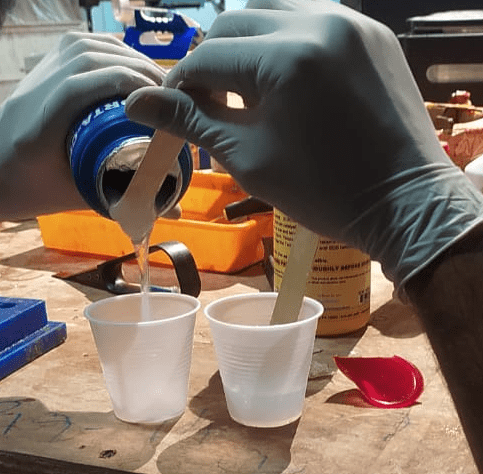
After that we poured the part B hardener into the resin cup

then we starts to mix with a pop stick .see the instructions of sorta-clear-37 from smooth-on.com
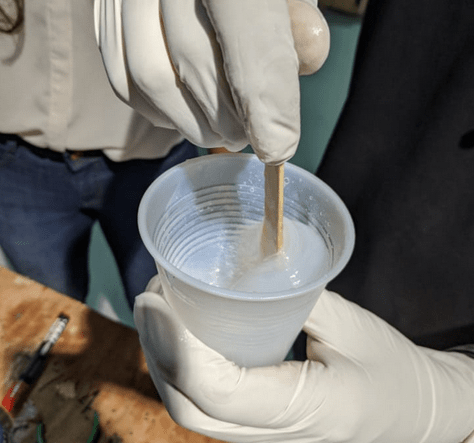
the mixing process must last upto 2 mins according to the instructions from the manufacturer.we also uses the drill to mix it well like in the fab tutorials
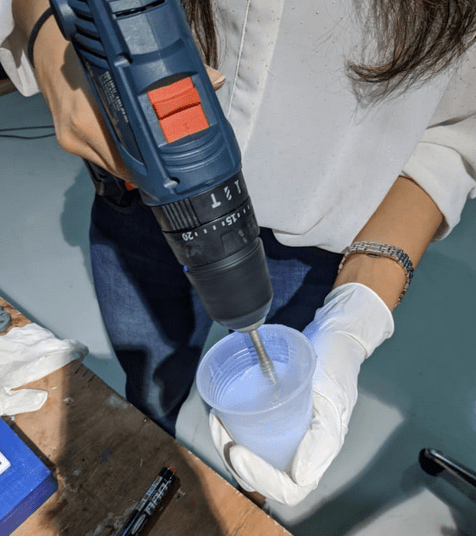
But the drill mixing not recommended by the manufacturer.It's just mixing the solution well.To remove bubbles inside the mold we should remove it by using a vacuum chamber process.Unfortunately we didn't have it,so we skips the step
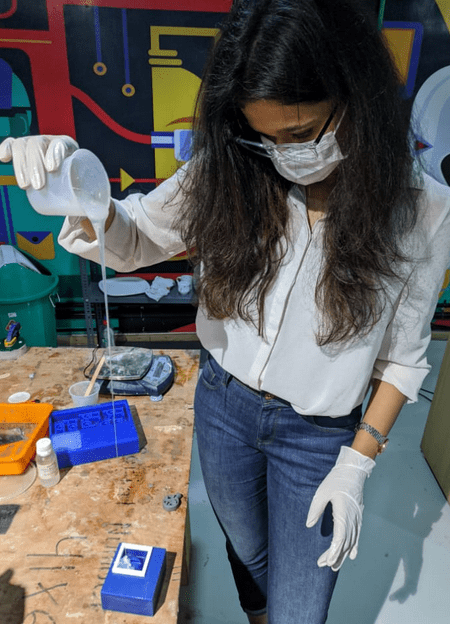
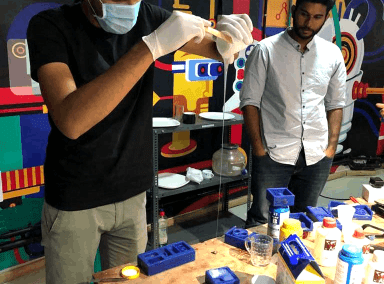
then we started to pour into the Positive wax mold,first in Alfia's mold and then in my mold
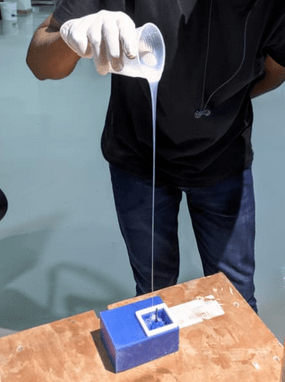
To pour the mold .not recommended to pour so close to the mold there is a chance to get a bubble inside the mold.so I lift the cup and made sure it's narrow
So the pouring is done!,according to the manufacturer the sorta-clear-37's curing time is about 4 hours.so we have to wait till it cures
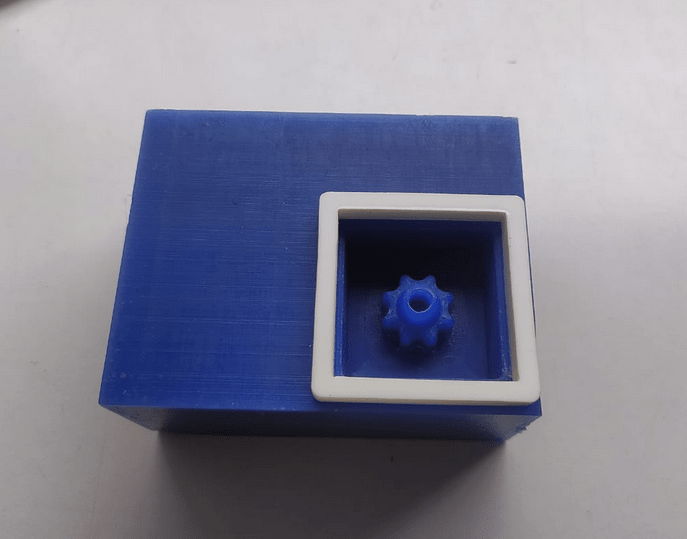
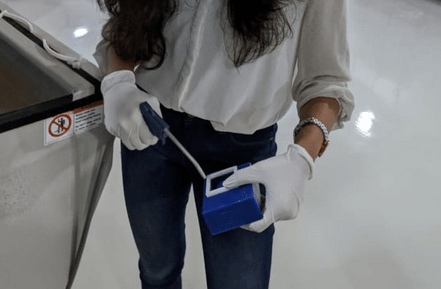
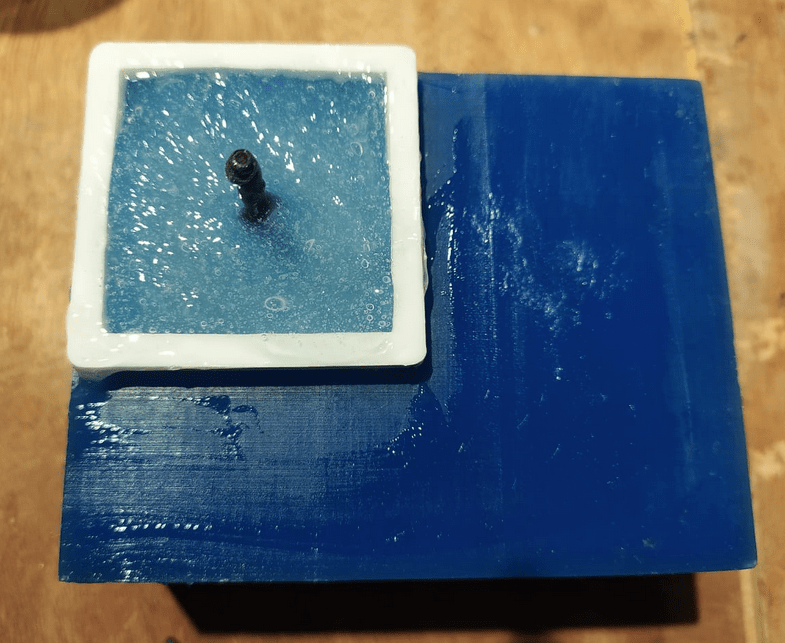
so after a 4-6 hours later the mold completely cured we taken out the negative silicon mold from the wax mold.it was easy for me because a sloped the wall of wax mold
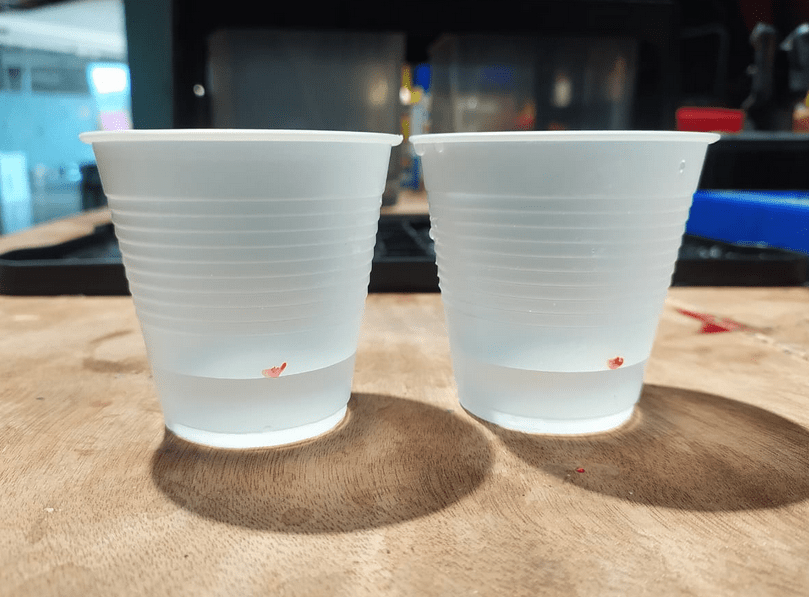
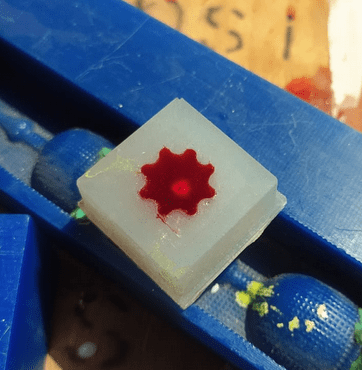
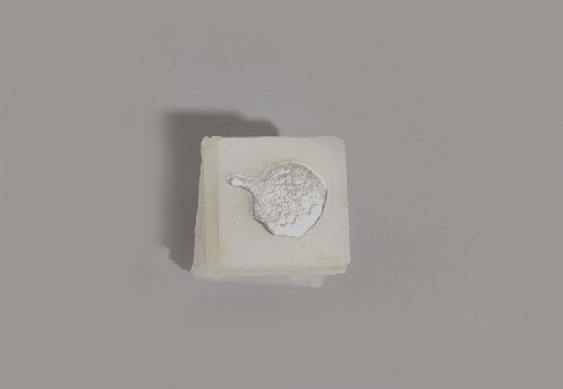
I removed the screw as well to clean the mold and also for inspection.but I noticed I got bubble inside at the edge of my model's negative
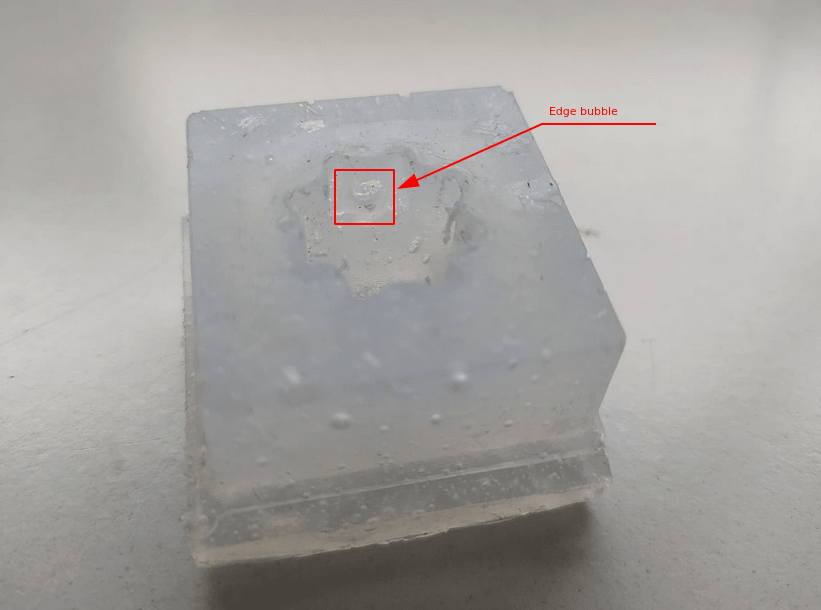
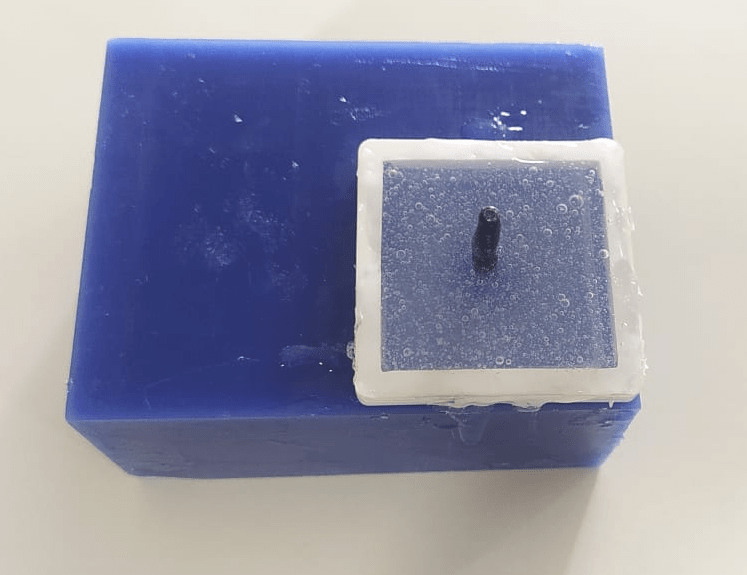
so I realized that might be a problem for casting the knob,it will affect the result.this problem occur because I couldn't keep the narrow pouring in stable also my mold poured after another mold.so there is chance the last mold get bad
I done the whole process again to make another mold.this time I made sure there is no bubble got inside.it will be more helpful if we got the vacuum chamber to remove the bubble.
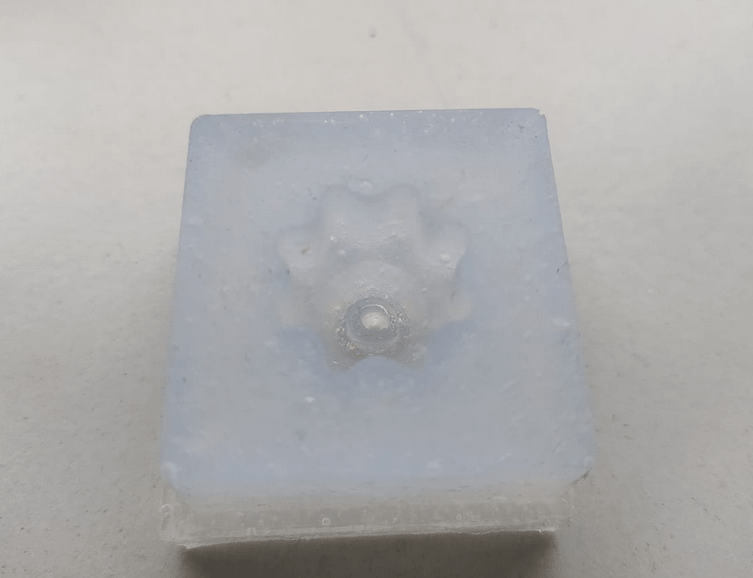
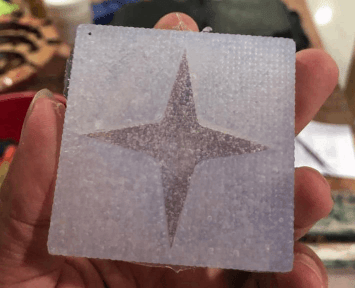
this time I got exact mold what I almost expected.there is still bubble in there.but that not gonna bother te final result.
Casting the Knob
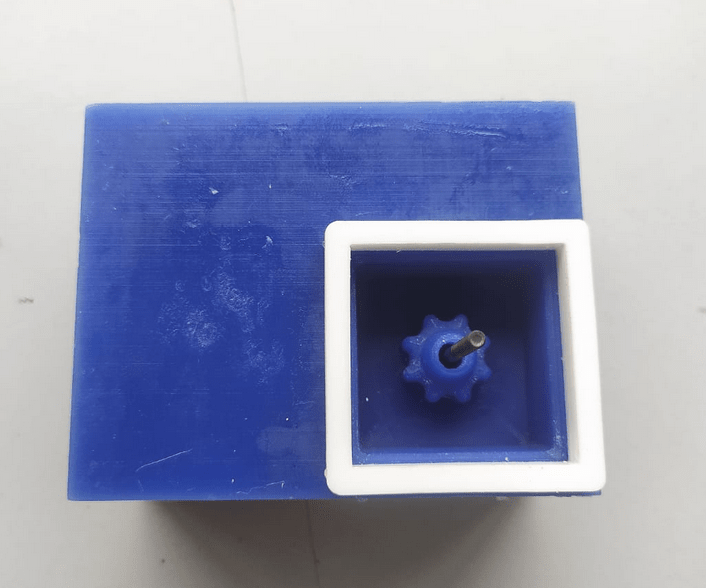
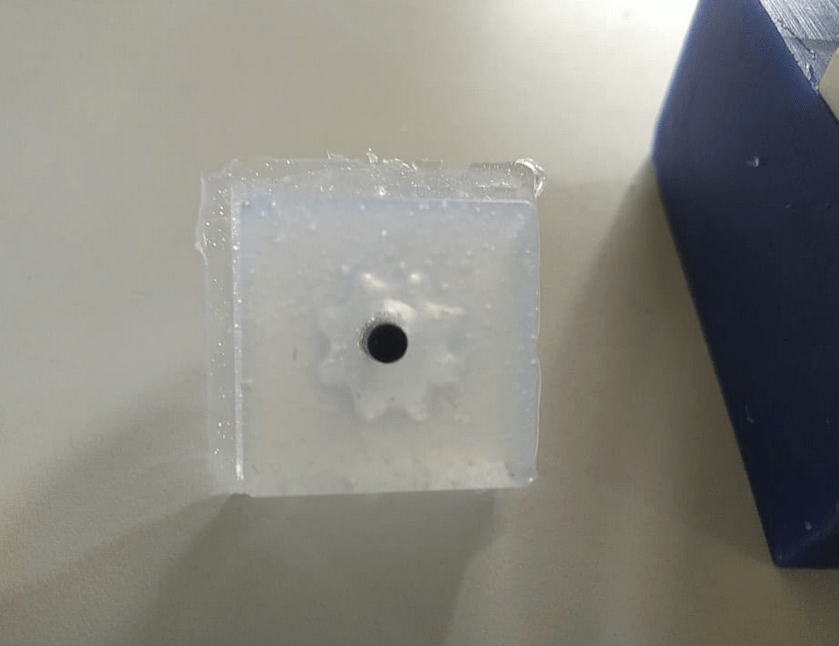
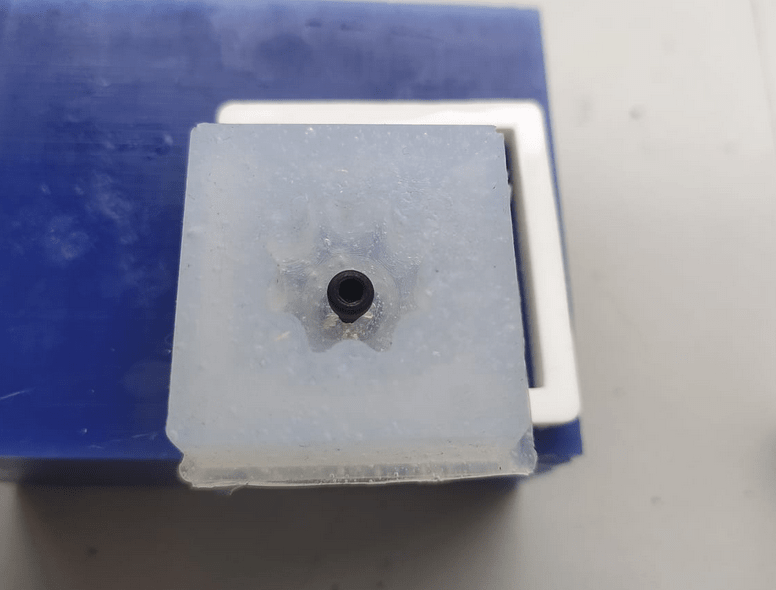
Now I'm ready to cast the knob from the silicon mold that I made.so I placed the M3 screw back inside the mold
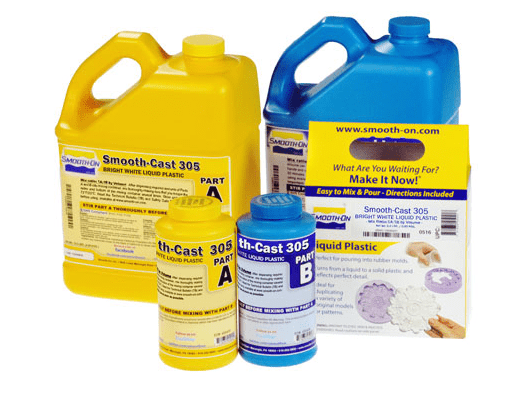
For casting the mold I'm using the smooth-cast-305 liquid plastic from smooth-on.com
It comes with default white colour.the cure time is offered is 30 mins curing time but pot time only last upto 7 mins check the above link for more information
Before I do my self,I did casted one model with my friend he has some 305 left so I tested with mine
The result look good but the casted part not sticks on the screw.the screw's head is rotate loose with the knob.so I realized that it need a bigger hexagonal head screw to fit or cast together to get it work
So I prepared other new screws.Inserted and soldered the hexagonal screw inside bigger M5 size nut with the help of sanding paper and drill sanded the hexagonal head to fit inside the nut.I also found one with full thread screw from the lab so I used 2 M3 Nuts for that one.

Like I did in the silicon molding process.I measured the volume with water and marked on the cups and poured the resin Part A to the level in a cup and the hardener Part B in other cup as well.the mixing ratio still 1:1 by volume
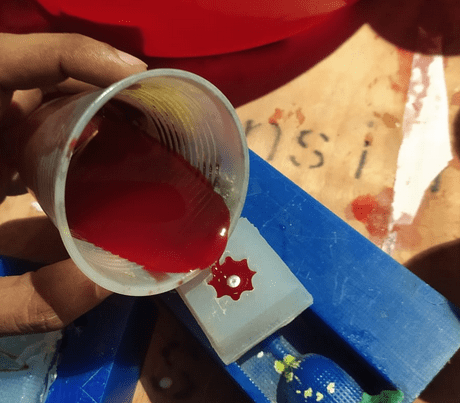
Then I added 2 drop of red pigment and one drop of yellow in to the resin to make get a orange colour.I'm using the so-strong pigments from smooth-on
After mixing the colour to the resin I realized that I picked wrong pigment compo to get orange color.but it's ok for me.
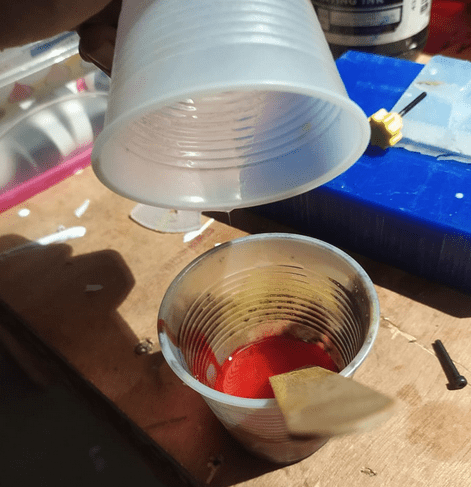
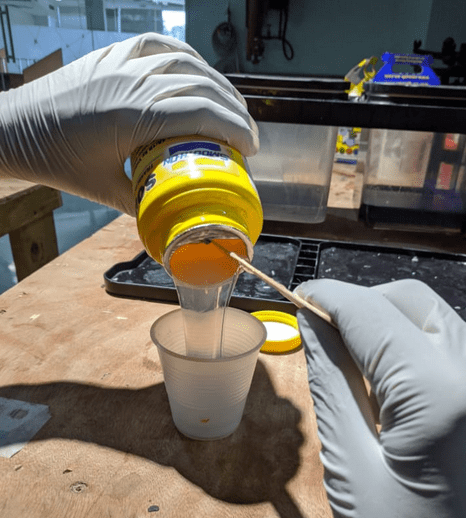
Then I poured the hardener to the resin and started to mix it well
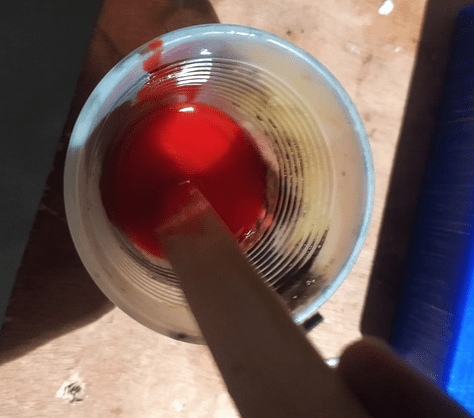
The mixing must last up to 1 mins according to the manufacturer's instructions.Then I poured the solution in to the mold
It wasn't that viscous to handle but anyway don't use hands directly u should use a better quality cloth gloves with silicon coating while handling it and also careful with the mixing
Then I left mold to let cure the liquid plastic more than 30 mins
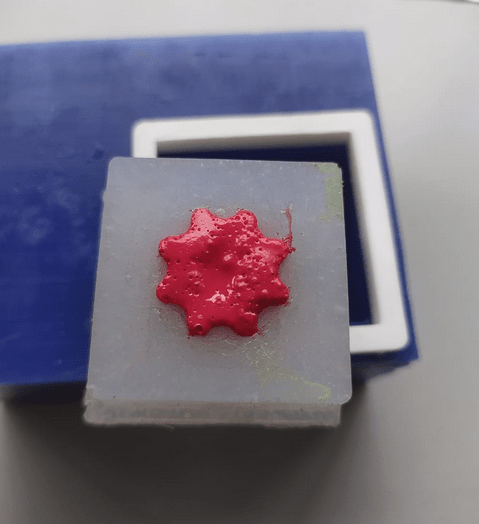
after it fully cured u can see the chemical reaction popped the bubbles out and overflowed the mold
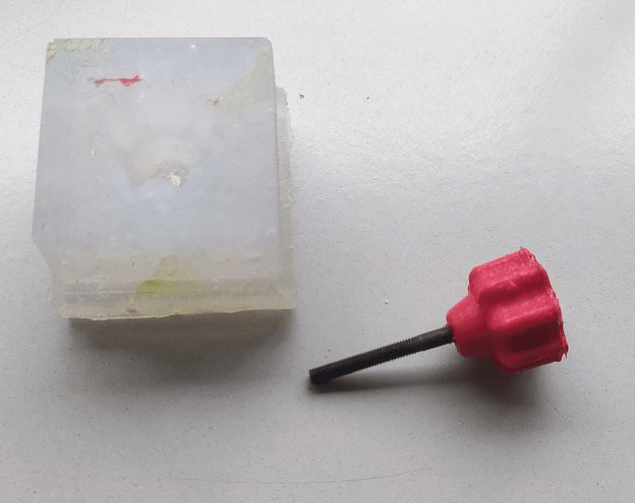
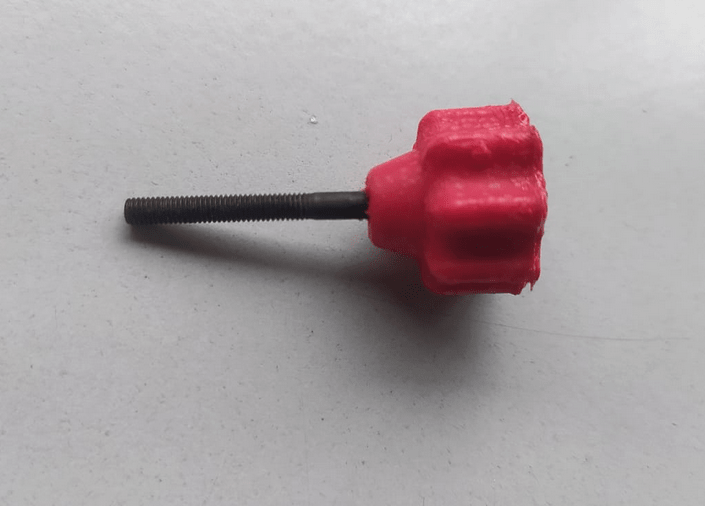
I taken out the knob from the mold it was great like I expected the screw embed well inside!
After this I casted another knob this time I pigmented for orange color like 2 drop yellow and 1 drop red but I was in a hurry forgot to mix it well upto 1 mins

See the results in the above picture came out very bad and very brittle when we try to brake it.which means something wrong with the ingredients or mixing.
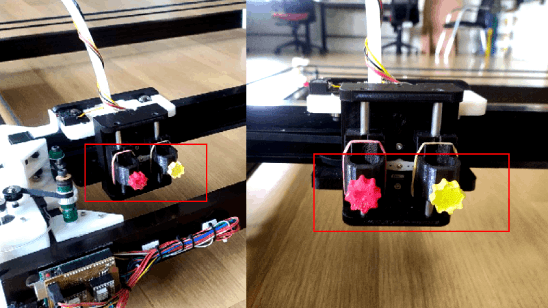
I assembled the succesful casts in our P-NASH Dual machine and works like a charm. I applied some epoxy glue on the casted yellow color knob to forbid free rotation of the screw in it.
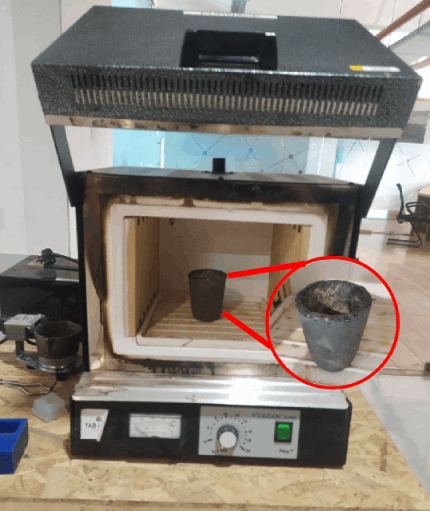
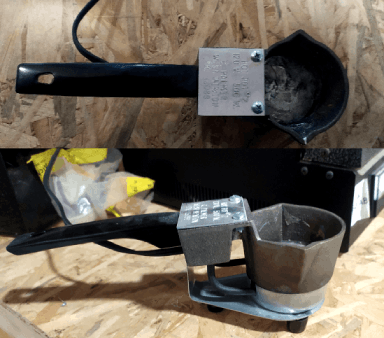
Casting with Bismuth
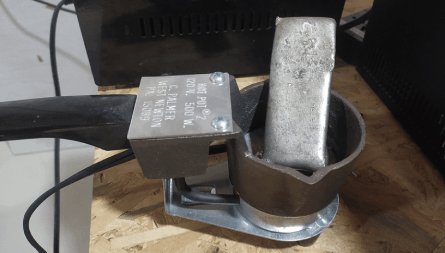
I put a bismuth bar in the hot pot and turned on to melt the bismuth bar to liquid.
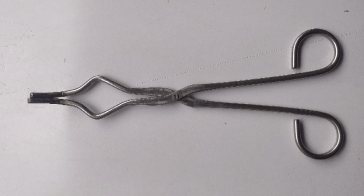
we can see the bismuth melting in the video turns out some bismuth are in it already which is enough for me.Then I turned off and taken the hot pot in my hand and cleared the slag lire aside using a long steel tool . After that I poured the bismuth into my silicon mold.
After pouring the bismuth in to the mold I put aside to let it dry. Bismuth also have fast cooling time but it's not a good idea to touch it soon before the heat get away.also the silicon can resist the heat so we can hold the mold carefully and not gonna do any harm.
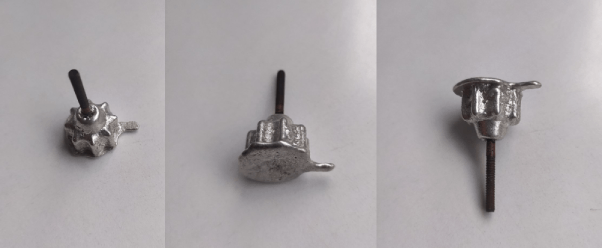
10 Min later I taken out the casted knob out of the knob and the results great and have some flashes and unwanted material but metal casting is awesome!! felt high satisfaction!.

Then I did some post processing works on by hand with help of some tools like hack saw , File, sand papers etc..
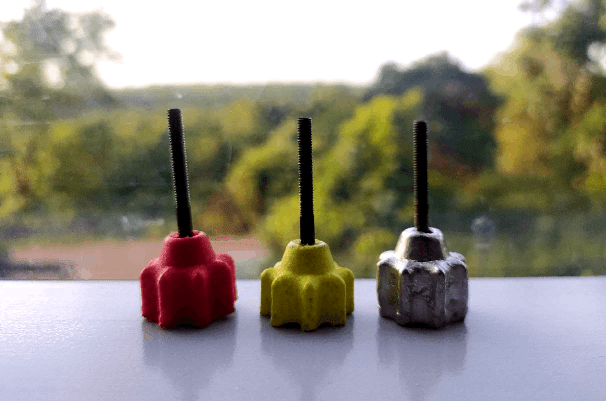
Here are the great results of the week and It's really beautiful and awesome!.
References
- Fab Academy Molding and Casting classes
- www.pcbway.com | Injunction Molding
- www.smooth-on.com | Casting products
Downloads
- The knob Design Files
- The knob Stl Files
- CAM Files