15. Interface and application programming
1. Weekly Brief Summary
I just try to run processing / Unity interface.
2. Weekly Assignment Requirement
Group assignment:
- Compare as many tool options as possible.
Individual assignment:
- Write an application that interfaces a user with an input and/or output device that you made
3. Group Assignment
FabLab KAMAKURA 2021 Lab site / Interface and application programming
4. Practice
I used my input board for checking light value.
Input Board Program
int LIGHTin = 1; // PA5

void setup() {
  Serial.begin(9600);
  pinMode(LIGHTin, INPUT);
}

void loop() {
  float lightIn = analogRead(LIGHTin);
  byte val = map(lightIn, 0, 1023, 0, 255);
  Serial.write(val);
  delay(50);
}
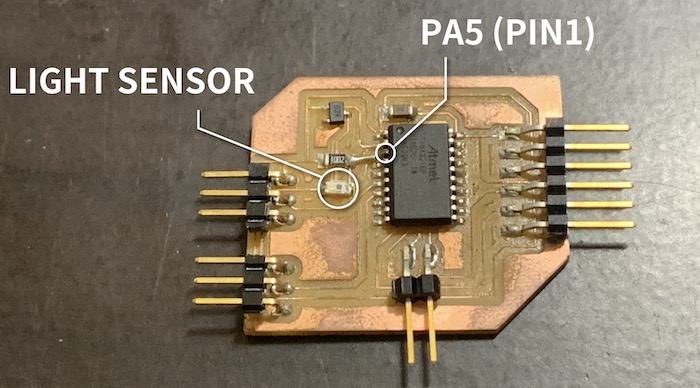
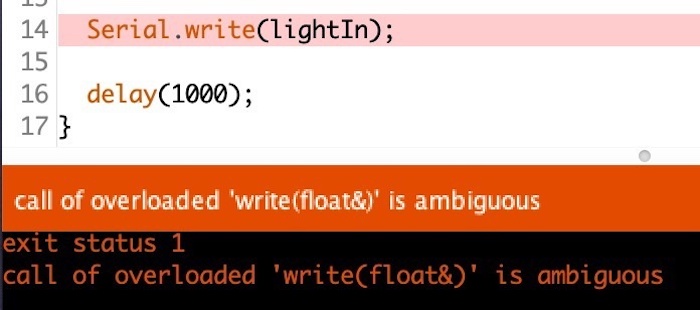
My input board has light sensor connected to ATtiny3216’s PA5, recognized as pin1. AnalogRead() in void loop get light value between 0 and 1023 every 50 microseconds. Arduino’s Serial.write() function cannot send float. I cast float value by byte declaration and map func, then Serial.write send compressed value.
Processing / firmata
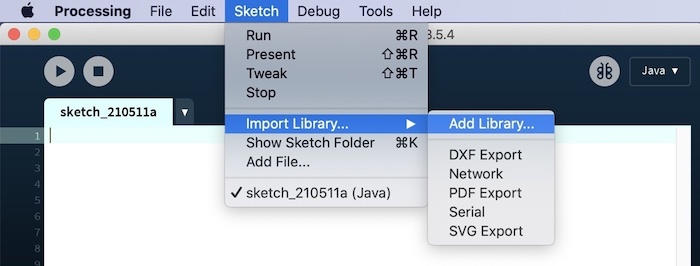
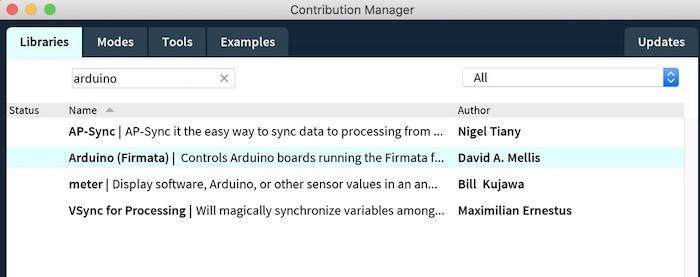
Processing is open soruce language for visualize by code. It can deal serial value from input board with arduino firmata library. To add firmata libarary, open Processing new sketch, add firmata library. Sketch > Import Library > Add Library > Arduino(Firmata).
Processing Sketch
I refer this page’s program and arrange it. Frequently used processing functions are as follows, and here is official reference.
| Code | Function |
|---|---|
| fill | define inside color |
| stroke | define outline color |
| ellipse | draw circle |
| rect | draw rectangle |
import cc.arduino.*;
import org.firmata.*;
import processing.serial.*;

Serial port;

float x;
float y;

int in_data;

void setup() {
  size(300, 300);
  port = new Serial(this, "SERIALPORT", 9600);
  background(0, 0, 0);
  textAlign(CENTER);
}

void draw() {
  fill(255, 70);
  noStroke();
  rectMode(CORNER);
  rect(0, 0, width, height);

  if (port.available() > 0) {
    in_data = port.read();

    x = width/2 + random(-3, 3);
    y = height/2 + random(-3, 3);

    fill(255);
    rectMode(CORNER);
    rect(width/2-20, height/2-20, 40, 30);
    textSize(in_data/10);
    fill(0);
    text(in_data, width/2, height/2);

    noFill();
    stroke(random(255), random(255), 255);
    ellipse(x, y, in_data, in_data);
    rectMode(CENTER);
    noStroke();
    fill(random(150),random(150),random(150), 10);
    rect(x, y, in_data, in_data);
  }
}
Result
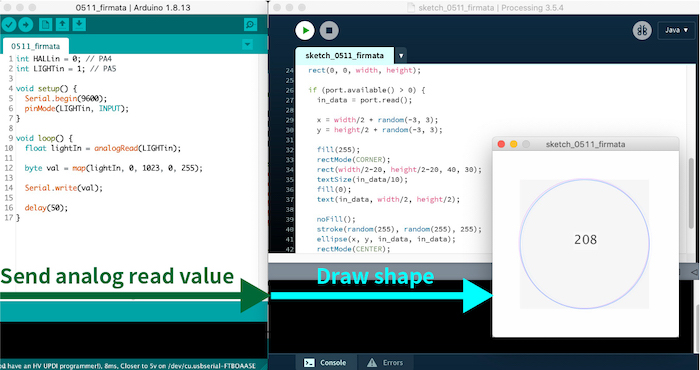
Input board gets analog value from light sensor, and send it to prosessing by serial communication. Then, processing draw images by using receied value.
Also I tried to draw 3D object with P3D/OPENGL library in processing. You need to add import processing.opengl.*;, and add P3D after size define. In this program, I set 20 3D boxes around circle, can change camera angle with mouse by camera function. Background color is changed by light sensor value as in the program above.
import cc.arduino.*;
import org.firmata.*;
import processing.serial.*;
import processing.opengl.*;

Serial port;
PVector[] objects = new PVector[20];
float x;
float y;

int in_data;
int backgroundCol;

void setup() {
  size(800, 400, P3D);
  port = new Serial(this, "SERIALPORT", 9600);
  background(0, 0, 0);
  textAlign(CENTER);
  for (int i = 0; i < 20; i++) {
    objects[i] = new PVector(width/2 + random(-200,200), height/2 + random(-200,200), 0);
  }
}

void draw() {

  for(int i = 0 ; i < 20; i++){
    pushMatrix();
    PVector o = objects[i];
    translate(o.x, o.y, o.z);
    fill(random(255));
    box(20,20,20);
    popMatrix();
  }


  if (port.available() > 0) {
    in_data = port.read();
    backgroundCol = 255 - in_data;
    background(backgroundCol);

    x = width/2 + random(-3, 3);
    y = height/2 + random(-3, 3);

    textSize(in_data/10);
    fill(255);
    text(in_data, width/2, height/2);

    noFill();
    stroke(random(255), random(255), 255);
    ellipse(x, y, in_data, in_data);
    noStroke();
    fill(random(150), random(150), random(150), 10);
  }

  camera(mouseX, 0, mouseY, width/2, height/2, 0, 0, 1, 0);
}
About processing 3D, I refered to this web page.
Unity
Unity is platform for game, app and many interactive contents. It also can read value from serial port. It’s almost first time to use unity-serial, so I talked with the instructor, and was taught how to use them and shared sample program.
Input Board Program(Arduino lang)
const int analogInPin = 1;
int sensorValue = 0;

void setup() {
  Serial.begin(115200);
}

void loop() {
  sensorValue = analogRead(analogInPin);
  Serial.println(sensorValue);
  delay(100);
}
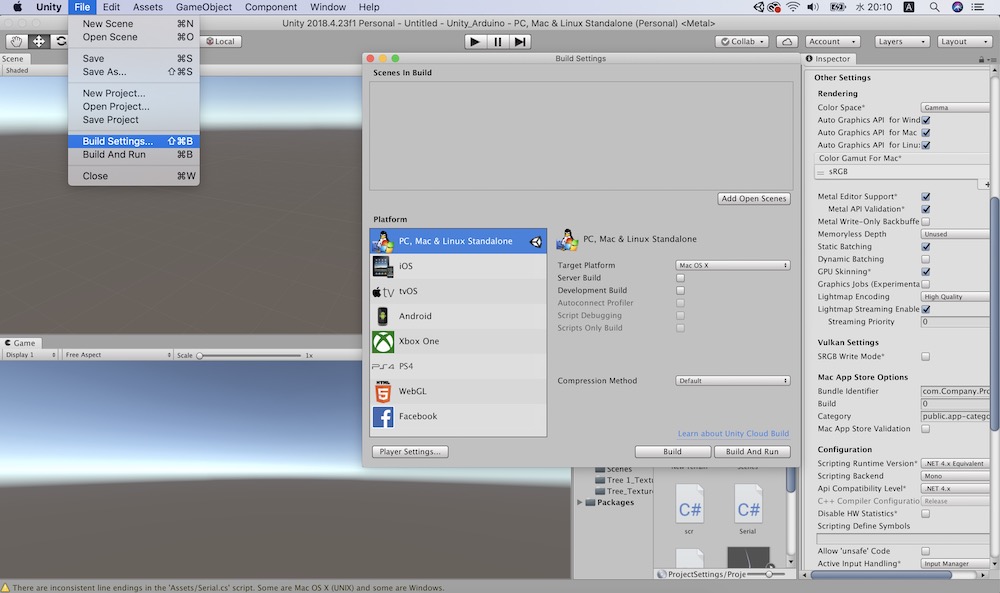
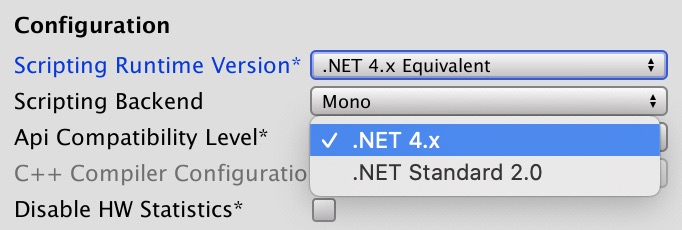
Unity Settings
For read serial value, need to change configuration. Create new Unity project, Build Settings > Player Settings(open inspector) > Other Settings > Configuration. Set Scripting Runtime Version as .Net 4.x Equivalent, Api Compatibility Level as .NET 4.x.
I made empty game object named serialInput, and attach C# scrpit below.
using System.Collections;
using System.Collections.Generic;
using UnityEngine;
using System.IO.Ports;

public class Serial : MonoBehaviour
{
    private SerialPort serialPort;
    public string mcDataString;
    public float mcData;
    public int n;
    public string USB_port = "SERIAL PORT";

    // Use this for initialization
    void Start()
    {
        serialPort = new SerialPort(USB_port, 115200);
        serialPort.Open();
    }

    // Update is called once per frame
    void Update()
    {
        if (serialPort.IsOpen)
        {
            mcDataString = serialPort.ReadLine();
            Debug.Log(mcDataString);
            n = mcDataString.Length;

            if (n > 1)
            {
                n = n - 1;
                string s = mcDataString.Substring(0, n);
                mcData = float.Parse(s);
            }
        }
    }
}
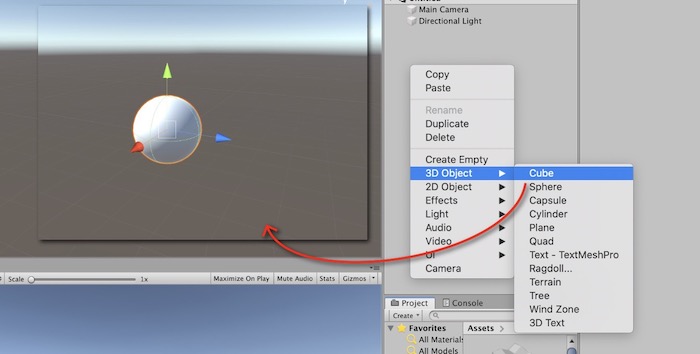
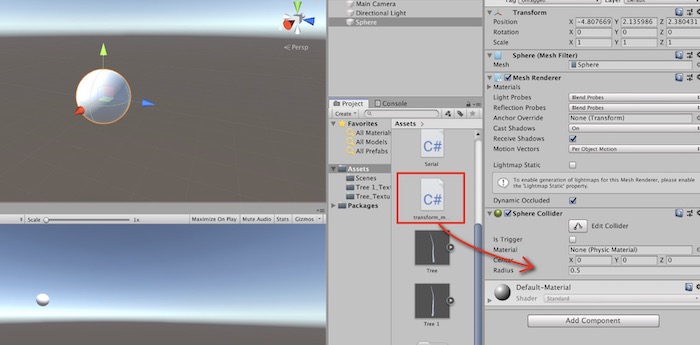
I also add new 3D object by right-click in hierarchy, and add attach C# Script by drag and drop.
using System.Collections;
using System.Collections.Generic;
using UnityEngine;

public class scr : MonoBehaviour
{
    GameObject serialIn;
    Serial script;
    // Start is called before the first frame update
    void Start()
    {
        Debug.Log("start");
        serialIn = GameObject.Find("serialIn");
        script = serialIn.GetComponent<Serial>();
    }

    // Update is called once per frame
    void Update()
    {
        float data = script.mcData;
        float i = data / 100;
        this.transform.localScale = new Vector3(1, i, 1);
    }
}