3. Computer Aided design
1. Weekly Brief Summary
I tried Inkscape and GIMP as 2D software, FreeCAD and Blender as 3D software. Although FreeCAD was completely new to me, I was able to understand the assembly functions.
2. Weekly Assignment Requirement
Model (raster, vector, 2D, 3D, render, animate, simulate, …) a possible final project, compress your images and videos, and post it on your class page.
- Modelled experimental objects/part of a possible project in 2D and 3D software
- Shown how you did it with words/images/screenshots
- Included your original design files
3-1. 2D Vector Software / Inkscape
I had been using Adobe Photoshop and Illustrator on a regular basis, so I decided to try other tools.
How to install Inkscape (with Command Line)
-
Access to Official Site (but…)
You can get dmg files from Inkscape Official, but When I accessed that page, I couldn’t see it due to maybe a server glitch.
-
Download XQuartz
Inkscape run on XQuartz in Mac OSX. You have to download from XQuartz web site.
-
Get Inkscape .dmg file via Terminal(homebrew)
Since I couldn’t see the official page, I checked if there was another way to download it, and found out that I could install it from the command line (Refference).
brew updatebrew cask serach-
Error: Unknown command: cask
- It means “I don’t have cask commands yet.”
-
brew install caskbrew tap homebrew/caskbrew install --cask inkscape
then, I got Inkscape .dmg file at
/Users/USERNAME/Library/Caches/Homebrew/Downloads.
hdiutil mount DIMGFILENAME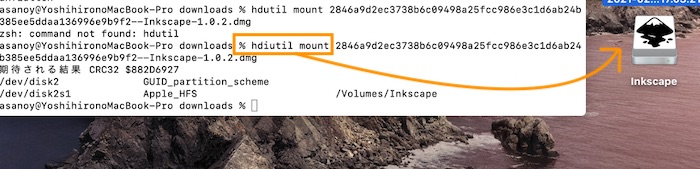
Finally I found Inkscape on Desktop, and moved to Applications folder.
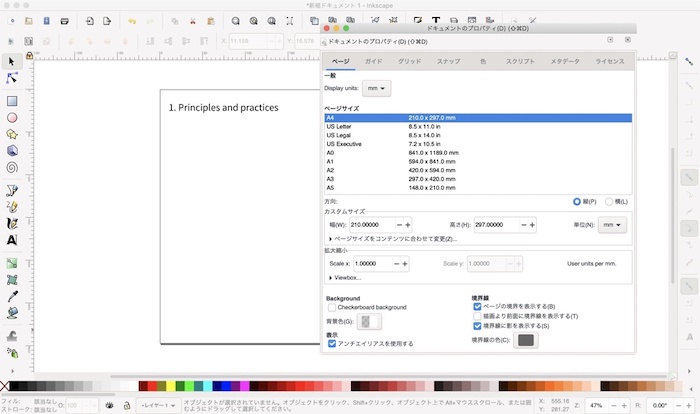
Make banner image with Inkscape
| Operation | Result |
|---|---|
| File → Property | Change options, like document size, etc. |
| File → Import | Import image files. |
| Object → Allign | Appear align Options. |
| Right Click → Clip | Clip objett according to front object shape. |

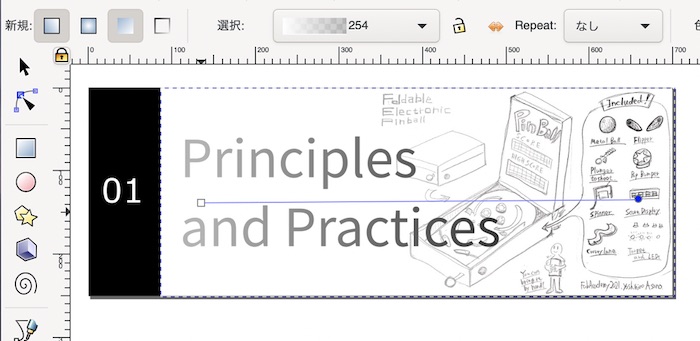
Objects are constructed by Fill and Stroke, Opacity.
You can also use graduation and opacity controll.
I made banners and paste on top page, which link to weekly assignment pages.

3-2. 2D Raster Software / Photoshop and GIMP
Raster images is collection of pixels. It is suitable for complicated images like photo, but not good at transform like zoom in/out.
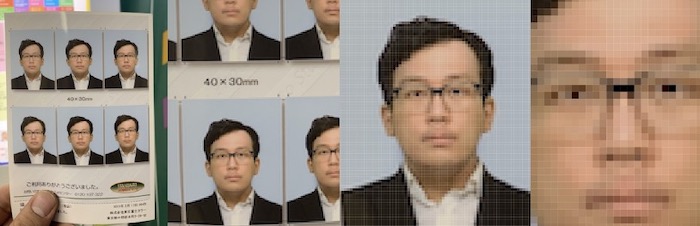
This image(portrait of me) open in Photoshop. As you zoom in, the pixels get bigger.

Raster tools are better than vector tools at drawing intuitive lines and giving gradual changes such as blotting and blurring. In this sample, I wrote line and blot out by smudge tool in Photoshop.

GIMP stands for GNU Image Manipulation Program ! It looks like same as Photshop. It seems that I can use my own scripts to process images automatically, with Script-Fu. Later I want to try it.
3-3. 3D Software / FreeCAD
I decided to try using FreeCAD. I was interested in it because it has similar performance to Fusion 360 and it is free. I will my own pinball machine, and there are many people who publish data of their own machines on the web, I decided to try modeling after them.
FreeCAD modeling
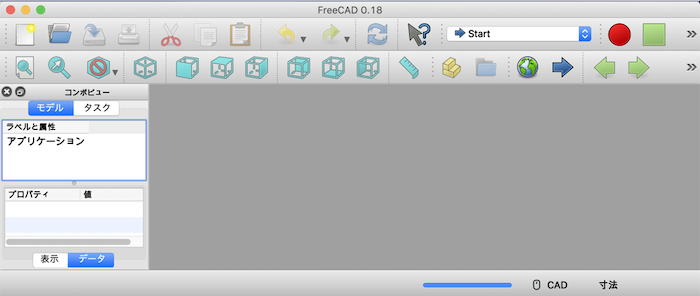
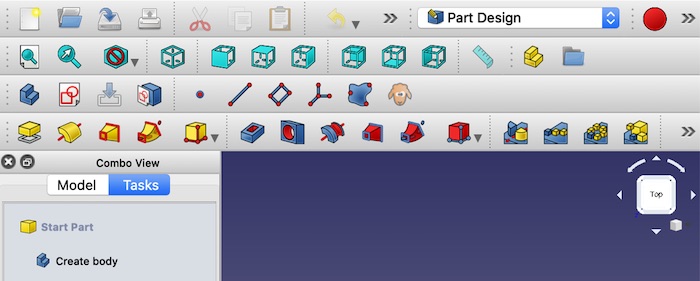
Install from Official Site. FreeCAD has many types of “Workbench”. I start with “part Design” and “Sketcher”.
Sketch Process
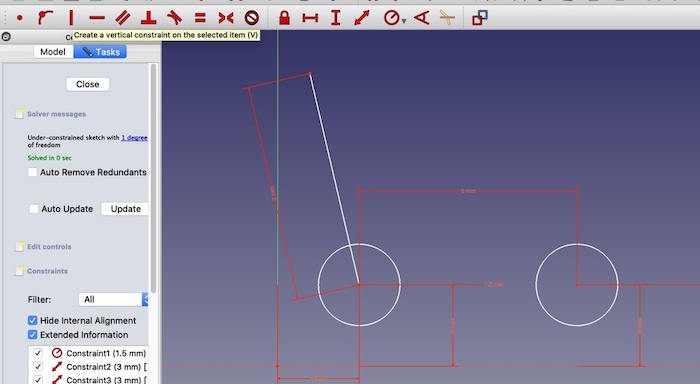
- Select Plane(XY, YZ, XZ or flat plane of exisiting objects)
- Using tools and draw sketch.
- Constrain all degrees of freedom
- It is very important, and complicated for first time. I have to select points and type of contraint.
- There are many types of constraint, Point to line, horizontal, vertical, perpendicular, length, degree, equallity, parallel …
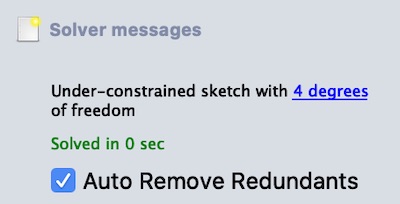
- If you have any under-constrained sketch, FreeCAD shows you warning message.
Make/Edit solid body
Choose constrained sketch and use tools for make solid body. For example…
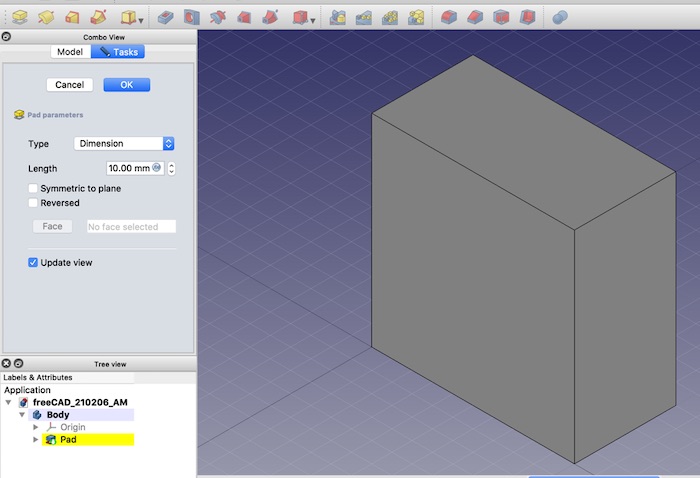
“Pad” for extrude in one direction.
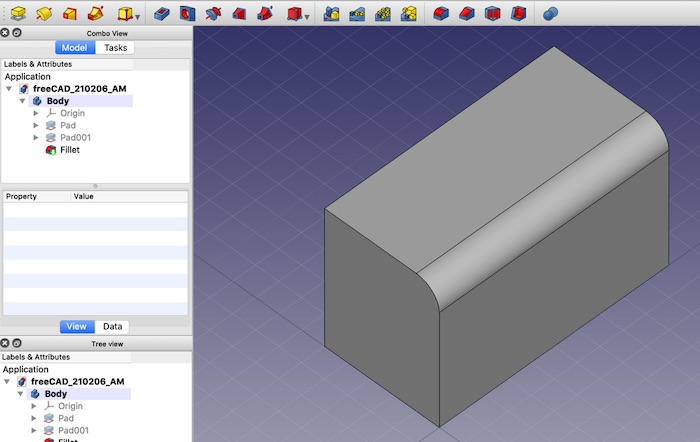
“Fillet” rounds edges.
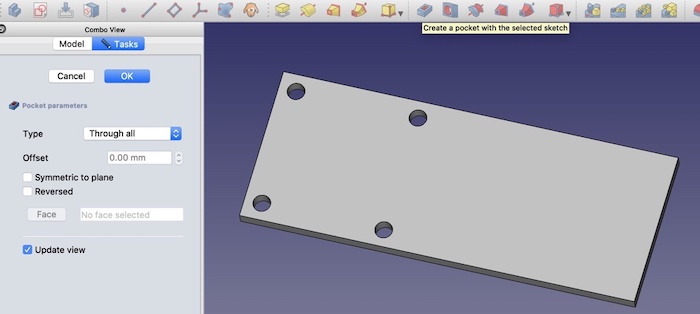
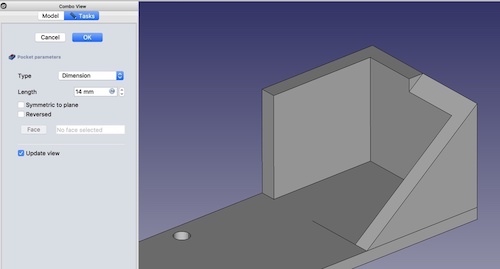
“Create Pocket” from solid body plane.
Practice
Thus I kind of knew how to create 3D model in FreeCAD.
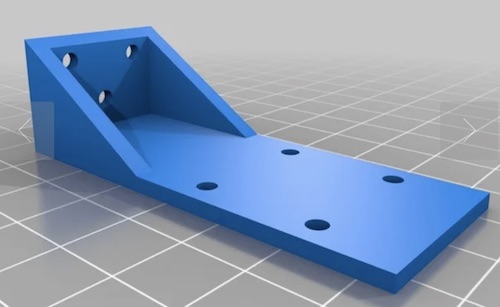
Let’s try to make Example, one part of Pinball Bumper by fluxwood
Open STL file in 3D viewe, this time I use Rhinoceros and gauged it. use “MeshToNurb” and “Dim” command.
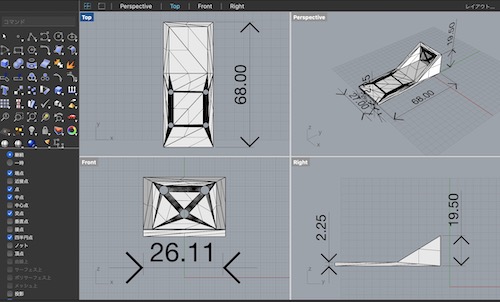
Write drawings and decide modeling process.
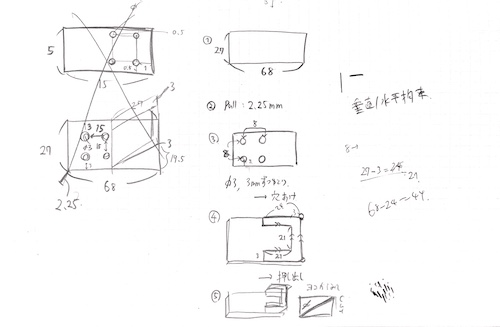
Sketch, pad, sketch again, create pocket, chamfer it.


FreeCAD assembly
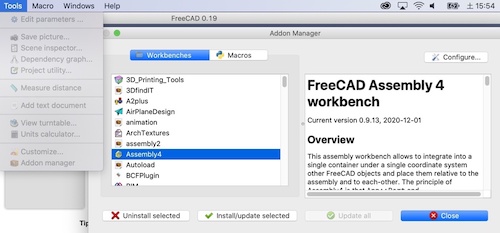
FreeCAD have assembly add-on workbench, “Assembly4”. However, FreeCAD 0.18 Addon manager doesn’t work well. It shows just only “3D_Printing_Tools” and I couldn’t solve it.
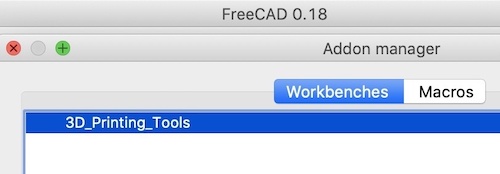
I changed FreeCAD version, 0.18 → 0.19. Finally it works well. The version distributed on the official website is 0.18, so I had to install 0.19 from FreeCAD github repository.
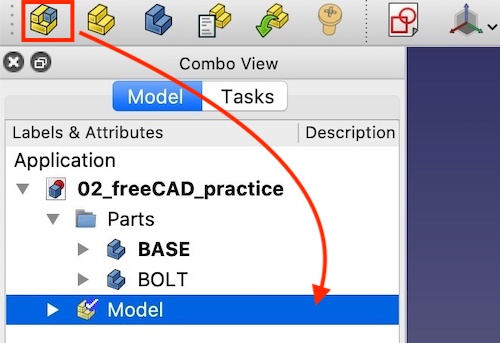
After making parts, move to “Assembly4” workbench, and click “Create a new Assembly 4 model”.
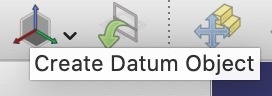
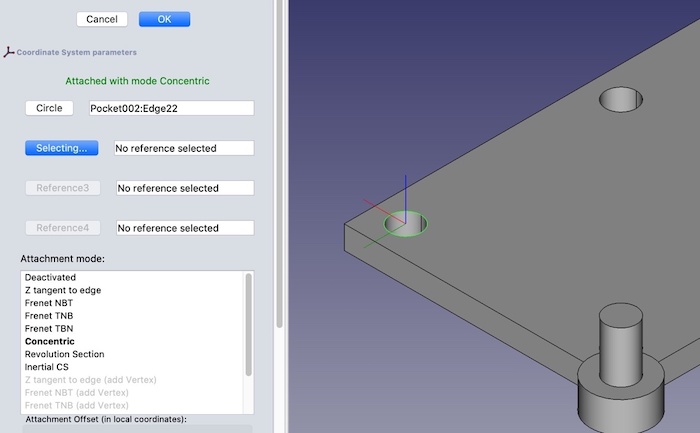
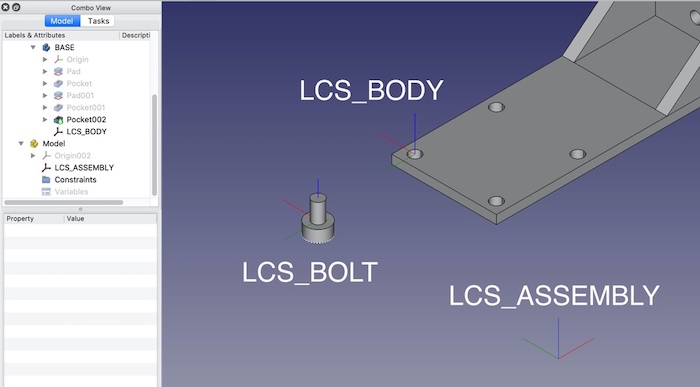
Need to Set Datum and LCS for each part to assembly. You can select up to four References. Select the Attachment Mode according to the number of references you have selected. This time, I’ll use Concentric.
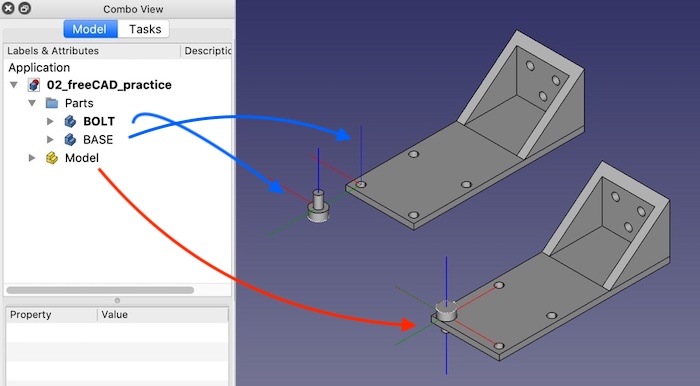
I created one blank assembly model, one body and one bolt. All three items has LCS.
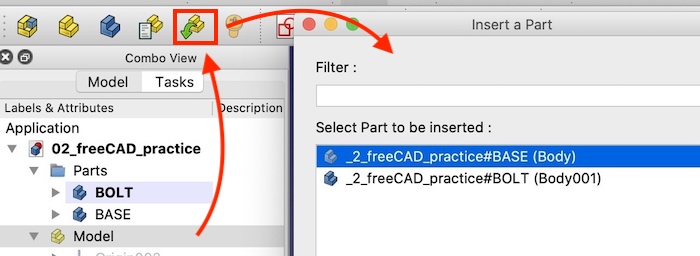
Select the Assembly model from the Combo view, select “Insert a link to Part”, and choose the part you want to use.
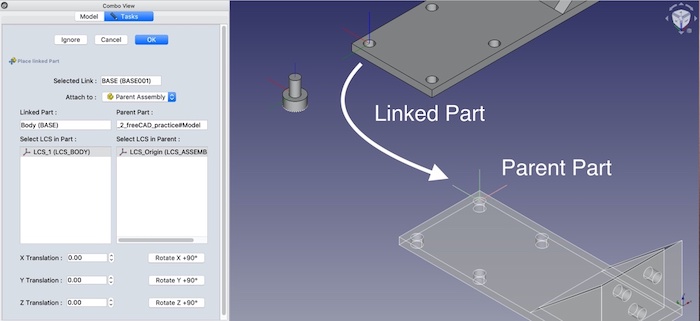
Select the Linked Part and Parent Part, and adjust the position by using the LCS of each.
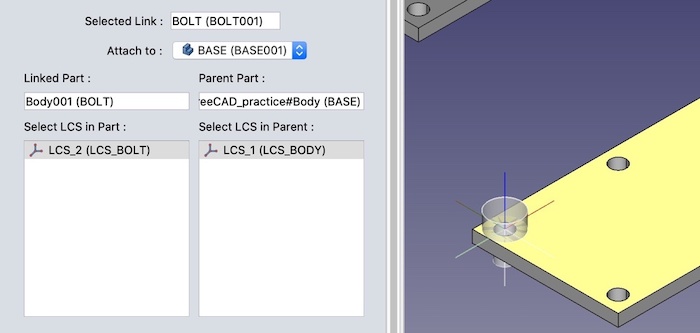
Finally, I got one aseemblied model and two existing original parts.
3-4. Rendering & Animation / Rhinoceros
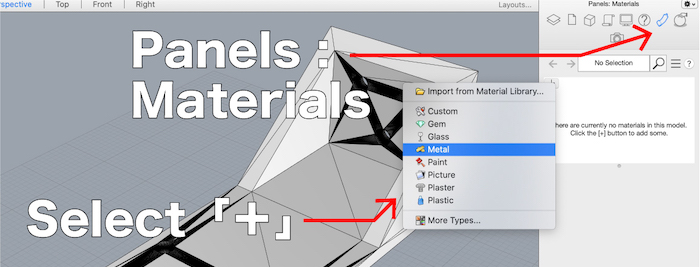
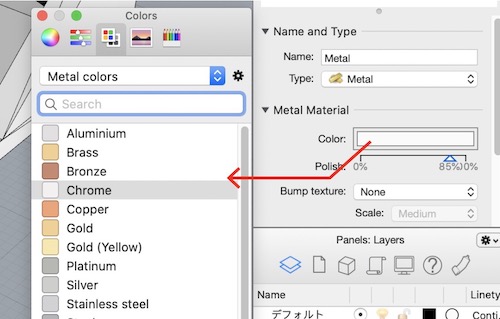
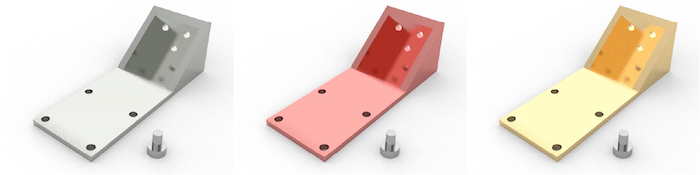
Then, I re-used Rhinoceros to render them. Import 2 STL files, and set materials by click + button and select types and color. By dragging material to objects, I can add material settings on them and Rendering image created by Render command refletcs its settings.
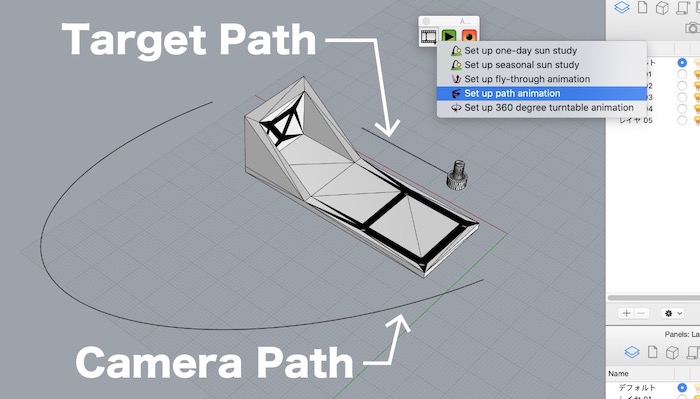
Also using Animation tool palette, I made animation from Rhinoceros. In this time, I used set up Path Animation, select camera path and target path, and set number of frames. Then I got a bunch of frames and its continuous movie on local html file. My movie below is caputured from local html fils.
3-5. 3D Software / Blender
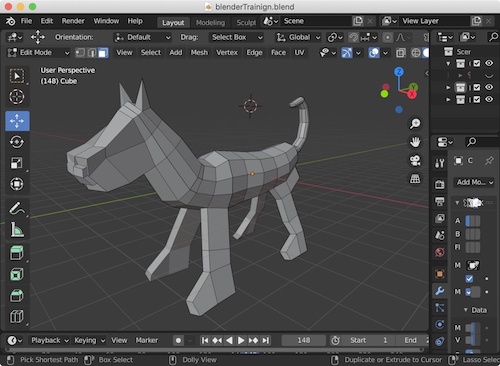
I’m working on a Blender tutorial for clean rendering and animation production. I couldn’t complete it in time, but the modeling method is interesting, as if I’m kneading clay, directly manipulating the mesh.
I refer to Blender Tutorial Web site (Written by Japanese) and made dog-like-thing :)
4. Learning Outcome
- Inkscape can be used in much the same way as illustrator.
- FreeCAD requests strict sketch constraint.
- Learned how to use the assembly function of FreeCAD.
What I felt
FreeCAD was very hard to get used to, but once I understood how it worked, it was easy to operate and easy to assemble and modify. I think I will use it as my main tool from now on.
I couldn’t get the time for GIMP and Blender, so I finished them halfway. I would like to redo them again when I need them.
5. Links to Files and Code
6. Appendix
- Inkscape
- GIMP
- Adobe Creative Cloud, including Photoshop/Illustrator
- FreeCAD official
- FreeCAD 0.19
- Rhinoceros
- Blender
FreeCAD tutorial
Blender Tutorial, Mai shared in Asian Review
My Laptop Preferences
| category | spec |
|---|---|
| OS | macOS Catalina ver.10.15.7 |
| Hardware | MacBook Pro (13-inch, 2020, Four Thunderbolt 3 ports) |
| Processor | 2 GHz QuadCore Intel Core i5 |
| Memory | 16 GB 3733 MHz LPDDR4X |
| Graphics | Intel Iris Plus Graphics 1536 MB |