How to make (almost) anything.
Week 02. Computer-Aided Design
Work done in the Lab under the guidance of my remote Instructor to accomplish the weekly assignments.
This week I did a basic sketch of my final project on Illustrator, tried three programs for 3D design: Tinkercad, Freecad, Solidworks, and started doing the model of my project on Rhino.
My weekly schedule:
| Wednesday, February 3 | Thursday, February 4 | Friday, February 5 | Saturday, February 6 | Sunday, February 7 | Monday, February 8 | Tuesday, February 9 |
| Global class | 2D design on Illustrator |
Tinkercad testing Freecad testing |
Solidworks testing |
- |
3D design on Rhino Rendering on Keyshot |
Animation on Photoshop Upload documentation |
2D Design
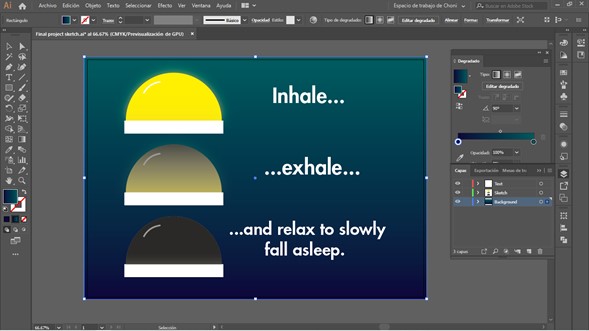
I started using Illustrator to make a basic flyer to explain my final project, I wanted to describe it with just a few words and some graphics so I drew a lamp and gave it a glowing effect with three gradation levels. This was drawn using pure simple figures like circles and rectangles using the Shape builder tool to trim the unnecessary parts.
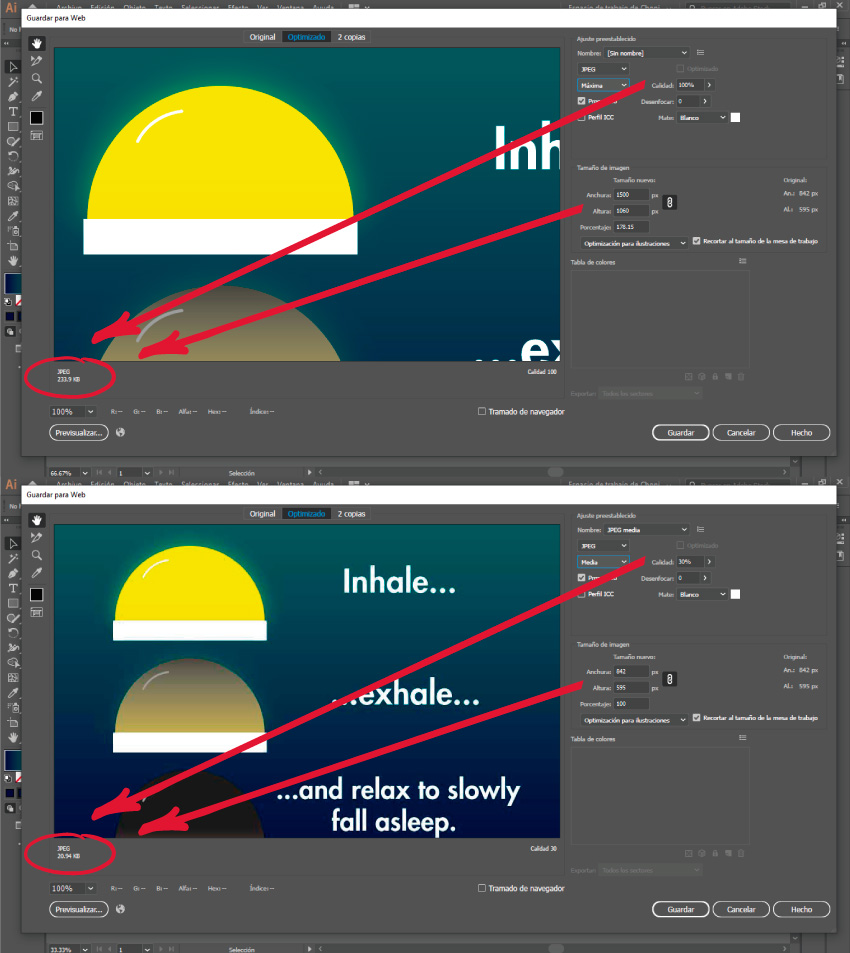
A very important recommendation that Neil gave us was about the weight of the files on our website: light files make the page load faster, so it is very important to use a low resolution and a high level of compression on all multimedia content we publish. In Illustrator's export options I used a high percentage of compression and a low resolution, reducing the weight of my images by up to 90%.
I updated my Final project page with this flyer cause I think it explains very well my project idea.
3D Design
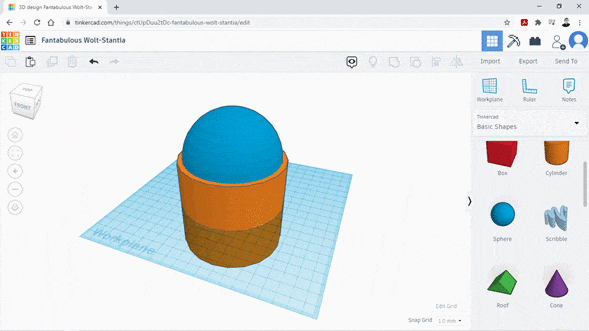
Tinkercad
Tinkercad is a very easy-to-use option that has a lot of potential for working with children or people who have no previous experience in digital modeling. The whole interface is based on the use of buttons, I think that being used to working with text commands made my work very slow since Tinkercad relies almost totally on the mouse instead of entering the information with the keyboard. I found it interesting to observe this platform from a UI / UX point of view: the creators tried to make it so simple and gave so much weight to the graphical environment that instead of offering hundreds of complex tools, all the modeling is done by adding or subtracting basic geometries. This workflow reminded me of my early drawing lessons where I had to decompose objects into their basic geometric representations to get a basic sketch with the correct proportions and then just add the details. Once you reprogram your brain and get used to this "new" workflow, you can model very easily.
Freecad
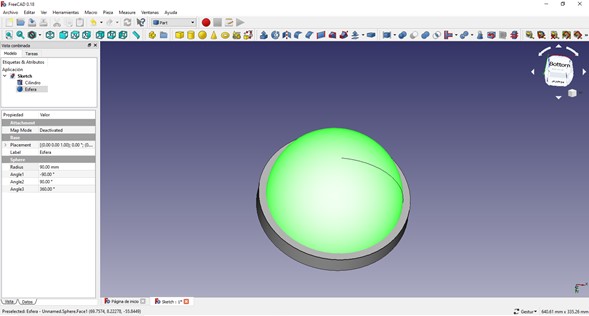
I installed Freecad and looked for a newbies tutorial. I found it to be a very powerful tool with countless uses, it even offers the option of programming new functions using Python, but it has so many options that it becomes a bit complicated to use it, at least for first-time users. In my opinion it is a vitaminized version of Solidworks (and open source).
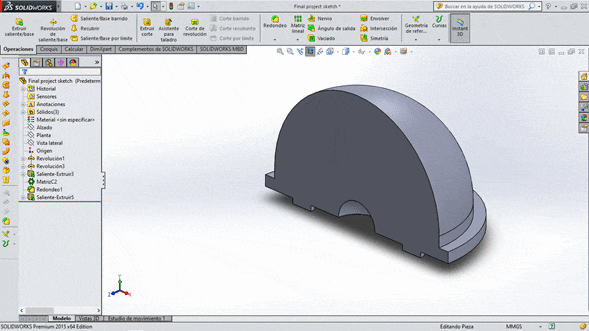
Solidworks
My last test was in Solidworks, years ago I used it as part of my daily routine so I thought the results would be outstanding, and I completely failed in my prediction. I cannot deny that my fundamental knowledge of the software is still present, I can draw a basic sketch, generate an operation such as revolution or extrusion and then integrate that part into an assembly or make a drawing, but that is all I remember. I had to deal with tools that I did not know where they were or hierarchies of relationships that I did not think would be indispensable, if I had to perform an animation of parts or simulation of efforts I would be totally lost. Fortunately, all the tools it includes work in a very intuitive way, so with a little practice I can surely recover my skills,+. It is important not to stop practicing because in a few days you could forget what you have learned. I will use it the next week to do parametric design.
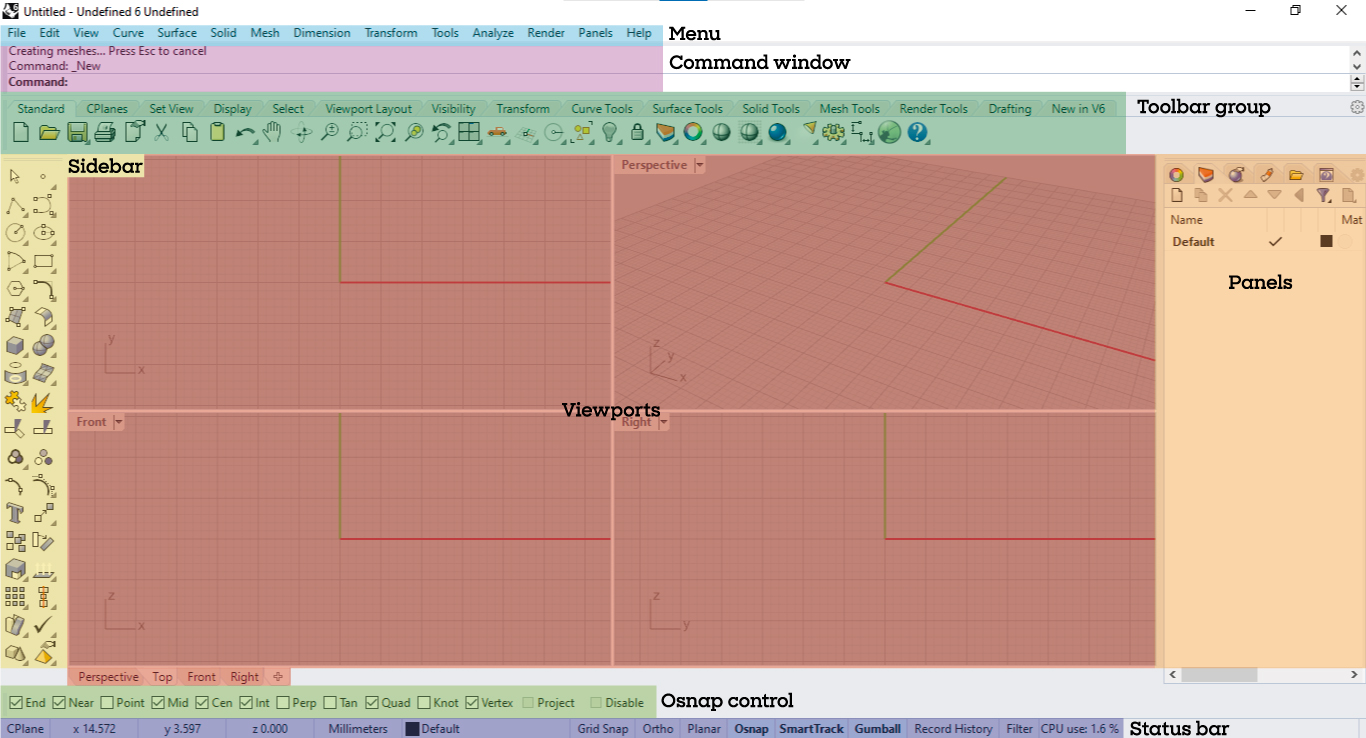
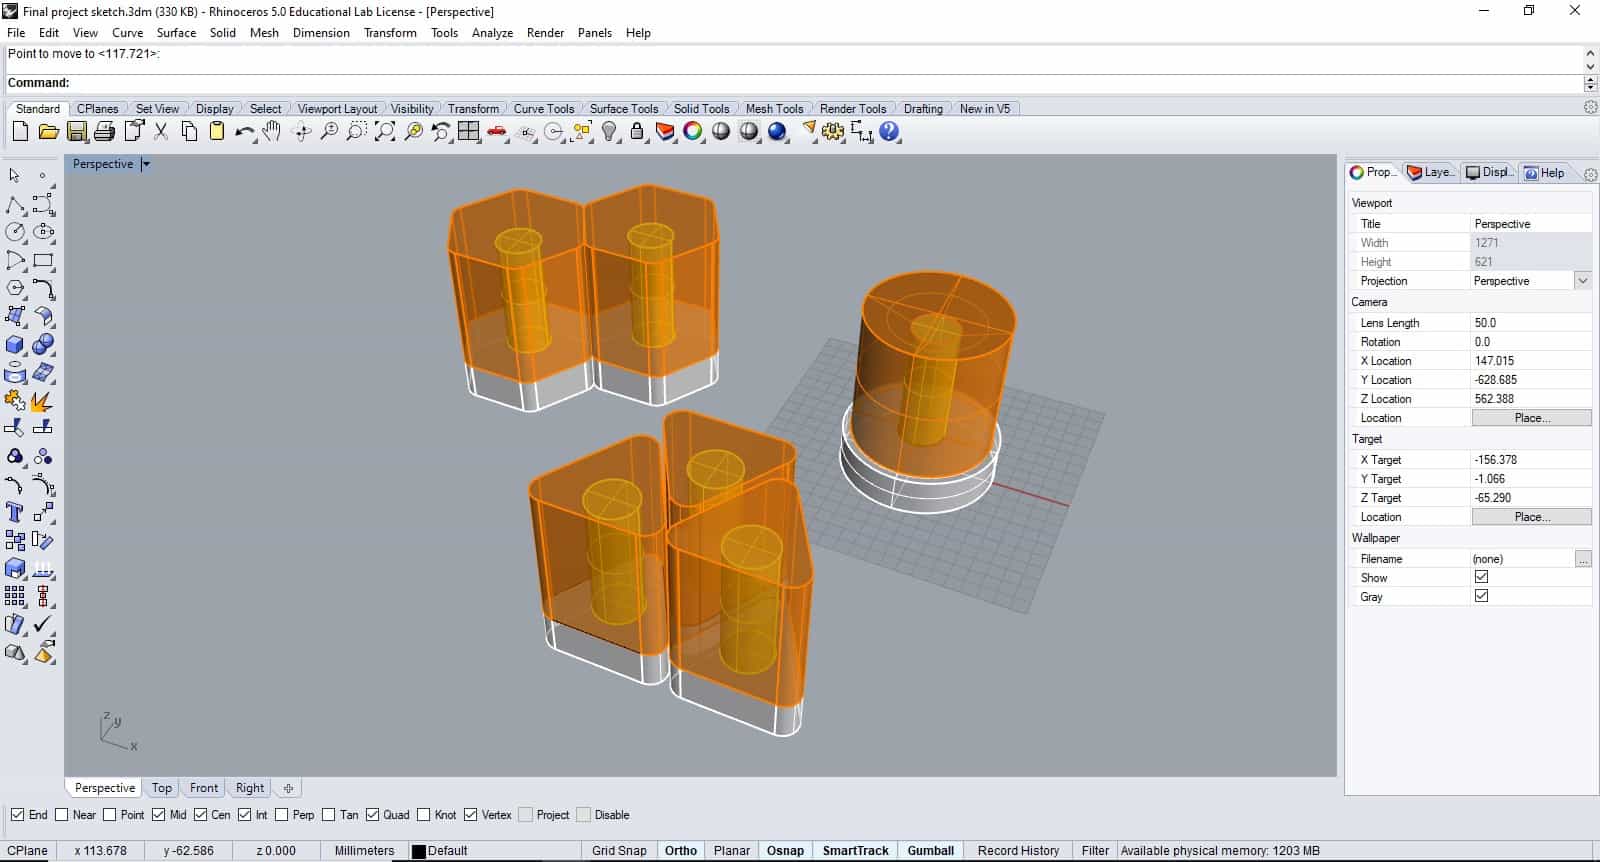
Rhino
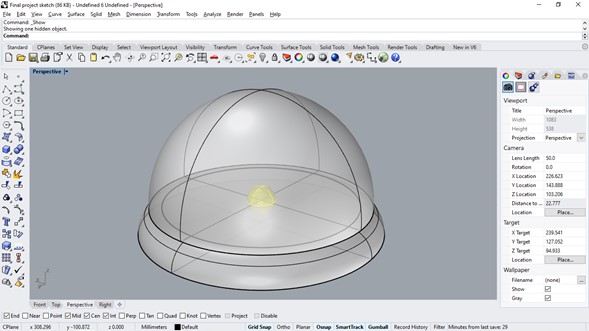
At the end I did my model in Rhino because it is the program in which I most commonly use. My first sketch was a kind of emergency lamp that is activated by pressing the curved surface, in my basic tests of the other programs I chose this piece for its low complexity, in Rhino I can do it with only three operations (extrusion, revolution and fillet creation), and if in other programs I can't model it faster than I do it in Rhino maybe I'll leave the experimentation for later since I have a limited amount of time.
Rhino works with NURBS: Non-uniform rational basis spline, a mathematical model using basis splines that is commonly used in computer graphics for representing curves and surfaces. It offers great flexibility and precision for handling both analytic and modeled shapes. It is a type of curve modeling, as opposed to polygonal modeling or digital sculpting. Basically it makes a graphical representation of an equation: in this example the Box command draws the lines that join eight points of the Cartesian plane creating a solid.
In my opinion Rhino has the best user interface as it is very intuitive and suitable for different types of people: you can select the tool icons in the left toolbar, search for them in the menu bar or just type their name in the command bar. The latter is extremely important because it requests all the essential information to work and it is very easy to just deposit the data that the software requests.
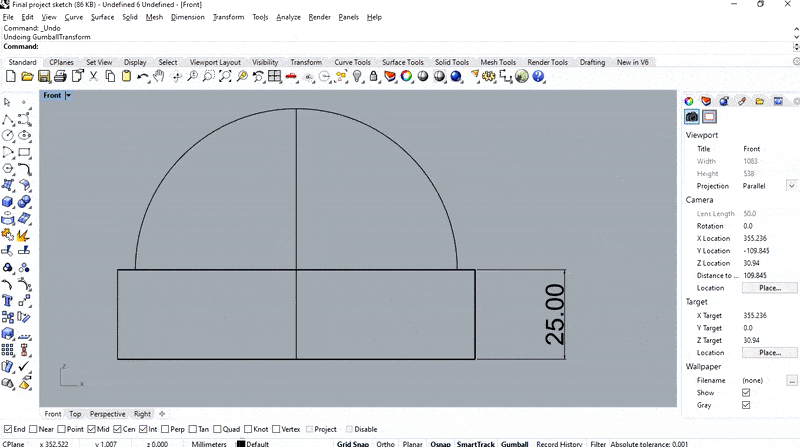
For this sketch I started using a circle, I made a 180° revolution to model the top of the lamp using the diameter as revolve axis.
Then I extruded the antoher circle for the base.
And finally I did a fillet on the edge.
Just three operations for this model:
Testing Tinkercad and editing the dimensions of my parts gave me an idea to change my workflow in Rhino: I use Gumball a lot to move or stretch my parts, but I never realized that you can enter a numeric value to perform an scale operation, which saves time by not using the Scale command properly.
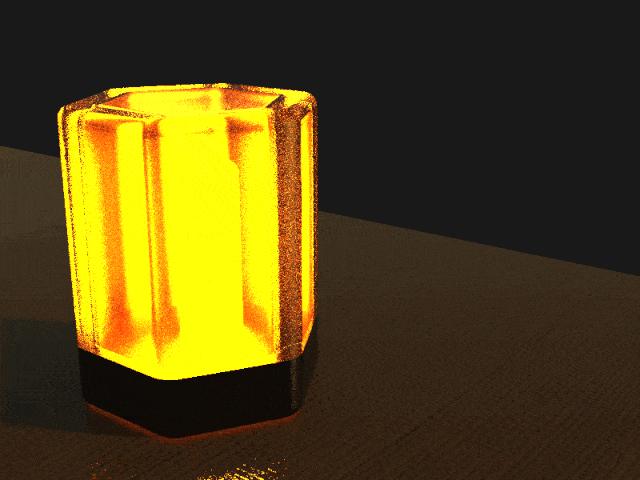
After a brief analysis I came to the conclusion that the shape was not innovative in any way, so I tried a couple more alternatives just with basic extruded geometries. I am considering making the lamp cover in clear 3D printing just with a little bit of dye to give it an orange or blue color.
Keyshot
To visualize my project in a more realistic way I decided to do a few renderings. The software I chose to make these renders is Keyshot thanks to its ease of use and how fast you can configure your scene compared to other render engines.
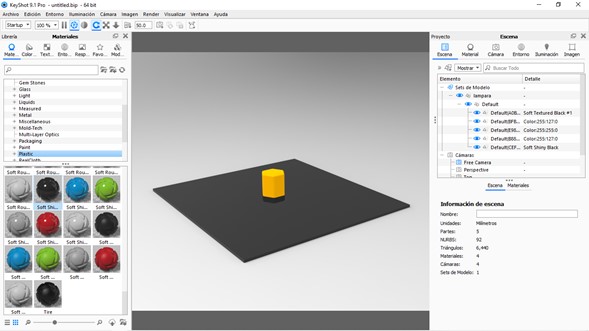
Keyshot is a very intuitive tool, just drag the materials to the pieces of your choice, incorporate a background and select a type of lighting for the scene, without the need to model large stages or configure complex lights.
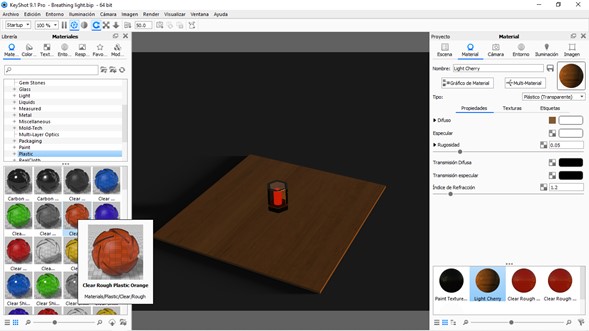
Once the scene has the desired appearance the camera can be placed in position and locked to not move it by mistake, I generate new cameras in order to test different compositions and compare them with each other without losing the position.
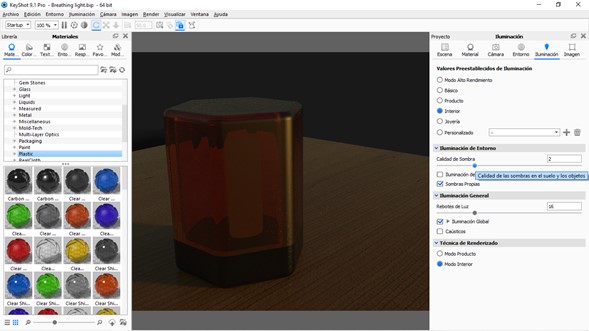
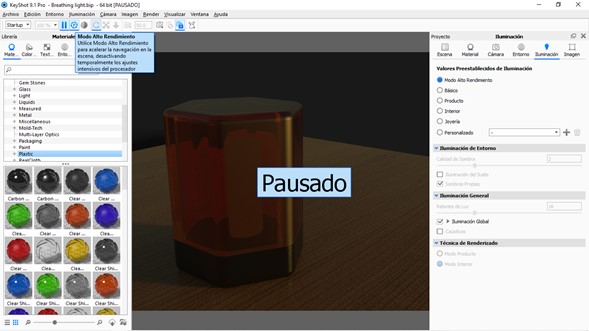
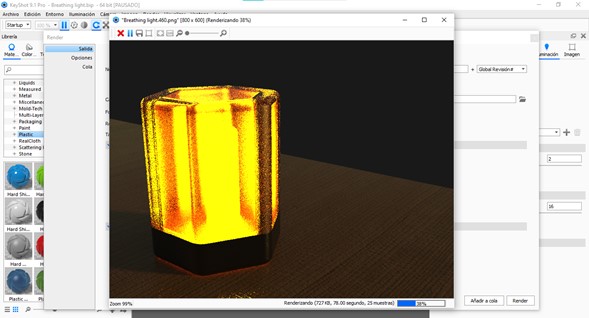
It is very important to consider the large amount of resources that the program uses. It has a high performance option that presents basic lighting and textures with a low level of detail, which is very useful to edit the render scene without having such high load times. If you are working on several tasks at the same time, it is advisable to pause the real time render until you return to the program since, even minimized, it continues rendering all the time.
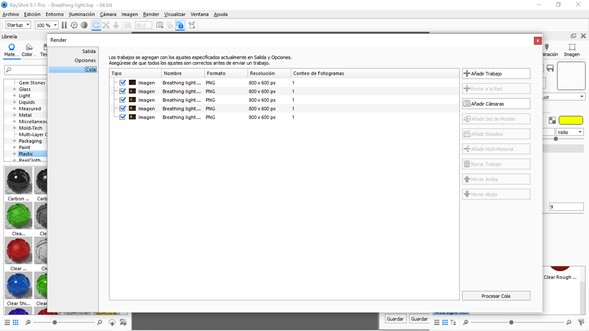
Another very useful function for me is batch rendering, in this way I can first create all my compositions and then start rendering, so I can do all the work without interruptions and when everything is ready just confirm and leave the PC working. In this case I processed all my renders together and didn't touch the computer again until it finished working two hours later.
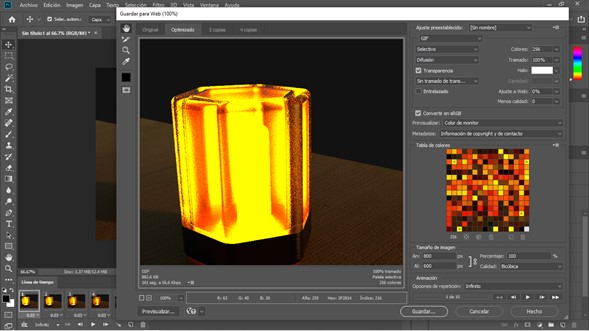
Once the rendering process was complete and I had my ten images I proceeded to make the animation presenting them one after the other. Photoshop can create these GIFs with lots of compression and resolution settings, on the Adobe website there is a very complete tutorial to create them. I finally got a presentable animation that was only 678 kb, much less than a video.
This is the result:
Files
You can download the Solidworks model here.
You can download the Rhino model here.
You can download the Tinkercad model here.
Tuesday, March 2.
I made a few changes on the shape of my 3D model, check it there.
|
For this assignment I:
|