Robotic arm
Group members
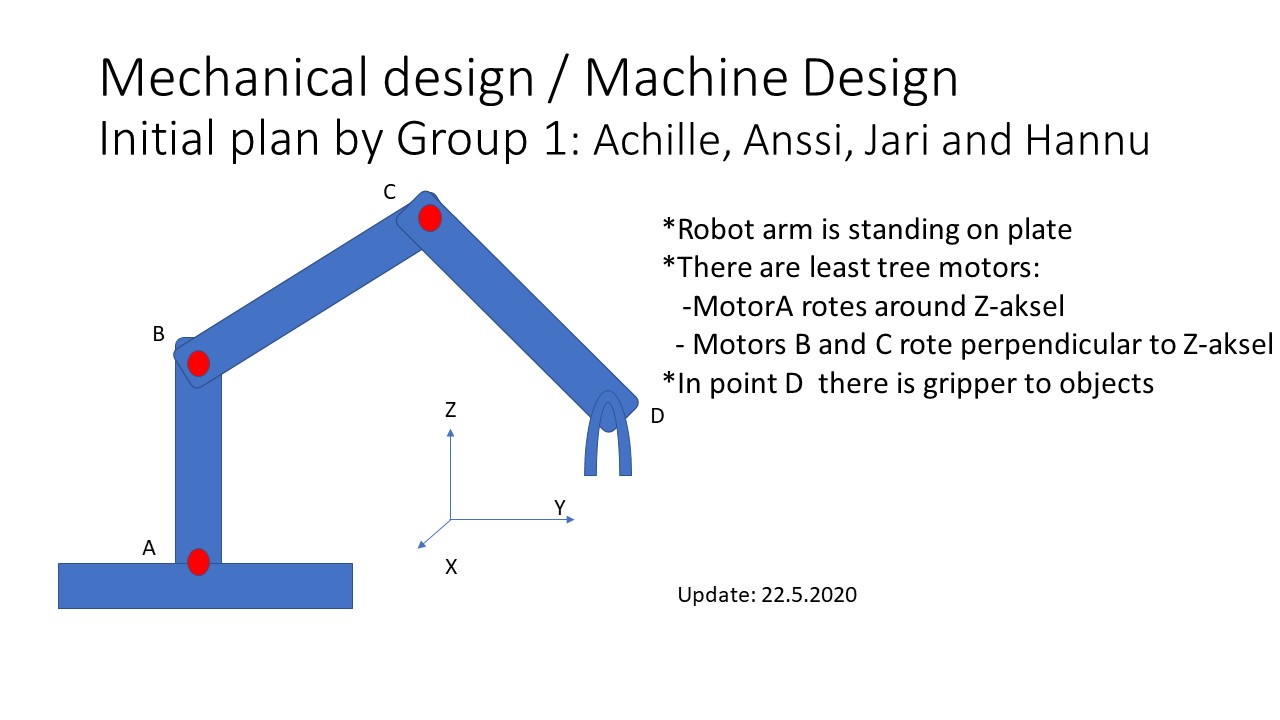
Sketch
We are planning to make a robotic arm for this week's assignment. It would be capable of moving objects in X, Y and Z -axis with a claw or something similar. Mainly used material would be cardboard. We were discussing it would be operated, but did not decide about it yet.
We divided our group in to two smaller groups. Achille and Hannu are making a design for the arm and cutting it. Anssi and Jari are taking care of electronics and programming. We found it easier to do this way because of the slow start. Otherwise we would have been stuck on the design phase too long if only one person would have done it.
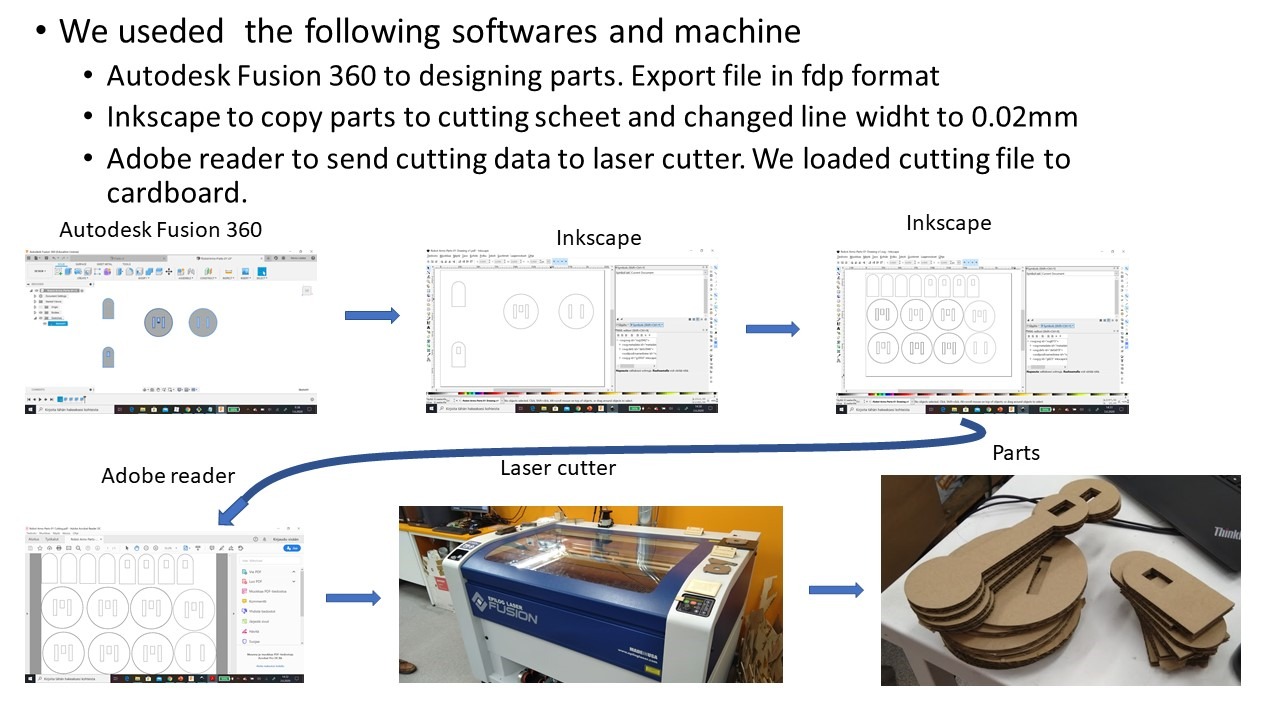
Design and cutting
As mentioned earlier, main material for the arm will be cardboard. Achille and Hannu started to make the design for it.
More about this can be found from Achille's and Hannu's documentations:
Achille, Week 15: Mechanical and Machine design
Hannu, Week 18: Mechanical and Machine design
Programming
Anssi started by looking at the servo motors first. We are going to use four of them, one at platform, two at arm and one at gripper. All servos were tested and they worked fine.
Next we had to have a program to control servos. This was done by using the servo-library in Arduino IDE. Controlling servos with Arduino is actually pretty simple. Problem is that it is difficult to test what are good ranges of values to use before the arm is assembled. Because of this fine tuning have to be left when it is assembled.
More about this and other test with servos can be found from Anssi's documentation: Week 17: Mechanical and Machine design
We are going to use Arduino UNO R3 as base board for the connections. Because we are using more than 2 motors it is advised at Arduino's servo library page to use another power source for them instead of only using Arduino UNO 5V.
Jari is going to use Raspberry Pi and NodeRed with UNO to create controls for the machine. Our plan is to have mainly manual controls and some automation when the gripper has picked an object.
More about controls can be found from Jari's documentation: Mechanical Design, Machine Design
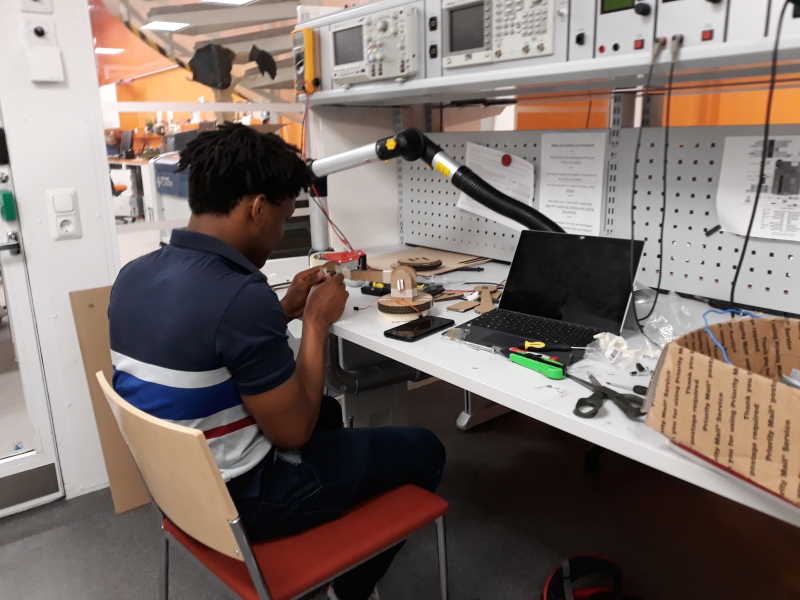
Assemble
Achille and Hannu started assembling platform and arm.
Short video of the arm in action.
Future development opportunities
Our “cardboard robot arm” robot project was aimed to design and test a robot for K-12 education. Our initial design was early prototype and quite fragile.
Cardboard structures should be re-redesigned in order to make more robust arm and platform for the robot. Now we had to tune and fix too much the robot during the testing. From the material perspective, if K-12 school has laser cutter, also stronger materials could be considered.
Cardboard was chosen, because it can be cut by using knife and scissors and that’s why it is suitable for educational scenarios with minimum of the maker equipment (only servos and Arduino needed).
Firmata and node-red was straightforward and easy way to make controls for arm if programming is not the primary aim in the project. However, if curriculum of the K-12 class is oriented towards of the programming instead of the making the arm itself, then some ready-made and durable components could be pre-fabricated to pupils by the teacher.
There are some existing projects in the instructables and other internet sources for educational contexts, but those require quite often that school is equipped with the laser cutter.
Files
Machine.f3d RoboticArmServos.ino docs_files_week15_Cutting.pdf