
|

| Sukkur IBA University Merit, Quality, Excellence |
Week - 7
Computer-Controlled Machining
CNC machining is an industrial procedure in which pre-programmed computer software dictates the movement of factory equipment and machinery. The method can be used to operate a variety of complicated machines, from grinders and lathes to mills and routers. With CNC machining, three-dimensional cutting tasks can be accomplished in a single set of prompts. Short for computer numerical control,the limitations of manual control, where live operators are needed to prompt and guide the commands of machining tools via levers, buttons and wheels., but the software programs and consoles employed in CNC machining distinguish it from all other forms of computation.
ShopBot
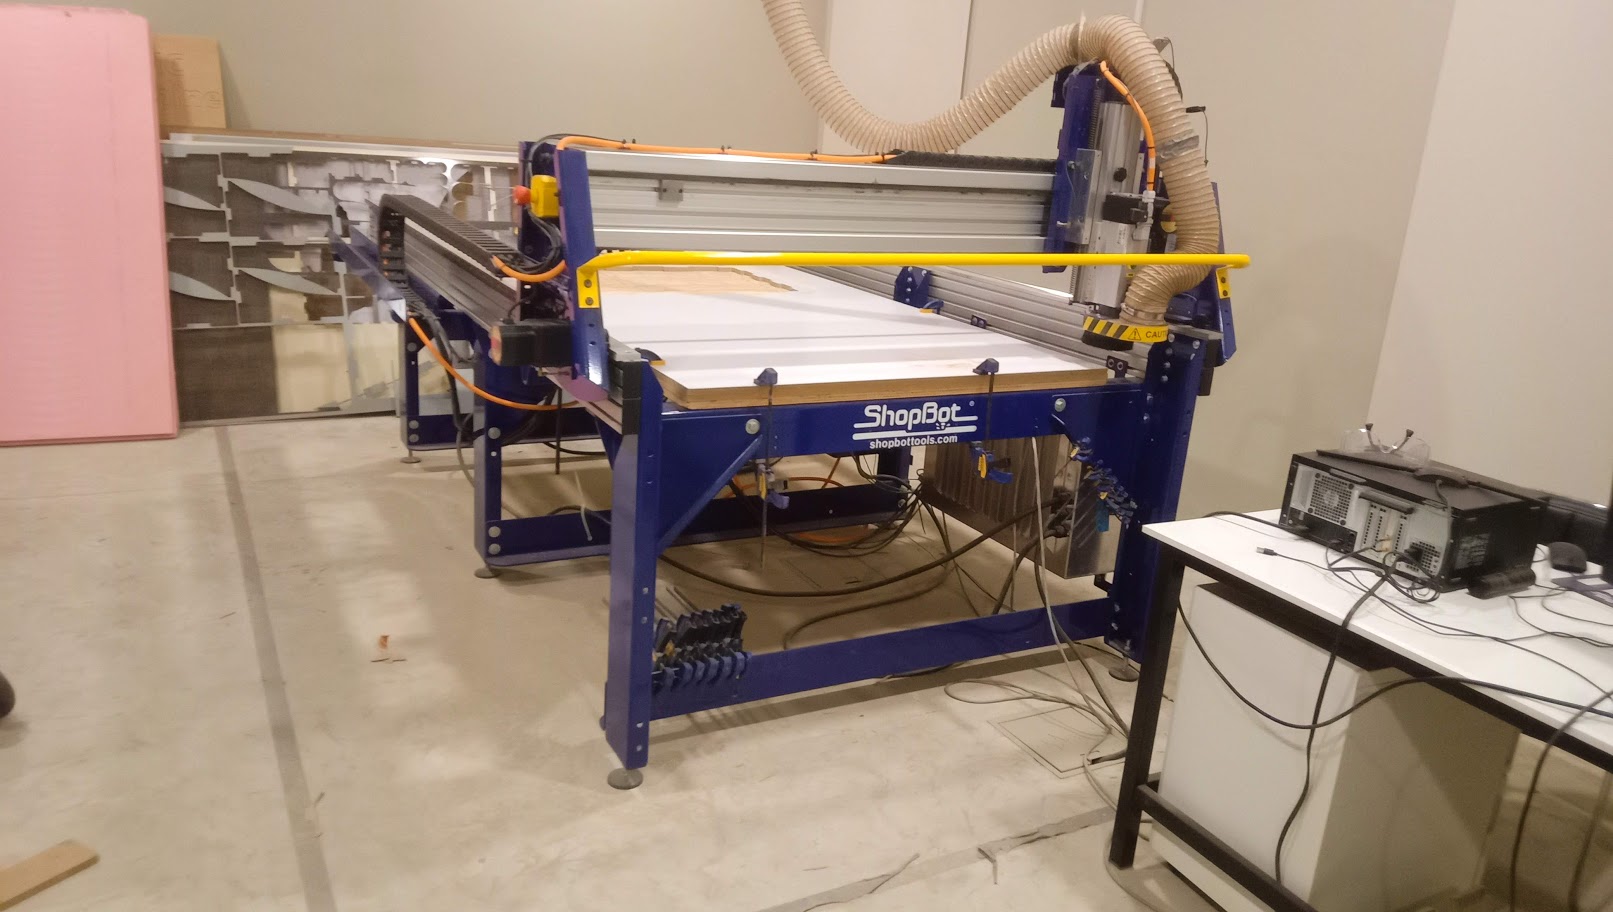
Before designing and cutting of my design. I need to know the workflow, specification and operations of our CNC machine. Shobot PRS Alpha is one of the low cost CNC router that comes with a good specification and precisional operations today. Shobot have a big bed size. Its comes with a 8x4 feet bedsize. It is large enough to cut out large sized designs. We are using a shopbot PRS Alpha 96X48 comes with a 96 X 48 (8 x 4 feet). ShopBot PRS Alpha have a speeds of 1800 inches per minute and cutting speed up to 600 inches / minute. It is easy to configure and easy to learn and also to use the Shobot PRS Alpha CNC Machine. Shopbot is affordable, fully production performance in digital fabrication of wood, plastic, foam and other materials like aluminium.
Safety Precautions
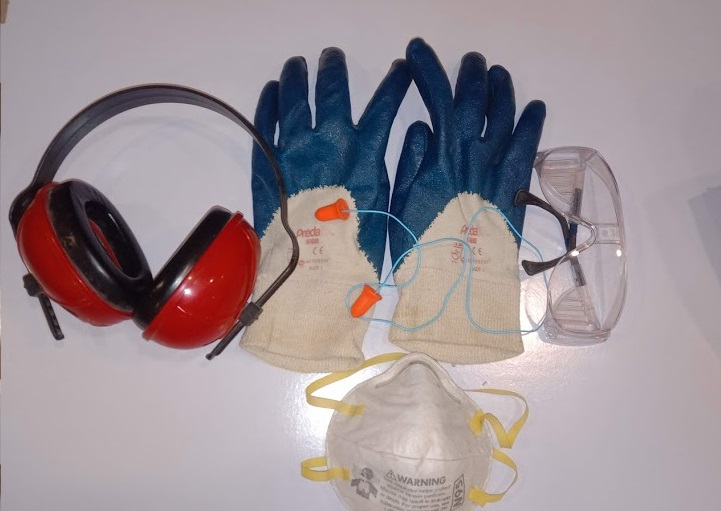
Safety is always comes first when you are gonna use CNC machines or other big machines in anywhere. We always double check the safety gears when using CNC machines in Fablab khairpur. Here is the Safety Gears we use in our Fbalab.
Safty Gloves
Safty Goggles
Ear Muffs Protectors
Ear Plugs
Dust Masks
Machine ON/OFF Switch
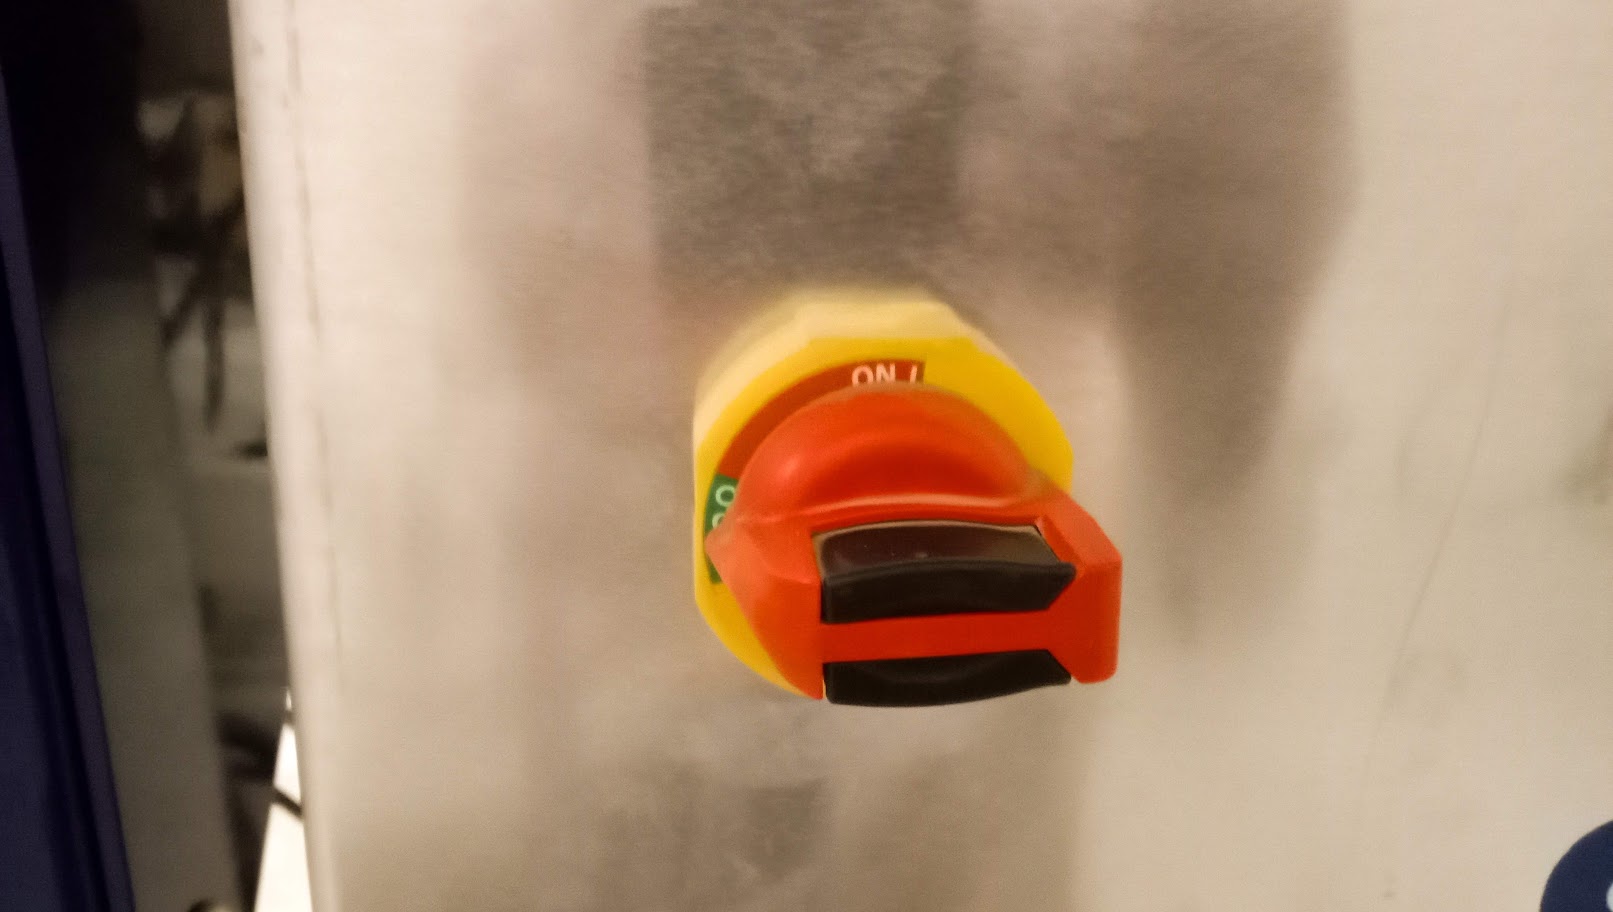
Every machines does have a ON/OFF switch. You can find the ON/OFF Knob in the right side of the shobot. Just turn the red color knob to ON or OFF the machine
Emergancy Stop Button
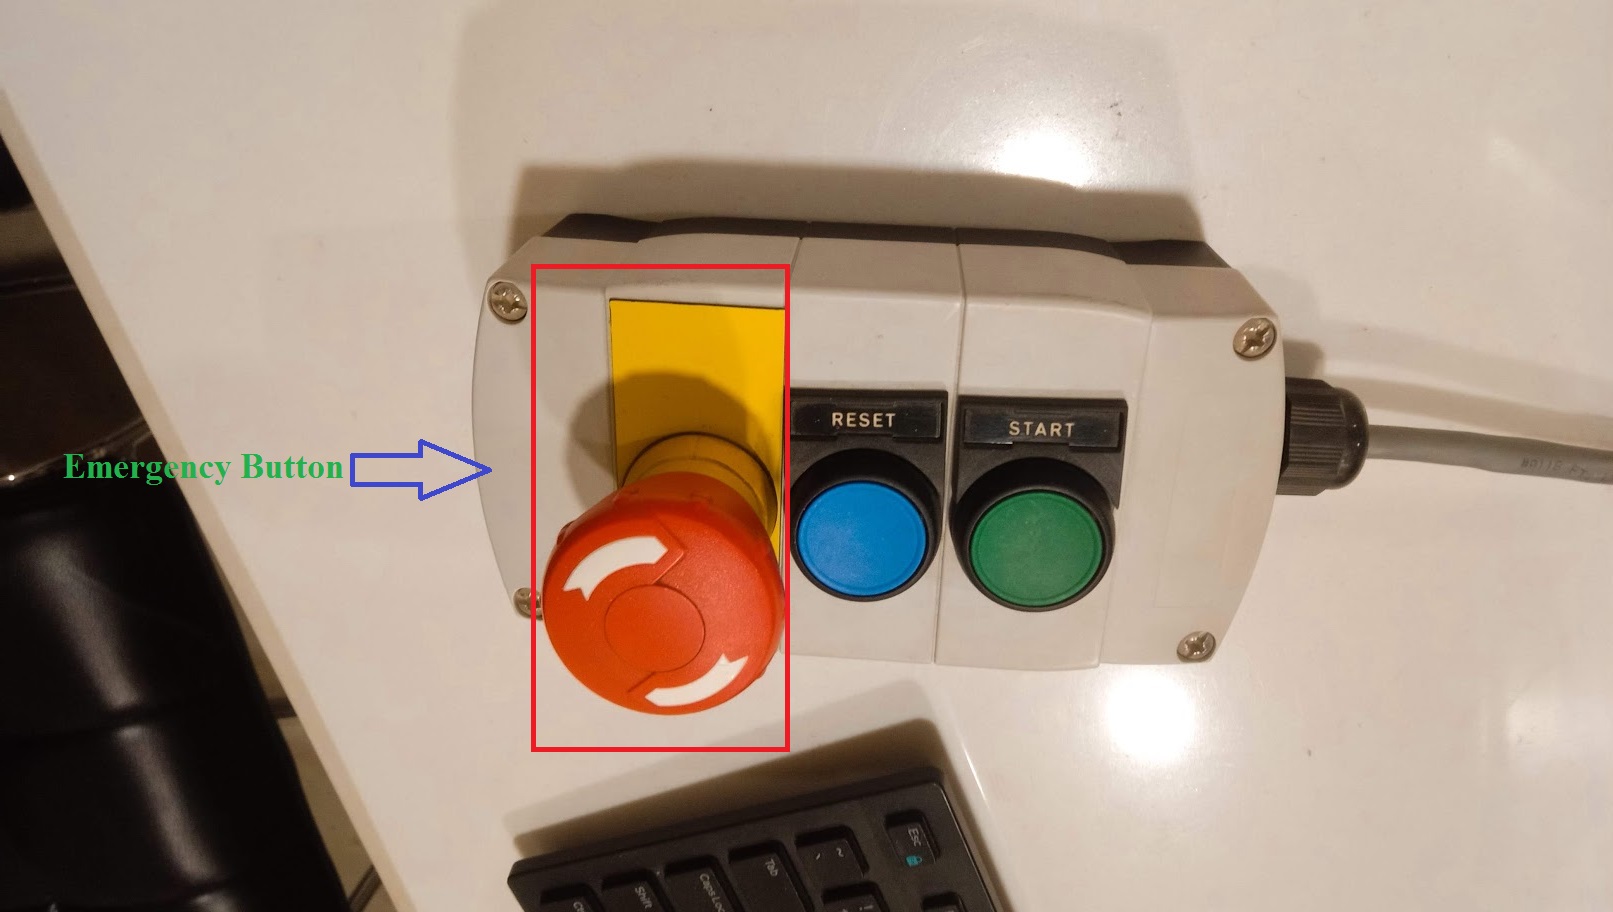
While using CNC machines, Danegerous actions comes without any expectations. Wrong moves lead injuries or other serious problems and damages. We can't avoid them fully because we are working with machines. Shopbot comes with two Emergancy stop button to avoid dangers and wrong moves. One is comes along with two other push button for Reset the machine and start spindle. The other is only a emergency button. The Emergancy button is a red push button. Ensure the two emergancy STOP switches are in the OFF position by rotating the RED STOP button on the COUNTER CLOCKWISE.
Interlock Key
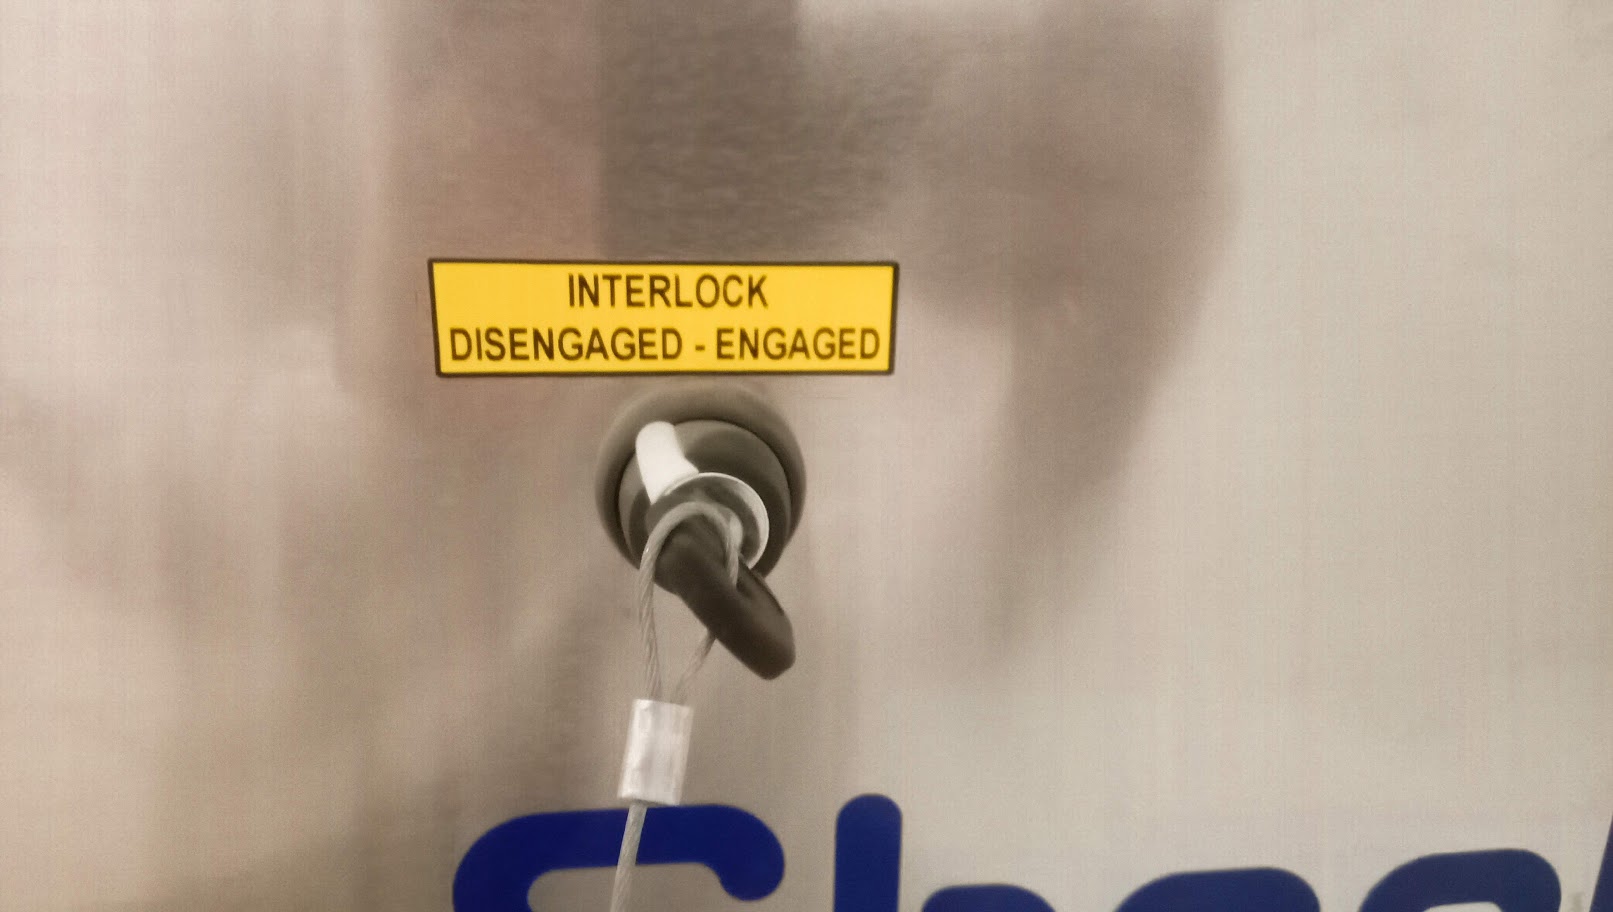
Inorder to start the spindle, first you need to insert the key into the Interlocks keyhole and engage it. The Interlock key is located near to the ON/OFF button.
Assignment
Individual Assignment
In this week we had to make something BIG on the CNC milling machine. This being a dangerous machine we didn't have the luxury to experiment as we did with the laser cutter and 3D printer, so we had to keep our design relatively simple.
Make Something Big
This assignment is all about to make something big. So, In our lab we take commercial orders also it is the order from one customer to make baby cot. I draw rough sketch of babycot on paper with dimensions. Skteching on the paper is very useful and important for designing. I will use colour sheet MDF 16mm.
3D Designing
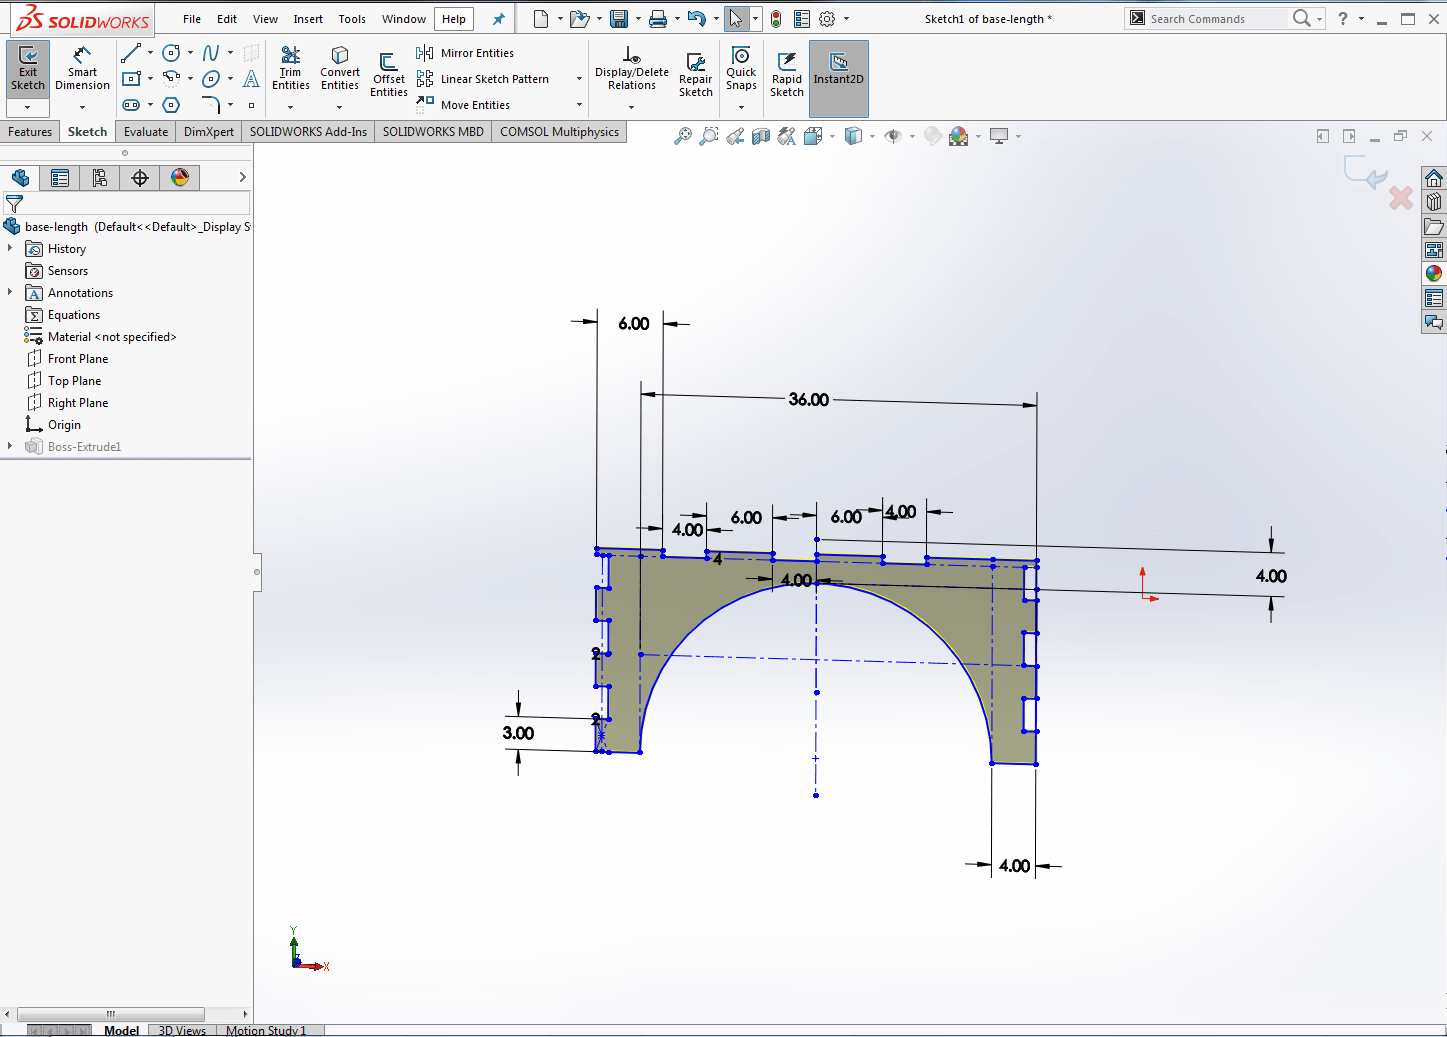
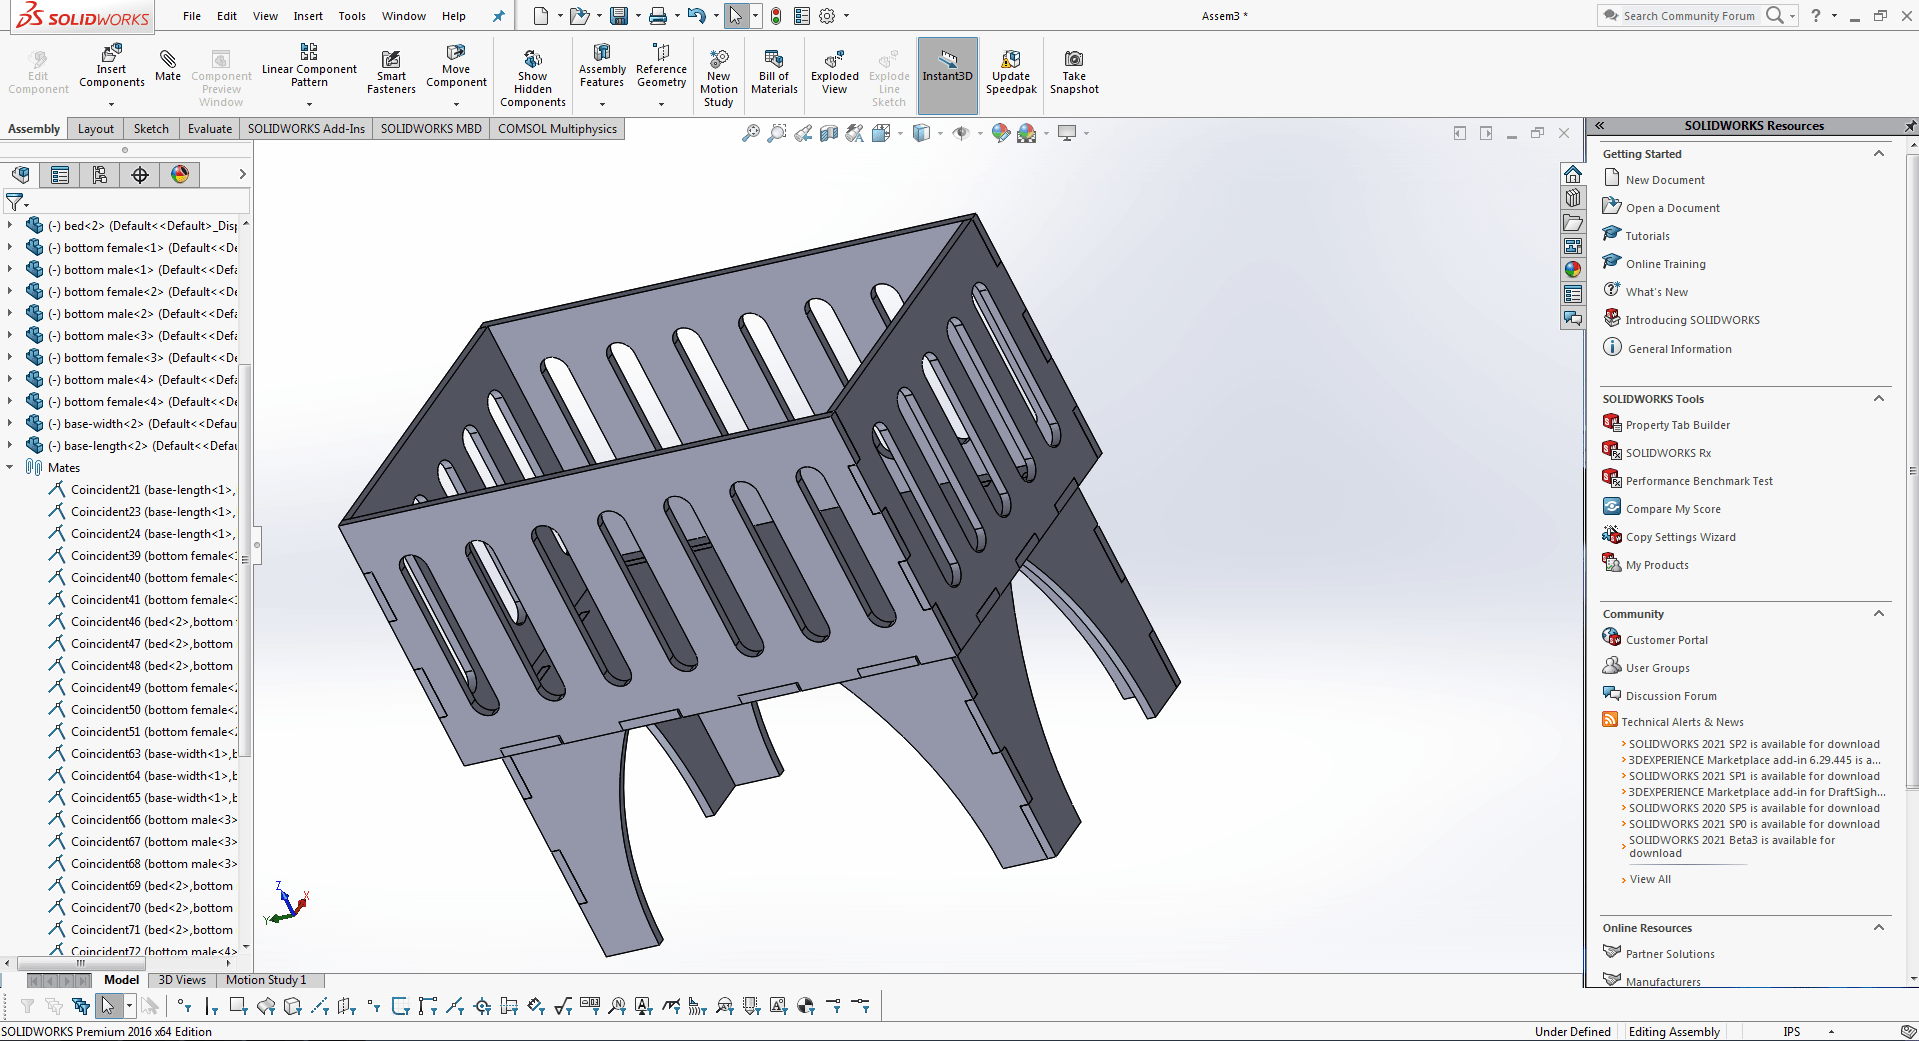
I started with designing parts in solidworks, First I designed base of the babycot width, height as well as tooths as before i have experience as we did same for parametric design.

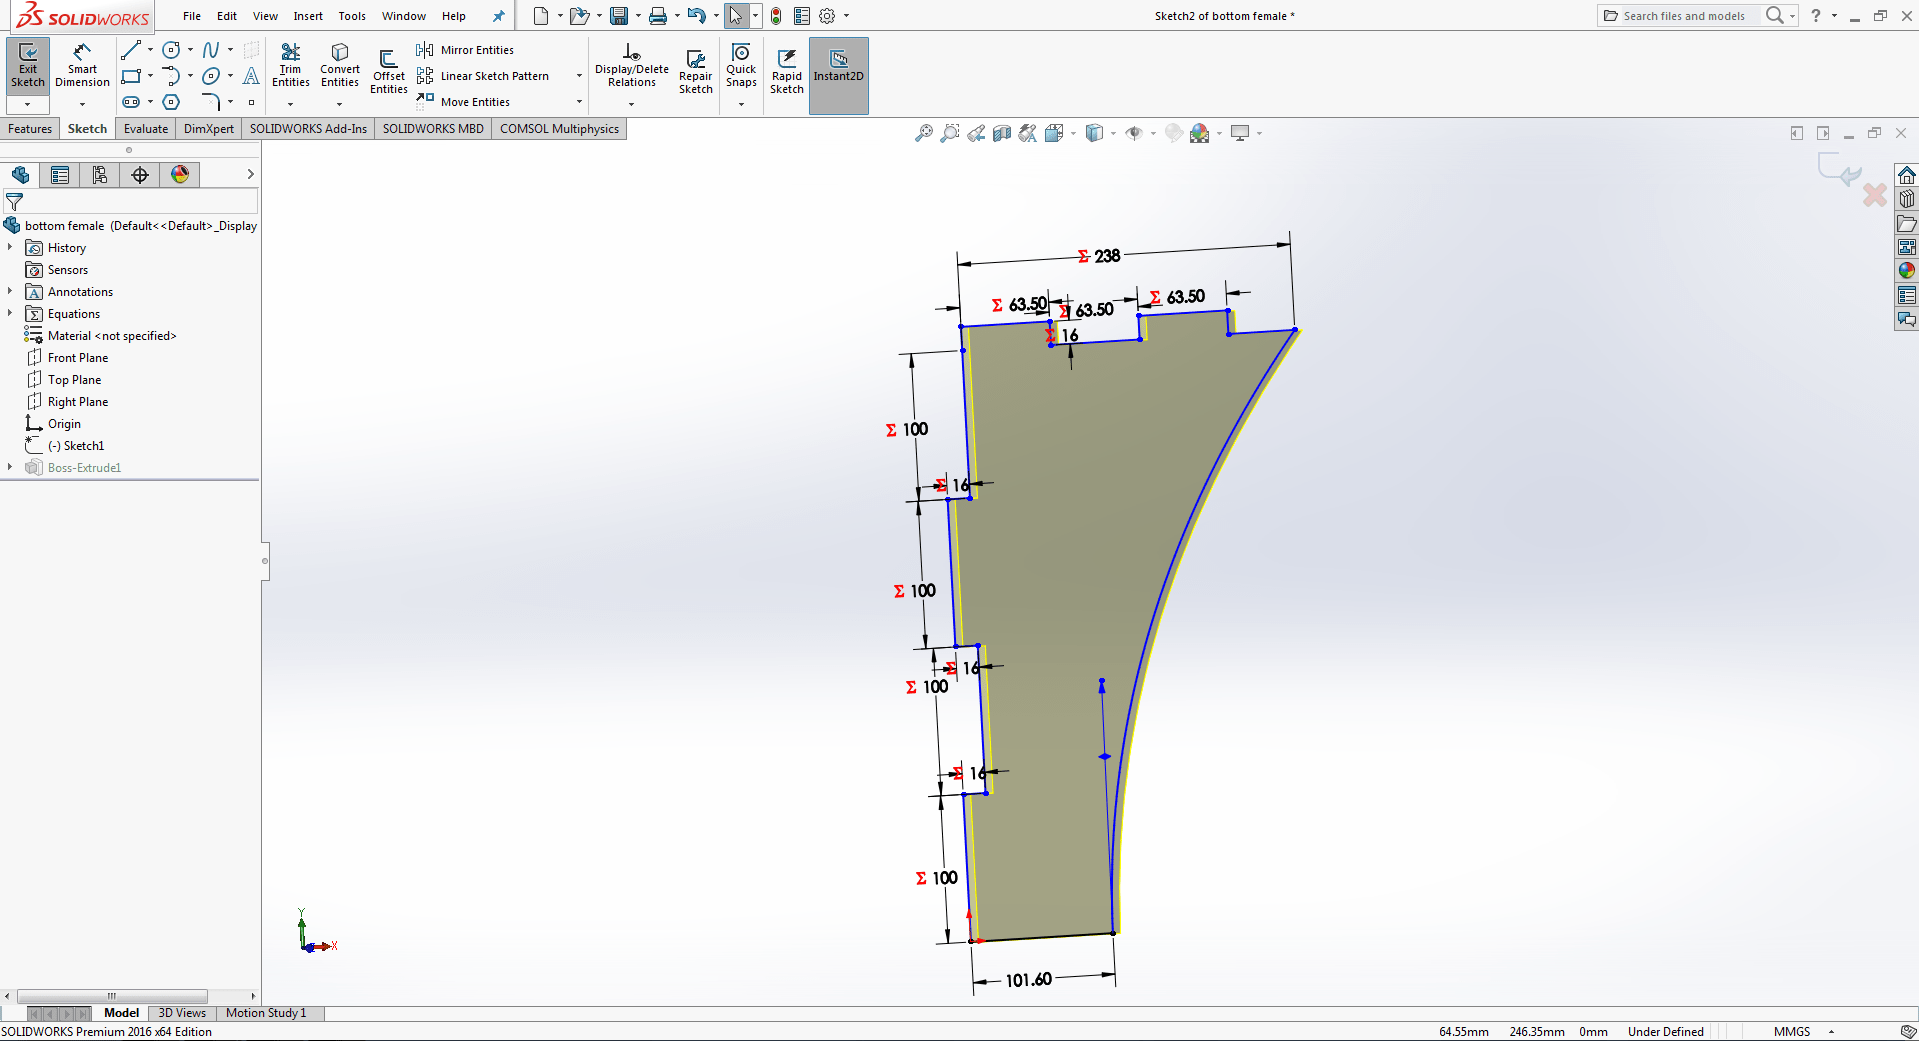
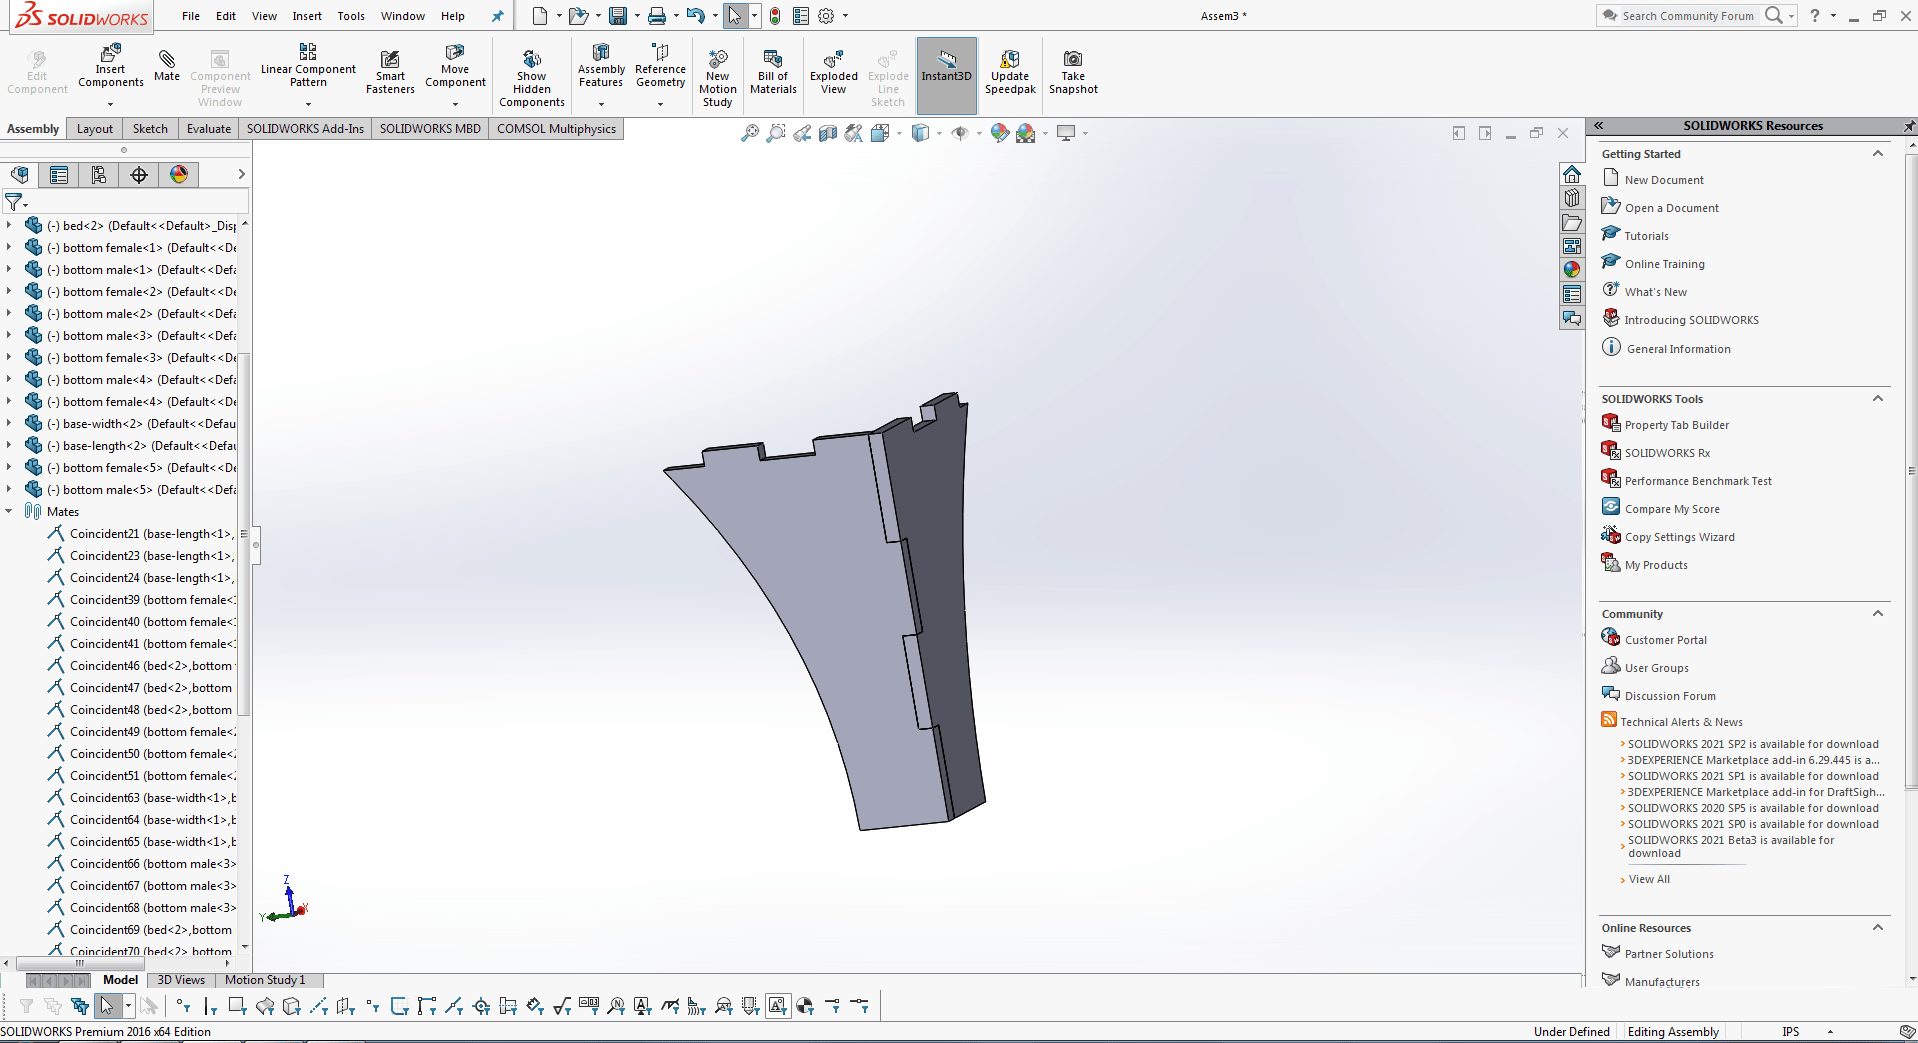
Then I designed upper side of babycot.
After that I designed another side of babycot.
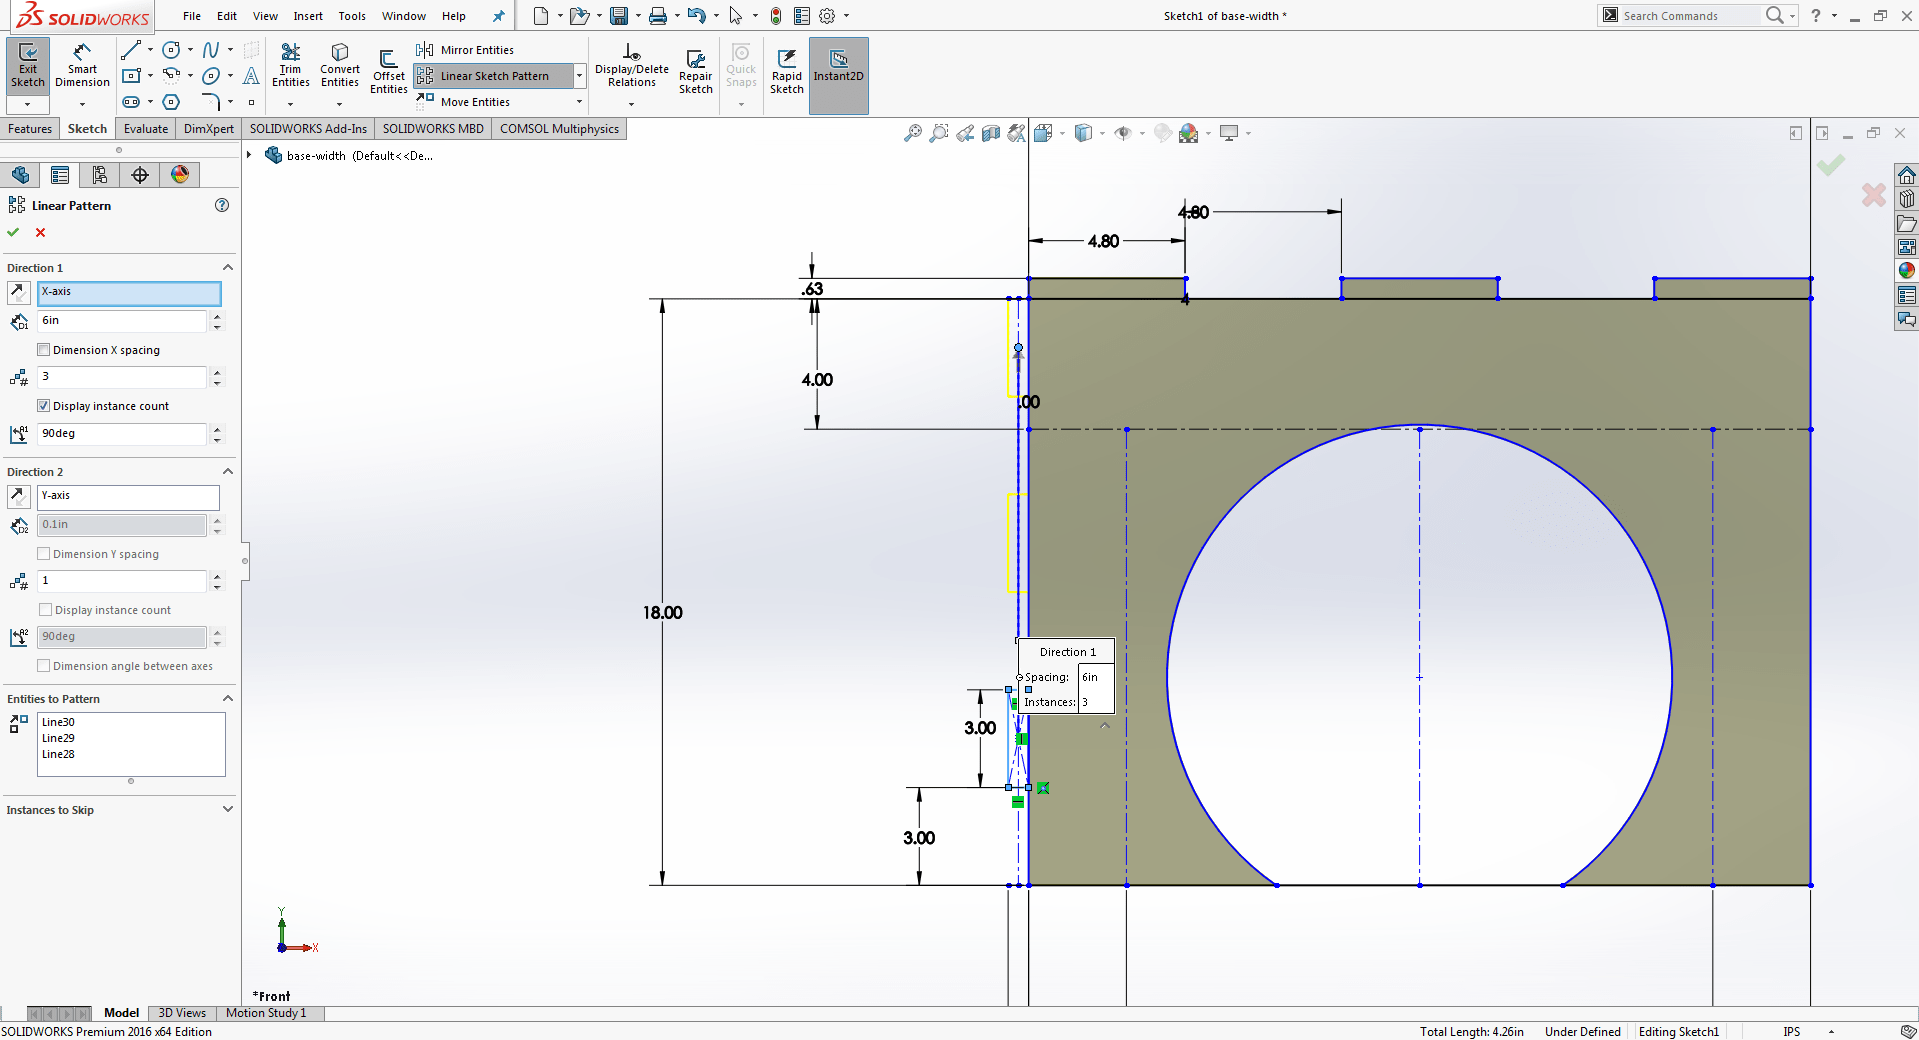
This is the base of babycot i am going to use the 2x4 parts which makes the 90 degree angle between the legs and The size is 4 inches of every bottom of the leg which means 4x8 inches.
And assemble all parts using "Mate" to check either the parts fitted perfectly or not in Assembly tab.
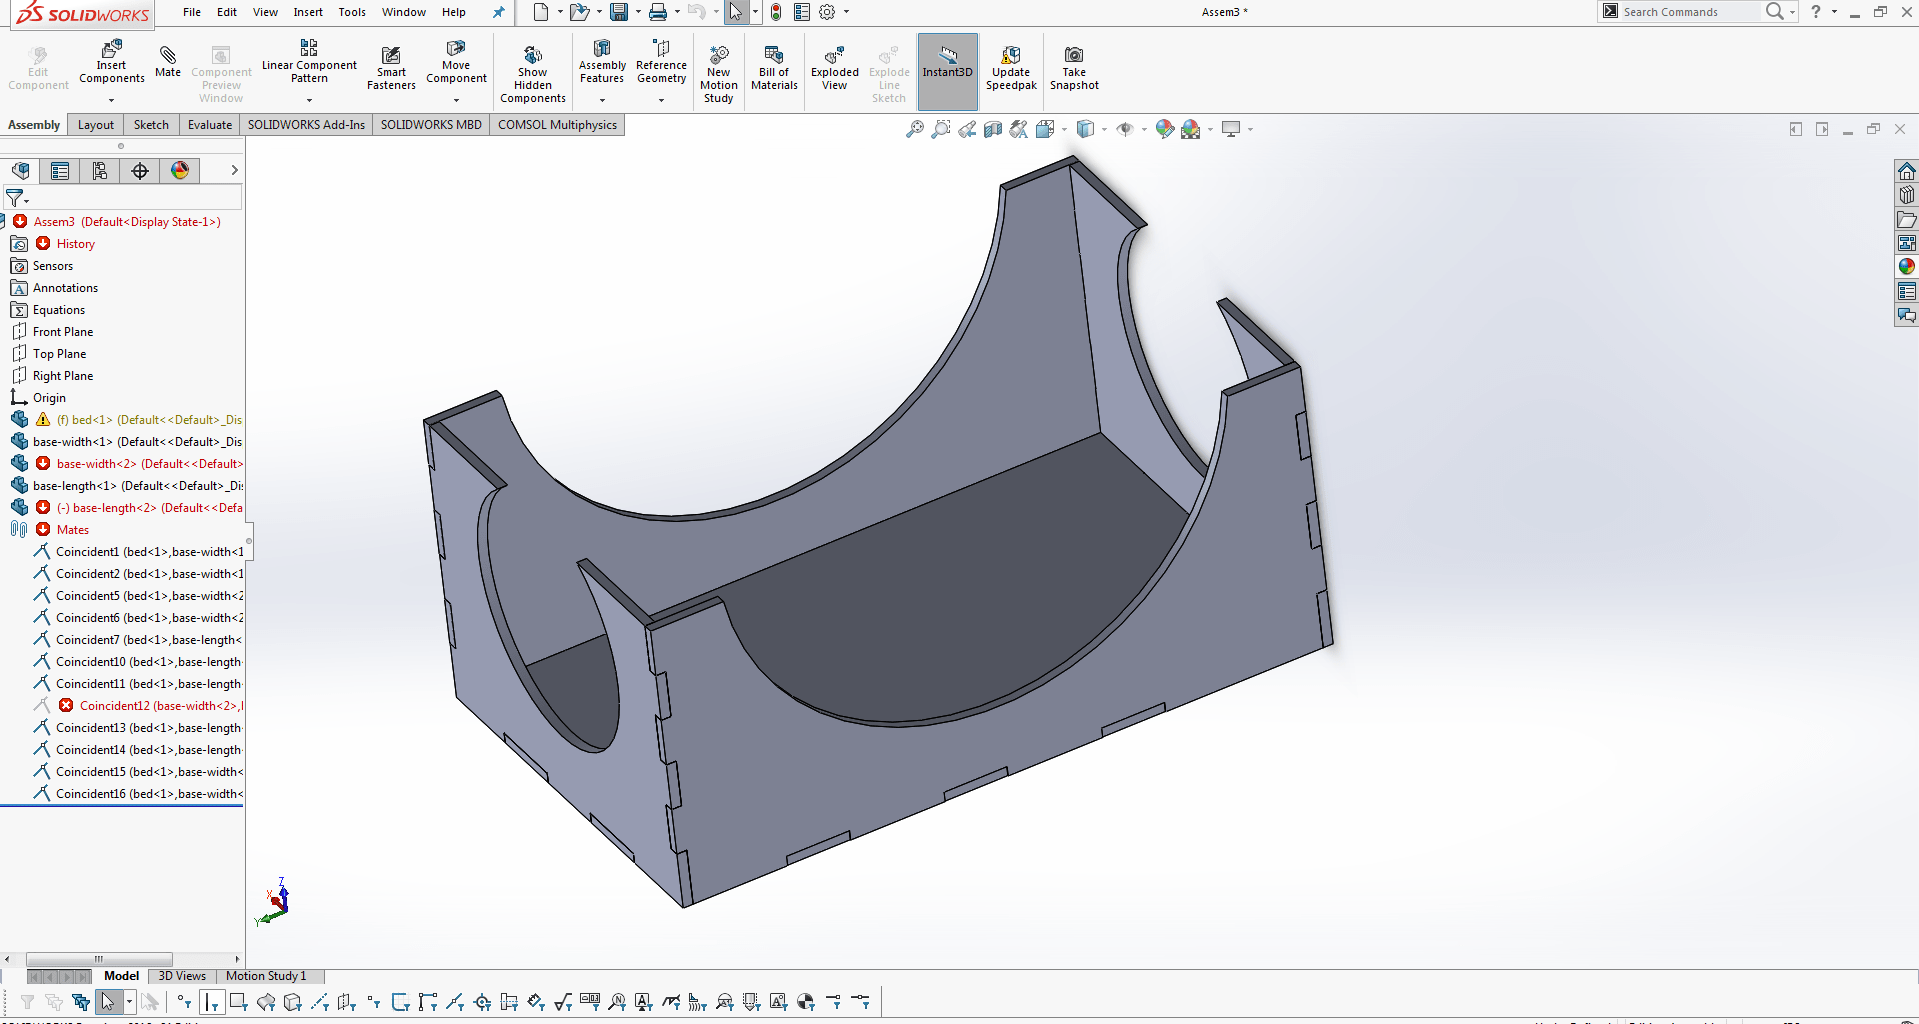
During the mate i found that i did too many conflits lines in side the design so, I took help from my instructor to fix these bugs and then go forward.
After that, I chose to use acrylic sheet between the gaps, so I called the customer and showed him the 3d version. He wanted some more changes, so I changed the design according to his wishes.
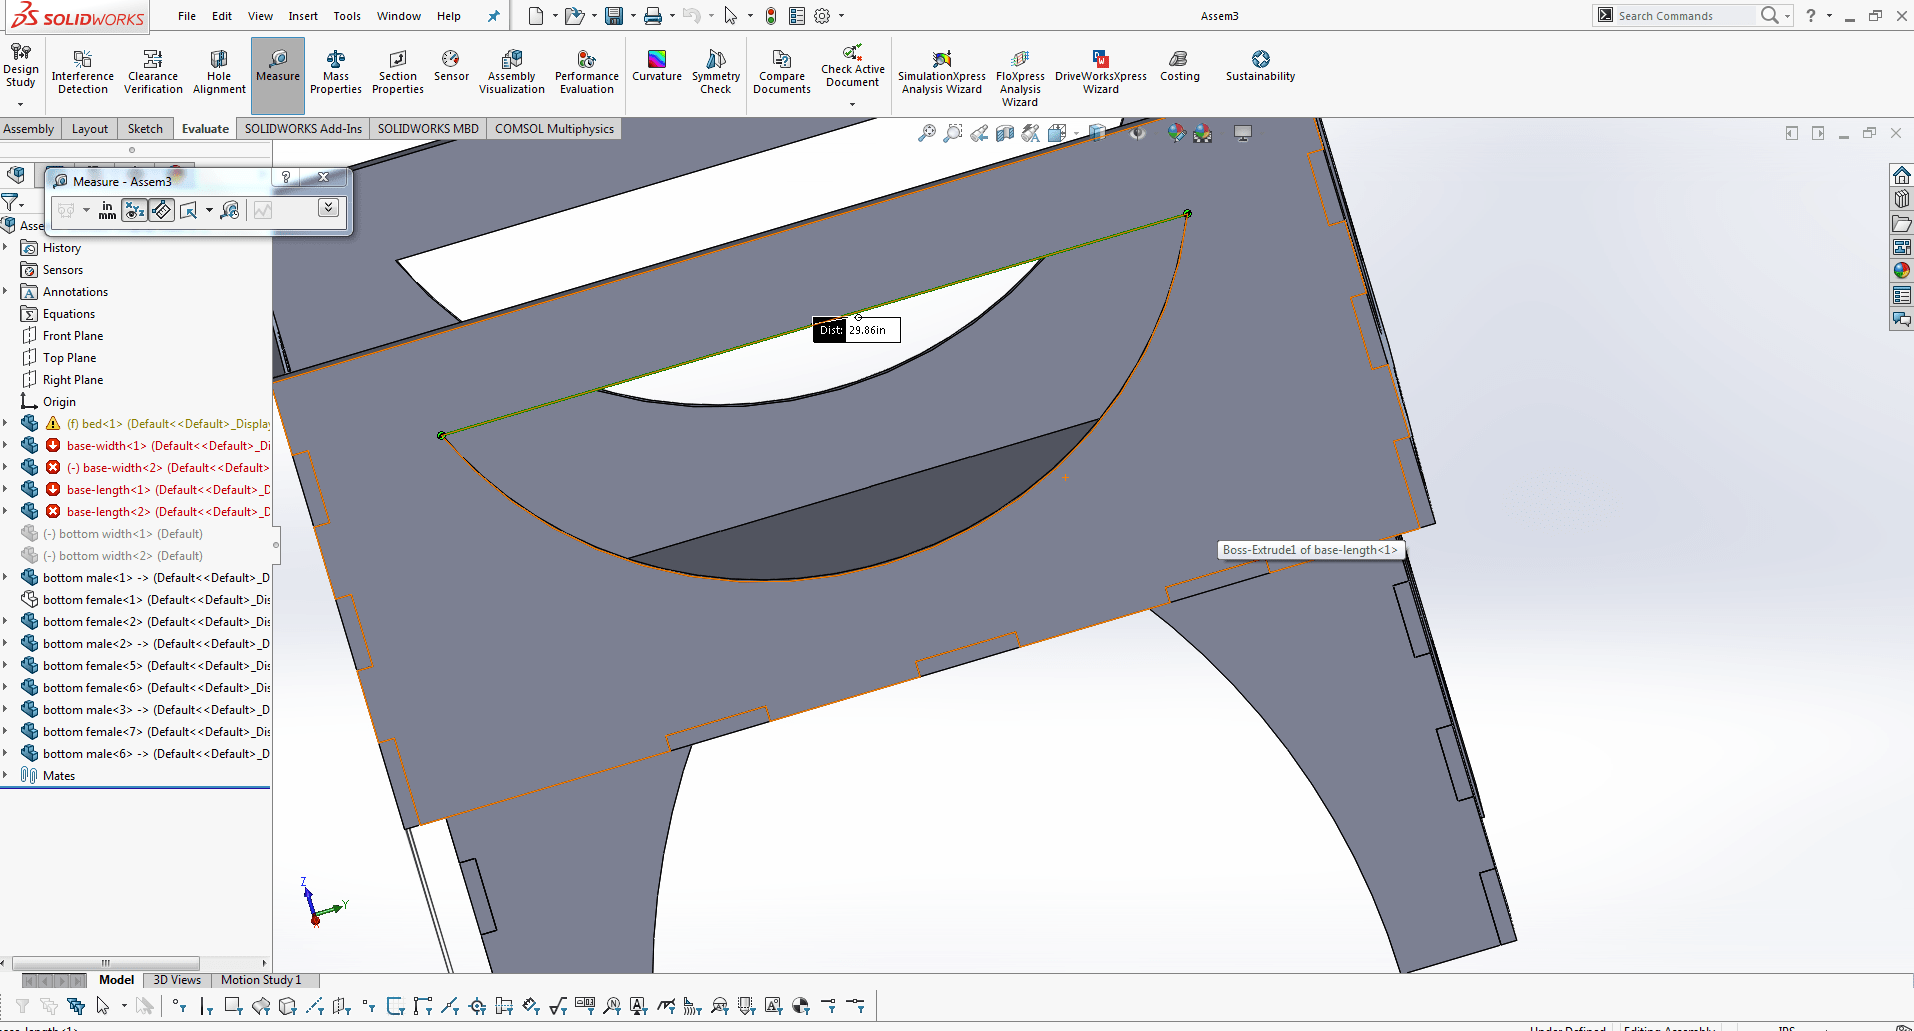
It looks like this after I changed my design and assembled all top pieces.
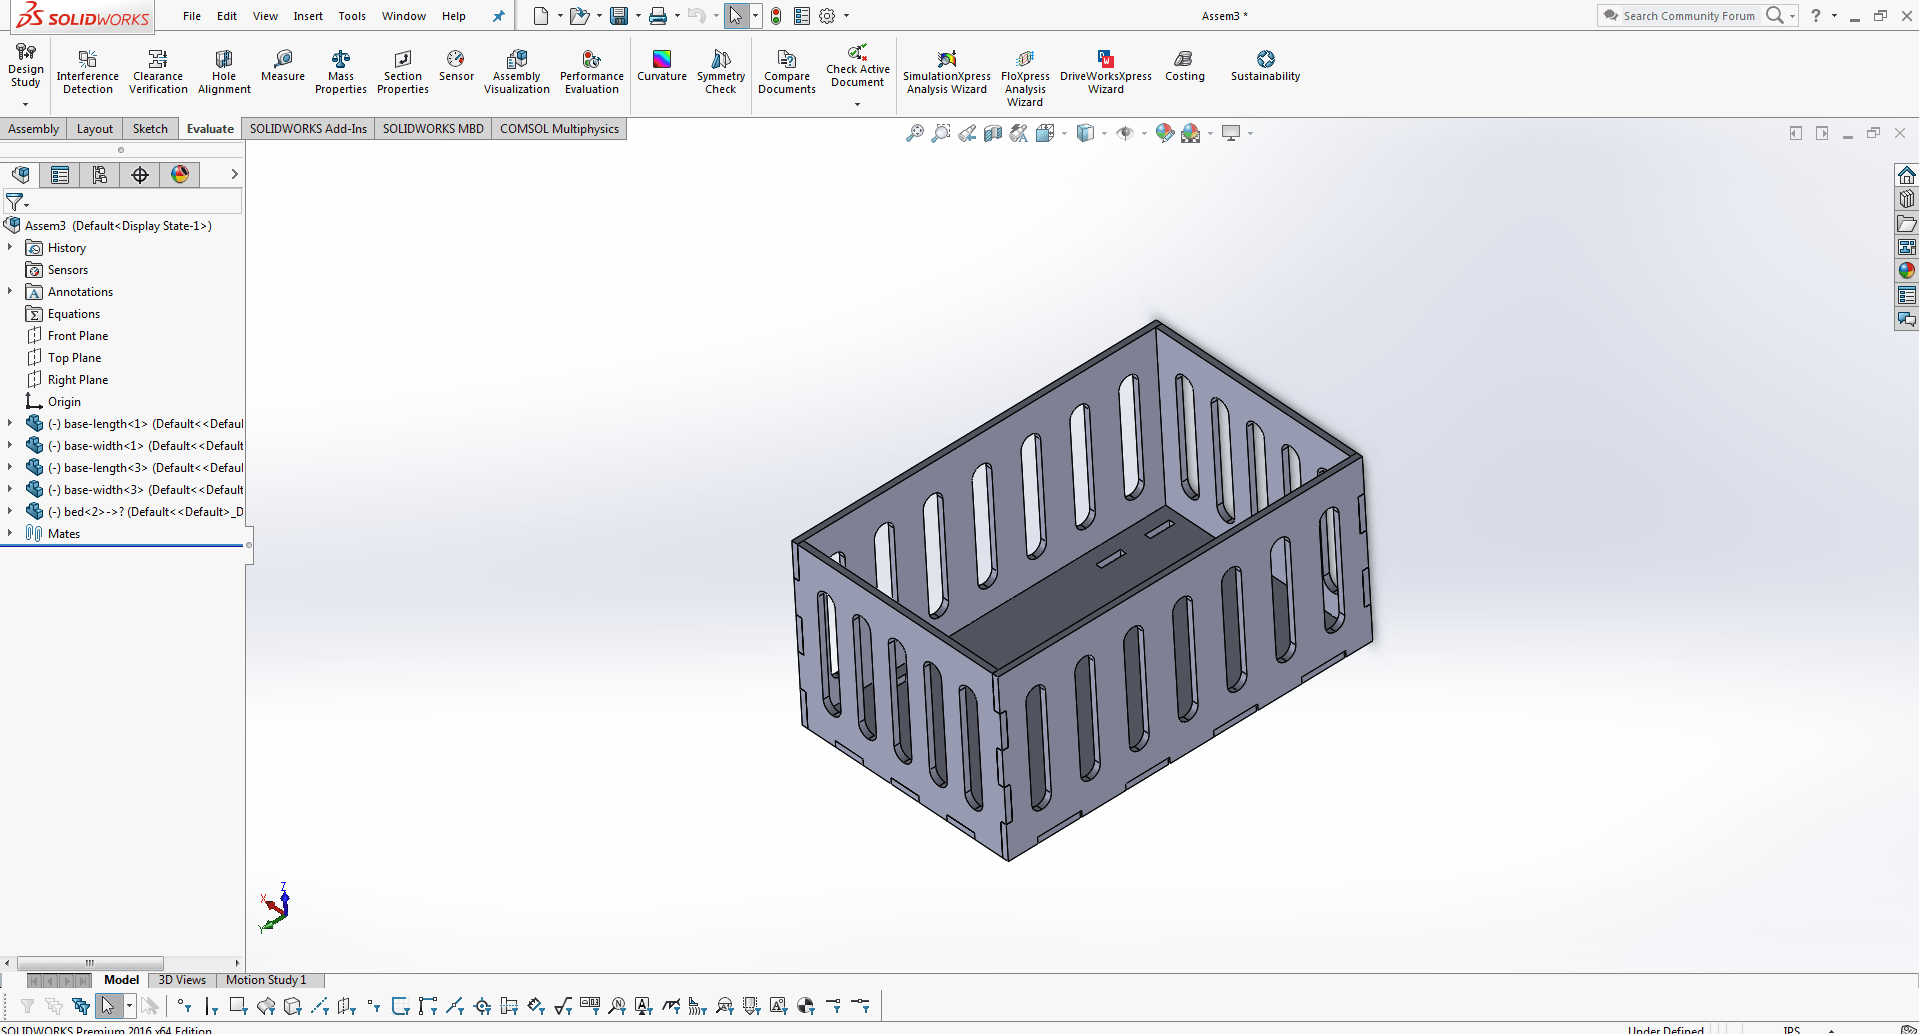
After ensuring that all of the pieces are correctly aligned in the assembly, I need to create a 2D design for laser cutting. To do so, I open another assemble tab and place all of the parts in the front plane.
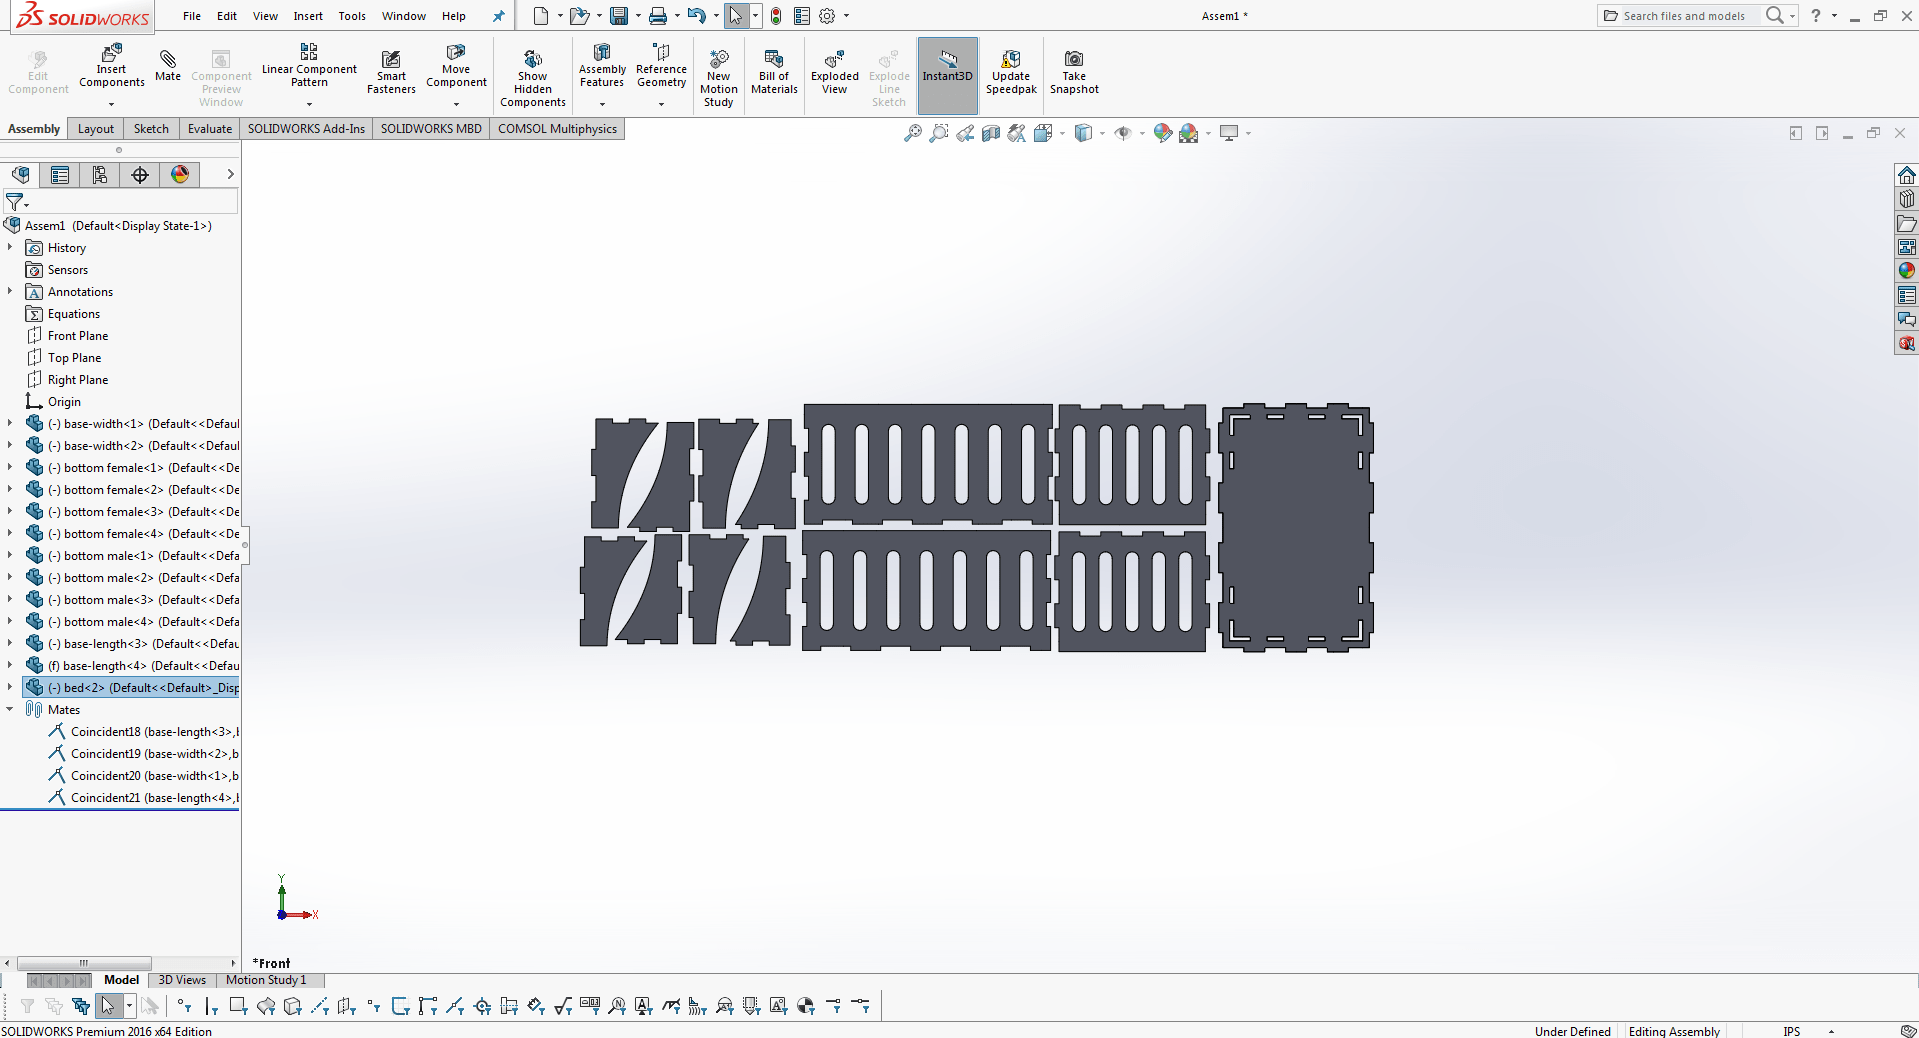
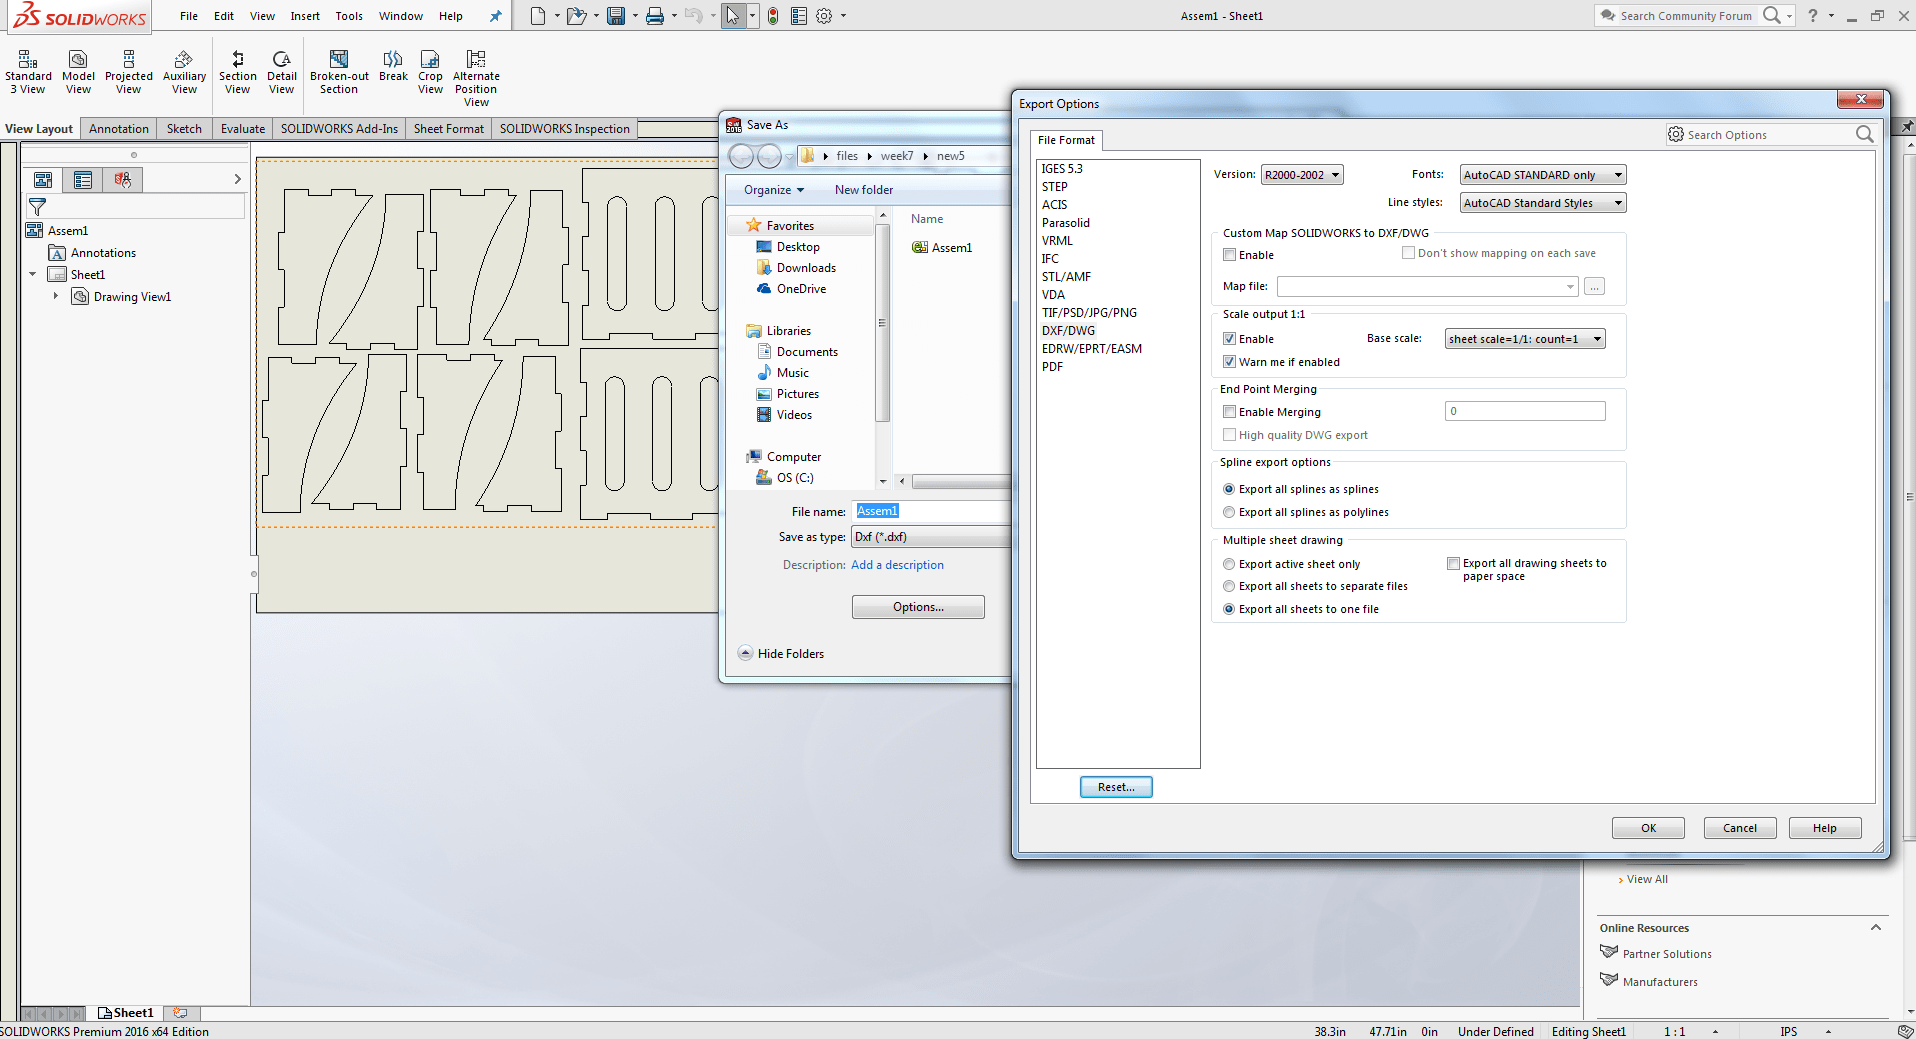
after completing the 2nd assemble document now to open this file in drawing document and save as DXF format.
Software
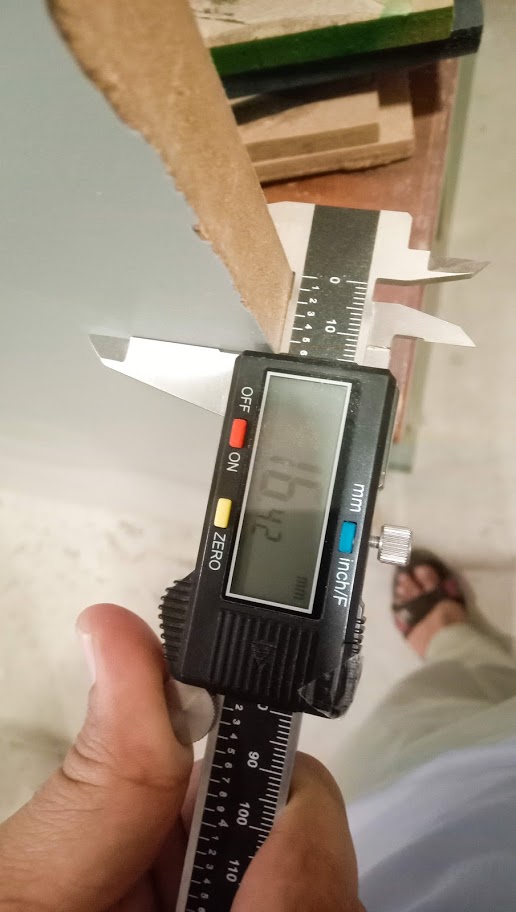
First i set the MDF board size and thickness,16.42mm
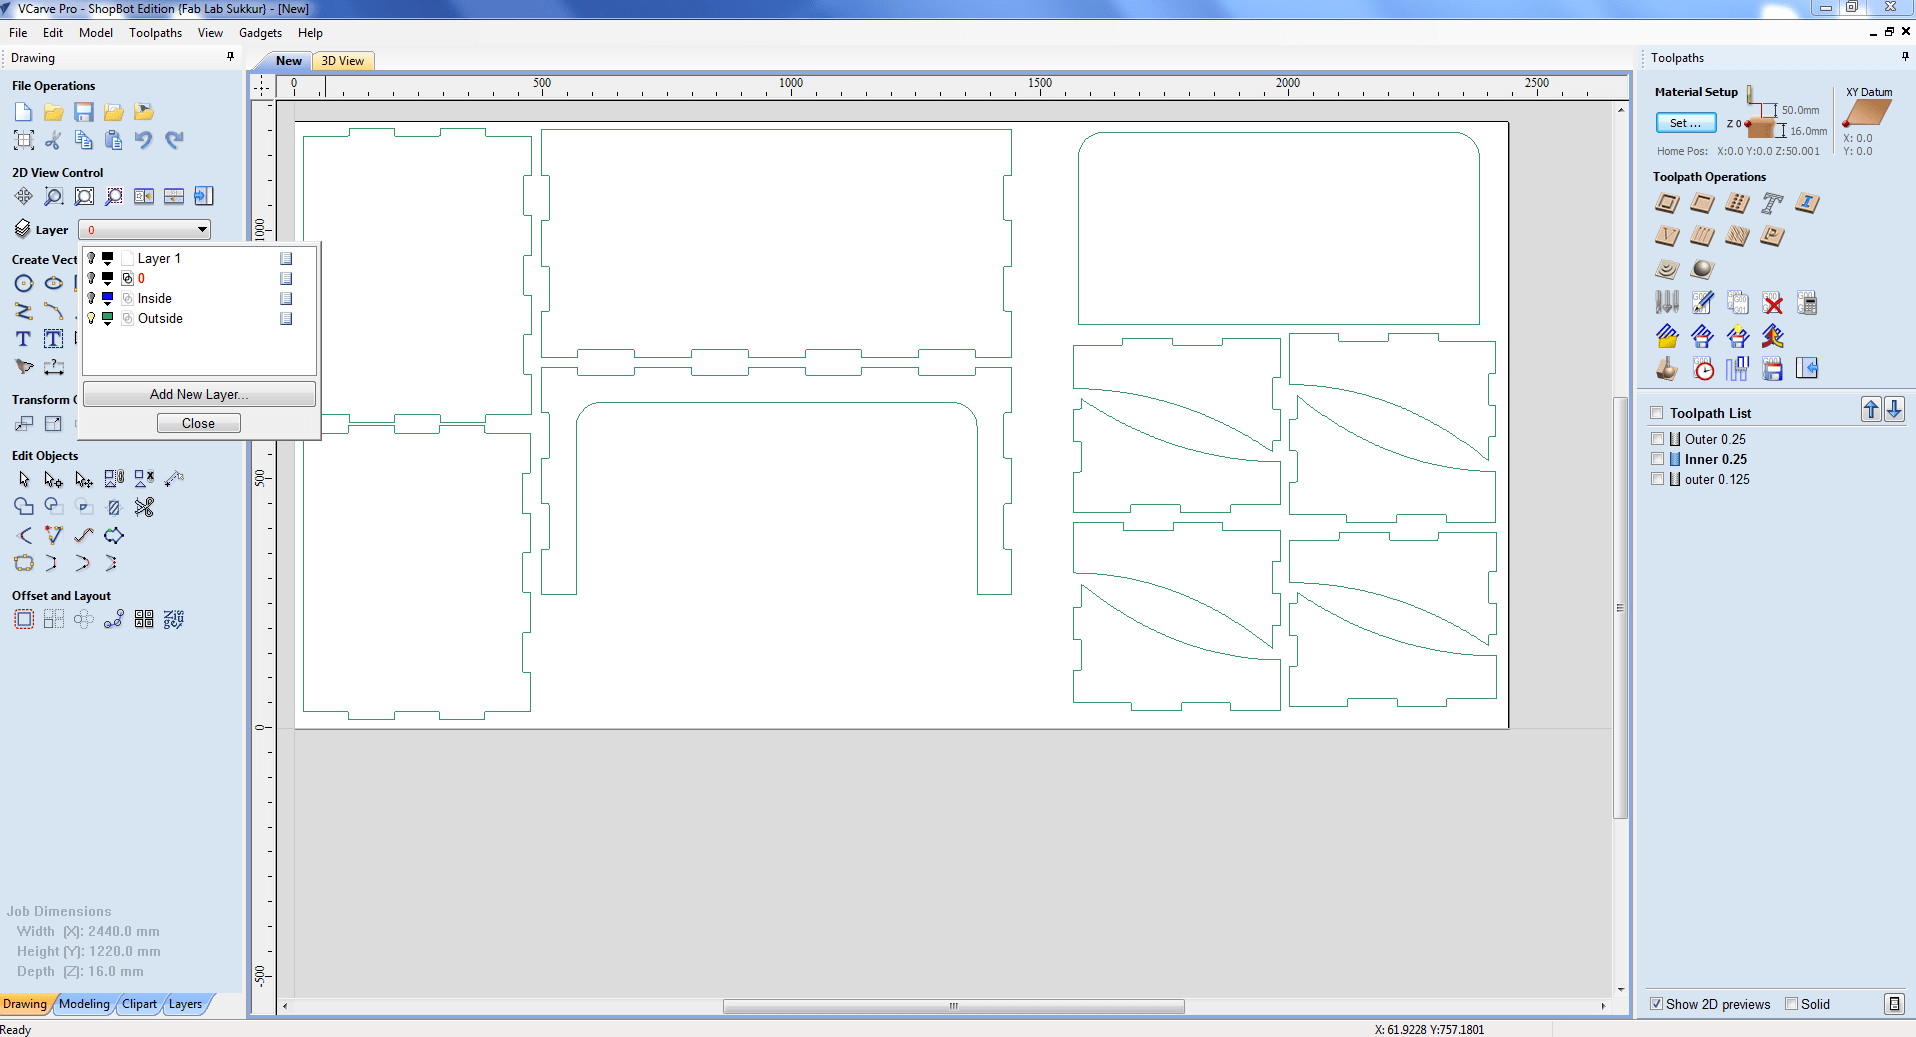
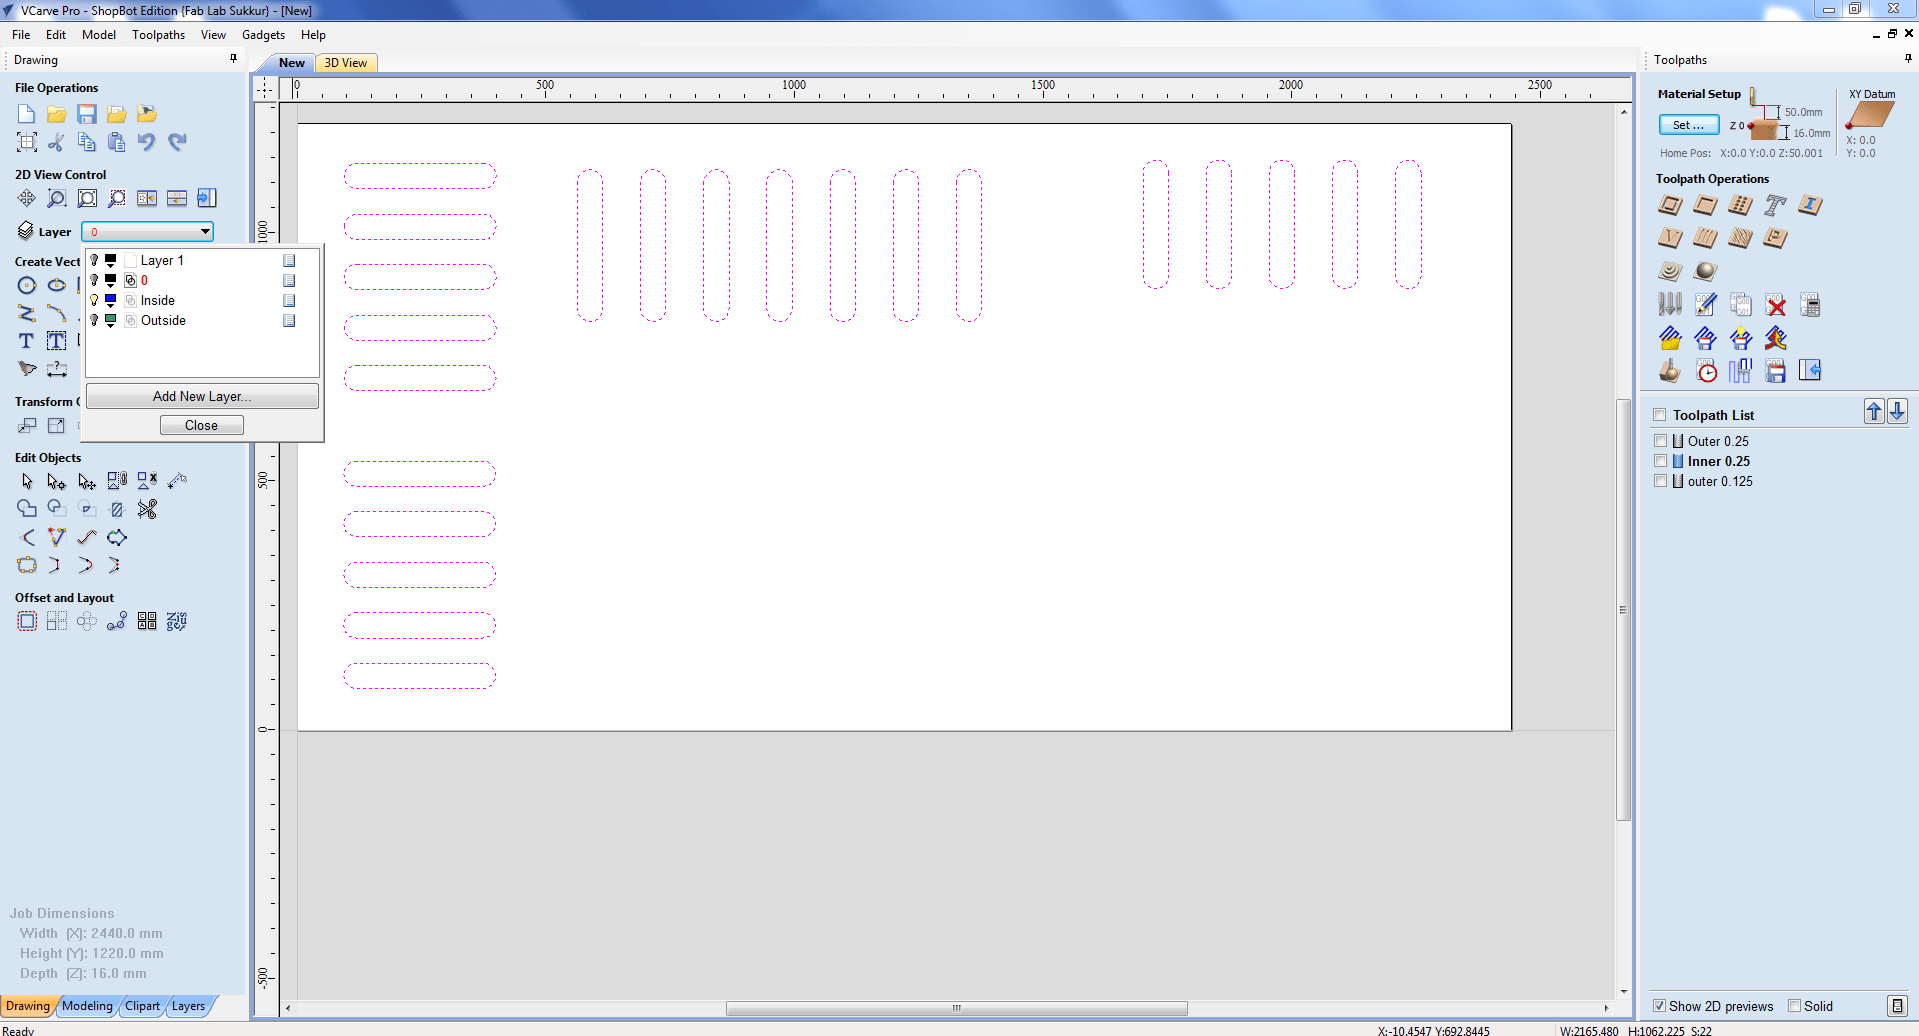
Then I create a guide layer to leave 20mm of space on each side, as well as a boundary layer to indicate the boundaries.
After that, I add two more layers. one for setting inside and outside breaks, and another for generating toolpaths separately.
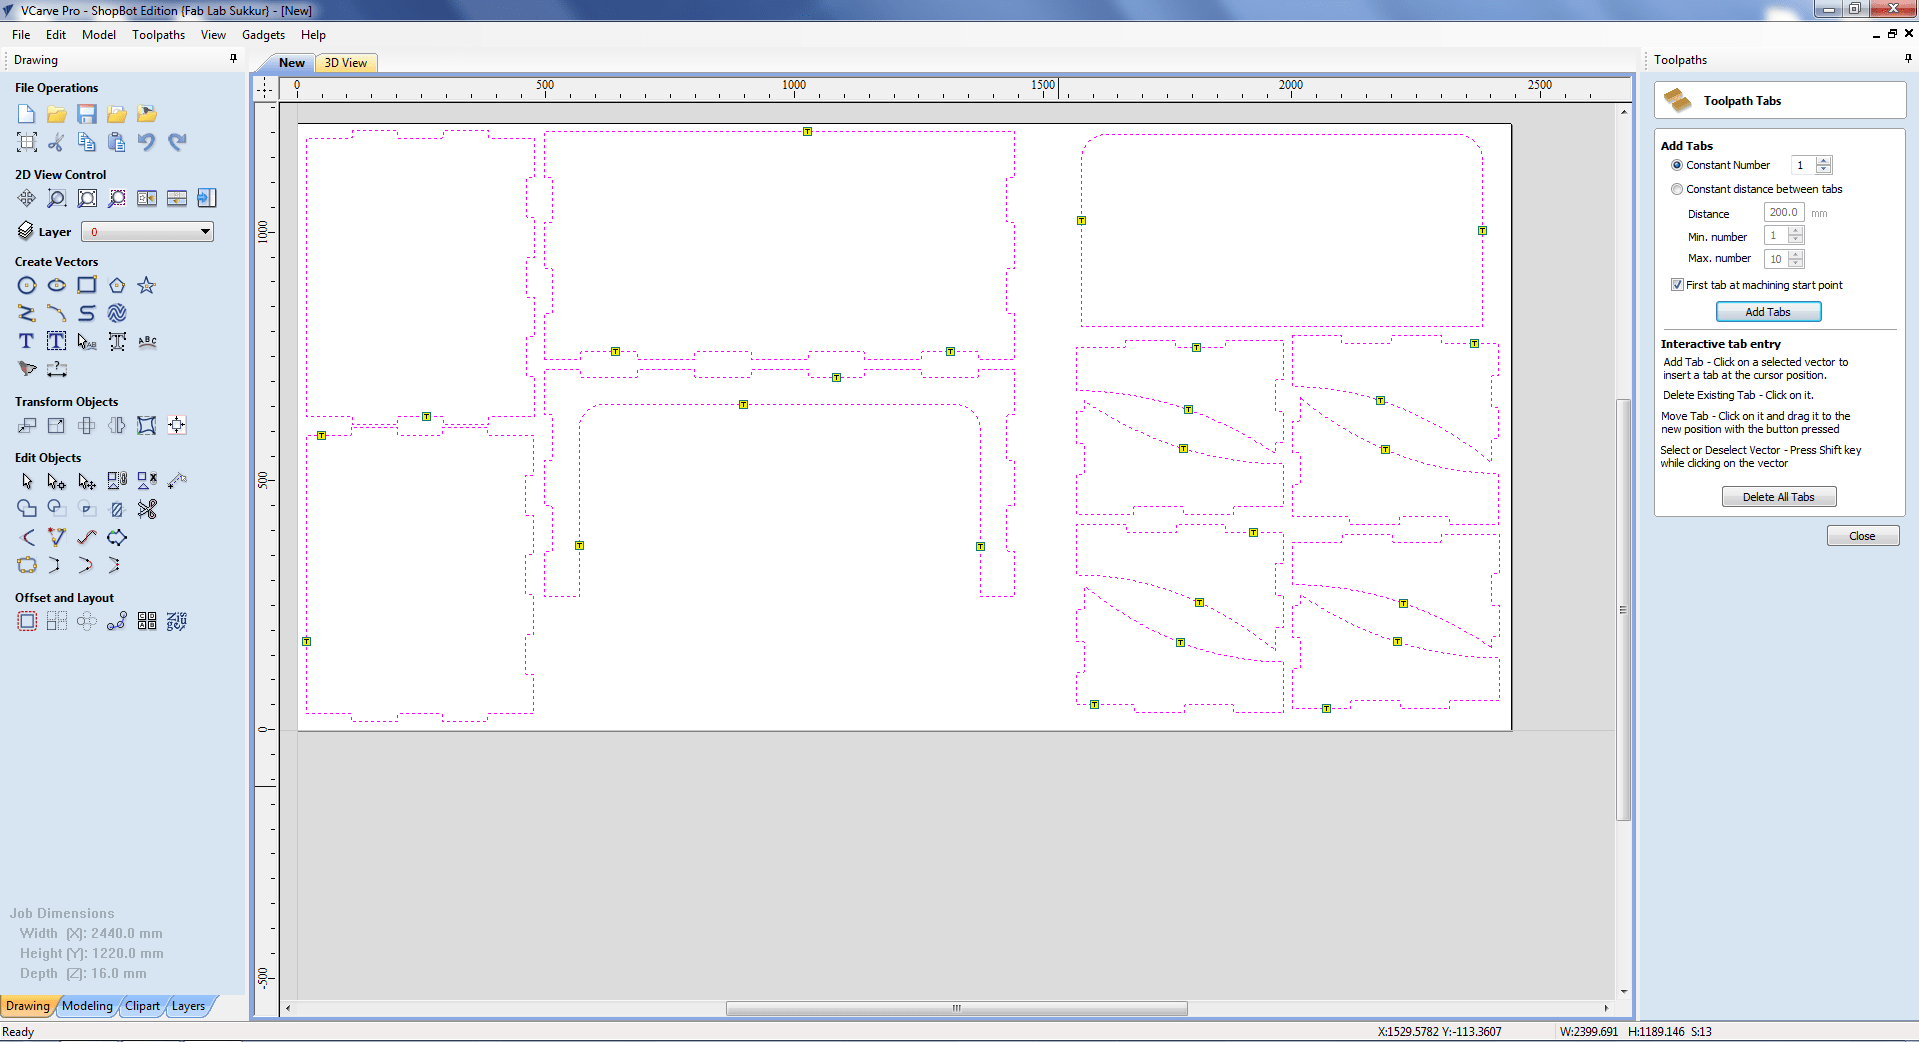
After that, I added tabs and made dog bones to detect the nerrow corners.
The next move is to create a toolpath. I need to cut the pieces boundaries, so I am going to use the profile toolpath.
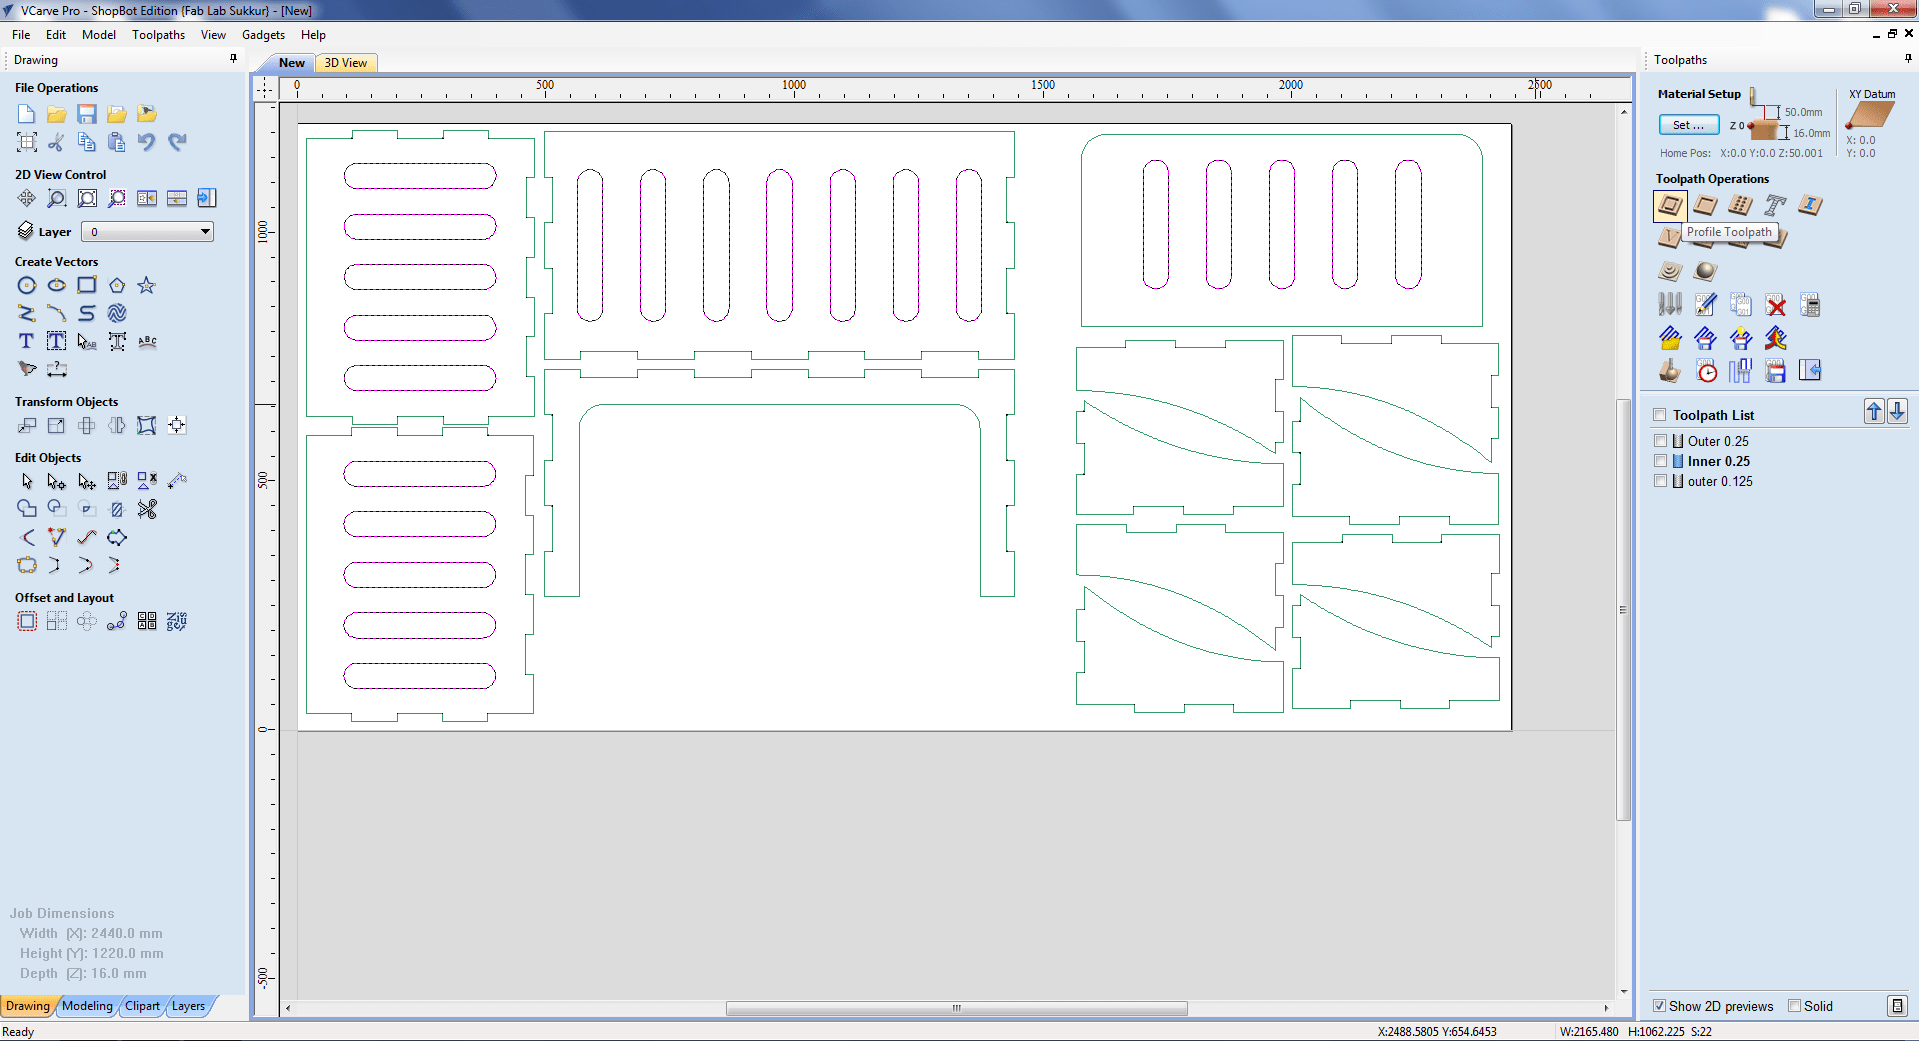
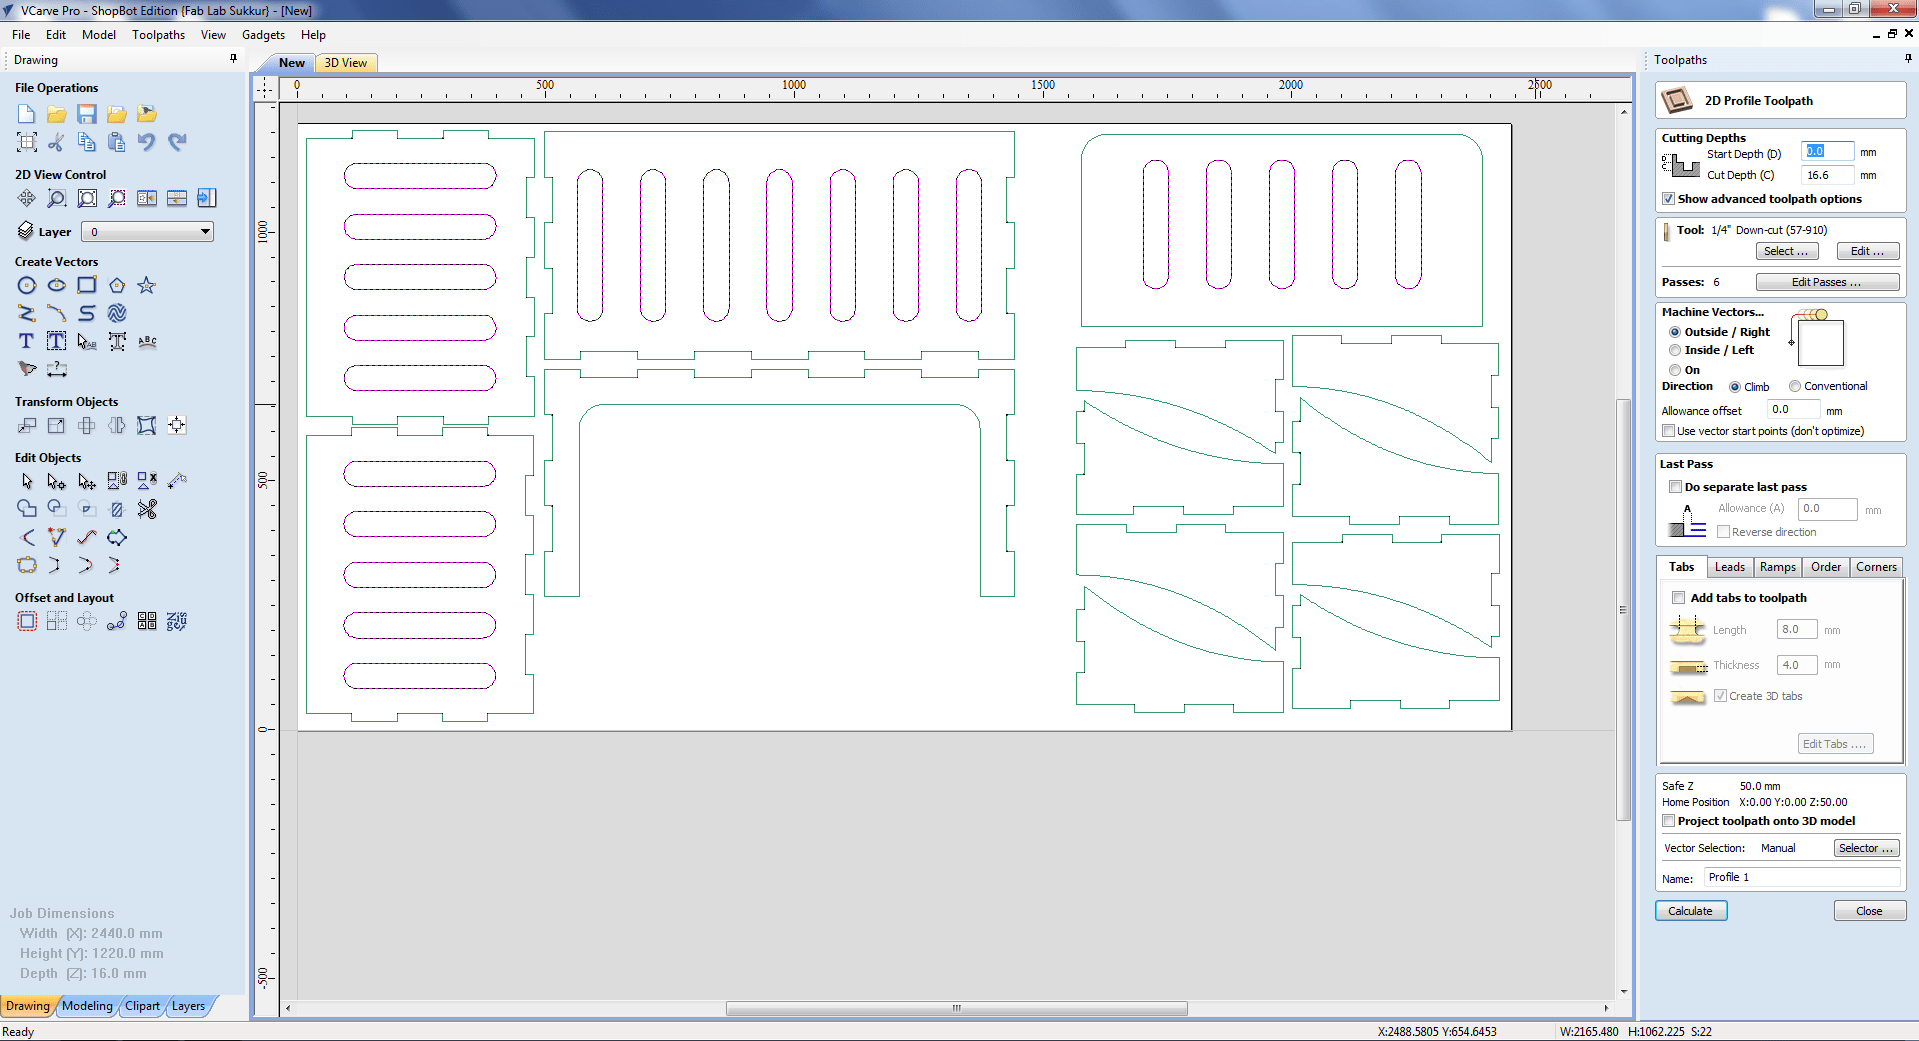
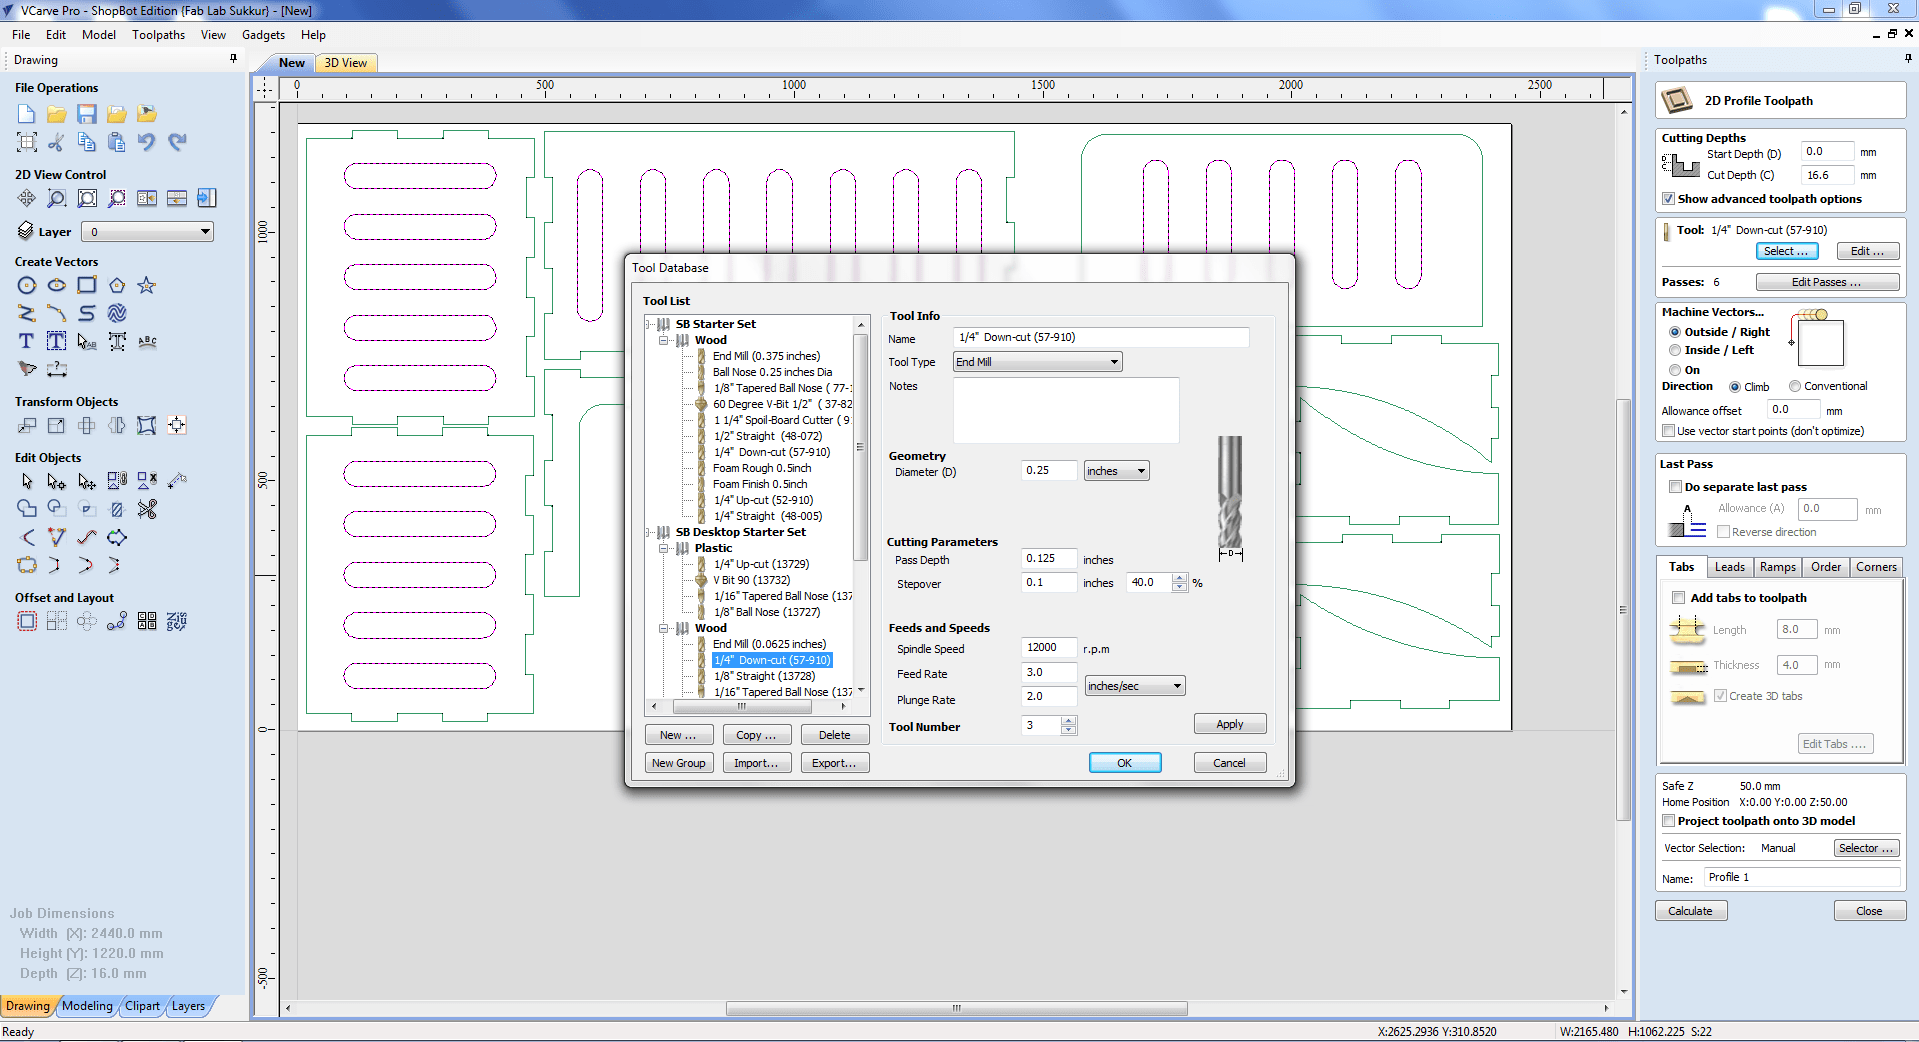
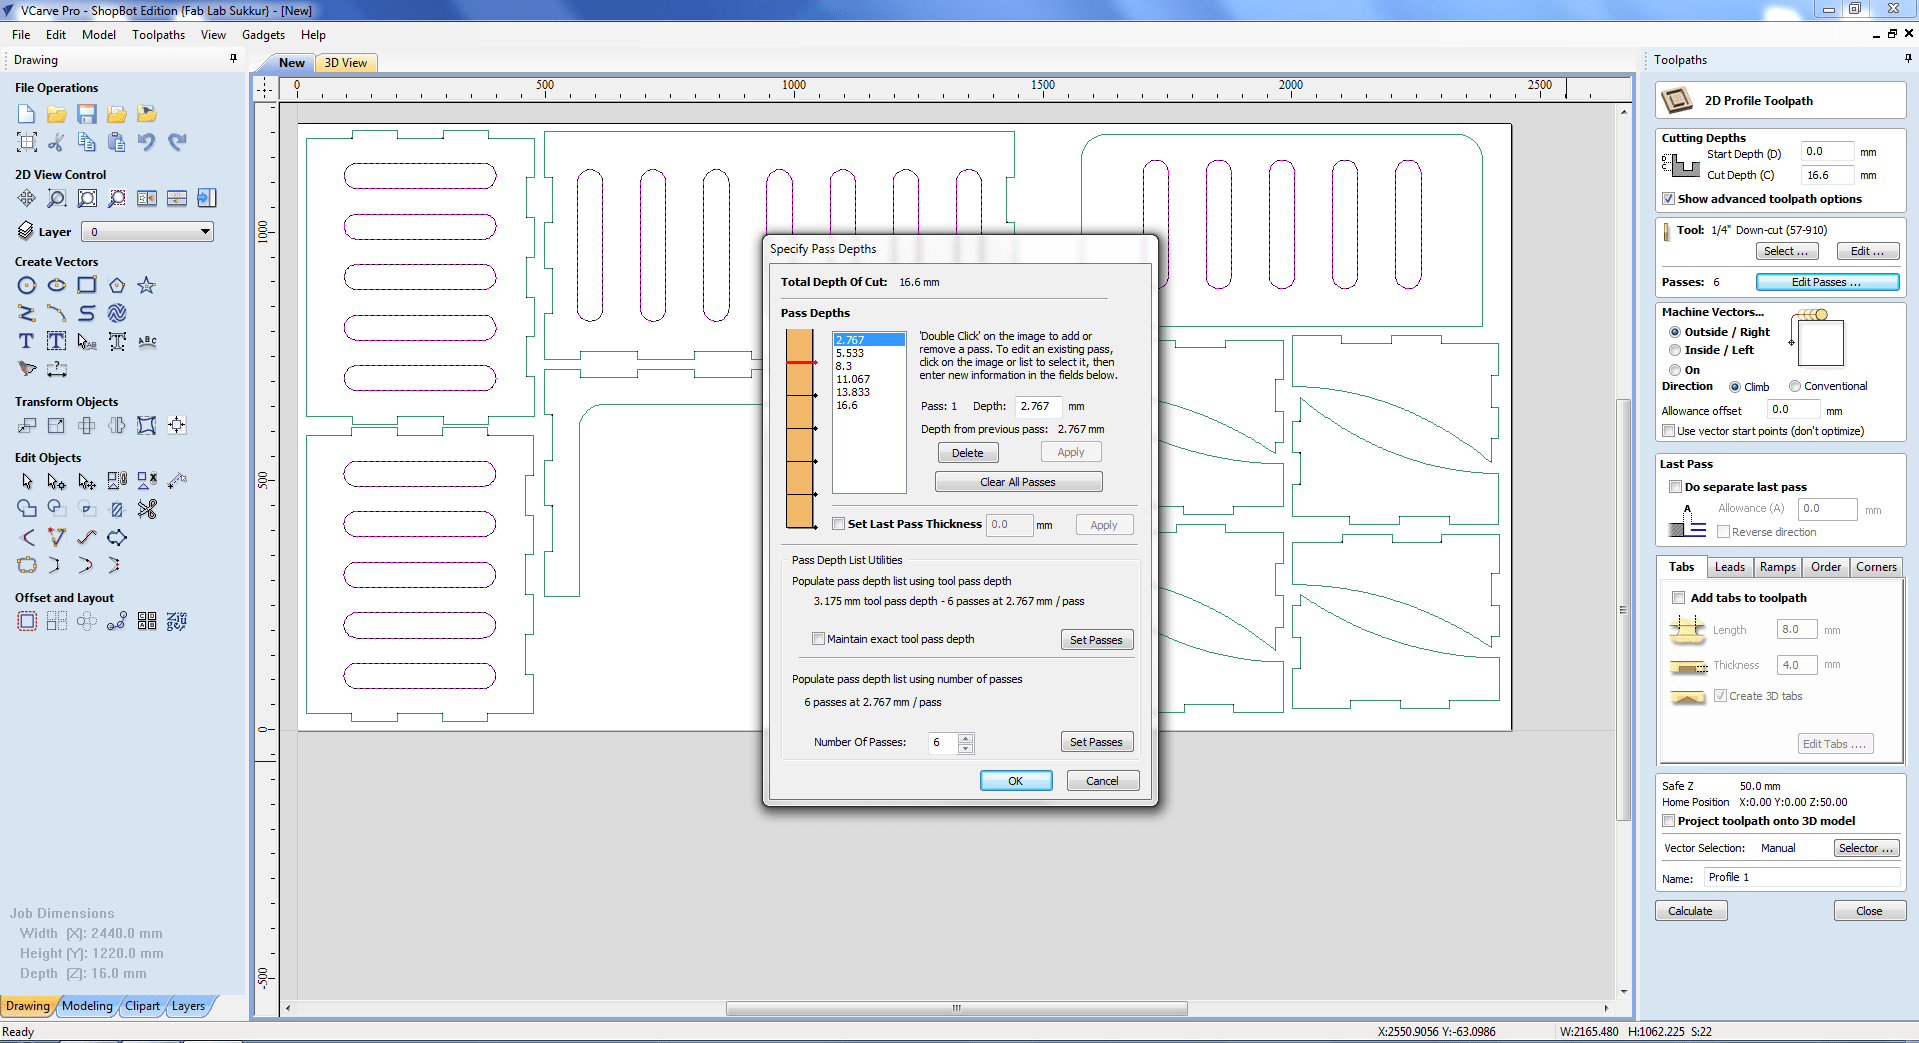
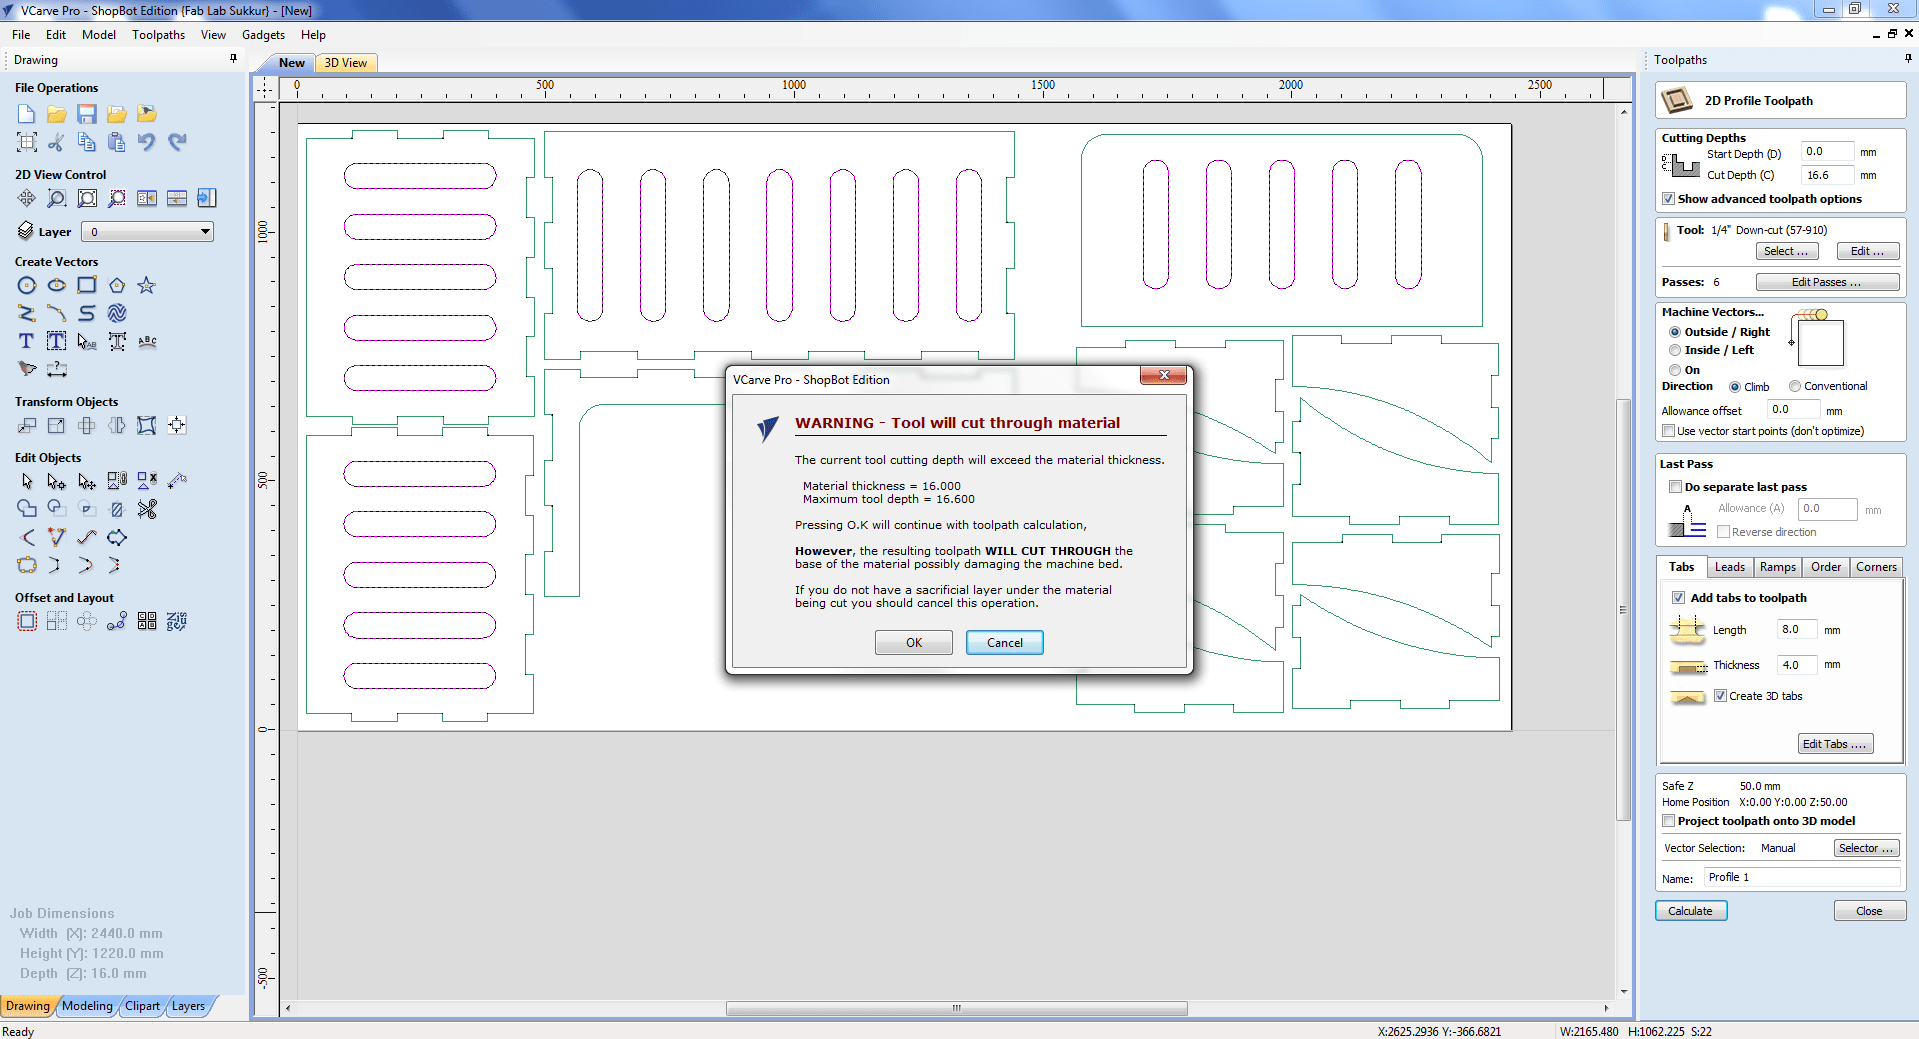
In the toolpath settings, I choose 16.8mm Cut Depth, Machine to run outside vectors, 1/4" Down-cut (57-910) drill bit, and tabs to keep the component in place when cutting. The created toolpaths will be saved as.sbp files, and the.sbp files will be provided to shopbot to perform the job.

CNC milling
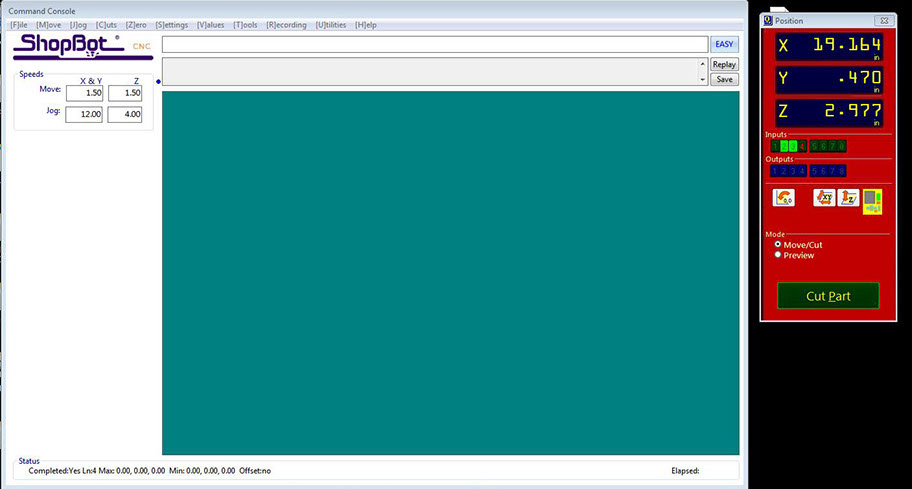
Installing the desired milling bit is the first step before beginning the milling process. As previously said, the bit must be inserted in the Collet, which is accomplished with these special spanners. Using the two USB cables given, connect the device to the shopbot app. The axial position of the bit and a command similar to a screen appear when the software is opened. We must shift the drill bit to a point that we will refer to as the origin. To do so, go to the location menu and press the yellow icon for the keypad option.
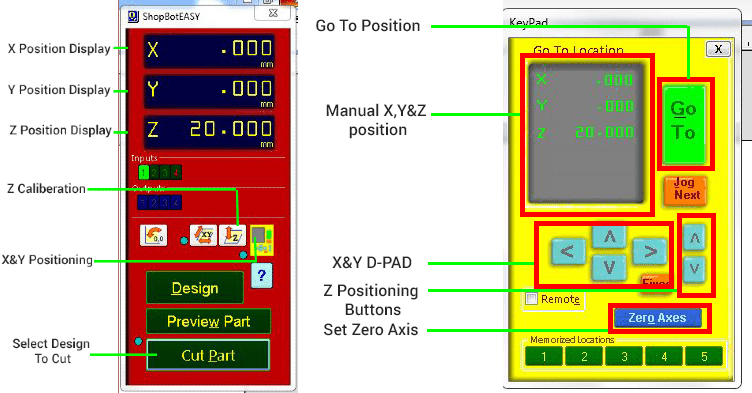
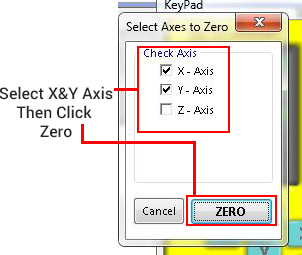
Switch the bit to the desired root point by pressing the arrow key by using the on-screen arrows. It could be a little difficult to get Z to work. The bit should come into contact with the bed at the precise point that it scrapes the top sheet.
Now we all set. Open the Shopbot software and then open the cut file by selecting the Cut button. Then you take your full focus on the machine, You need to activate the Interlock key to activate the spindle. Then you need to click on the Start button, you will get pop message to turn on the spindle by pressing the start button on the ESTOP button control. after the spindle starts rotating. you are good to go. Click start in the software. Now the machine starts to do the job. But yould ready to press the ESTOP button if anything went wrong. Sometimes there is high chances to break the bit or any injuries. Always recommend to to do CNC machining with a partner.

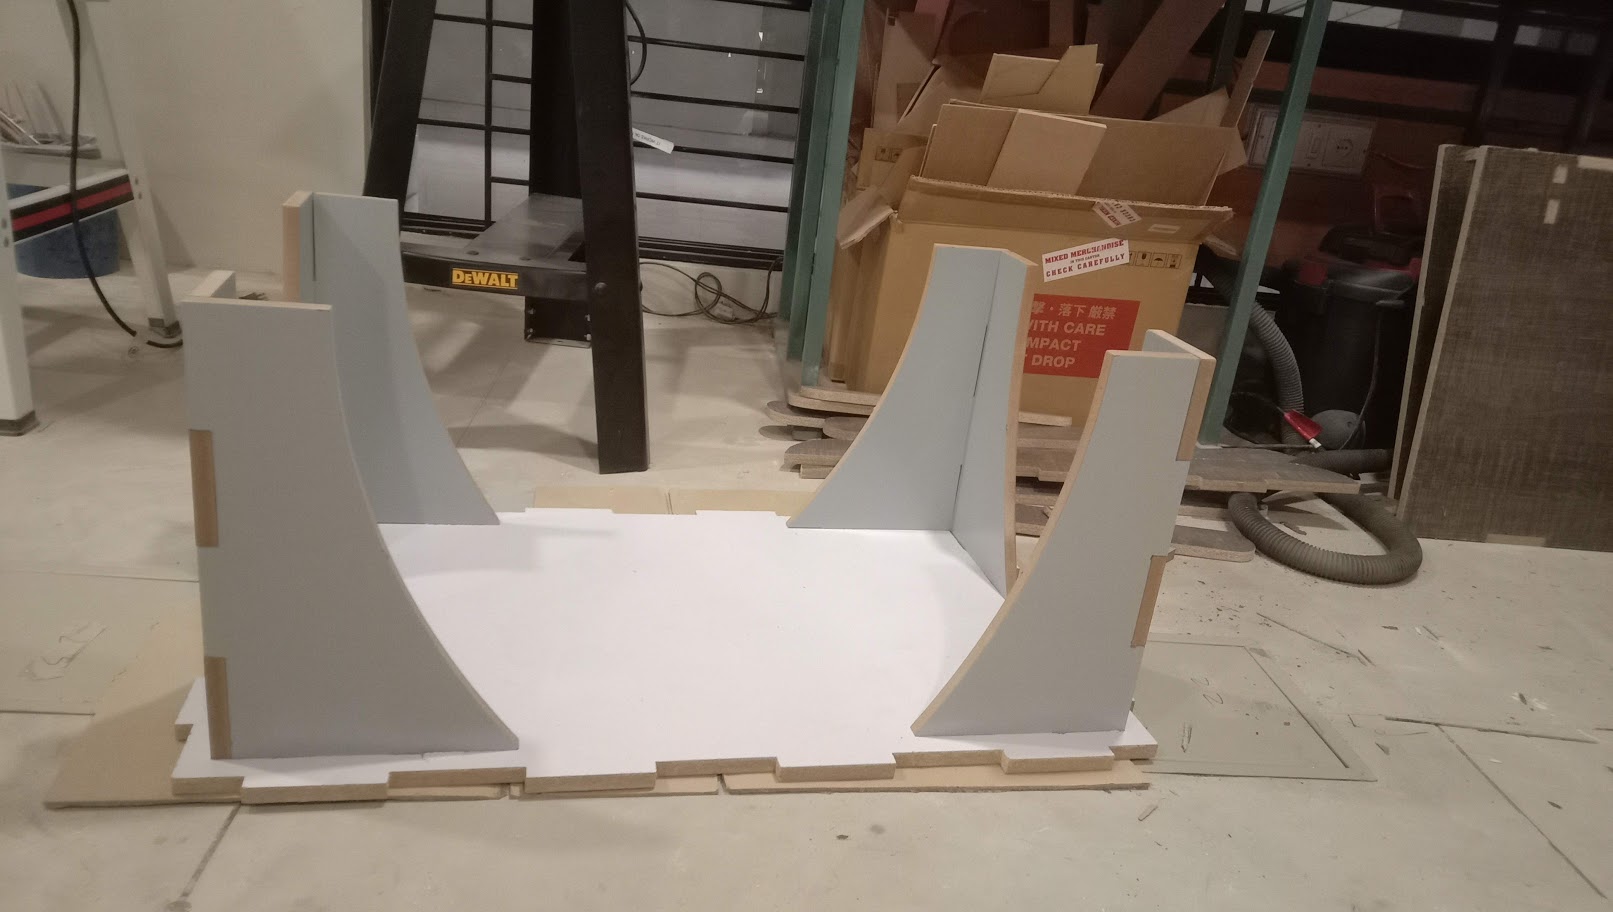
After cutting out all the parts i need to assemble them . Here is a snapshot of the parts.

Assemble the Parts
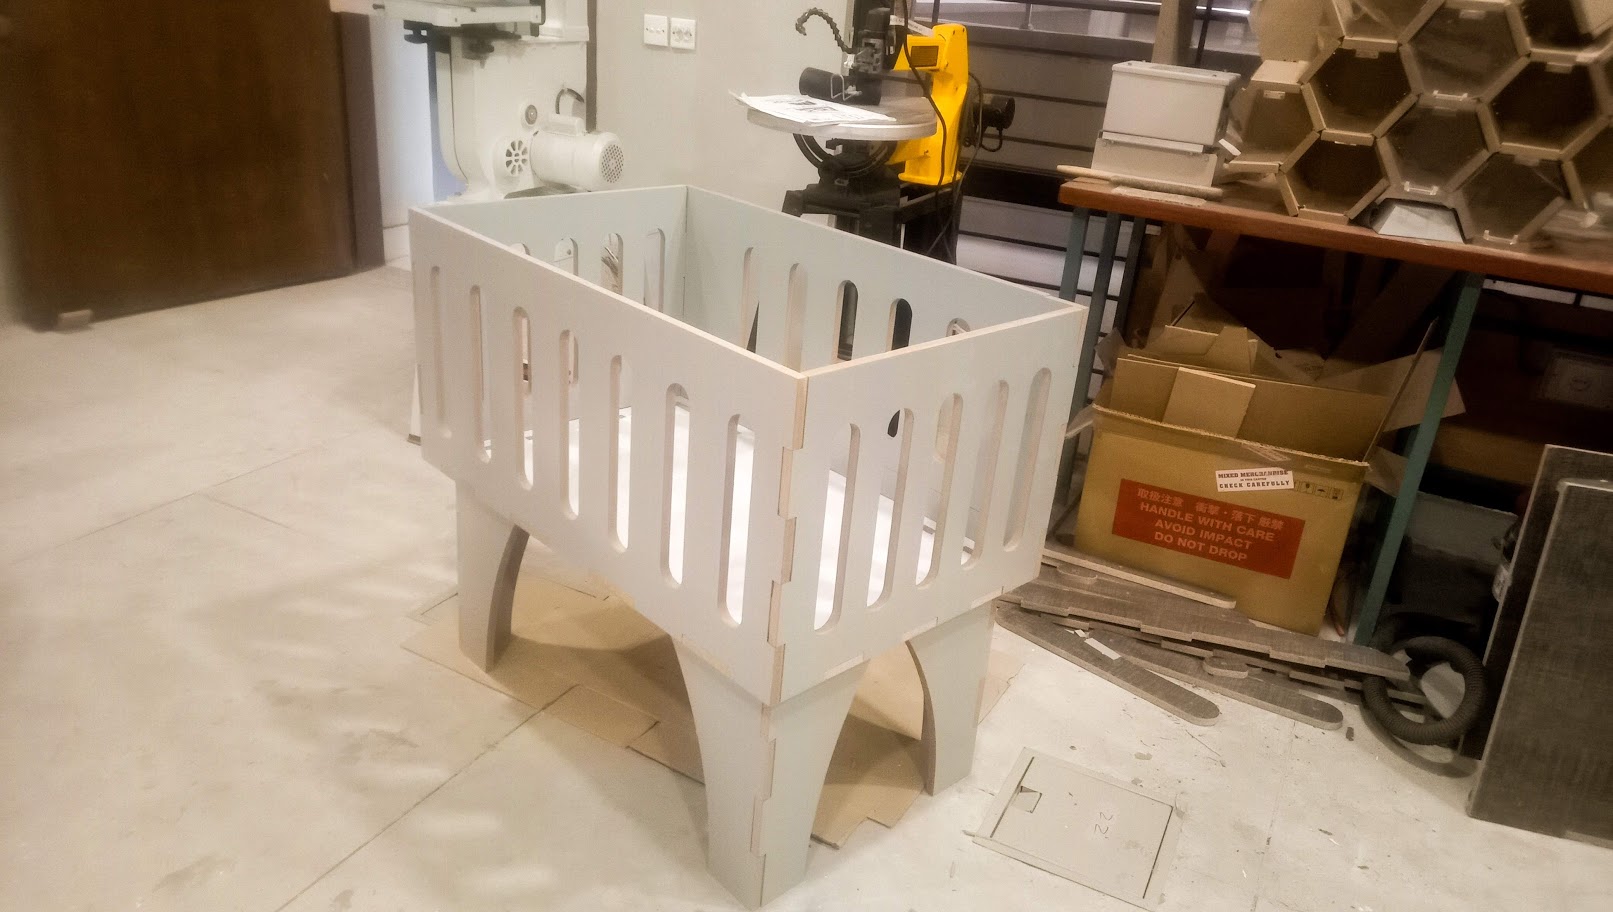
It's time to put the pieces together.
This is the final product which i have designed.
Group Assignment
The group assignment of this week is we have to test run out, alignment, speeds, feeds, and toolpaths for your machine. For this we made a design in solid works and cut it in CNC.
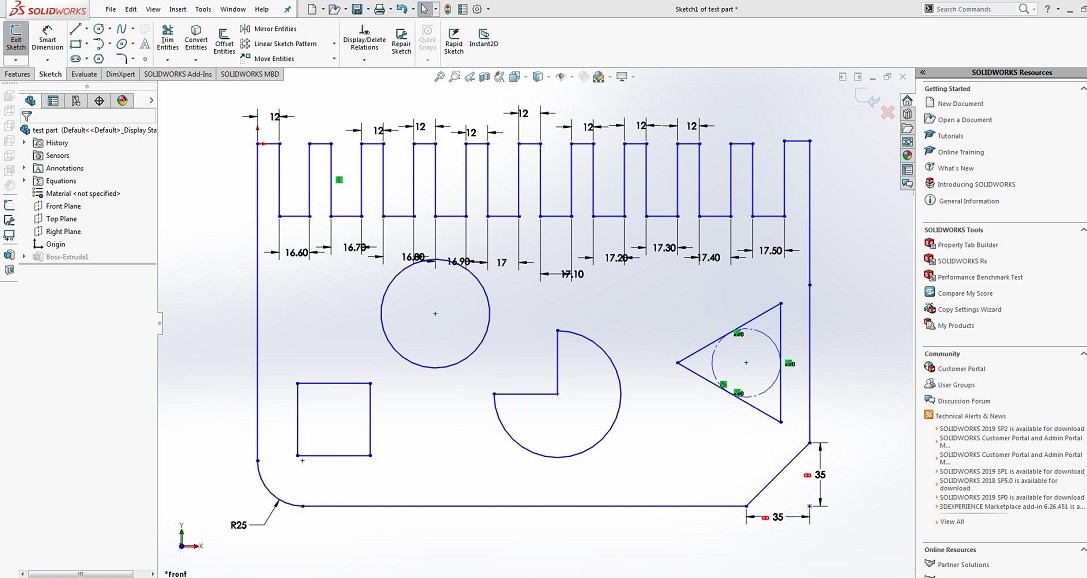
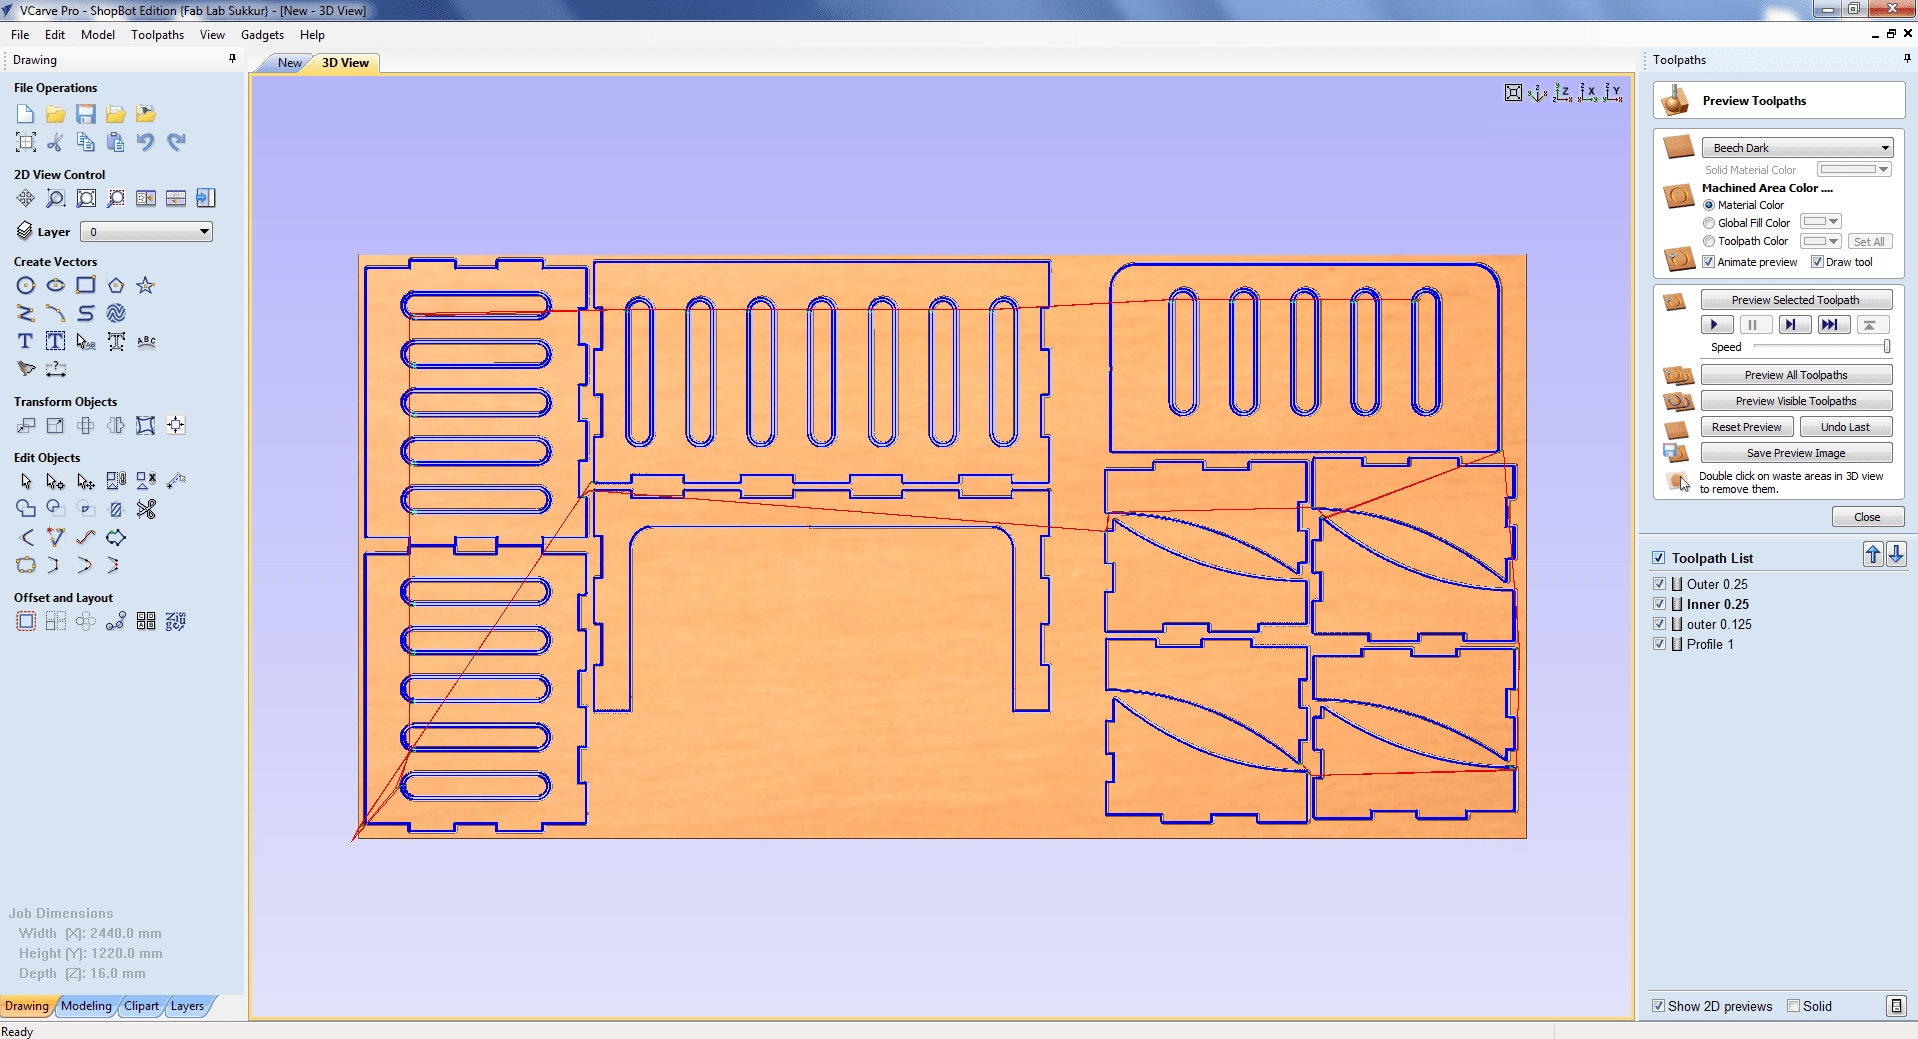
We save the file in a dxf format and open it in V carve pro to generate the tool paths.
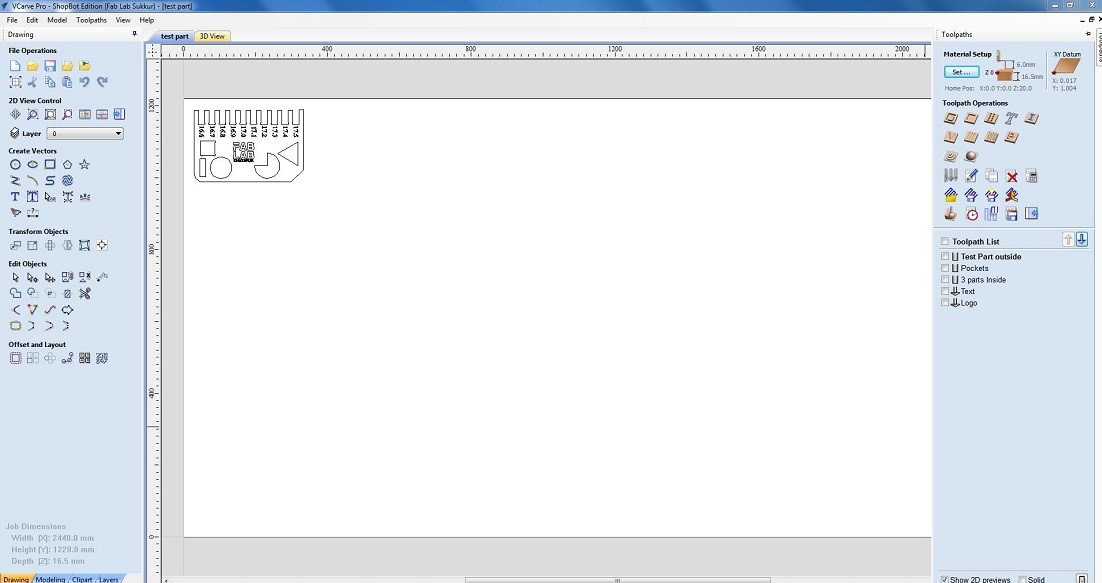
After Cutting

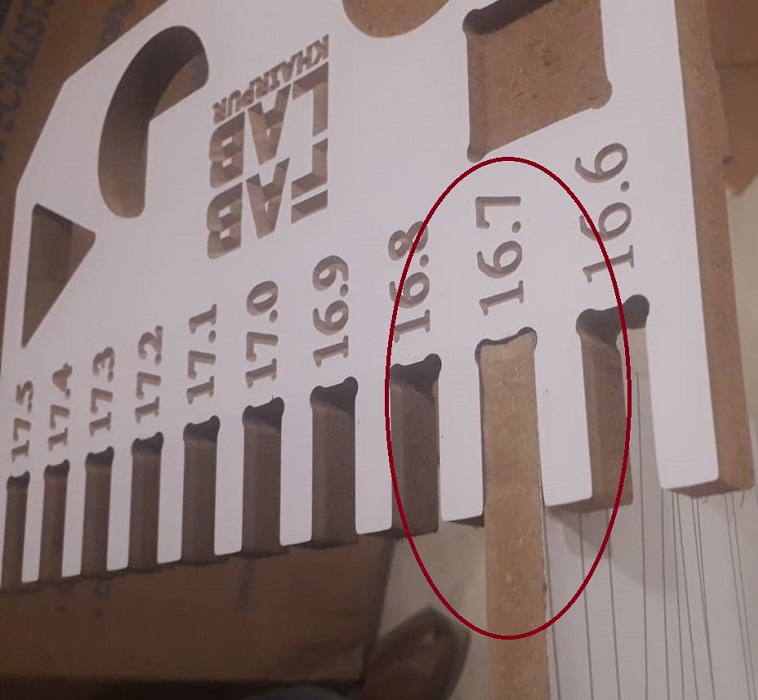
We have the MDF sheets in lab with thickness of 16.3mm. So we cutted part in that sheet, we used both outside cut and inside cut on different areas and also used pocket tool path you can also see in image and after cutting it was fixing in 16.7mm cutted area, we cutted this area with outside cut toolpath.
"Click here"to download all files of this week