
|

| Sukkur IBA University Merit, Quality, Excellence |
Week - 11
Molding and Casting
Assignment
Group Assignment
- Review the safety data sheets for each of your molding and casting materials, then make and compare test casts with each of them
Individual Assignment
- Design a 3D mold around the stock and tooling that you'll be using, machine it, and use it to cast parts
Molding
It is the process of manufacturing by shaping liquid or pliable raw material using a rigid frame called a mold or matrix.
Casting
Casting is a manufacturing process in which a liquid material is usually poured into a mold, which contains a hollow cavity of the desired shape, and then allowed to solidify.
Group Assignment
This week group assignment is to review the datasheets of the materials we are using in making mold and cast. Below we are sharing some important points after reviewing safety datasheets of Mold Max 60 for molding and Smooth-Cast 305 for casting materials
Mold Max 60 Safety DataSheet Review:
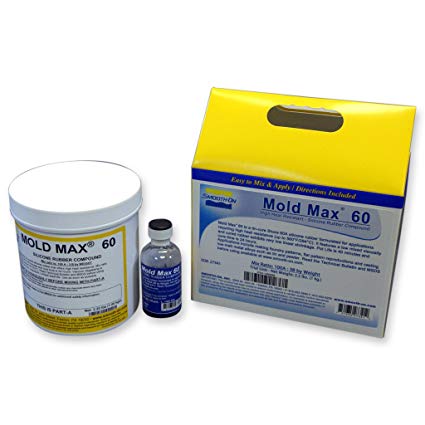
Mold Max 60
Product/Chemical Name: Mold Max 60 Part A:
- Hazards Identification - Not hazardous according to United States Occupational Safety and Health Administration (OSHA).
- Inhalation - Remove source(s) of contamination and move victim to fresh air.
- Eye Contact - Flush eyes with plenty of water. If irritation persists, seek medical attention.
- Skin Contact - In case of skin contact, wash thoroughly with soap and water; remove contaminated clothing and launder before reuse.
- Ingestion - Do not induce vomiting unless instructed by a physician. Contact physician immediately
- After first aid, get appropriate in-plant, paramedic, or community medical support.
- Flash Point - 300 °F
- Handling Precautions - Minimize breathing of vapors and avoid prolonged or repeated contact with skin. Wear proper protective equipment. Use good general housekeeping procedures.
- Storage Requirements - Store in cool dry, well-ventilated area
- Protective Clothing/Equipment - Wear chemically protective gloves to prevent prolonged or repeated skin contact. Wear protective eyeglasses or chemical safety goggles, per OSHA eyeand face-protection regulations 29 CFR 1910.133 and European Standard EN166. Contact lenses are not eye protective devices. Appropriate eye protection must be worn instead of, or in conjunction with contact lenses.
- Toxicological Information:
- Eye Effects: Irritation
- Skin Effects: Irritation
- Carcinogenicity: None Determined
- Mutagenicity: None Determined
- Teratogenicity: None Determined
Product/Chemical Name: Mold Max 60 Part B:
- Hazards Identification
- Harmful if swallowed.
- Irritating to eyes, respiratory system and skin.
- Harmful to aquatic organisms may cause long term adverse effects in the aquatic environment.
- Inhalation - Remove source(s) of contamination and move victim to fresh air. If breathing has stopped, give artificial respiration, then oxygen if needed. Contact physician immediately.
- Eye Contact - Flush eyes with plenty of water. If irritation persists, seek medical attention.
- Skin Contact - In case of skin contact, wash thoroughly with soap and water; remove contaminated clothing and launder before reuse; seek medical attention if rash develops.
- Ingestion - Do not induce vomiting unless instructed by a physician. Contact physician immediately
- After first aid, get appropriate in-plant, paramedic, or community medical support.
- Flash Point - 150 °F
- Handling Precautions - Minimize breathing of vapors and avoid prolonged or repeated contact with skin. Wear proper protective equipment. If ventilation is not sufficient, wear proper respiratory equipment. Reseal partial containers. Use good general housekeeping procedures.
- Storage Requirements - Store in cool dry, well-ventilated area
- Protective Clothing/Equipment - Wear chemically protective gloves and aprons to prevent prolonged or repeated skin contact. Wear protective eyeglasses or chemical safety goggles, per OSHA eye- and face-protection regulations 29 CFR 1910.133 and European Standard EN166. Contact lenses are not eye protective devices. Appropriate eye protection must be worn instead of, or in conjunction with contact lenses.
- Toxicological Information:
- Eye Effects: Irritation
- Skin Effects: Irritation
- Carcinogenicity: None Determined
- Mutagenicity: None Determined
- Teratogenicity: None Determined
Smooth-Cast 300 Series Safety DataSheet Review:
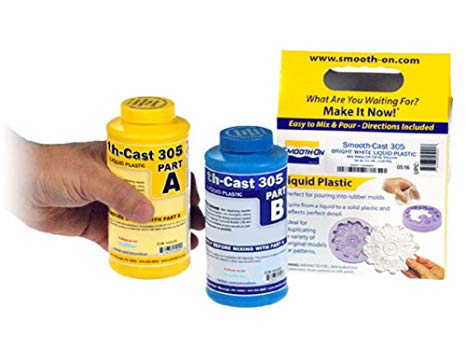
Smooth-Cast 305
Product/Chemical Name: Smooth-Cast 305 Part A:
- Hazards Identification
- Harmful by inhalation.
- Irritating to eyes, respiratory system and skin.
- Limited evidence of a carcinogenic effect
- Harmful; danger of serious damage to health by prolonged exposure through inhalation environment.
- Inhalation - Remove source(s) of contamination and move victim to fresh air. If breathing has stopped, give artificial respiration, then oxygen if needed. Contact physician immediately.
- Eye Contact - Flush eyes with plenty of water. If irritation persists, seek medical attention.
- Skin Contact - In case of skin contact, wash thoroughly with soap and water; remove contaminated clothing and launder before reuse; seek medical attention if rash develops.
- Ingestion - Do not induce vomiting unless instructed by a physician. Contact physician immediately
- After first aid, get appropriate in-plant, paramedic, or community medical support.
- Flash Point - 262 °F
- Handling Precautions - Minimize breathing of vapors and avoid prolonged or repeated contact with skin. Wear proper protective equipment. If ventilation is not sufficient, wear proper respiratory equipment. Reseal partial containers. Use good general housekeeping procedures.
- Storage Requirements - Store in cool dry, well-ventilated area
- Protective Clothing/Equipment - Wear chemically protective gloves to prevent prolonged or repeated skin contact. Wear protective eyeglasses or chemical safety goggles, per OSHA eyeand face-protection regulations 29 CFR 1910.133 and European Standard EN166. Contact lenses are not eye protective devices. Appropriate eye protection must be worn instead of, or in conjunction with contact lenses.
- Toxicological Information:
- Hazardous Component: 4,4’ Methylene, bis(phenylisocyanate)
Product/Chemical Name: Smooth-Cast 305 Part B:
- Hazards Identification - Not hazardous according to United States Occupational Safety and Health Administration (OSHA).
- Inhalation - Remove source(s) of contamination and move victim to fresh air.
- Eye Contact - Flush eyes with plenty of water. If irritation persists, seek medical attention.
- Skin Contact - In case of skin contact, wash thoroughly with soap and water; remove contaminated clothing and launder before reuse.
- Ingestion - Do not induce vomiting unless instructed by a physician. Contact physician immediately
- After first aid, get appropriate in-plant, paramedic, or community medical support.
- Flash Point - 262 °F
- Handling Precautions - Minimize breathing of vapors and avoid prolonged or repeated contact with skin. Wear proper protective equipment. Use good general housekeeping procedures.
- Storage Requirements - Store in cool dry, well-ventilated area
- Protective Clothing/Equipment - Wear chemically protective gloves to prevent prolonged or repeated skin contact. Wear protective eyeglasses or chemical safety goggles, per OSHA eye- and face-protection regulations 29 CFR 1910.133 and European Standard EN166. Contact lenses are not eye protective devices. Appropriate eye protection must be worn instead of, or in conjunction with contact lenses.
- Toxicological Information:
- Acute Inhalation Effects: None Established
- Acute Oral Effects: None Established
- Reproductive Toxicity: None Established
- Mutagenicity: None Established
- Teratogenicity: None Established
- Sensitization: None Established
Individual Assignment
I wanted to make a wax model of a country flag. The optimistic form of the job will be the first wax mould created.
- Making 3D Model
- Milling a wax (to get regid mold)
- Making a flexible mold
- Casting the end result
3D Model
To make a model First I download a suitable and simplified image from Google, then I go to this web page Remove background to remove online background and i download image as a png .

I select raster image

Go to document properties and resize
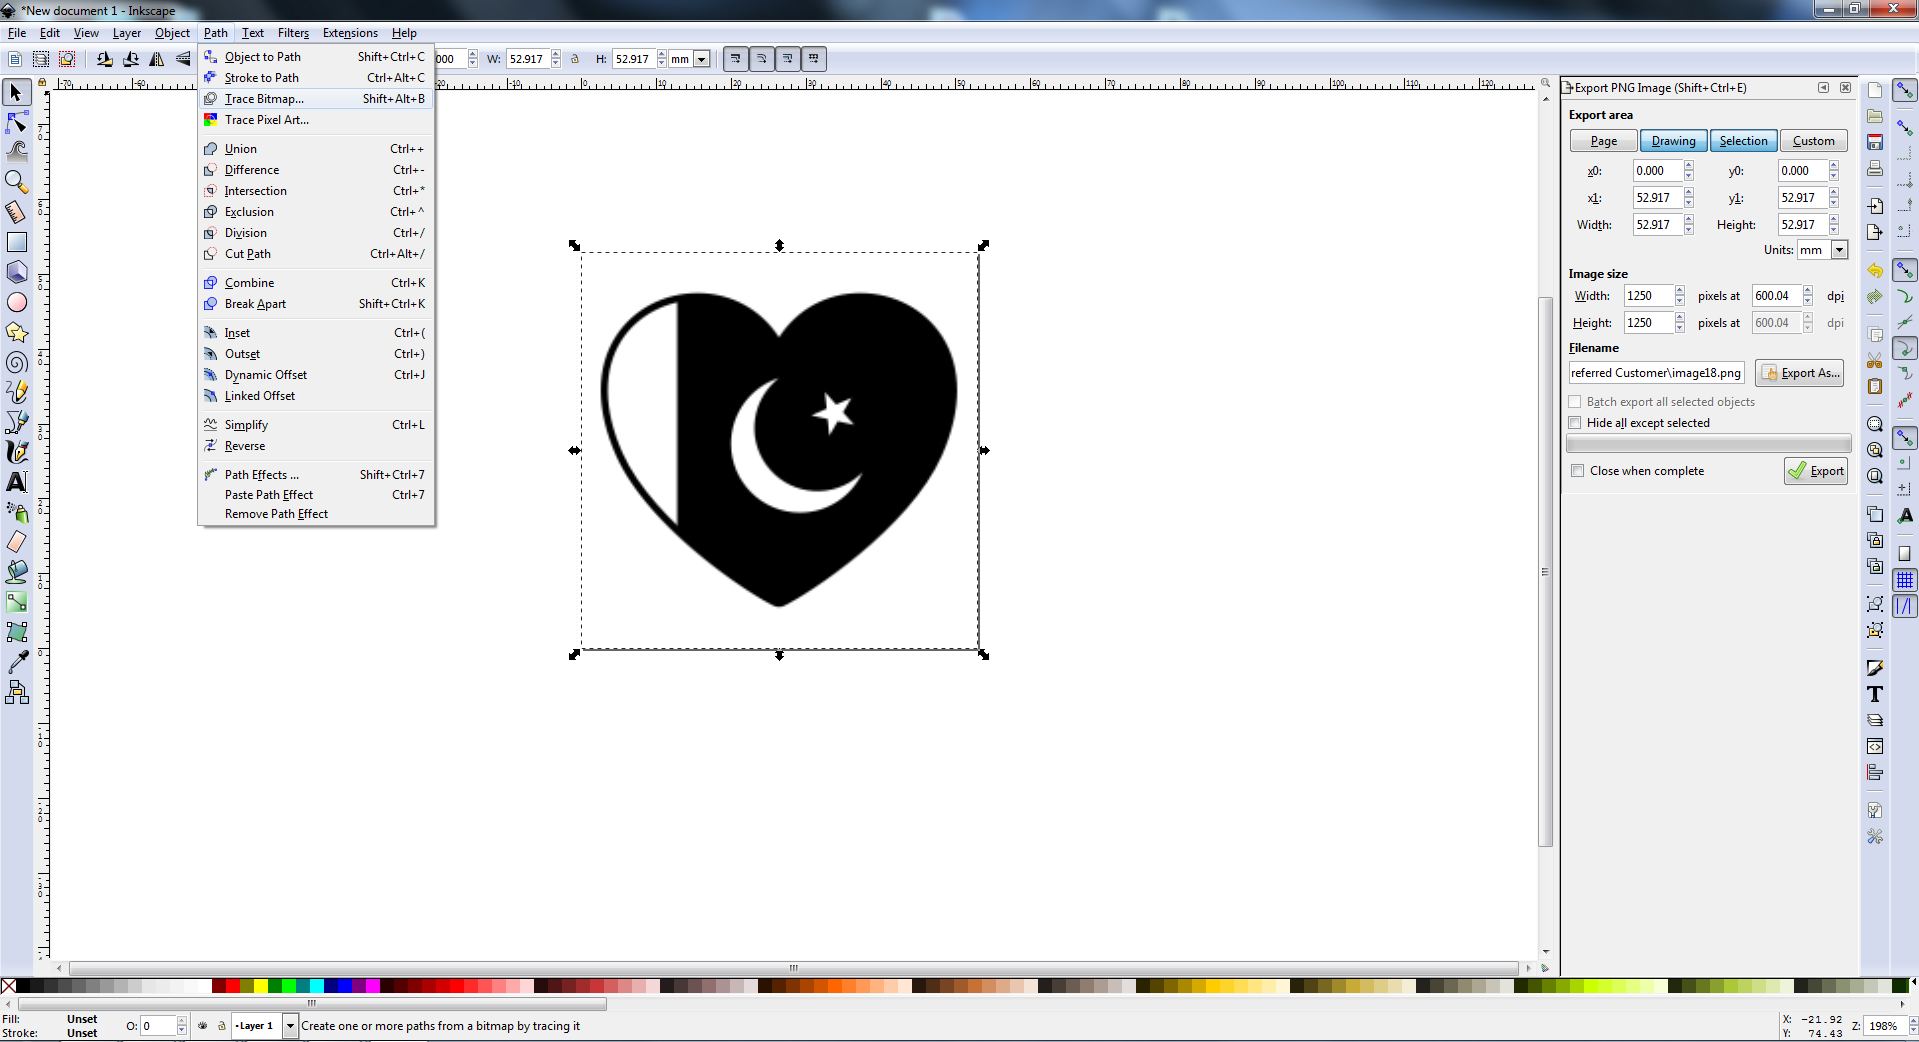
Then go to path and click on trace bit map
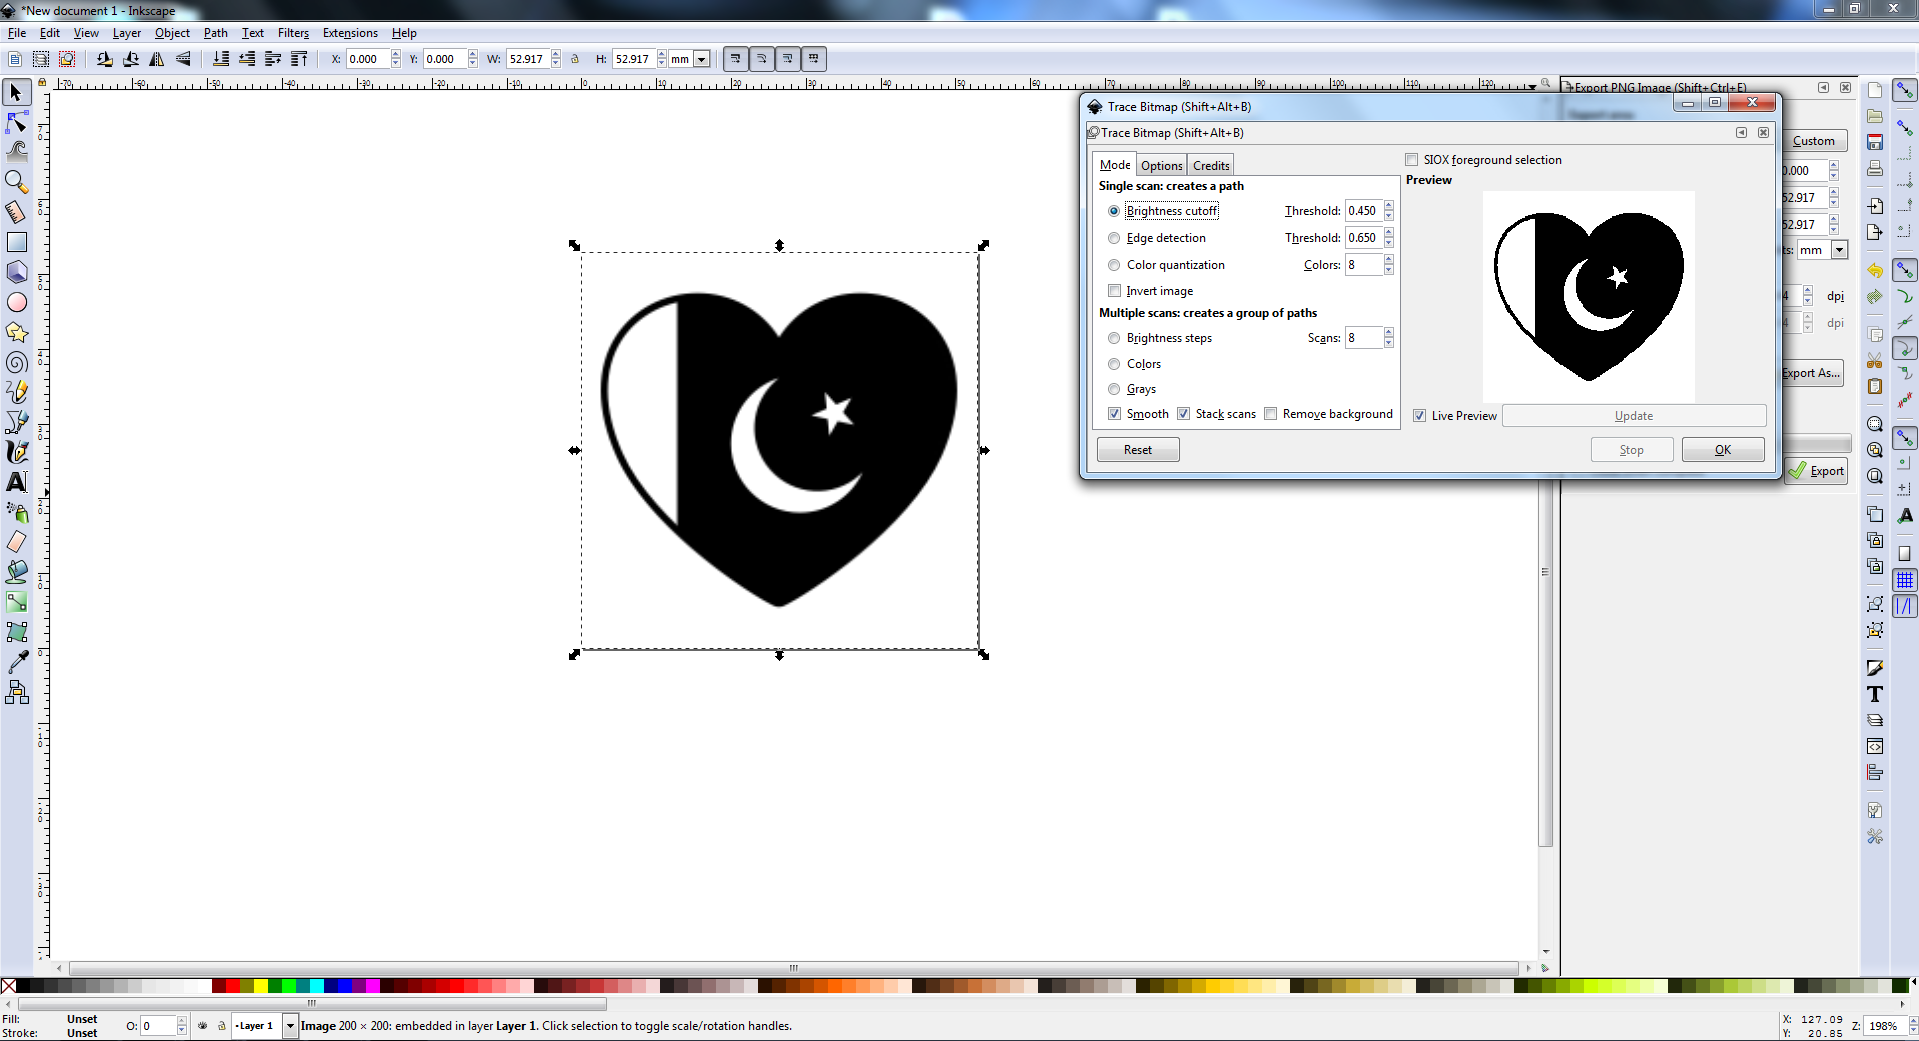
Select picture then tick on live image

Here are both picture raster and vector i delete raster image
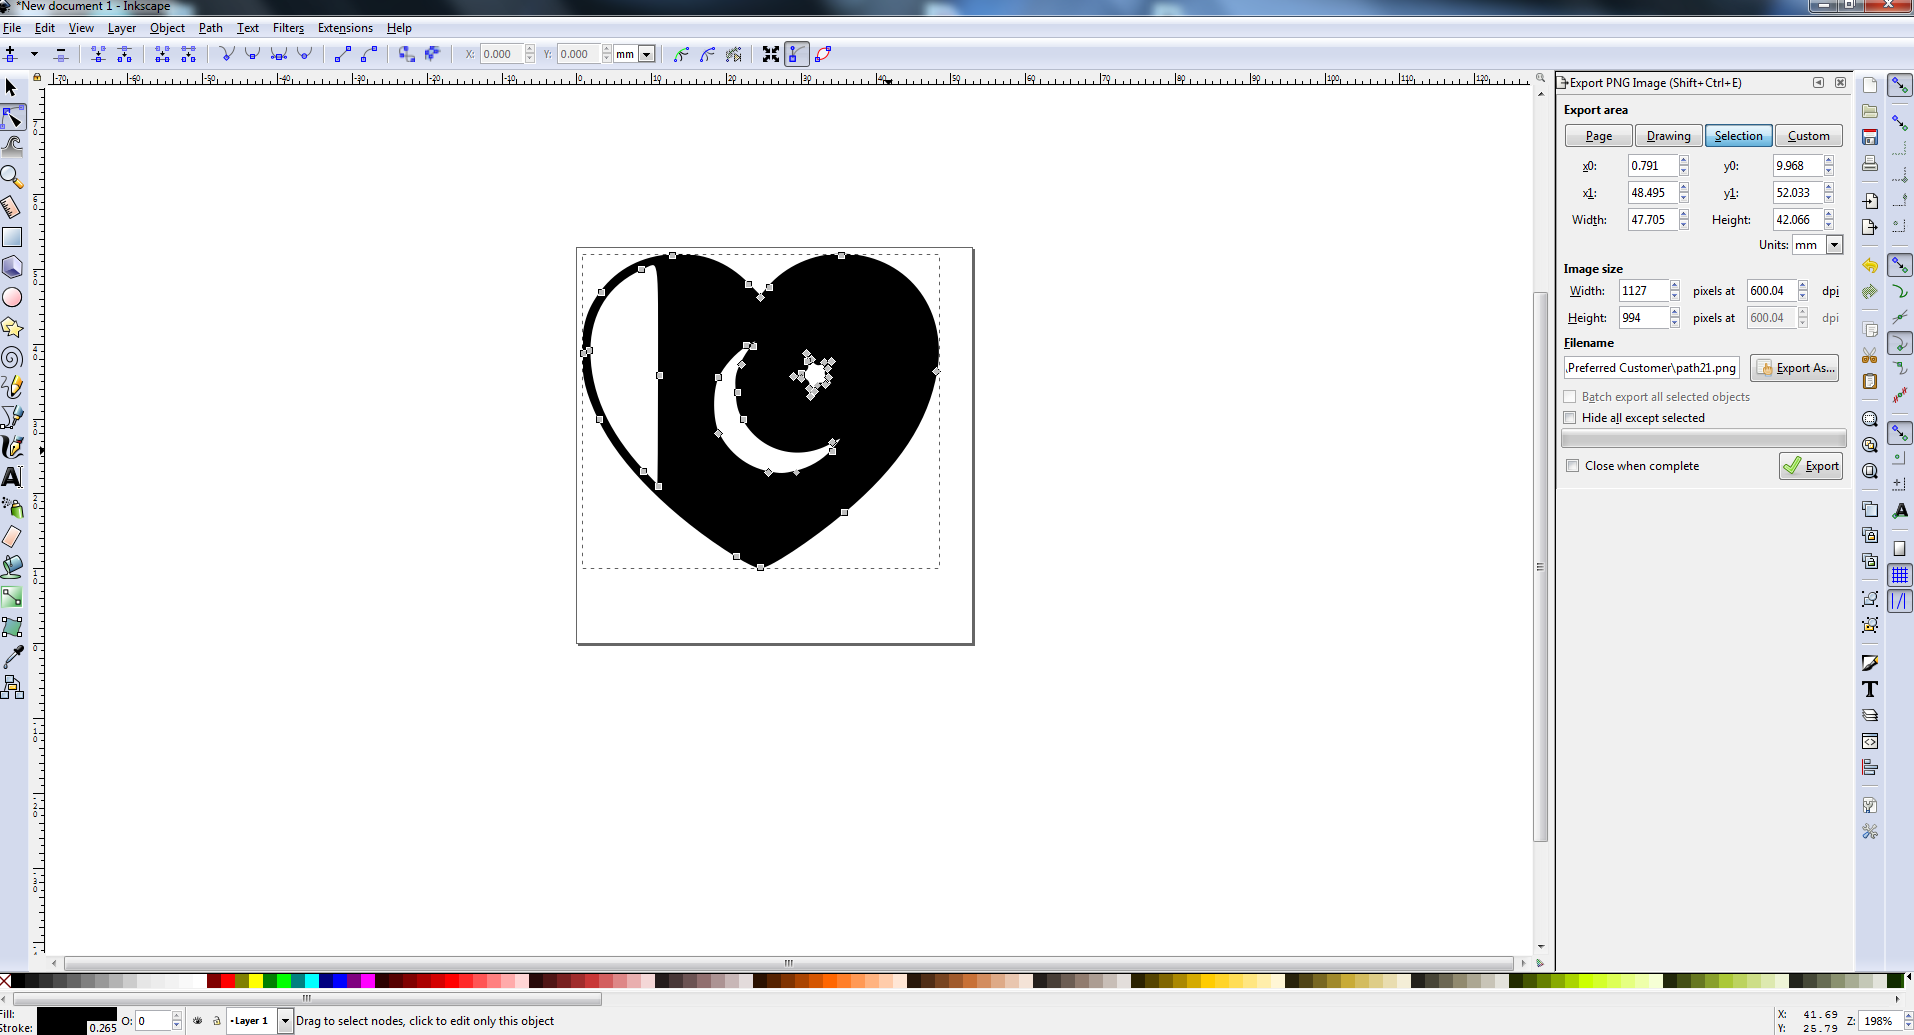
To see the paths i double click on picture
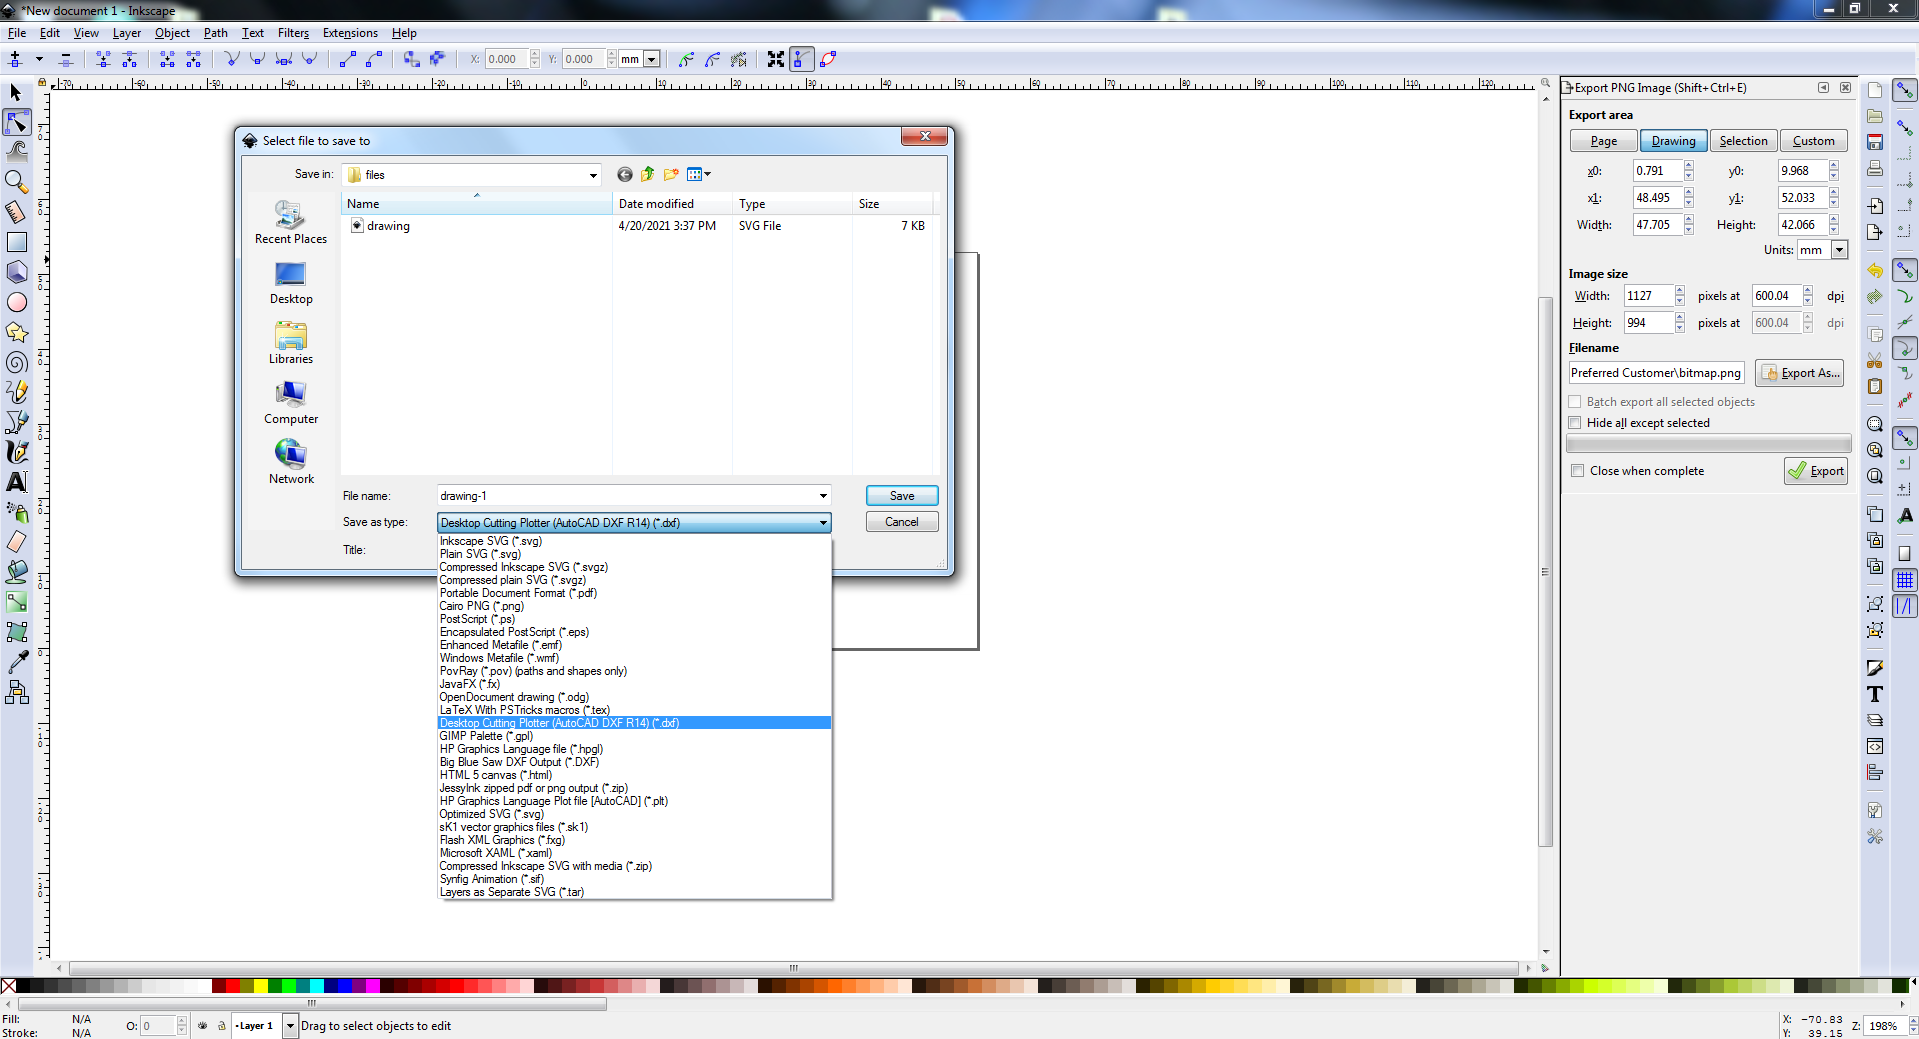
Then have save as a DXf formate
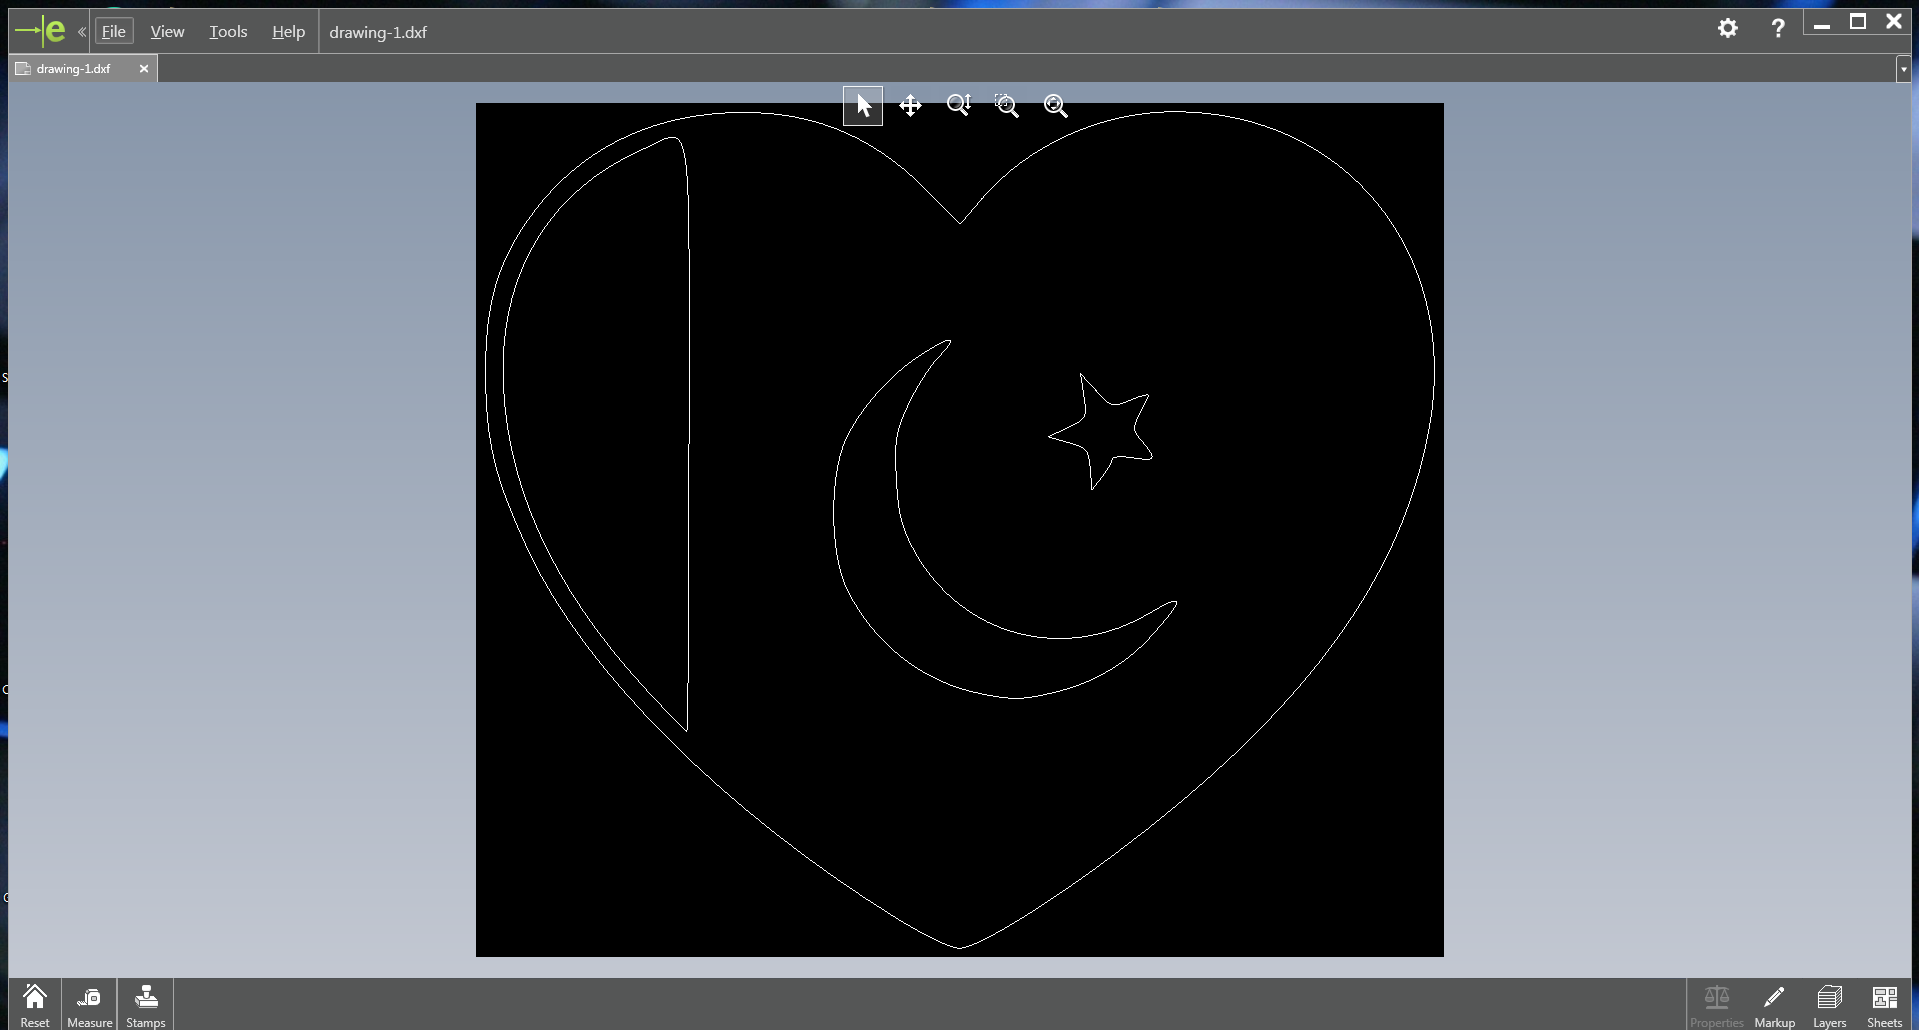
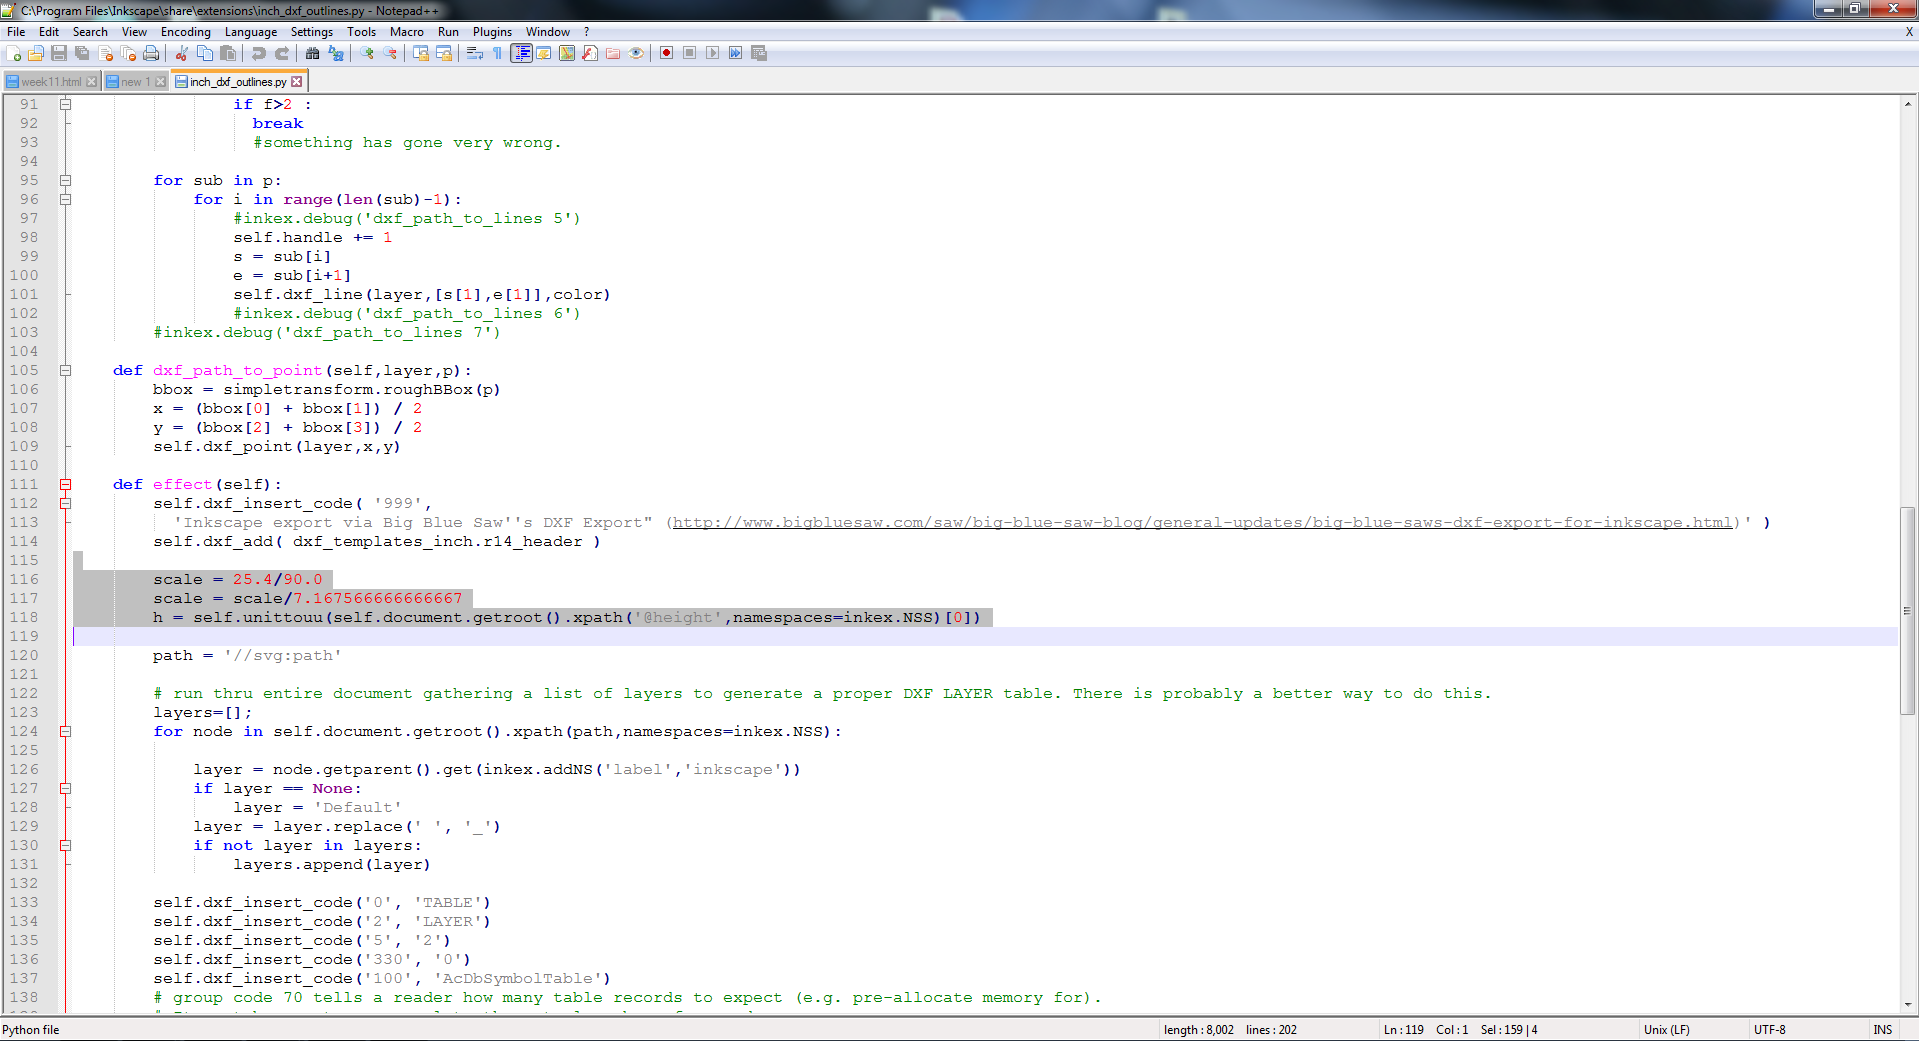
I had scaling issues after converting the extension from svg to DXF.
Scaling issue
I bumped into a scaling issue when converting an SVG file to DXF. I fixed it by following these steps.
As a result, I devised a solution. I used this link to instal the Inkscape extension.Big Blue Saw DXF Export for Inkscape.
However, I wanted to make a couple of modifications to one of the script files.
After installing the extension in Inkscape, find and open the file
inch_dxf_outlines.pyin your text editorof choice.
Making the following adjustment around line 118:
h = inkex.unittouu(self.document.getroot().xpath('@height',namespaces=inkex.NSS)[0])
to
h = self.unittouu(self.document.getroot().xpath('@height',namespaces=inkex.NSS)[0])
Since I work in millimetres rather than inches, I had to make another adjustment. Get the following modification along line 116::
scale = scale/25.4
to
scale=scale/7.15
With BigBlueSaw and those two changes, my millimeter SVG files in Inkscape now export to DXF at the proper size.
These are the steps that I mentioned above.
Solid work
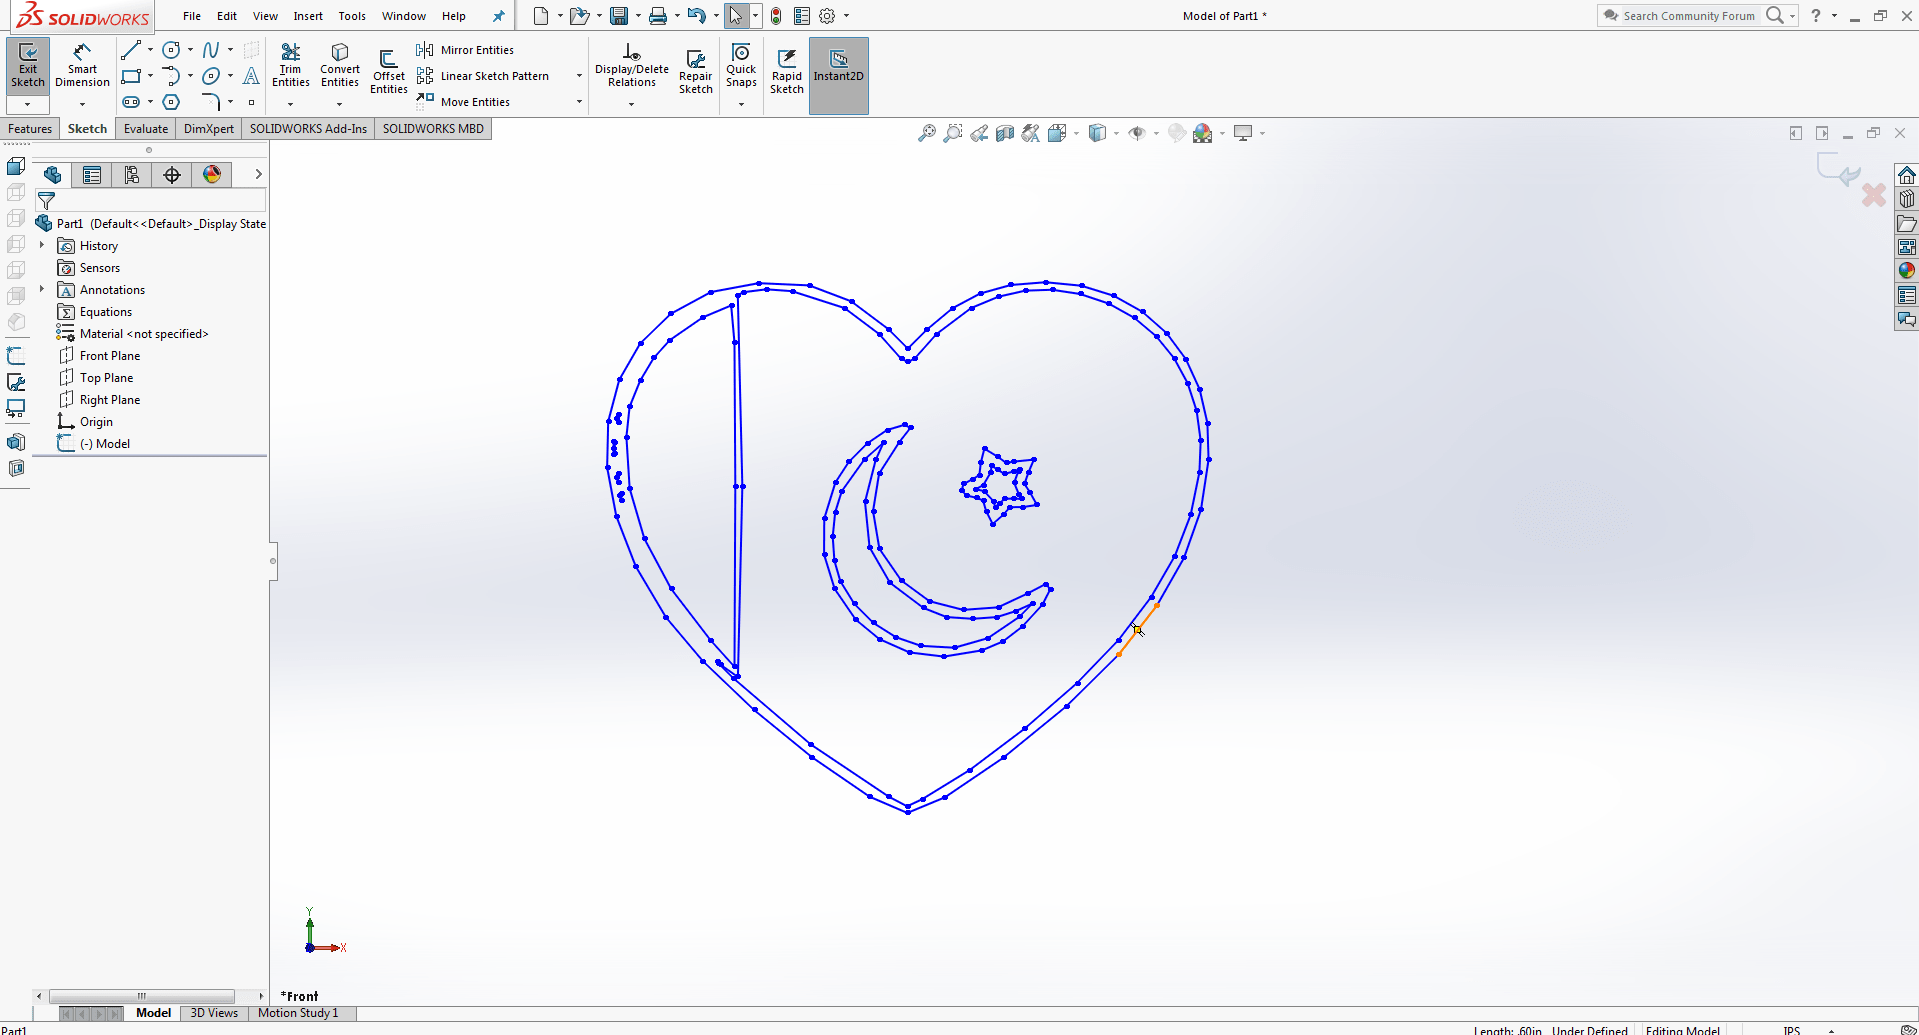
After import the image i saw the unwanted part so i removed it
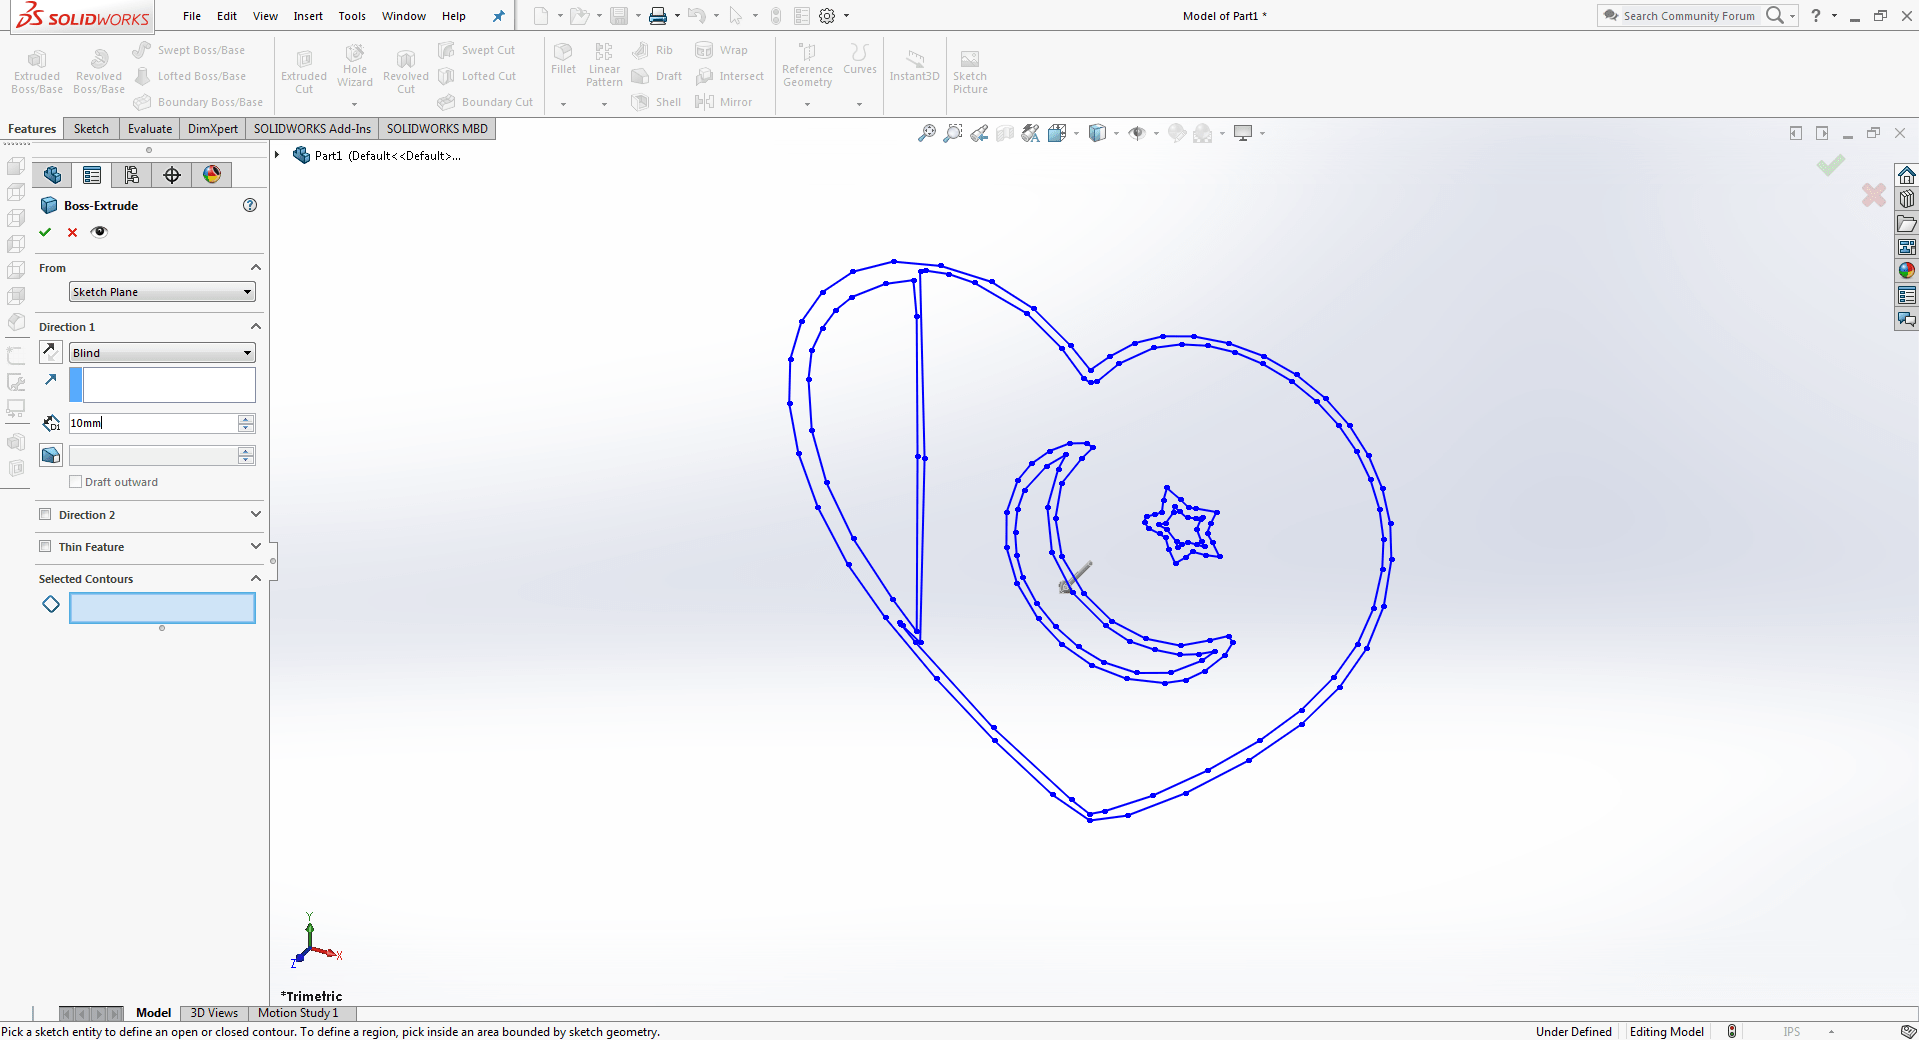
Go to extruded and set 10mm.
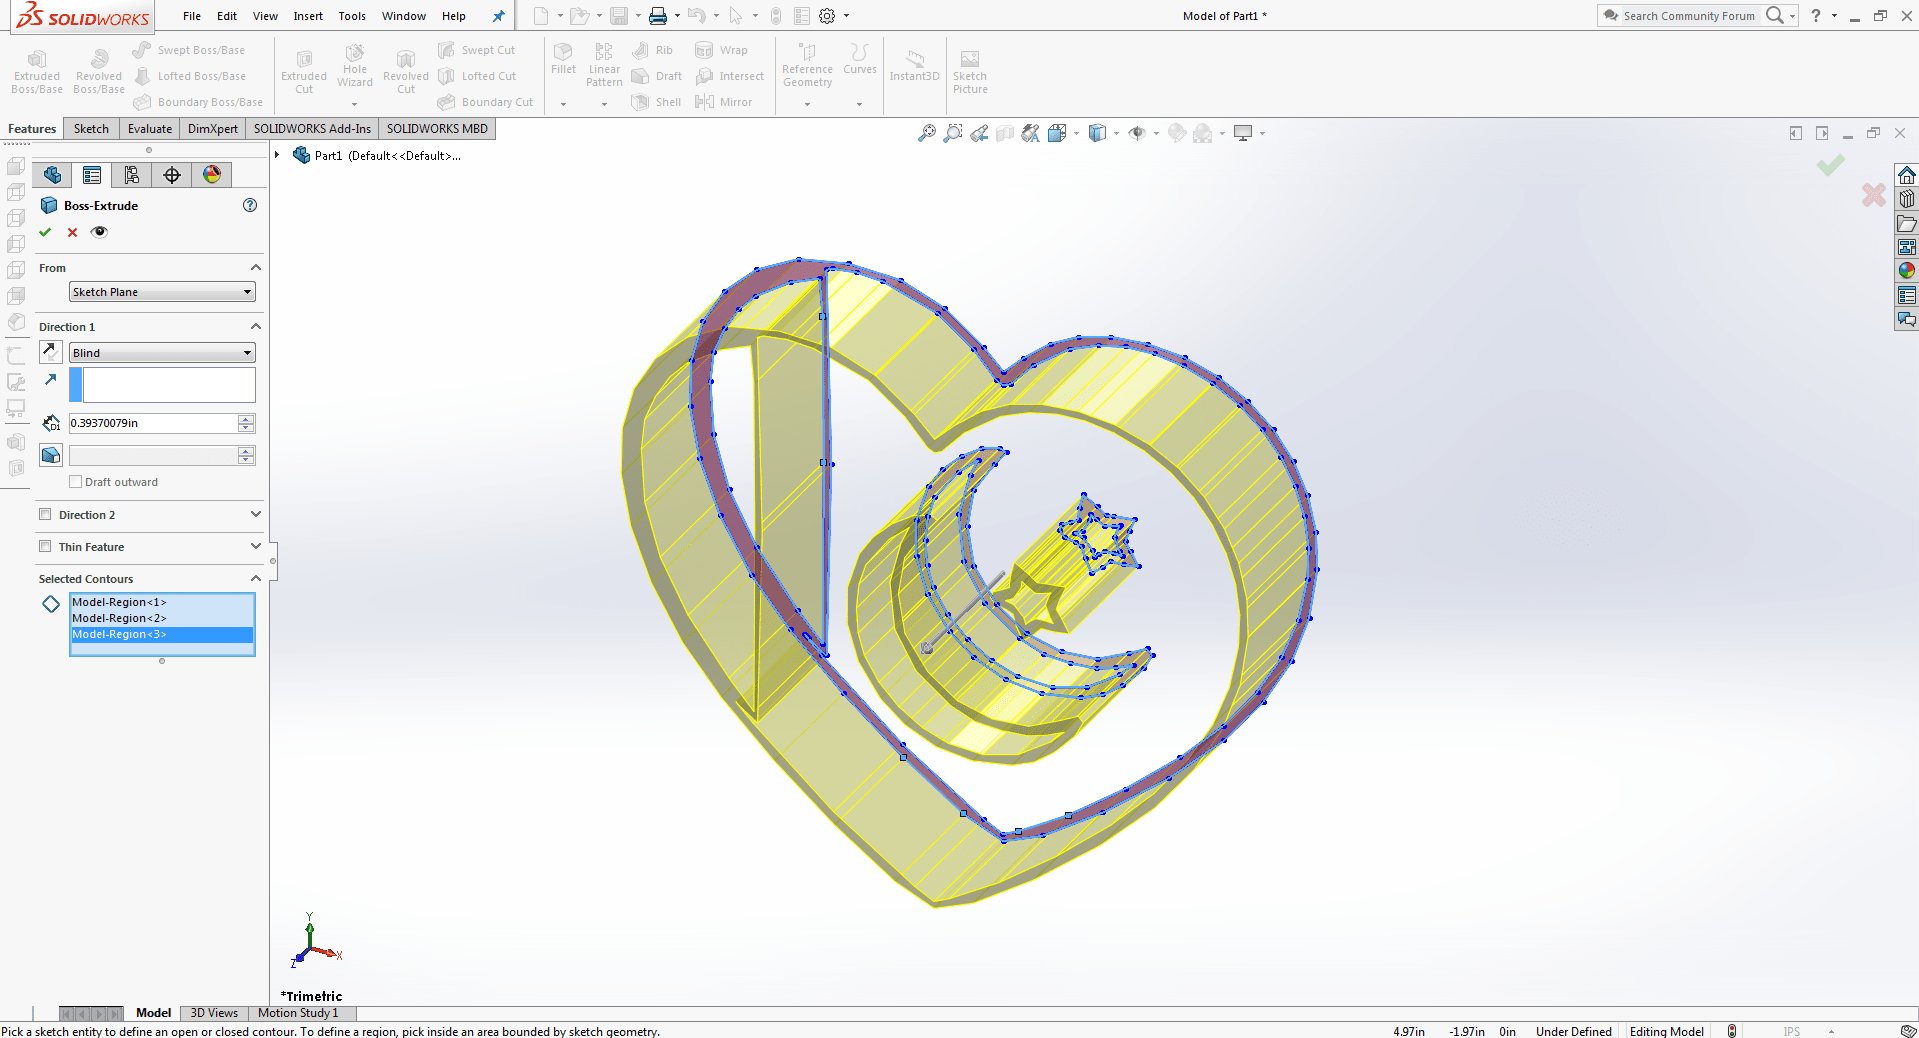
Then I choose the extruded part.
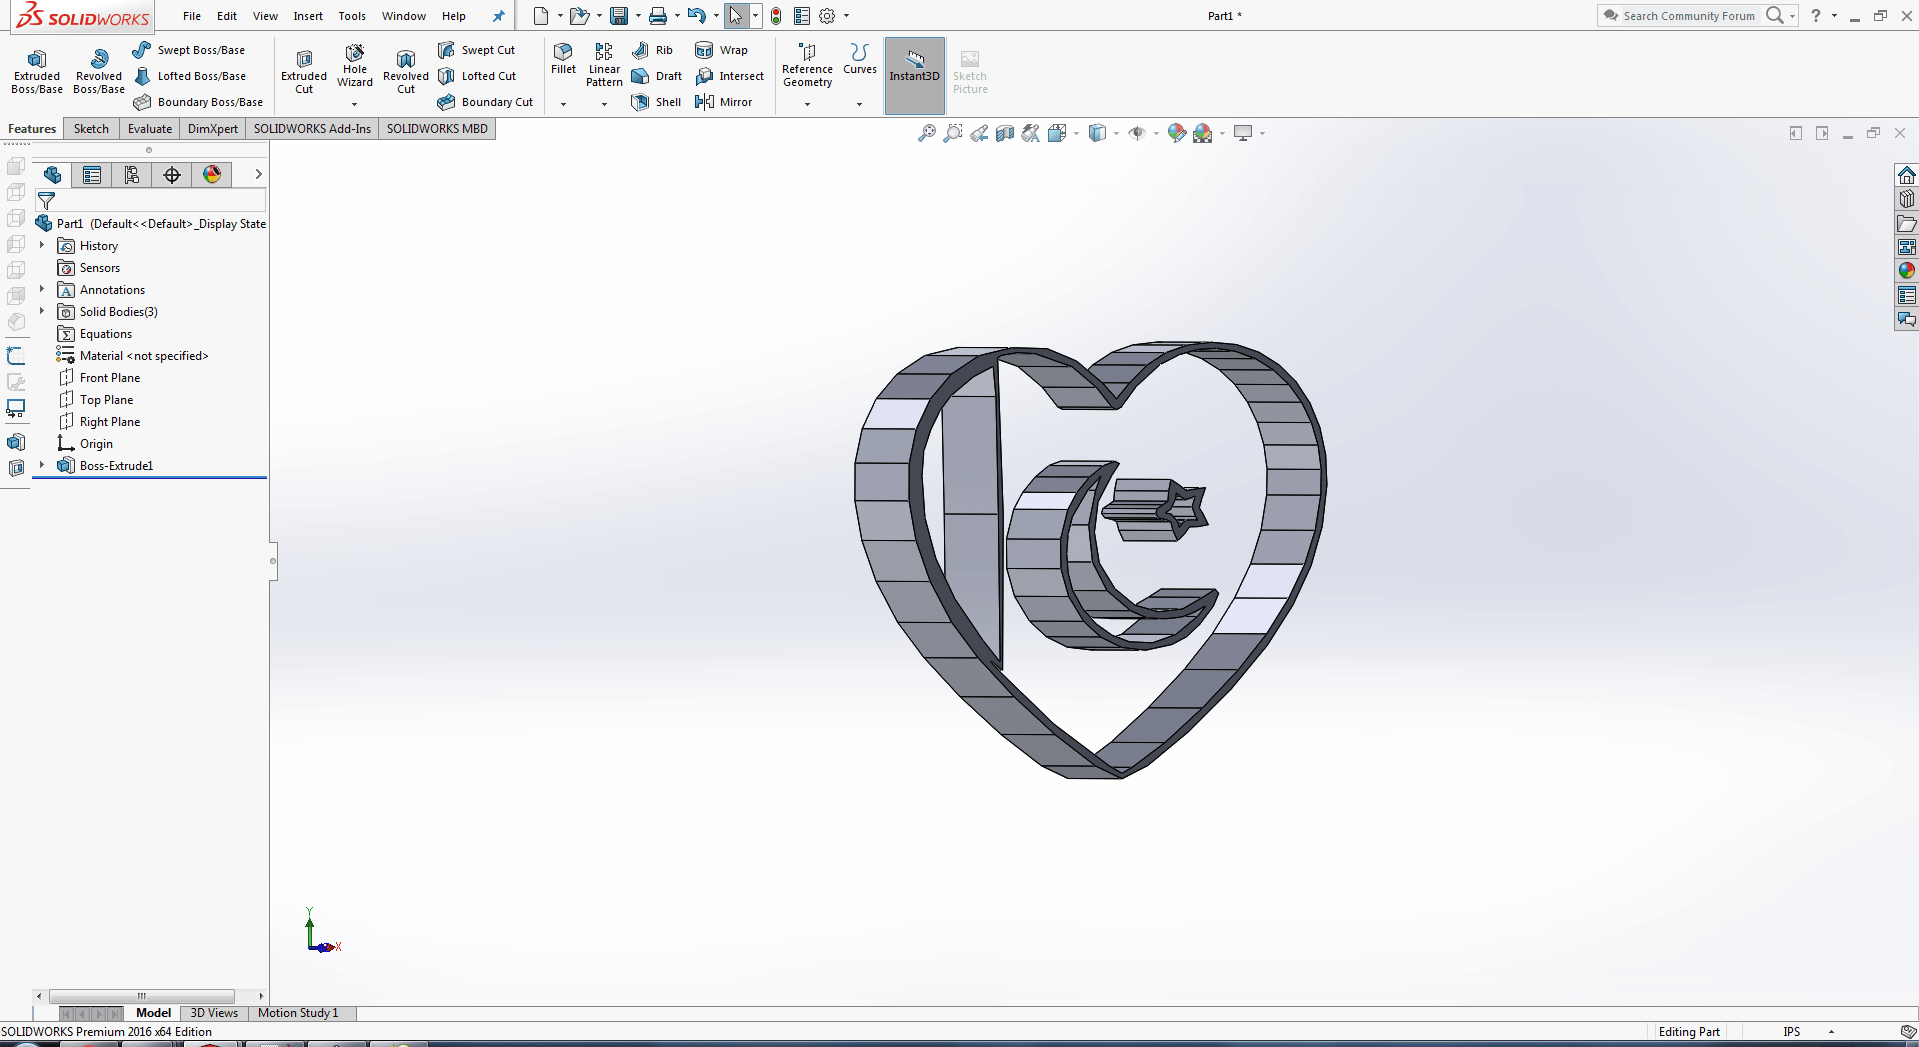
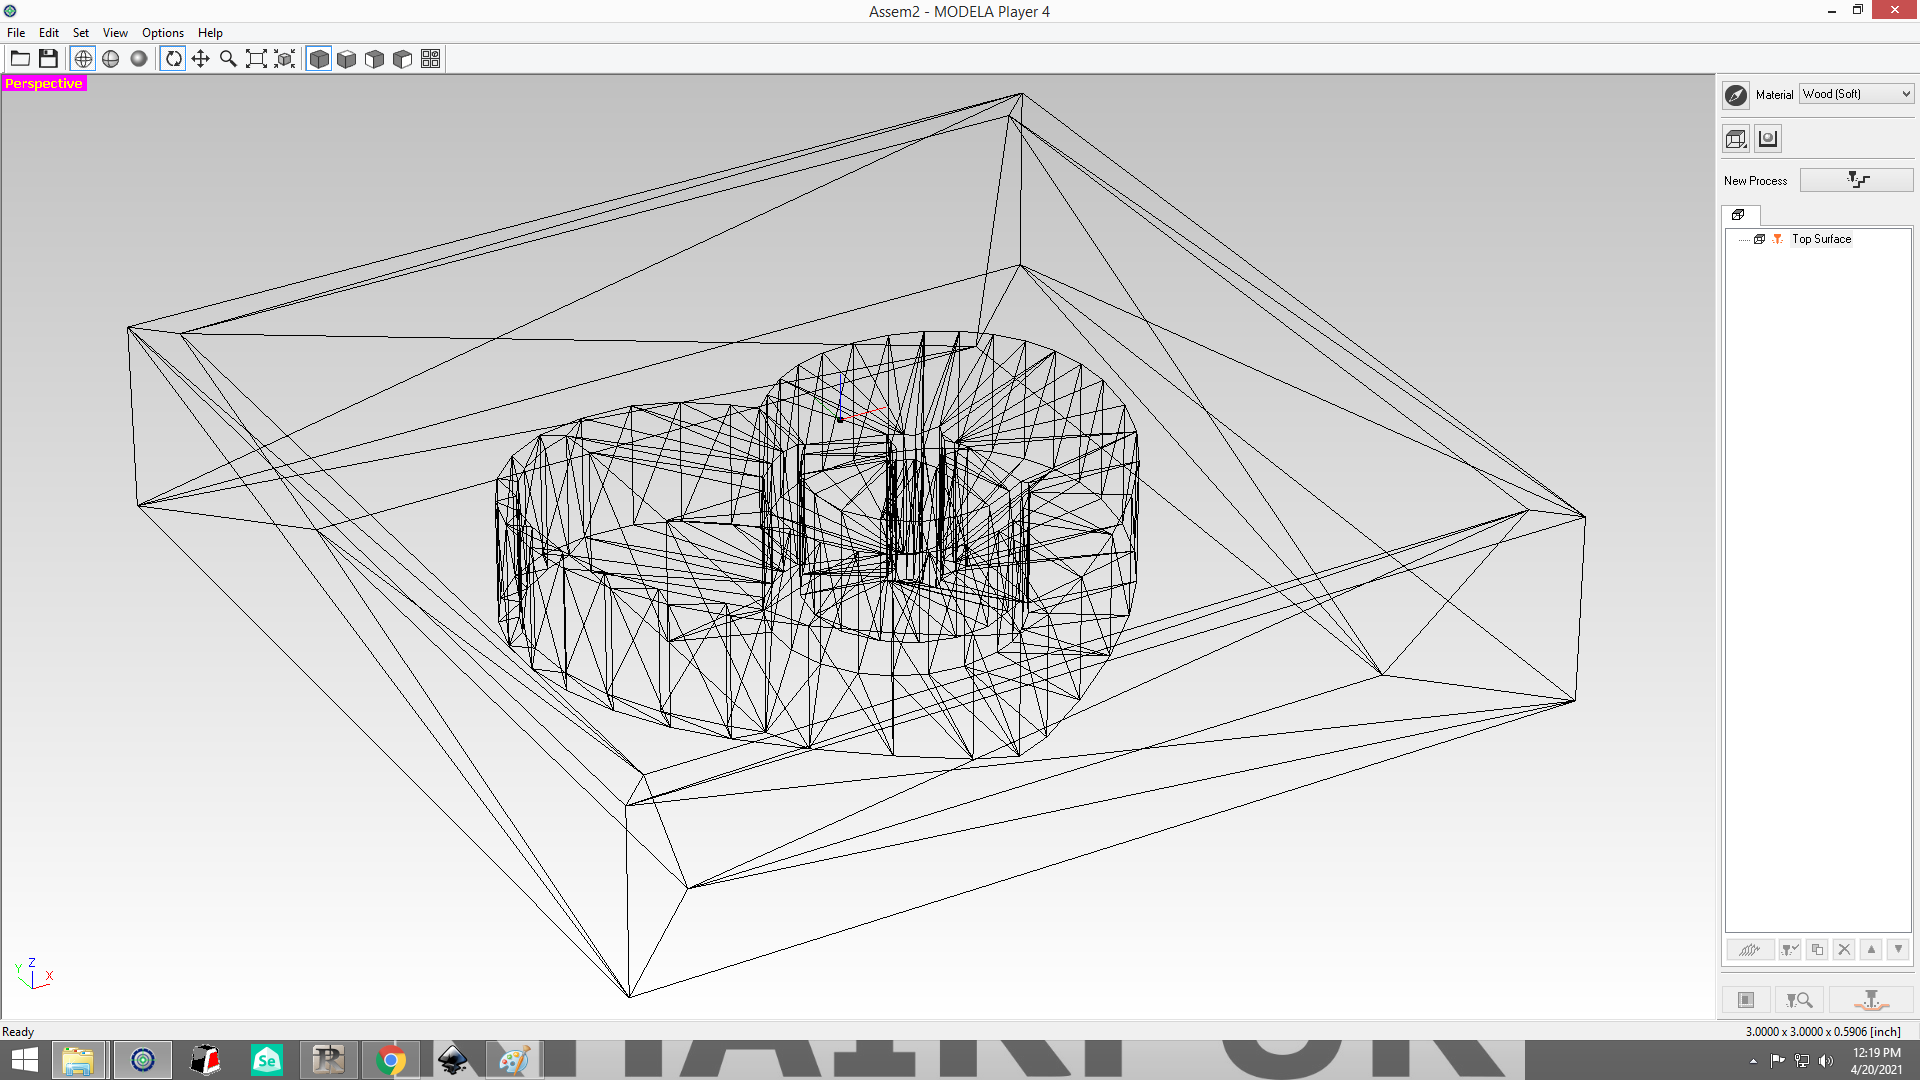
This is what it feels like when it's been extruded.
When I showed the picture to my instructor, he noticed that the thickness of the walls is very thin. As a result, I made an improvement.
Designed Outer Walls
I made an exterior boundery that looks like a zoom out design to hould the liquid because it is easy to remove the material from the mould.
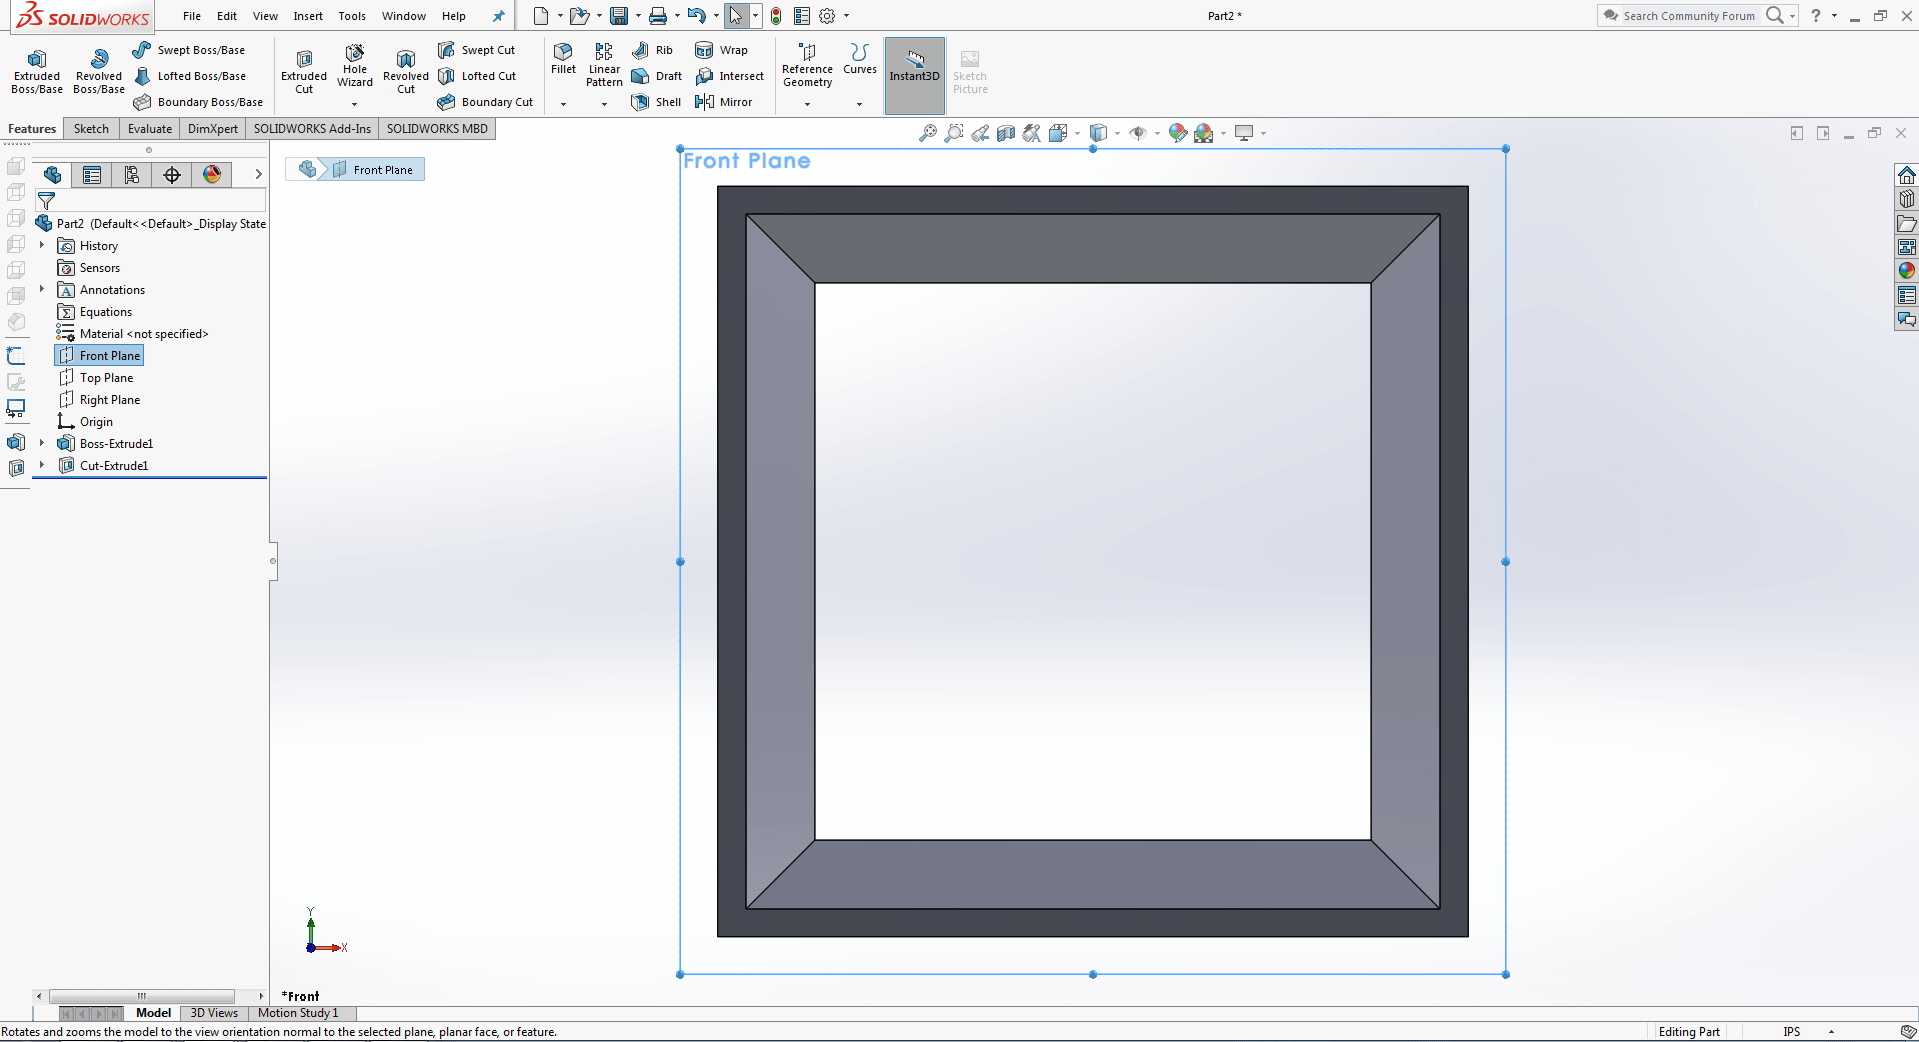
I created a boundary to hold the liquid.
After matting, here's my design.
Modela Player 4
To make a.prn file for the SRM-20. I took the following steps, which I'll mention below:
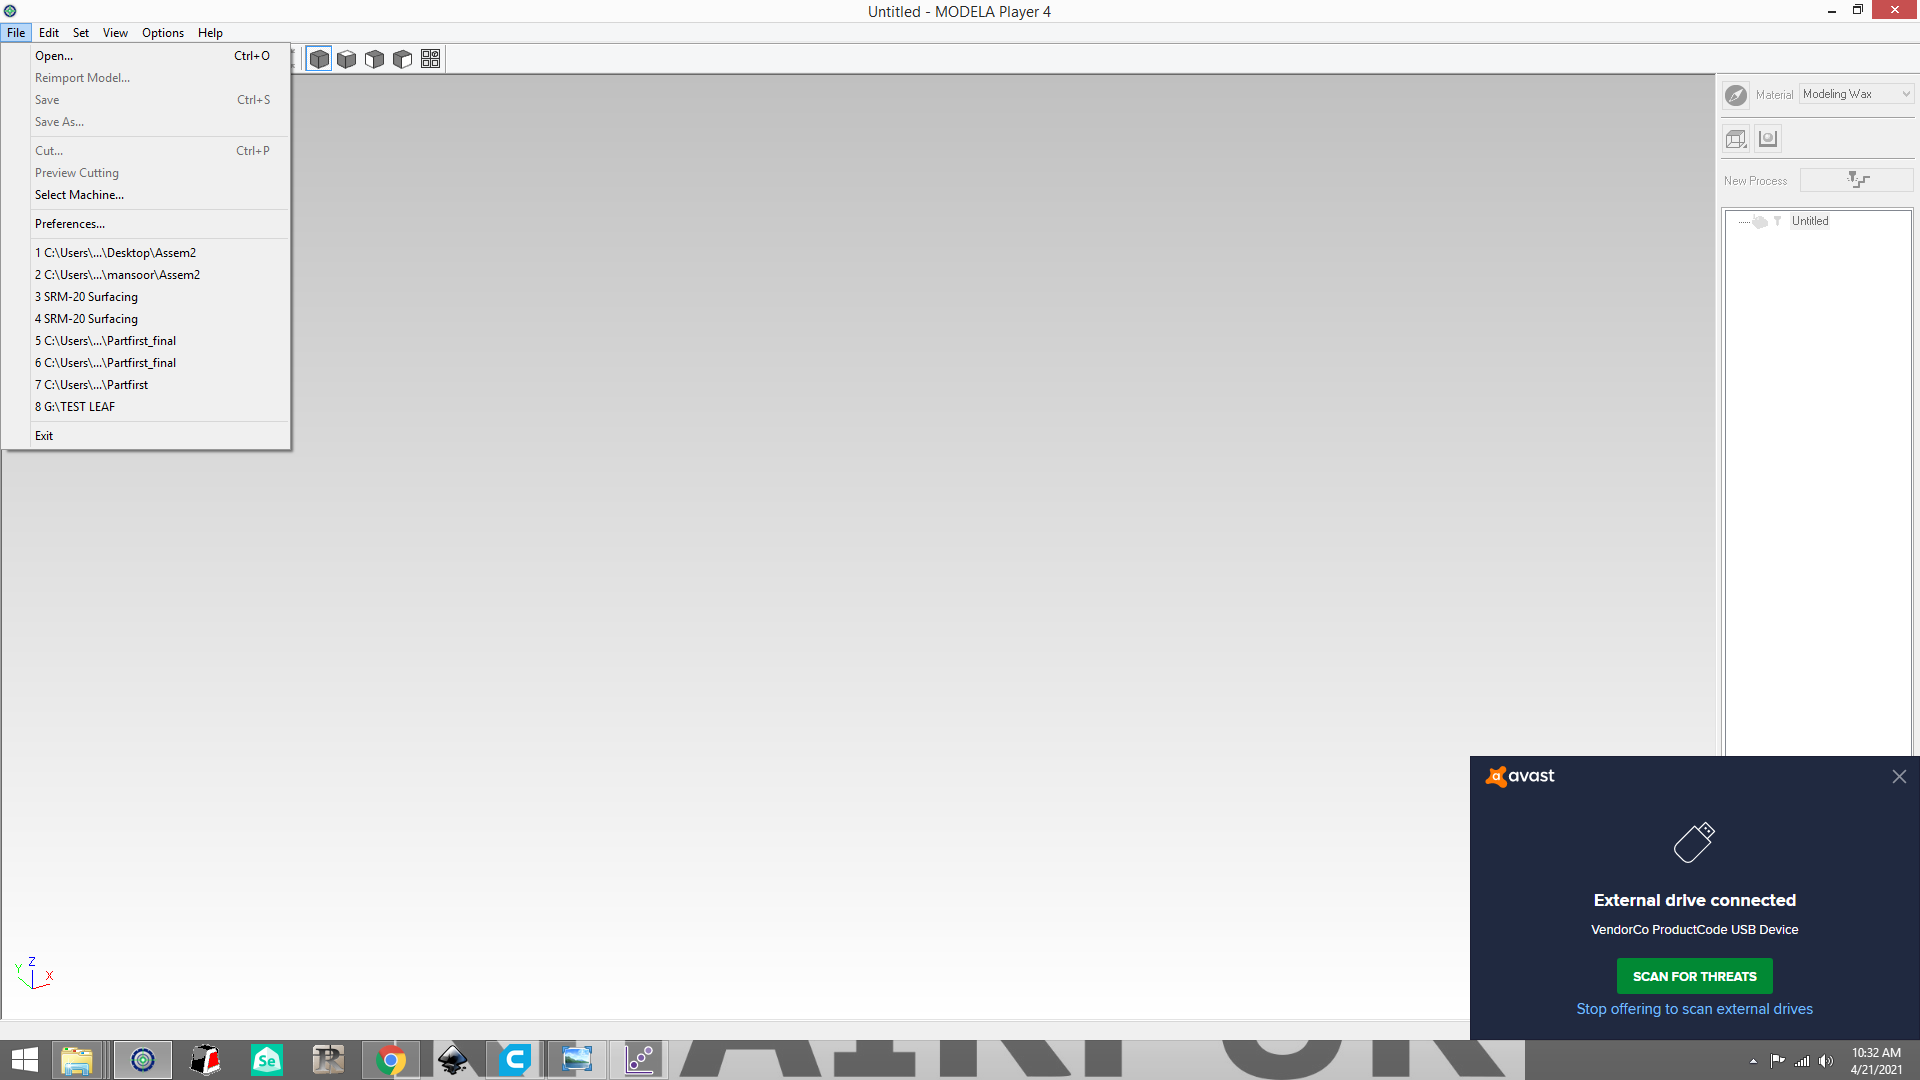
Open the Modela Player 4.
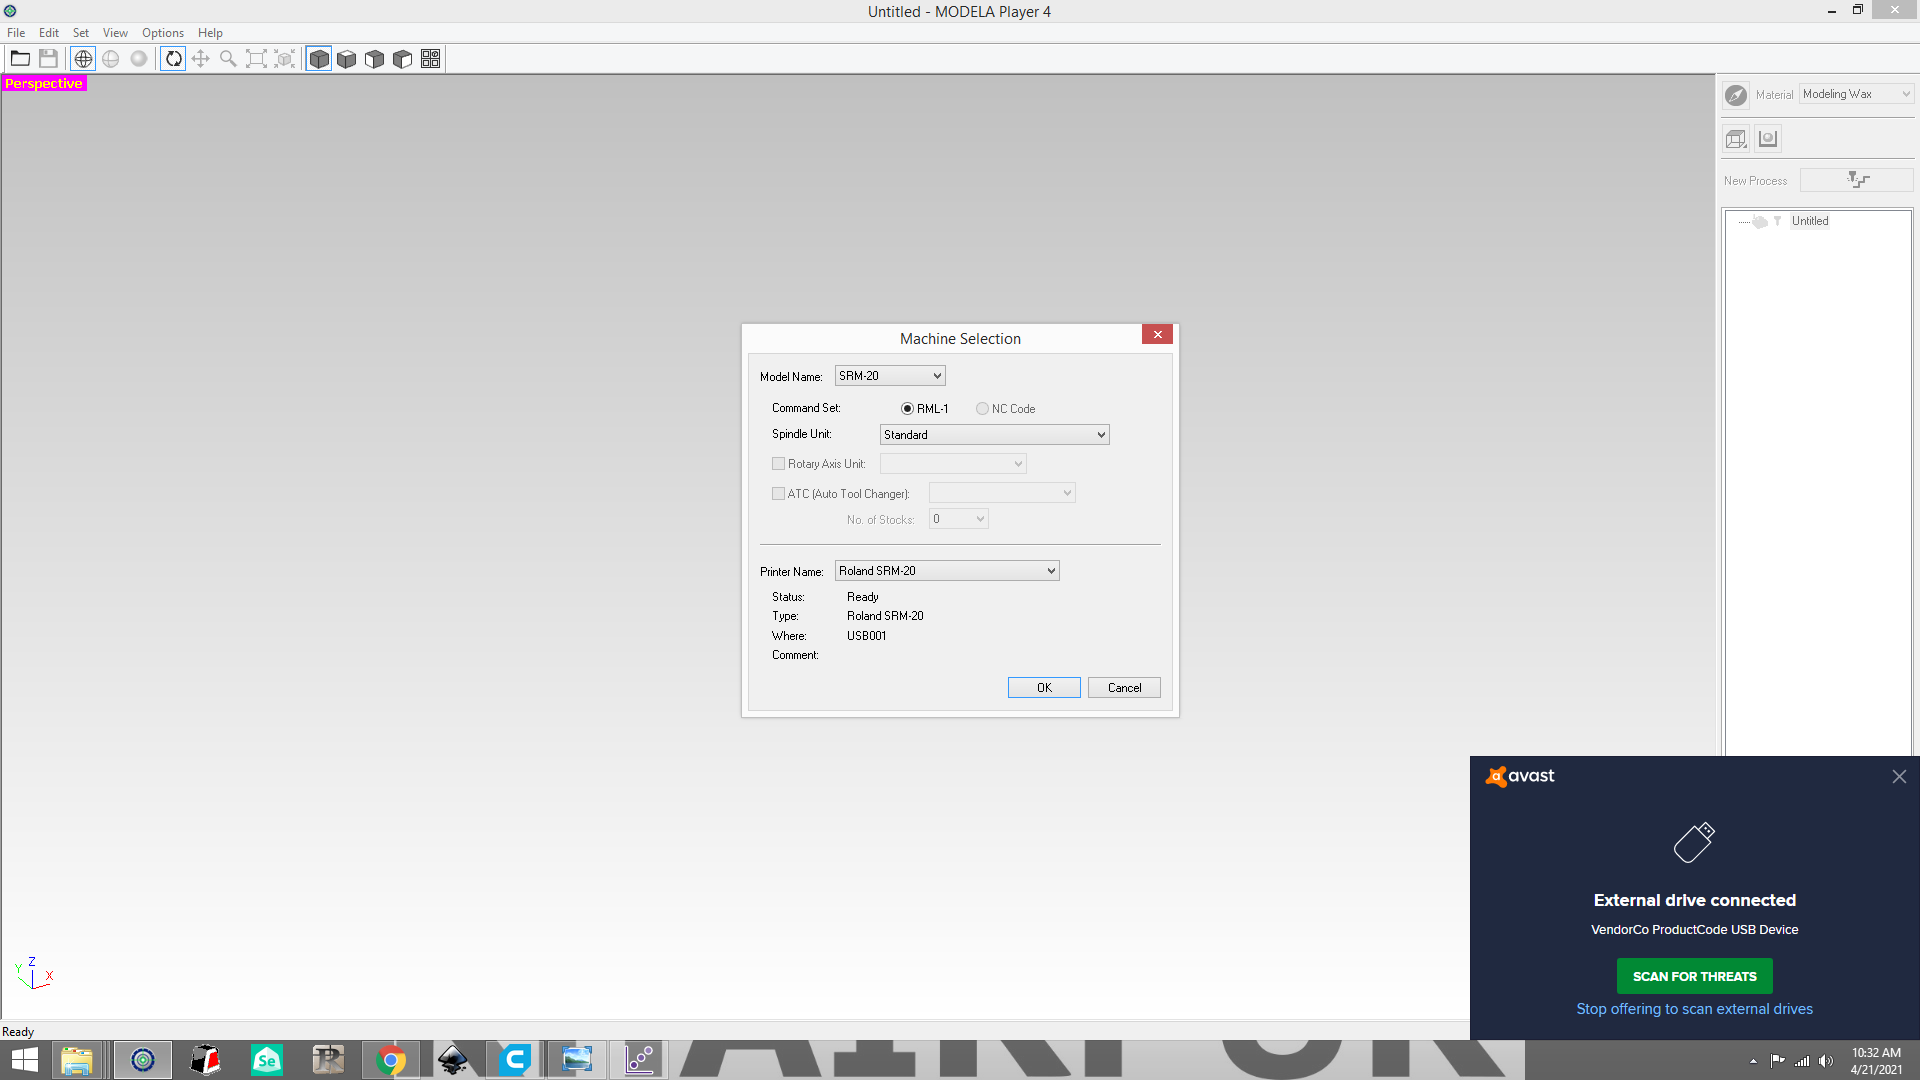
Go to file and select Select Machine.
Go to file, open the file

Then go to material select molding wax
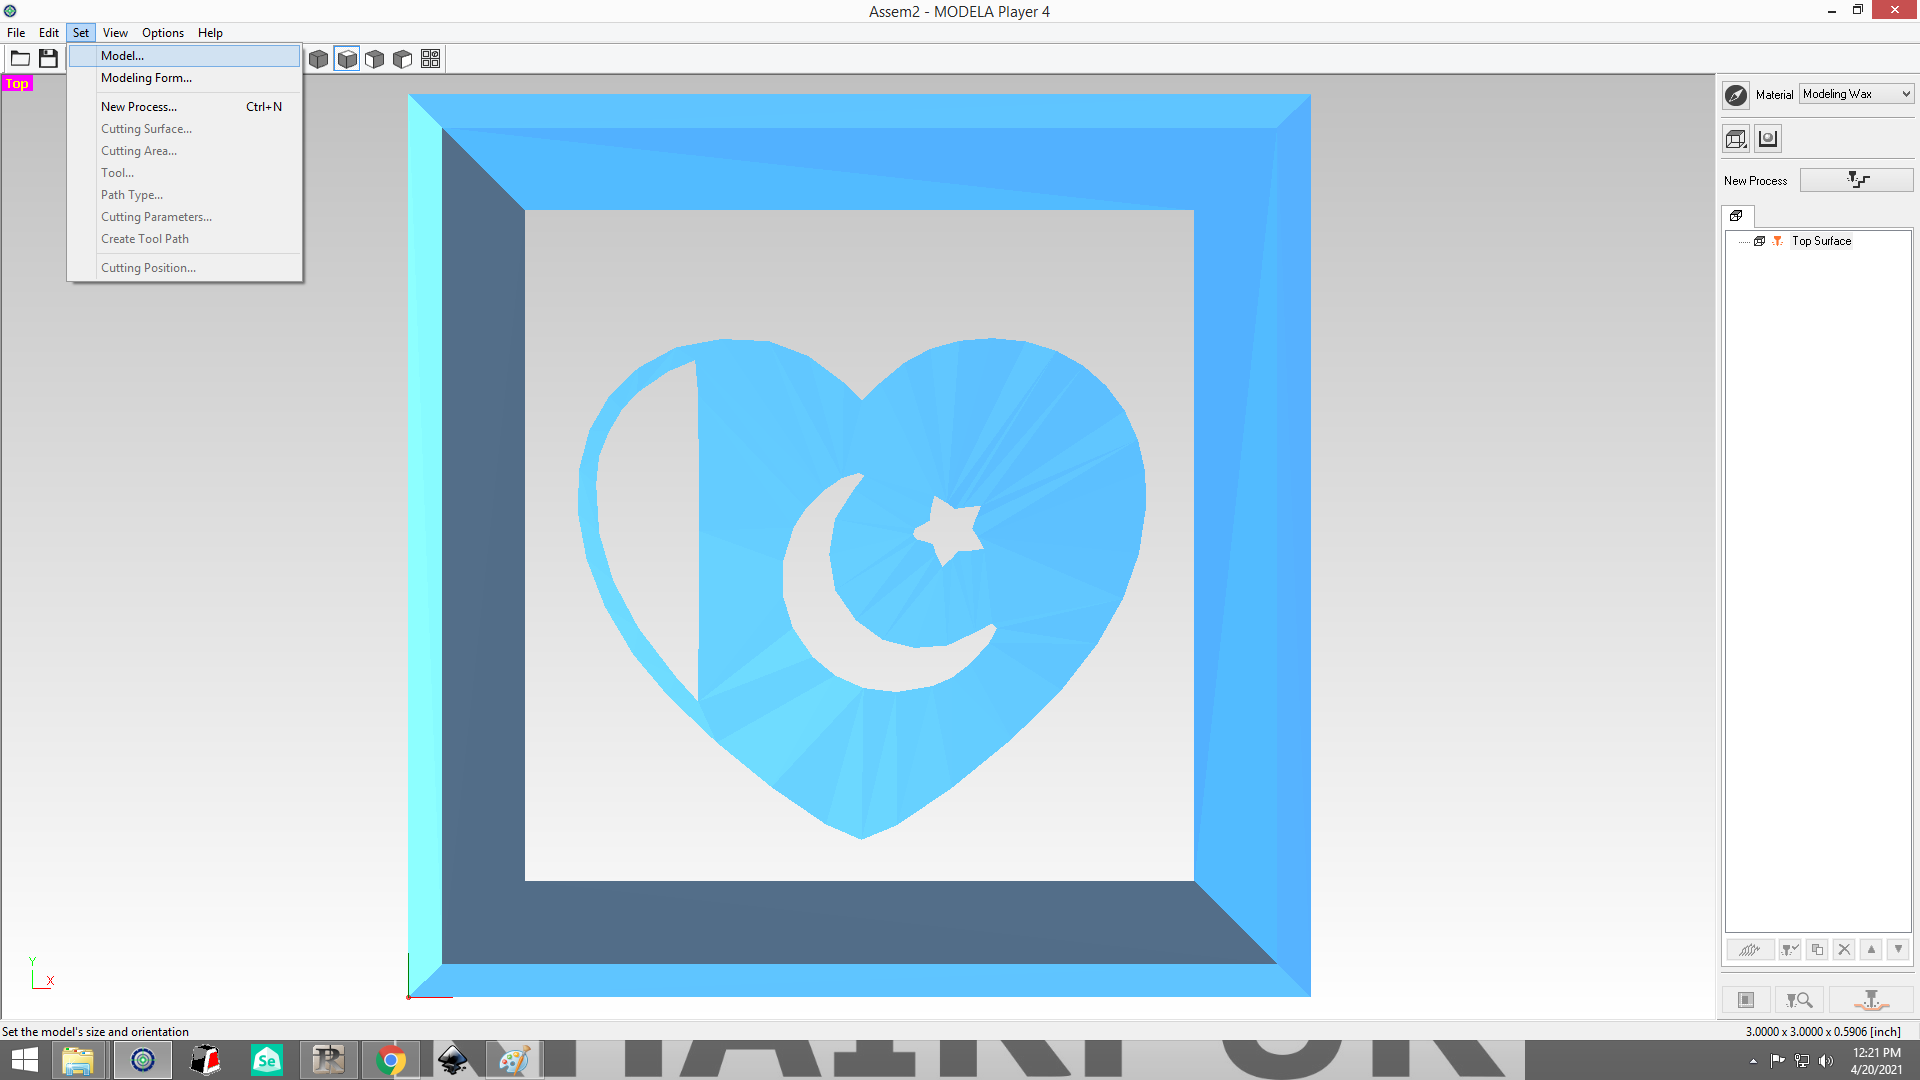
Go to Set and Model.
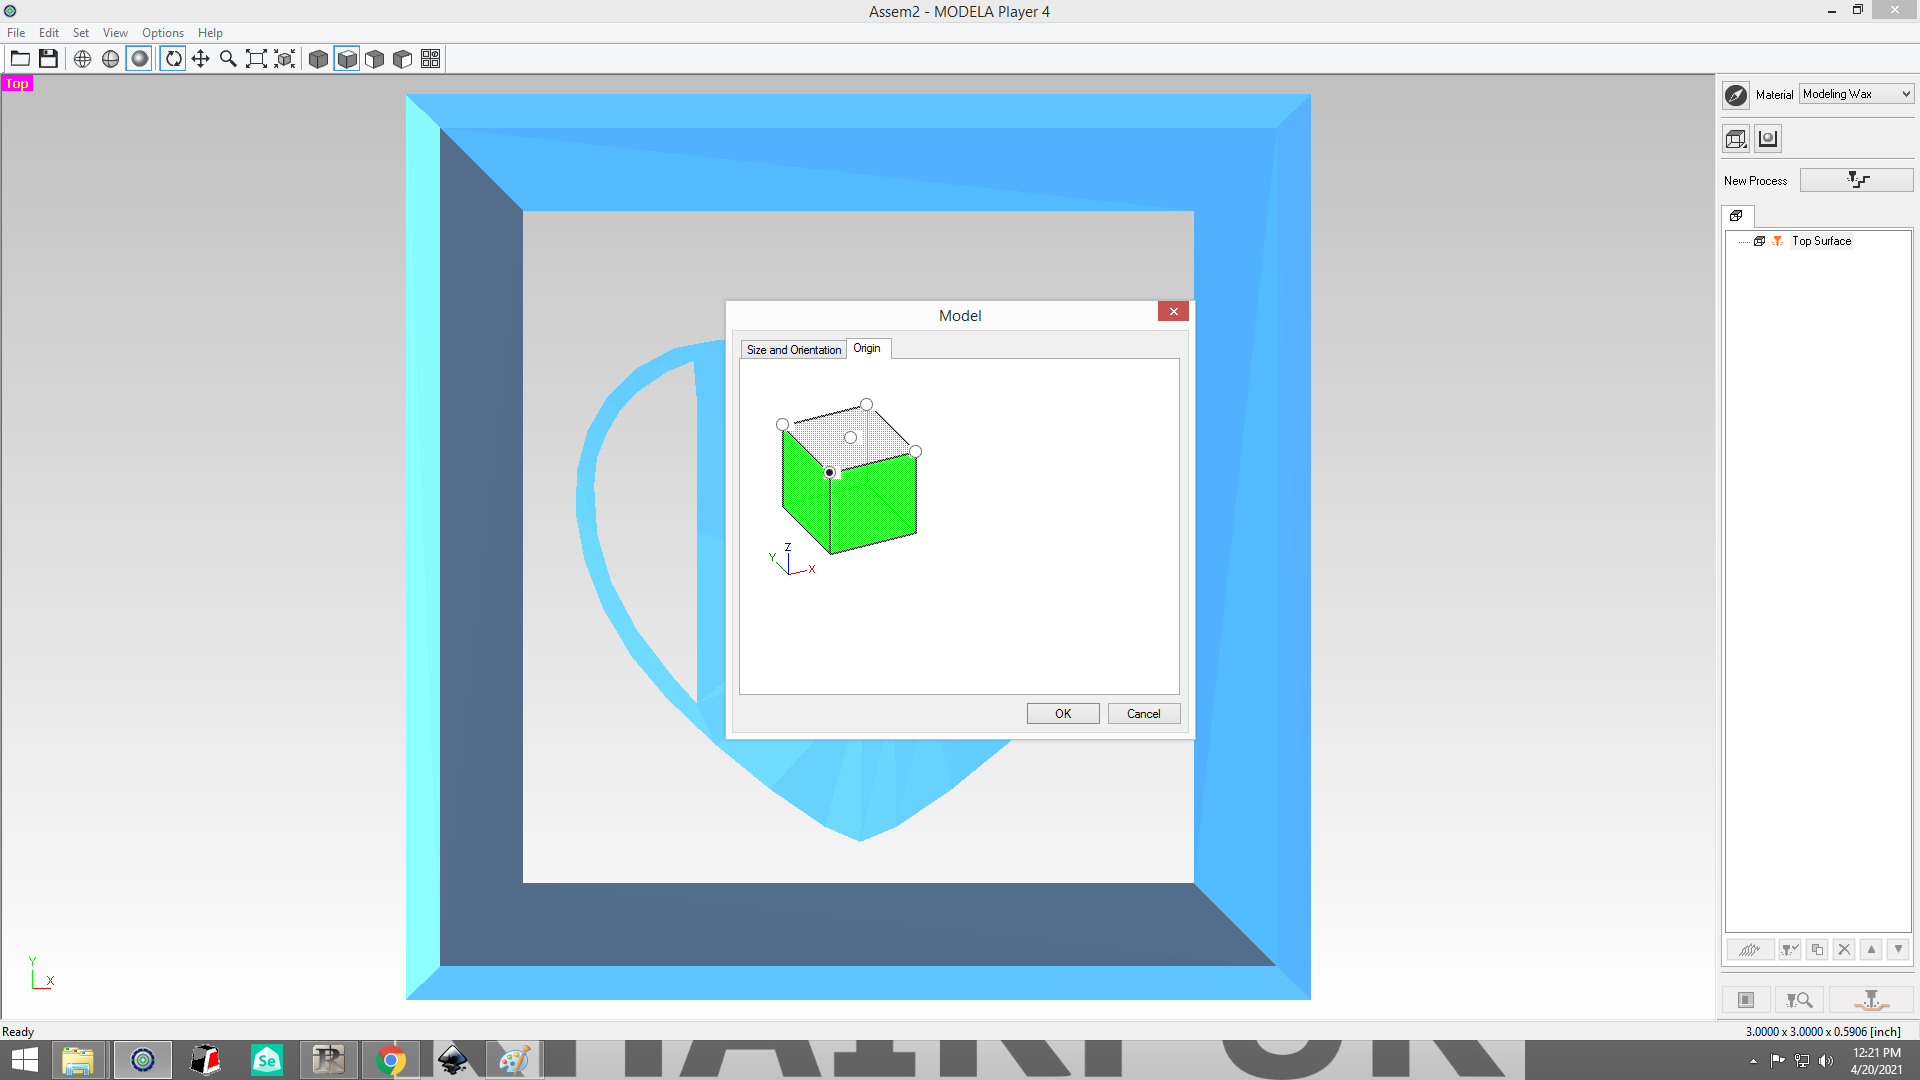
Check on Origin .

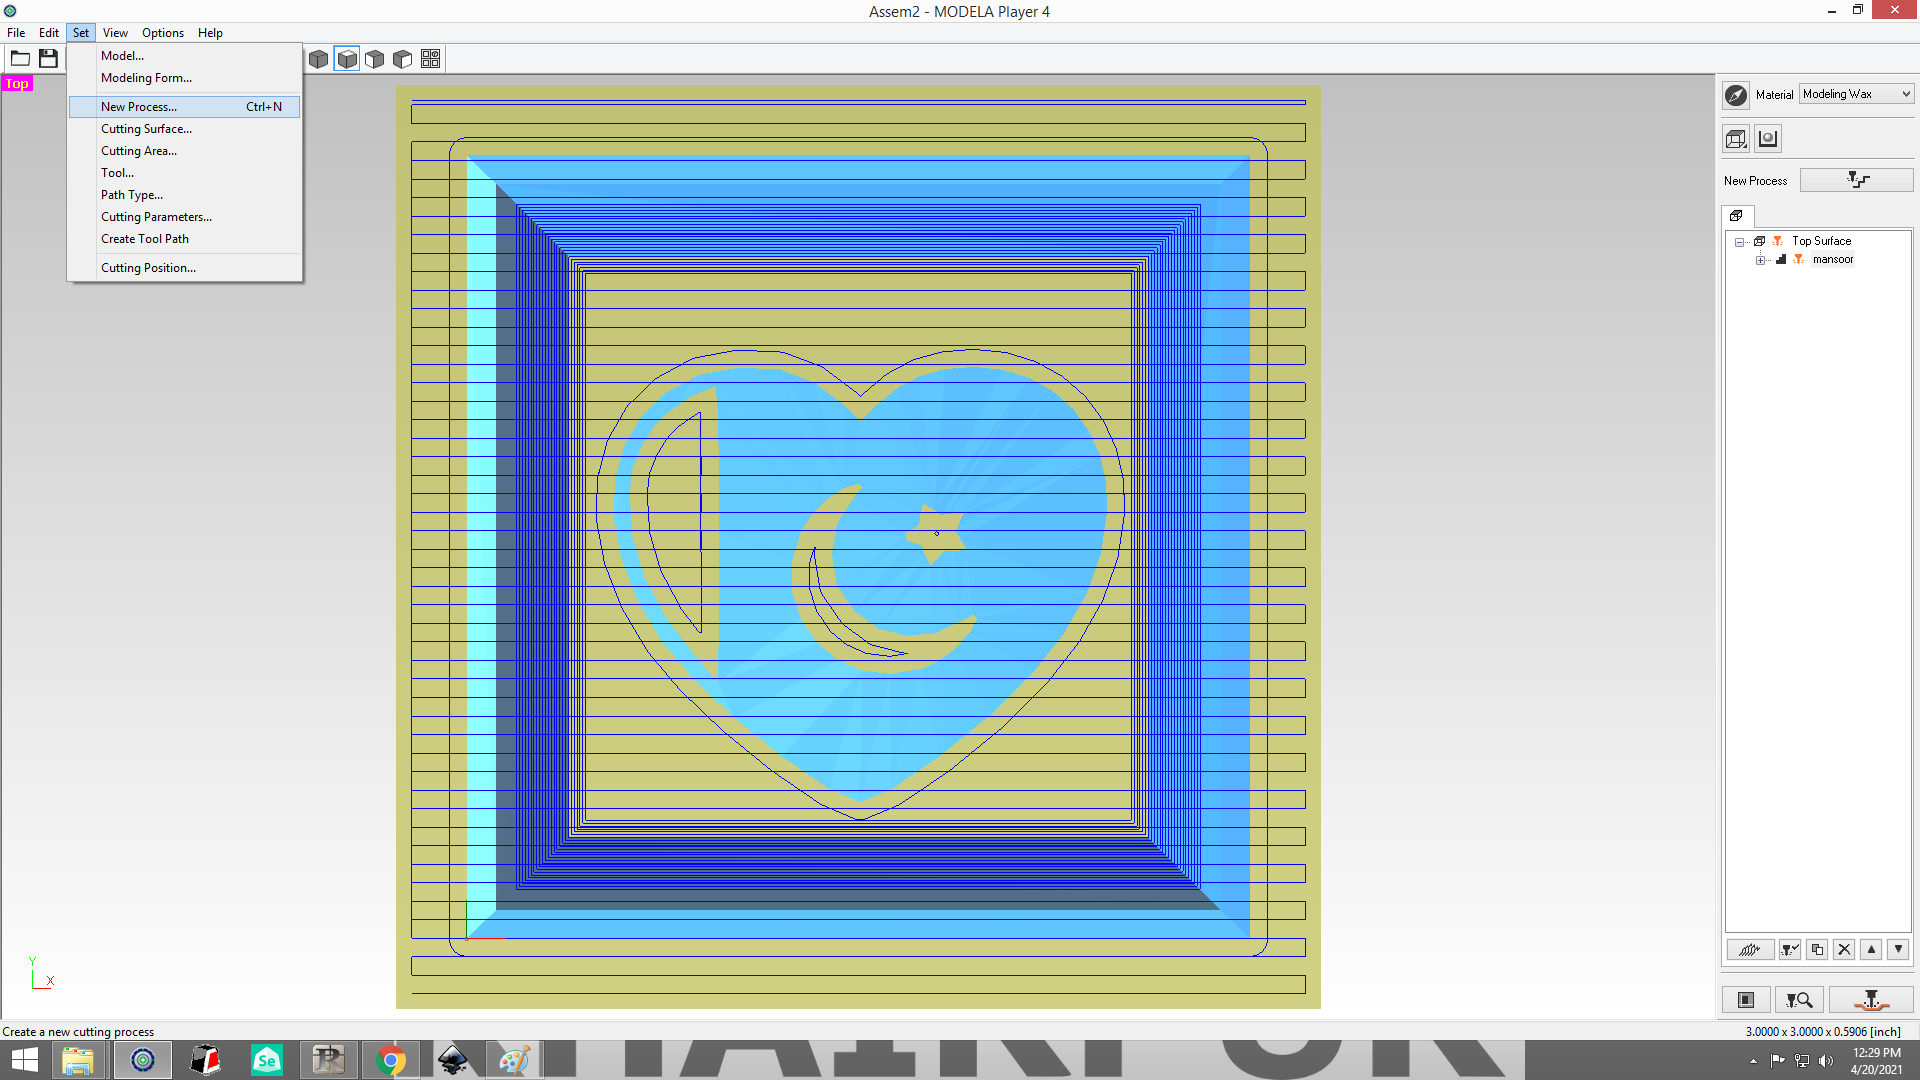
Go to Set and New Process .
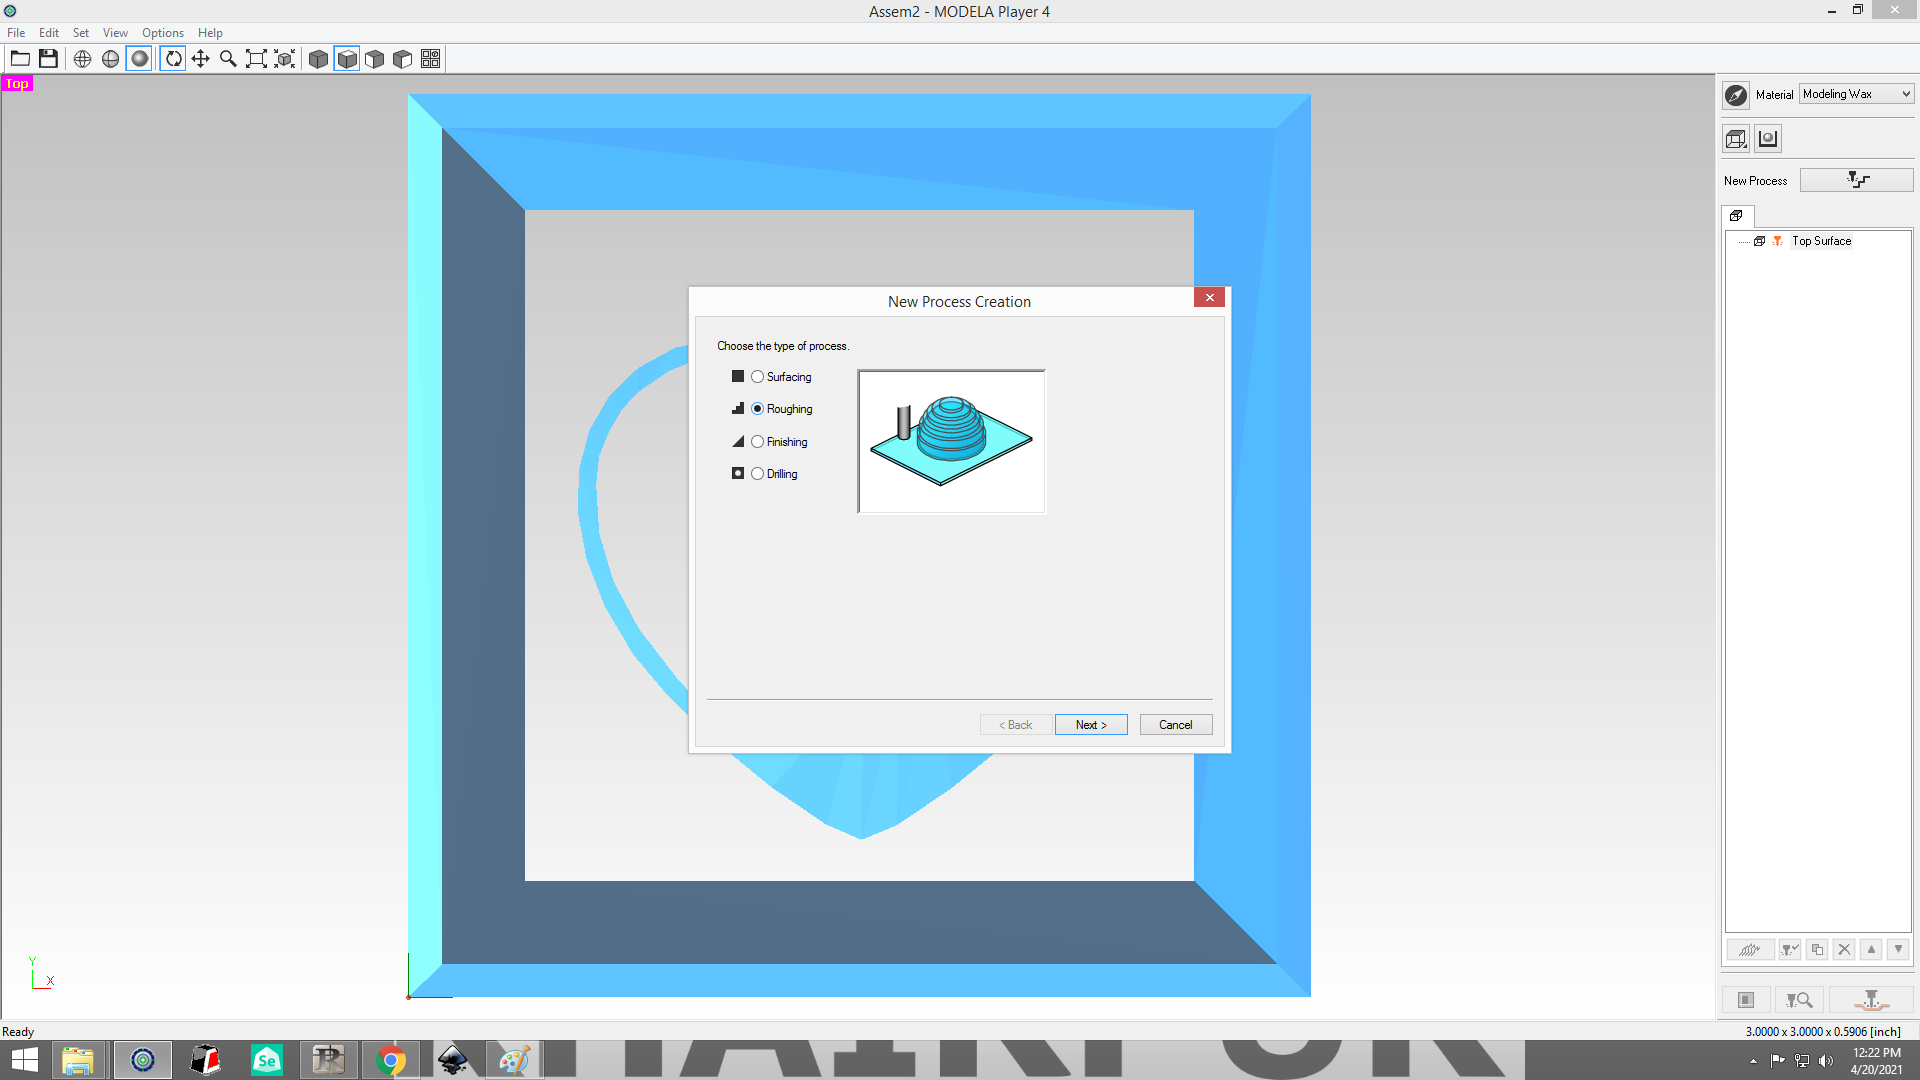
Then check on Roughing, then Next

Select 3 mm Square then Next.

Check on Partial then resize the red boundary line inside the box then Next.
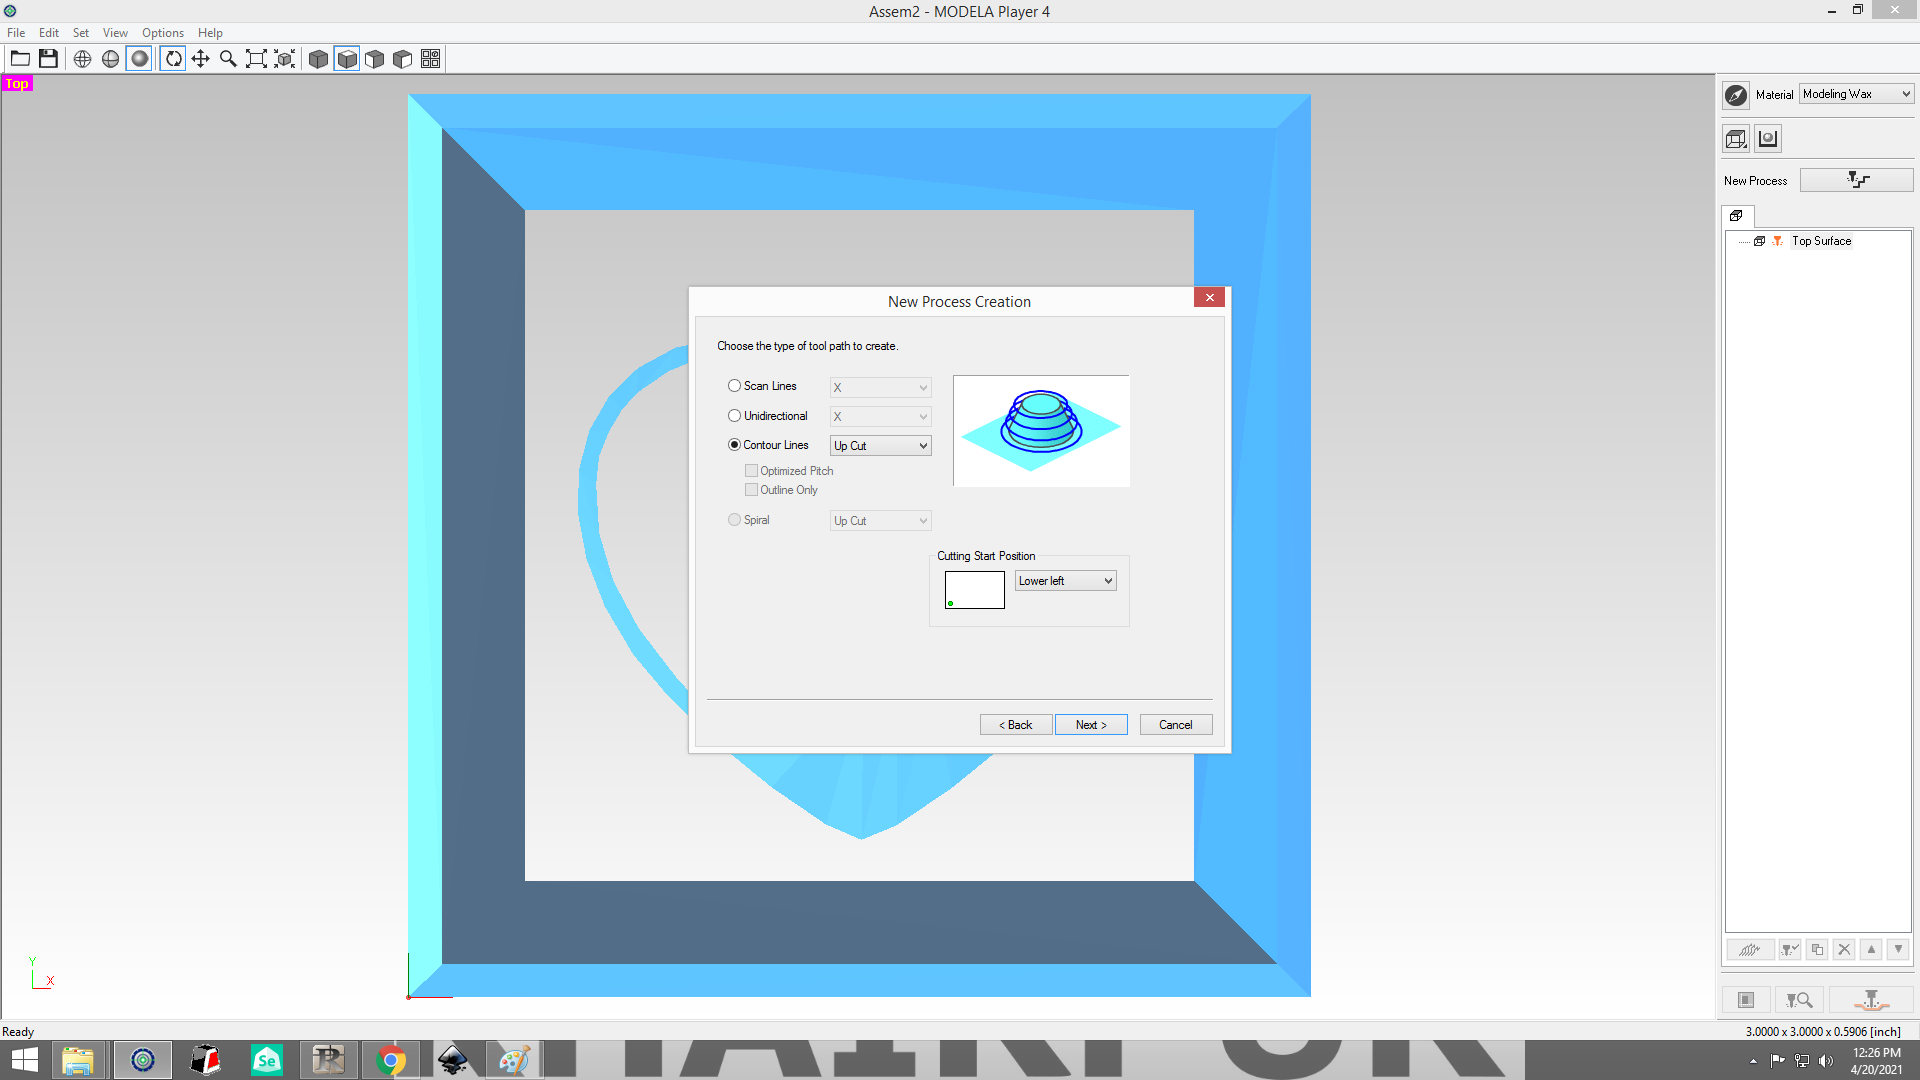
Check on Contour Lines Up Cutthen Next.
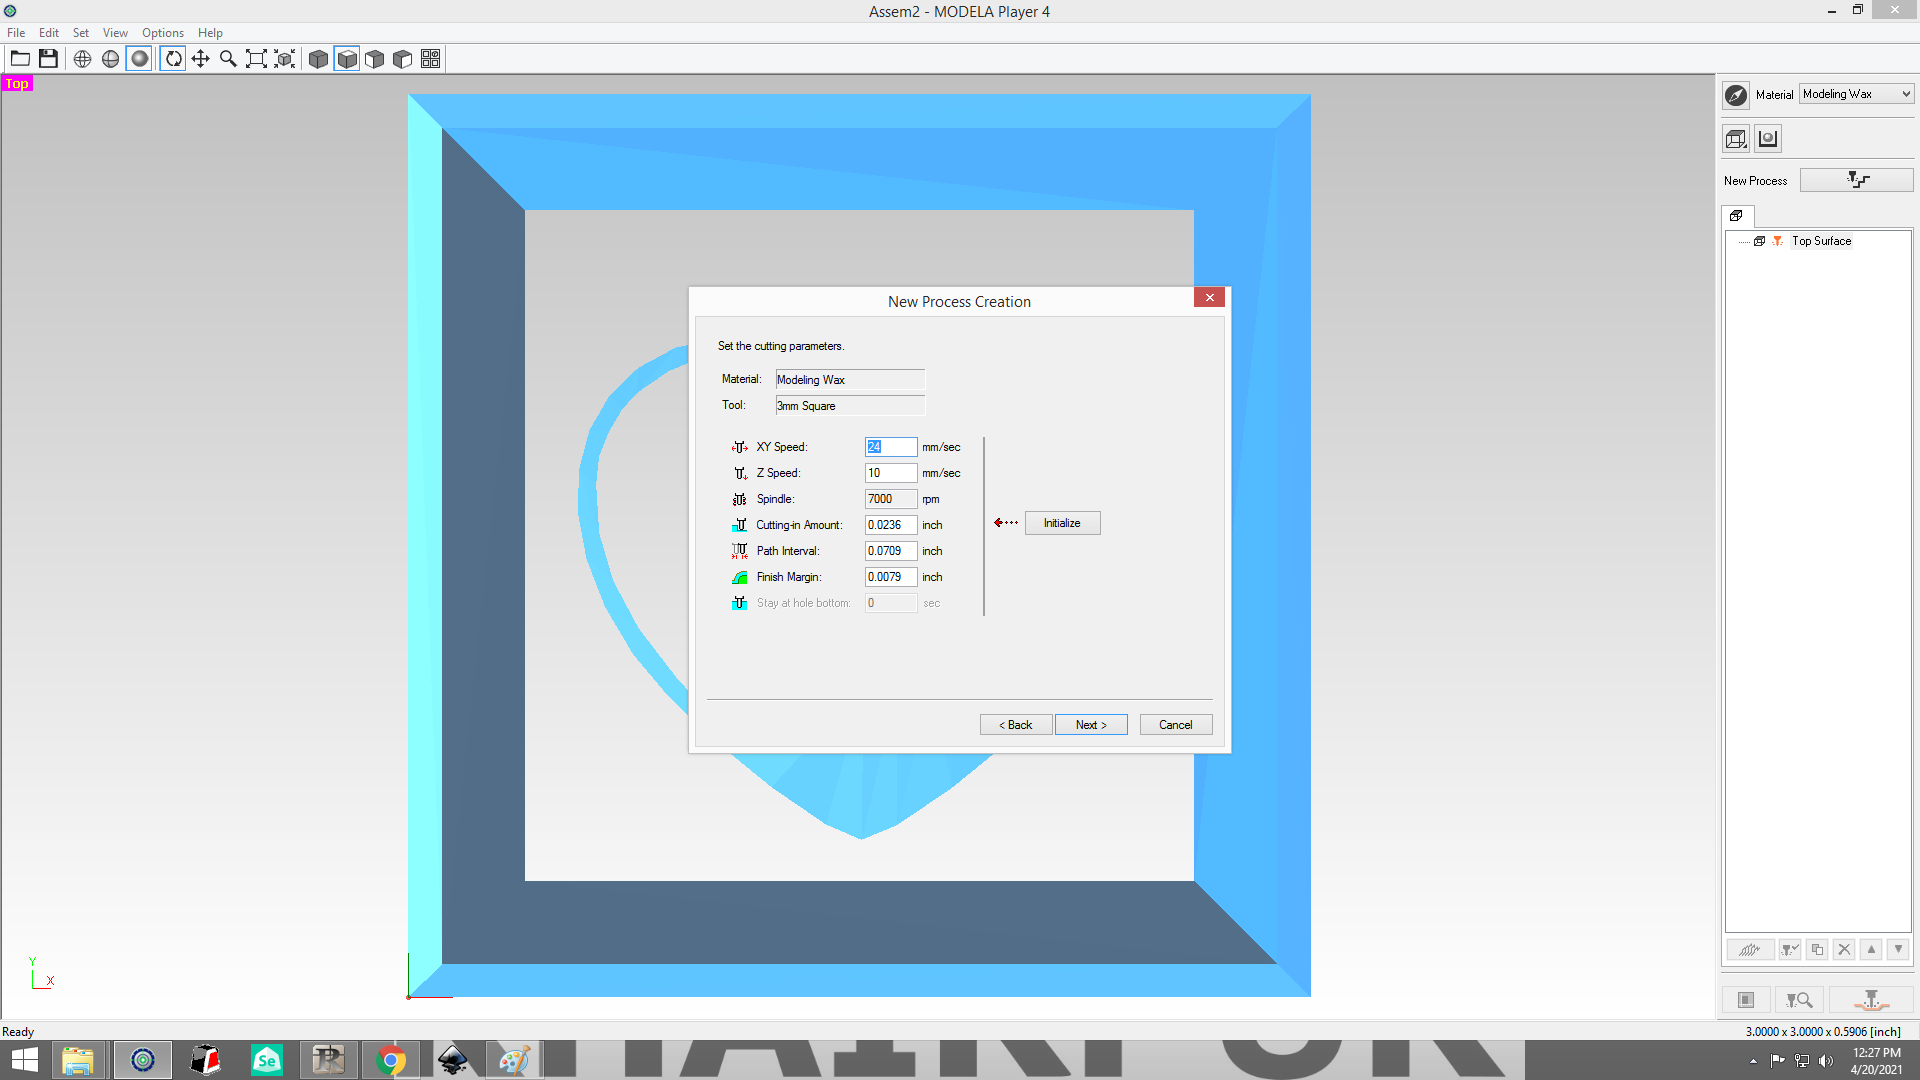
XY speed as 24mm/sec, then Next
Now Process for Finshing
Go to Set and New Process .
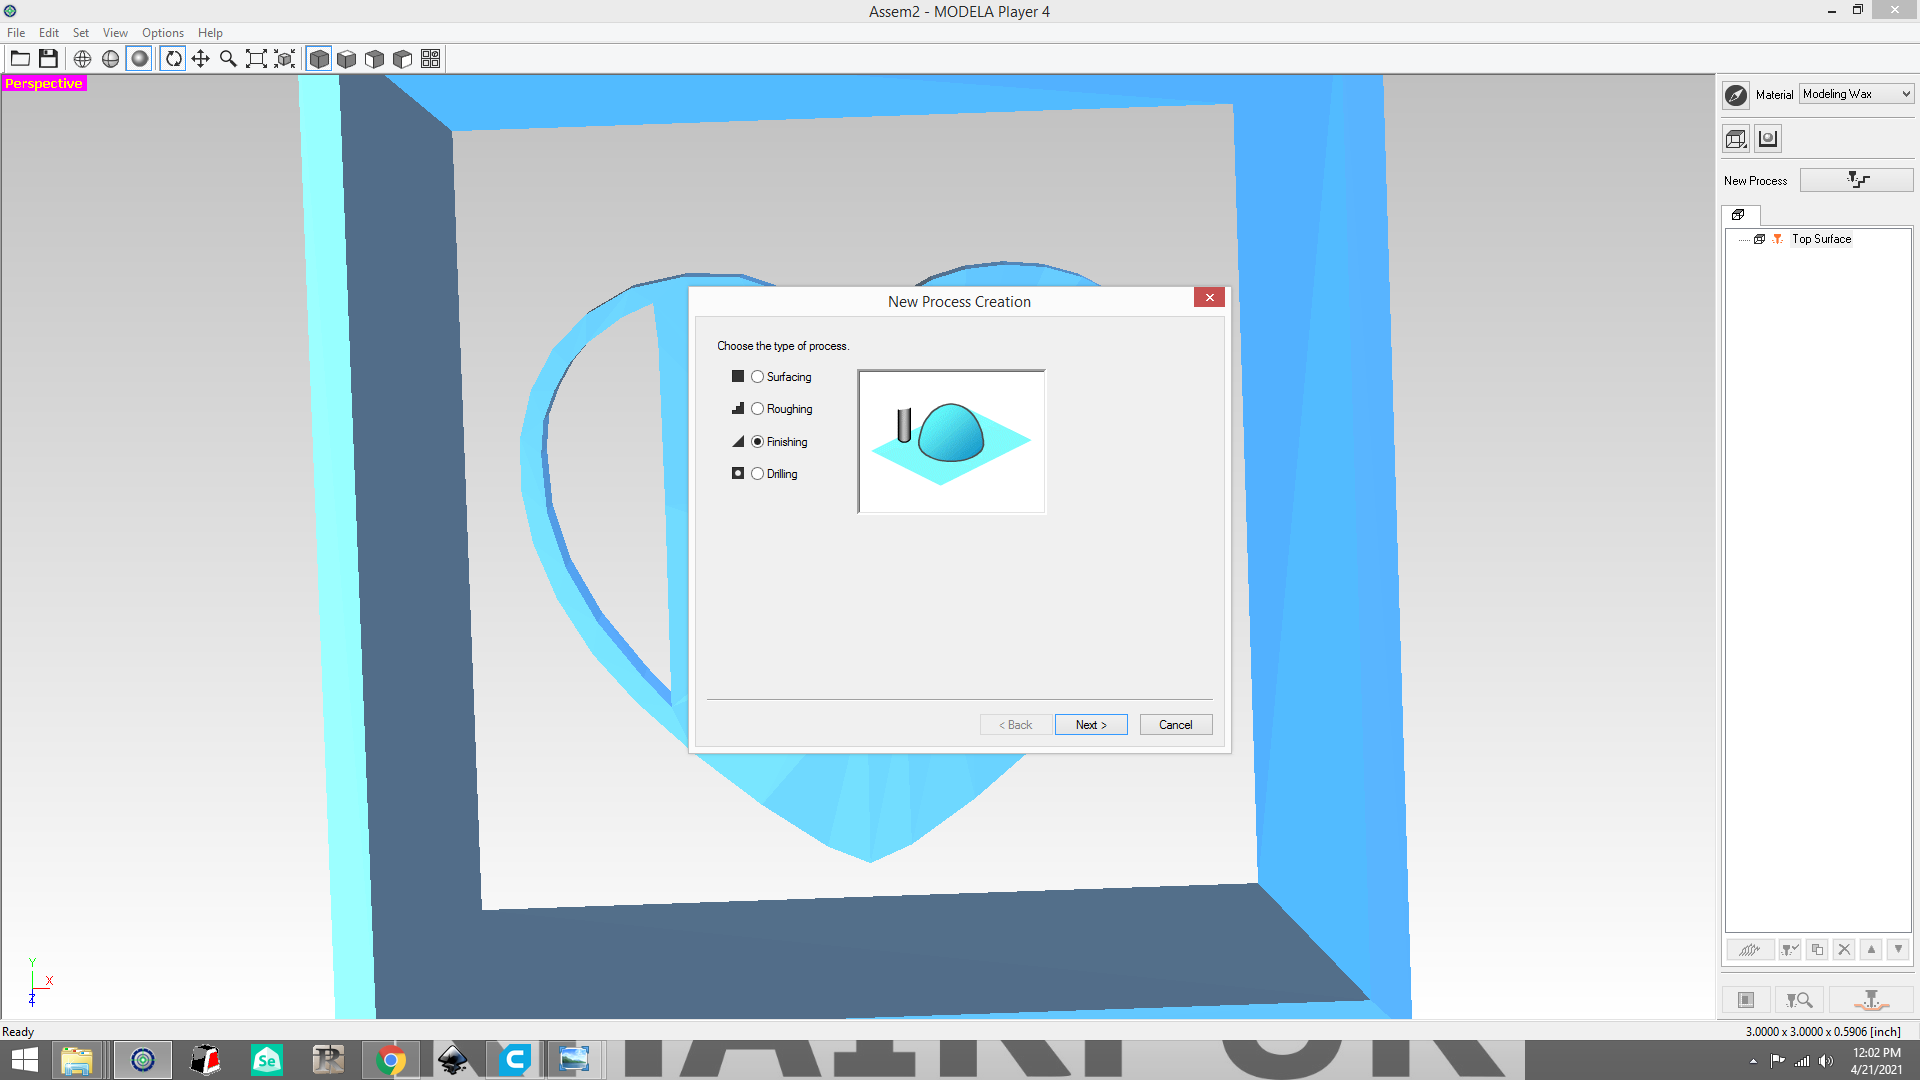
Then check on finshing, then Next.

Check on Top [+Z] then 'Next'
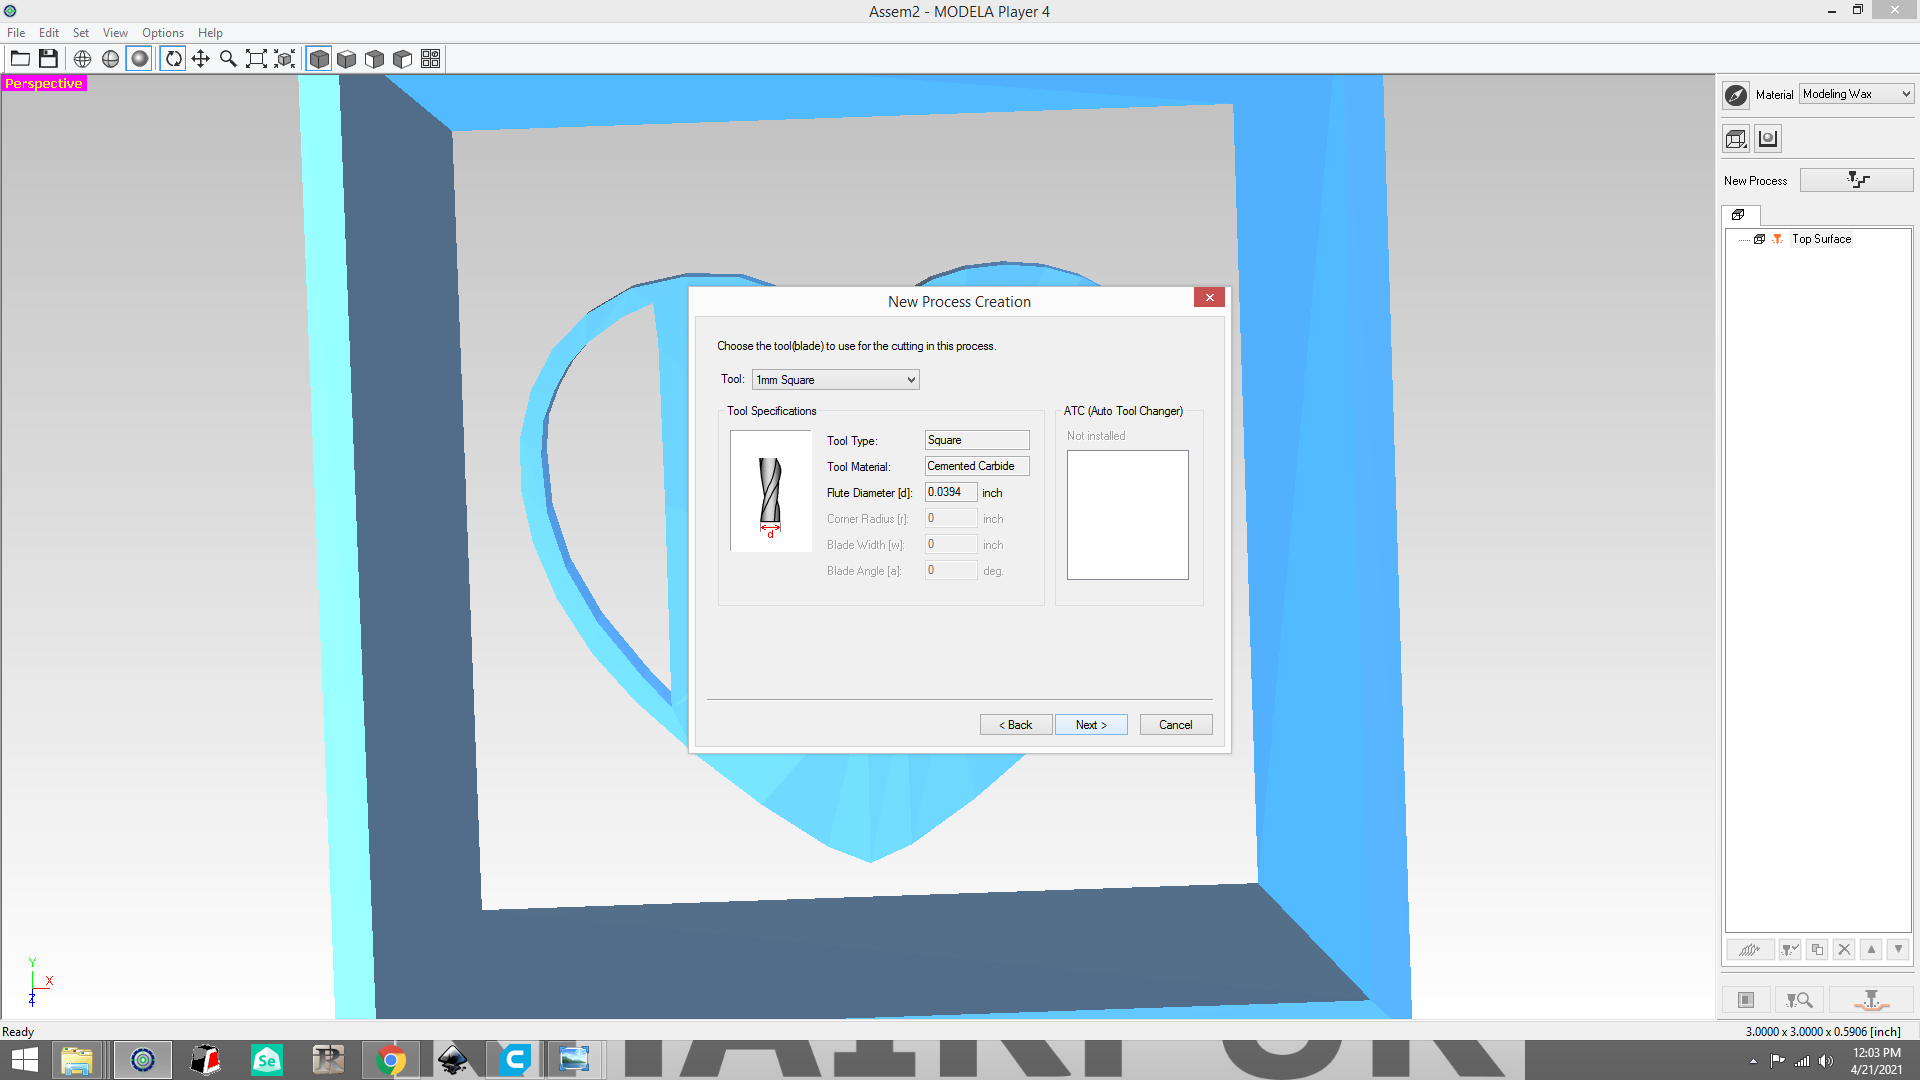
Select 1 mm Square then Next.
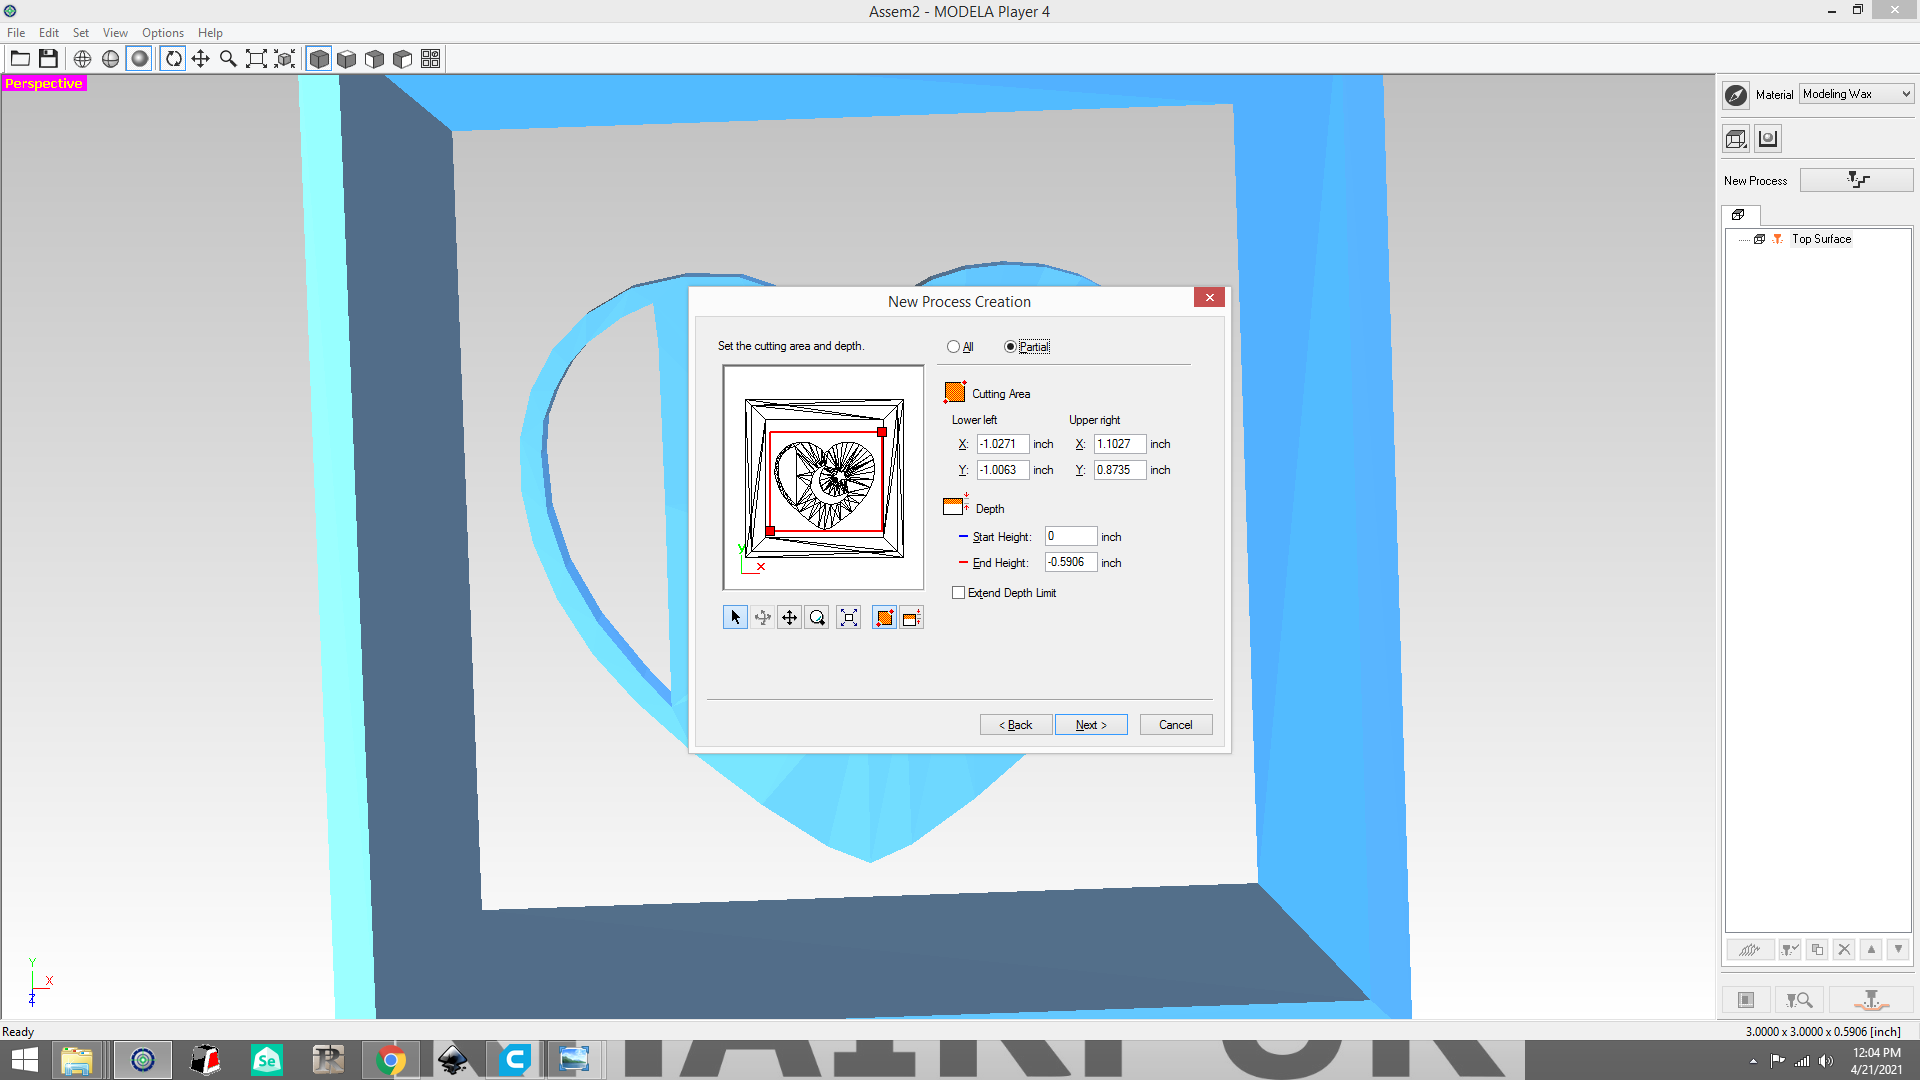
Check on Partial then resize the red boundary line inside the box then Next.
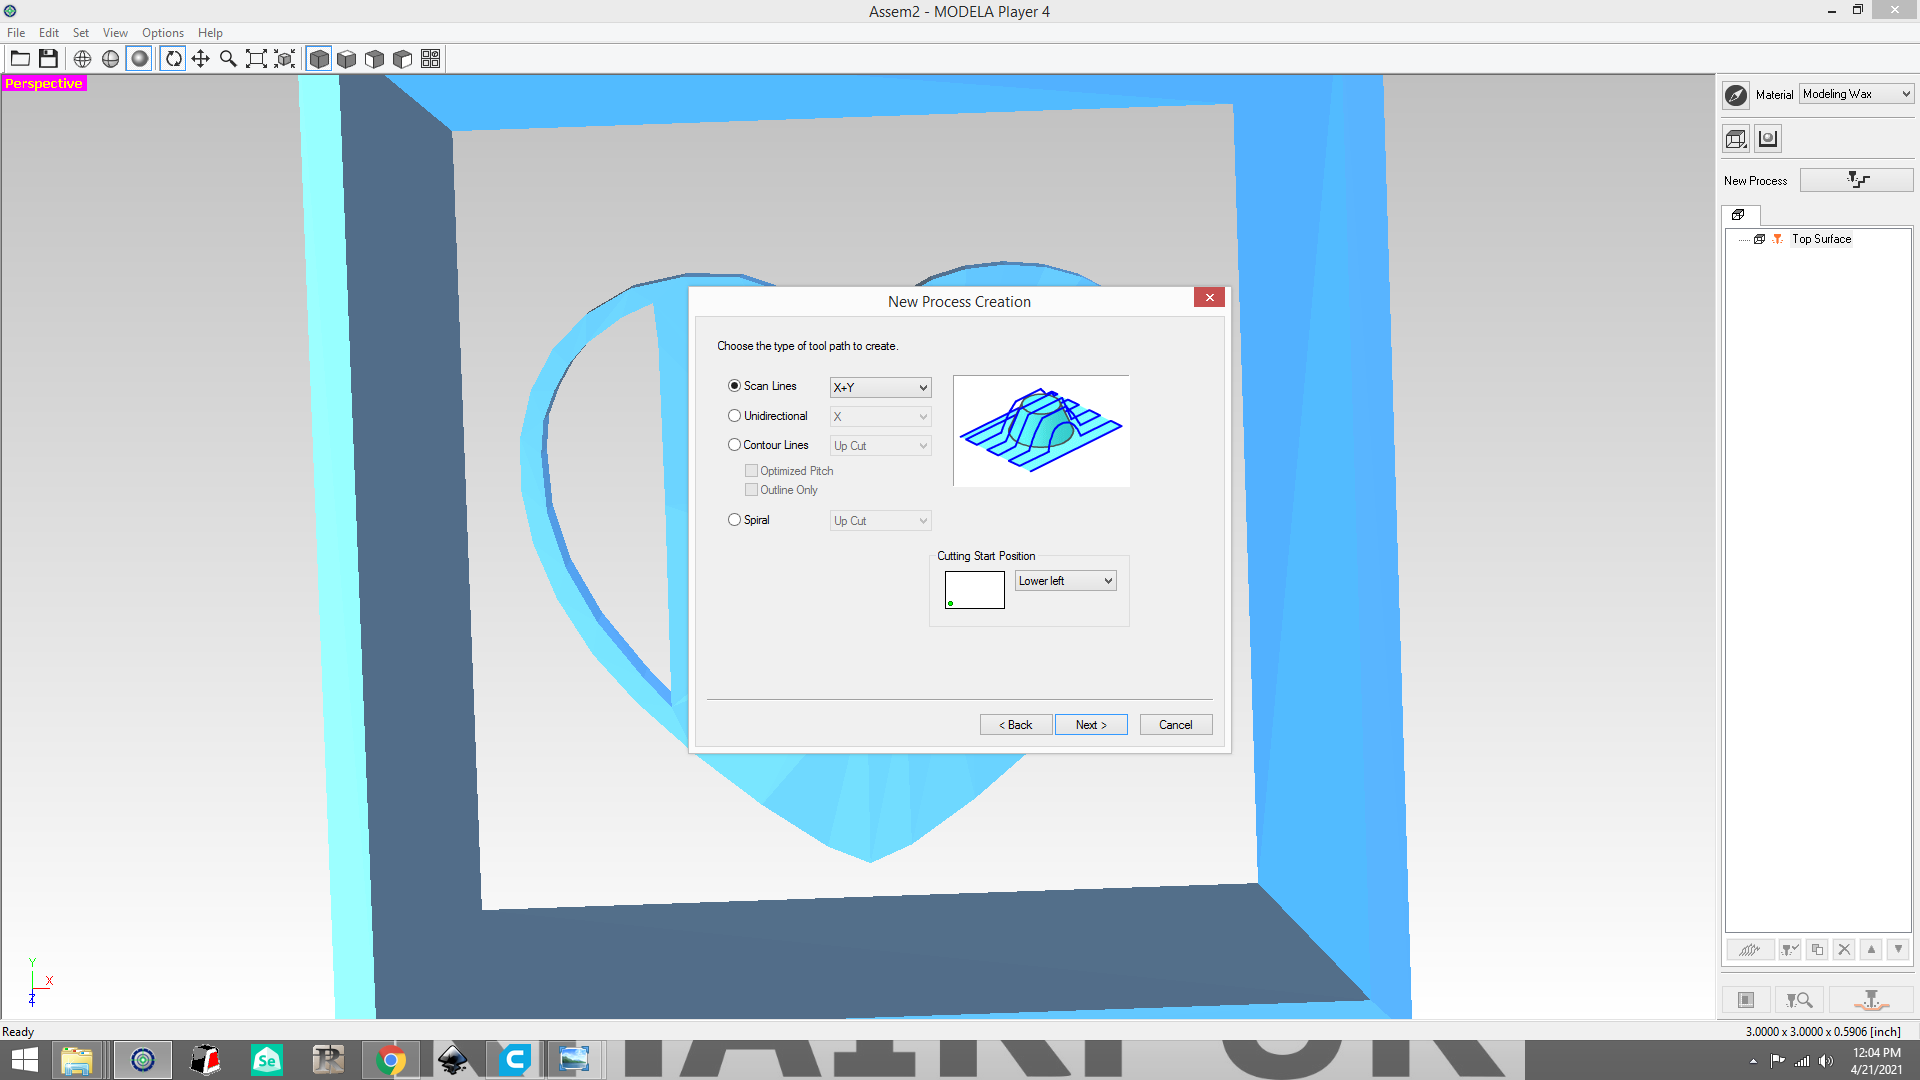
Check on Contour Lines Up Cutthen Next.

XY speed as 16mm/sec, then Next
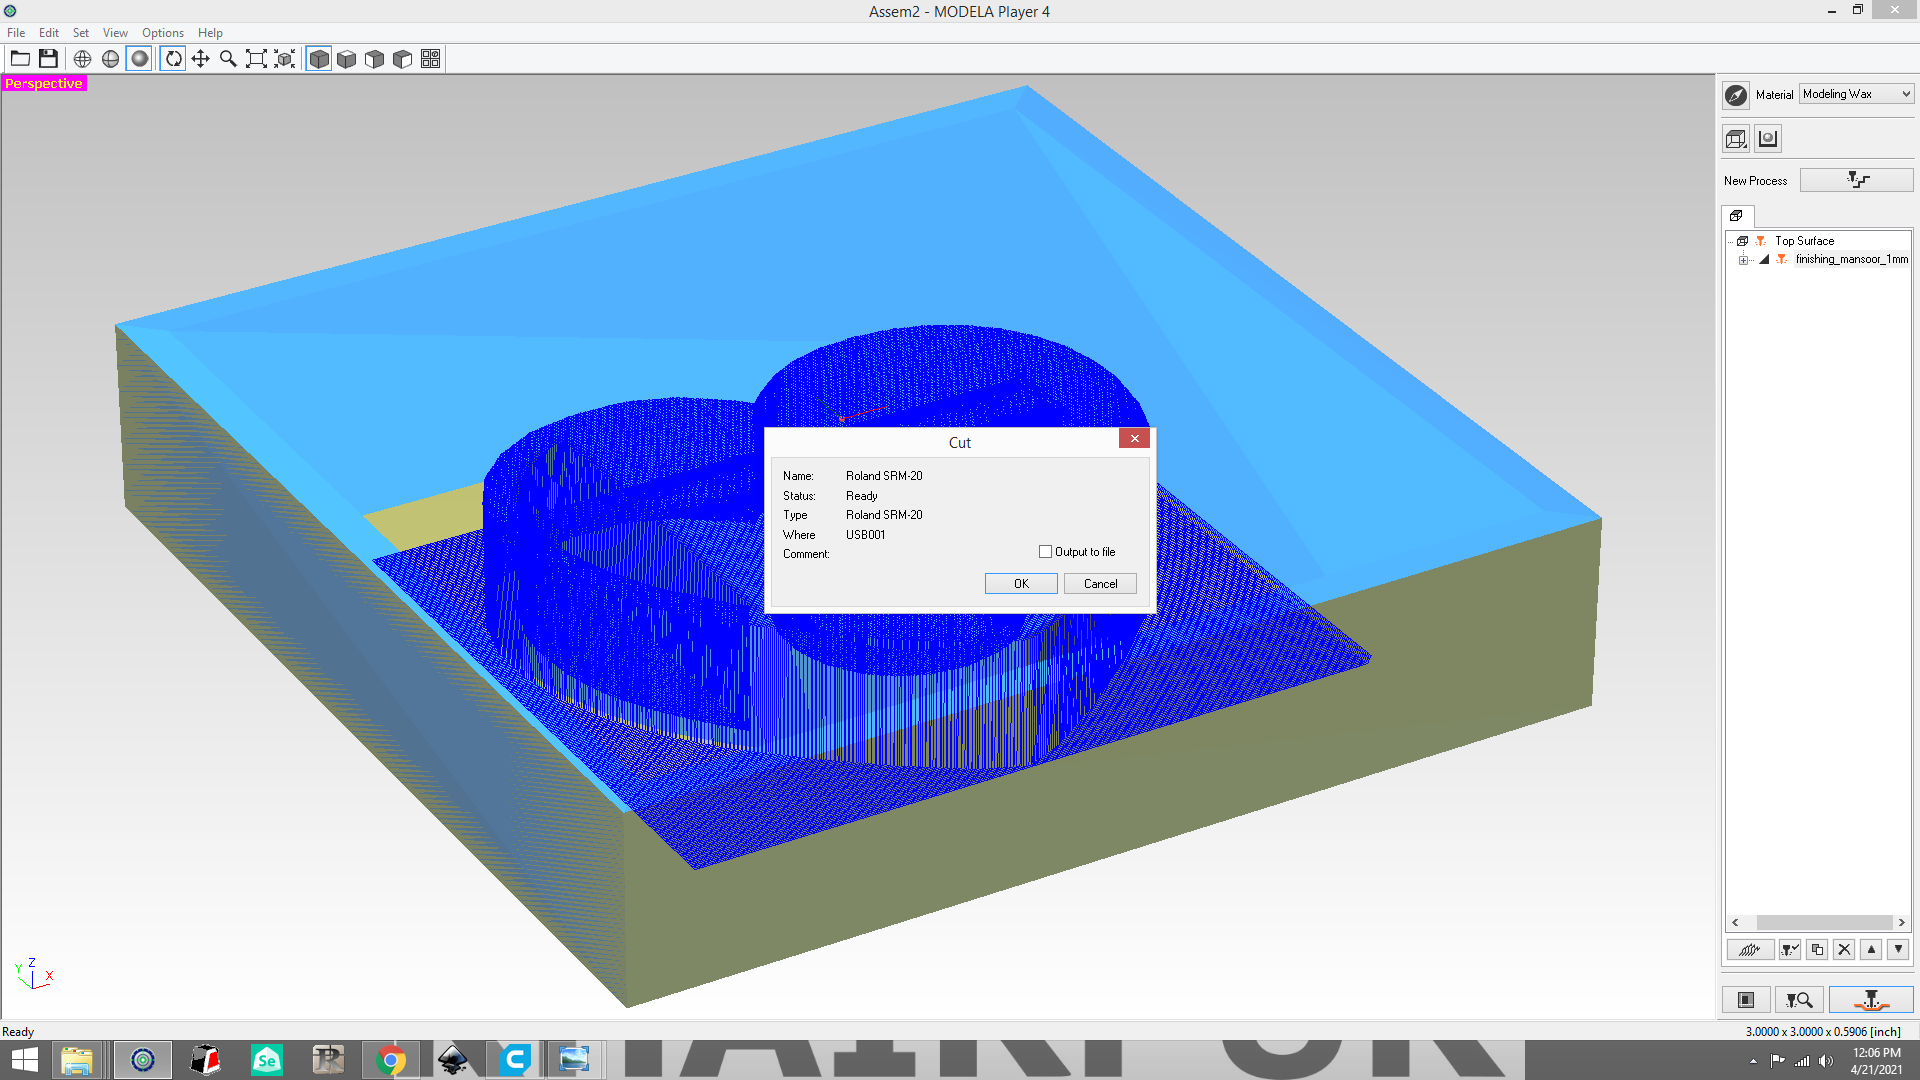
So now save the file and then Finish.now click on Cut ,to save the .prn files.
Actually, this is where I made a mistake: as the milling machine mills, the top of the bits (collect) component reaches the wall of my design, causing my design to degrade. This is because I chose a bit size of around 3mm, but I am working with a dept of 10 mm.
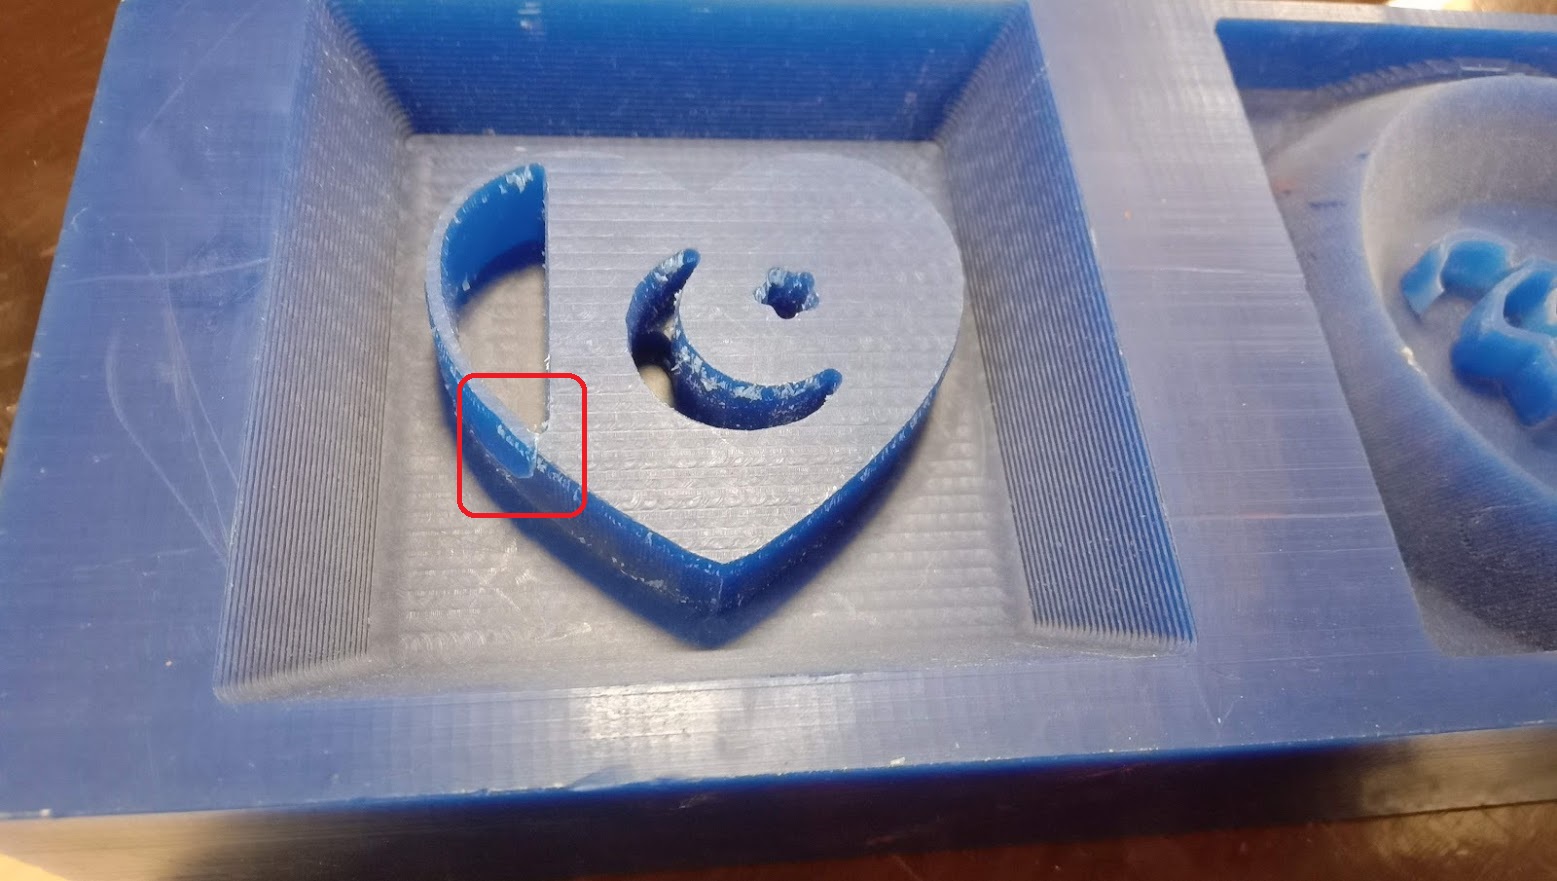
Here is the outcome of my design where mistake can be seen it is due to too much depth of model but bit depth is just 3mm which I have used.
I am going improve my design so for that i begin again work on soild work.
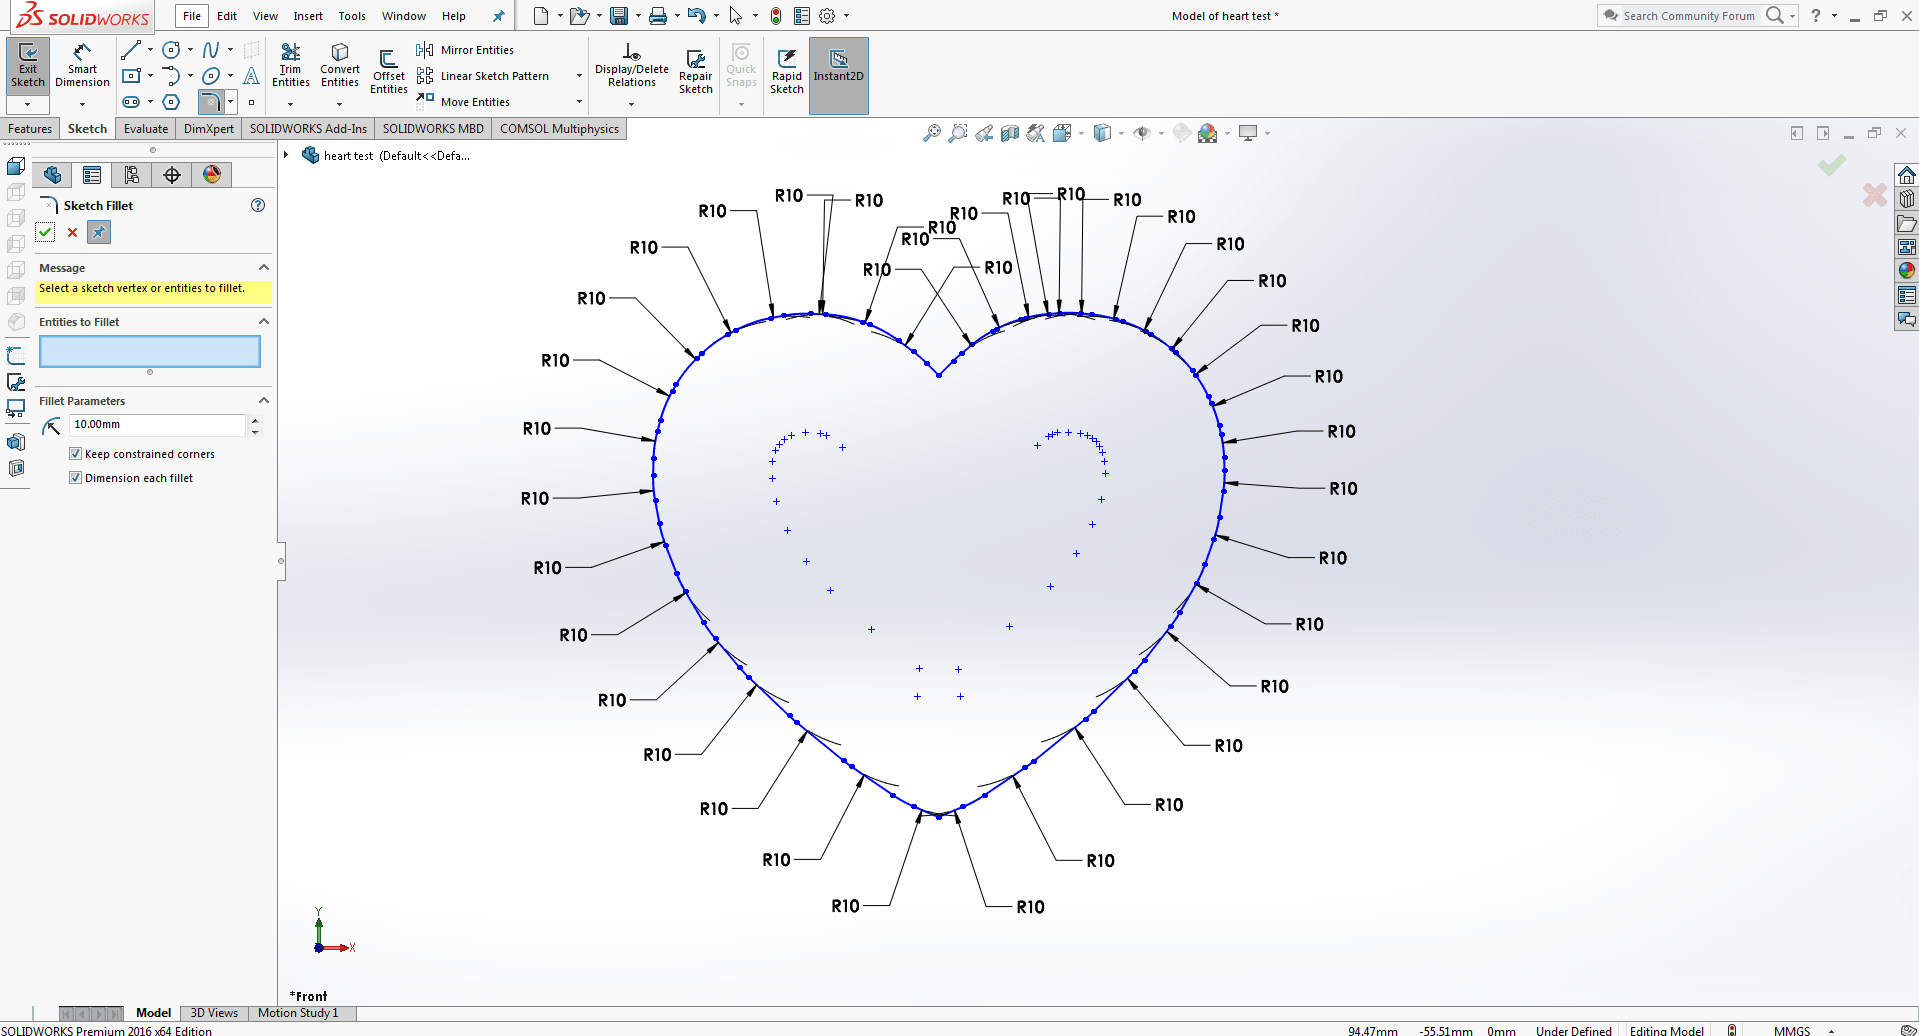
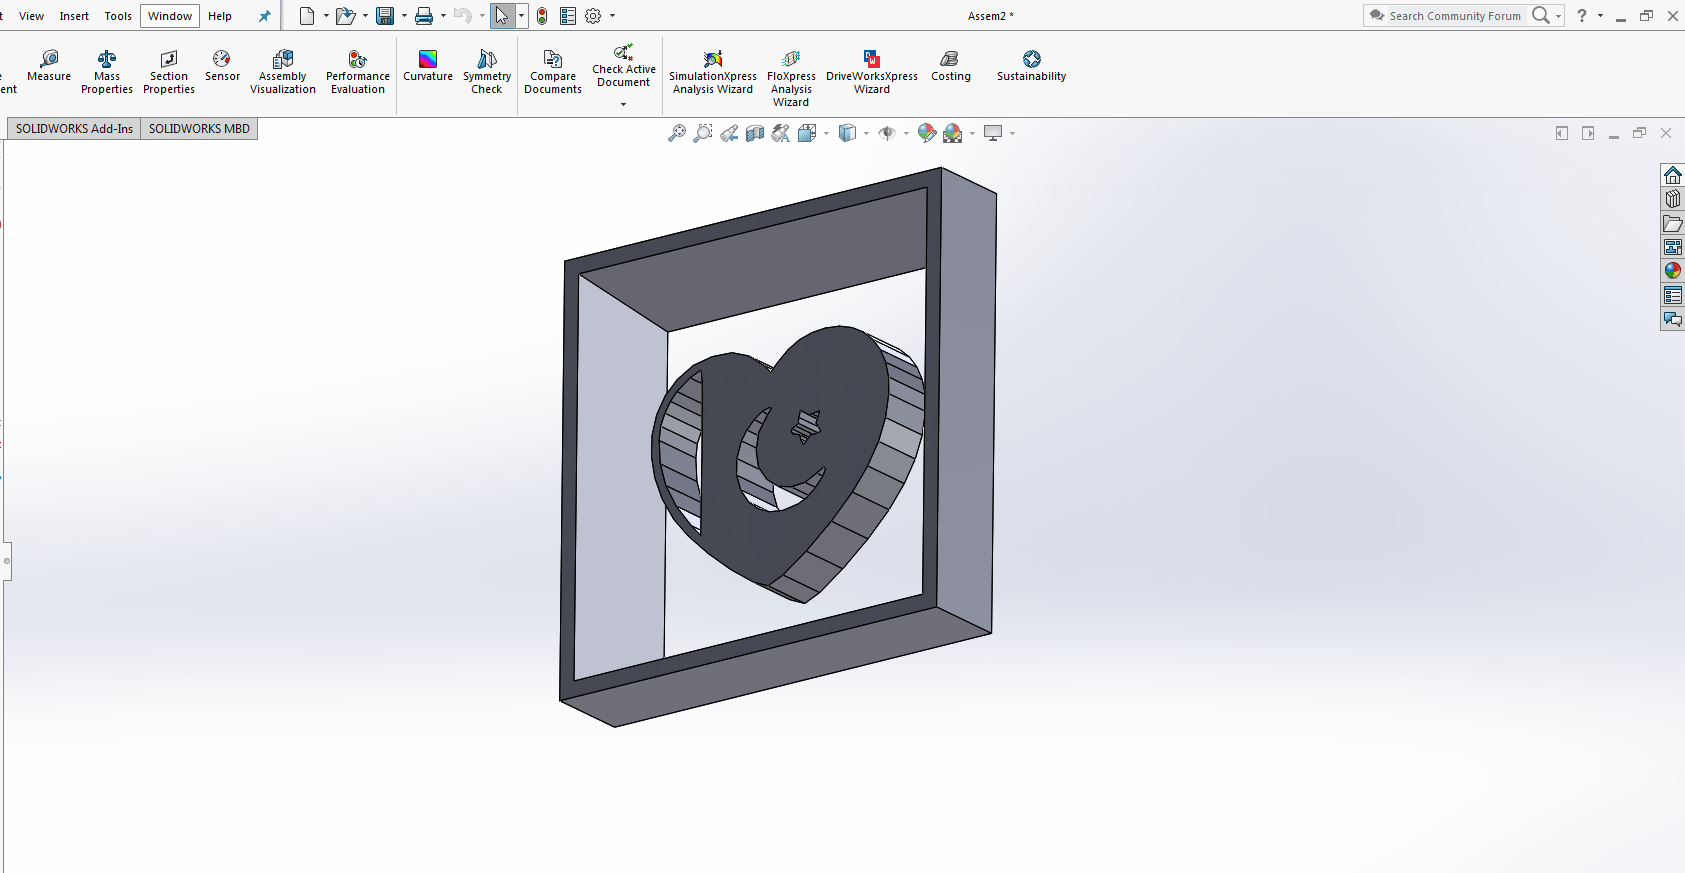
Click on sketch fillet and select all corner lines.
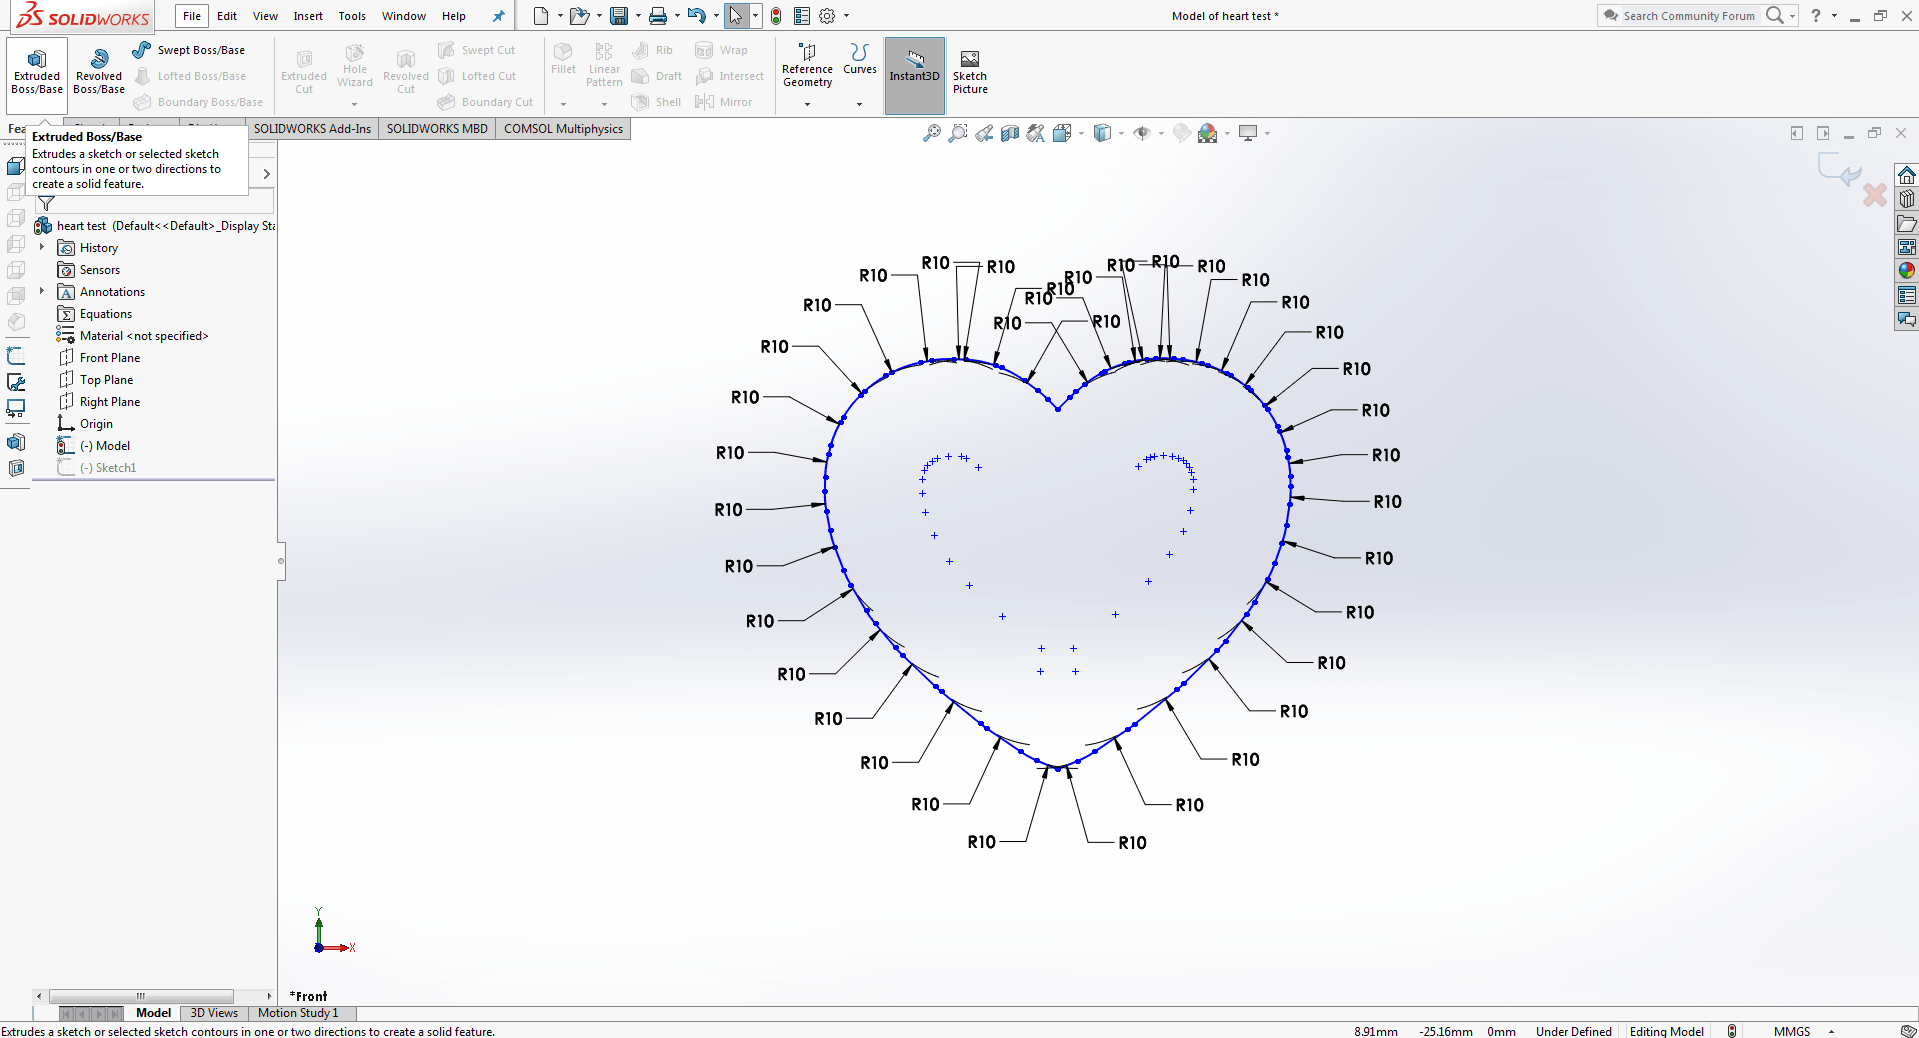
After selecting the click on ok then go to future and click extruded boss.
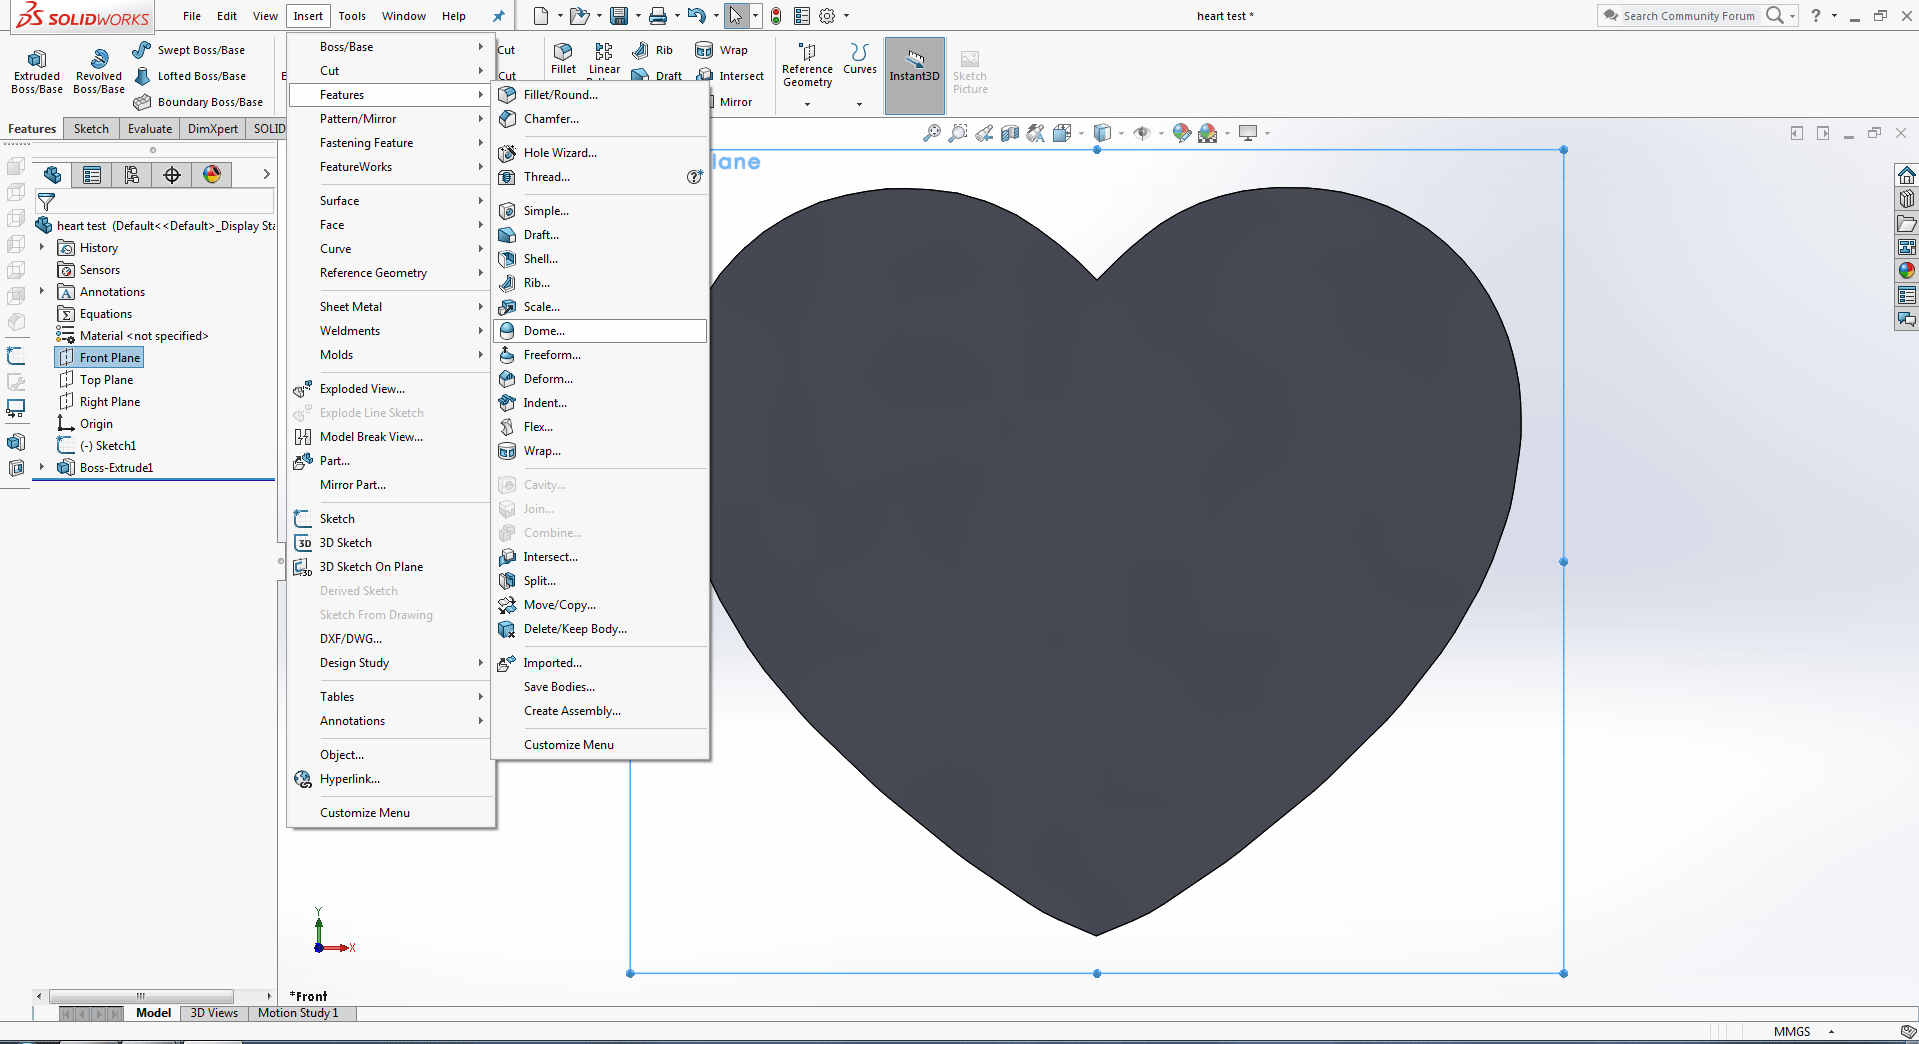
Go to insert features click on Dome.
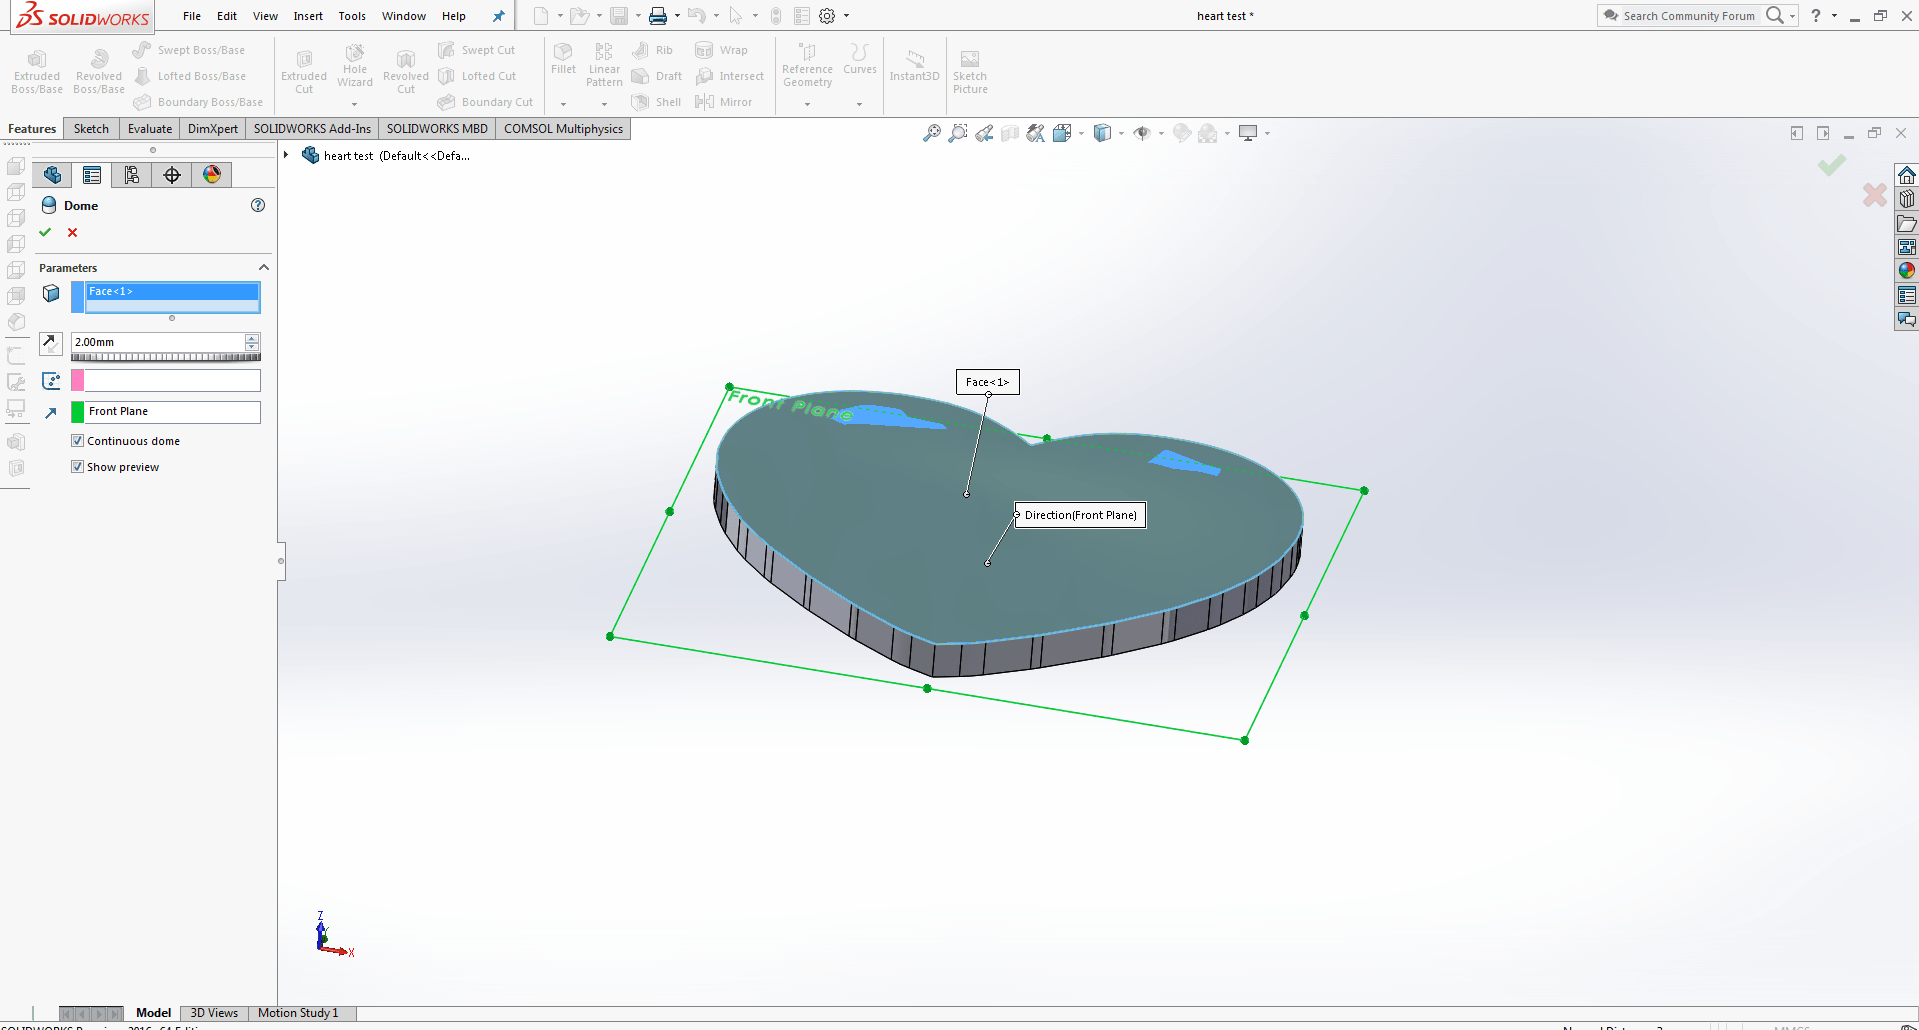
Select face and click on Continuous dome and the ok.
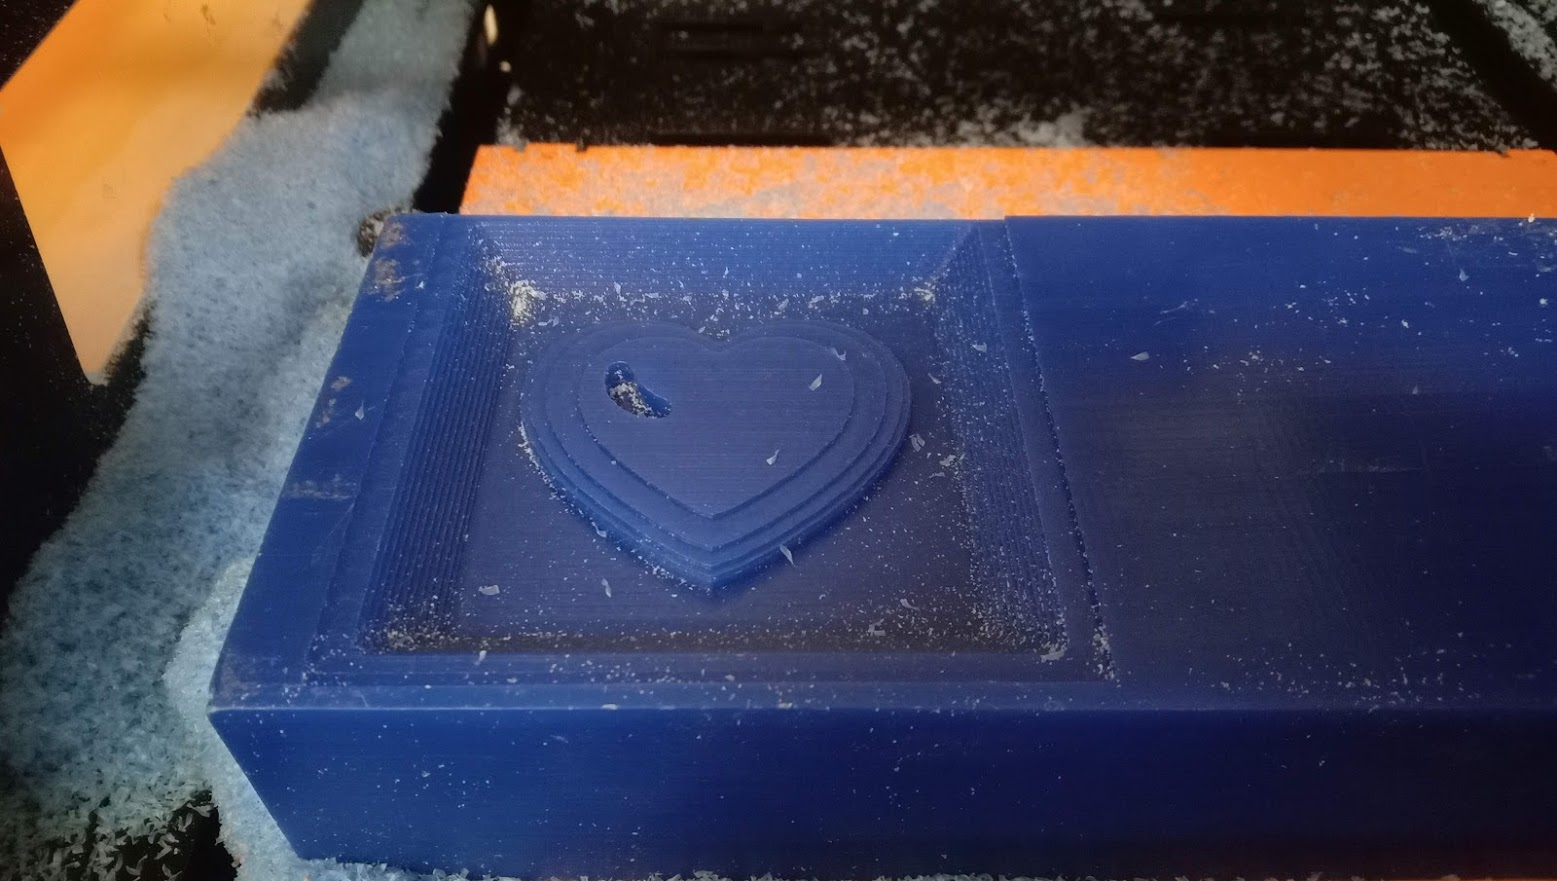
Here is the heart where the top of the heart is smooth curve.
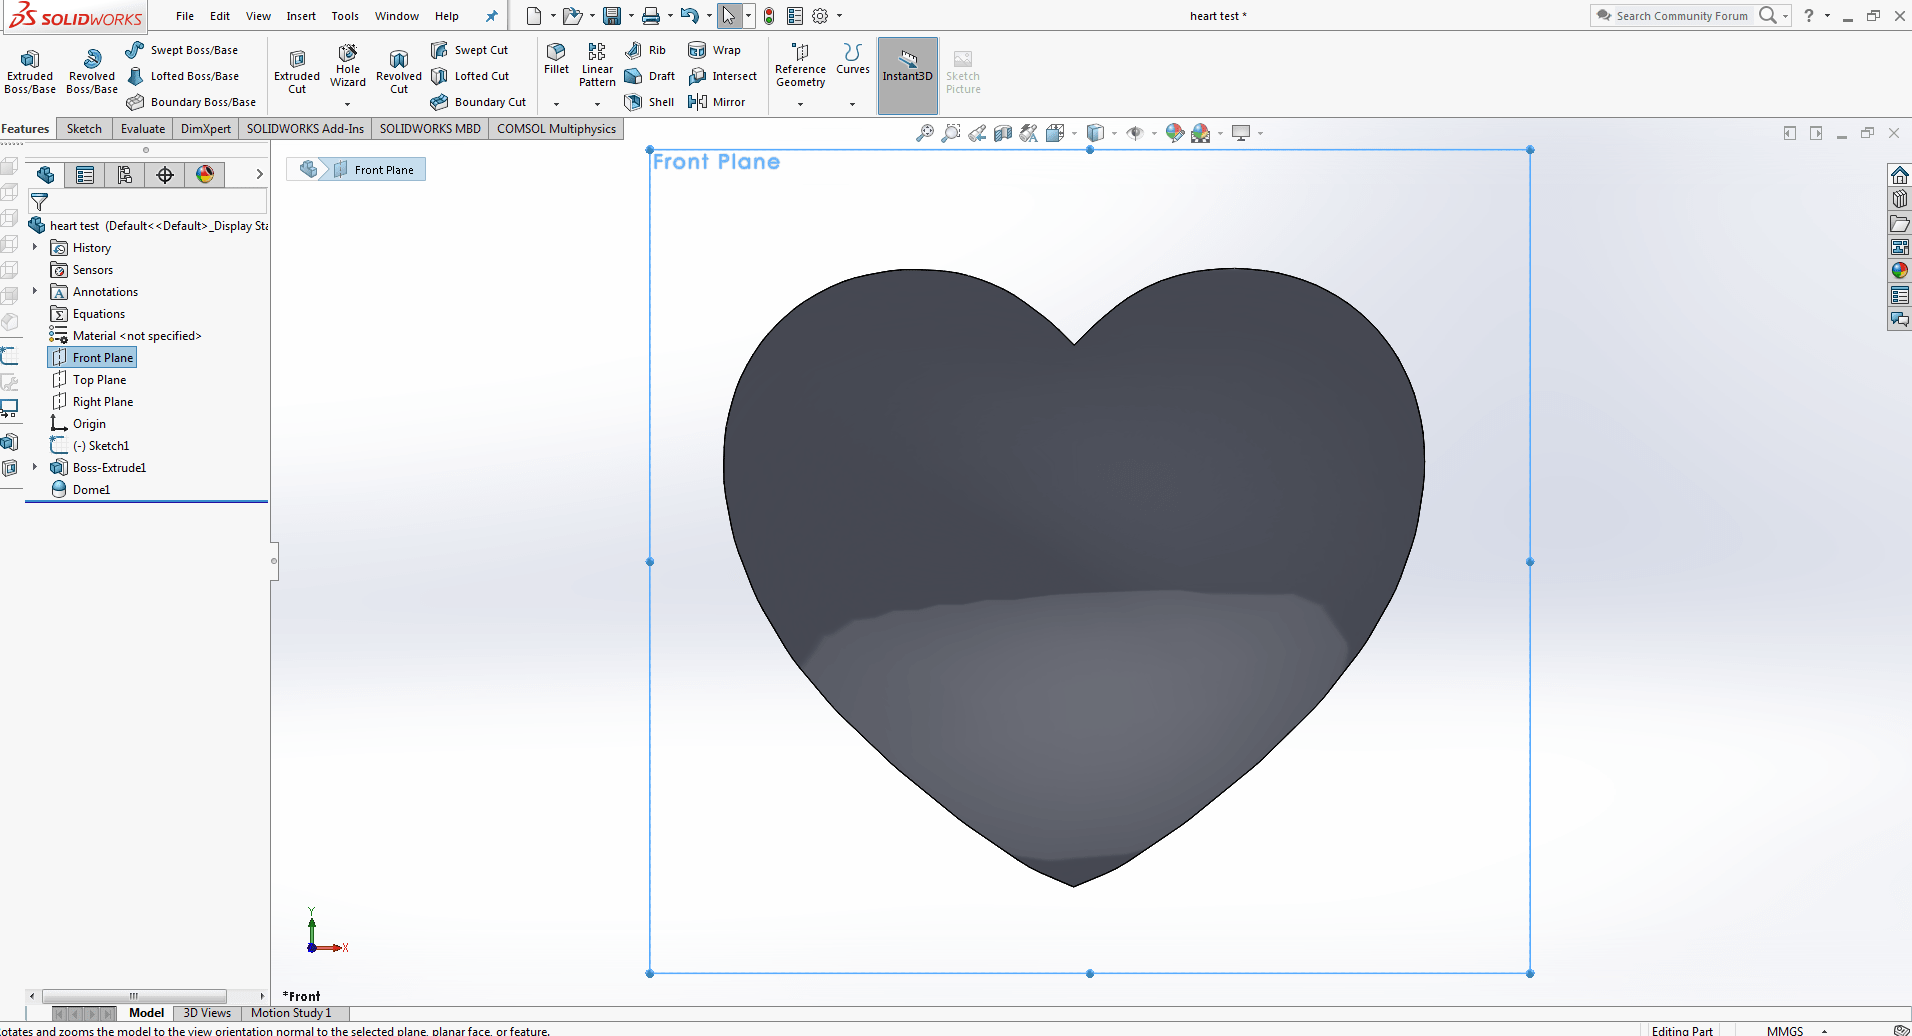
Then maked moon and star on the heart and go to future and click on cut extruded .
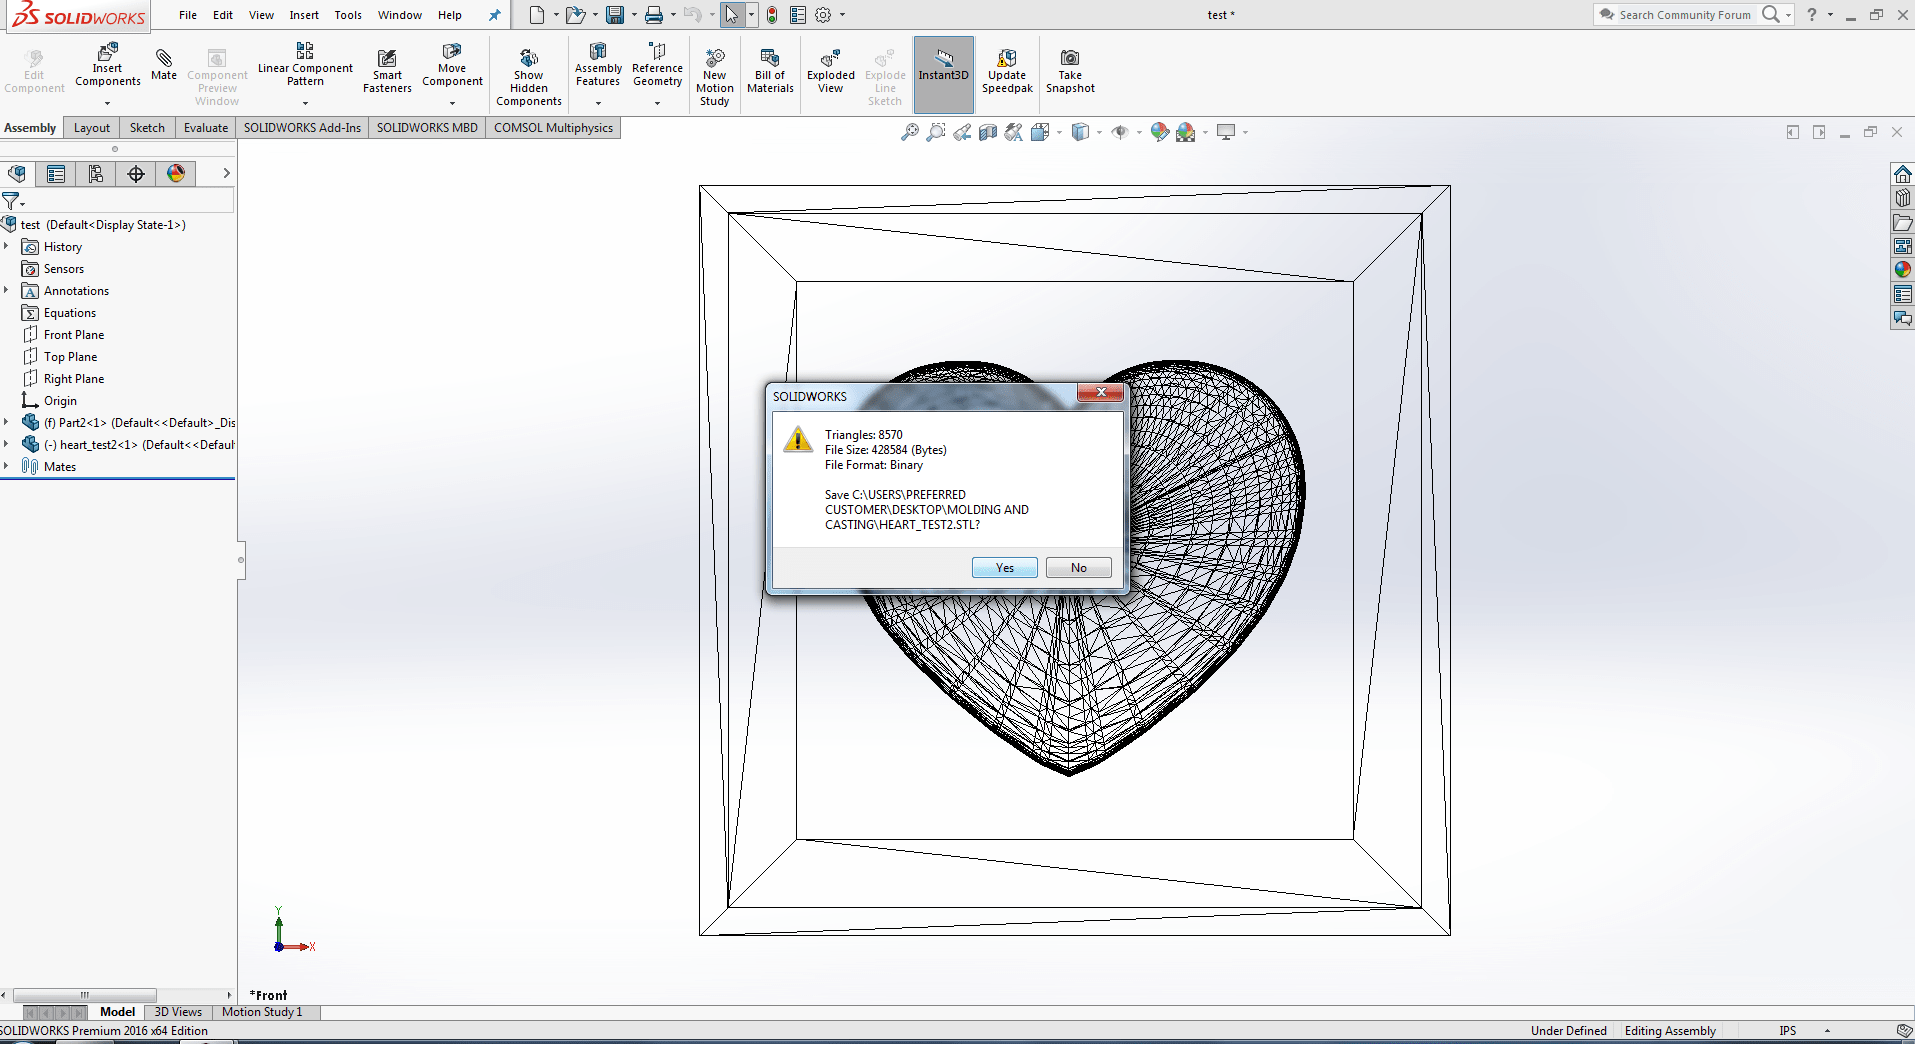
And save this File as a stl formate.
For molding i repeat Process as shown above
This is the Roufing while using 1/8 bit.
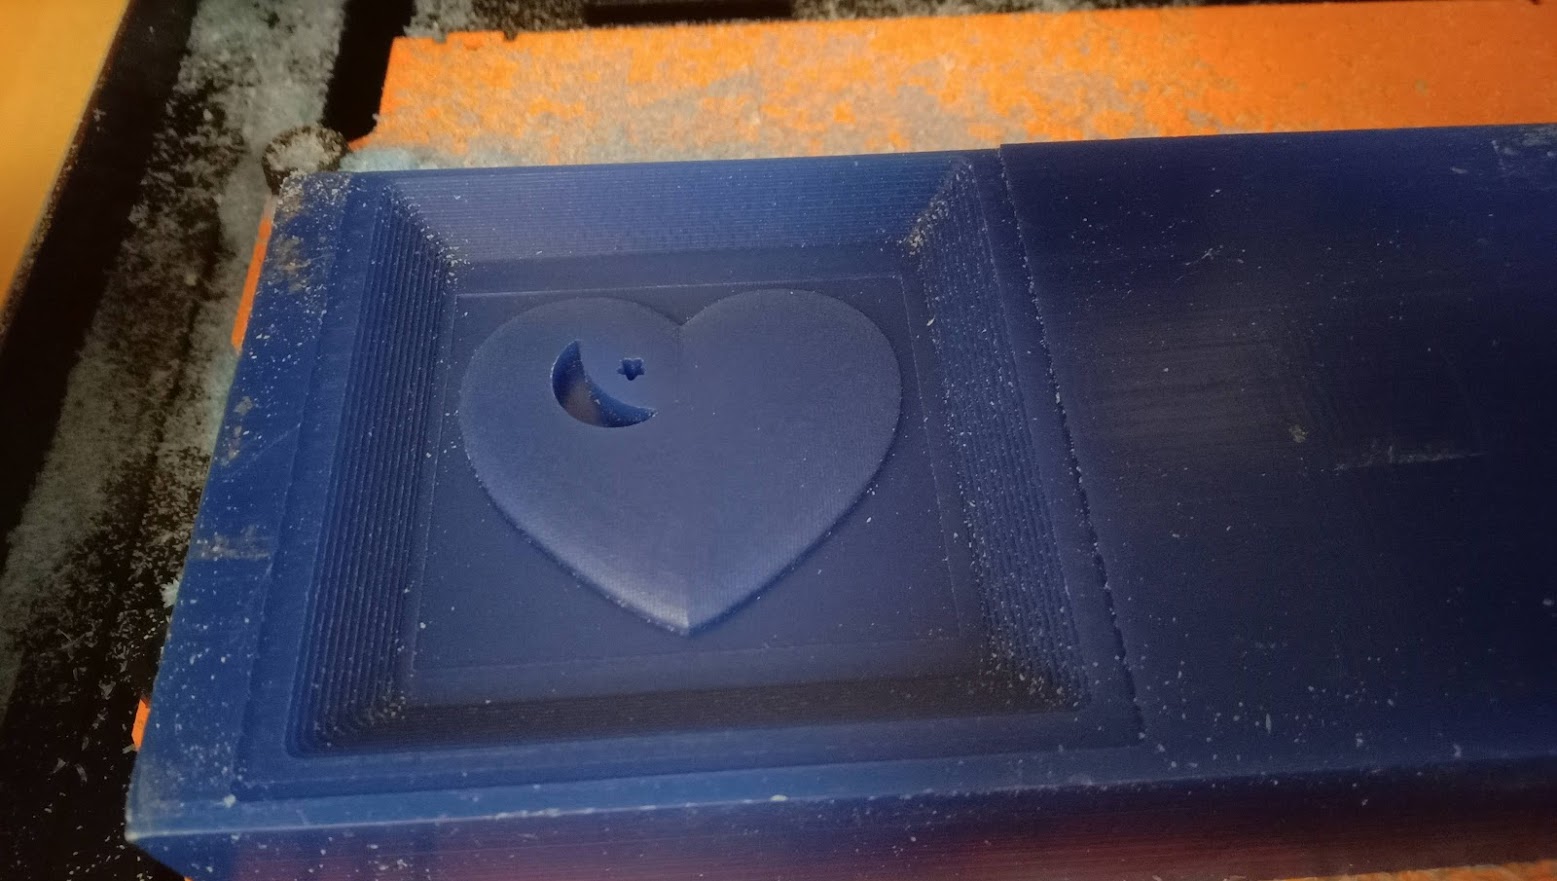
After finishing it is Ready for put silicon material
Making Flexible Mold
After making Rigid Mold its time to make flexible mold from it. I am using Mold Max 60 which is used to cast on plastic.
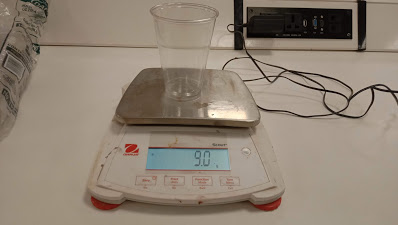
Empty glass weight is 9 gram.
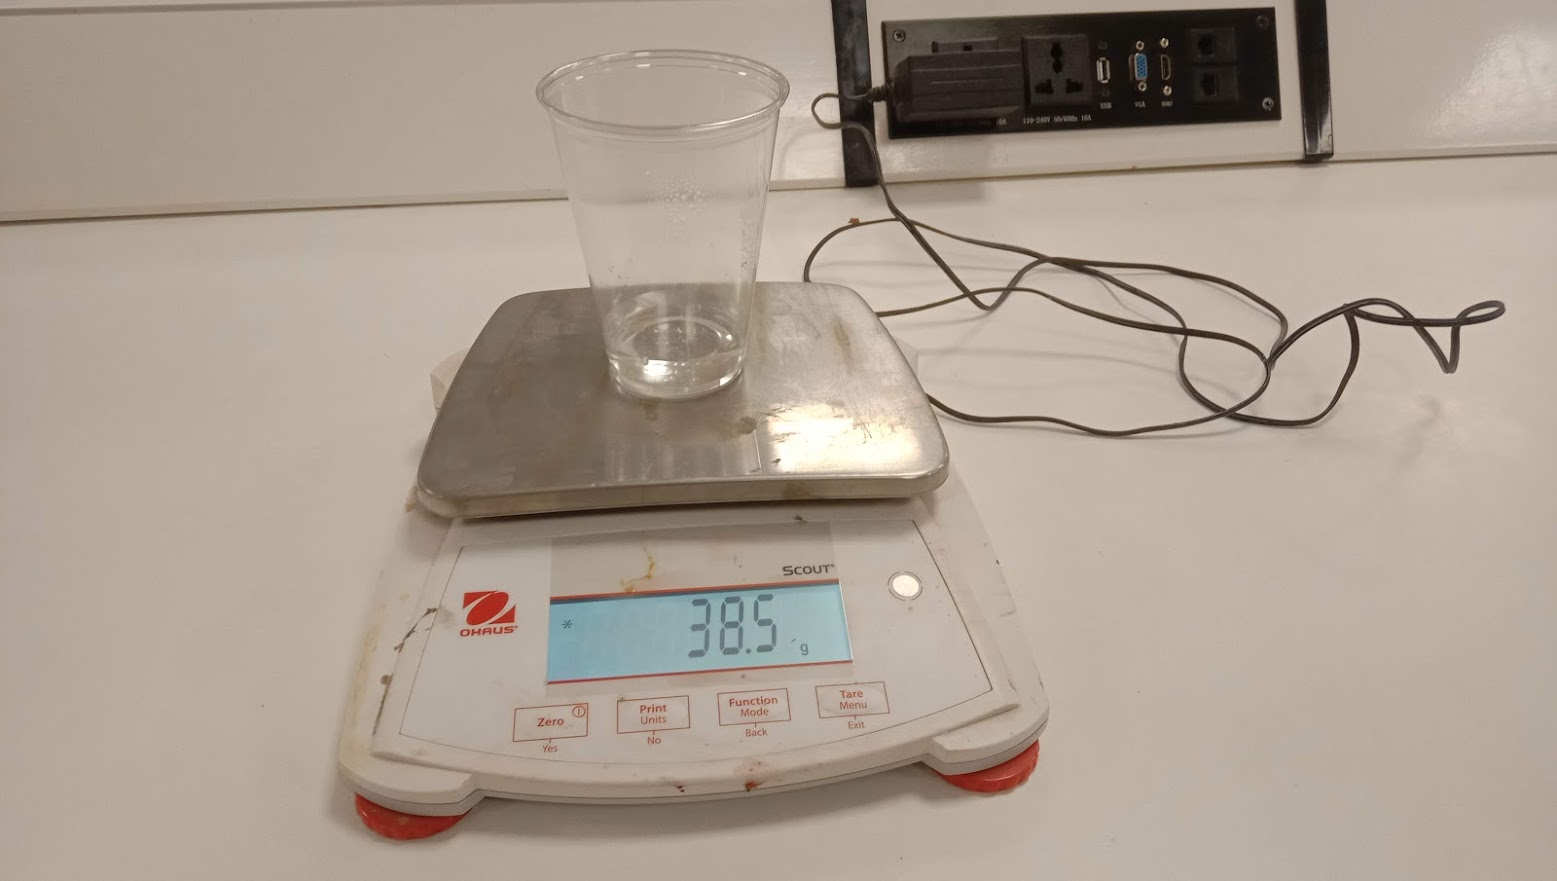
Water is poured into the wax and then into a glass.

And then Mixed 100:3 ratio material and mixed it and put it on the molds.
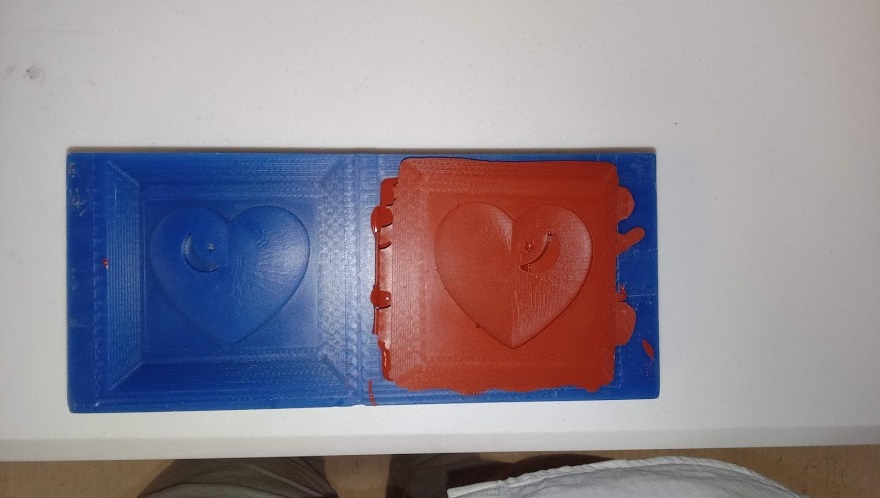
Now my design is ready for casting.
SMOOTH ON Liquid Plastic Cast 305
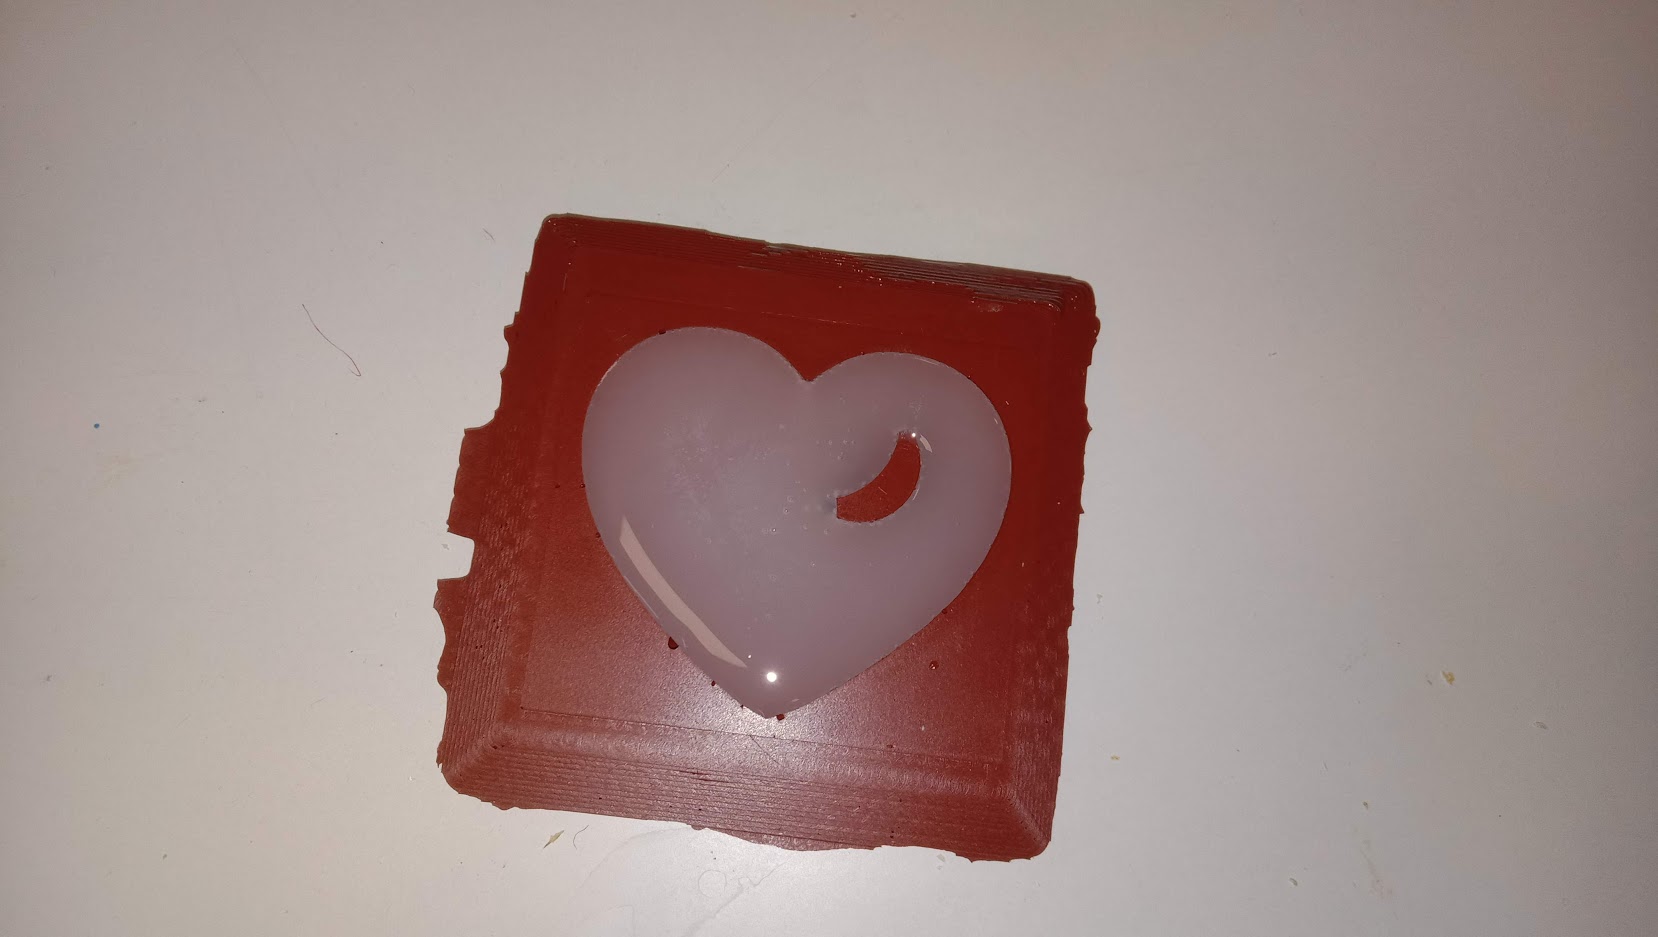
Mix Part A and B by weight 100:90 and Port time is 7 minutes and Curing time is 30 minutes.
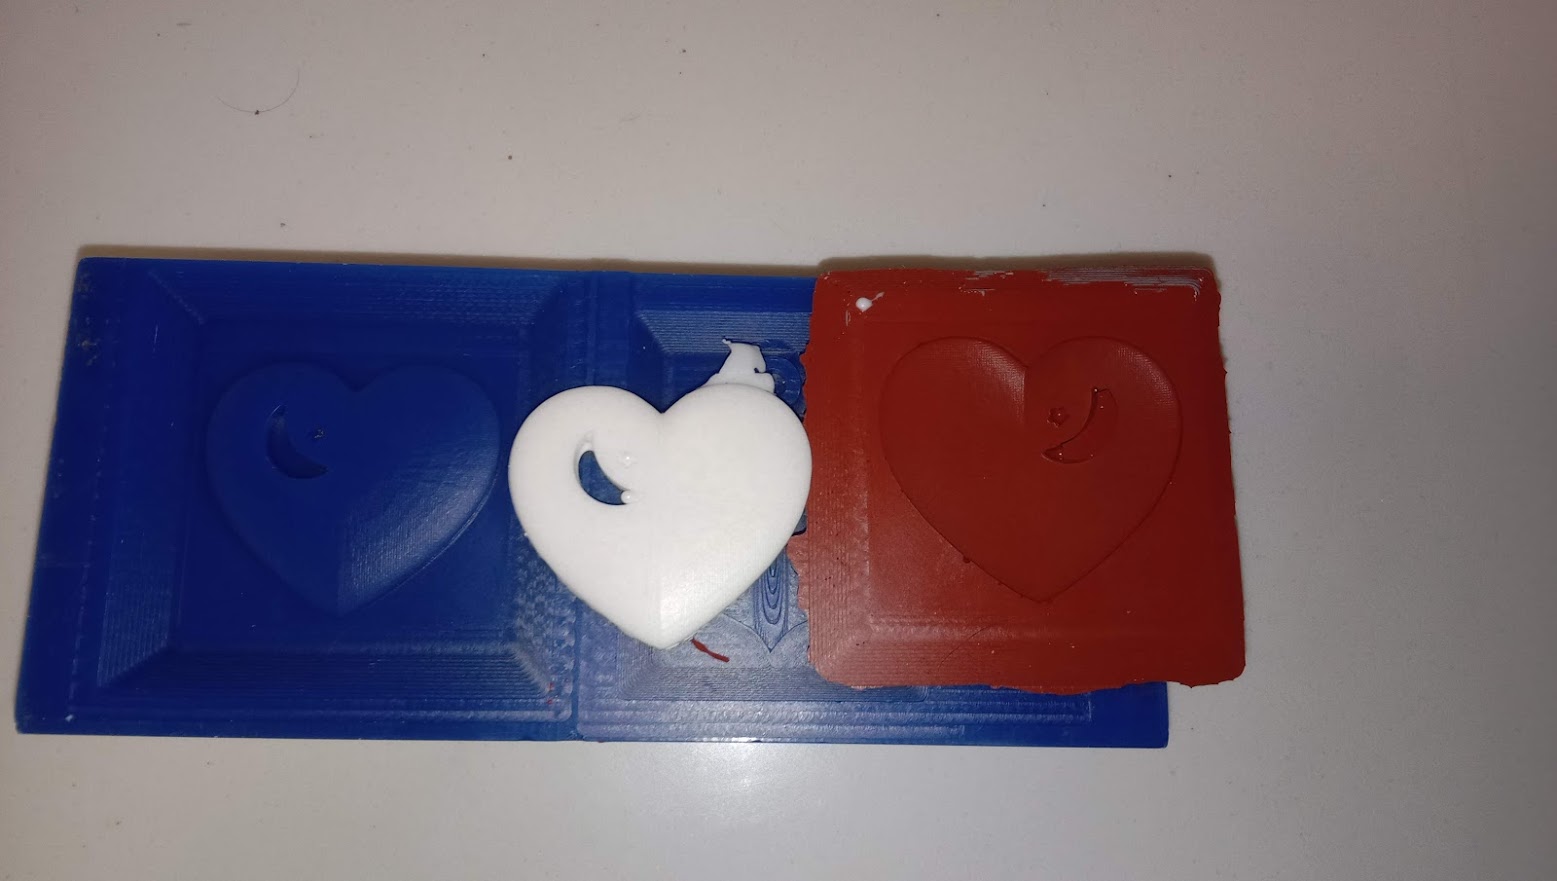
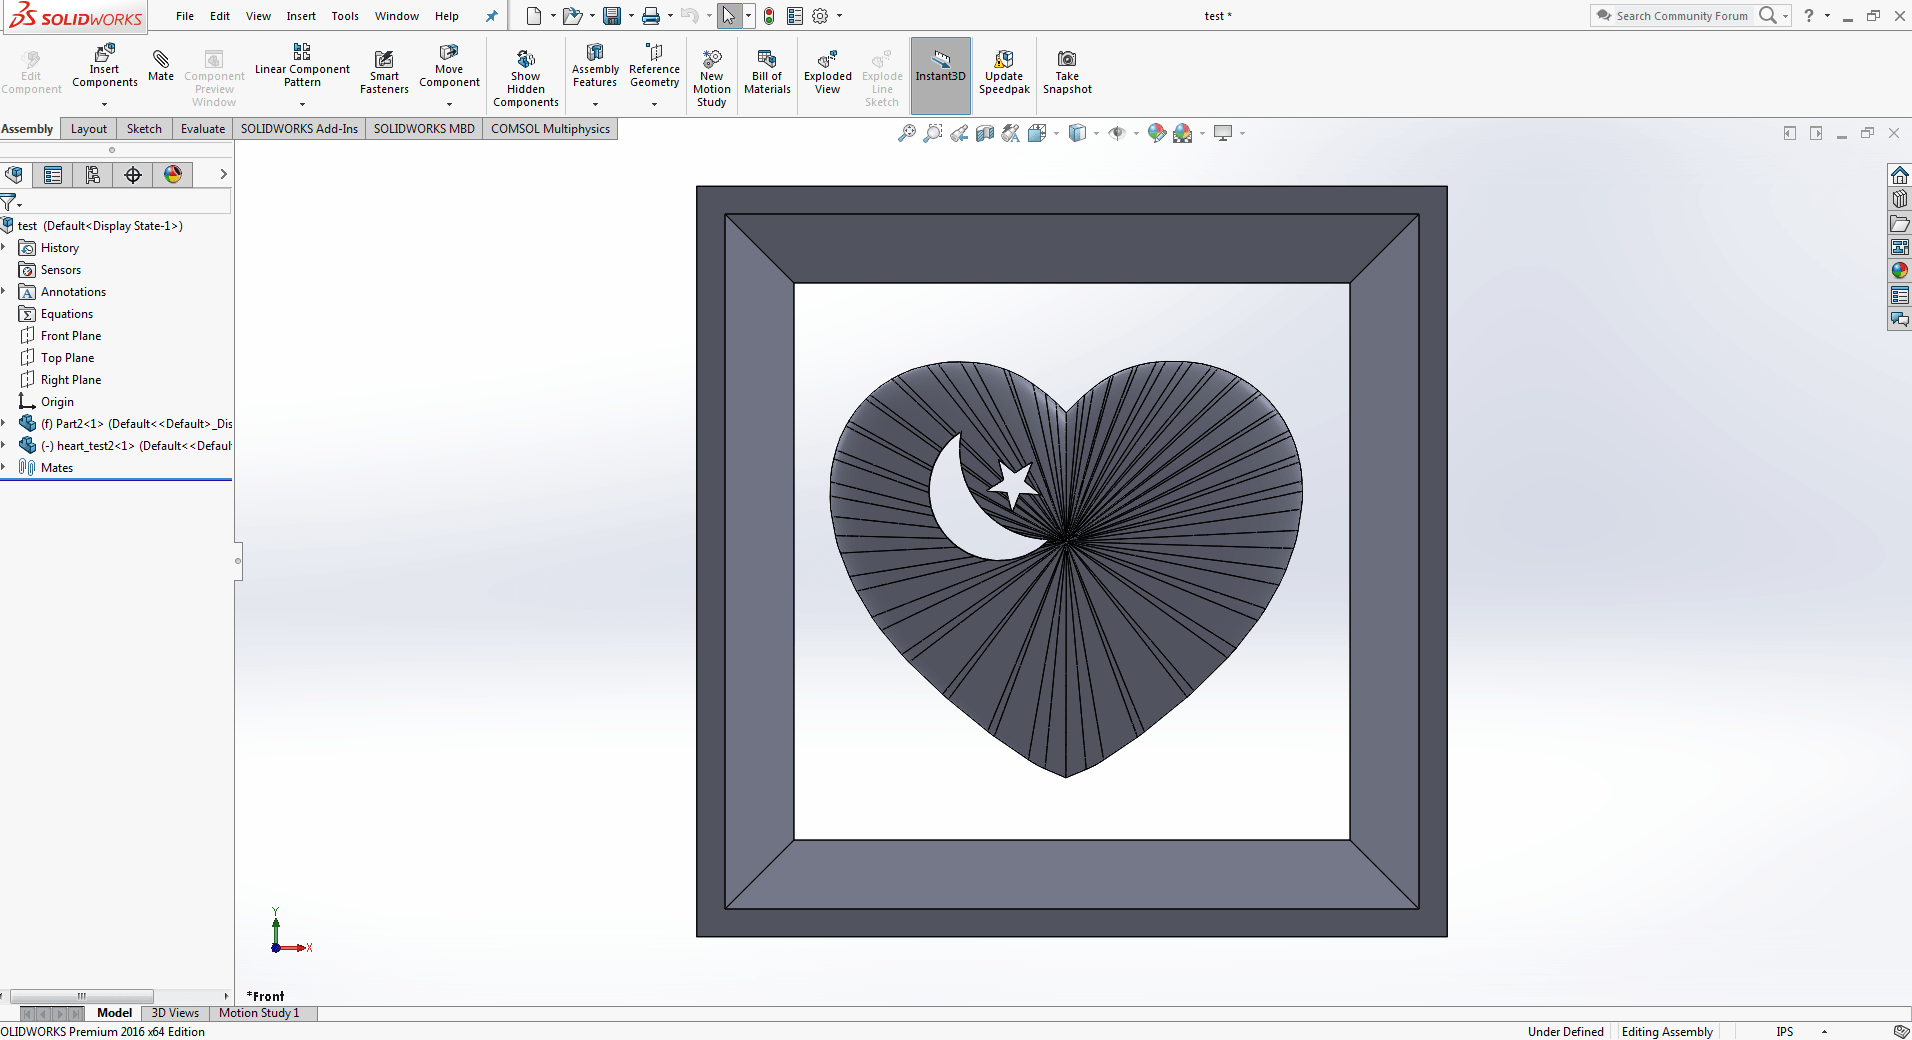
The whole procedure Rigit Mold > Flexible Mold > One-Picture Casting
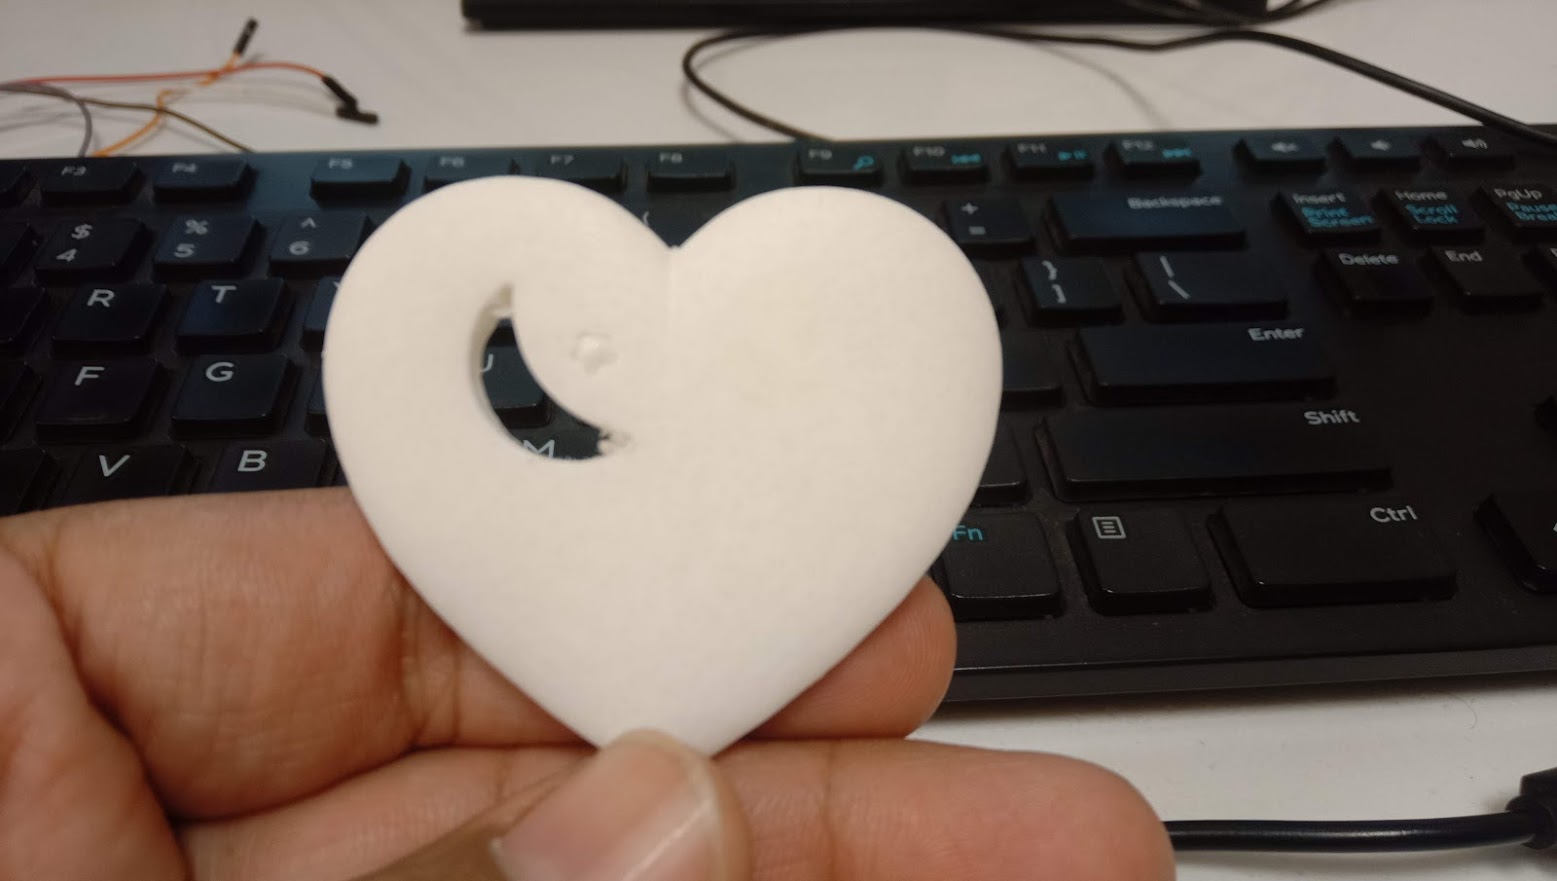
Hero Shot of Final result
"Click here"to download all files of this week