
|

| Sukkur IBA University Merit, Quality, Excellence |
Week - 10
Input Devices
Assignment
Group Assignment
probe an input device's analog levels and digital signals
Oscilloscope
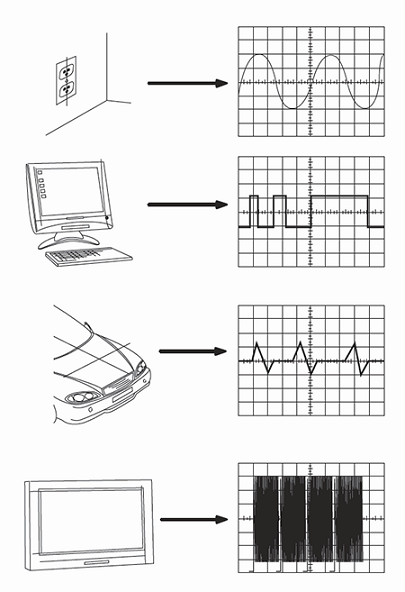
While working with electronics, for debugging and testing behavior, we need to understand the circuits on signal level, which multimeters fails to do. In this case Oscilloscopes comes into picture. A digital oscilloscope measures the signal, and then converts that measurement into a digital format using an ADC converter, after which the data measured is depicted as a digital waveform representation. From this representation various paramters can be evaluated.
Electrical stations, computers, motorcycles, and televisions are examples of typical waveform sources.
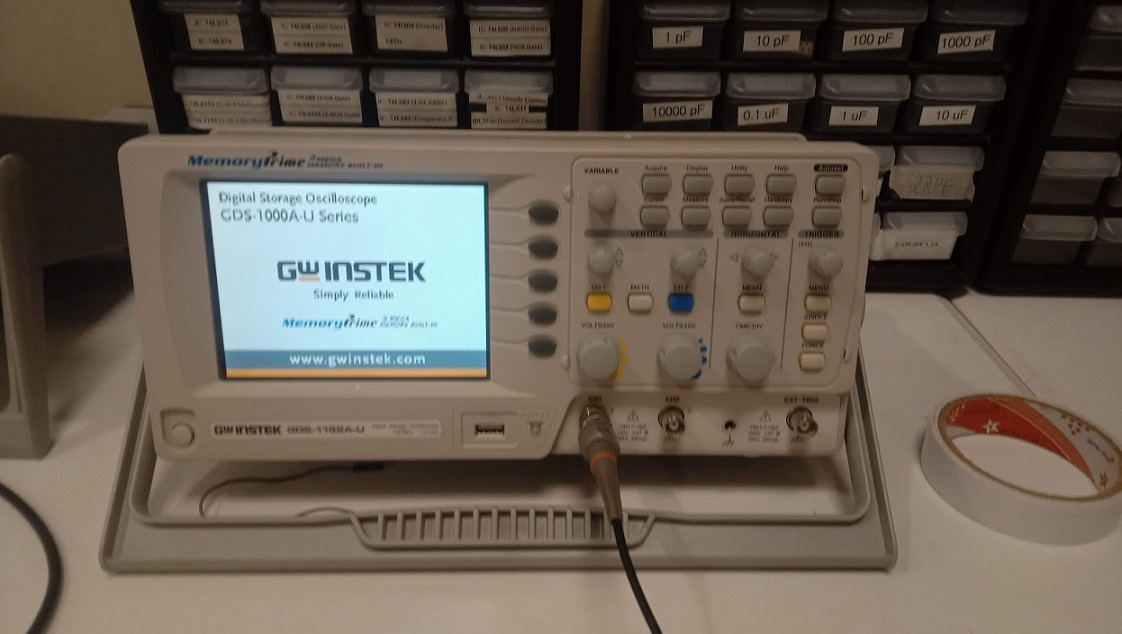
Specification of GOS-1152A-U
150 MHz Bandwidth.
2 Channel.
1 GSa/s Real-Time Sample Rates Maximum, 25GSa/s Equivalent-Time.
2 Mega Point Record Length.
2mV-10V Vertical Scale.
1ns-50s Horizontal Range.
Up to 27 Automatic Measurements.
5.7" TFT LCD Display.
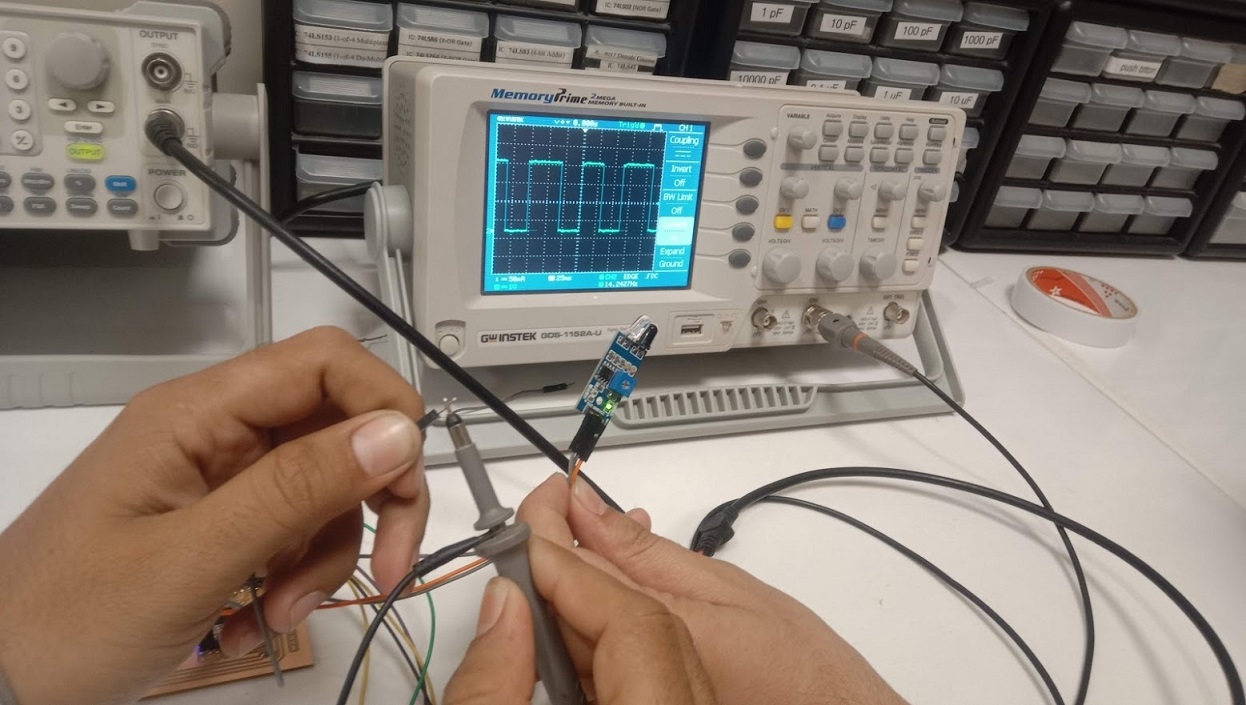
Digital Signals Measurement
We initially evaluated the IR sesor on an Arduino UNO by connecting the probes to the IR output pin, which displayed a frequency.
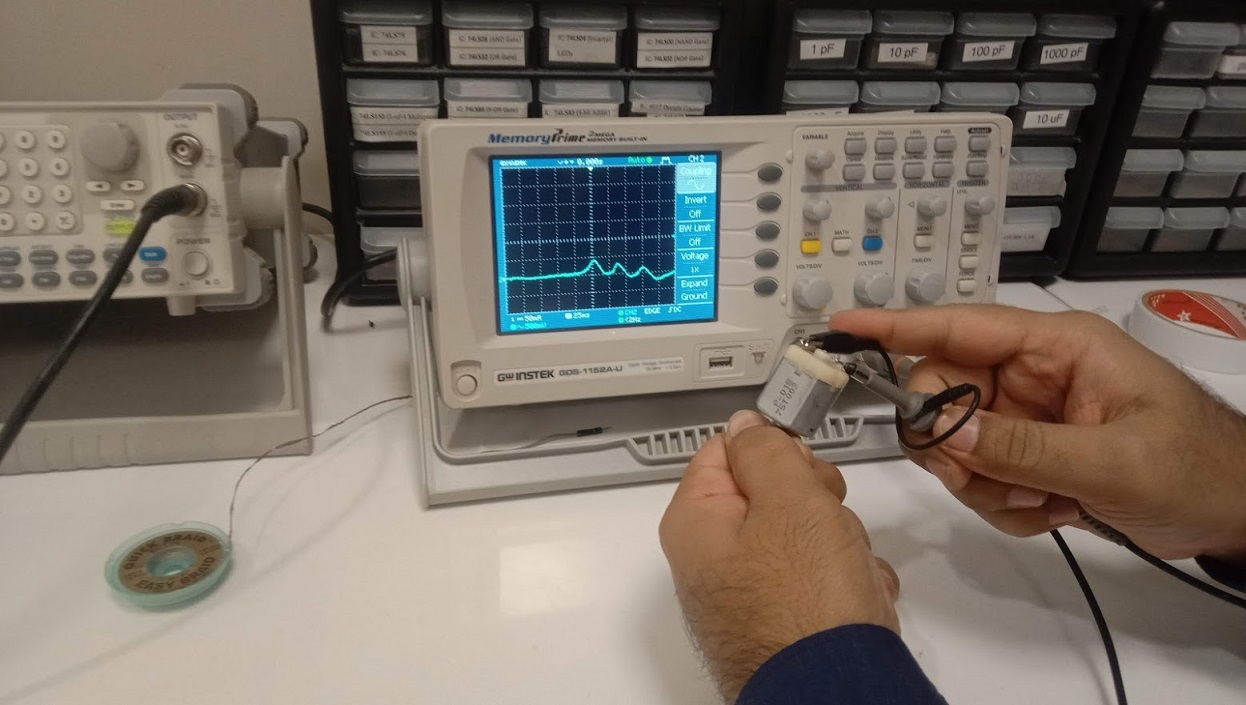
Measuring Analog Signals
For measuring the analog signals, We connected both the terminals of the motos with the probes of the DSO and then we rotated the motor shaft manually.
Individual Assignment
Measure something: add a sensor to a microcontroller board that you have designed and read it
sensor
In the broadest definition, a sensor is a device, module, or subsystem whose purpose is to detect events or changes in its environment and send the information to other electronics, frequently a computer processor. A sensor is always used with other electronics, whether as simple as a light or as complex as a computer. Learn more from here. We have different type sensors are available in the market with high quality sensitivity level. But sensors are comes mostly in two type ANALOG sensor and DIGITAL sensor. The Analog sensors can serve a percisional reading because it can give us analog output. So a small fluctuations in the sensitiviy can be read by using analog sensors. But the digital sensor's sensitivity is great, but we could get the digital reading of the sensor (0 & 1) technically HIGH and LOW values. So in some cases digital sensors are better to use. But if you need precisional reading its better to use analog sensors. I will expain more about in the group assignment section.
passive infrared sensor (PIR sensor)
Iam goint to use a PIR sensor also in this week. PIR sensors allow you to sense motion, almost always used to detect whether a human has moved in or out of the sensors range. They are small, inexpensive, low-power, easy to use and don't wear out. For that reason they are commonly found in appliances and gadgets used in homes or businesses. They are often referred to as PIR, "Passive Infrared", "Pyroelectric", or "IR motion" sensors
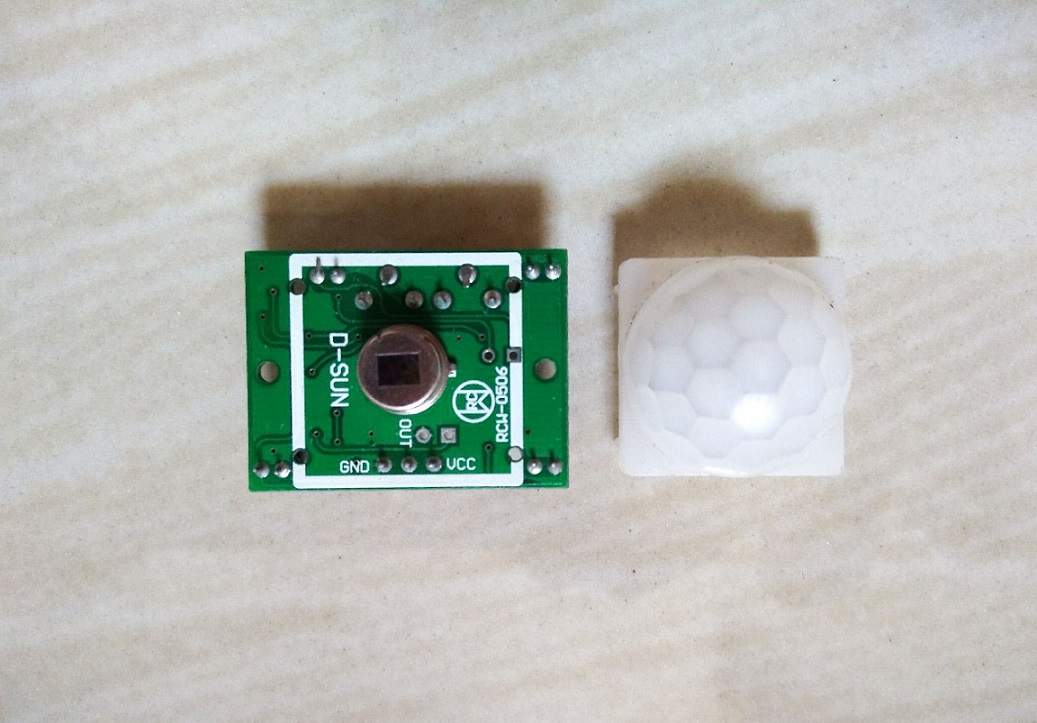
PIRs are basically made of a pyroelectric sensor (which you can see below as the round metal can with a rectangular crystal in the center), which can detect levels of infrared radiation. Everything emits some low level radiation, and the hotter something is, the more radiation is emitted. The sensor in a motion detector is actually split in two halves. The reason for that is that we are looking to detect motion (change) not average IR levels. The two halves are wired up so that they cancel each other out. If one half sees more or less IR radiation than the other, the output will swing high or low.

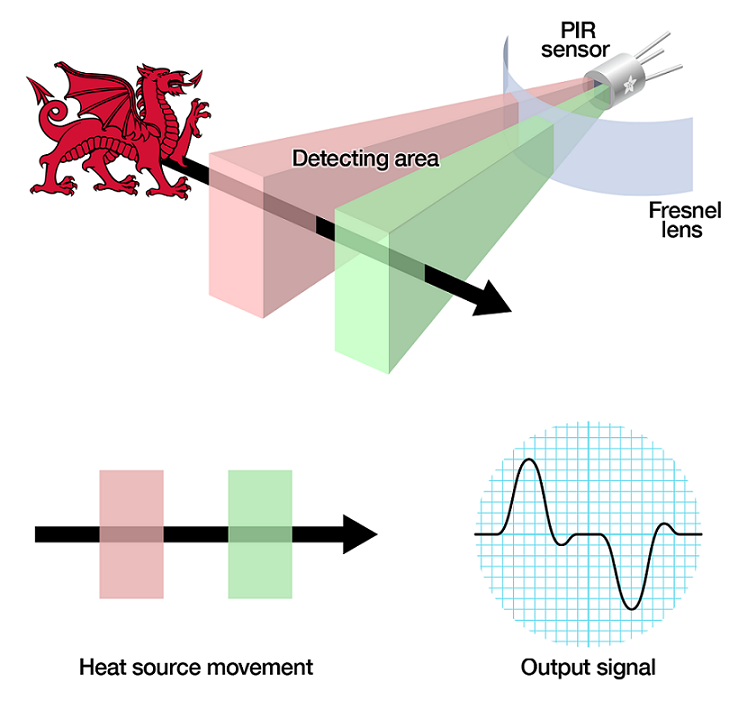
PIR sensors are more complicated than many of the other sensors explained in these tutorials (like photocells, FSRs and tilt switches) because there are multiple variables that affect the sensors input and output. To begin explaining how a basic sensor works, we'll use this rather nice diagram The PIR sensor itself has two slots in it, each slot is made of a special material that is sensitive to IR. The lens used here is not really doing much and so we see that the two slots can 'see' out past some distance (basically the sensitivity of the sensor). When the sensor is idle, both slots detect the same amount of IR, the ambient amount radiated from the room or walls or outdoors. When a warm body like a human or animal passes by, it first intercepts one half of the PIR sensor, which causes a positive differential change between the two halves. When the warm body leaves the sensing area, the reverse happens, whereby the sensor generates a negative differential change. These change pulses are what is detected.
Testing PIR with ardiuno uno
A PIR sensor is one that senses movement in a limited range, usually around 7 feet for cheaper sensors. The sensor "senses movement" by detecting patches of infrared radiation in front of it. Everything emits some level of infrared radiation, and the more an object emits, the more the sensor can "track" it. You rsnesor module should have two small potentiometers on it. Those potentiometers adjust the sensitivity of the sensor and the delay time between mappings of the environment. Now that you have a basic knowledge of these kinds of sensor, you need to know if yours functions, so let's build the test circuit.
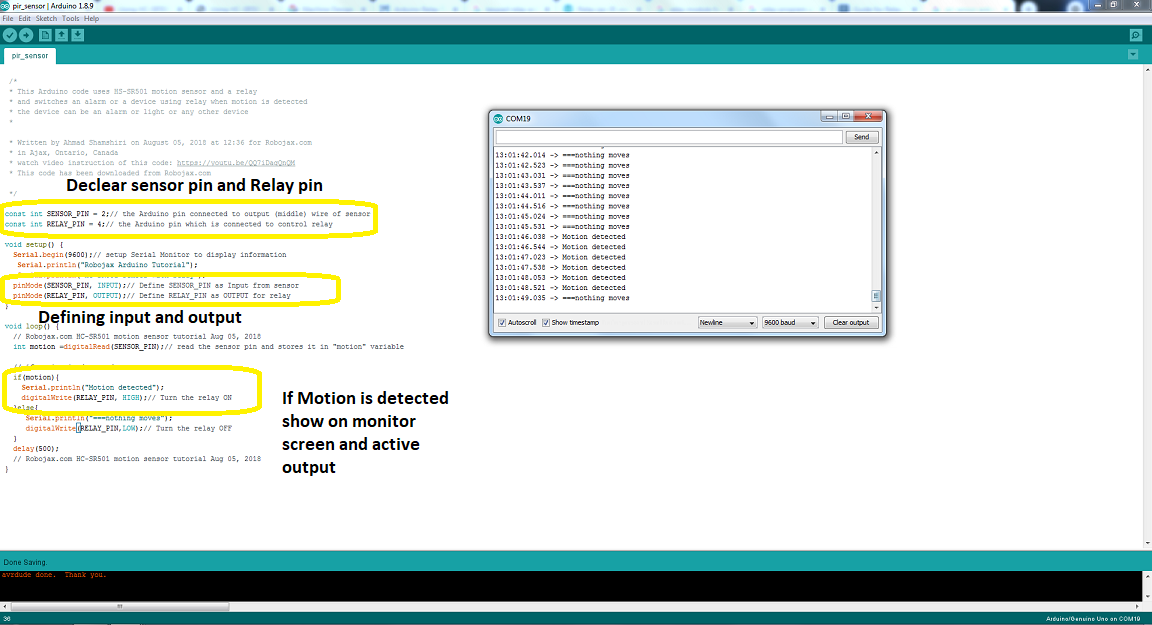
I used led to see the output result.
The electronics
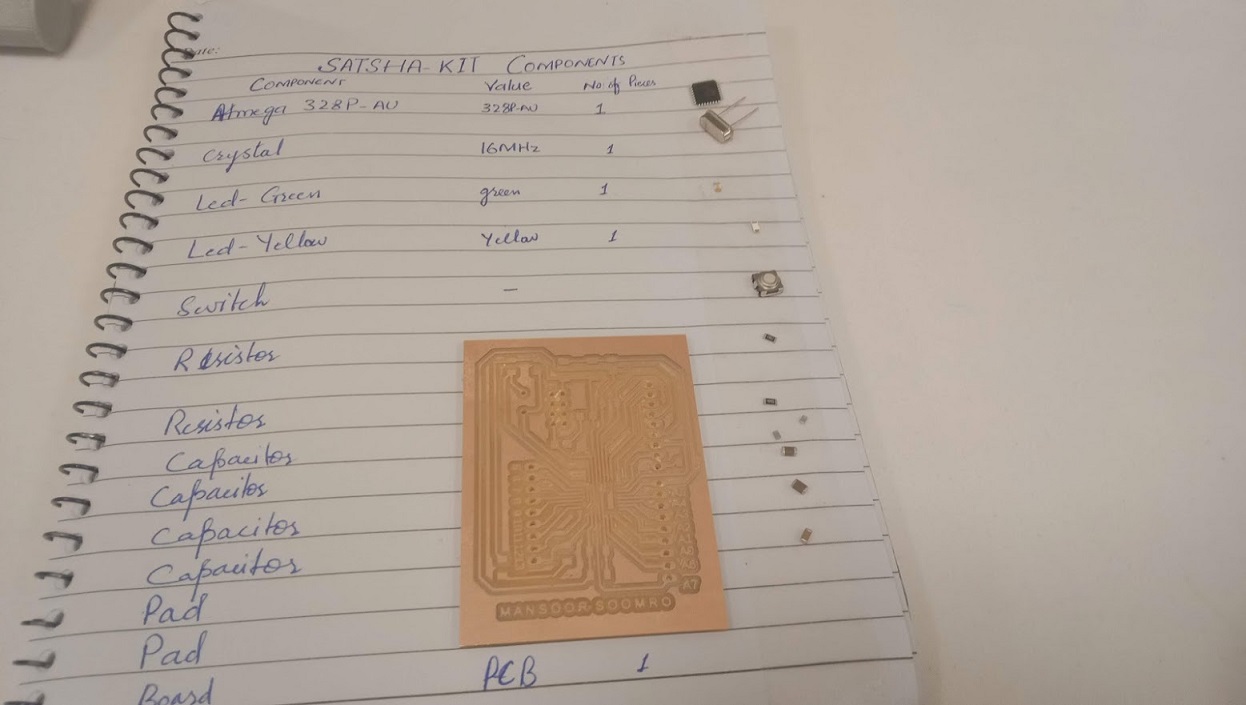
The board I started with is SatschaKit. This board seemed suited for the project.
After that, I kept soldering the board. I discovered that I was missing a few components that were required for the board to function properly. I was fortunate enough to obtain that from IBA Sukkur. There was one 16 MHz crystal and two 27 pF capacitors in the circuit.
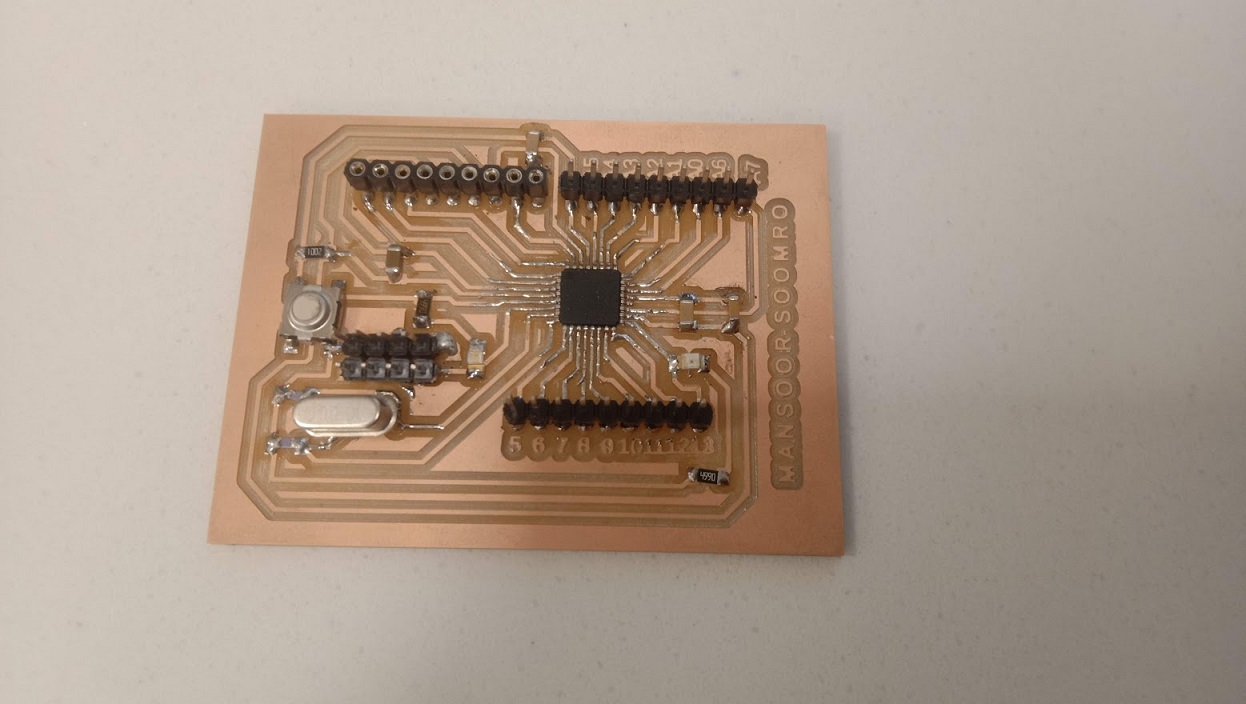
After soldering the board, I went on checking if the board worked correctly, and to program it - using an Arduino board.
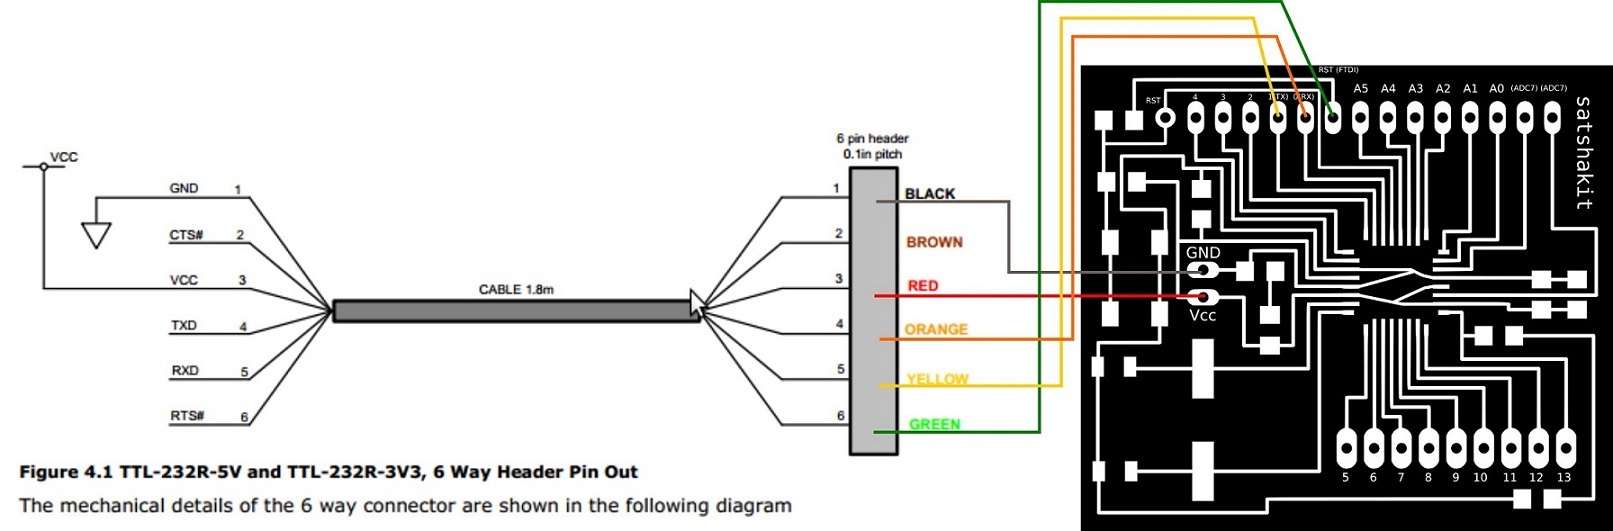
See the schematics below for how to hook up with the FTDI cable.
Programming
Since my microcontroller is a "Arduino," I used the Arduino app to set it up. To programme the IR sensor, you'll need the libraries that is the requirements.

I decleared the IR sensor to the pins 5, and the LED was decleared to pin 6.
"Click here"to download all files of this week