
Assignment:
- Task First is Group project: Test the design rules for your printer
- Task second is Design and 3D print an object (small, few cm) that is Additive.
- Third Task Is 3D scan an object.
Introduction
3D Modeling is used in a variety of applications to make representations of physical objects on the computer. 3D modeling is a subset of Computer Aided Design (CAD), in which you use a computer to assist in the design process for any type of design work. It is used in a variety of applications, mostly when it comes to designing parts on the computer to assist in the making or visualization of those parts. The computer model is used to communicate dimensions, material types, etc. to anyone viewing the design, and can be used to make control paths for Computer Numerical Controlled (CNC) machines. All 3D modeling programs start out with the basics of working in 3D dimensions: simple shapes and geometries. Most CAD programs start with basic shapes, either sketches of 2D shapes that can be "extruded" into three dimensions, or simple 3D shapes like blocks, cylinders, or spheres whose dimensions can be adjusted. Above is a simple box made in two different programs, Tinkercad, a simple, introductory 3D modeling program, and Autodesk Inventor, a professional 3D CAD program used for product design and simulation.
Testing the design rules for the Printing the 3D Objects:
First of all ,We have downloaded a standard test 3D file from the fab acadmey 2020 Cource and we have printed files by using Ultimaker 3D Printer.
3-D design Test file is downloaded from here HERE
This file we have import in Cura to set the Parameters to print it.
File Setting in Cura for the Printing
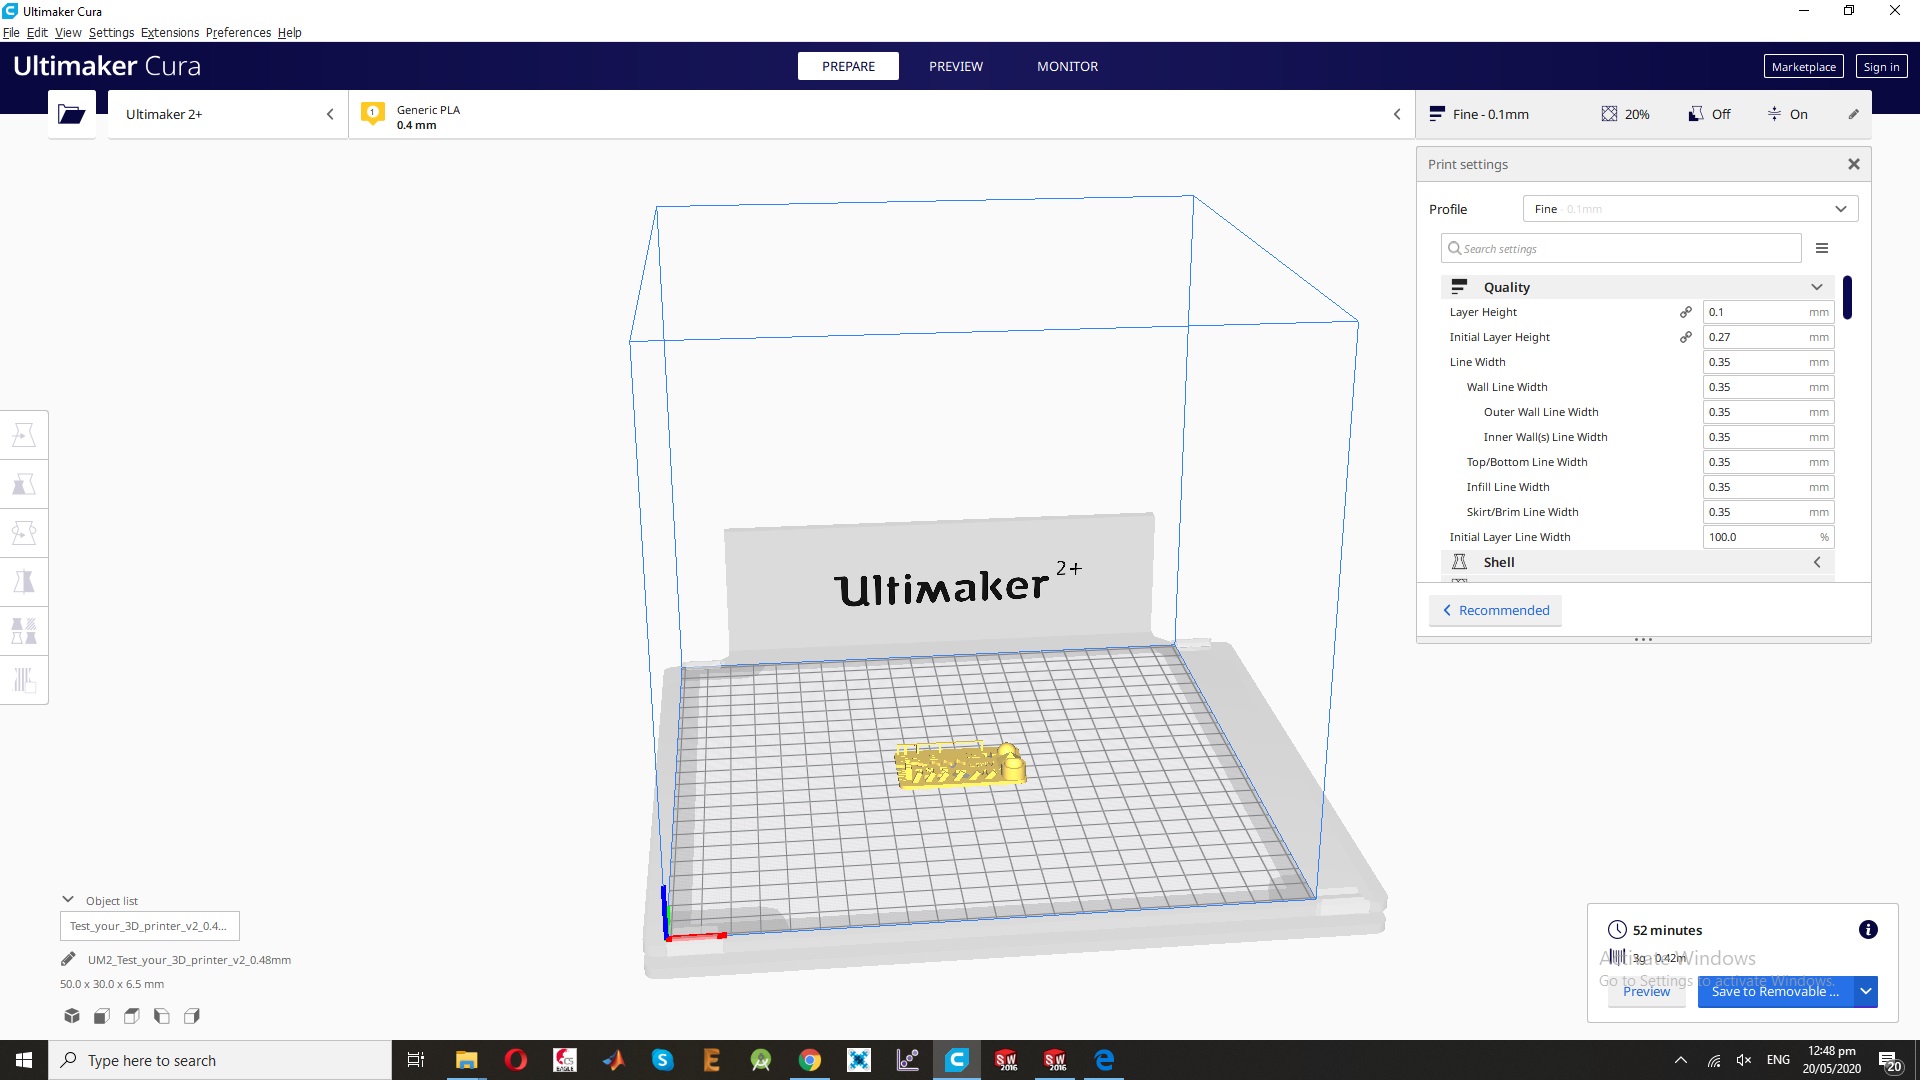
For the Printing We Need these Parameters:
- for Th help to print and opertate the ultimaker Machine so I uesd User Manual for the Printing which is attached : HERE
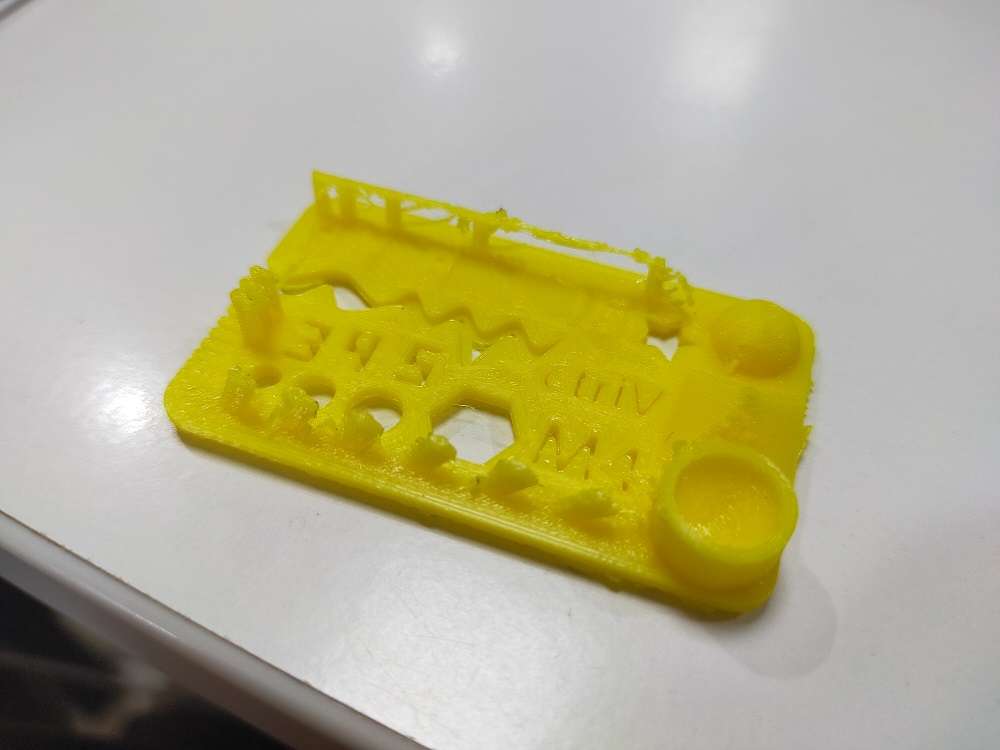
- Size: the object is 4 x 50 x 50 mm (baseplate) measure with a caliper
- Fine details: pyramid, cone, all numbers — check if all things look nice and smooth
- Minimum distance between walls: 0.1/0.2/0.3/0.4/0.5 mm depending on your nozzle size and slicer settings you will get different results
- Overhang: 25°/30°/35°, depending on printed material/cooling, these will not be as seen on the rendering provided
- Flatness: all flat areas these should be flat with no gaps
Printing file and Test Printer :
Assignment after Printing :
Learning from this week
If anything has slope of degree (less than 70 degree) then it does not need support to print.
Following settings are available in Cura.
layer height: The layer height is one of the most frequently changed settings. It is the thickness of one printed layer in millimeters. With a thinner layer height you can increase the quality of the print, leading to a smoother surface and more detail visible in the Z-direction (height) of the model Wall thickness and wall line count: This setting adjusts the thickness of walls of the model. Ultimaker Cura rounds the wall thickness to a multiplication of the line width. In general, a wall thickness of two or three times the line width is sufficient.Top/bottom thickness With the top/bottom thickness you can set the thickness of the solidly printed top and bottom layers of the print. A higher value ensures all gaps on the top and bottom layers are closed completely. However, this can also increase the print time and amount of filament used.
Infill density The infill density defines the amount of plastic used on the inside of the print. A higher infill density means that there is more plastic on the inside of your print, leading to a stronger object. An infill density around 20% is used for models with a visual purpose, higher densities can be used for end-use parts.
The print speed: It defines the speed (in mm/s) at which the print head moves while printing. Based on this setting, Ultimaker Cura calculates the extrusion flow.
Build plate Adhesion type: Different options that help to improve both priming your extrusion and adhesion to the build plate. Brim adds a single layer flat area around the base of your model to prevent wraping. Raft adds a thick grid with a roof below the model. Skirt is a line printed around the model, but not connected to the model.
Task to 3D Design and Printing ,3D Objects:
In this Assignments i have Planed to Design the Olympiad Ring and we are Well Known from the 3D object Designing and printing is really attractive and Intertesting. For this I have decided design a non-subtractive object. The first reason to choice this software is that we can design almost any object in it and can make its animation too. I have tried Solid Work Software.
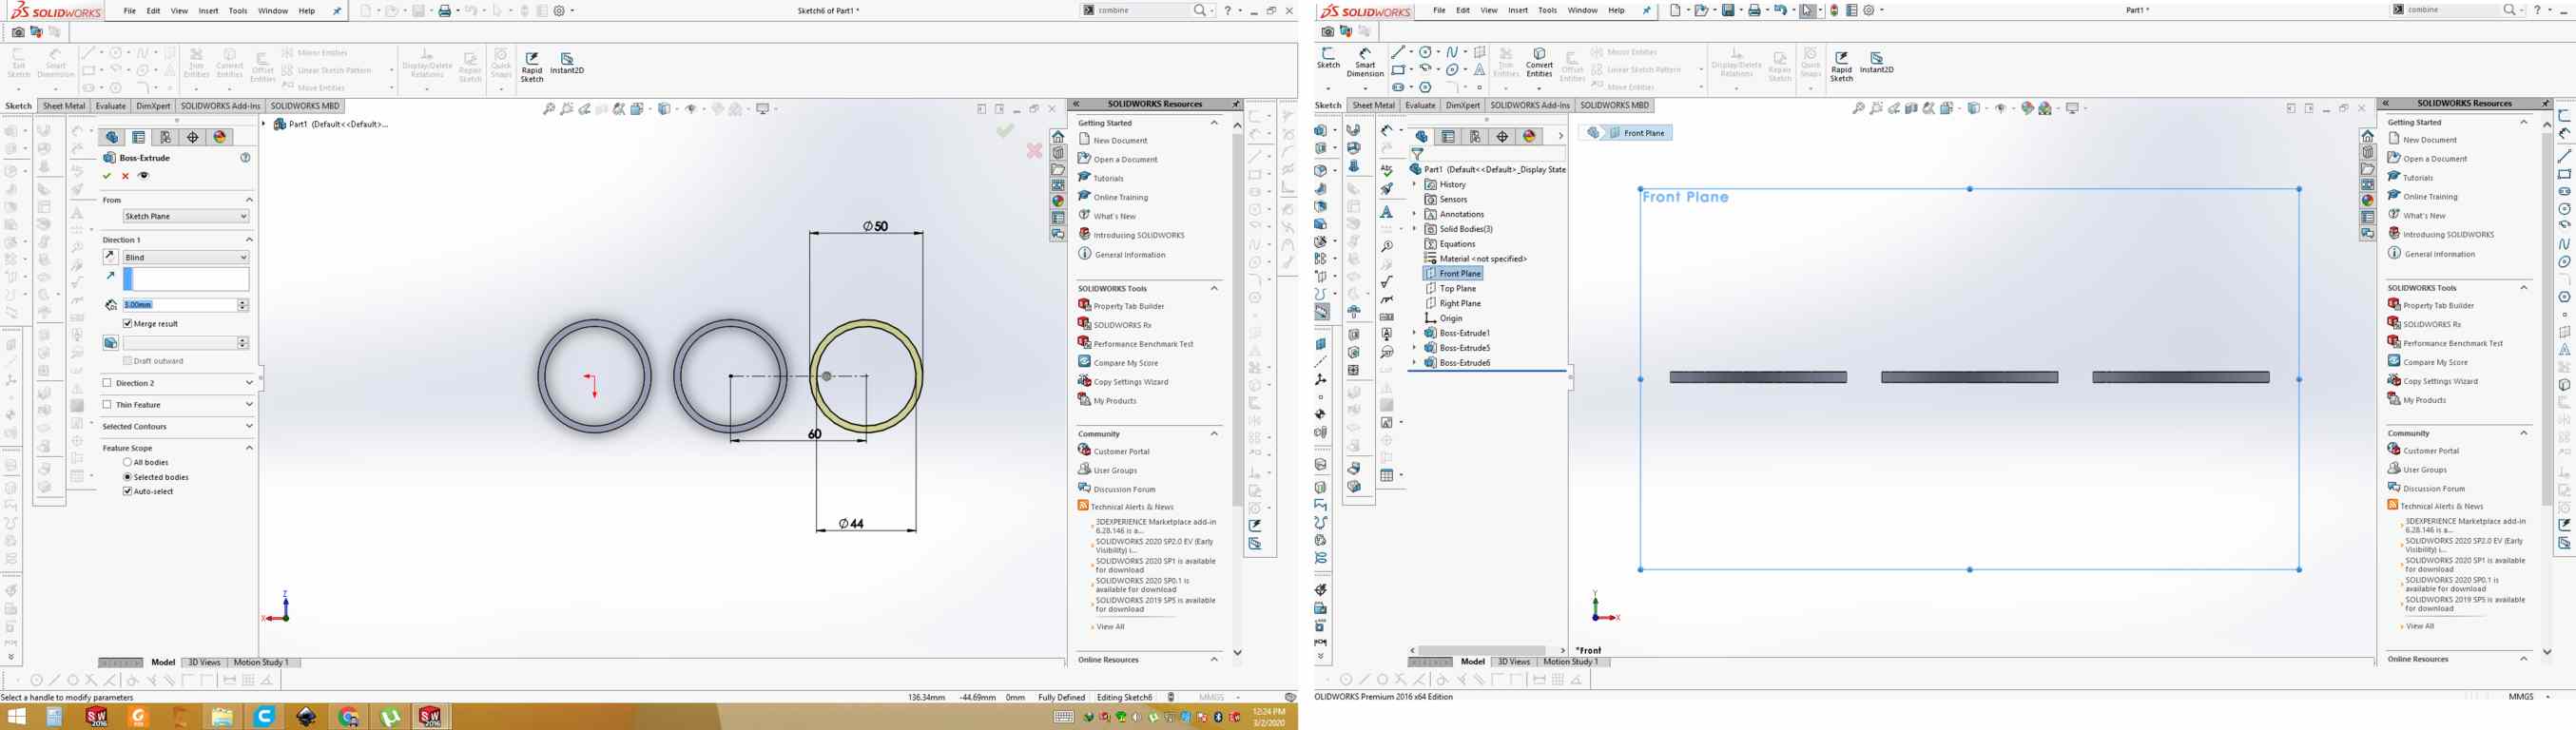
First , I want Design in Solid Work. I have open the Solid Work , First set the Plane And then Draw the Circle With 50mm outer and Inner 44mm Redius , and the Extude the Circle. after that again I have set the Plane at Draw the Agian second Circle.
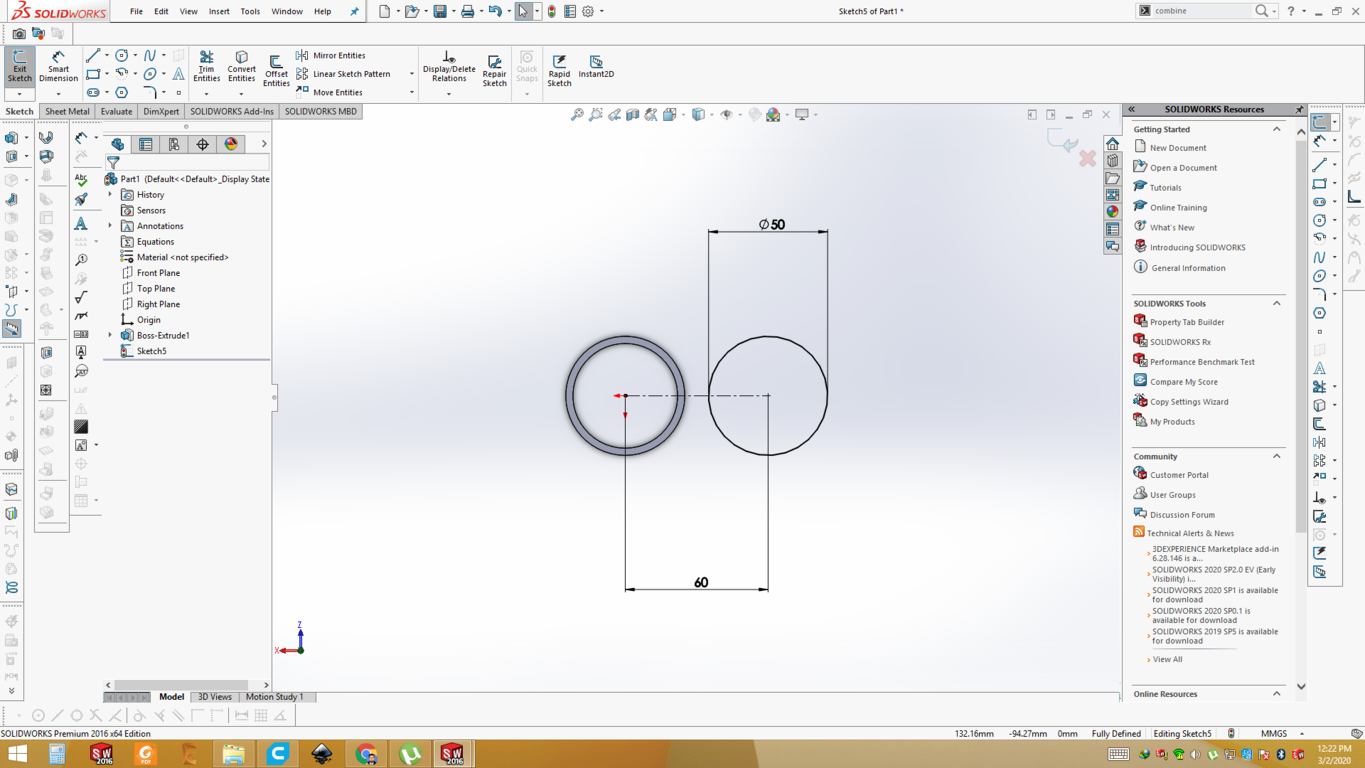
So, the Next I have Add one More Ring Parallel with other with Same size .Here Attached in this Image.
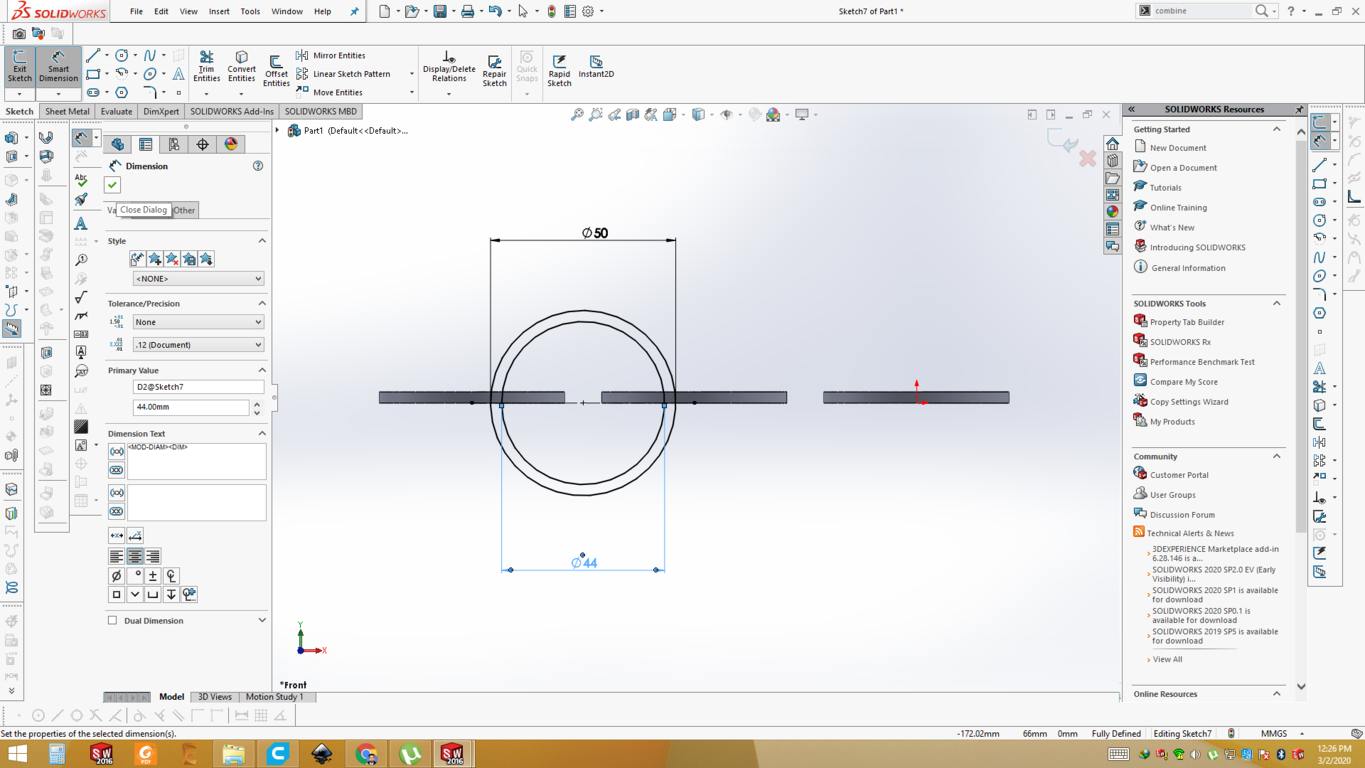
Now I am goig to add Fourth ring , but this ring is combine merage with First and Second Ring.
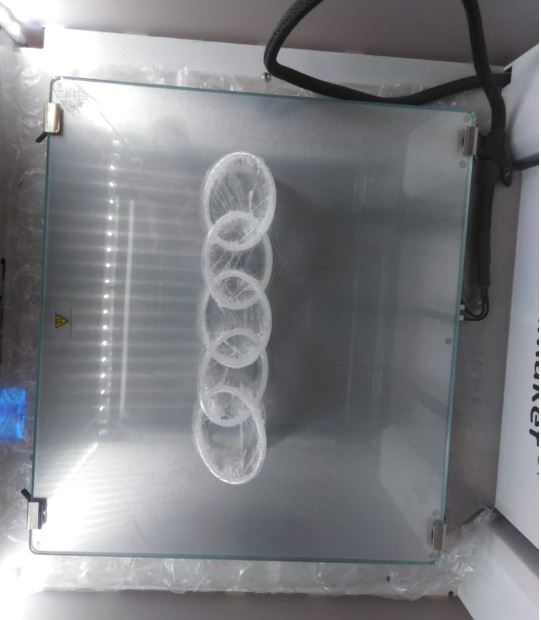
This the Final 3D Olympiad Ring Look , Here Attached Iamge.
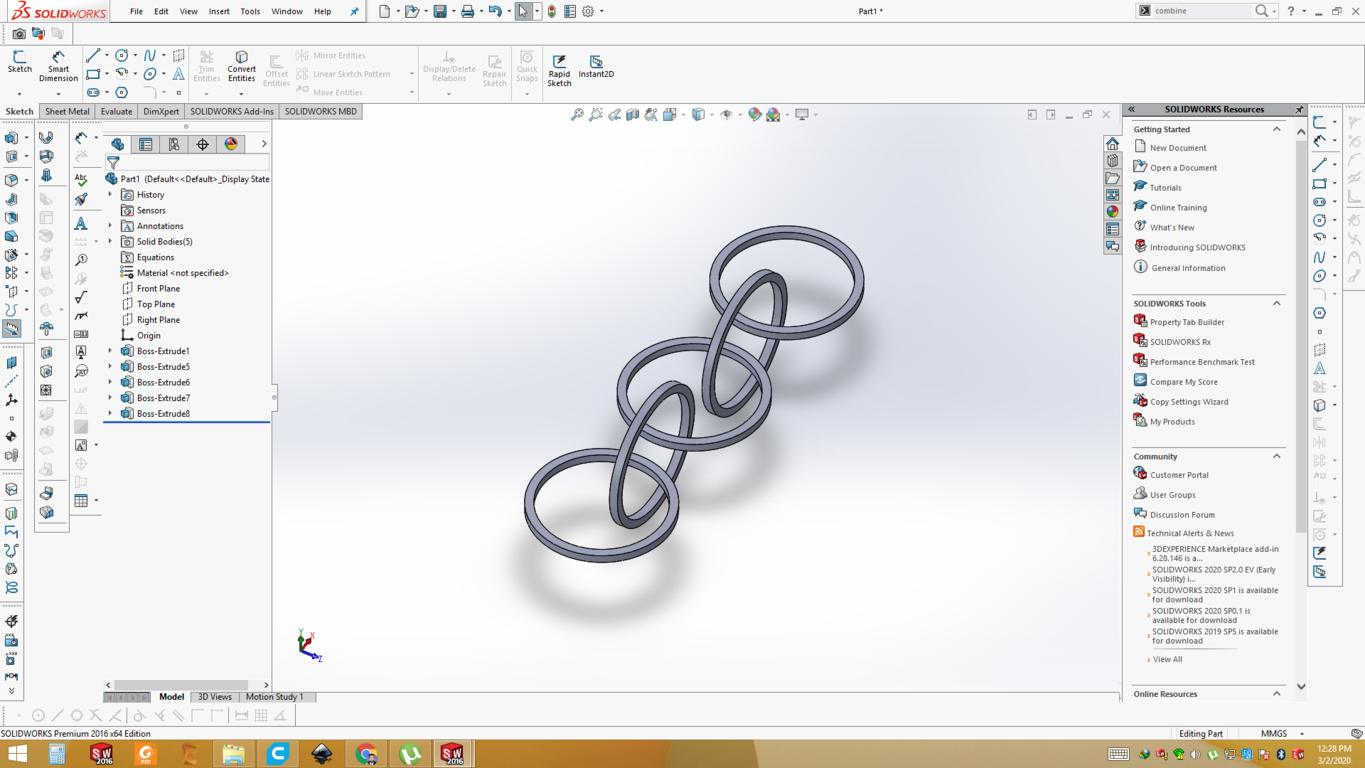
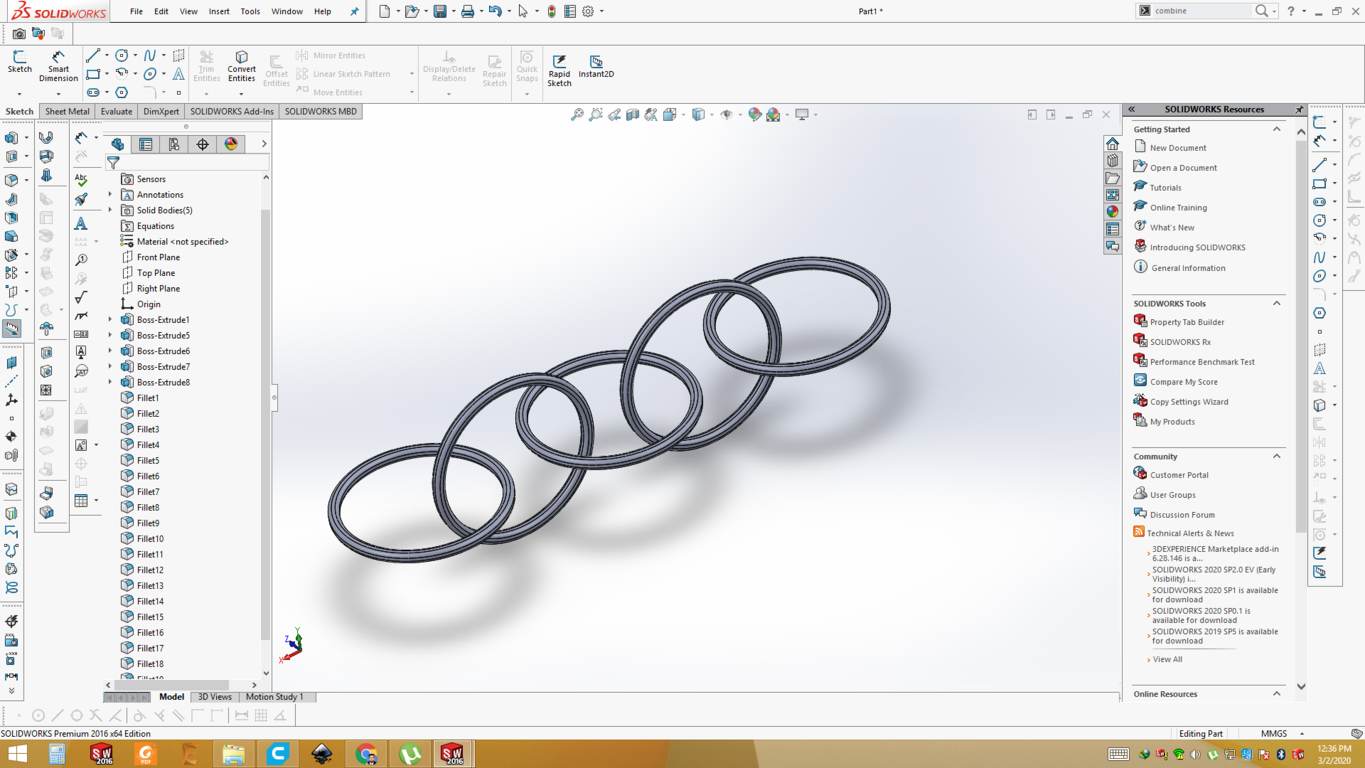
Its Look Fine with Sharp edges but I feel these Sharp edges may be cut the human Skins so I have set the Sharp edges for my Design.Now Its Look Very Well.
For the Printing the file we need to export the . stl file to Cura.So first we have to set the Cura Setting of the 3D Design File for the Printing.
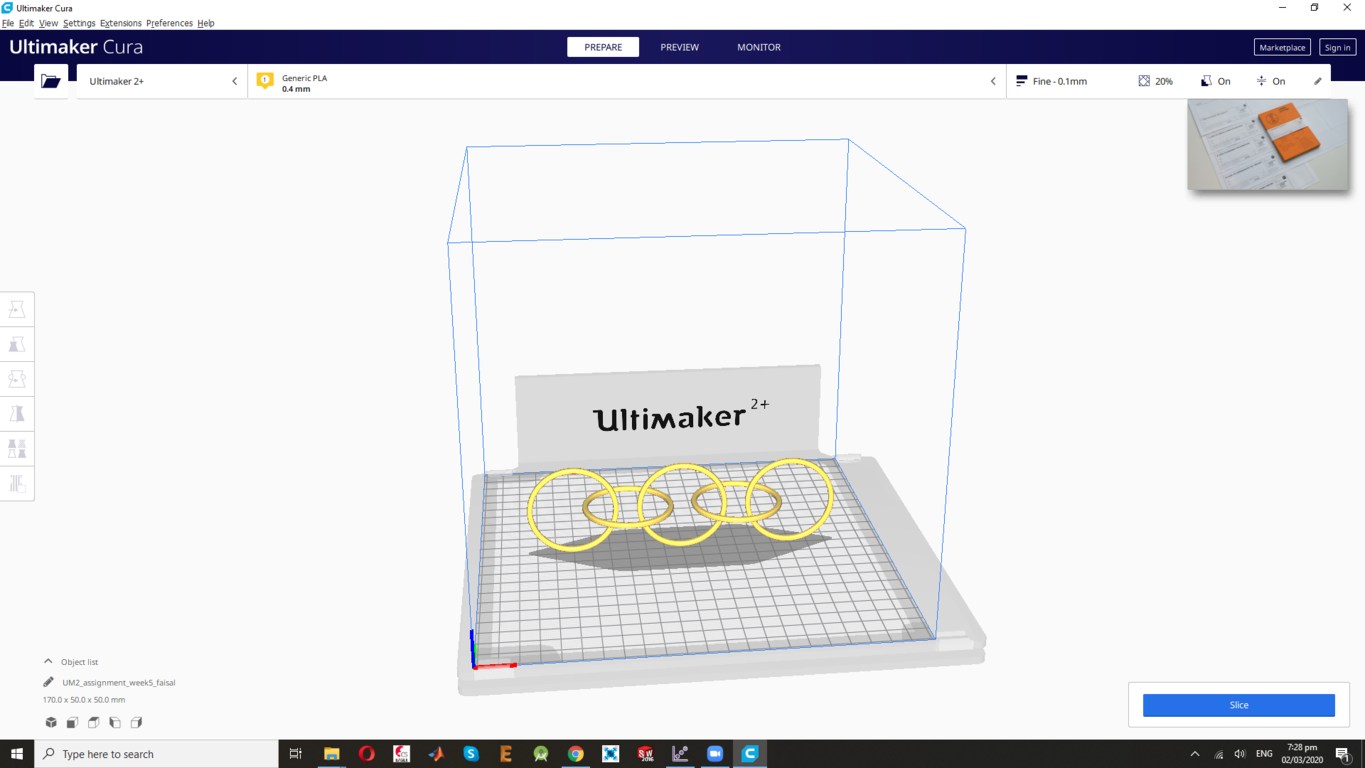
3D Design after the Printing
In this First 3D Printing design attempt not Successfully fine due to its orientation ,this Design is not complete for the Final Phase, SO after this result , I agian Shift the orientation and agian print the file.
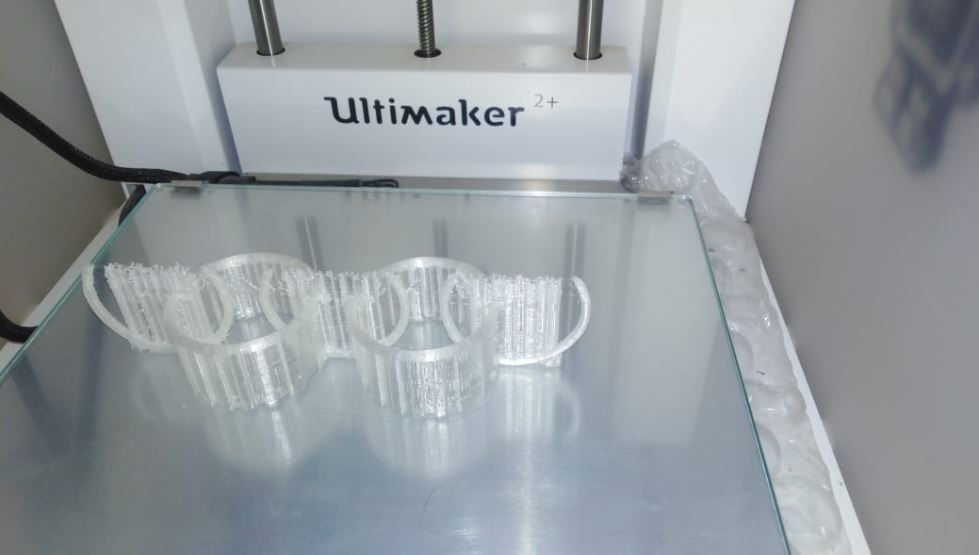
First Attempt :
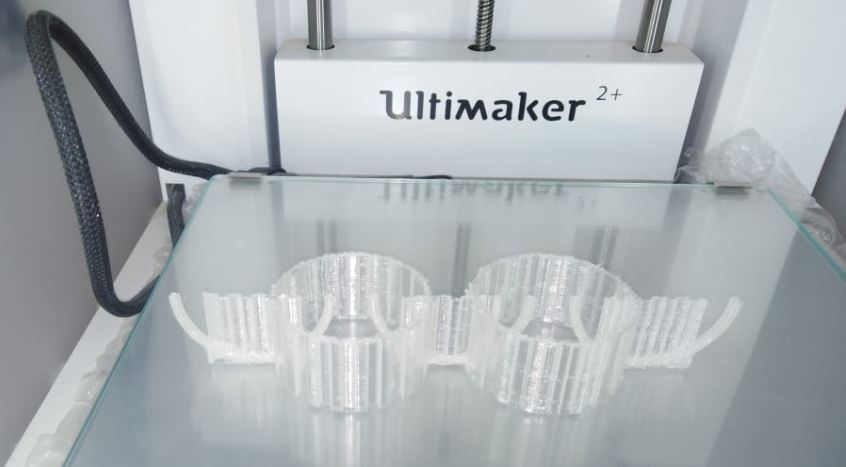
Second Attempt:
Third attempt:
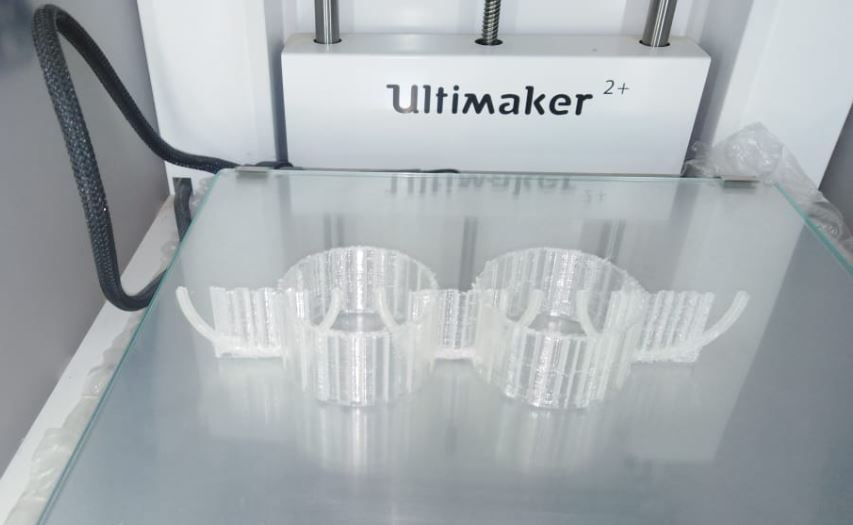
Finally, I have changed the Orientation as well as some other changes than after the forth attempt my design is ready, because of retraction there was some PLA at unwanted places of the model that is why I did not so much clean my Design but now it look more clear and Fine.
3D scanning:
3D scanning technology has always been out of reach to the consumer because of expense, complexity, and time. These scanning technologies often use expensive laser range sensors and scanning tables that require the user to be motionless for upwards of four minutes. Some pieces of software use photos from all around the subject to create the model. They use computer vision to detect the edges of objects and photo stitching techniques to make the 3d model. I have not had much success with photogrammetry as it often produced models that were not 3d printable. This 3d scanning technique uses an off-the-shelf Xbox Kinect and free software to create 3d models easily.
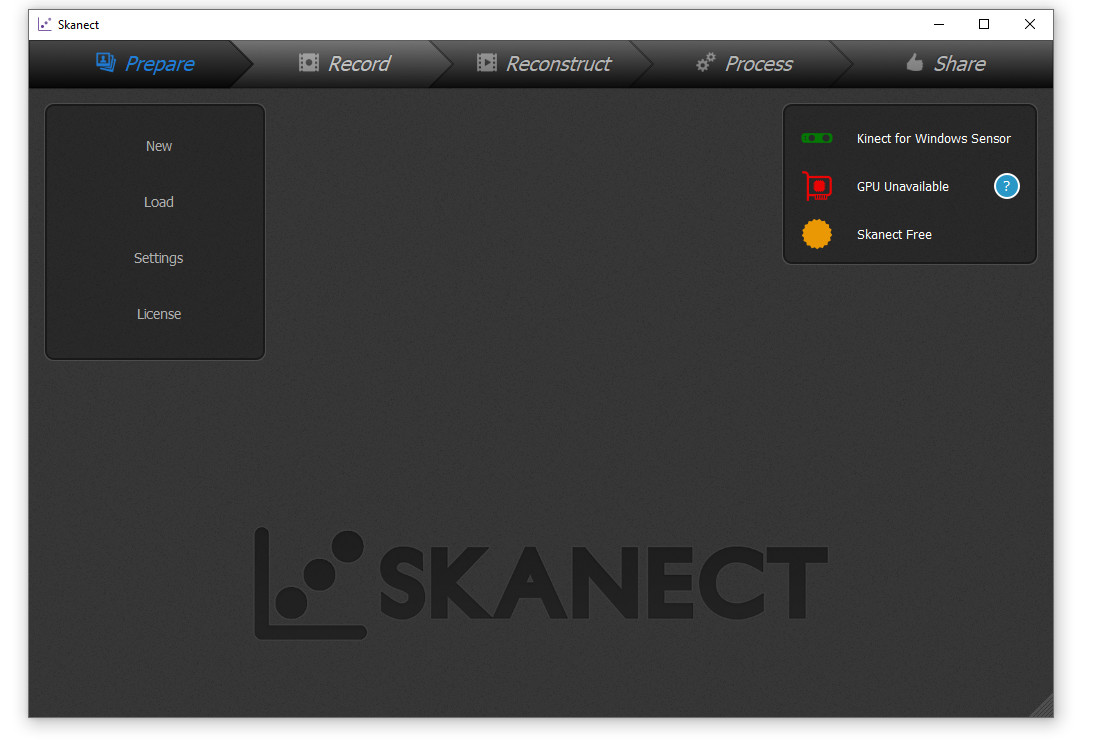
- For this task First I have planed to scan my self , so i have complete this task , i haved used Kinect Scaner and install the Skanect Software and its Supporting tools for the Scaning.
- Connect the 3D scanner with Pc and connect the Sensor Connectivity Here Attached the Images :
Now I want Scan my Self :
Observation:
I have observed during this scanning is that it is not a professional way to scan an object. But somehow it gives the concept of 3D scanning in very easy way.It very Interseting Task.
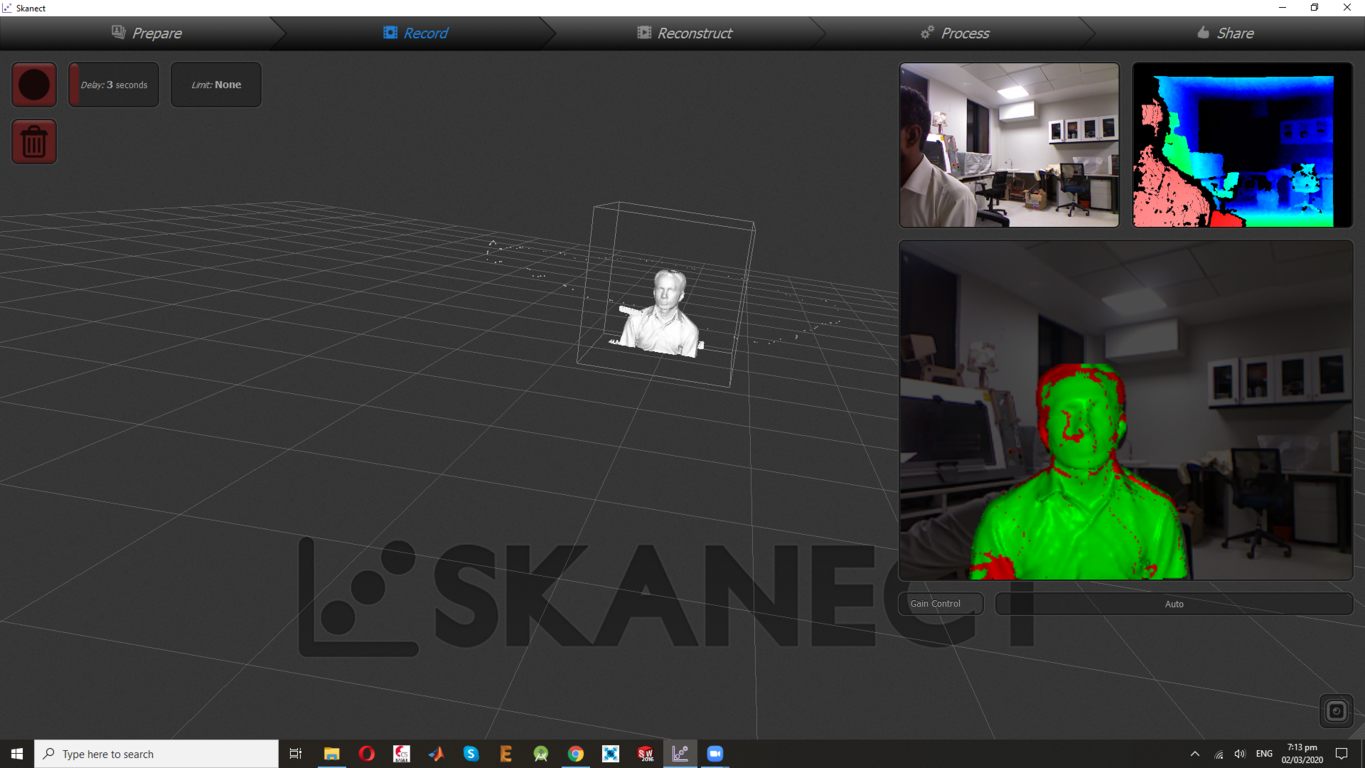
I my Self scanning using XBOX-360.
For this type of scanning I have found a really interesting object in lab That Is I am so I have paln to apply all the 3D scanning Rule on me. I decided to scan my self by using XBOX-360 because of its size. Here is the image of this My self
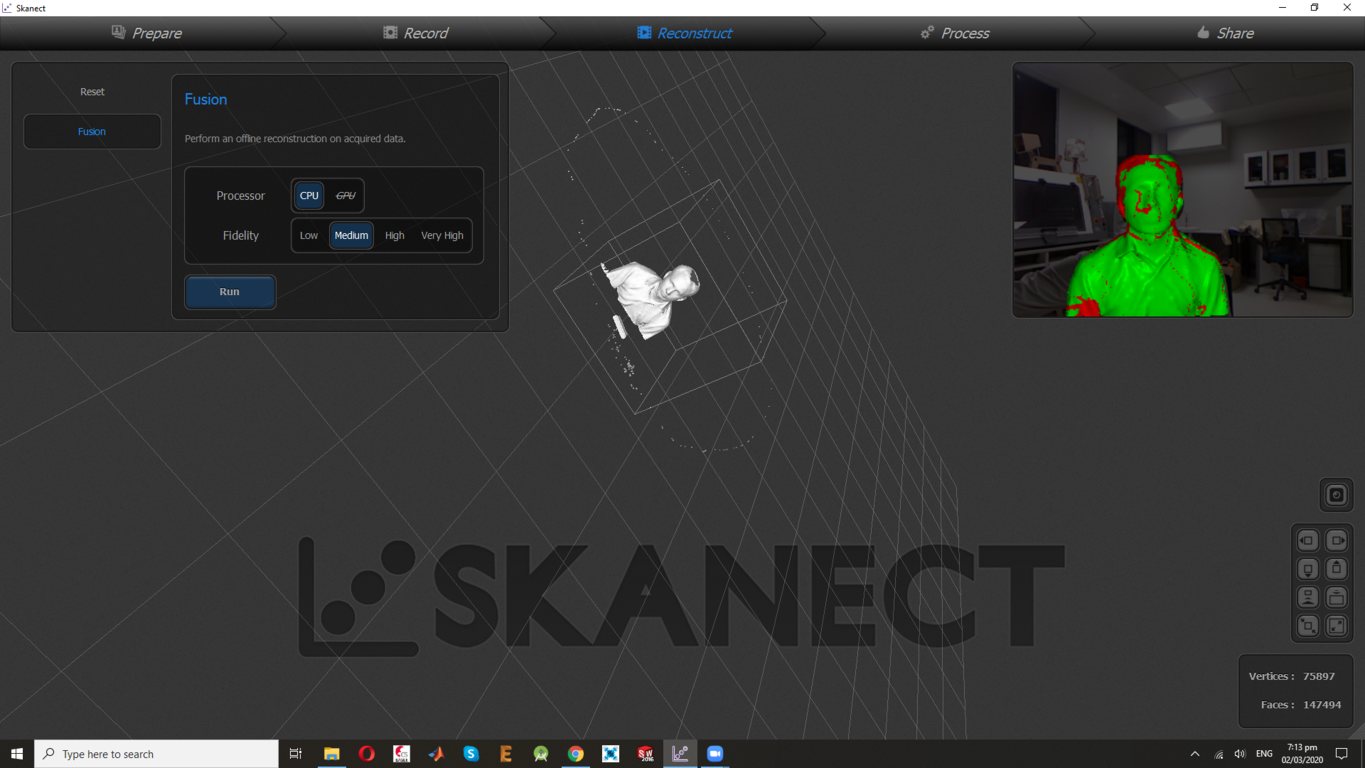
XBOX-360 used for scan my self. Following image shows the important scanning details and final scanning result.

The final scanning result is really good in term of detail, but unfortunately I have missed the hands of this cartoon for scanning due to small scanning area. I have reduced the area because of time taking by the Scanner. Overall Pneumatic scanning is really good option for 3D scanning of small object.
Here is the another snapshot of final scan from another angle.

3D scanning using Kinect is really an interesting part of this assignment, not only just interesting but fast also as compare to other methods.
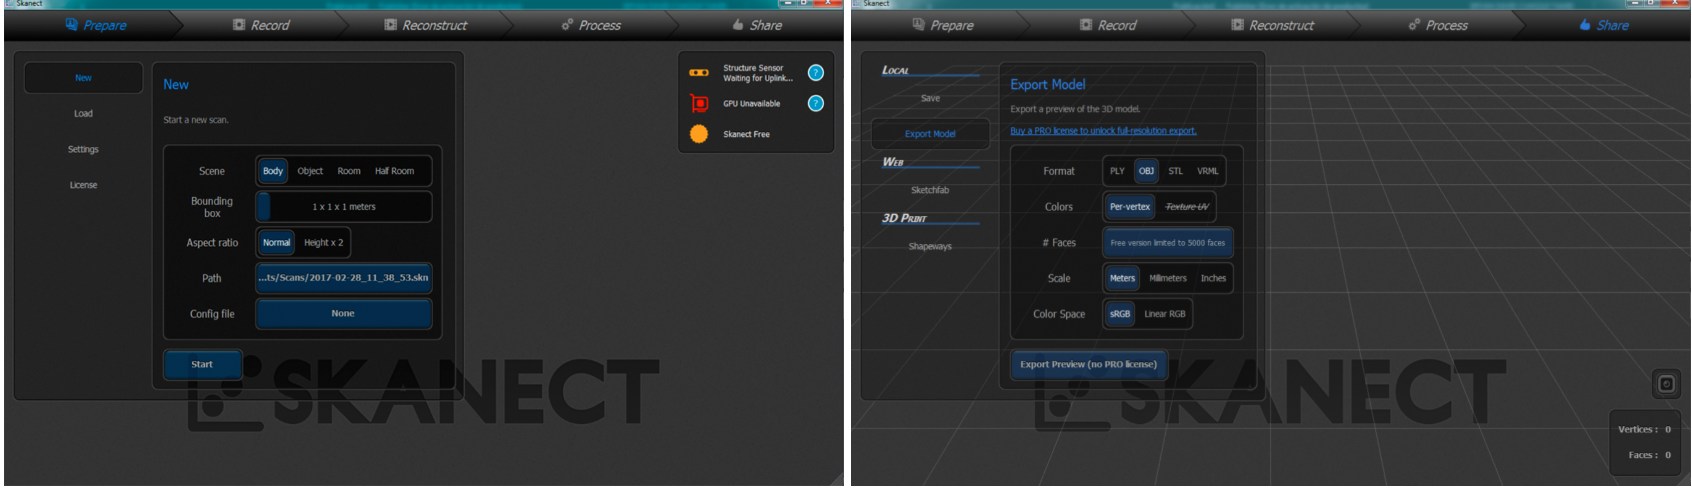
First I downloaded skanect 1.8 and installed it in my PC and took scanning with Kinect. After Scanning .stl file was generated.
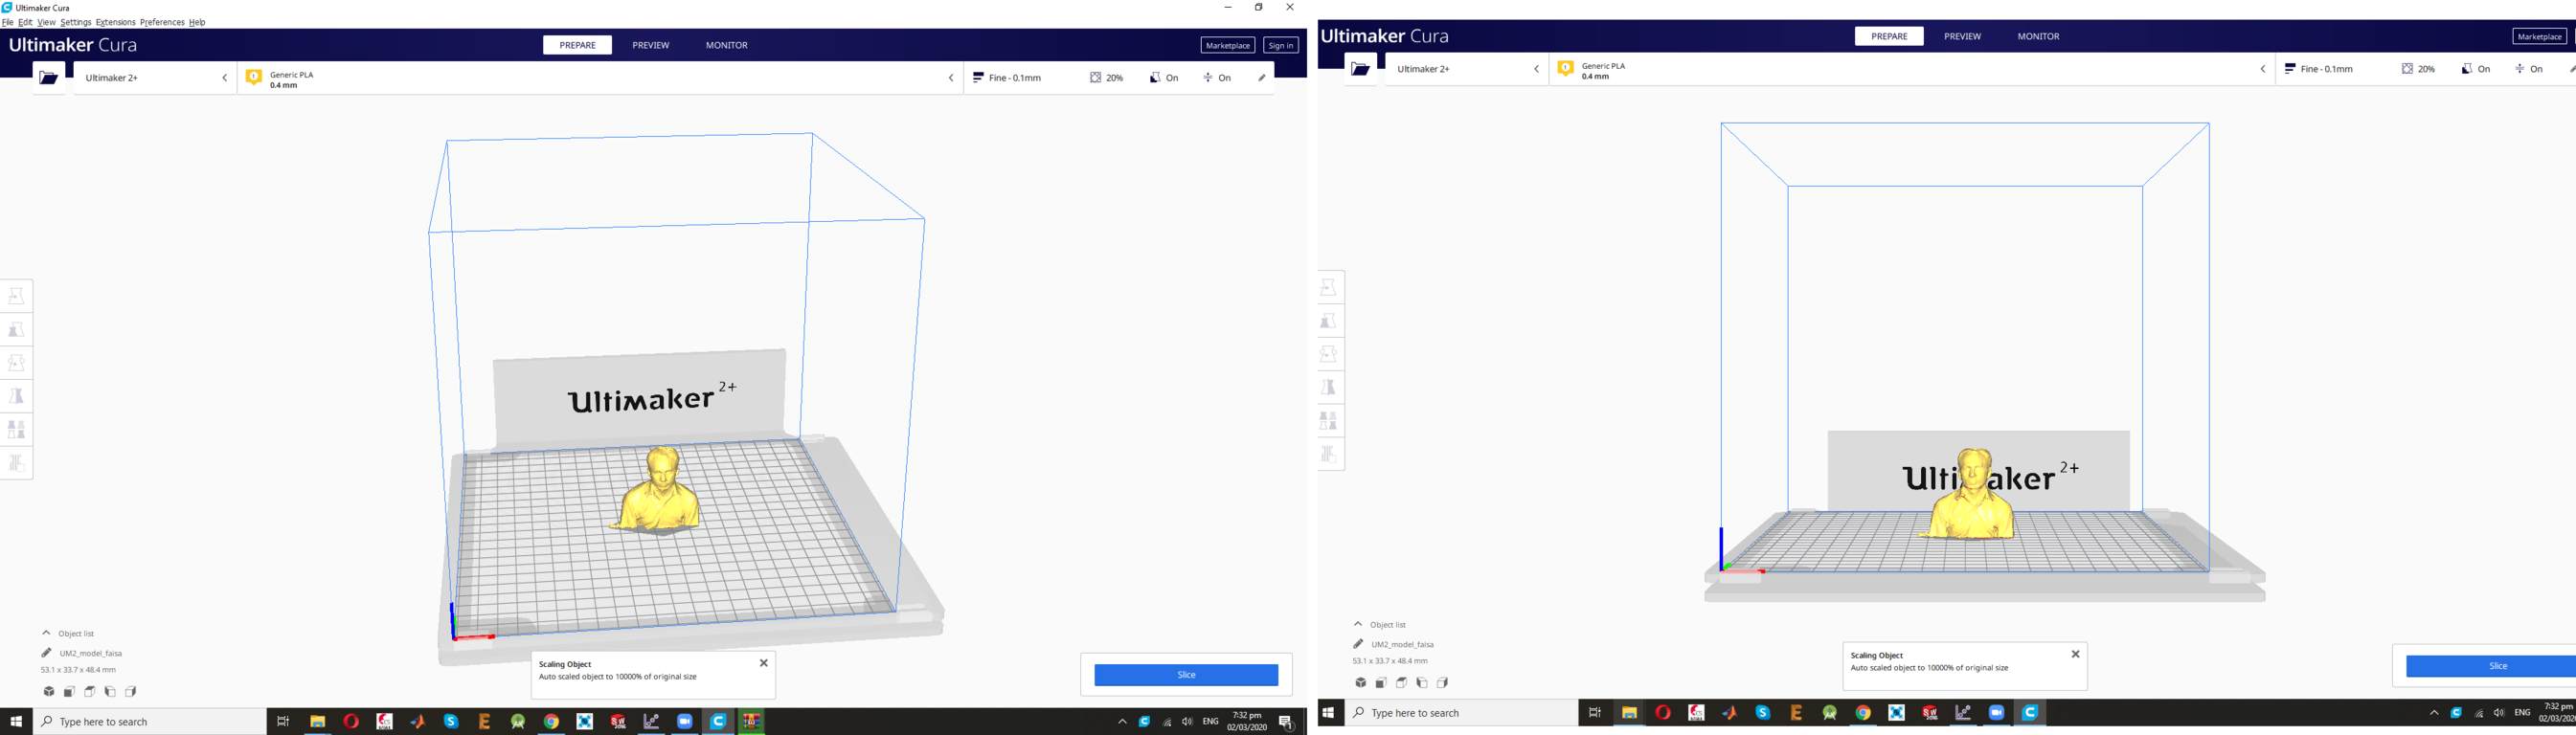
Now the final step is to export the model to Cura for printing,I have done the Cura printing setting but I Do not want to print my 3D Scaning design.
Observation:
This type of scanning is really great when we are scanning large objects. It also scan with really good detail and its fast as well. But we need to scan it carefully, if something goes wrong during scanning then we need to compensate it by using the Software setting.
Conculsion
This Week Was very interesting week, this we have first Study about the 3D object , CAD design and Printer, First we have Print the Assignments on 3D printer Ultimaker2+ , after this I ahve design the ring In CAD Software and Try to Print it after the third Attempt Finlay I have done the Job. In Last we have learned about the Scaning the 3D objects. you know every Body want to Scan himself so I done that Job and it was Very Enjoyable and Learning Week.
Download all files from here

This work is licensed under a Creative Commons Attribution-NonCommercial-ShareAlike 4.0 International License