
Assignment
- Write an application that interfaces with an input &/or output device that you made.
For this assignment so in this Week I am working on distance sensor HC-SR04, Leonardo and Processing ID , to measure the distance and serial send to Processing ID where I make a GUI that show the distance in cm.these are the instruction to complete the assignments, First of all ,I have download the Processing ID from HERE and Install my PC.
Distnace Sensor:
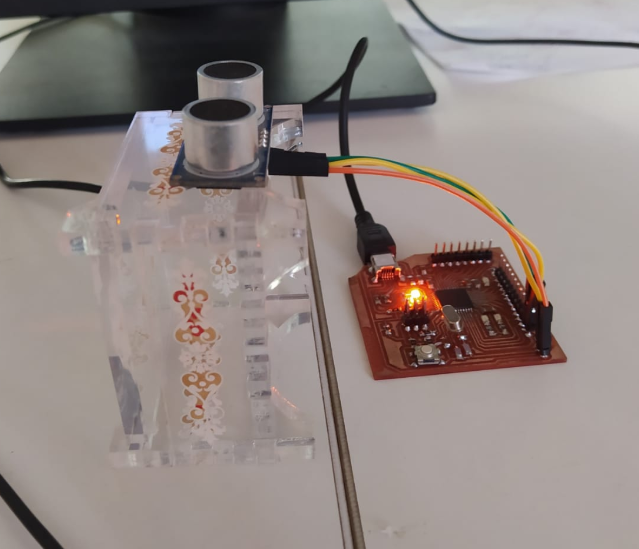
I have connect the distance sensor with my Leonardo Board,to measure the distance,Pin configuration of Sensor with Leonardo. The second step is to interface the sensor with Leonardo,Where distance sensor is working on the ultrasonic waves,Ultrasonic sensors work by emitting sound waves at a frequency too high for humans to hear. They then wait for the sound to be reflected back, calculating distance based on the time required. This is similar to how radar measures the time it takes a radio wave to return after hitting an object.
Pin configuration of Sensor.
Arduino Programing
I have connect the distance sensor with my Leonardo Board,to measure the distance,Pin configuration of Sensor with Leonardo.
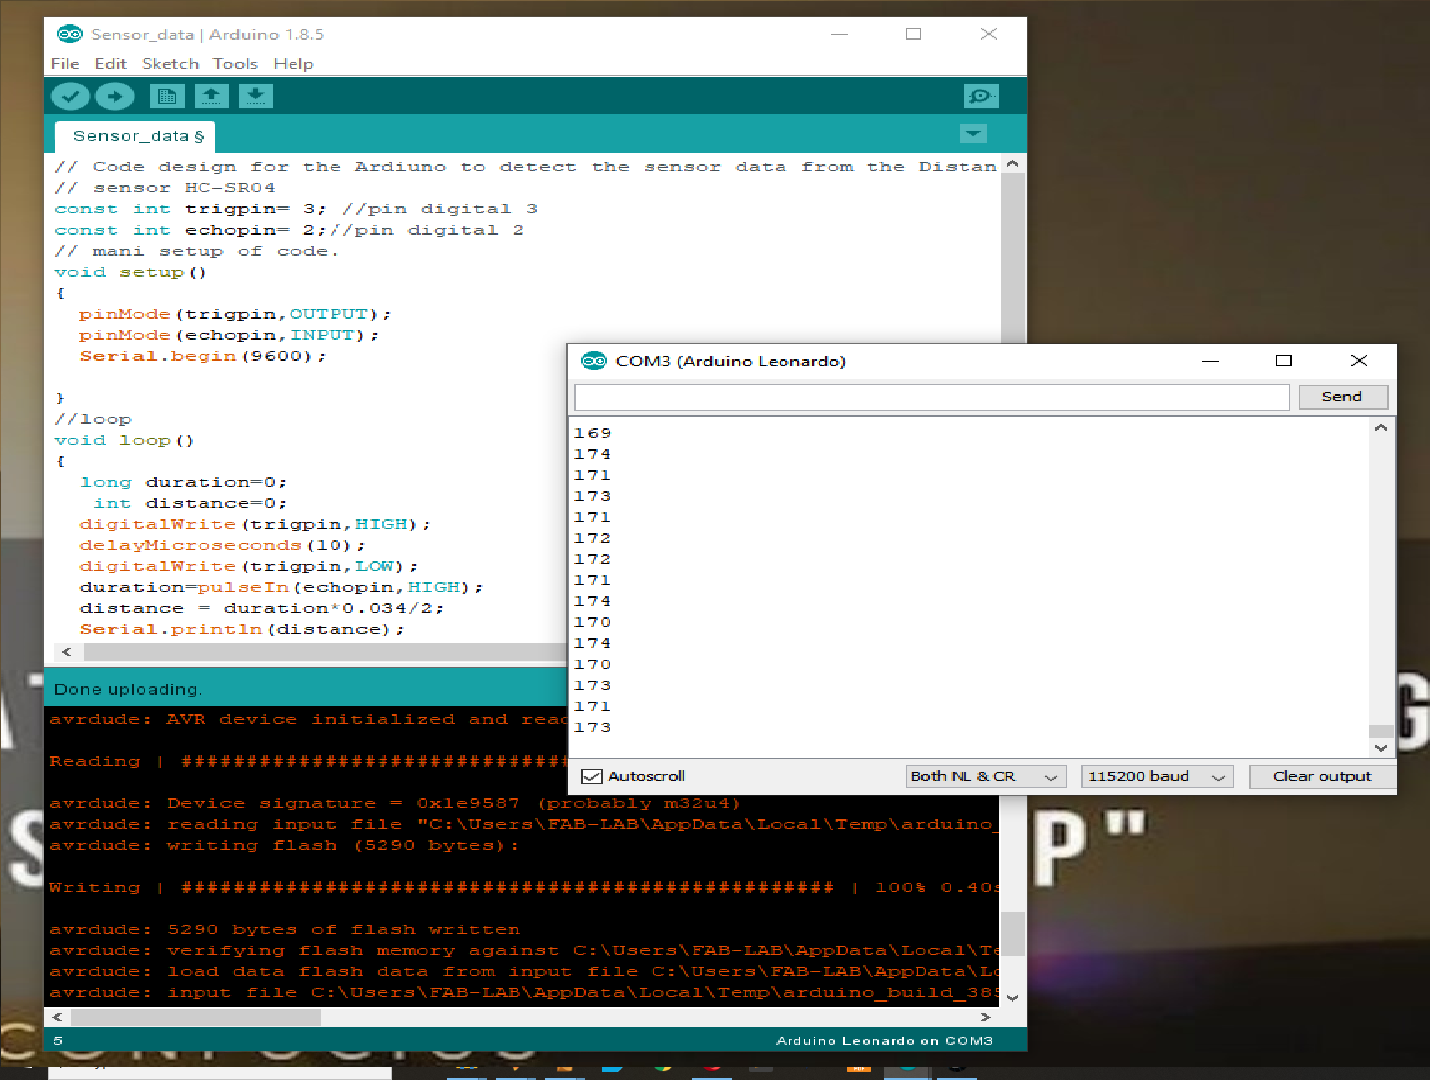
Now I have written the Code in Arduino ID in C Language , After that select the Board Leonardo.
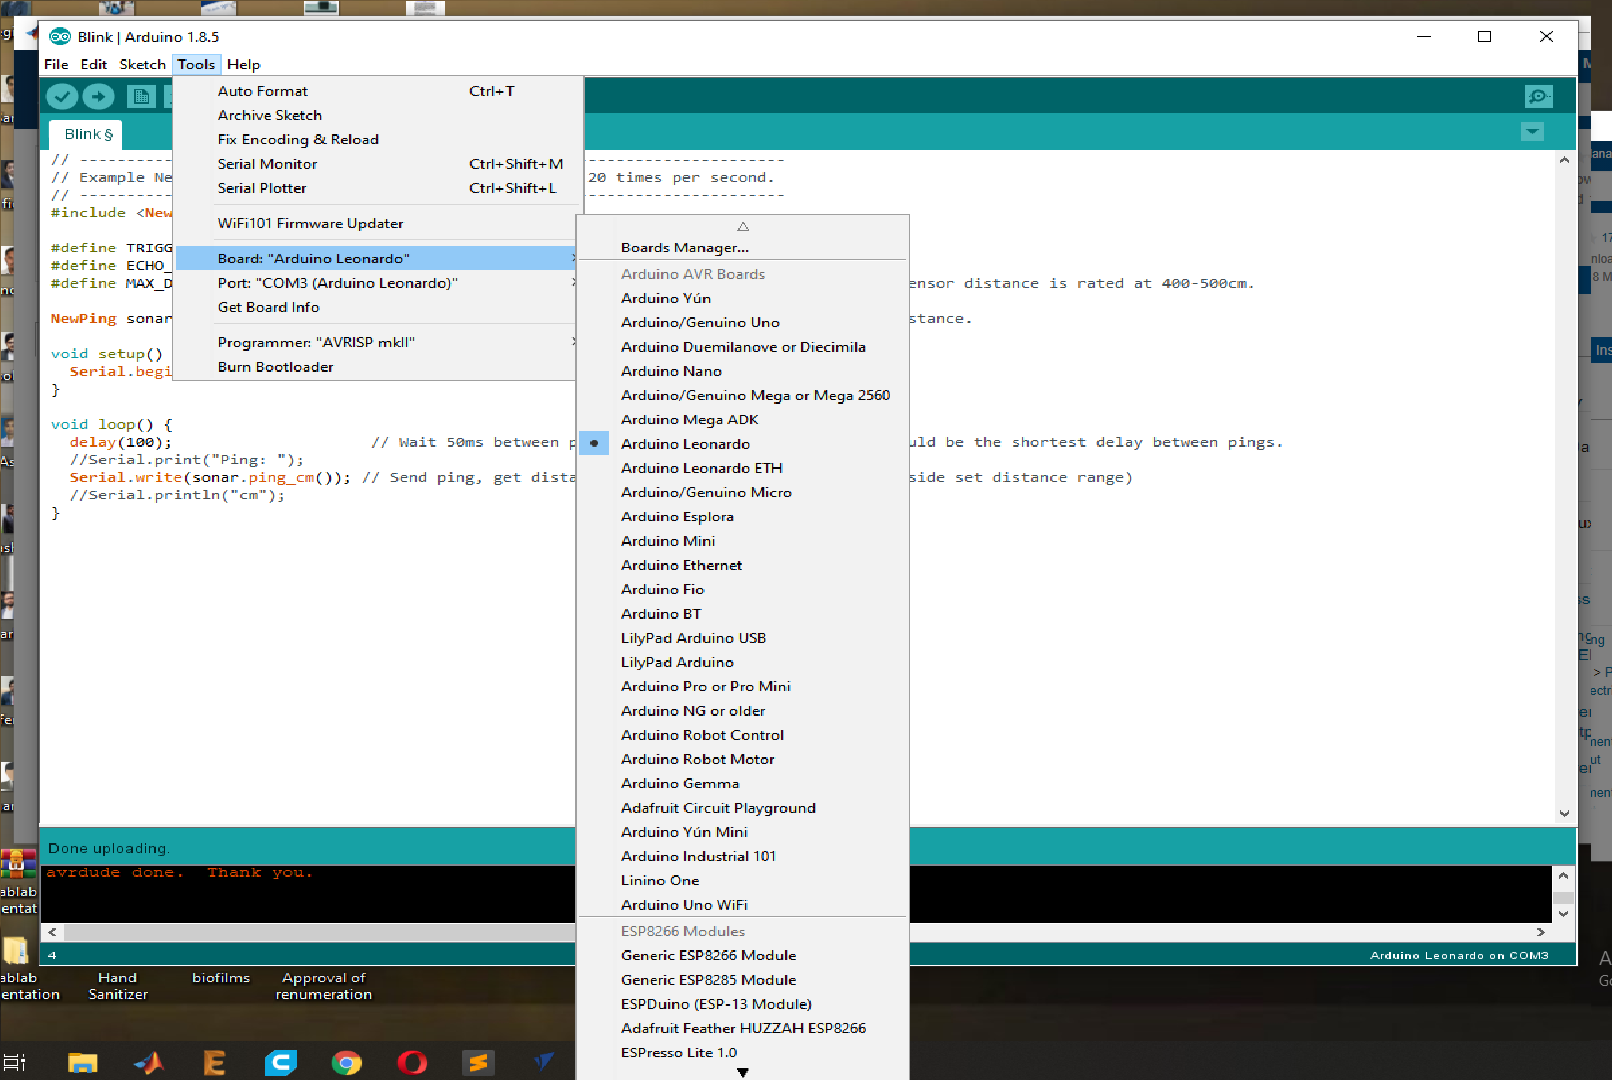
After that I have Select the Leonardo Port "COM3".
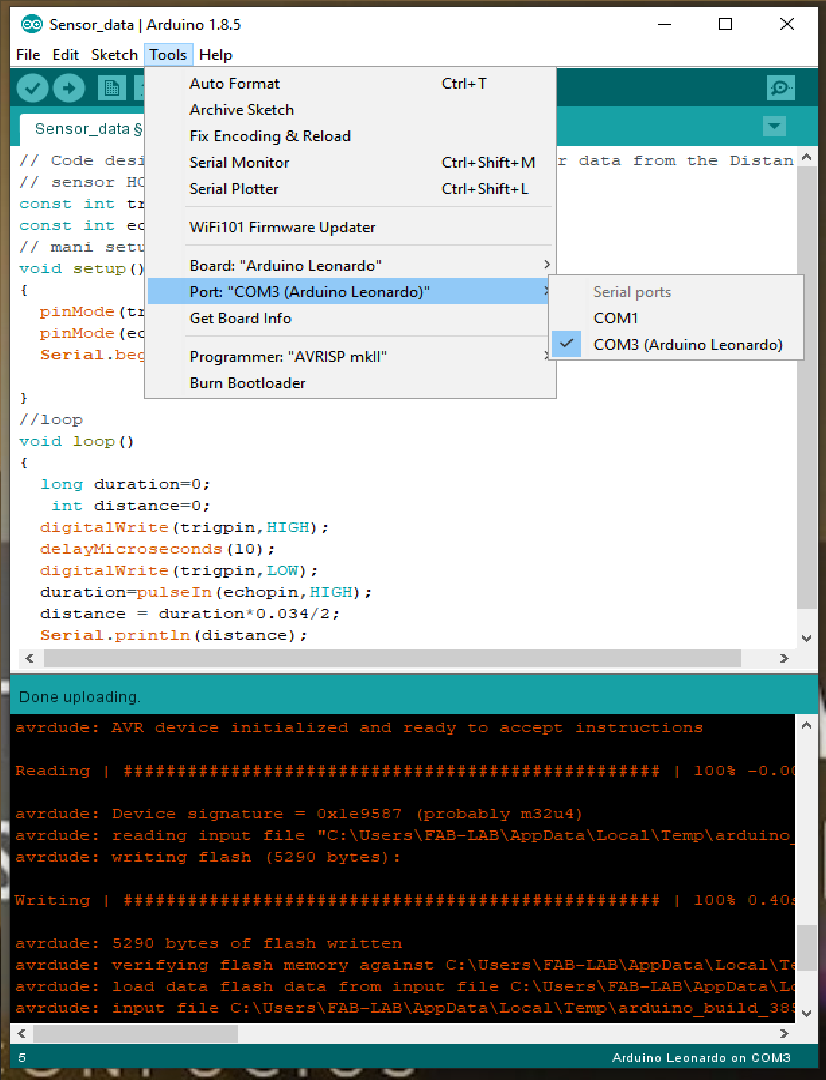
Now upload the Code in Leonardo Board.
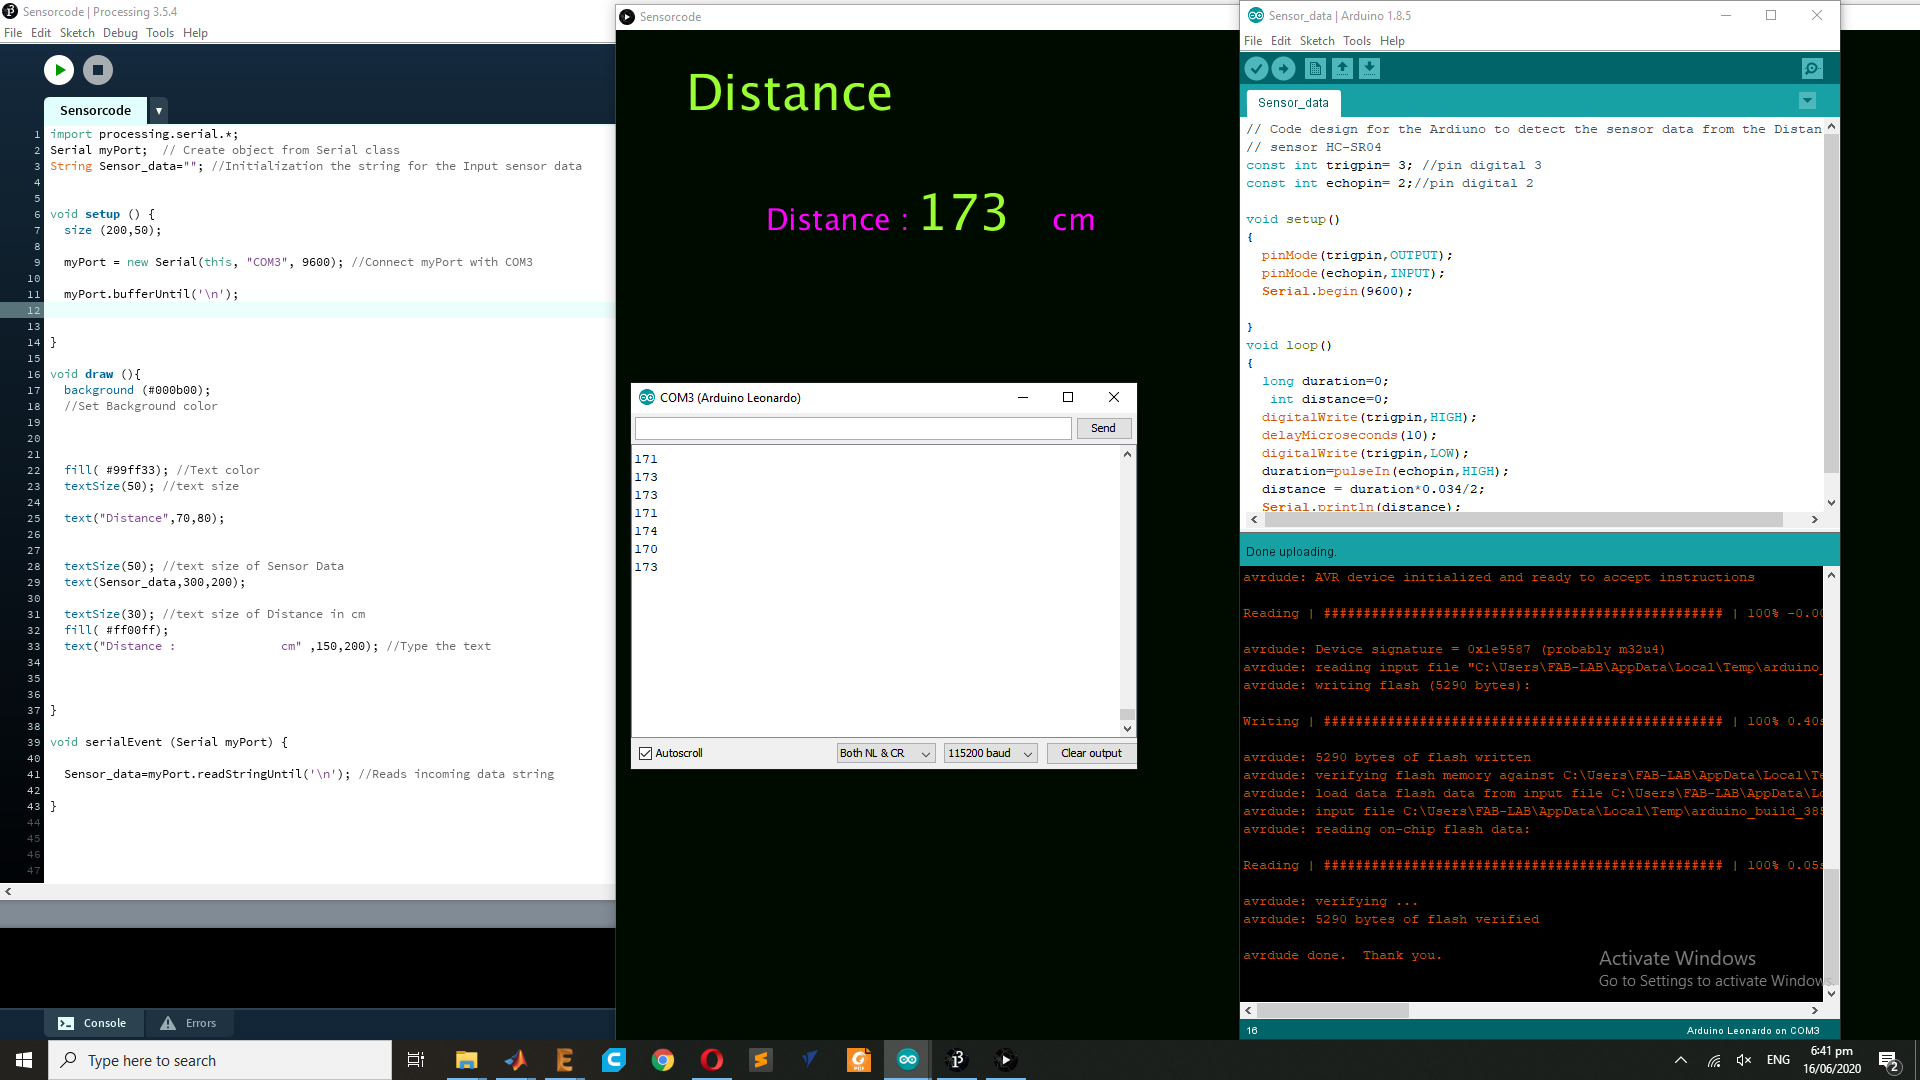
After the Uploading the code and get this results that first part is working serial data is shown in serial port of the Leonardo.
Processing Programing.
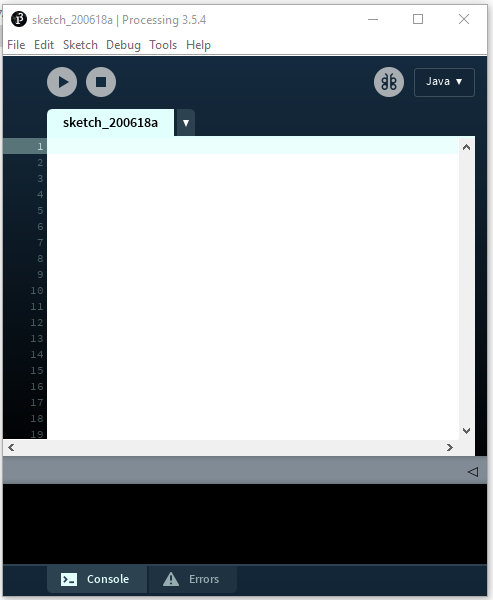
Now the phase to design the graphical User Interface for the Sensor data by using the Processing ID.so first I have open the Processing ID, goes to sketch and Import the Serial library and write the code for the GUI and Serial Communication.
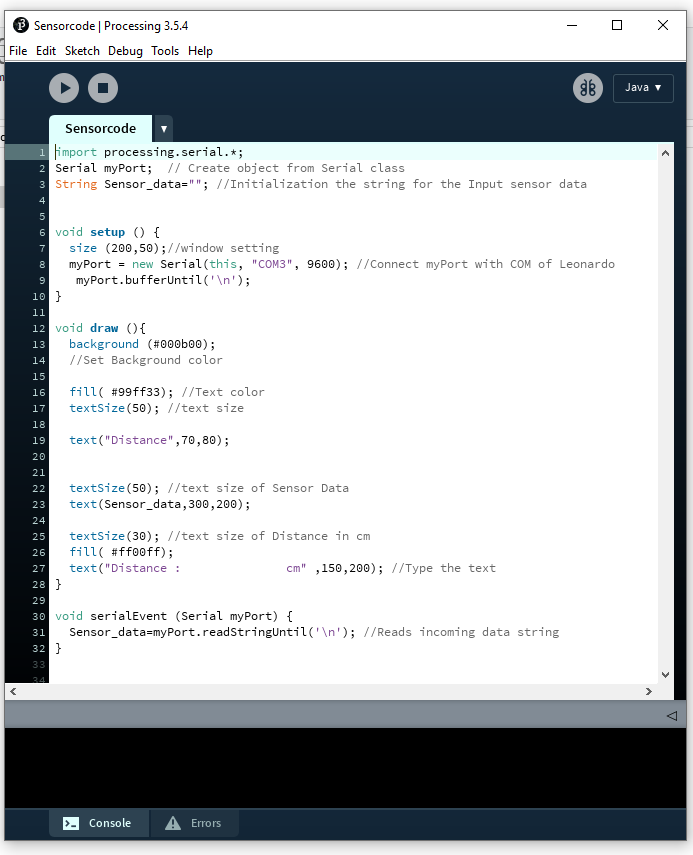
For the GUI color I have used this link to find the HEX code for the background and other display setting. HERE
Again,I have upload the code in Leonardo , after the " uploading done " I have run the Processing ,but GUI is not working, I found Issue related the port that port is not working.I try to solve the port issue,I found that in my code their error of port I have fixed but again show that port is busy , I was confused that how Can I solve , that time I saw that my Serial port of Leonardo is open , So I have close it.Now run the processing now Its working.
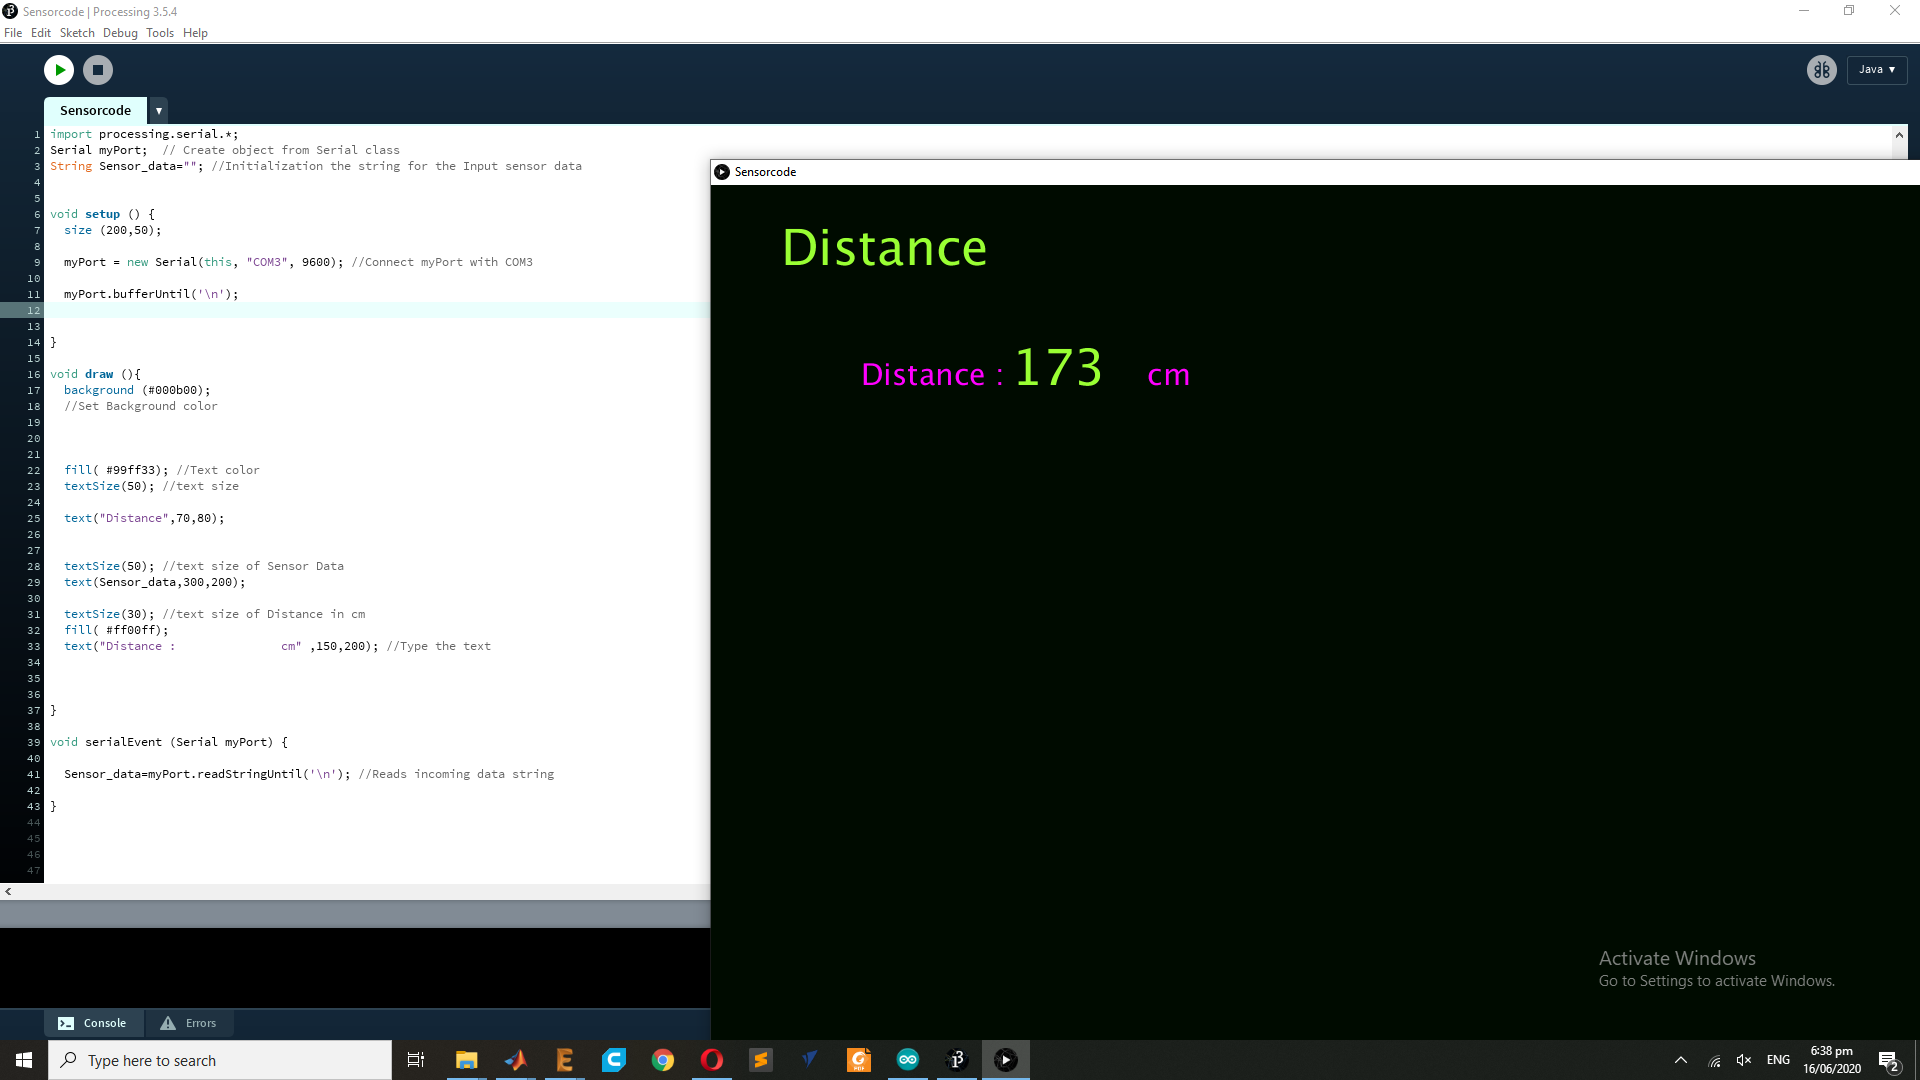
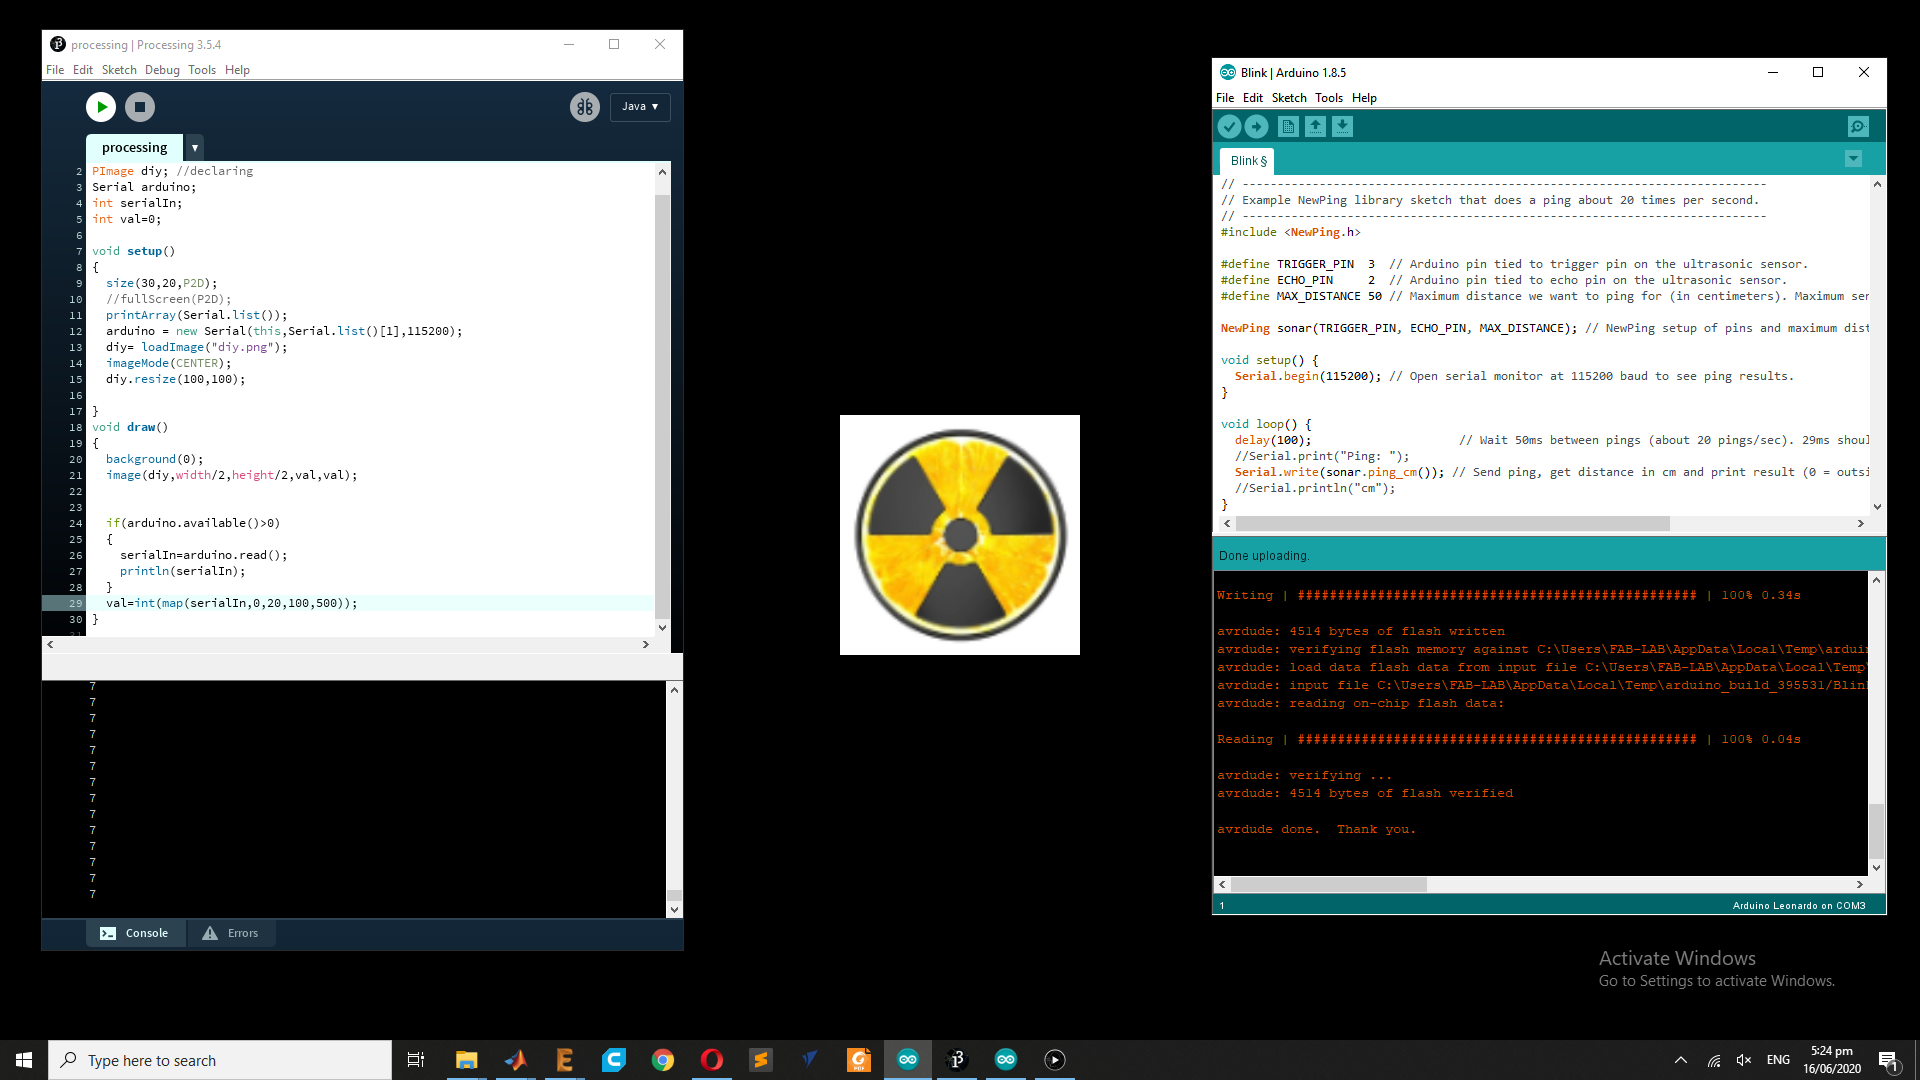
So the final result is shwon in GUI look like a this.
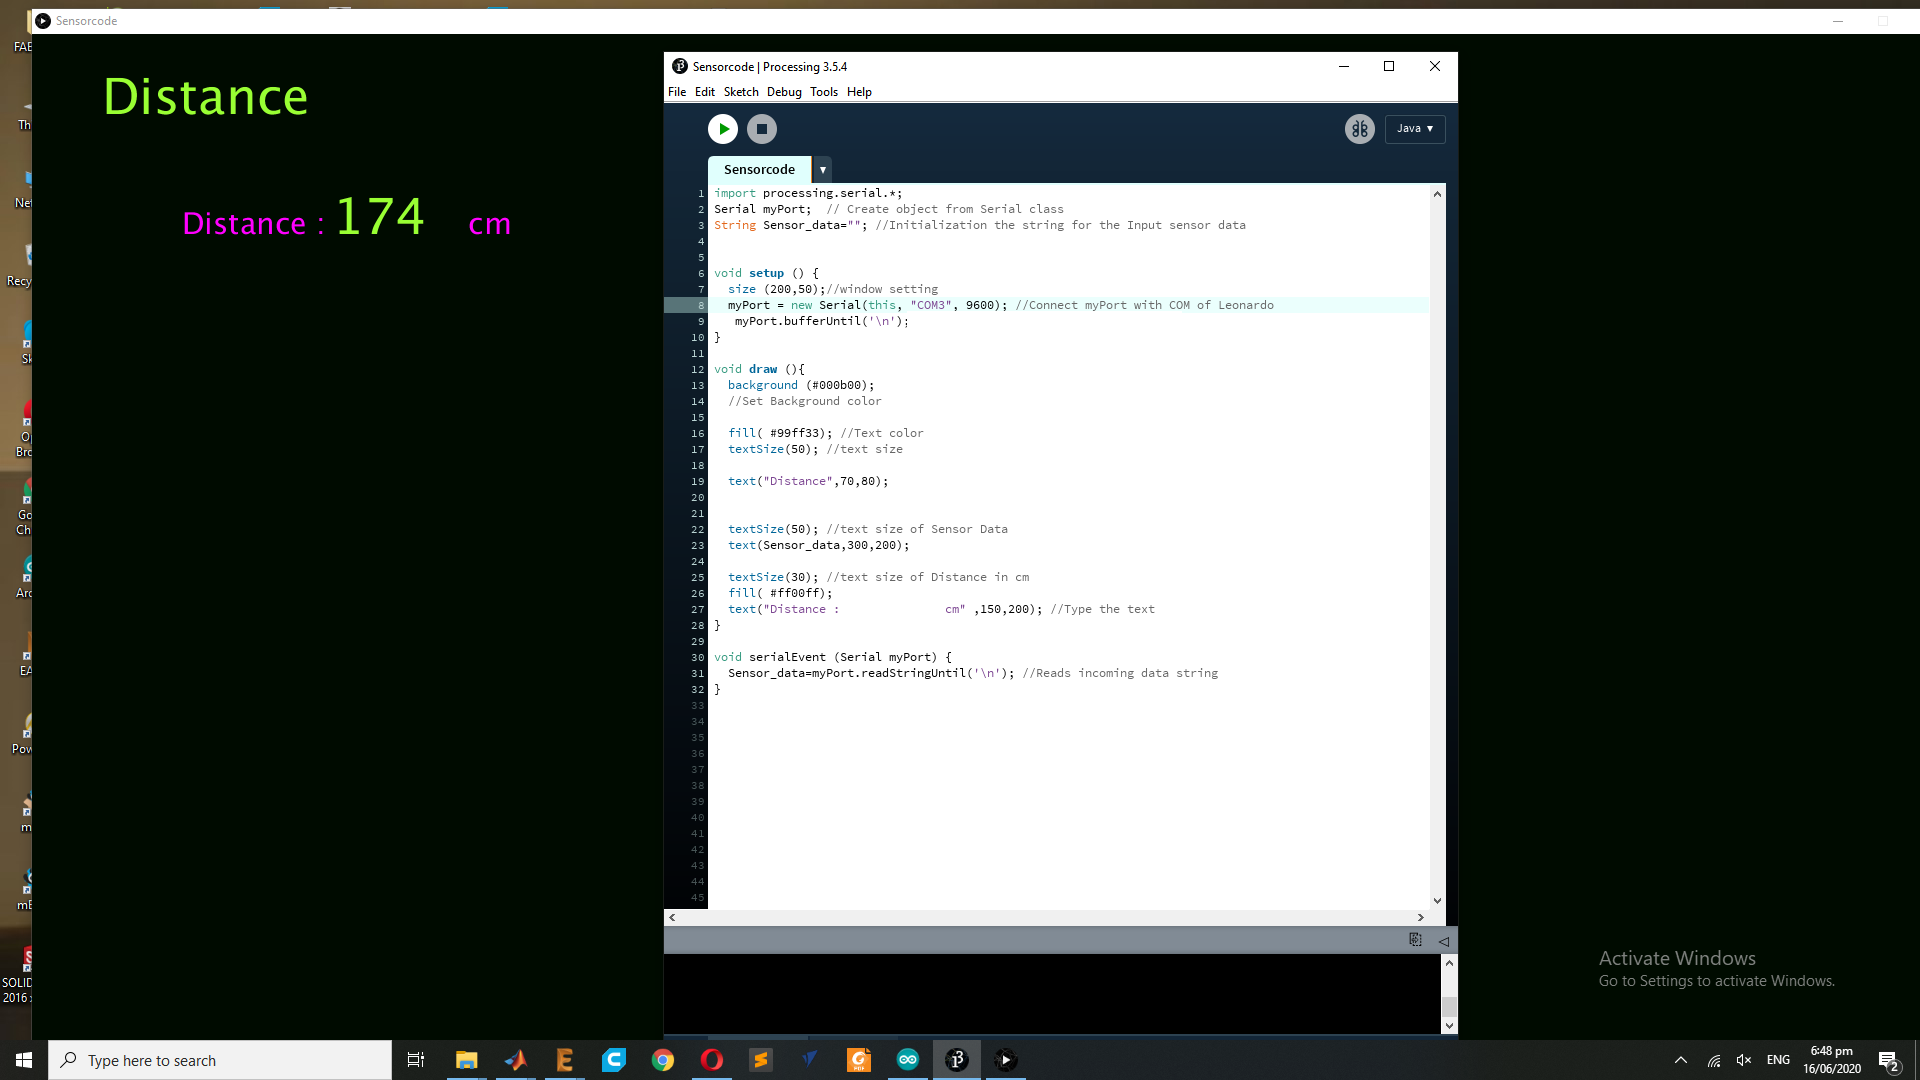
This the Code of Processing and Leonardo with Result on GUI and Leonardo serial Port.
Final Demo of the Assignments
In this demo , I consider my hand as object that is moving up and down , when my hand is near to sensor that show the distance nearest between object and sensor, while I am going to chang the position of hand then the distance is change with respect to the hand position , as shown demo.
Extra Task using Processing :
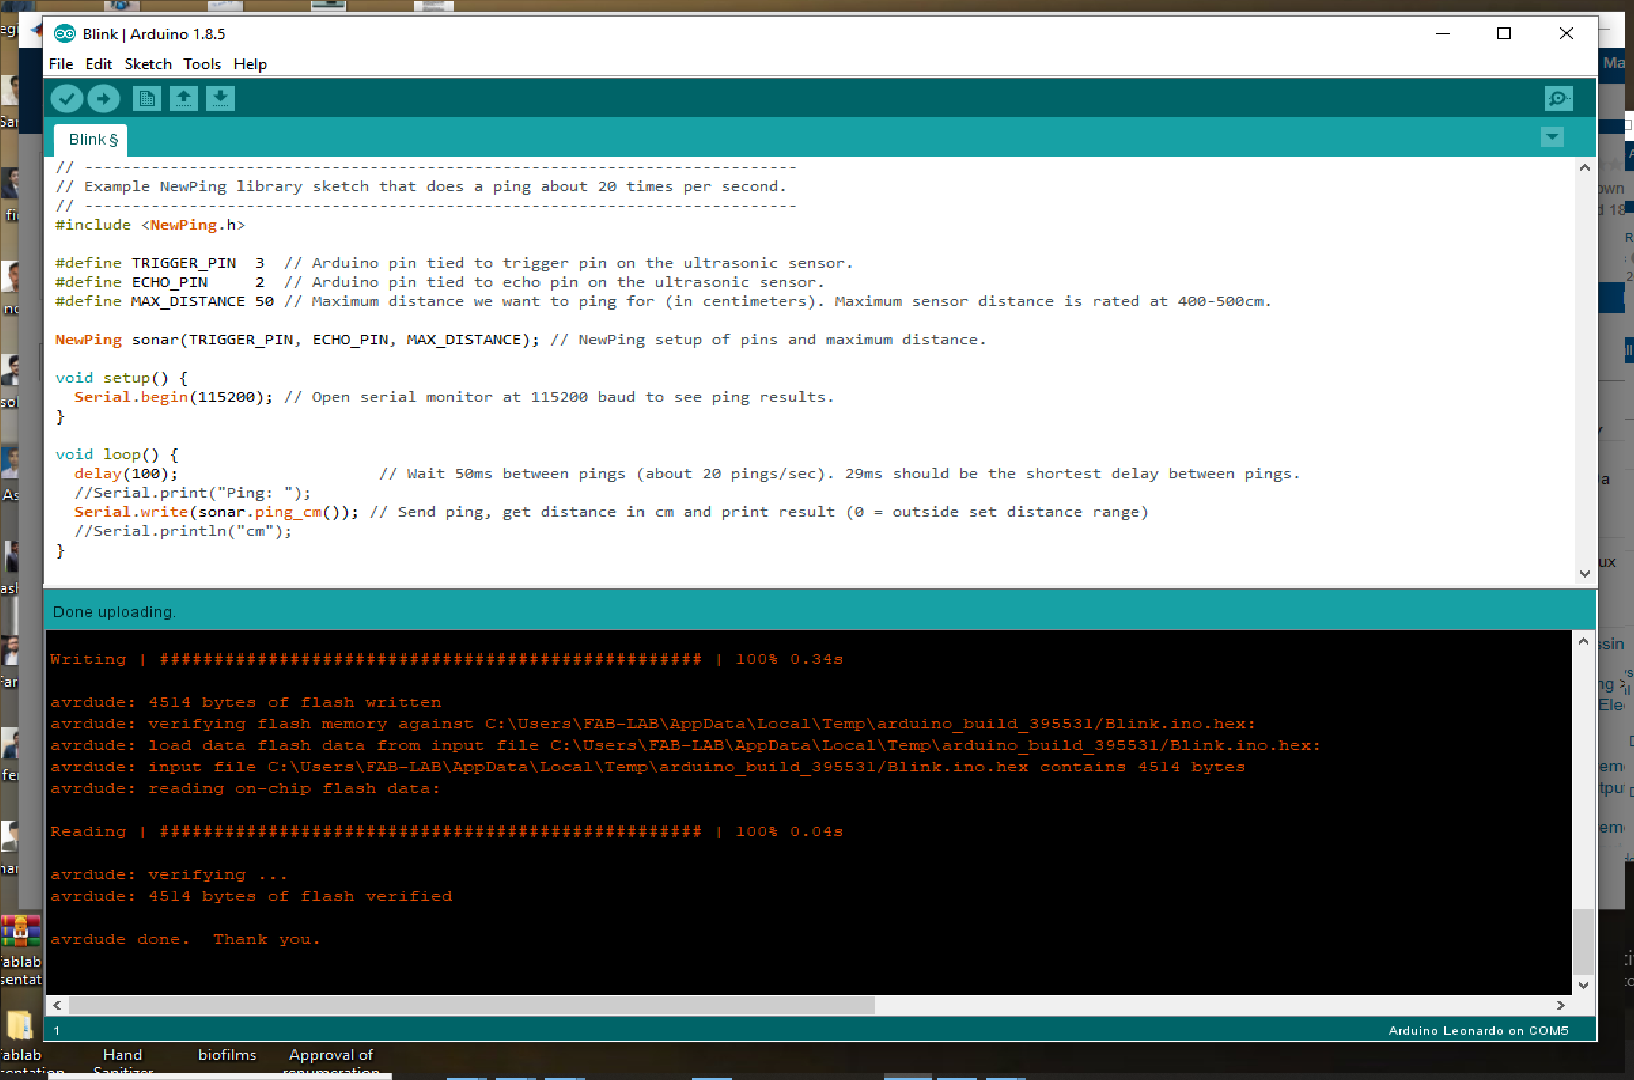
This work is extra for the learning the processing using image processing technique . for this task I used this library "NewPing.h" for the image read in C++ in Leonardo the overall code of the distance sensor is same , for download the arduino library. HERE
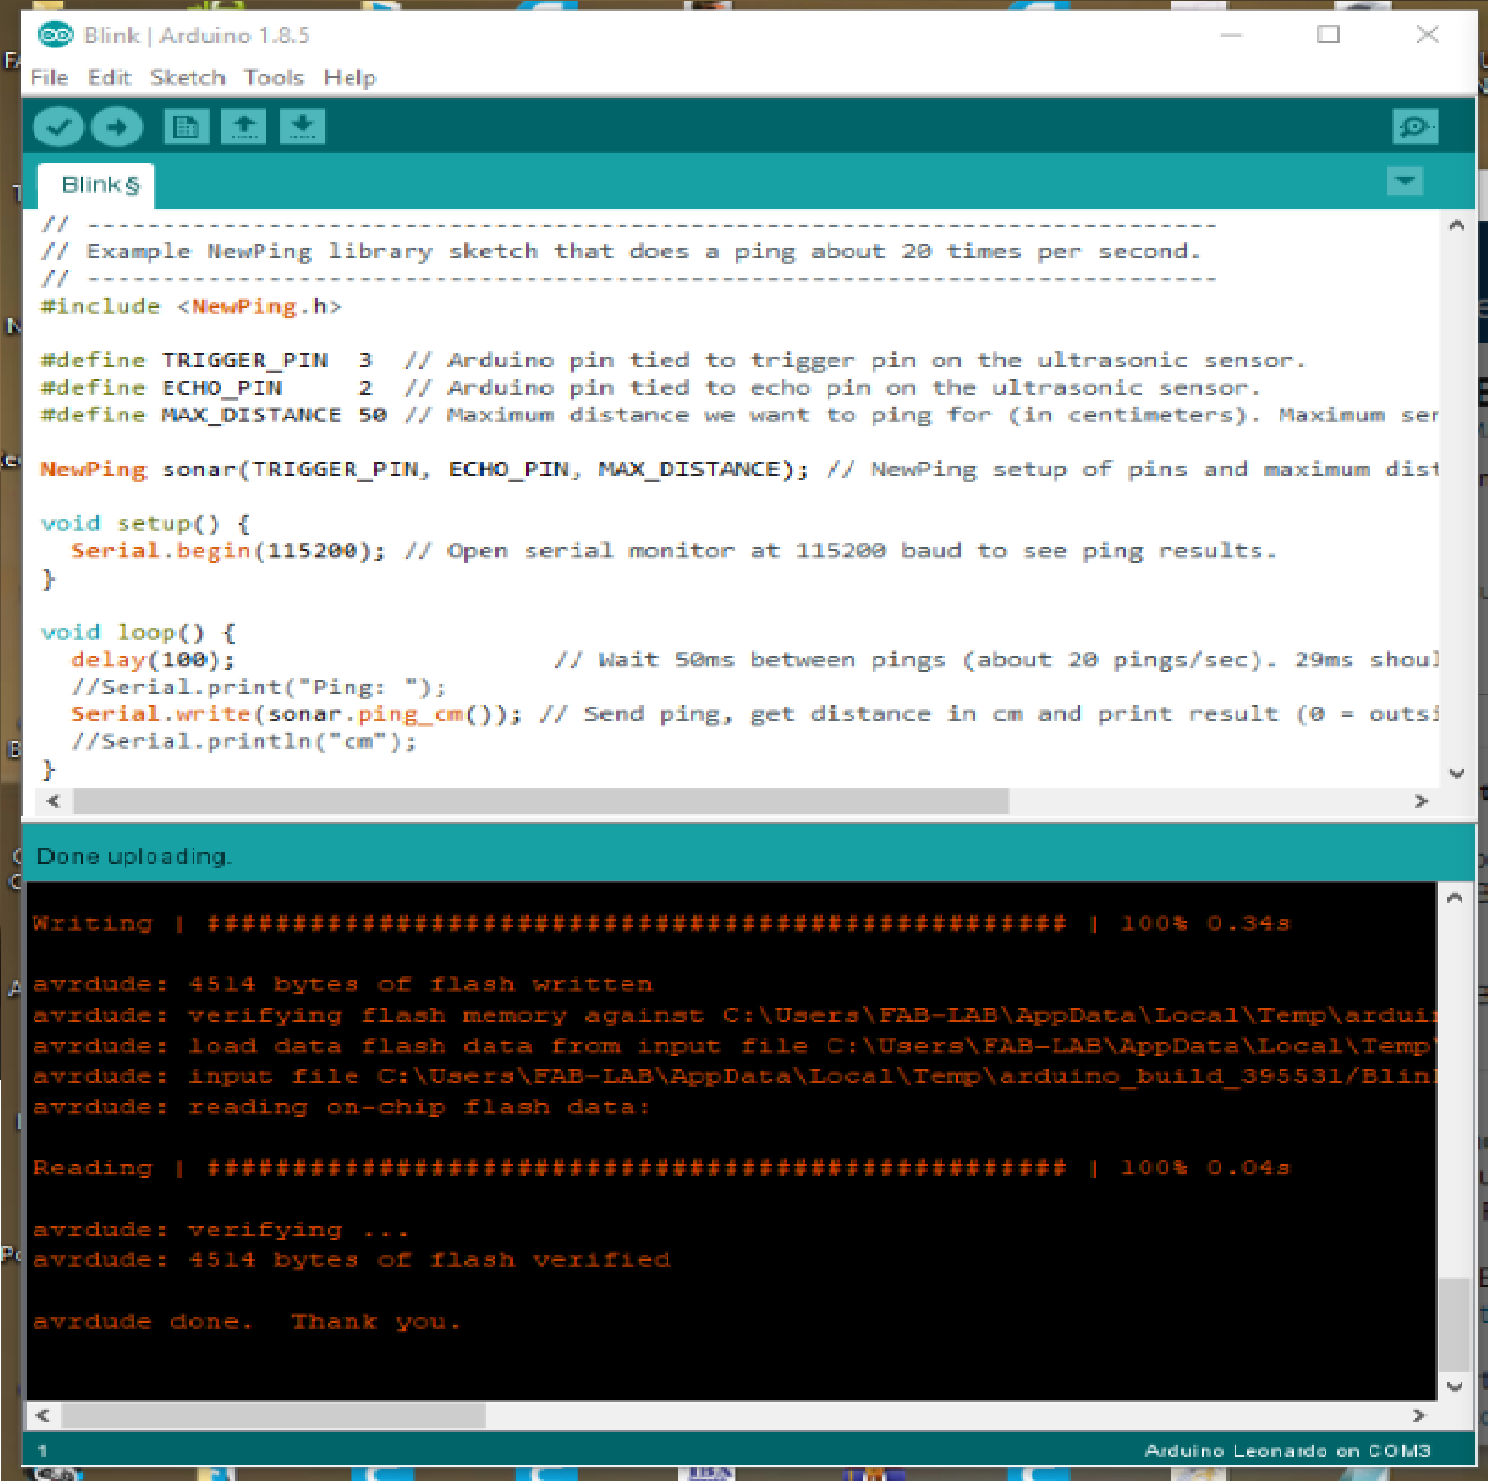
After the upload code in Leonardo now phase to design the code for the image processing in processing so first import the library for the serial input from the Leonardo, add this command "Pimage"for the image read. and set the serial port " 1".
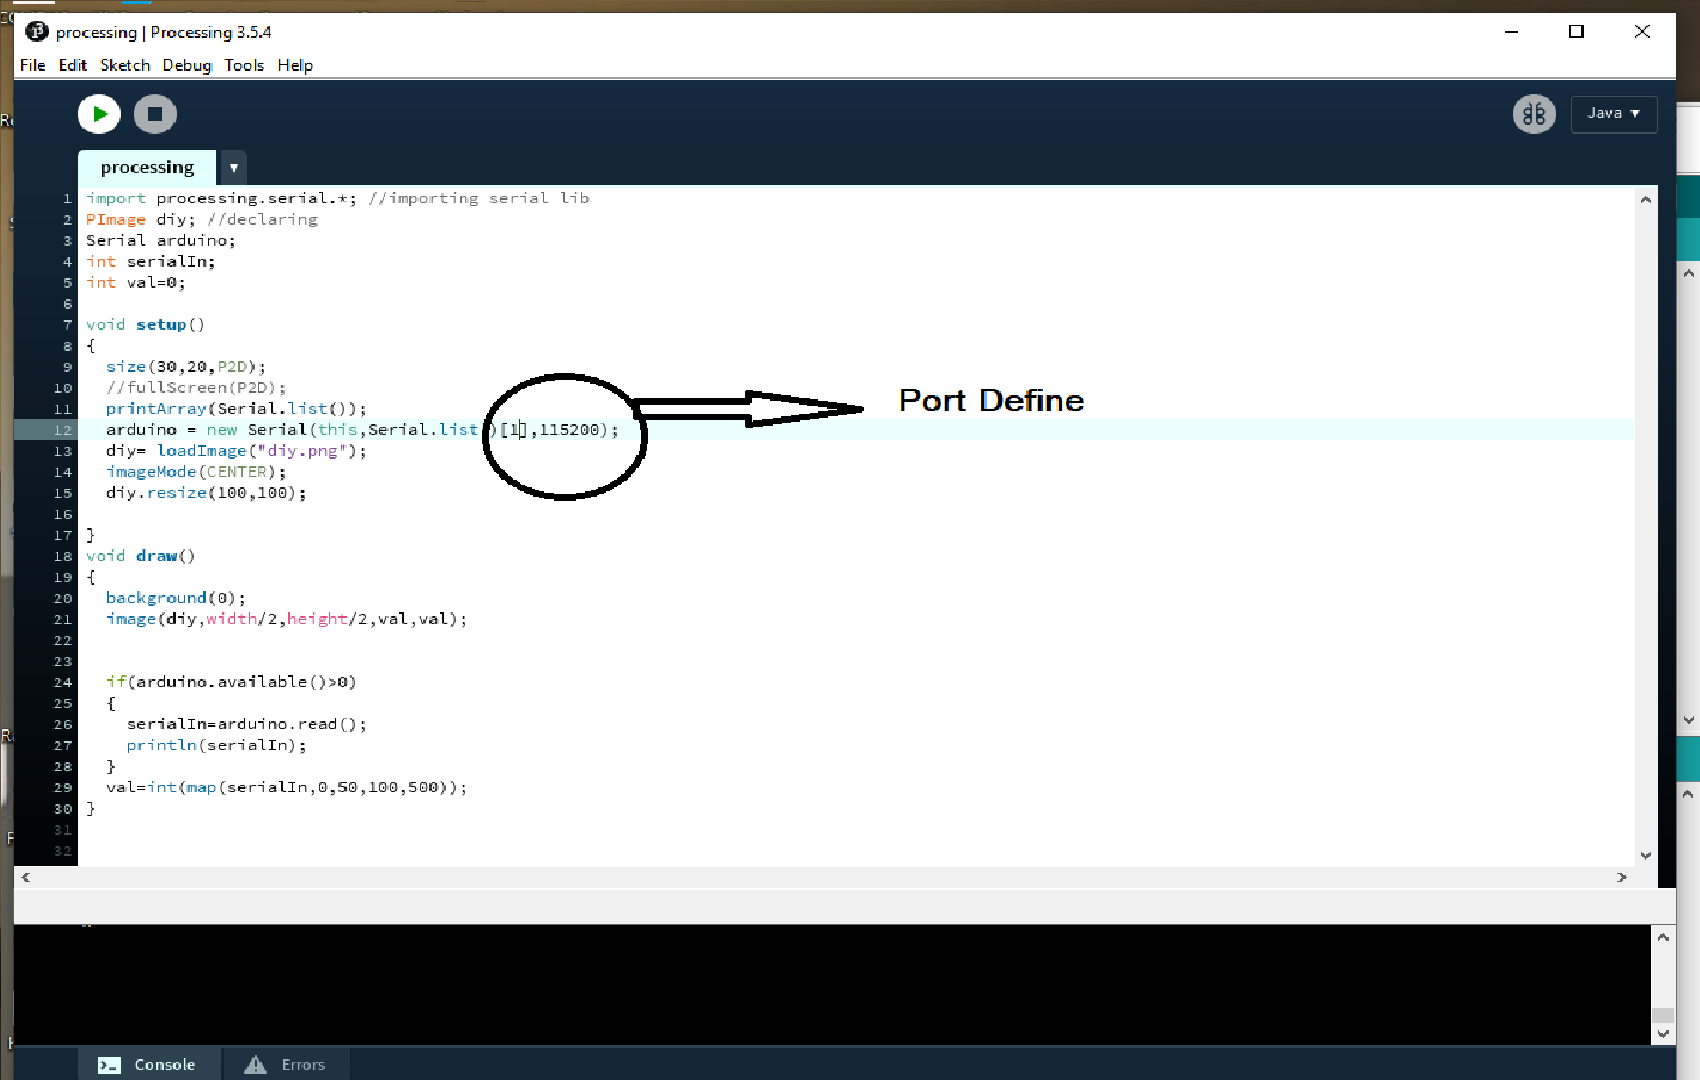
After code designed , I have run the processing then I found serial value on the Processing ID Window.

This is the GUI. it tell us the that when oject near to the sensor the image size will be small if distnace is high then the image is going to high.
Demo of the task
In this task I have worked on the Image processing technique,I used the library for image process that is "newping.h", after that I have call that image in processing using this command "Pimage". in this work I have use the distance sensor as input while the GUI is output and consider my hand is an object", well this task is based on the distance while distance short or small the image size is small and when distance is high then the image size is high,this task like a game for the kids.
Group Assignment:
In this week in group assignment we have compare the two tool.
Processing
Processing is a graphics library and IDE based on the Java programming language, first released in 2001 by developers Casey Reas and Ben Fry. Its goal is to simplify computer programming for visual artists, providing new classes and mathematical functions for creating and processing computer graphics. Its IDE, called Sketchbook, uses an abstraction, called a "sketch," to represent its fundamental Java class, HERE .
Basically Processing is besed on a Java-based language. It is an open source programming language and integrated development environment (IDE) developed for new media arts and visual design communities with the Image processing , GUI design and aim of educating people who are not programmers with the visual concept of the essence of computer programming.
MIT App Inverter
MIT App Inventor is a web application integrated development environment originally provided by Google, and now maintained by the Massachusetts Institute of Technology (MIT). It allows newcomers to computer programming to create application software(apps) for two operating systems (OS): Android (operating system)|Android, and iOS, MIT App Inventor is an intuitive, visual programming environment that allows everyone even children to build fully functional apps for smartphones and tablets. Those new to MIT App Inventor can have a simple first app up and running in less than 30 minutes.The MIT App Inventor project seeks to democratize software development by empowering all people, especially young people, to move from technology consumption to technology creation, HERE .
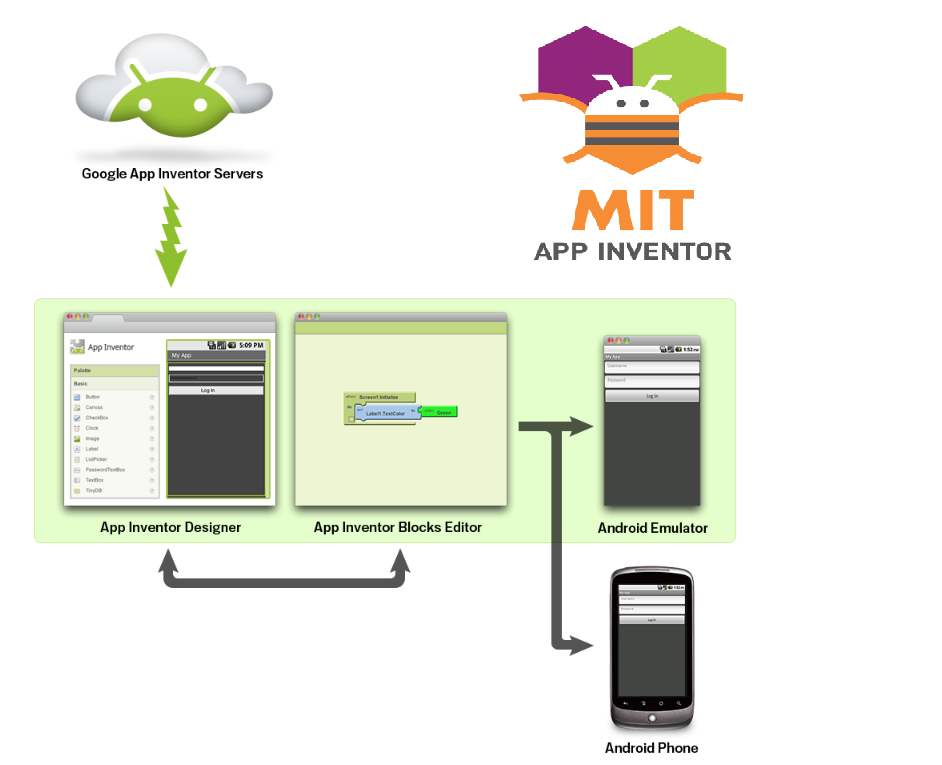
It uses a graphical user interface (GUI) very similar to the programming languages Scratch (programming language) and the StarLogo, which allows users to drag and drop visual objects to create an application that can run on android devices, while a App-Inventor Companion (The program that allows the app to run and debug on) that works on iOS running devices are still under development. In creating App Inventor, Google drew upon significant prior research in educational computing, and work done within Google on online development environments
Arduino
Arduino is the language of the Hardware , The integrated development environment (IDE) of Arduino is a cross-platform application software developed on Java and C, and includes an editor with syntax highlighting, parentheses and automatic indentation, and a compiler capable of compiling and uploading with one click. We use the C ++ language base for the Arduino operation and the compiler uses avr-gcc. It is designed so that users who are unfamiliar with software development can easily program. Programs or code written through these Arduino IDEs are called "sketches". HERE .
The source code for the IDE is released under the GNU General Public License, version 2.[4] The Arduino IDE supports the languages C and C++ using special rules of code structuring. The Arduino IDE supplies a software library from the Wiring project, which provides many common input and output procedures. User-written code only requires two basic functions, for starting the sketch and the main program loop, that are compiled and linked with a program stub main() into an executable cyclic executive program with the GNU toolchain, also included with the IDE distribution.The Arduino IDE employs the program avrdude to convert the executable code into a text file in hexadecimal encoding that is loaded into the Arduino board by a loader program in the board's firmware.By default, avrdude is used as the uploading tool to flash the user code onto official Arduino boards.
With the rising popularity of Arduino as a software platform, other vendors started to implement custom open source compilers & tools (cores) that can build and upload sketches to other MCUs that are not supported by Arduino's official line of MCUs.
Compare processing with arduino
Both languages are relatively easy to learn compared to other languages. In the case of processing, it is a language for education. Arduino is a language designed for beginners to easily program from the time of design.
Processing and Arduino have very similar interfaces, and even the scripting language you use is very similar. So if you modify the example of processing a bit, you can use arduino and vice versa.
However, in the case of processing, a program designed to show something visually, arduino is a program for showing the machine's operation by programming with kits, so you can use it as convenient for your purpose.
Conclusion
In this week I have learned about the Processing Interface with Leonardo and design the GUI using the Processing , third thing is that I have learned from this week is that we can use this tool for the Image process,this week was quite interesting.In this week we have explore the lot of programing tool and platforms for the app developing, And in this week I have worked on the Processing IDE.
Download All file of this week Here.

This work is licensed under a Creative Commons Attribution-NonCommercial-ShareAlike 4.0 International License
.