4. Computer controlled cutting
Group Assignment
Laser cutter:
Make test part(s) that vray cutting and dimensions, to characterize our laser cutter
Tool: Laser cutter CO2
Class: 3R (for this class, lasers are considered safe when handled carefully. There is only a small hazard potential for accidental exposure. For visible-light lasers, Class 3R lasers’ output power is between 1 and 4.99 milliwatts.
Laser Power: 100 watt.
Model: Golden Sign GS9070
Materials: Plywood/Mdf 4mm; Cardboard 6mm; Plexigrass 5mm

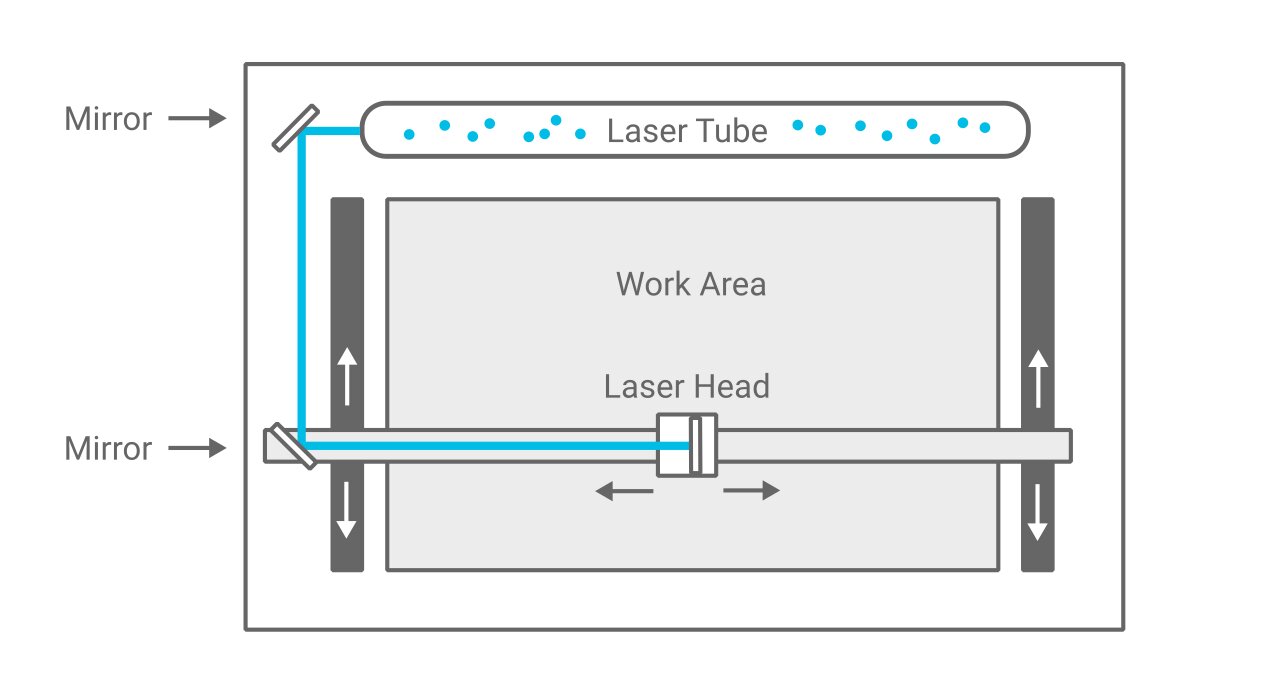
How does a laser cutter work?
In a CO2 laser cutter machine, the laser beam is created in a tube filled with CO2 gas. Next, with the help of mirrors and lenses, the laser beam is directed to the laser head and focused on the material surface. Electronically controlled motors move the laser head to cut or engrave the desired shape into the material of the workpiece. The shape is defined by an input file which can be a vector or raster image

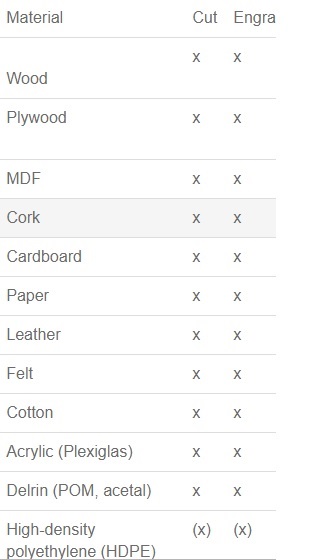
What materials can be cut or engraved with a laser?
What are the Settings for laser cutter?
The most important settings of a laser cutter are power, speed, frequency and for focus distance.
Power: Defines the output power of the laser. Typically can be set from 0 to 100% (maximum power). High power is used for cutting thick materials and lower power is used for engraving and cutting of thin materials such as paper.
Speed: Determines the movement speed of the laser head. For engraving and cutting of thin material, the speed is usually set (close) to the maximum.
Frequency (Hz, PPI): The frequency parameter specifies the number of laser pulses per second. Frequency depends completely on the material used. For example wood cuts best at around 500 to 1000 Hz and for acrylic 5000 to 20000Hz are recommended to achieve a smooth edge.
Focus: As previously explained, there is a focusing lens inside the laser head. The focus point (where the laser beam is thinnest) should be on the material surface or slightly below, for most applications. #### setup
1- Switch ON the laser
2- Switch ON the pointer
3- Unlock X/Y motor axes
4- helping you with the pointer, move the X/Y axes to set the user origin, in the upper left corner of the piece to cut, then SET with Origin Button
5- Set the Focus helping yourself with the spacer tool, unscrew the laser head screw, move the laser head Up or down, until the spacer touches the surface of the piece to be cut.
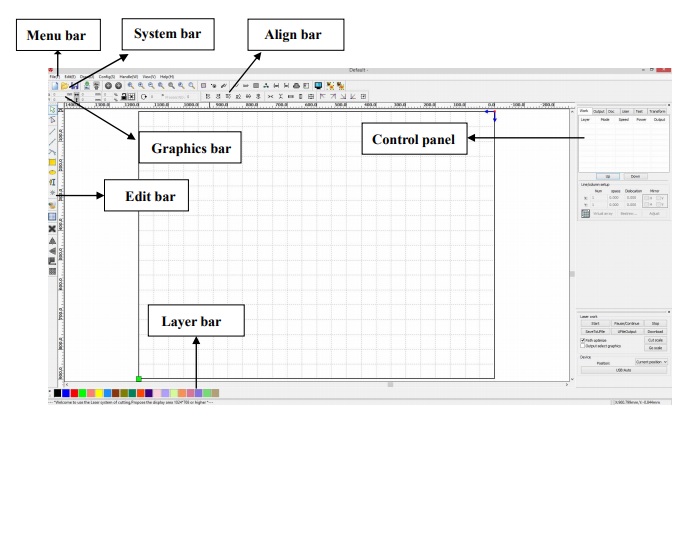
Software
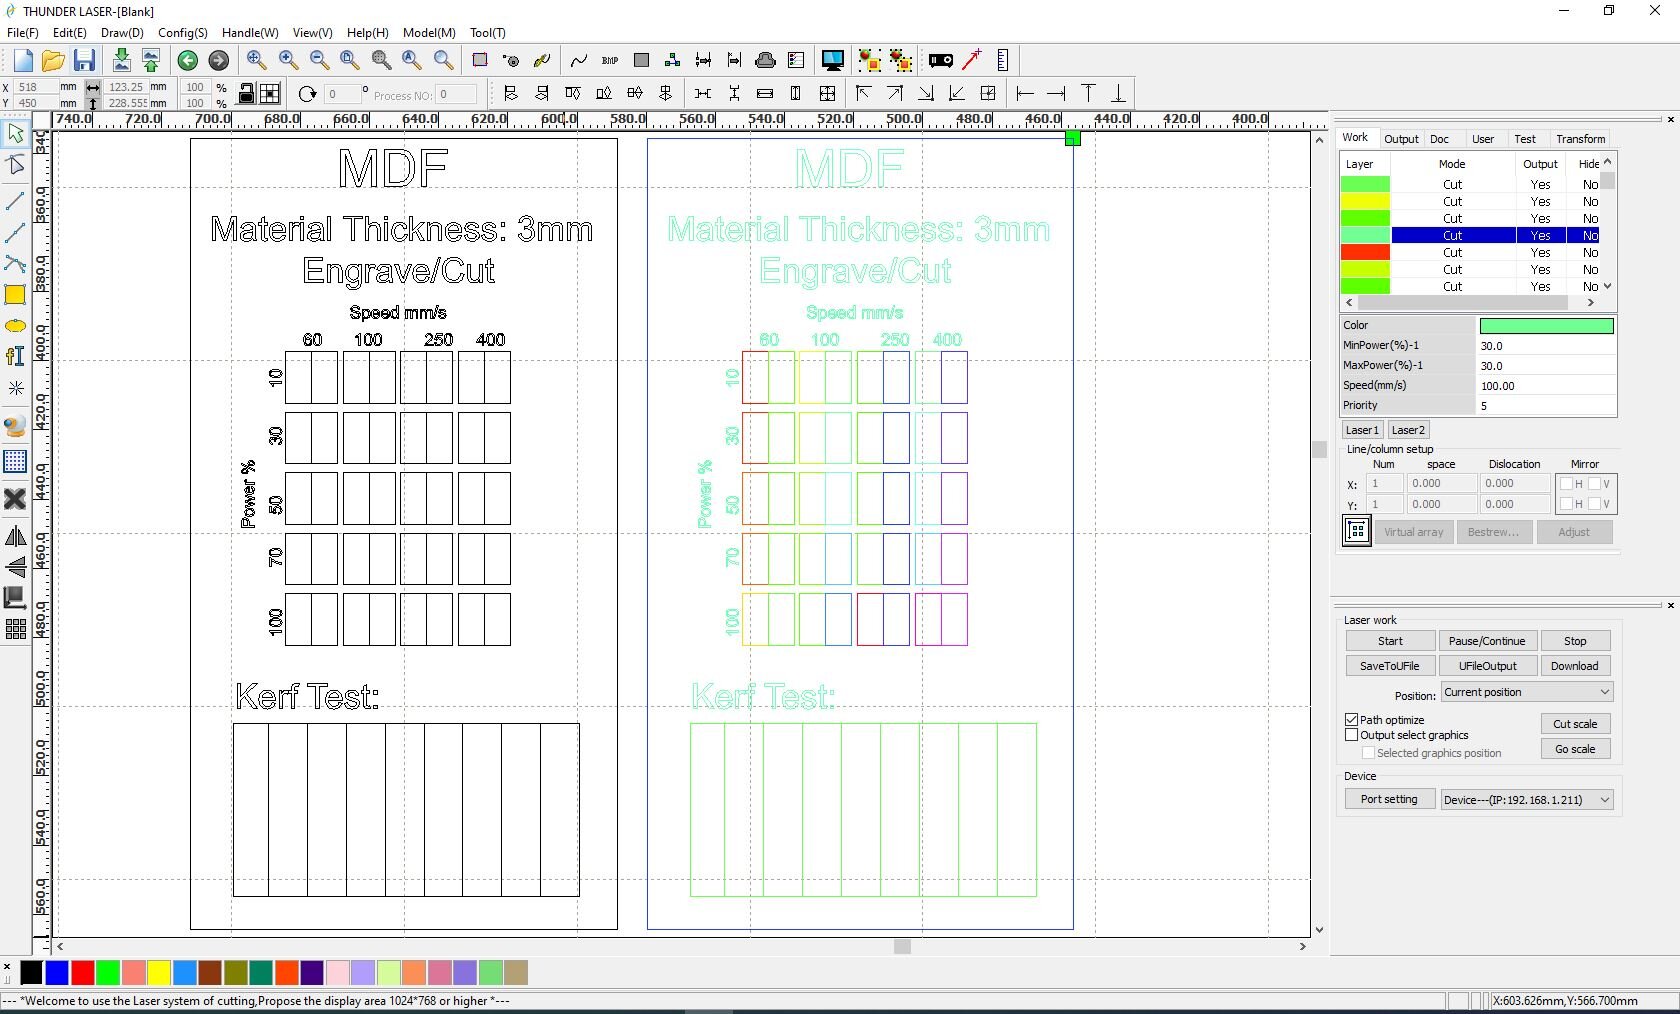
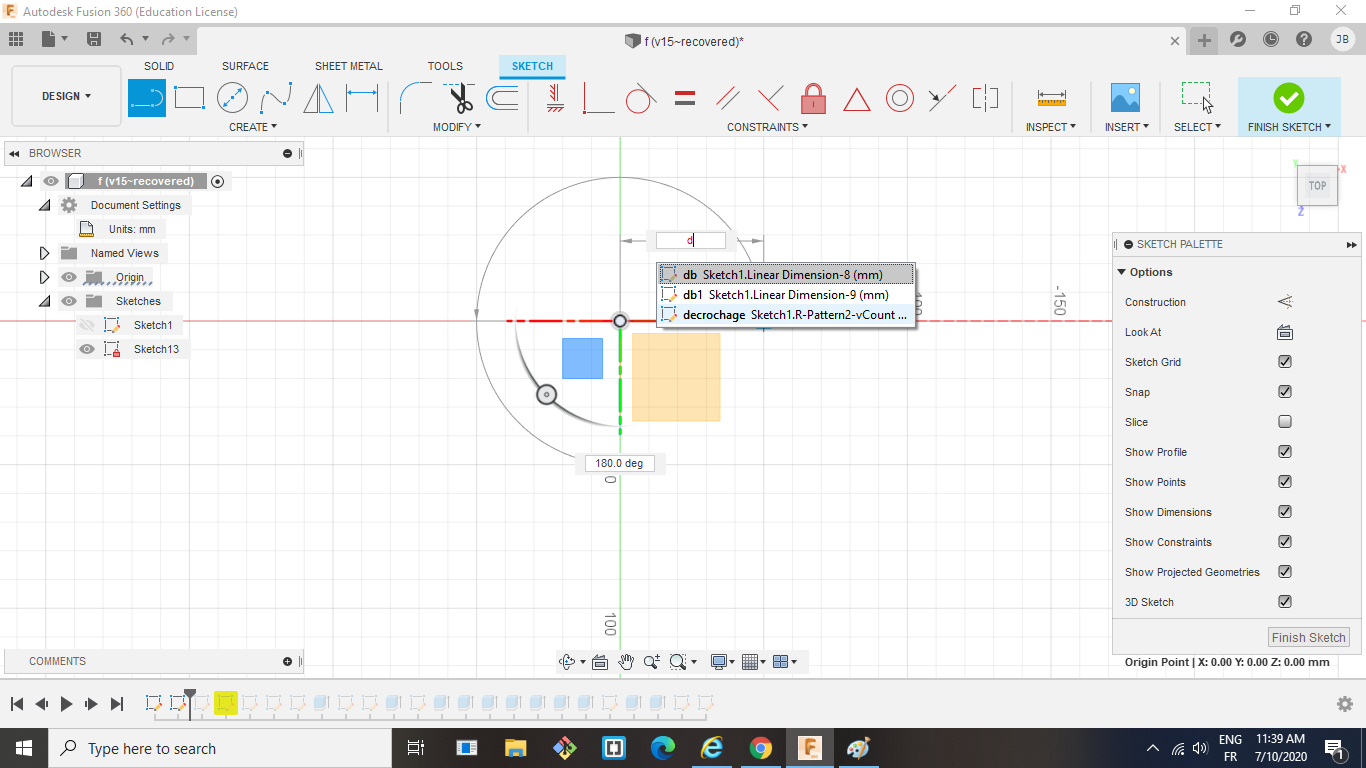
Before using the machine, We started designing our own Test Template using Fusion 360 in 2D sketching.


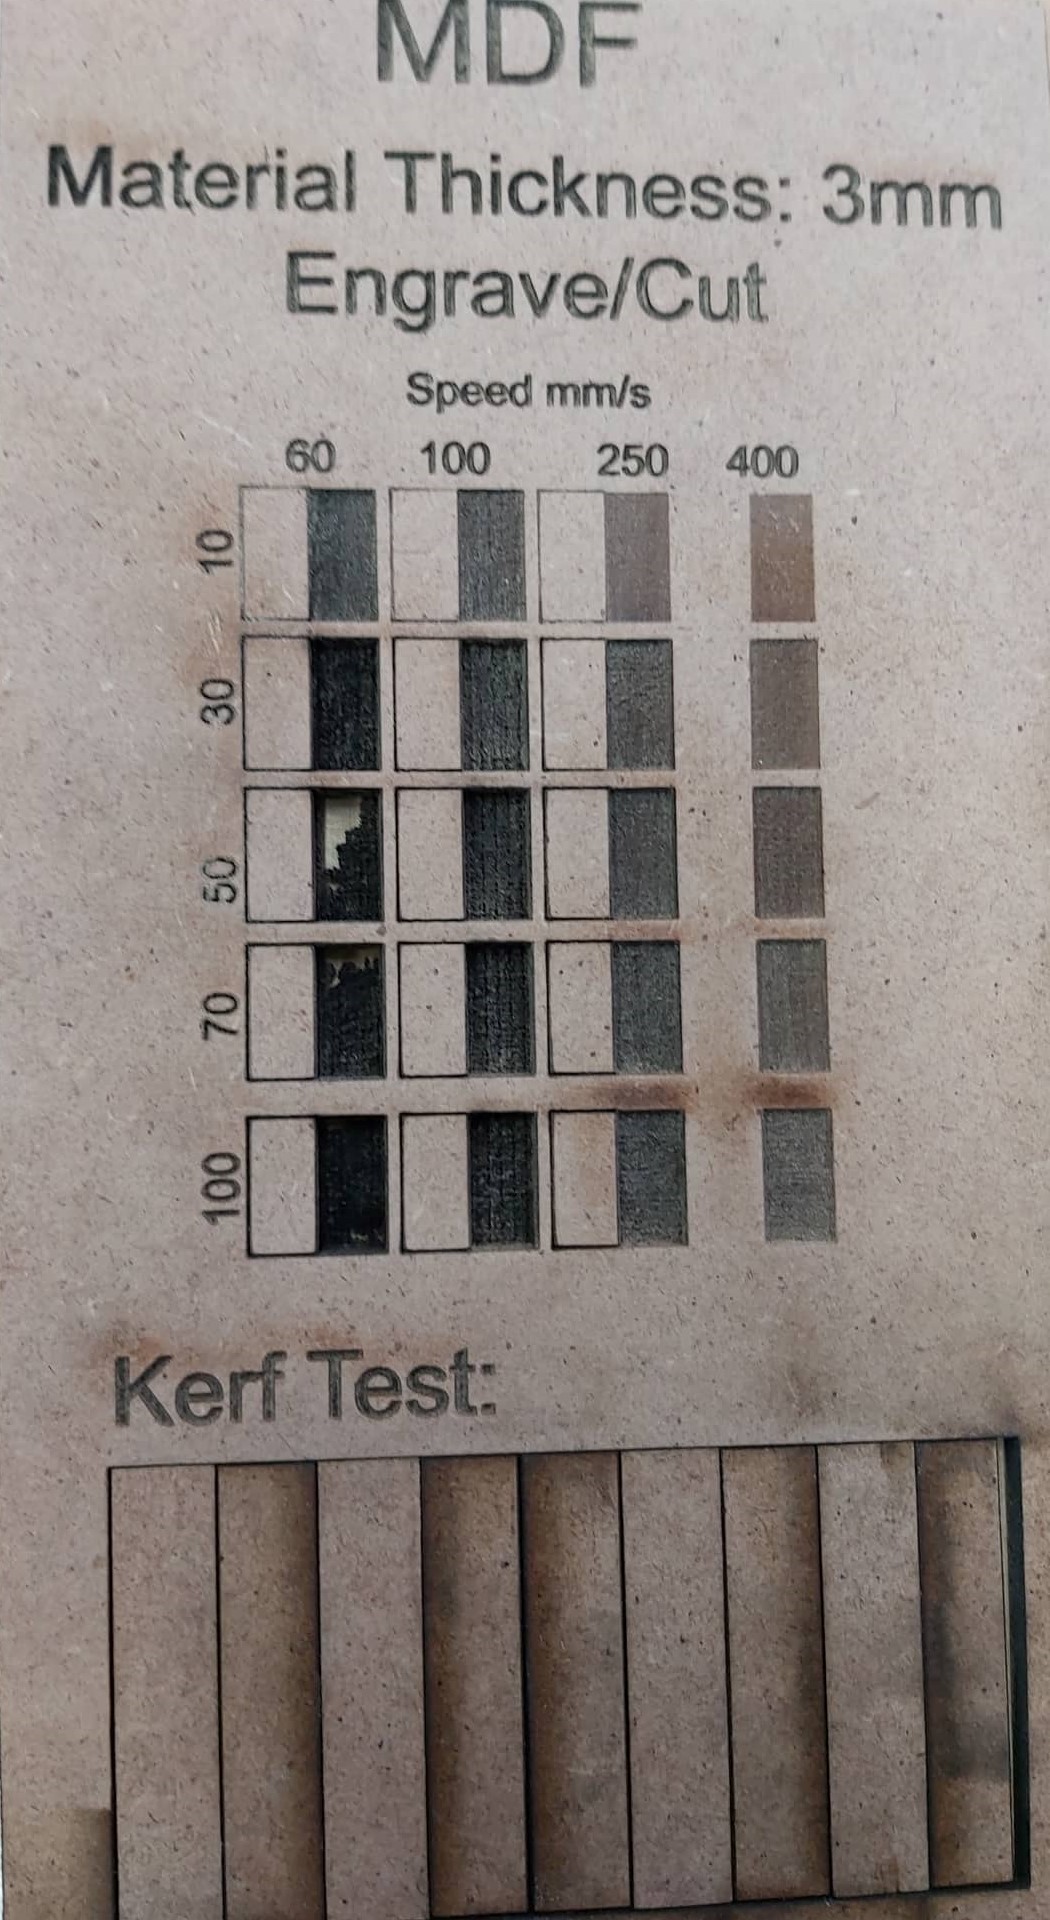
We chose to test cutting and engraving at the same time on MDF 3mm with diffrent speed and laser power for each rectangle test (like shown in the previous image). Then export the sketch to DXf format.
The RDWork system supports the following formats: Vector format: dxf, ai, plt, dst, dsb, and related formats. Bitmap format: bmp, jpg, gif, png, mng, and related formats
this is the final result of the group assignment:
Kerf
We did also a Kerf test: Kerf is determined by material properties and thickness, the focal length of the lens and the gas used while cutting, I’ve designed a simple test in order to find a kerf. As in the previous picture we have drawn 9 rectangular pieces (10mm each) for 10 vertical cuts. This for make an average on the long distance.

ividing this gap by ten gives the average kerf for that material and material thickness. In the our case we’ve obtained a 0.3mm kerf for plywood with 3mm thickness.

Individual assignments
To start this assignment First I explain What is Parametric Modeling.
So Parametric modeling is a modeling process with the ability to change the shape of model geometry as soon as the dimension value is modified. Parametric modeling is implemented through the design computer
I open fusion 360 and I start to define the parametre whitch i will use to desgin the electronic card box for my final project


I start the desgin
I use the parmetre like a dimension of my desgin

If I change the parmetre all the desgin dimension well change
before changing parmetre

 after changing


I export all the files to DXF .I open with Autocad to do some modification

I prepare fils in RDWORKS

I check laser focus

I choose two colors for cutting and engraving .I start by scan after i cut. I check my parameters for speed and powers


I clik in button sart


the end of cutting

finally I assemble the pieces to get a nice box

files
Vinyl Cutter
A vinyl cutter is a type of computer-controlled machine. Small vinyl cutters look like a desktop printer. Like a printer controls a nozzle, the computer controls the movement of a sharp blade over the surface of the material. This blade is used to cut out shapes and letters from sheets of thin self-adhesive plastic (vinyl). The vinyl can then be stuck to a variety of surfaces depending on the adhesive and type of material.
this is owr machine CAMM-1 GX-24 24” Vinyl Cutter


