03. Computer Controlled Cutting - CCC
This week was an epiphany. I finally started feeling like I am getting a grip of Fusion360, of materials and of constructing objects in space. Also, vinyl cutting is fun!
Laser Cutting 101
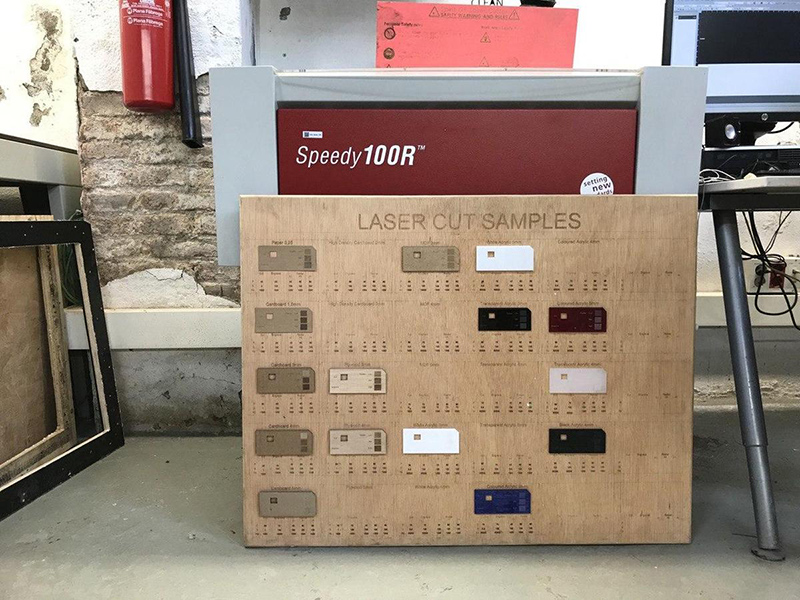
The following machines were introduced to us:
-
the multicam laser cutter which the most powerful beast in the lab with possibility of cutting large objects.
-
the trotec 100 and the trotec 400, which as their names indicate, has different power, and bed sides.
We used those machines in order to experiment with material, understand power, speed & the pulses per inch.
The most basic basics of laser cutting basics
-
Do not leave the machine unattended
-
Do not cut any material you are not sure is safe (like carbon)
-
Always make sure the central extractor is on for all laser cutters.
-
Always clean the lens as Arman captured in live action right here!
-
Always calibrate your laser before cutting for accuracy of outcome.
- If you see a flame for 2 seconds, stop the work immediately!
also,
-
Trotec always make sure the lid is closed while cutting.
-
Multicam Stay away from the machine area when it is on. Turn on the water cooler that cools down the laser.
This is a detailed explanation of the group assignment done by Tue.
I was not able to attend the group assignment due to work commitments in most cases of my fab lab journey.
Laser cutting: the how
As the name might suggest, it can cut using, you guessed it, a laser beam. It is generated, then directed through multiple lenses in order to finally cut through some material!
The settings for each material differs, depending on the density of the material.
Those settings the speed & power.
Speed is calculated by mm/s.
Power is calculated on a % scale.
Slower & strong cuts stronger material. The opposite cuts thinner material. Playing with those values could also allow us to engrave! (I will talk about this a little bit later)
This value table is present at all times in the lab, provided by our dear tutors.
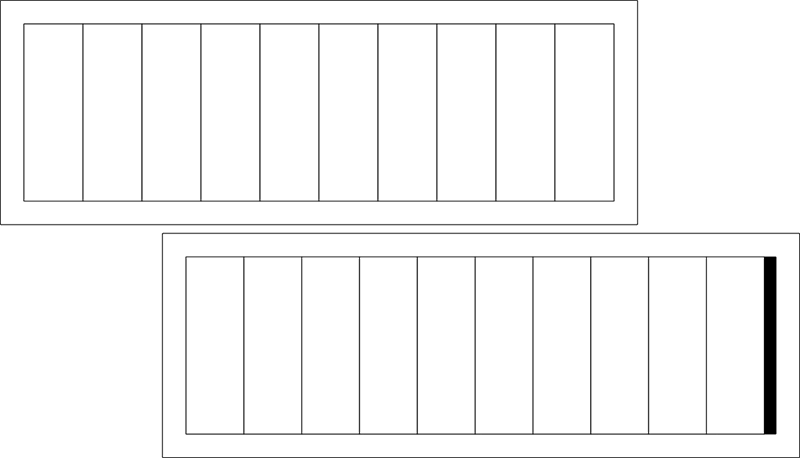
The importance of the kerf
Laser cutting made it very clear how important parametric design is.
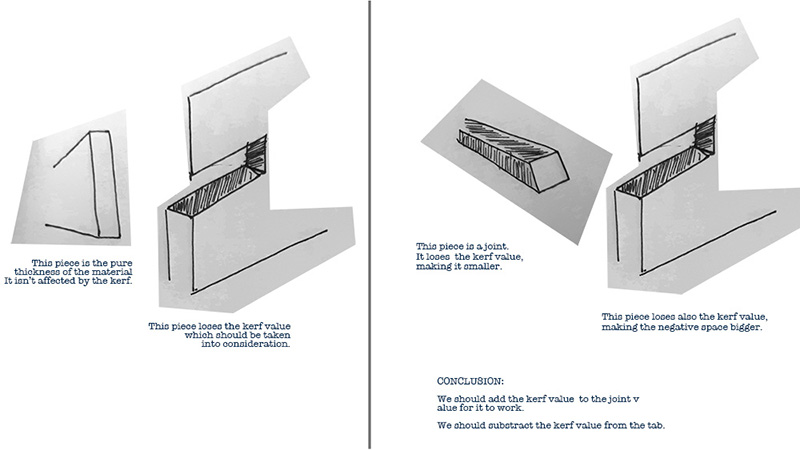
Let me introduce you to The KERF
The kerf is how much thickness the laser will remove on top of the design initial dimensions.
It is affected by both the speed & the power of the laser.
My colleague Antoine showed me on Monday afternoon a really nice trick for calculating the kerf.
How parametric design helps with the kerf
When wanting to assemble two pieces together in your design, defining parameters will ease the worries of always calculating how the pieces will fit together.
I started by testing out simple shapes.
I made sure the width of the tabs is material thickness - kerf

Why, you may ask? let’s put values on this to make it clearer.
I tested using 4mm cardboard. If I want the tabs of the shapes to fit with a 4mm cardboard, then the width of those tabs should be 4mm.
But the kerf will cut an extra, as tested by my colleagues, 0.15 mm.
This adds up to 4.15 mm.
Therefore having a tab width of material thickness - kerf
= 4mm - 0.15 mm
= 3.85 mm will allow pieces to fit in together smoothly
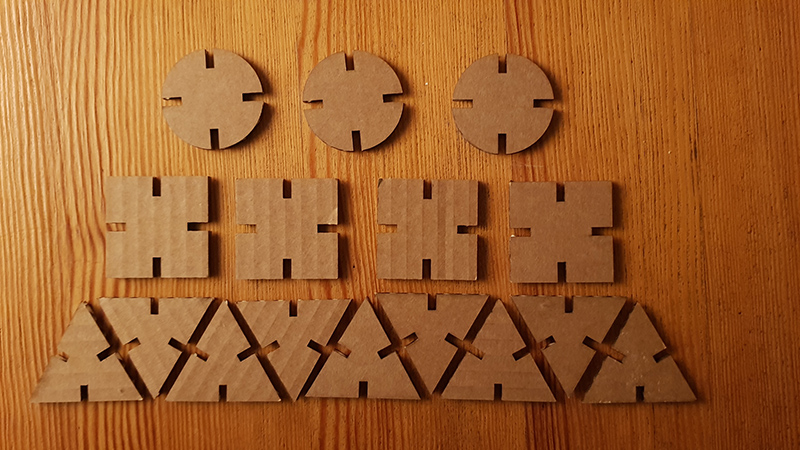
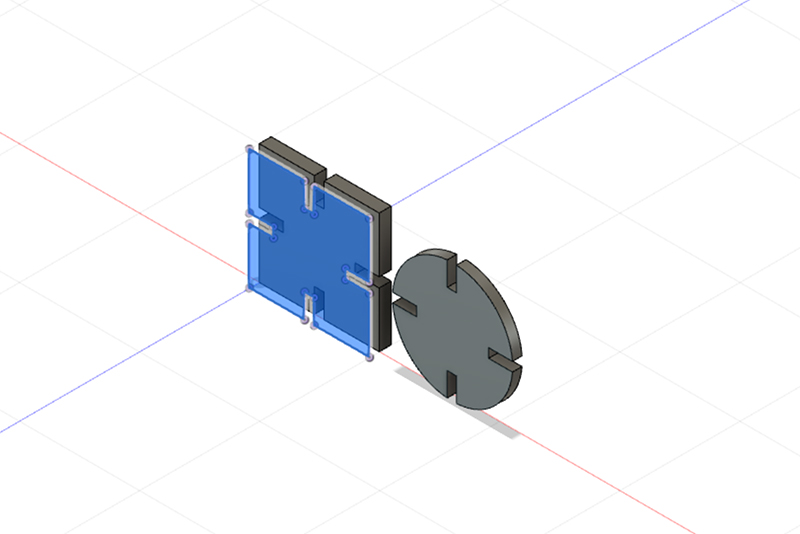
Hypothesis: The math differs slightly when having wood joints
When the joints are cut to work as inputs in tabs, both the joint and the tab are losing the kerf value.
If we use the same parameters as the ones used above for the cardboard, we get the following the results.
The joint will fill the negative space of the tab. Which means that once cut, it will lose the kerf value. material thickness - kerf = 3.85mm
The tab, like in the previous case, will win the kerf value as it will be emptied of the negative space used to fill the joint. Tab: material thickness + kerf = 4.15mm
That leaves us with a 30 mm space that will not allow the joints to come in together!!
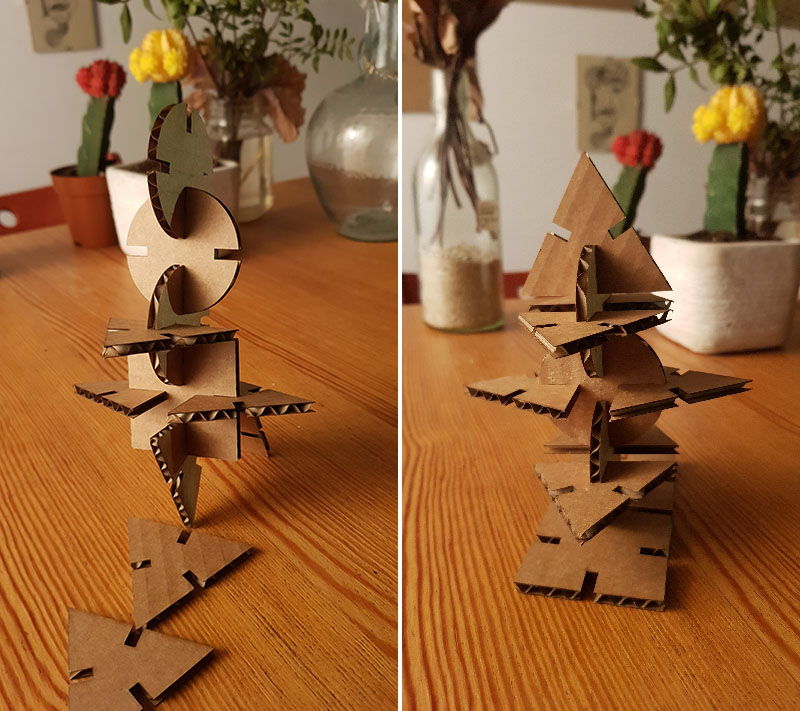
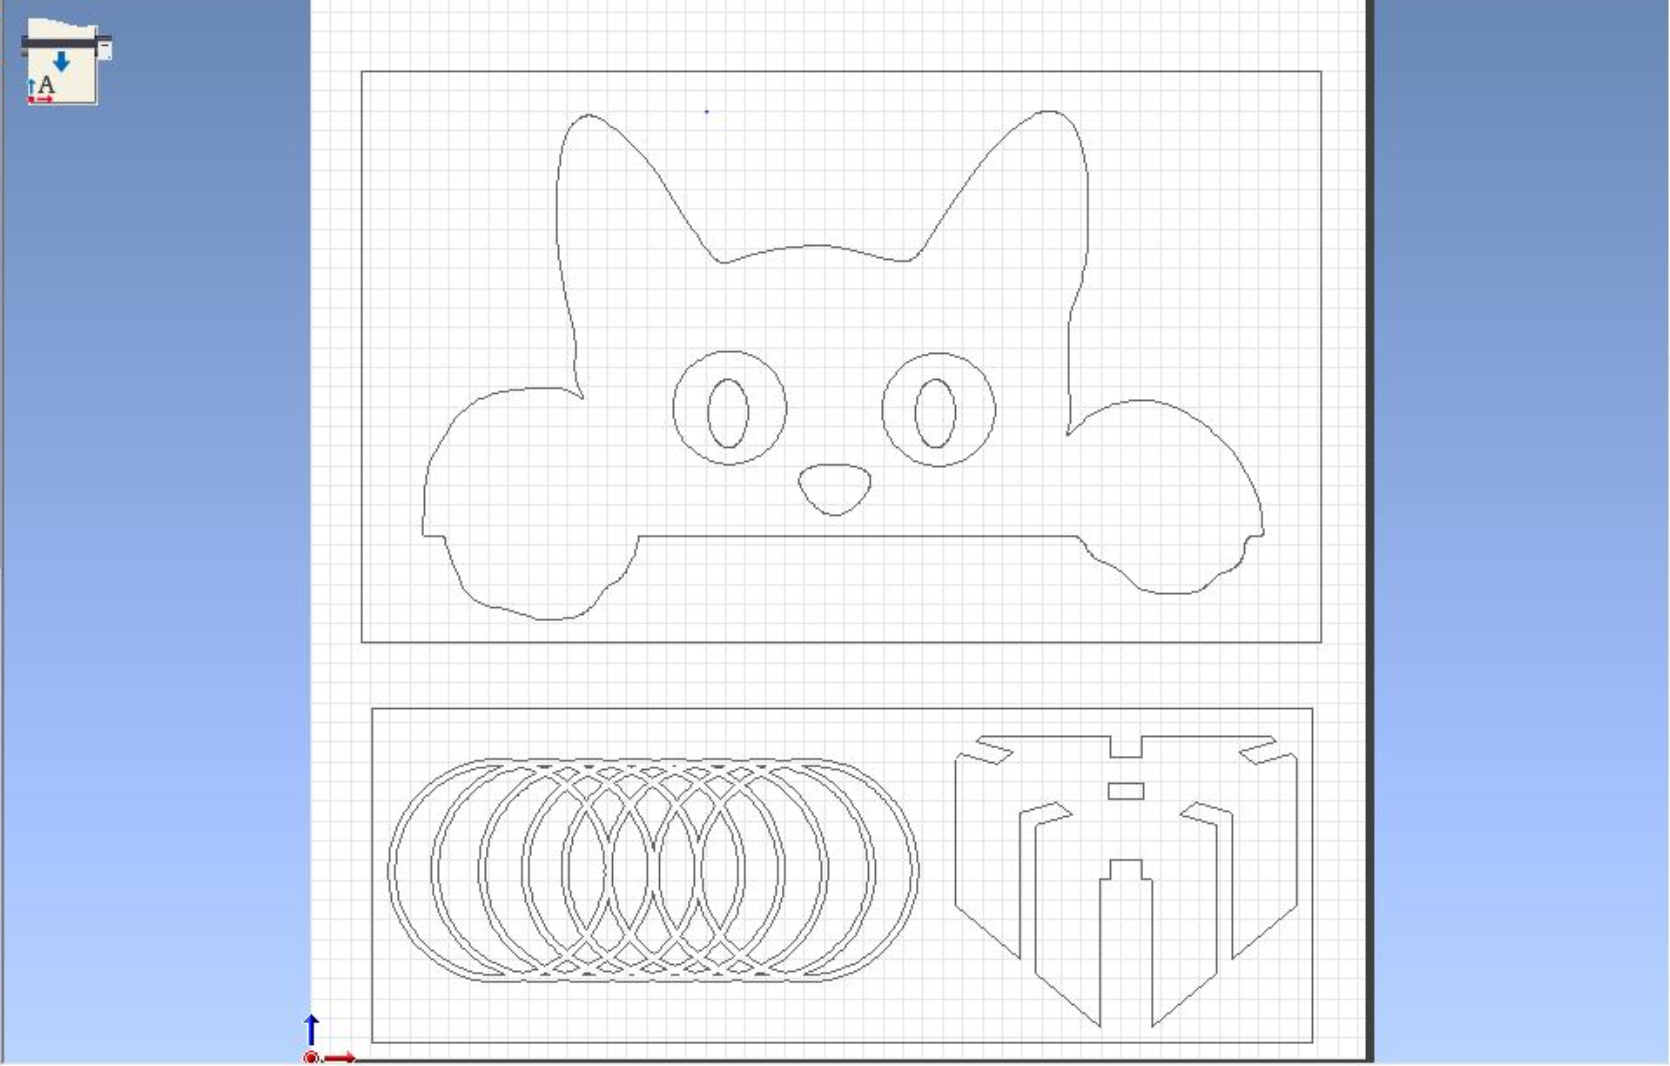
Now that all the basic were covered, this is the project I hopefully will be able to finish in the upcoming days:
A stand for my laptop!
JobControl for Trotec & file handling.
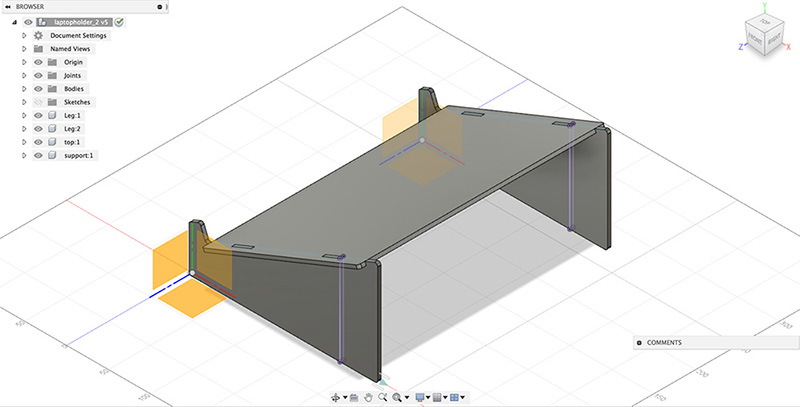
After working on fusion360, I exported the faces that I wanted to .dxf in order to open it on rhino.
The Trotec printing software works with either engraving or cutting (though lowering the power & fastening the speed can give an engraving effect).
The order of the work is pre-determined by Trotec Job Control & it is colour coded.
Black always corresponds to engraving, and it would be wise to do the internal cuts before the external ones so that the piece in the laser cutter doesn’t become uneven and ruin the job or the laser.
Always make sure that:
- the bed dimension is correct.
- the cutting settings are well set.
- to select raster cutting for engraving & vector cutting for lines.
- to deselect “minimize to job setting” if you are superposing two different files, eg. one raster & one vector.
Wiseness from my tutors: test smaller samples always to make sure everything is working as planned to avoid wasting time, power & material.
Living Hinge
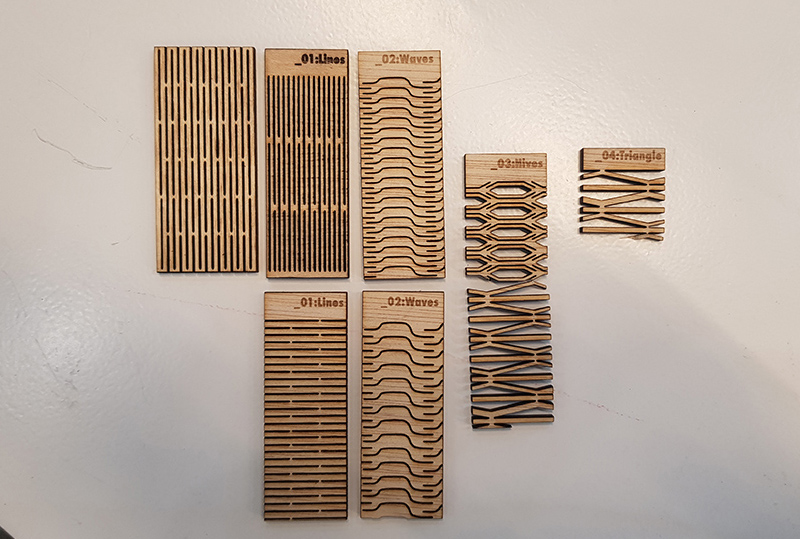
When I saw how living hinges work, I wanted to try it out myself.
Living hinges are basically patterns of cuts that allow material like plywood to fold. I decided to work on small scale living hinges to test how they behave differently.
I realised those are the parameters that make it or - literally - break it.
- the distance between the patterns on the x line.
- the gap between the patterns on the y line.
- the width & height of the pattern elements themselves.
But also, different living hinges have different folding capacities. But that could be wrong because of my illustrator catastrophe.
At first, I used .ai. That was a mistake. Calculating & controlling the three variables is hectic.
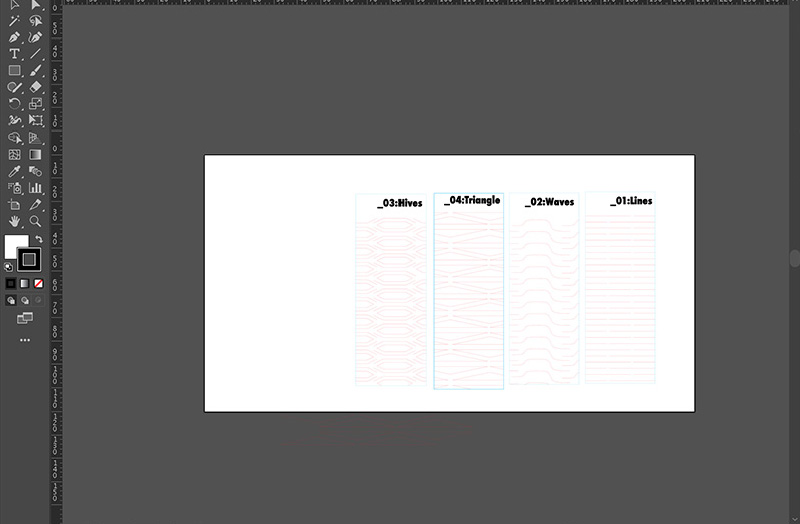
Either way, I went on with using illustrator, exporting to .dxf files to open on rhino.
That led to a lot of overlapping objects, having to use Make 2d command constantly.
After a couple of hours of being stuck in a loop, I realised I can use the Inkscape plugin in order to easily calculate the parameters & test my living hinges, which are very time-consuming to test!
It finally worked!!
Engraving (includes group documentation)
For engraving, as Tue has mentioned in her group documentation, I used grayscales to set the different engraving colours.
I first tested by creating squares, one is black and the rest are grey gradients.
I couldn’t know the settings of the greys, so I had to visually compare.
Eventually, I decided to set my darkest colour for the engraving at Speed 100 Power 80.
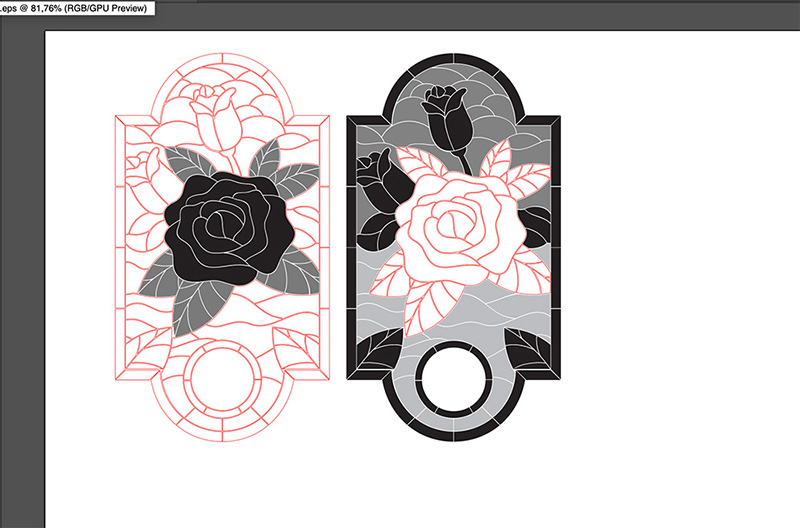
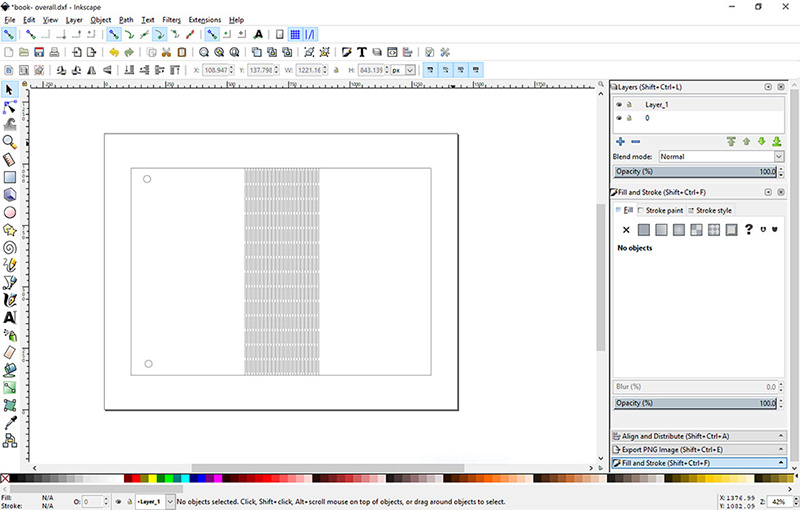
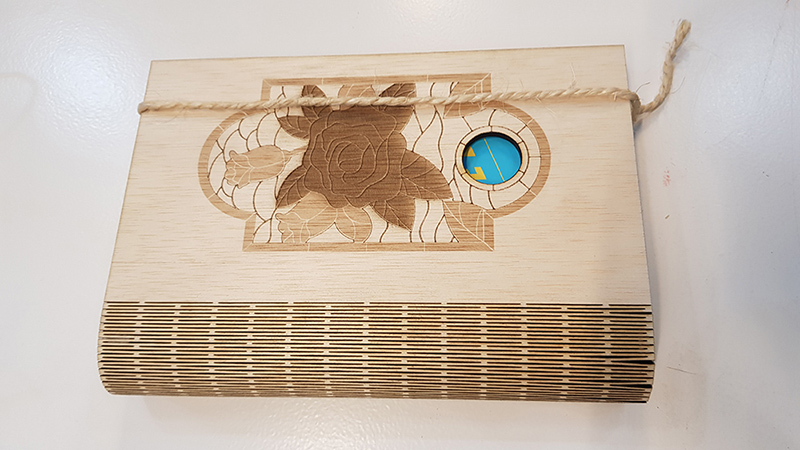
Hardbook cover: the best of engraving & living hinges
From all the trials & errors from before, I was able to create a hardbook cover to protect my books from getting their covers torn from the first couple of times put in the bag!
Roland Vinyl cutter
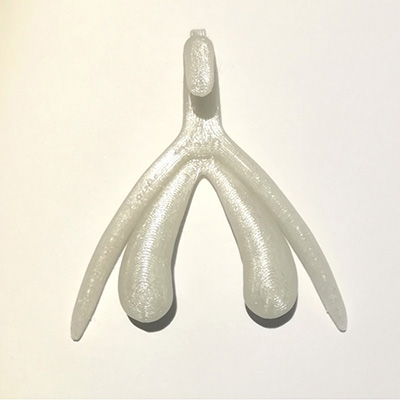
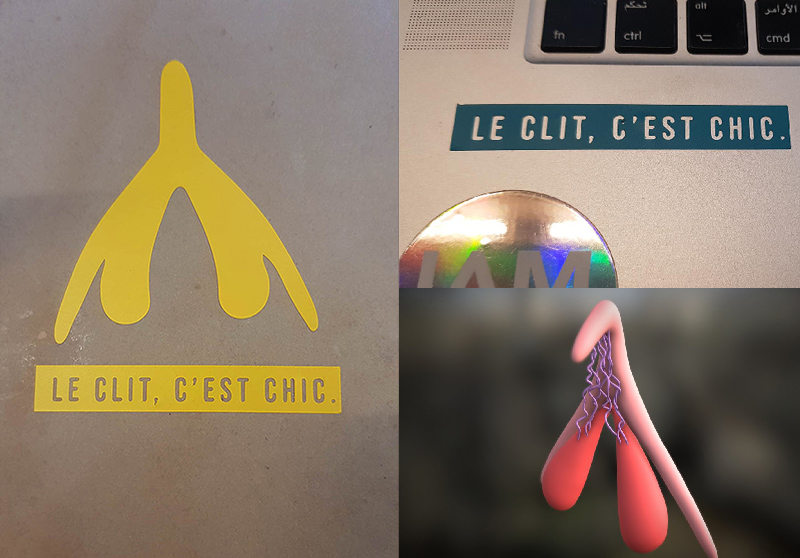
This part was super fun as I was familiar with vinyl cutting. I decided to do a vinyl from female sexual pleasure encouragement.
I used the Roland CAMM-1 GX-24 24 Vinyl cutter
I first created a silhouette of my subject in photoshop, and saved in .psd.
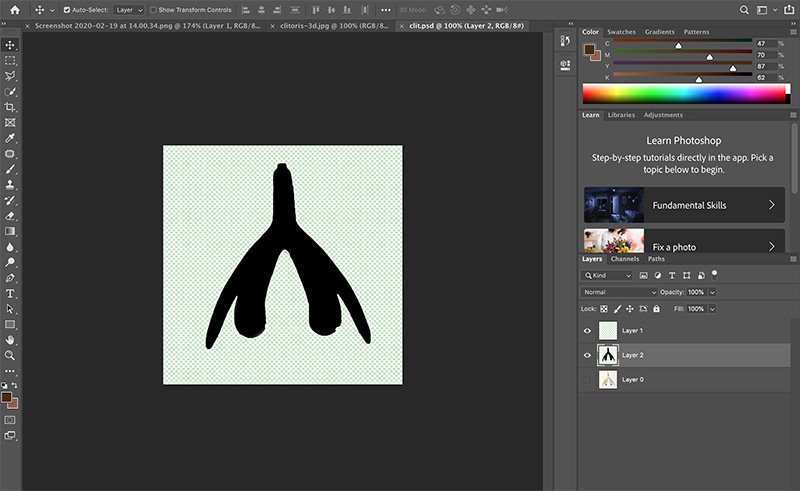
I after opened it in illustrator, image trace, Expand in order to turn it into a vector.
After having the vector, it had some edges.
I softened the extra anchor points using the edge softener pen
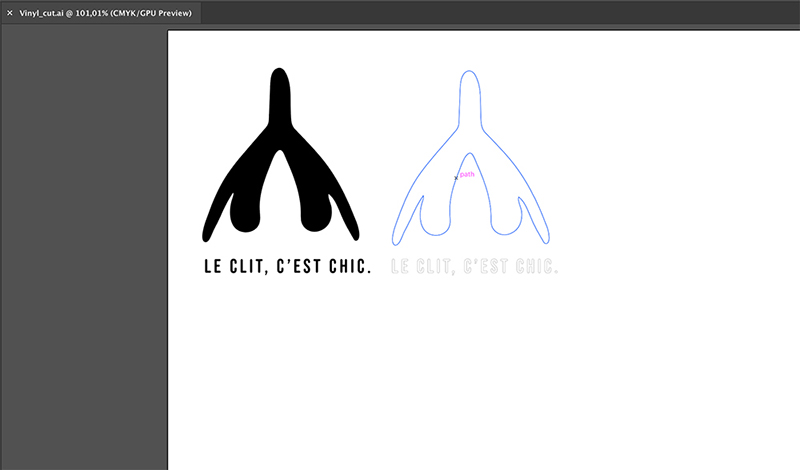
I also added some text & I created a negative space in order to use the negative & positive space.
Lucky I did that. I realised that removing individual letters & sticking them with the right kerning is difficult. It would be better if the font is linked to each other in a stencil way.
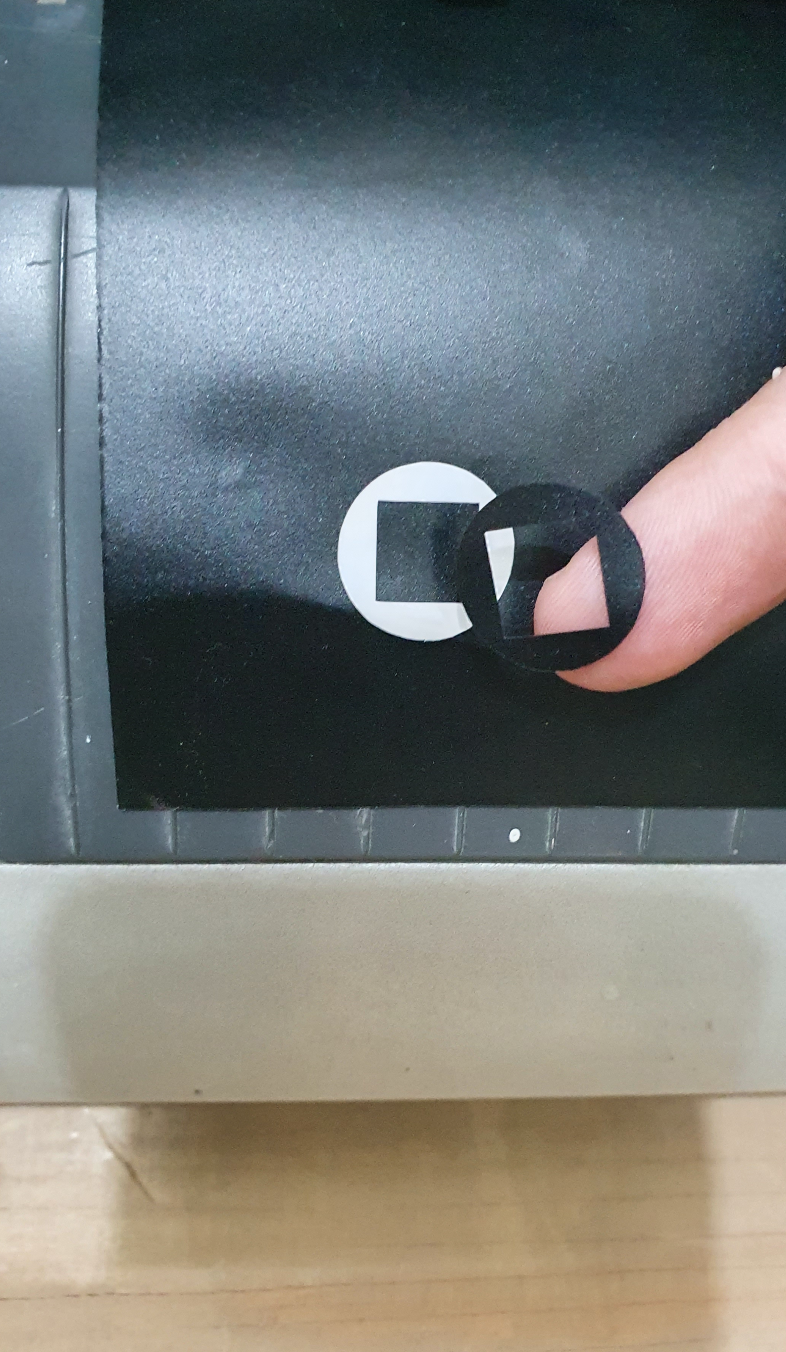
I had to export to CC3 because CC8 was not working on cut studio.
The export should be an outline in .png, .ai cc3 format.
Cutting it for real
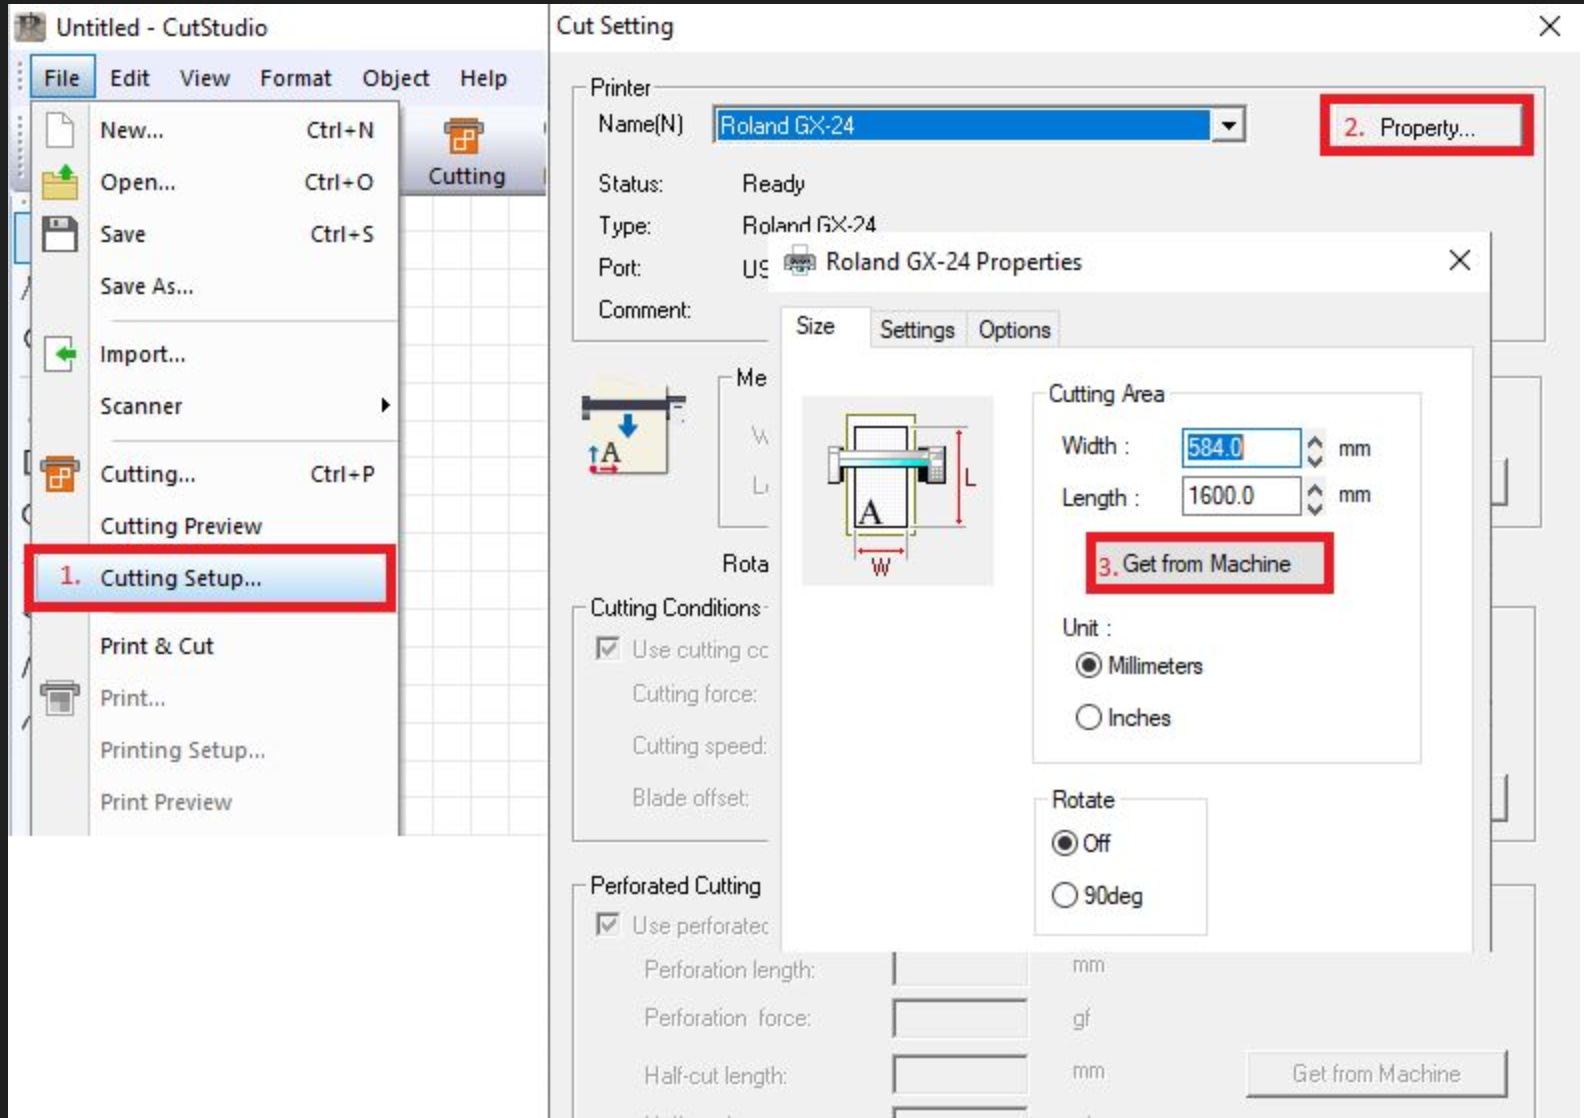
I imported my file into CutStudio.
I inserted my two A4 coloured vinyl sheets into the machine from the back to the front.
I then adjusted the blade so that it only cuts the surface.
Afterwards, I set the origin of the cutting in a way that I do not create much waste.
PAM! result done.
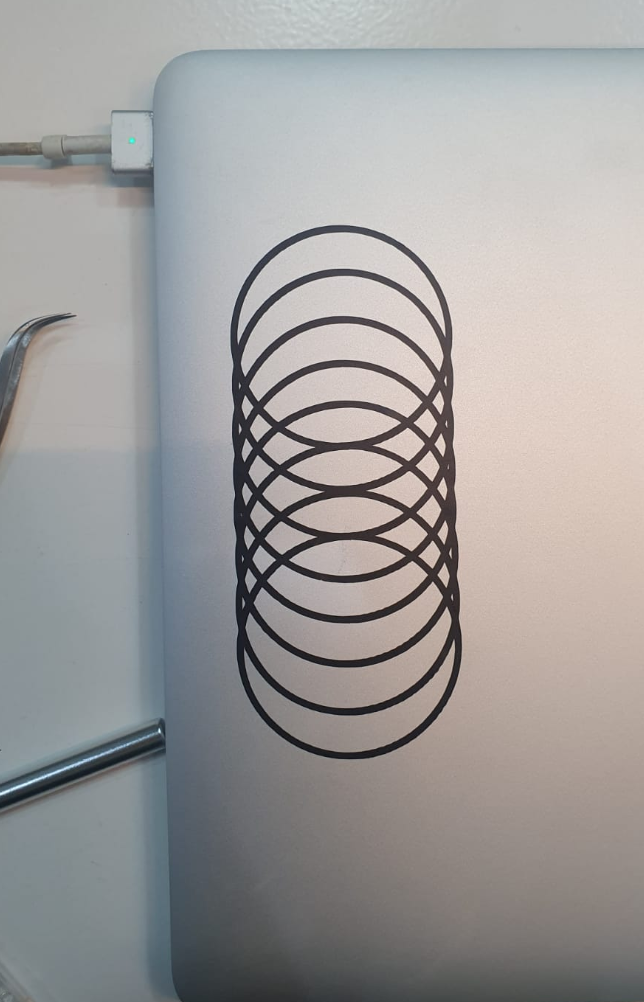
Update 2021: Adjusting the Roland Vinyl Cutter
Since I am not able to retreive the documentation of last year, I decided to do it again. I am using the Camm-1 Servo.
There are a couple of things to keep in mind when using it:
-
I bring down
the locking tabin order to insert my sheet from the back. -
Make sure to
adjust the wheelto be well put on top of your material as long as
it is in line with the pre-determined marks of the machine.
The machine will then understand where the working space will be. -
We then pull up the locking tab to fix the material.
-
I then select the type of material i am using.
I am not using a roll, soI specify it is a sheet.
The machine then detects the size of the sheet I am using.
It gives me aWidth of 263 mm and a heigh of 386 mm. -
The blade is then adjusted manually. We take it out.
The blade works like a screw, from which you can bring out or in the needle.
We test directly on the material.
If it cuts correctly without scratching the sheet protecting the sticky side
of the vinyl, it would be the correct blade adjustement. -
I set up the speed and thickness of the material.
12cm/s for 140 gf 0.250mm -
By clicking
testfor a second, the machine does a test to see if it’s easily cut without going through the protective paper.
This is the end result I get!
Cutting it for real
One of the most important learnings I got from this task is
EXPERIMENTING with different softwares. I was so within the
Adobe ecosystem that I did not even realise the Inkscape plugin exists.
The idea is to look at the solution from different perspectives,
not only focusing on the end goal, but making the process easier along the way.