6. 3D Scanning and printing
This week I took my time in researching and understanding the processes of 3d printing, the materials, and post processing procedures. Mostly I focused on the FDM process since this was the most common process and the one used in our lab.
Below is a summary of my findings on FDM process. Following that I will illustrate my first attempts printing and scanning 3d objects.
I. 3d Printing
What is FDM ?
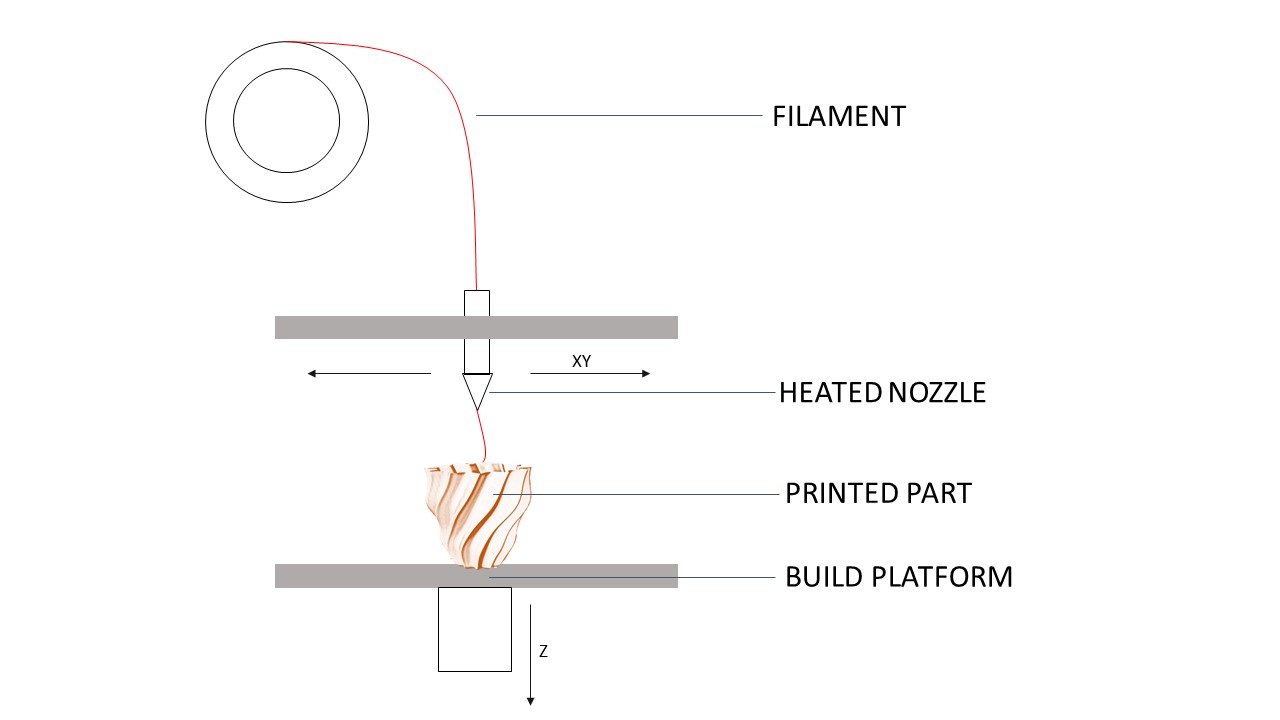
Fused Deposition Modeling FDM is considered an extrusion method in the 3d printing process. This process works by depositing melted material (thermoplastic polymers) in a pre-controlled manner layer by layer following the design of the printer user.
FDM Characteristics
- Layers - Layers are a very important factor as they control the quality of the overall print
| Layer Thickness | Printing Time | quality |
|---|---|---|
| Thick layers | Fast | Rough surface |
| Thin Layers | Slow | Smoother Surface |
- Support - is a sub structure built by the machine when overhanging structures exceeds a certain limit. To explain this below is an illustration of the YHT rule.

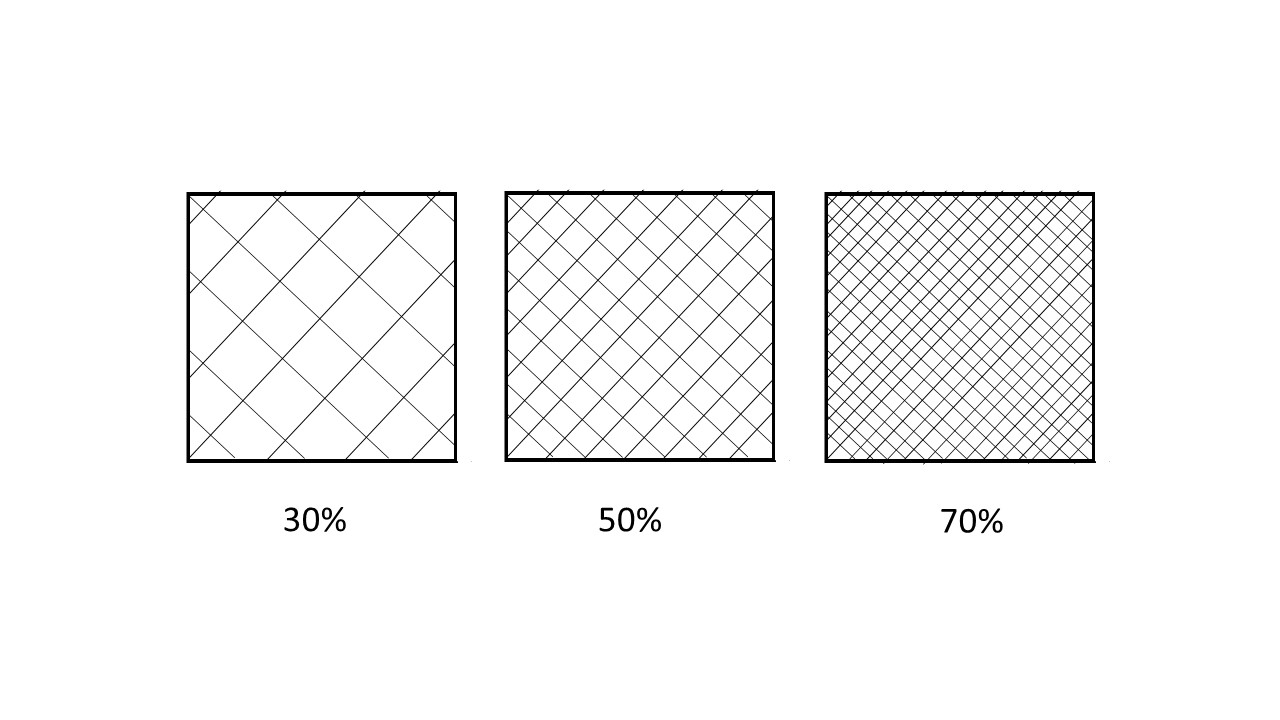
- Infill - the infill percentage should be increased for more strength and decreased when strength is not very important
General Design Rules for FDM
- Bridging: the gap should be no greater than 5mm as sagging could happen.
- Try avoiding small vertical holes (these will be undersized) however, you can drill the hole to size after printing)
- Overhang: up to 45 degrees can be printed without the need of Support. Above that support is required as curling might happen.
- Avoid sharp corners, always chamfer of fillet corners
Tips
- Try minimizing the need for support as much as possible.
- Consider part orientation

Materials
FDM is a very versatile technology which allows for a wide range of materials The most common FDM materials are PLA and ABS. Recently, ASA are becoming very popular as it has similar properties to ABS but it is much easier to print with.
For more information on which materials is most suitable for your print check this article
Post Processing
- Support Removal ( Standard and dissolvable)
- Sanding
- Cold Wilding
- Gap Filling
- Polishing
- Priming & Painting
- Vapor Smoothing
- Dipping
- Epoxy Coating
- Metal Plating
For more detail about the post processing techniques click here
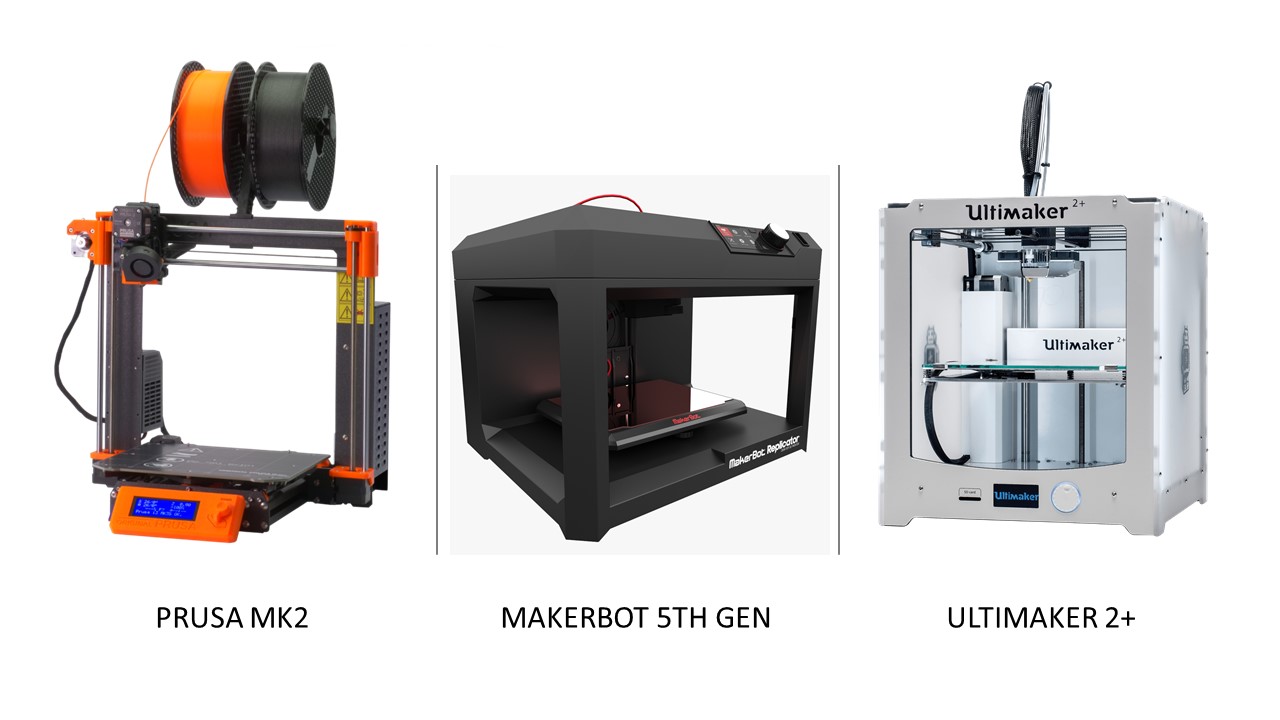
3D Printers available at Fab lab Bahrain
| SPECS | PRUSA MK2 | MAKERBOT 5TH GEN | ULTIMAKER 2+ |
|---|---|---|---|
| Nozzle | 0.4 mm | 0.4 mm | 0.4 mm |
| Layer Thickness | 0.05 – 0.3 mm | 0.05 – 0.3 mm | 0.02 – 0.6 mm |
| Filament Diameter | 1.75mm | 1.75mm. | 2.85mm |
| Speed | 100 mm/s | 150 mm/s | 300 mm/s |
| Materials | PLA/ ABS / PETG /TPU (FLEXIBLE) | PLA | PLA |
| Slicer | Prusa / Slic3r | MakerBot Print | Ulitmaker Cura |
| Build volume | 25 x 21 x 20 cm | 25 x 20 x 15cm | 22 x 22 x 20 cm |
| Automatic Calibration | Yes | Yes | No |
” Almost all 3 printers performance are similar to some extent with some minor differences in speed and build volume. For me, I didn’t have a preference of one over the other and tried to use whatever is available”
First Print
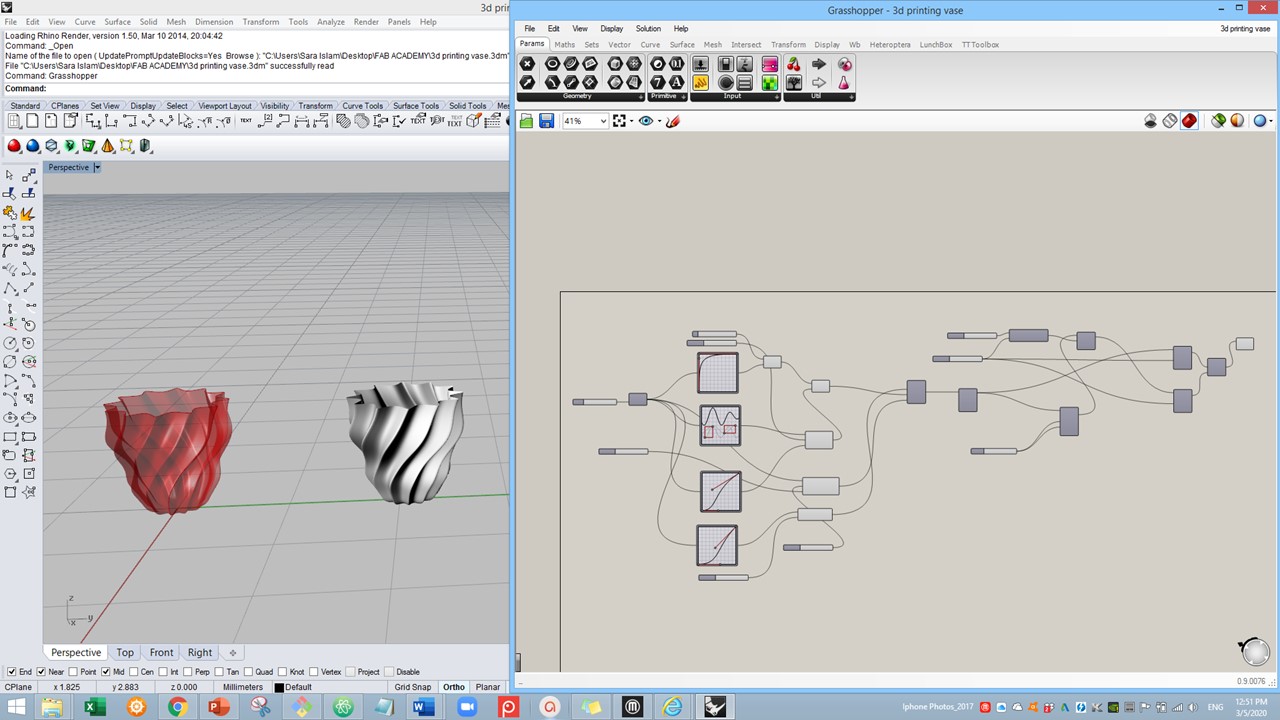
For the design of my model I followed a grasshopper definition of a parametric vase from a tutorial. However, my design was different as I used different parameters. I decided to use Rhino and grasshopper to refresh my knowledge of them. The design of the vase couldn’t be fabricated by the subtractive methods. On the contrary, additive manufacturing techniques like the 3d printing was perfect for it.
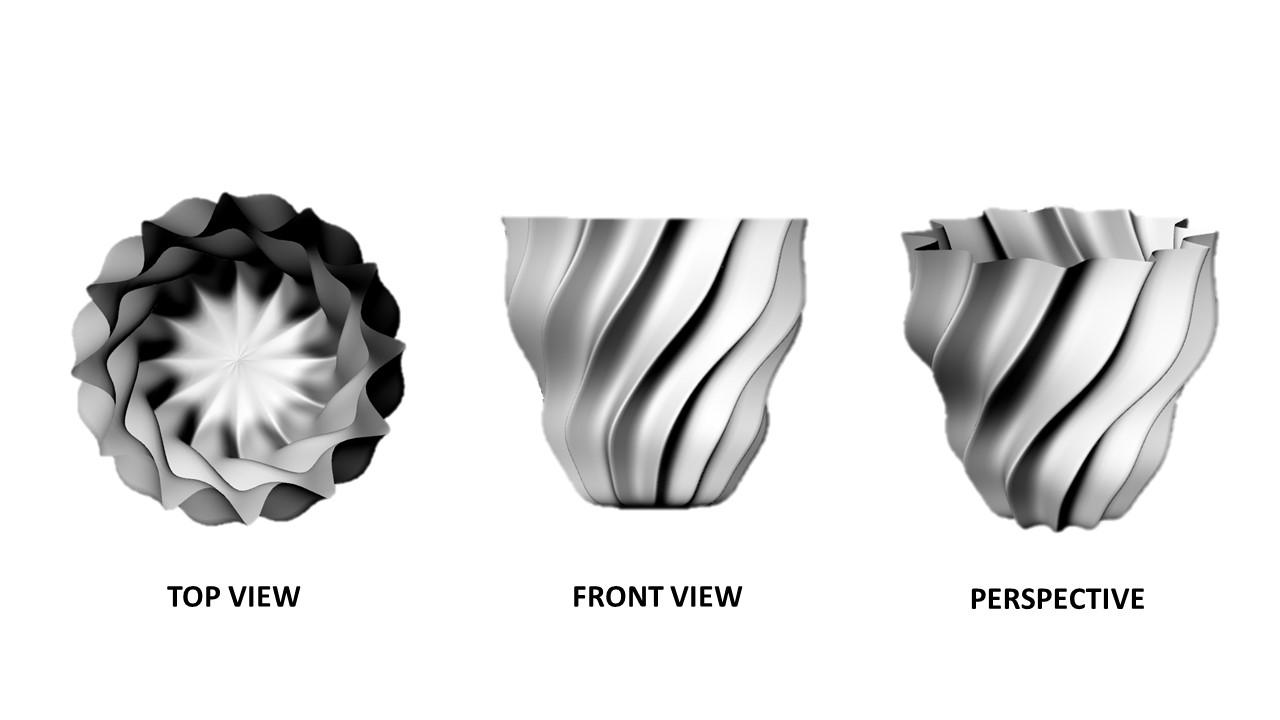
” For my print I used MakerBot as it allows the user to make a raft to the design which aids in stabilizing the part on the building platform. The raft also protects the model from getting damaged by leftovers on the printing surface. Moreover, in MakerBot I was able to control the print from the computer and send it from there”
Makerbot Slicer
For my Makerbot printer I used Makerbot Print slicer. It’s interface is very simple and easy to work with. Below are the steps I followed to proceed to printing my model.
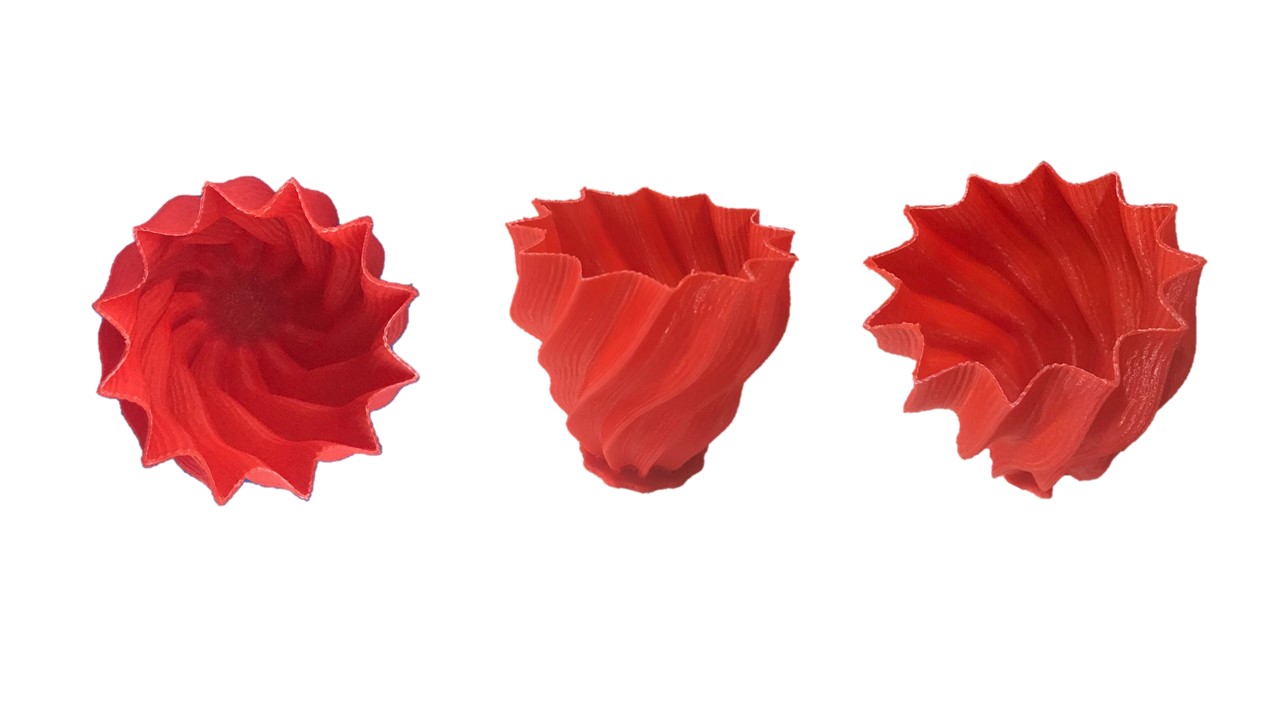
Then the print has started and the estimated time was almost 2 hours.
The model has finished printing and I was happy with the results
Problems Faced
For some reason I faced two challenges when trying to print my model. I believe this happened when exporting my model from Rhino to the stl format or maybe it was something I forgot during modeling.
Problem 1: Inside of my vase was being filled
Action taken:
I reduced the infill percentage to 0% so it doesn’t get any infill.
Problem 2: The top of the vase was covered by a lid
Action taken:
I stopped the printing before finishing all the layers to avoid this last bit that I didn’t need.
Learning Outcomes
- Always preview and try to observe what’s going on on the printing before actually starting the print to avoid fail prints and act accordingly.
- Make sure you double check on the model before exporting to make sure there aren’t any problems.
Second Print
II. 3d Scanning
Problems Faced
Learning Outcomes
Useful links
Design Files
- First Print-Rhino
- [First Print-Grasshopper](
- Second Print-Rhino
- Second Print-Grasshopper
