Work flow of assignment
Group Assigmnent :
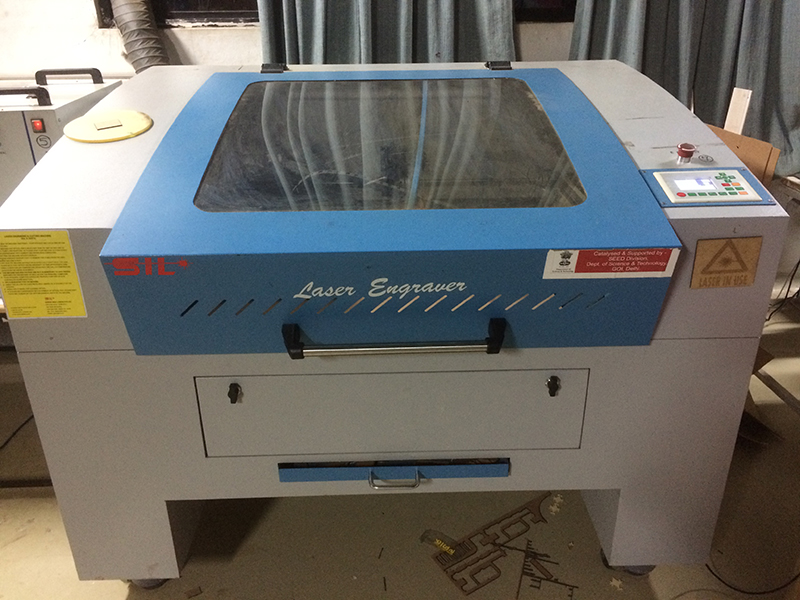
About Lase Cutter
Laser cutting is a technology that uses a laser to cut materials, and is typically used for industrial manufacturing applications, but is also starting to be used by schools, small businesses, and hobbyists. Laser cutting works by directing the output of a high-power laser most commonly through optics.
Now I am going to make something interesting and useful thing. But first I need to learn about the laser cutter machine.
1)To find out Kerf When we try for press-fit, found it's too loose fit. so I decided to find out the kerf.
KERF:
The laser burns away a portion of material when it cuts through, this is known as the laser kerf and ranges in 'mm'.
Laser Cutter Machine Software
RD Works
RDWorks is a powerful program that allows you to perform laser cutting engraving operations. Develop and edit patterns and design projects for laser cutting machines in the dedicated environment with access to tools for drawing separate points, vertical and horizontal lines, polyline, ellipses, circles, rectangles, circles, Bezier curves, etc. Writing texts is also possible.
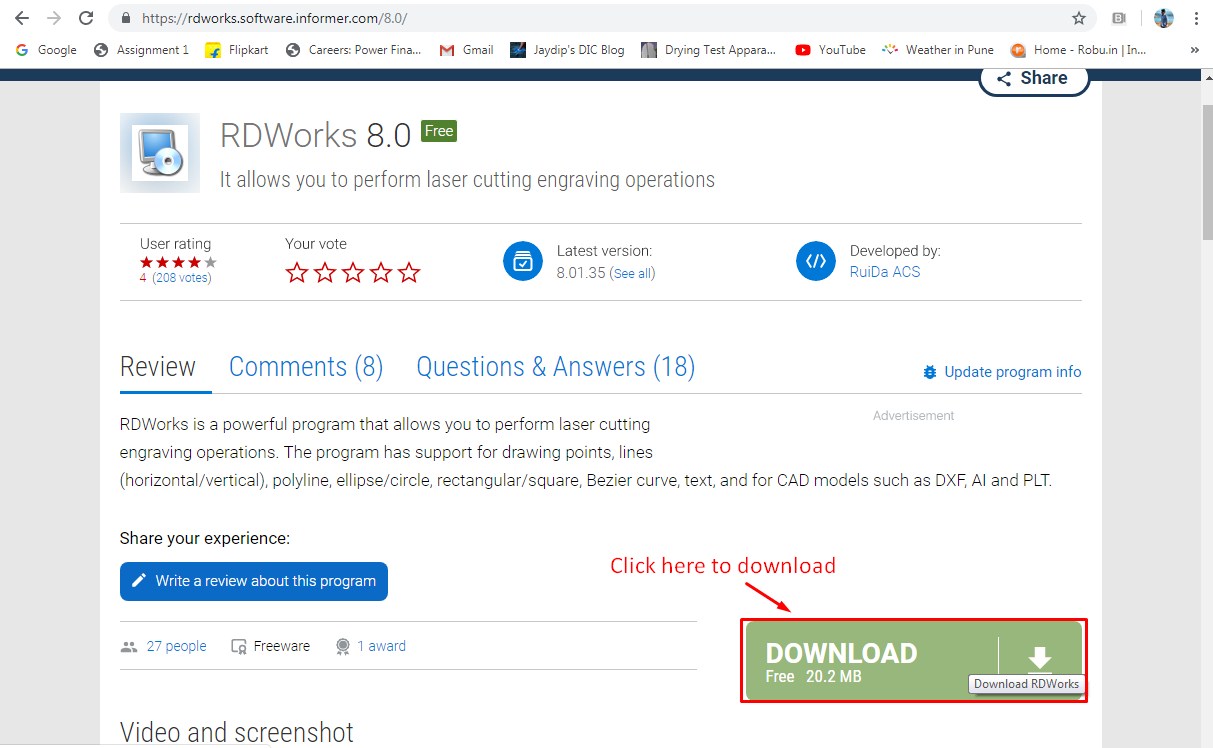
About RD Works

Group Assignment
In our fablab 8 students, so we make the 4 different groups. And assign the tasks to every group. So me and Aanand are in same group. Our task in to find out correct cutting speed and power for 4mm Acrylic material.
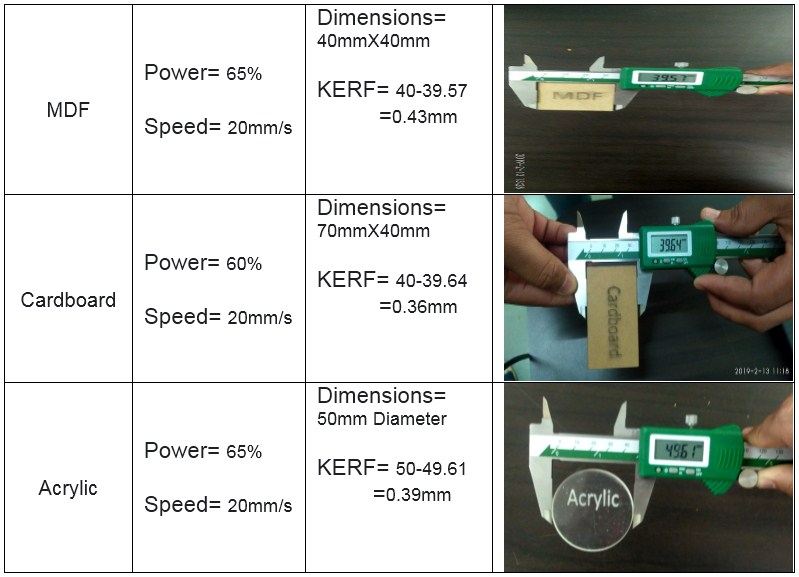
We took 3 materials Acrylic, Cardboard and MDF. Designed Circle, Rectangle and Square in RD works. We gave the Power and Speed by referring standard chart in our Fablab.
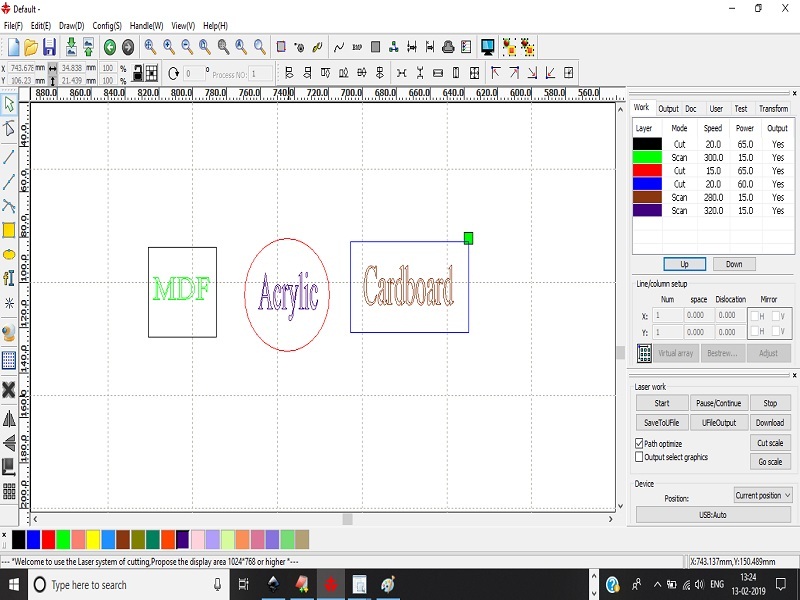
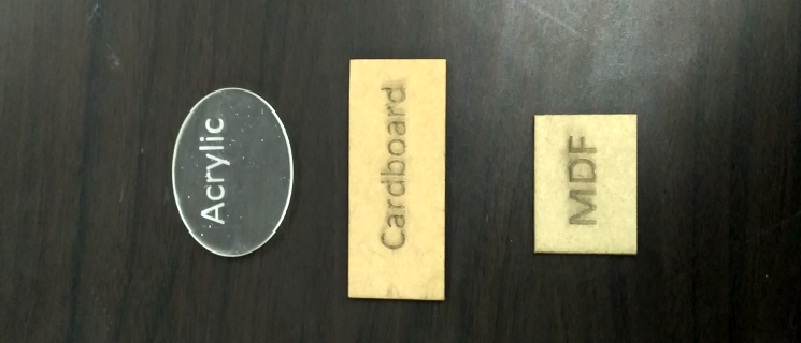
After cutting we checked the KERF for Acrylic, Cardboard and MDF material. and results are shown below:
As per our task we designed a chart in RD works for 3mm acralic material, which includes six 1mm sq squares also engrave their Spped and power.
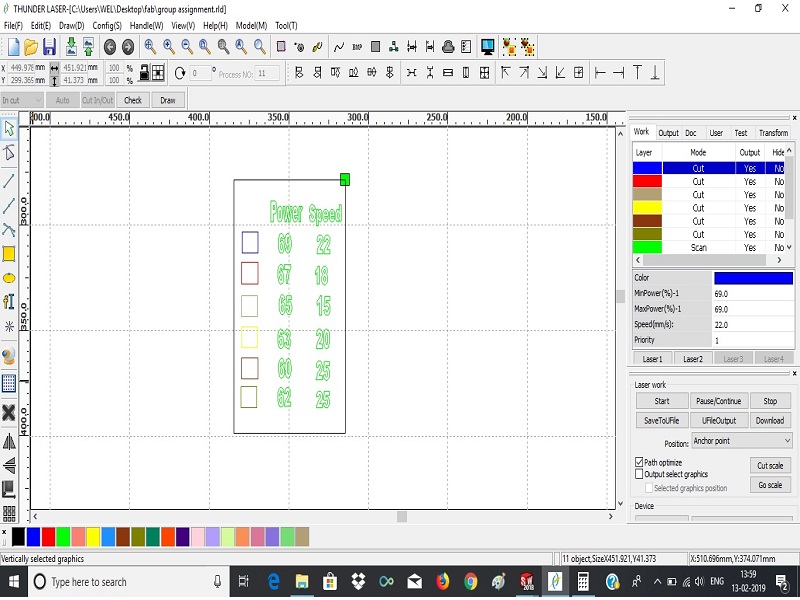
After cutting we checked the which speed and power has minimum KERF. And results are shown below:

We found correct Speed=15mm/s and Power=65% for 3mm acrylic.
Same as above, other group member's also did kerf calculation for different materials are as follow:
Tushar and Vaibhav worked to characterize the laser cutter for Acrylic material.
Aditi and Manoj worked to characterize the laser cutter for MDF material.
Pooja and Hemang worked to characterize the laser cutter for MDF material.
Individual Assigmnent :
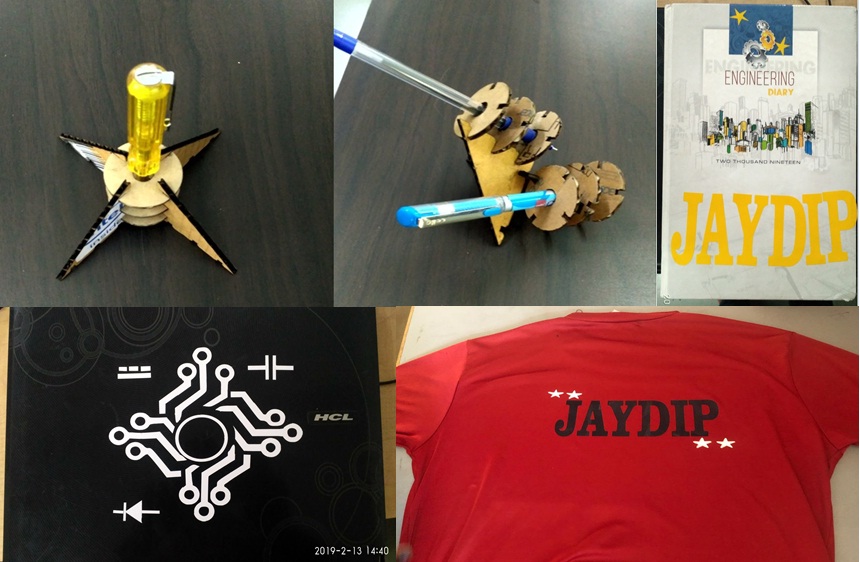
I am going to make a 'Testor/Pen holder' for press-fit laser cutting assignment in solid works.
Circle
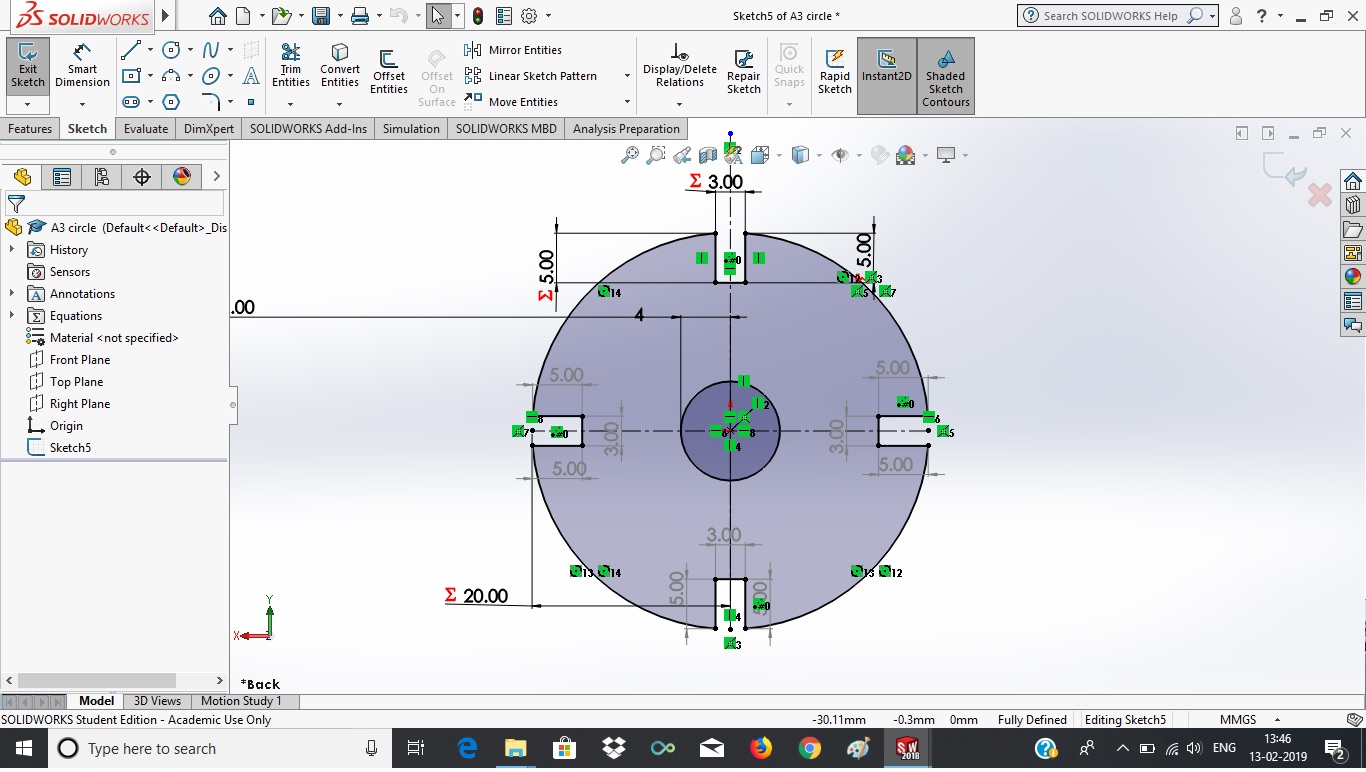
So, first I draw the two different radius circle. One is '4.50mm' and another is '30mm'.
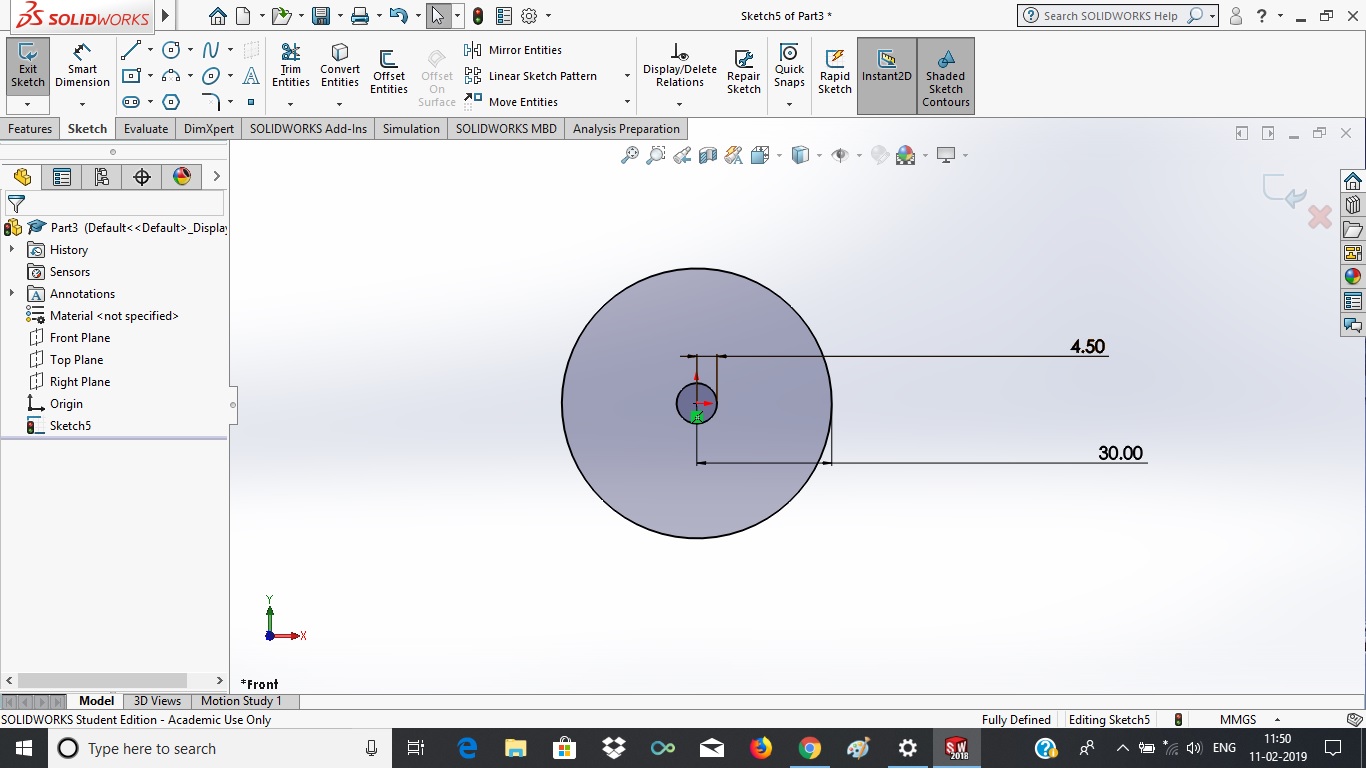
Made '5mm X 5mm X 5mm' notch on outer circle perimeter. I used 'line' tool from sketch option.
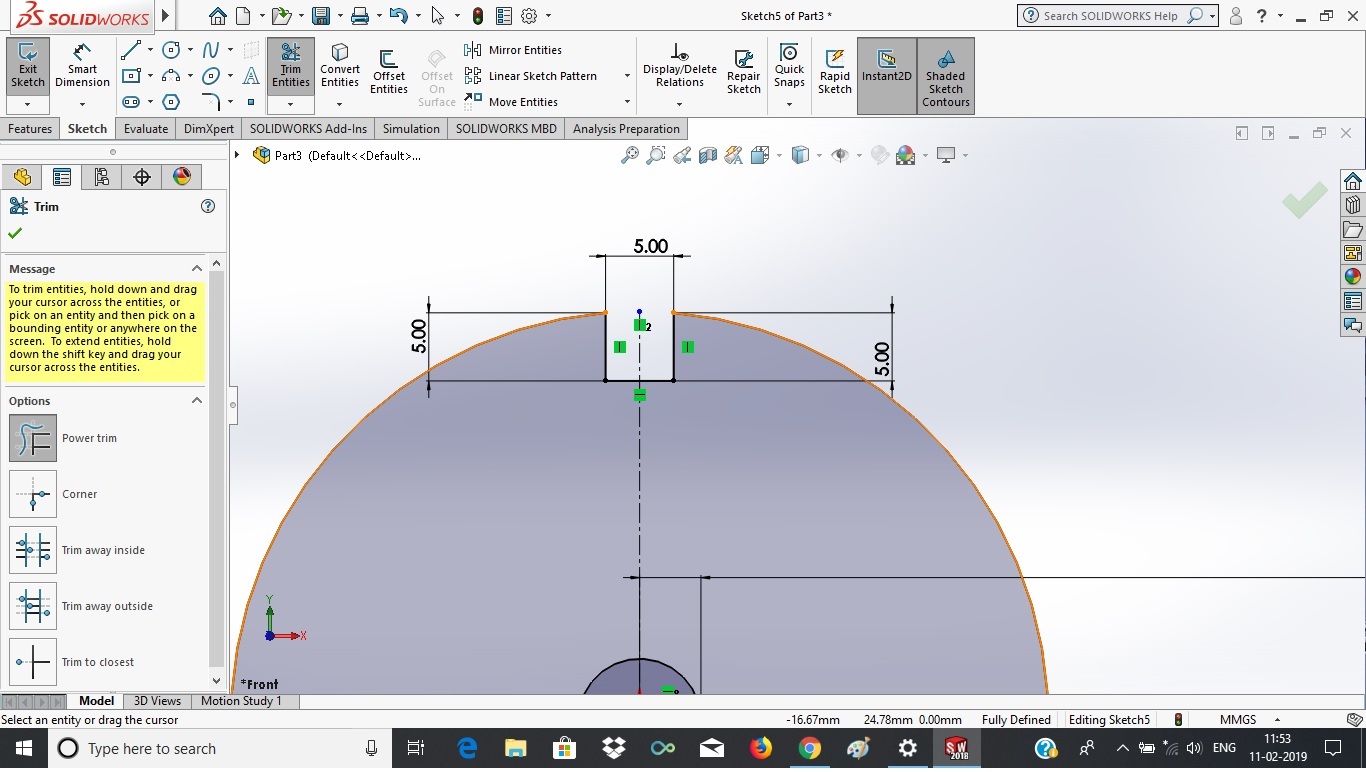
Made notch's sketch parametric using 'mathematical expressions'. Then by using 'Linear sketch pattern' I draw the same nothes on perimeter at another 3 points. Now total 4 notches on outer circle perimeter.
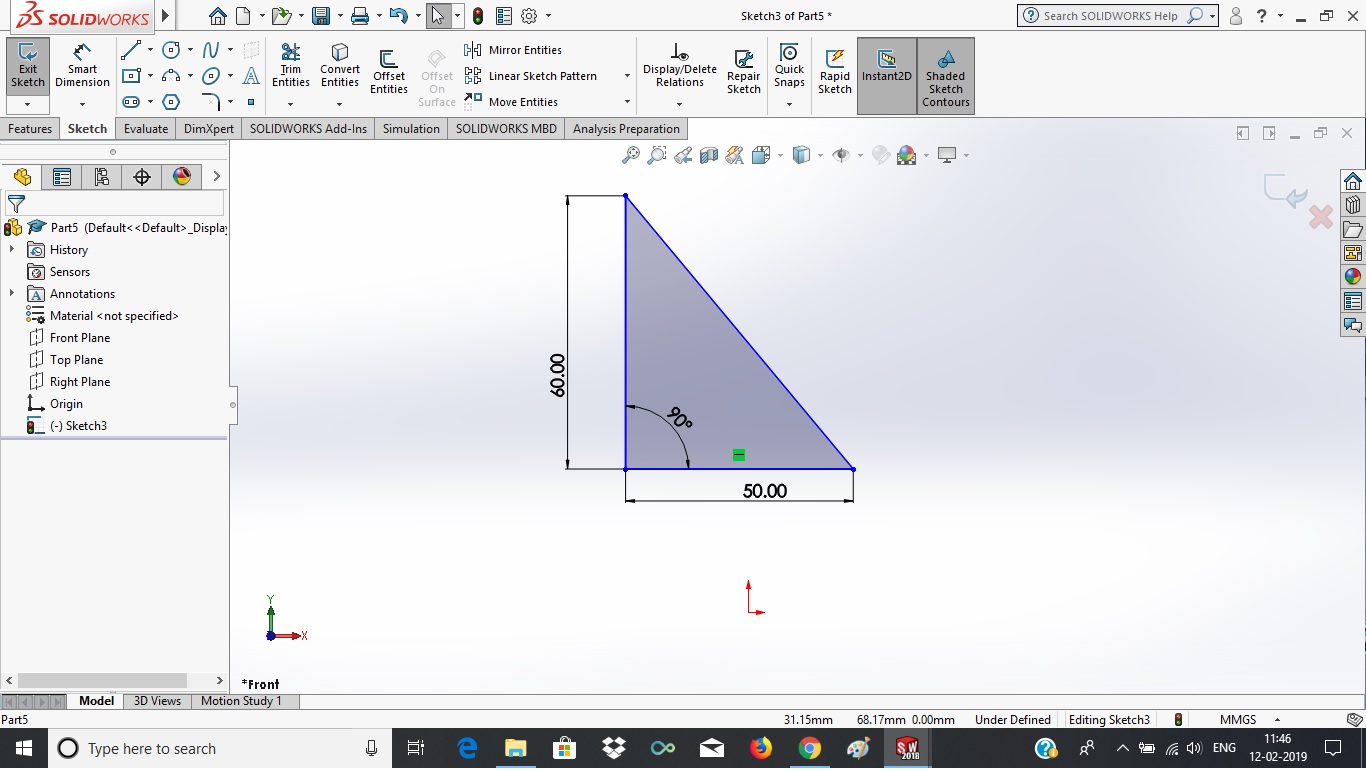
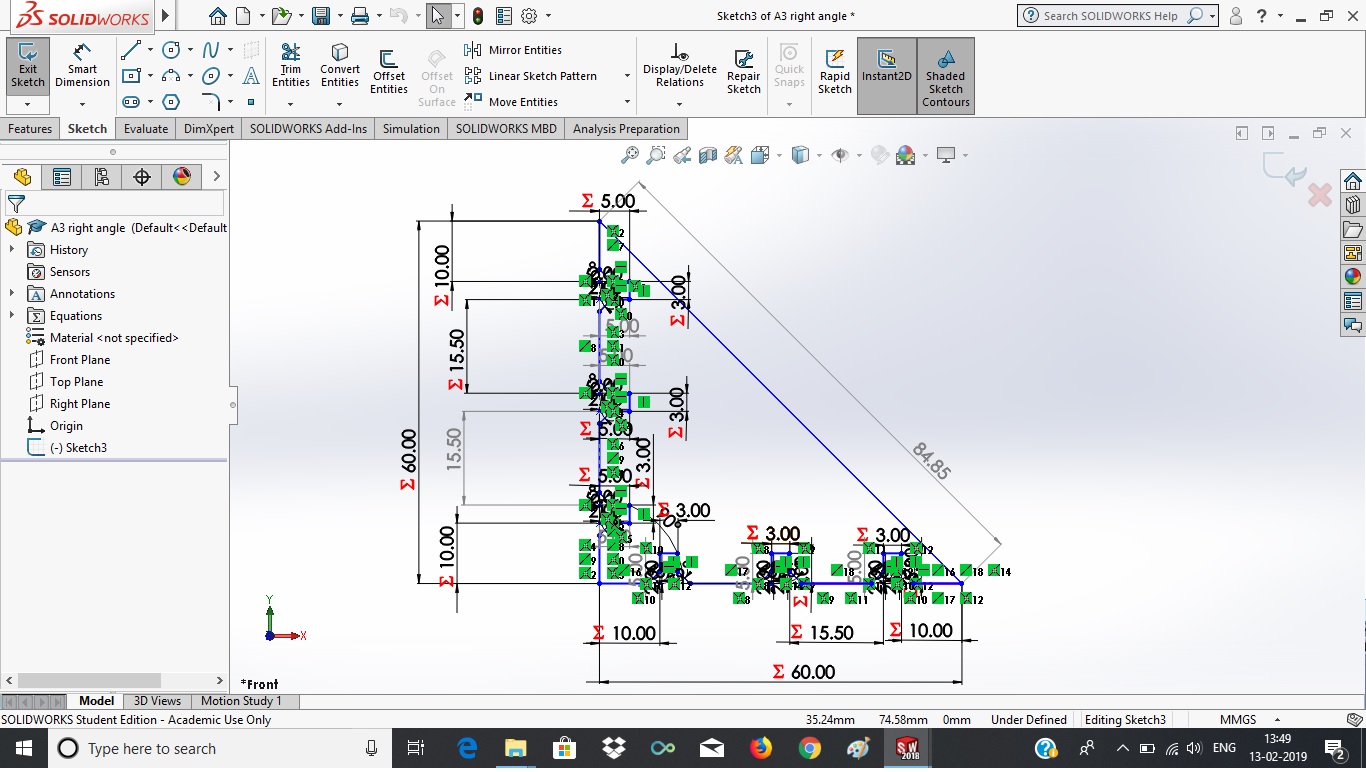
Right-angle In this I draw the right angle with dimensions of two side which perpendicular to each other, 50mm and 60mm respectively.
Then made '1.70mm' notch having length is 8mm. I used 'line' tool from sketch option. Then made also chamfer 'D1=2mm' & 'A=45degree' by using 'Skech chamfer' tool. And made notch's sketch parametric using 'mathematical expressions'.
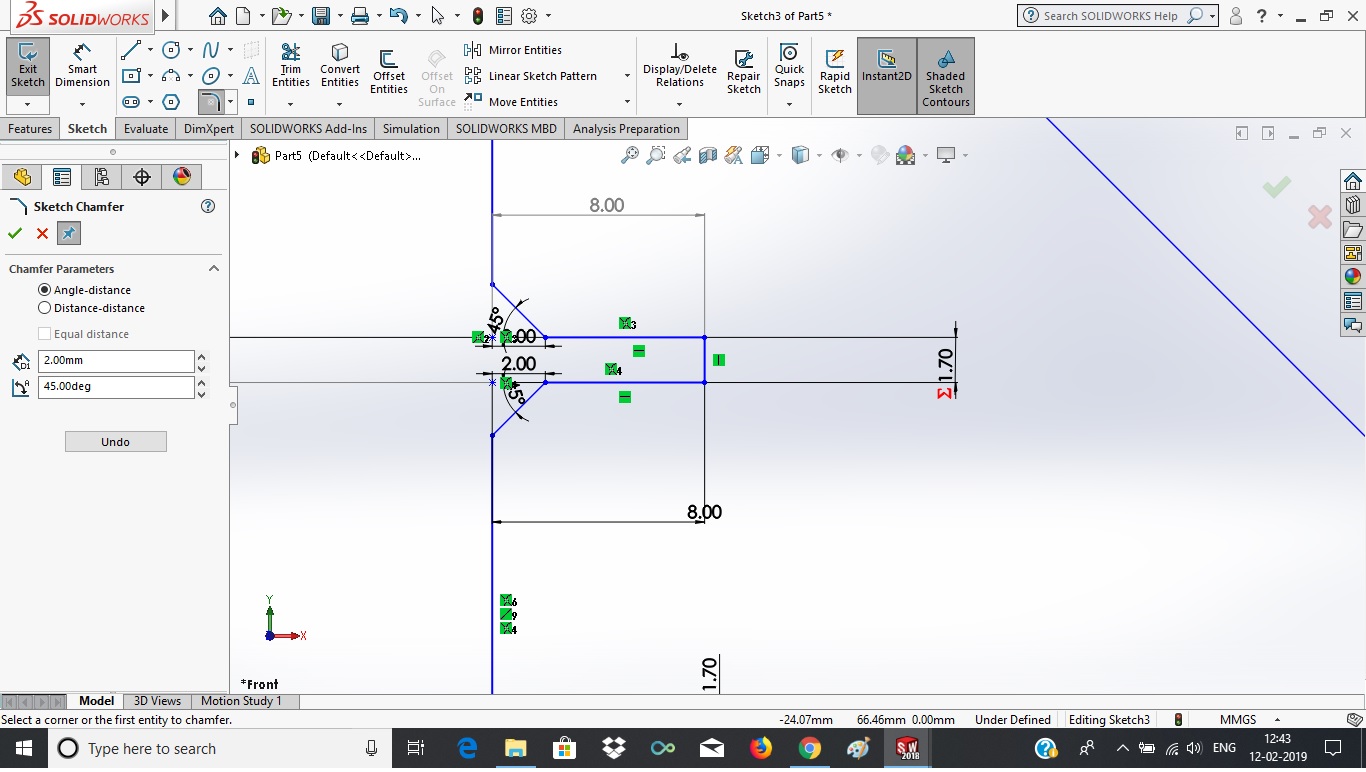
Then made same three-three nothches on two side which are perpendicular to each other And made all notch's sketch parametric using 'mathematical expressions'.
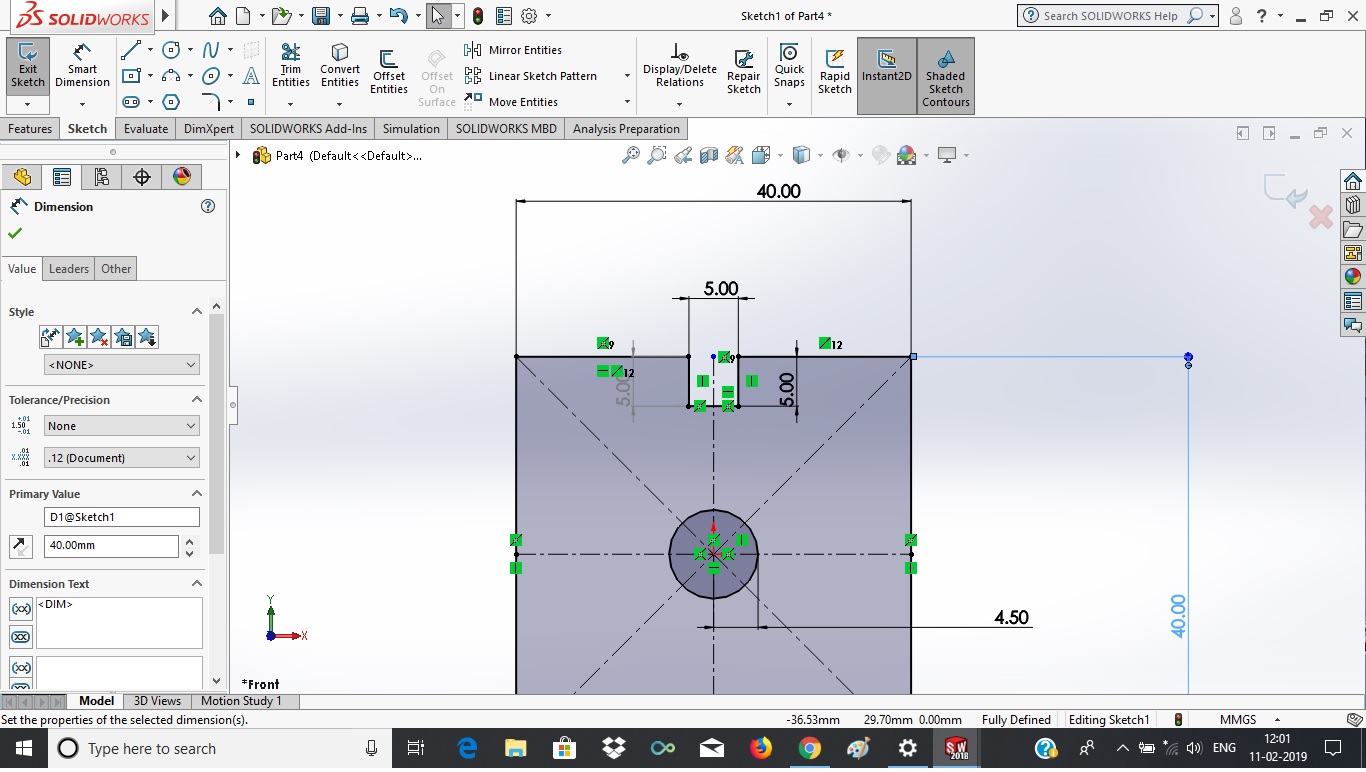
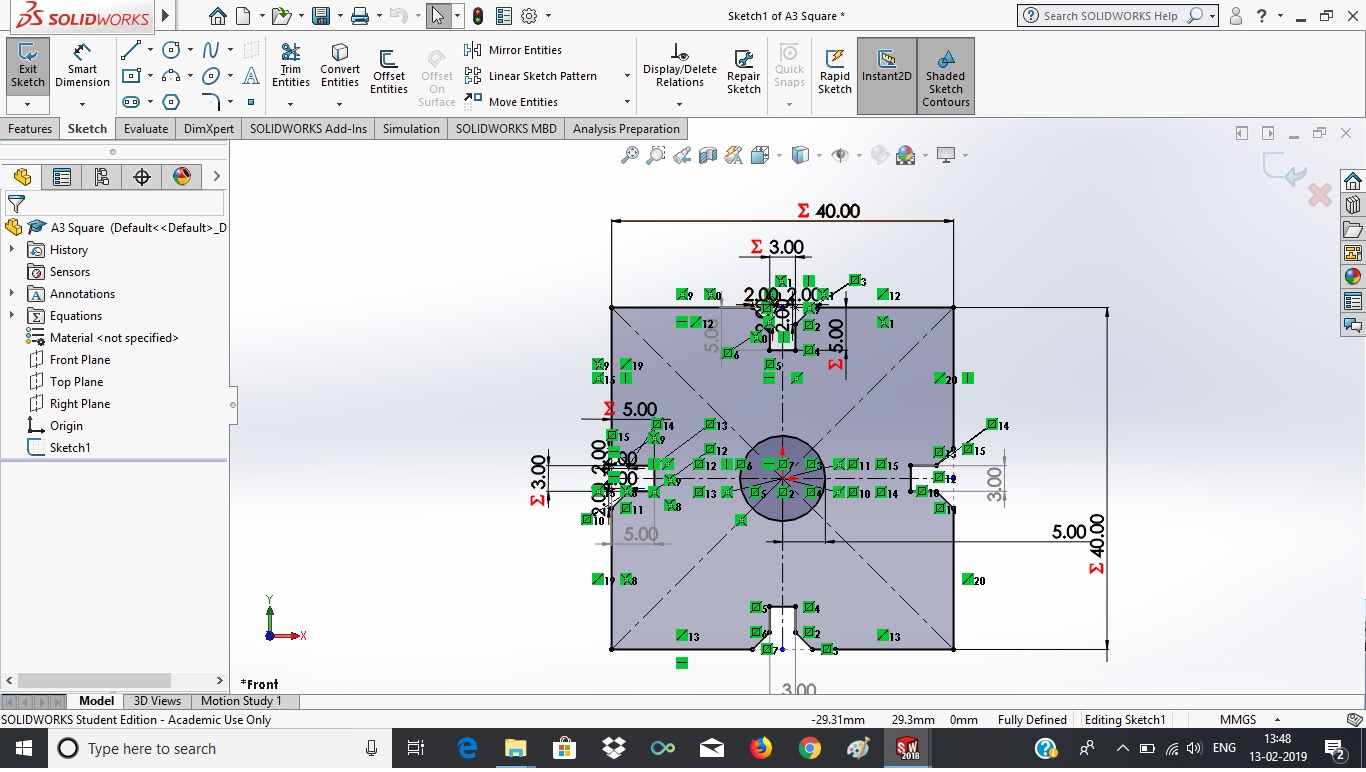
Square In this I draw the circle and square with dimensions, '4.50mm' radius and '40mm' X '40mm' sides of square respectively.
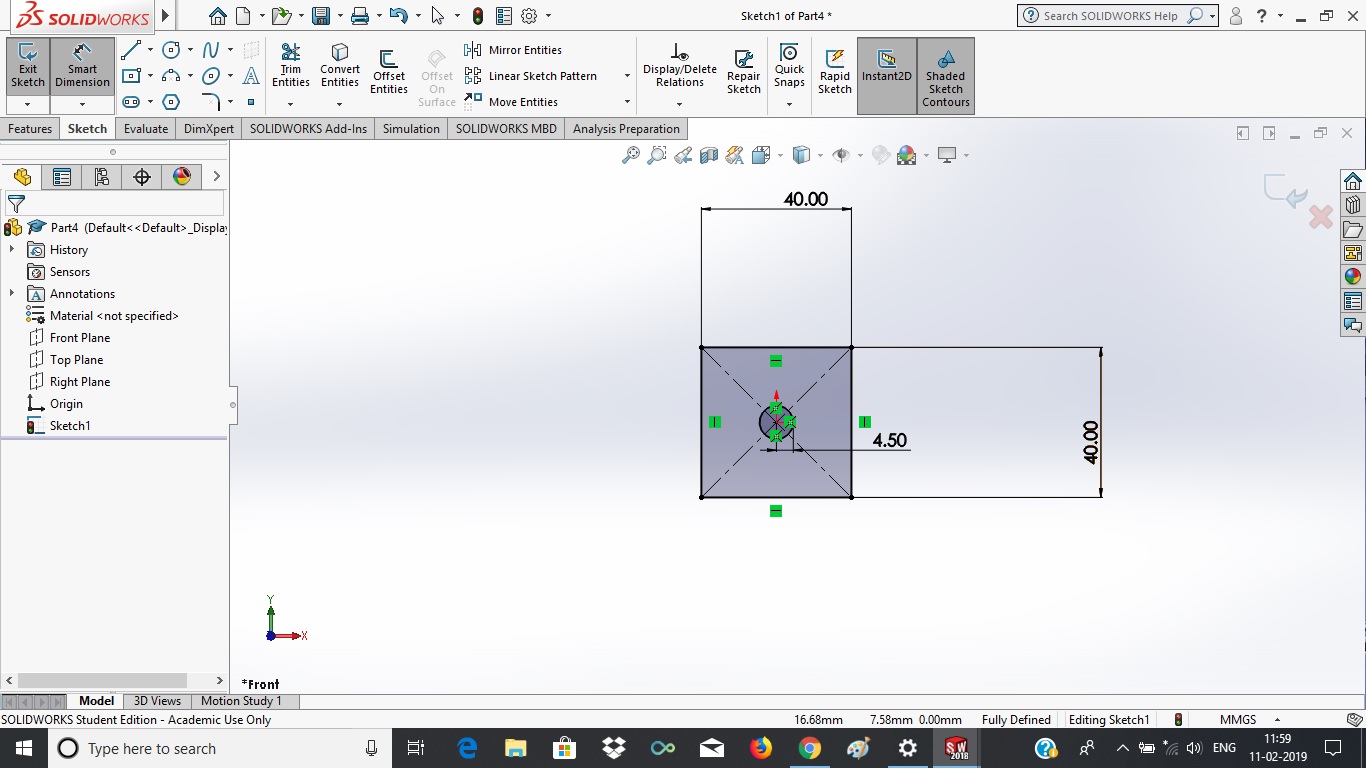
Then made '5mm X 5mm X 5mm' notch on centre of one side of square, by using 'line' tool from sketch option. Then made also chamfer 'D1=2mm' & 'A=45degree' by using 'Skech chamfer' tool.
Then made same one notch on each side of square by using 'line' and 'mirror' tool. And made all notch's sketch parametric using 'mathematical expressions'.
Prepare '.rld' file After parametric design in solid works. I export the '.DXF' file from solid works. And with this '.DXF' we can't go directly for laser cutting. So these '.DXF' files imported into RD works software and made '.RLD' file for laser cutting.
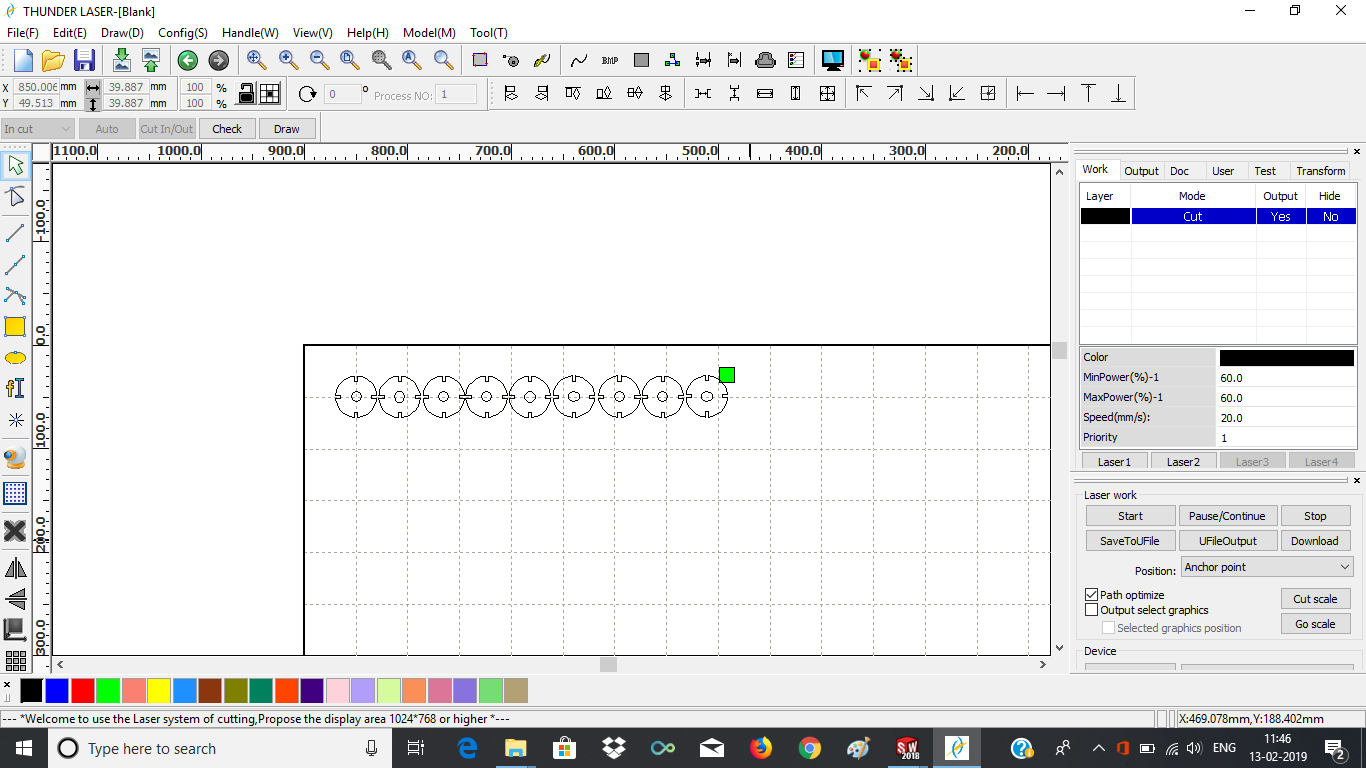
Circle '.rld' file
Square '.rld' file
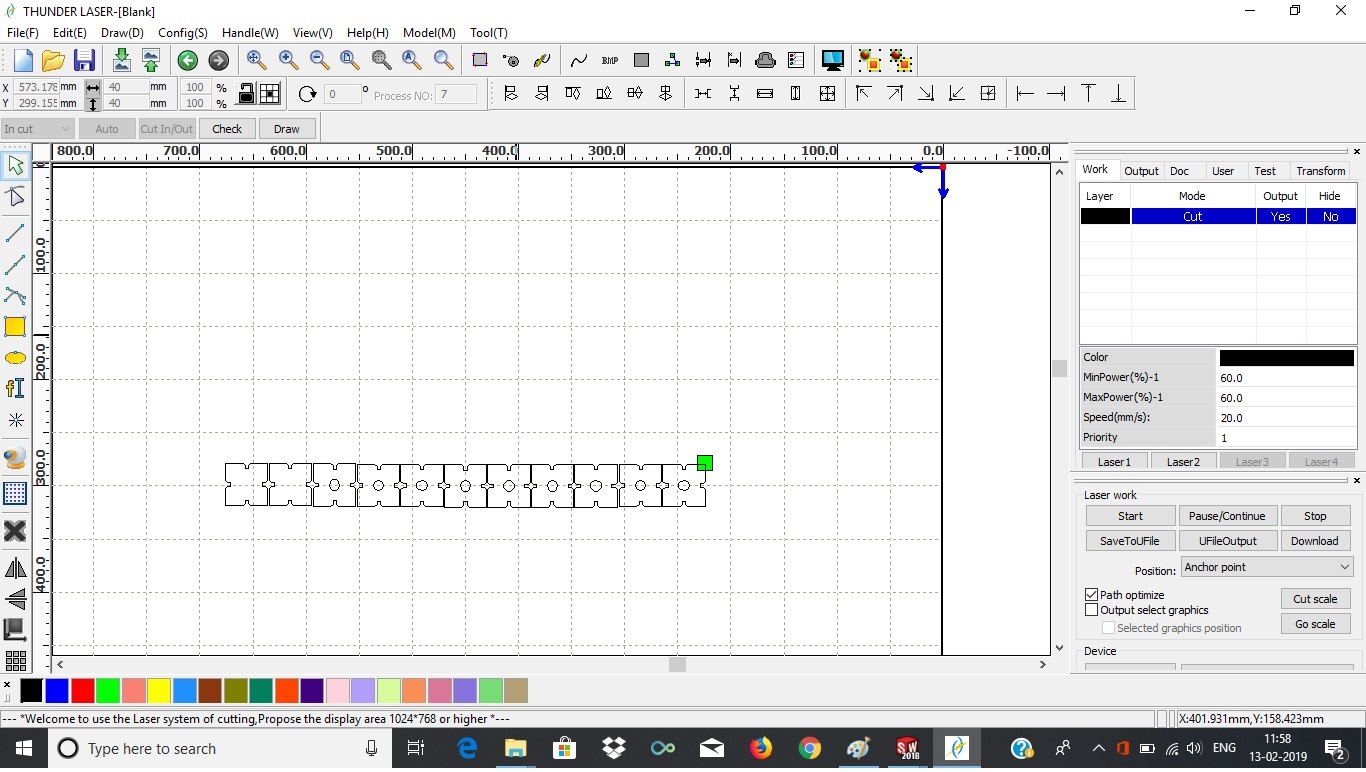
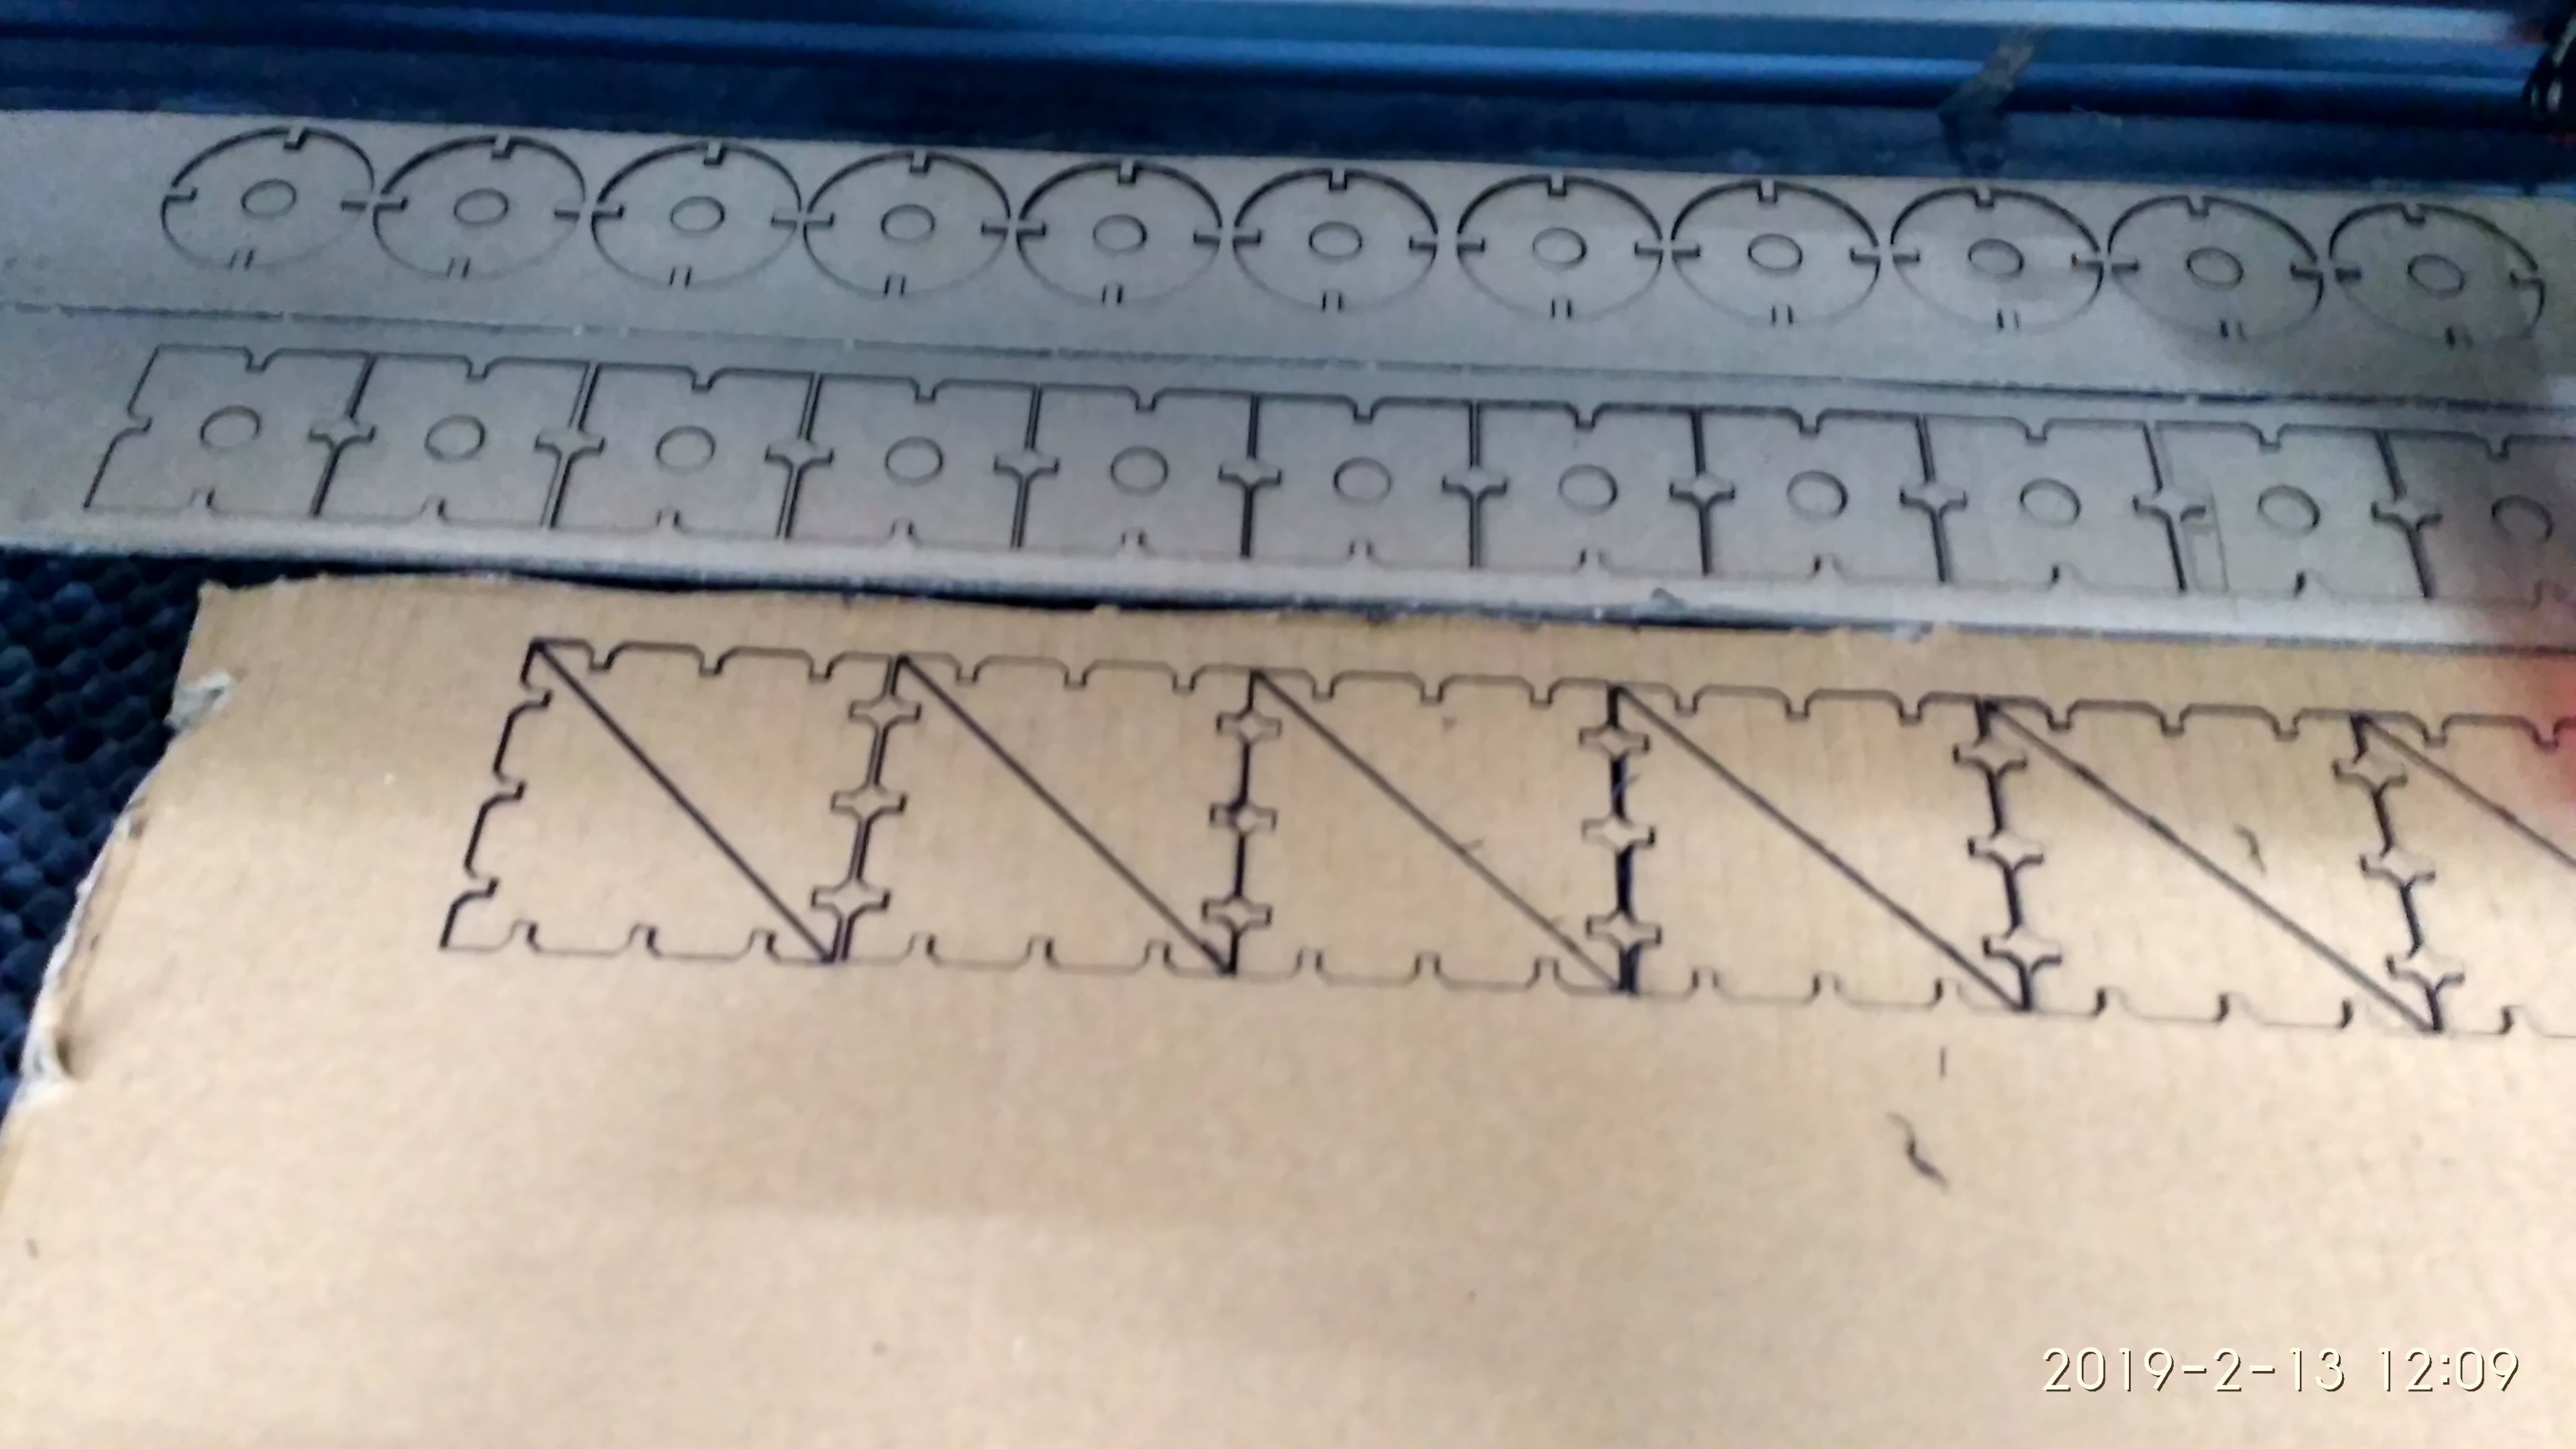
I had 3 small sheet of cardboard with 3mm diameter. So I made setting, power= 60% and speed= 20mm/s. Then I cut the my parts on laser cutter is shown in below:
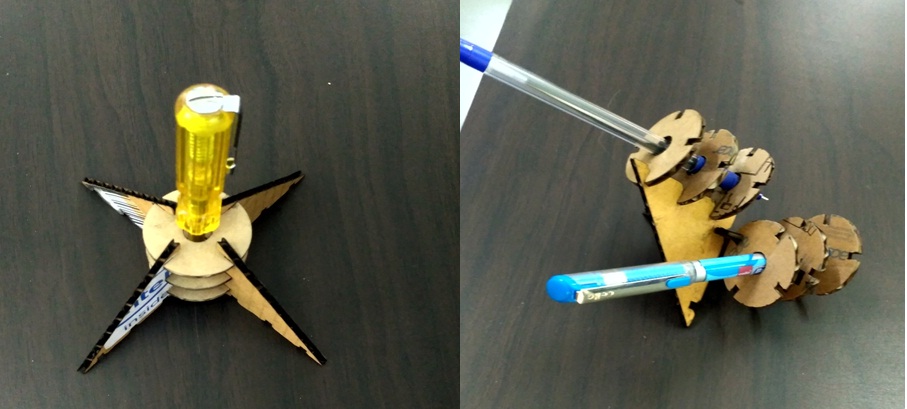
My parts are parametric and they can be assembled in multiple ways. shown in below:
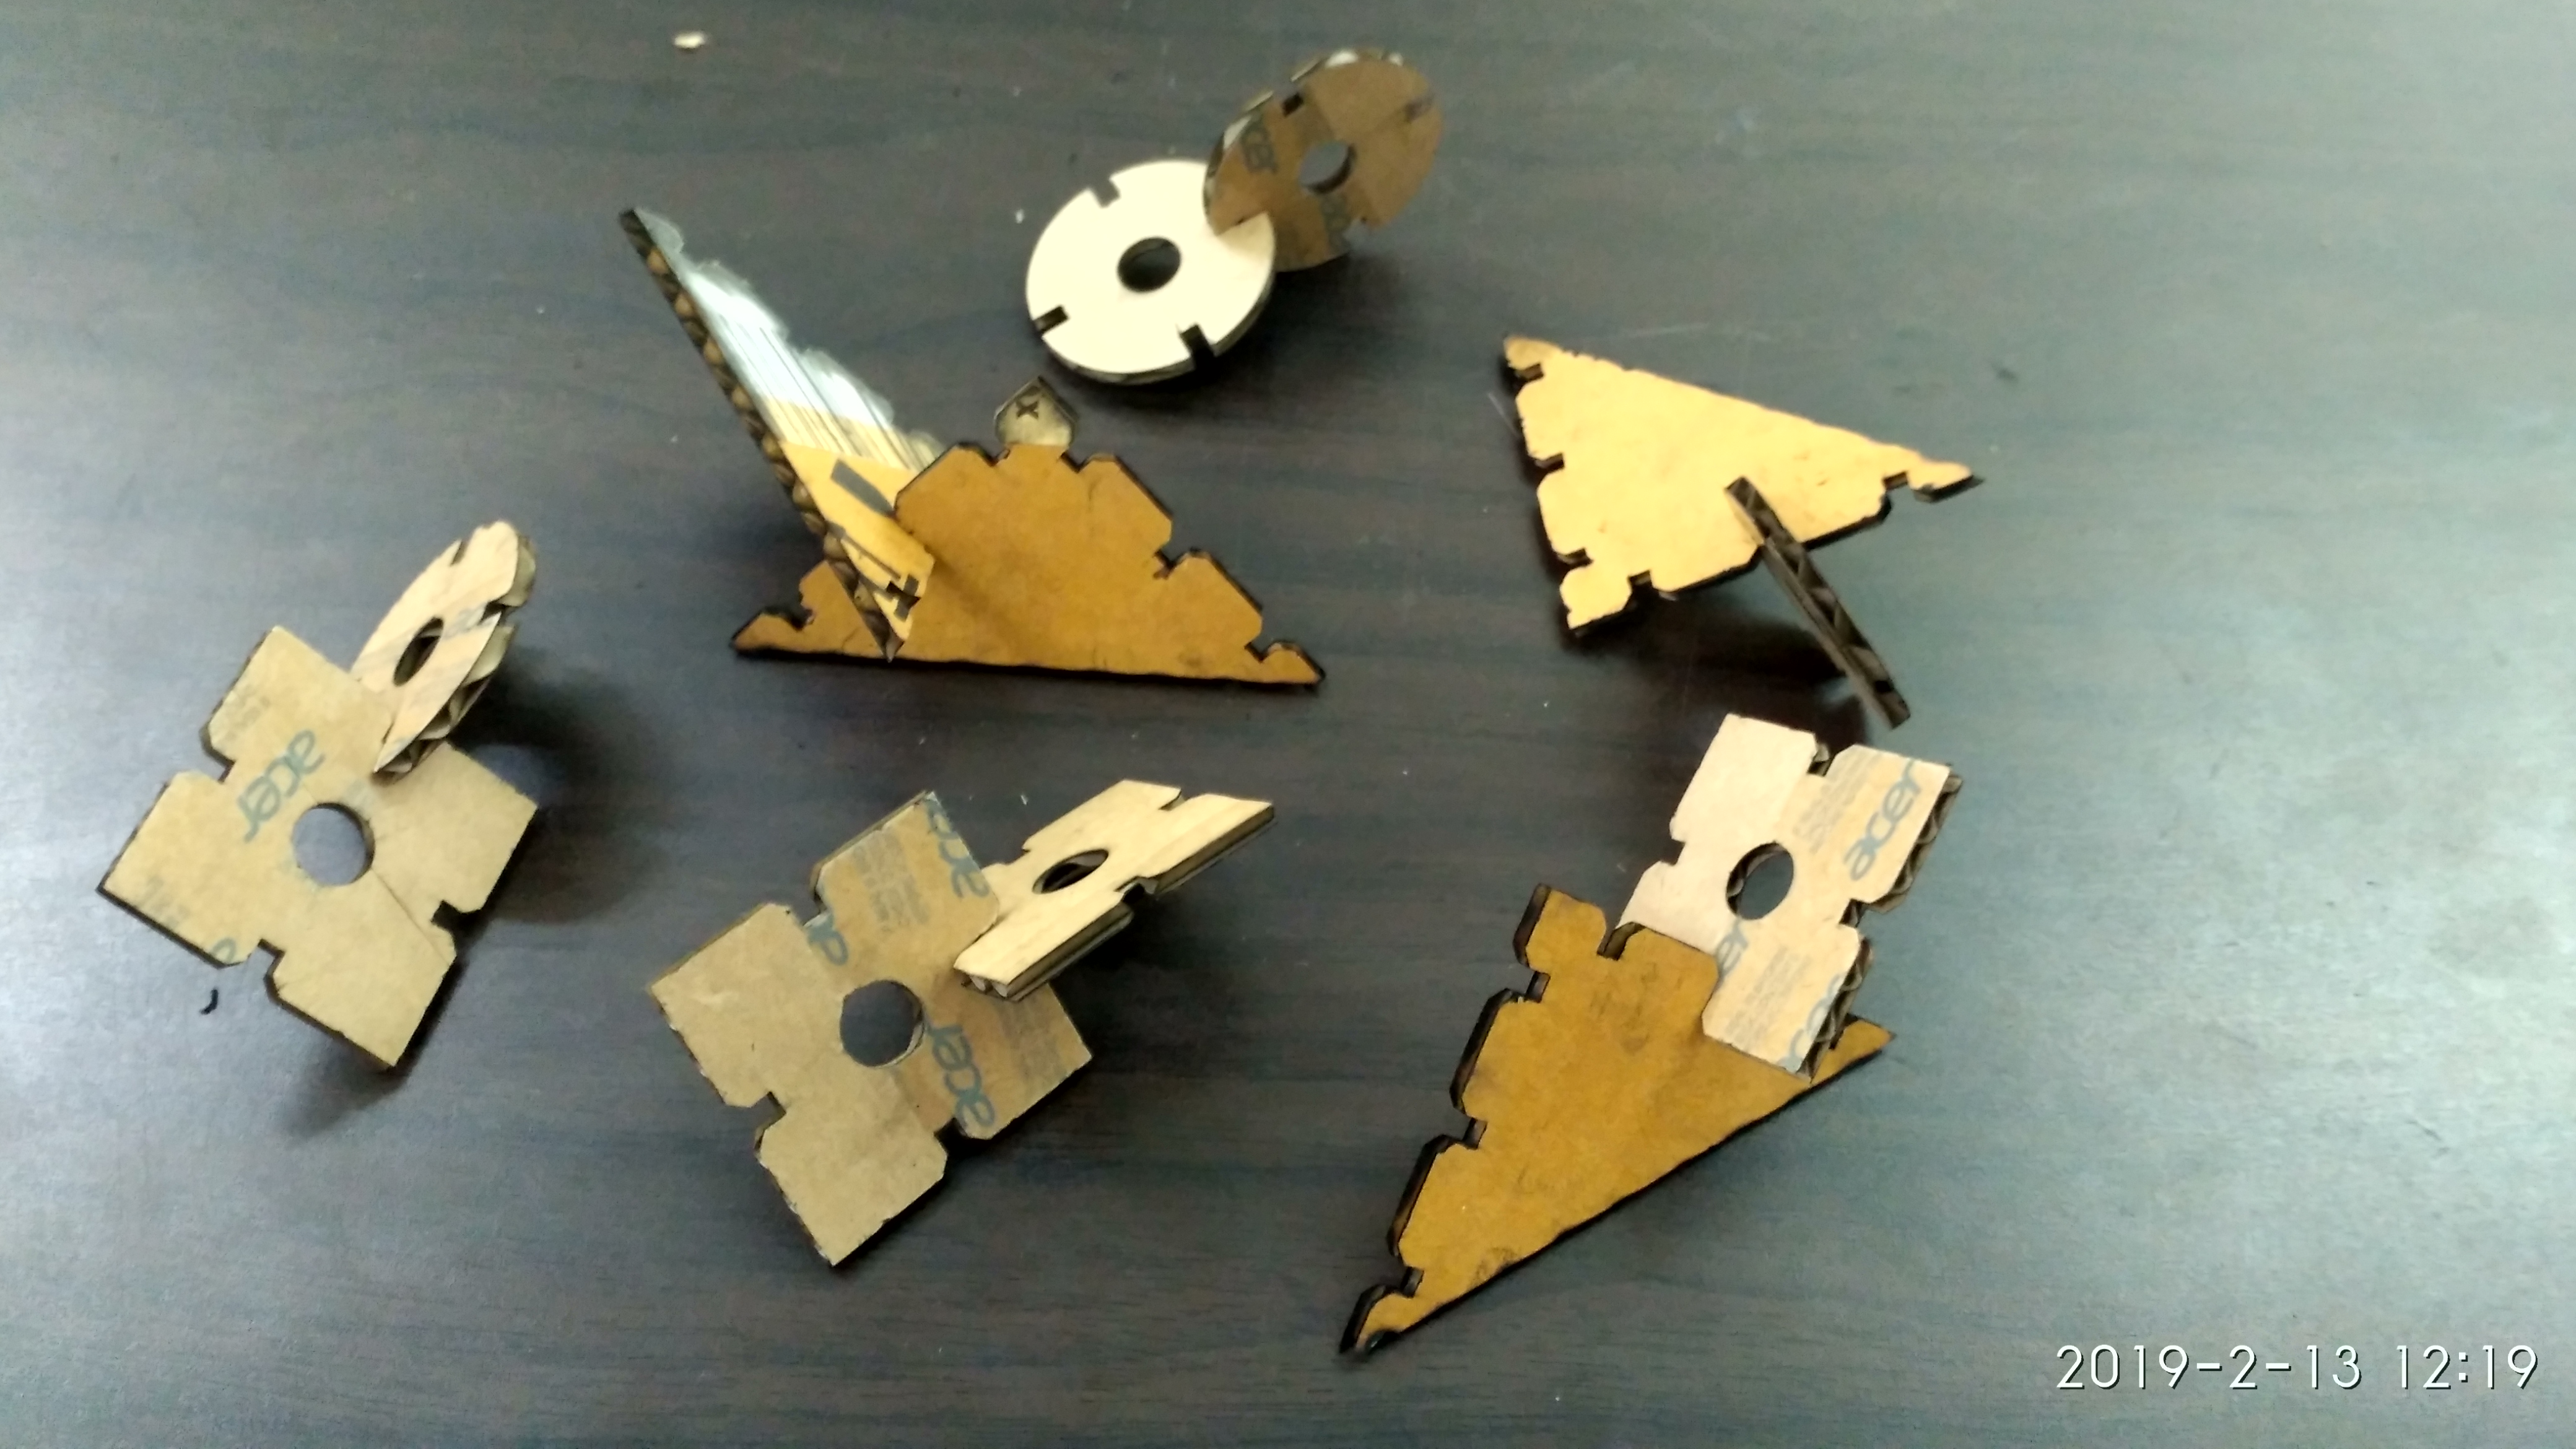
Tester/Pen stand
Vinyl Cutter
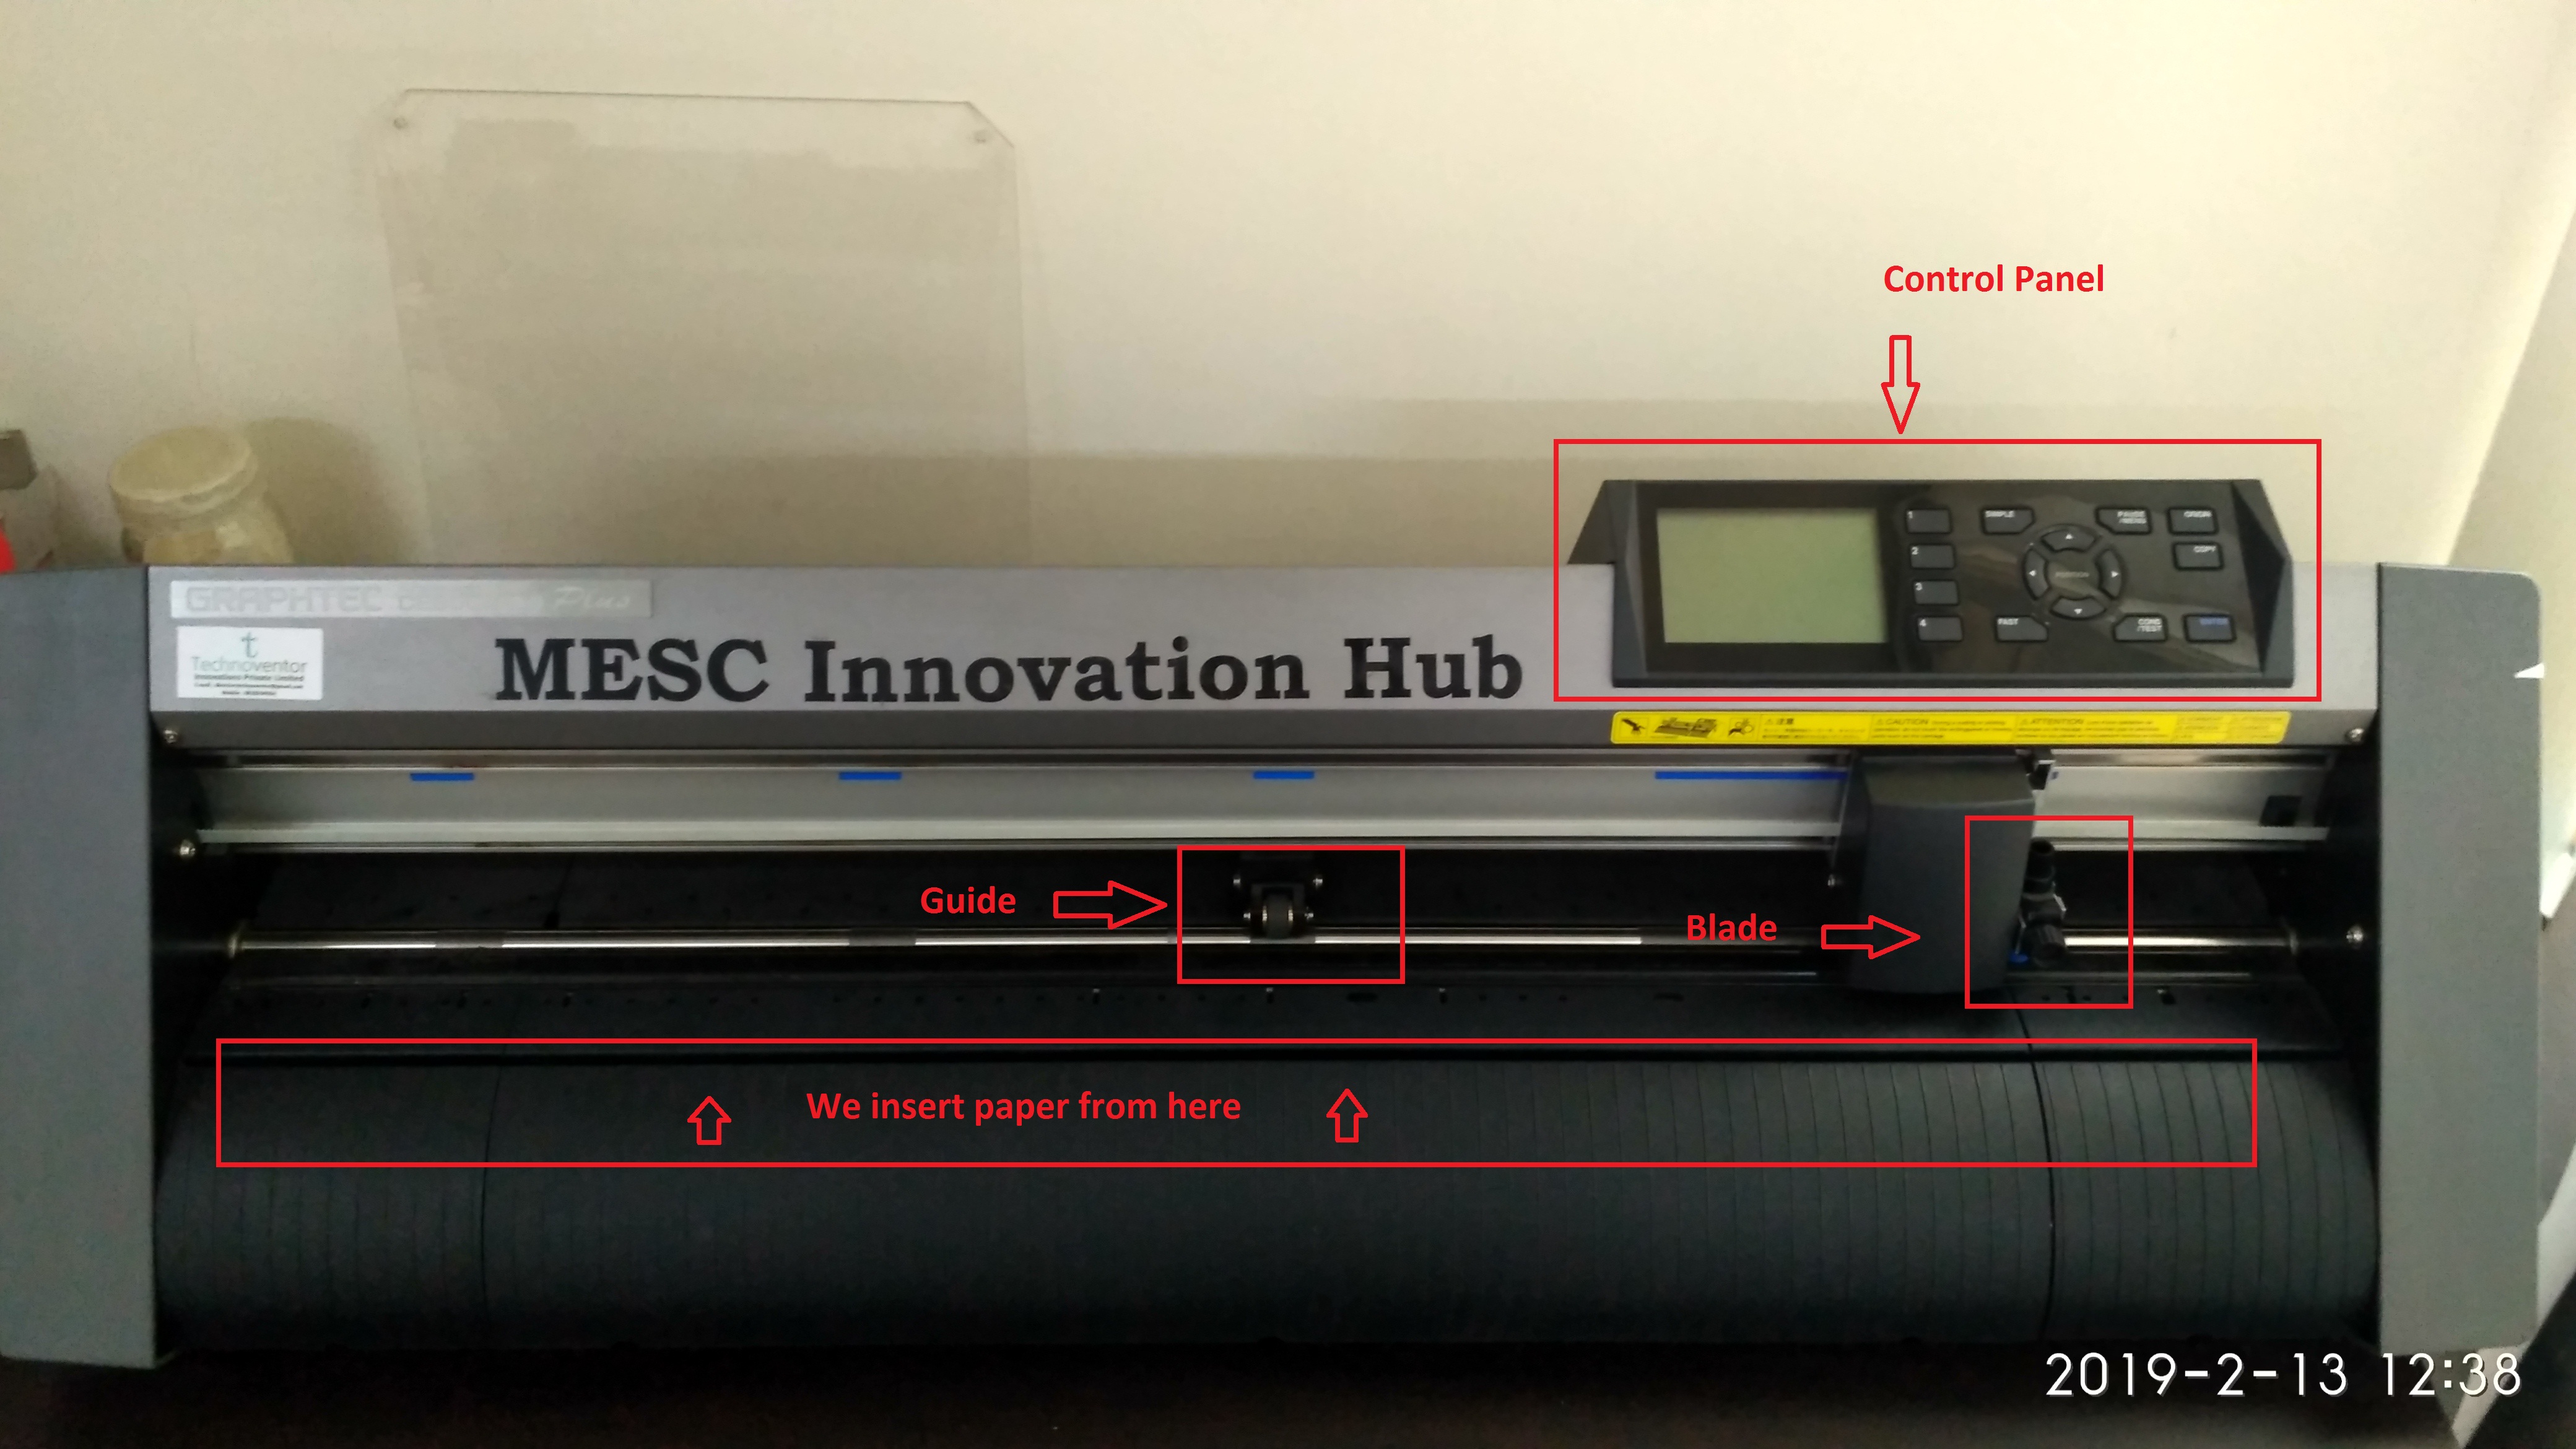
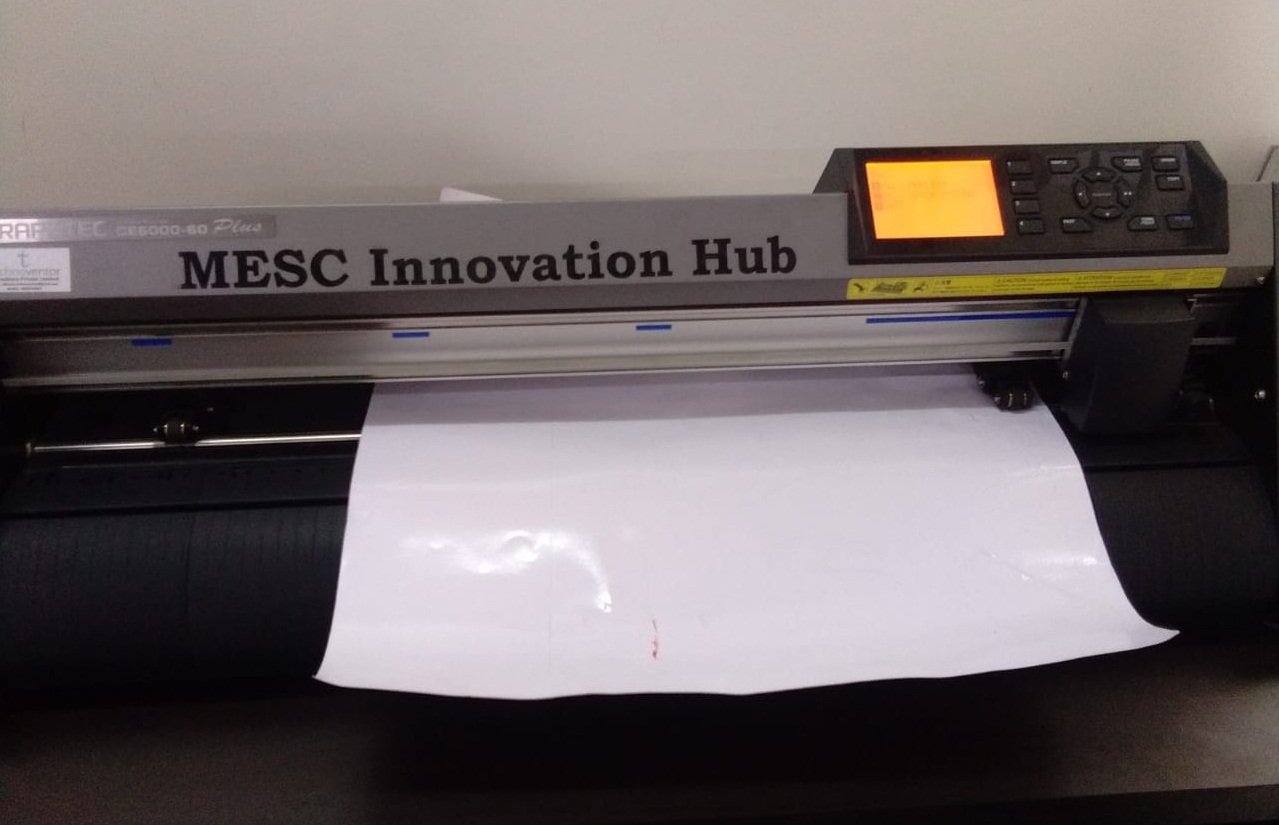
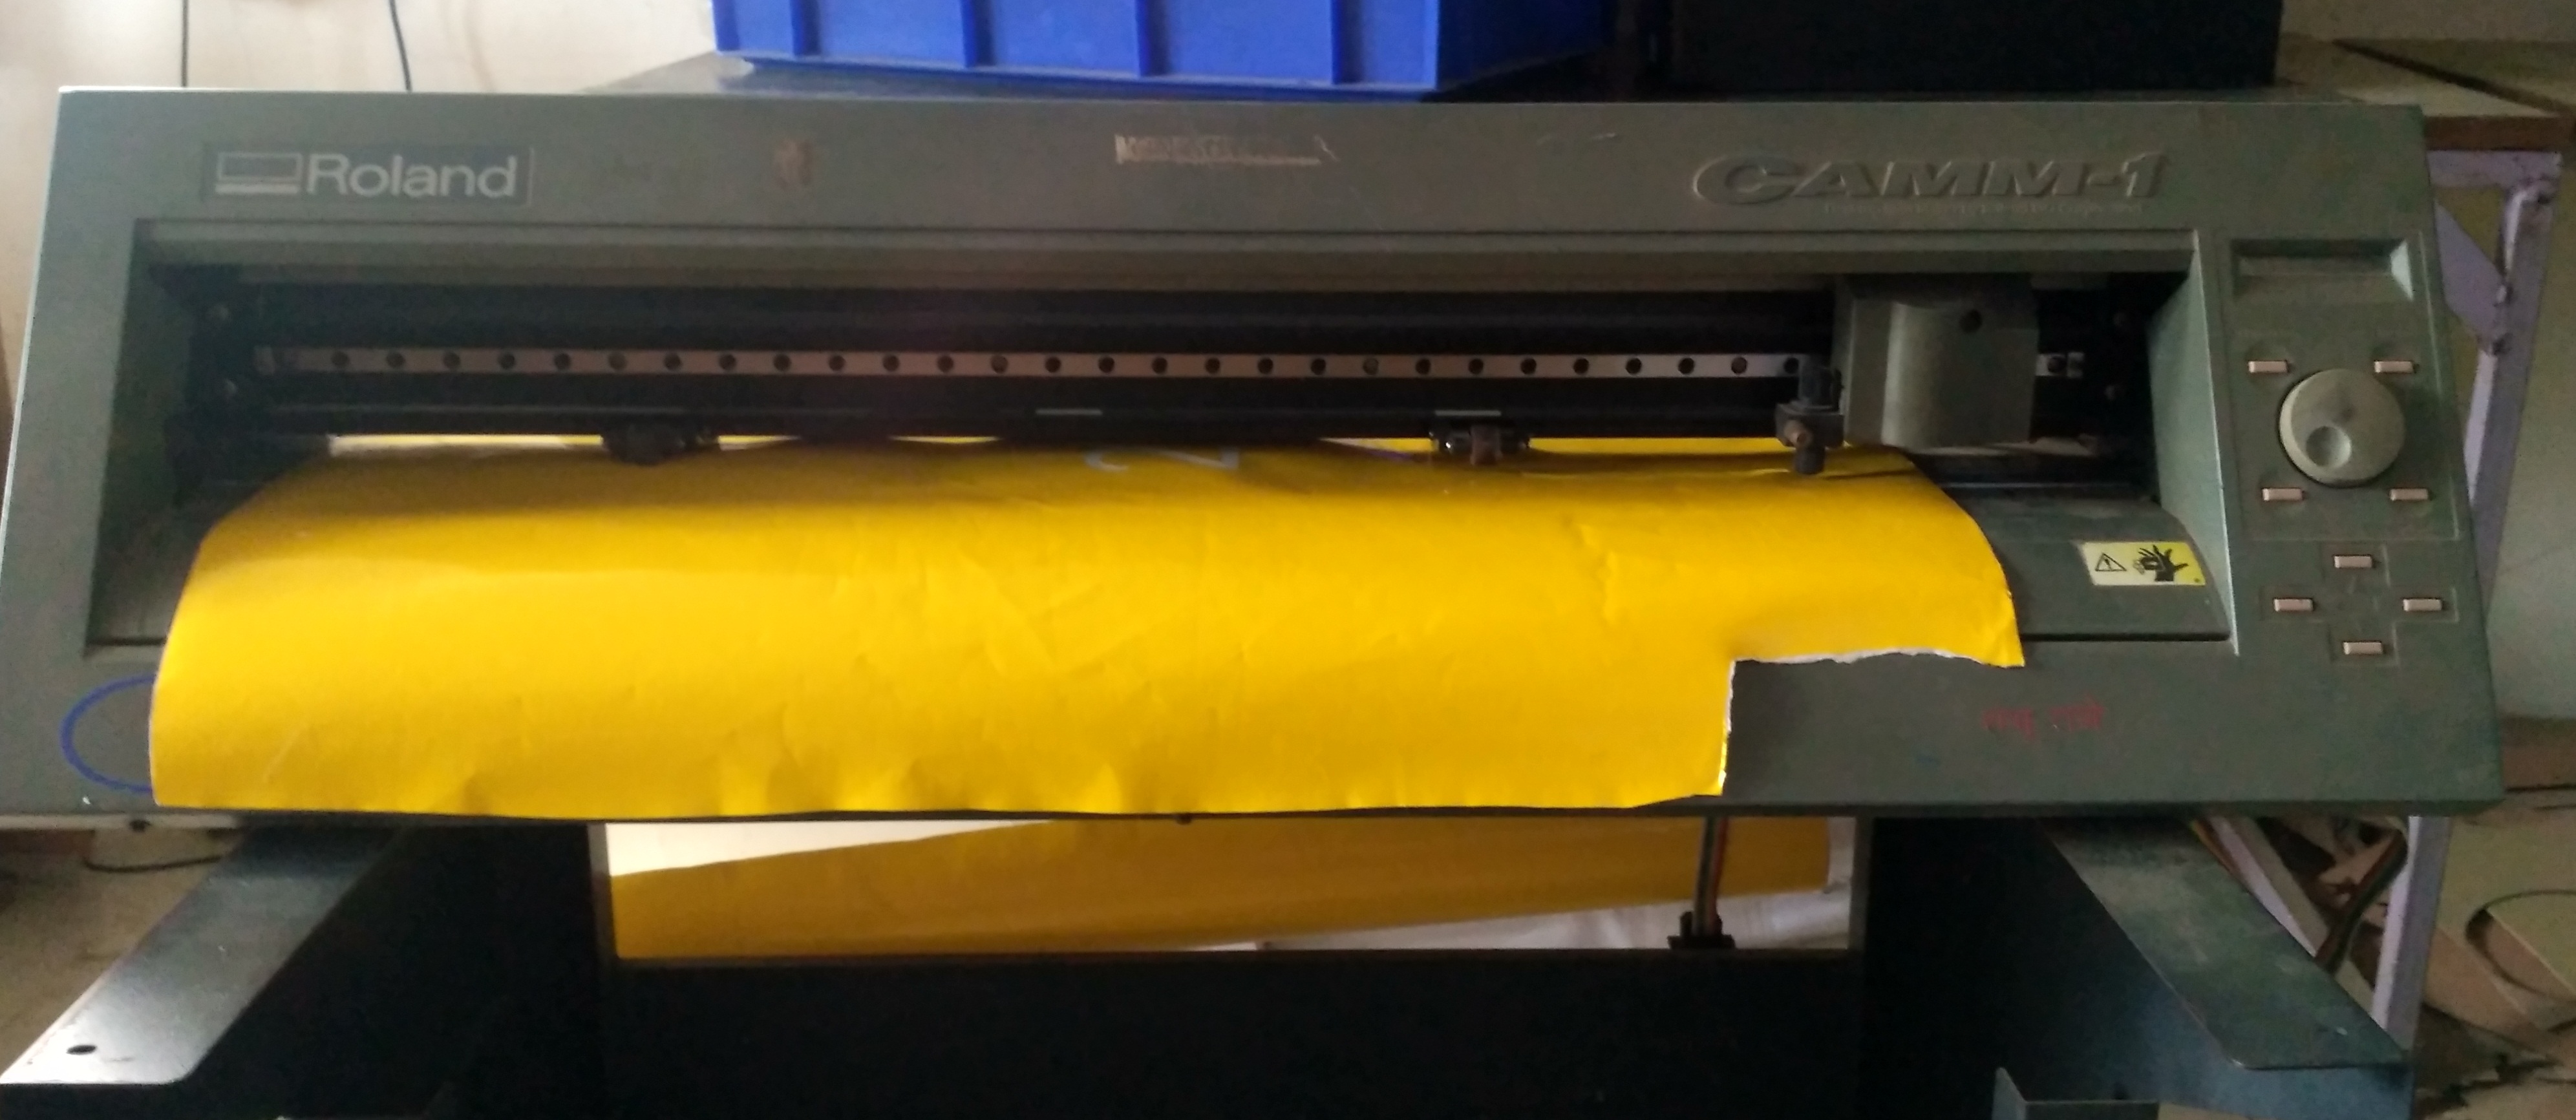
We have "GRAPHTEC CE6000 Plus" Series Vinyl Cutter / Cutting Plotter in our lab. This amongst the easiest to use on the market whilst yielding high quality results every time.
About Vinyl Cutter
Graphtec CE6000 Plus Series- The built-in front control panel provides complete parameter control including eight preset cutting conditions, as well as advanced features like tangential control mode, down force offset, pen up speed, blade wear monitoring and more. With a 25 pin RS-232C or the High Speed USB 2.0 control interface, a newer, larger LCD screen.
Design logo
In my lab this software was already installed with license. So now, I'm going to design a logo, which I can be stick on my laptop.
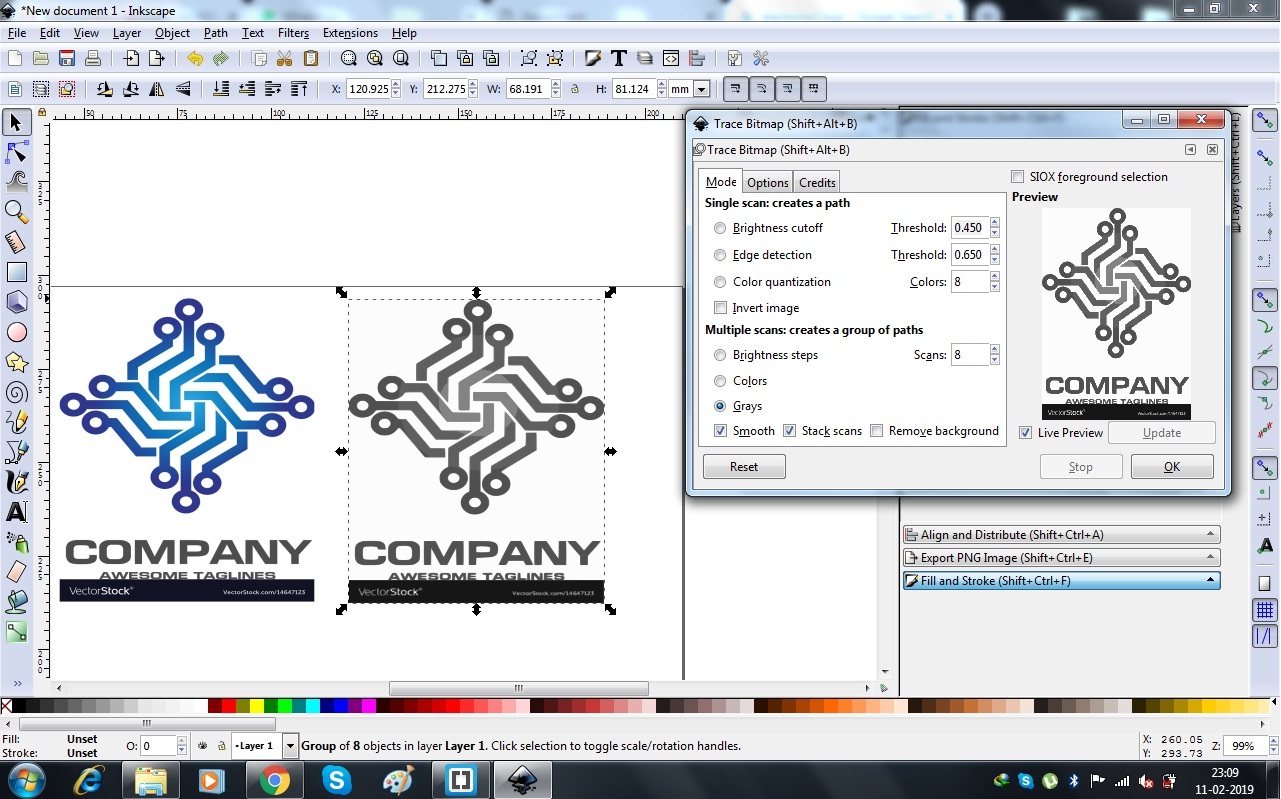
First I download a '.JPG' image from internet, then that image import in the inkscape. Using 'Trace Bitmap' I make a another image.
After trace bitmap I ungroup the image. And deleted unwanted bojects.
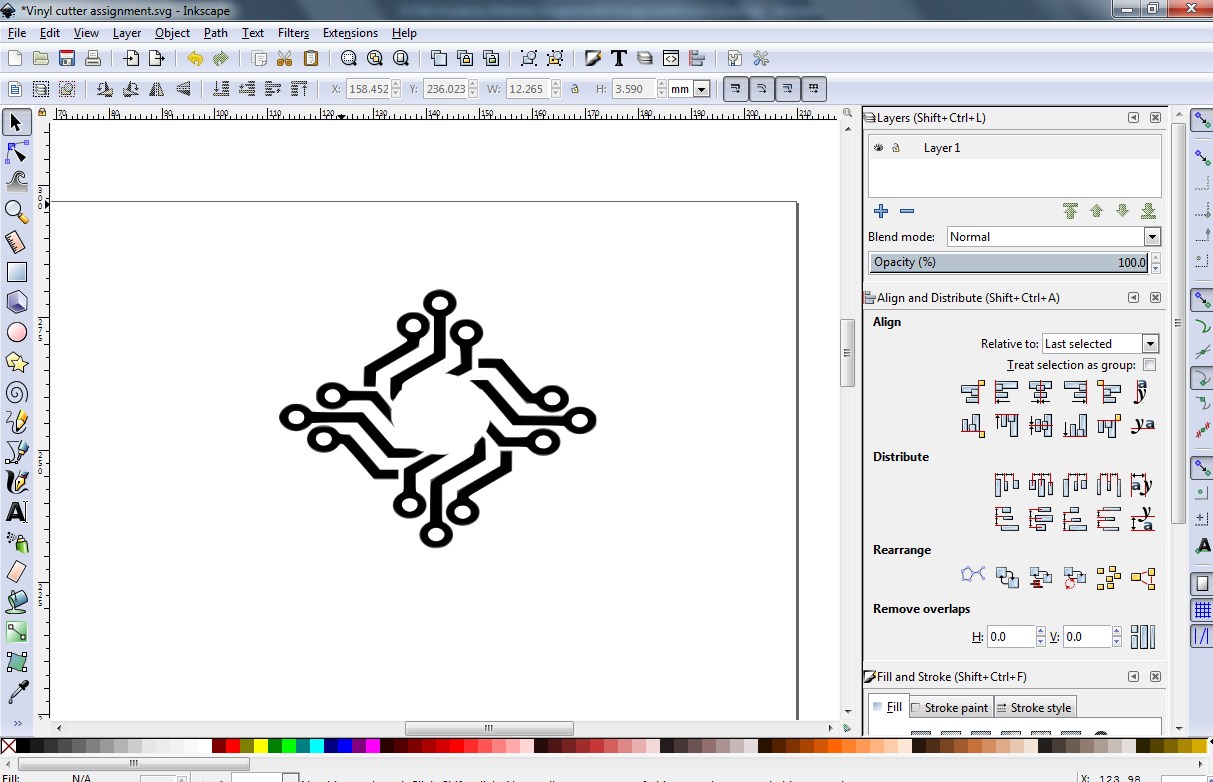
Then I made some 'electronics symbols' using sketch tools.
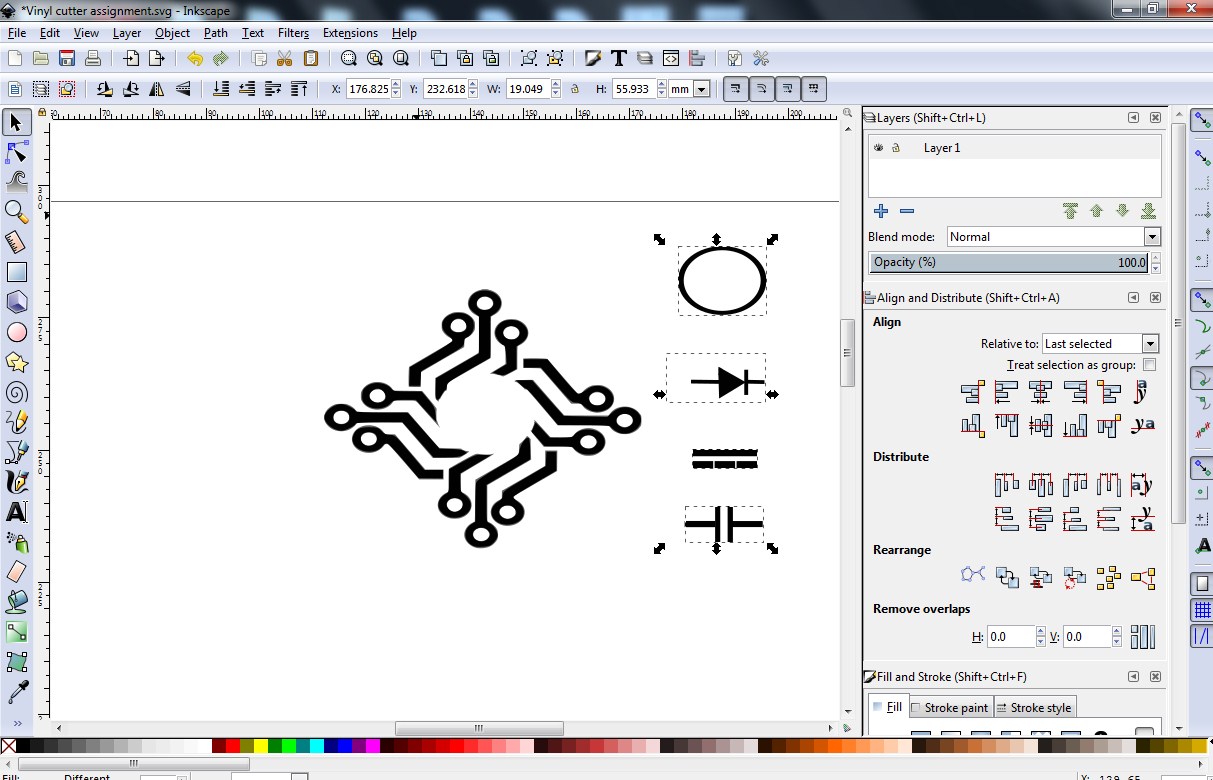
Placed the symobols, where I wnat. Then I select all objects and make a single objects using 'group' tool.
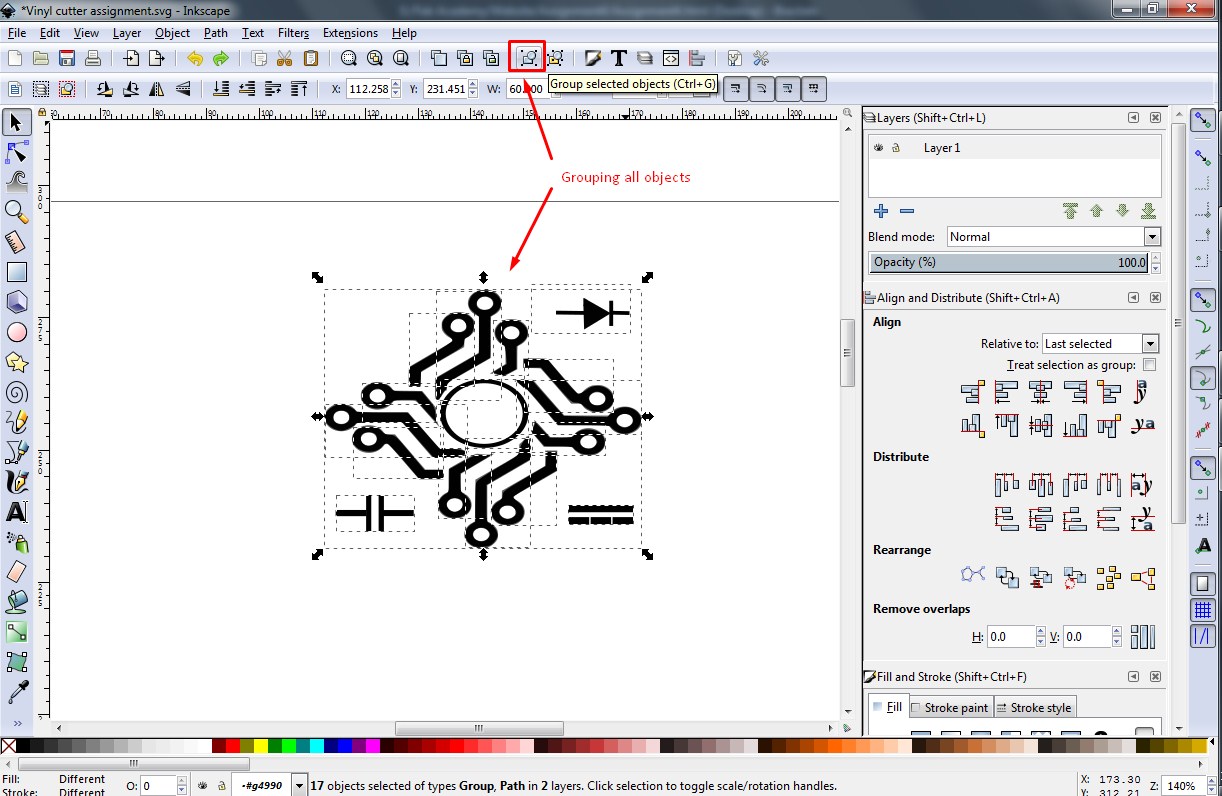
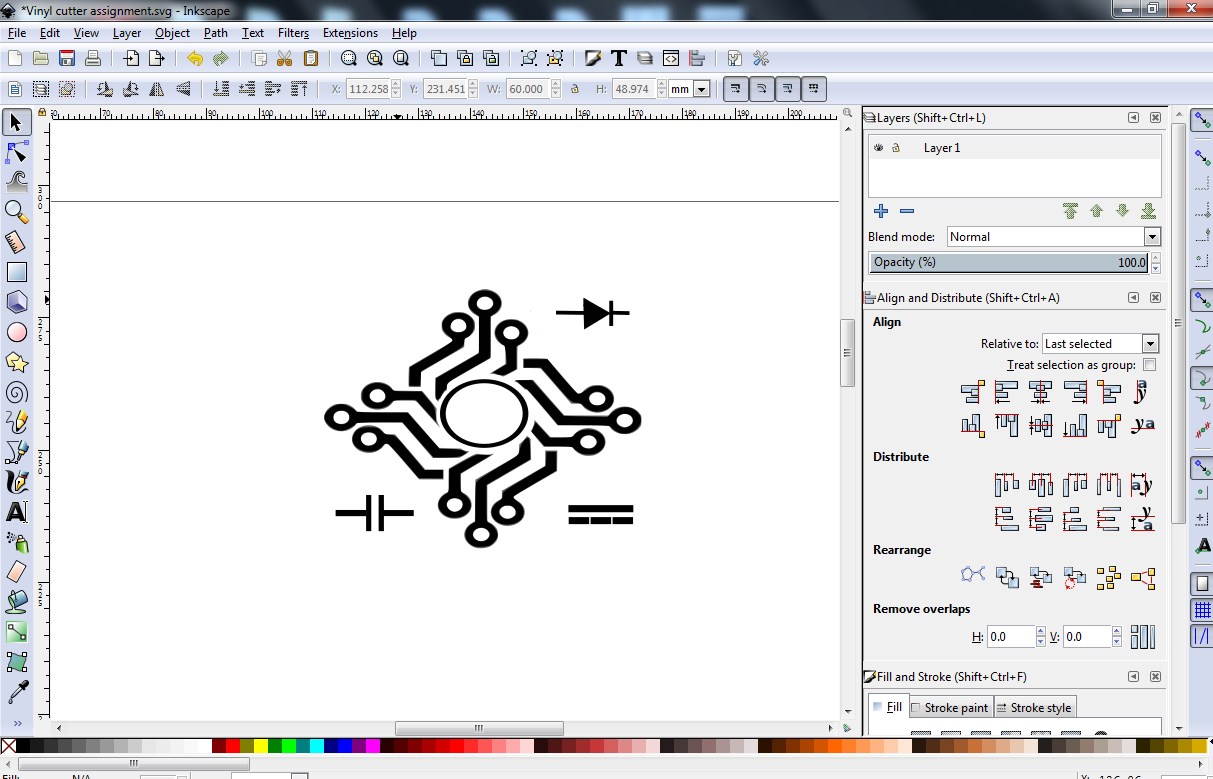
After grouping the ojects, final oject shown in below: And now I'm going to cut on vinyl cutter.
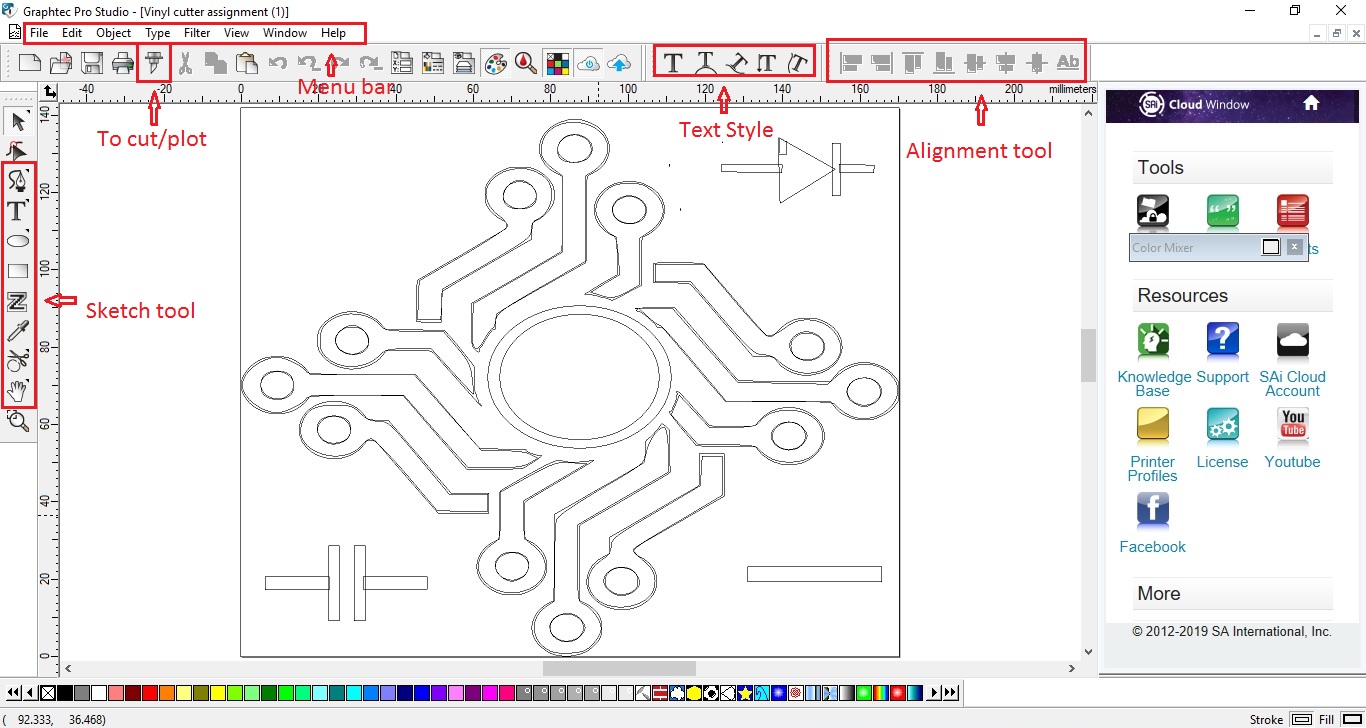
About Graphtec Pro Studio
It is the software for creating original designs and has enhanced functions such as auto-shapes, shading, and editing functions. It is like the popular graphics design software as the Adobe Illustrator and CorelDRAW. It can also configure the cutting conditions and other settings on the plotter. Importing of EPS, Ai, CMX, and PDF file types are supported. Graphics created with other popular design software can be imported into this software.
I exprot '.DXF' file from inkscape and import same '.DXF' file in 'Graphtec Pro Studio'.
I Put the vinyl paper in the machine and lock it. After that I set the origin and then I start cutting by clicking on "Cut/Plot" option in Machine software.
After cutting, I stick masking tape on my desgin(on vinyl paper). And remove cut part of vinyl paper and then stick on my laptop. Then again removed the masking tape and get vinyl cut design on my laptop.
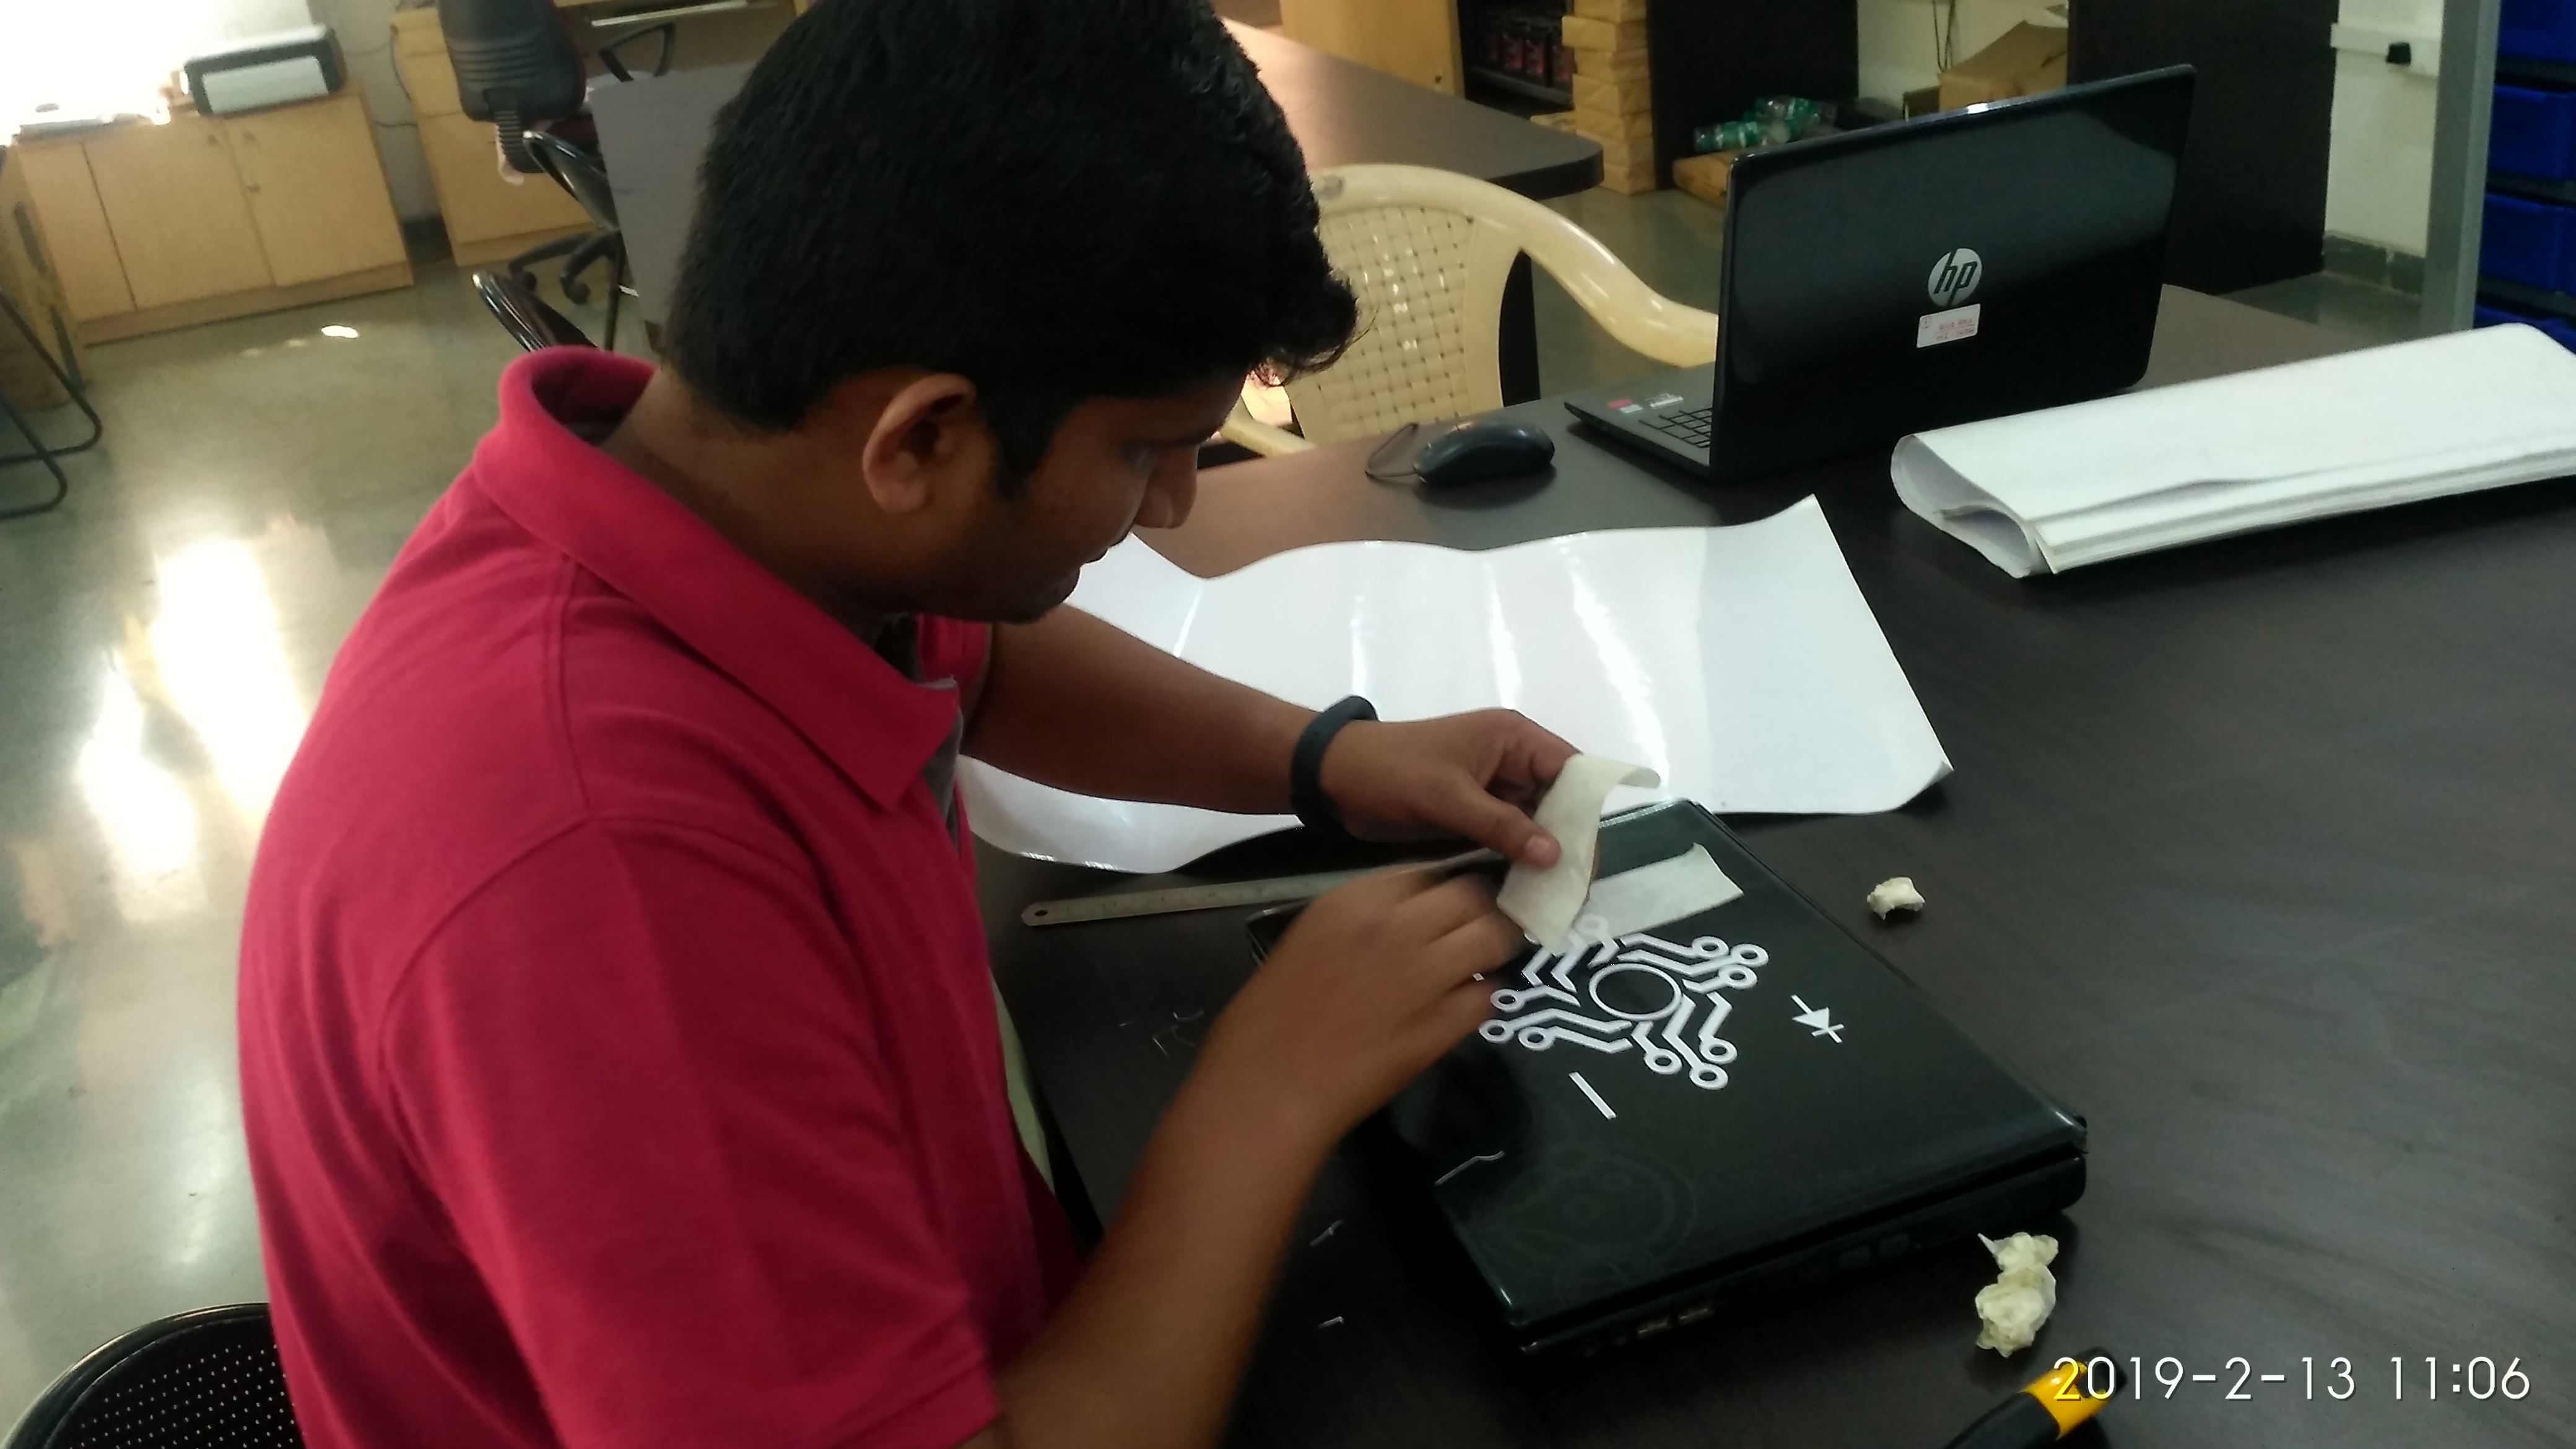
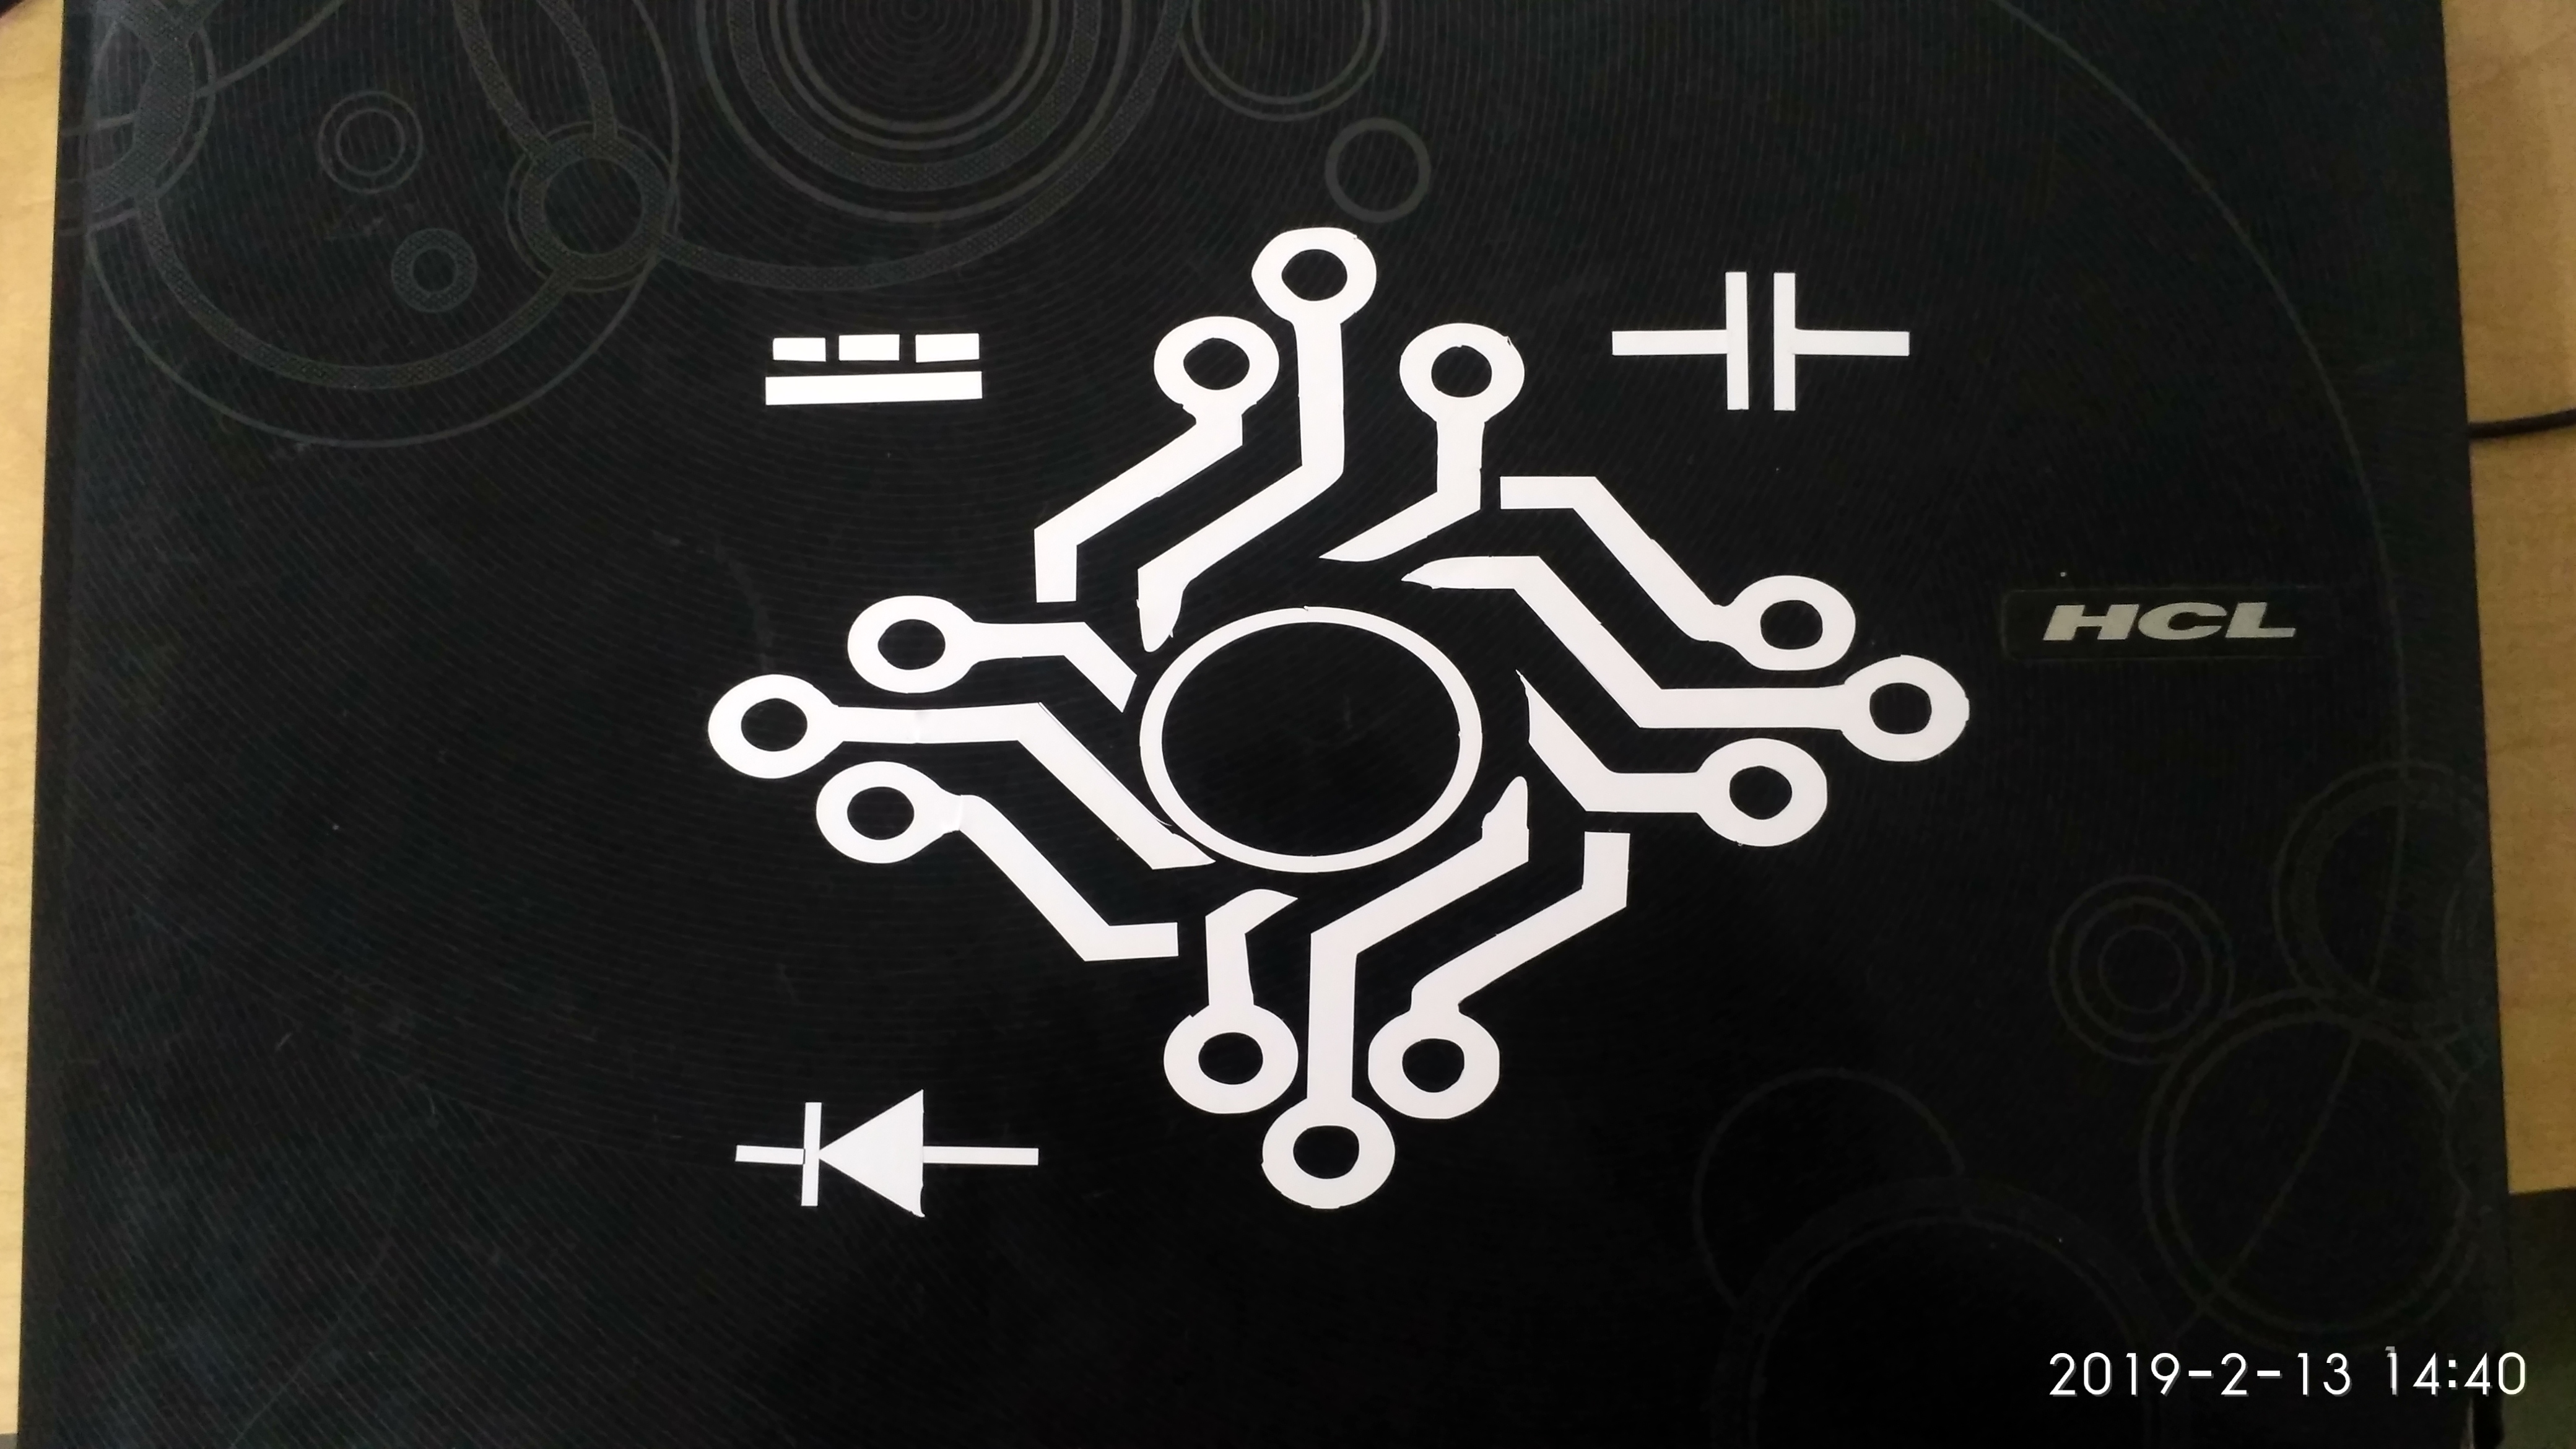
Finally I get my design on my laptop using vinyl cutter.
T-shirt printing
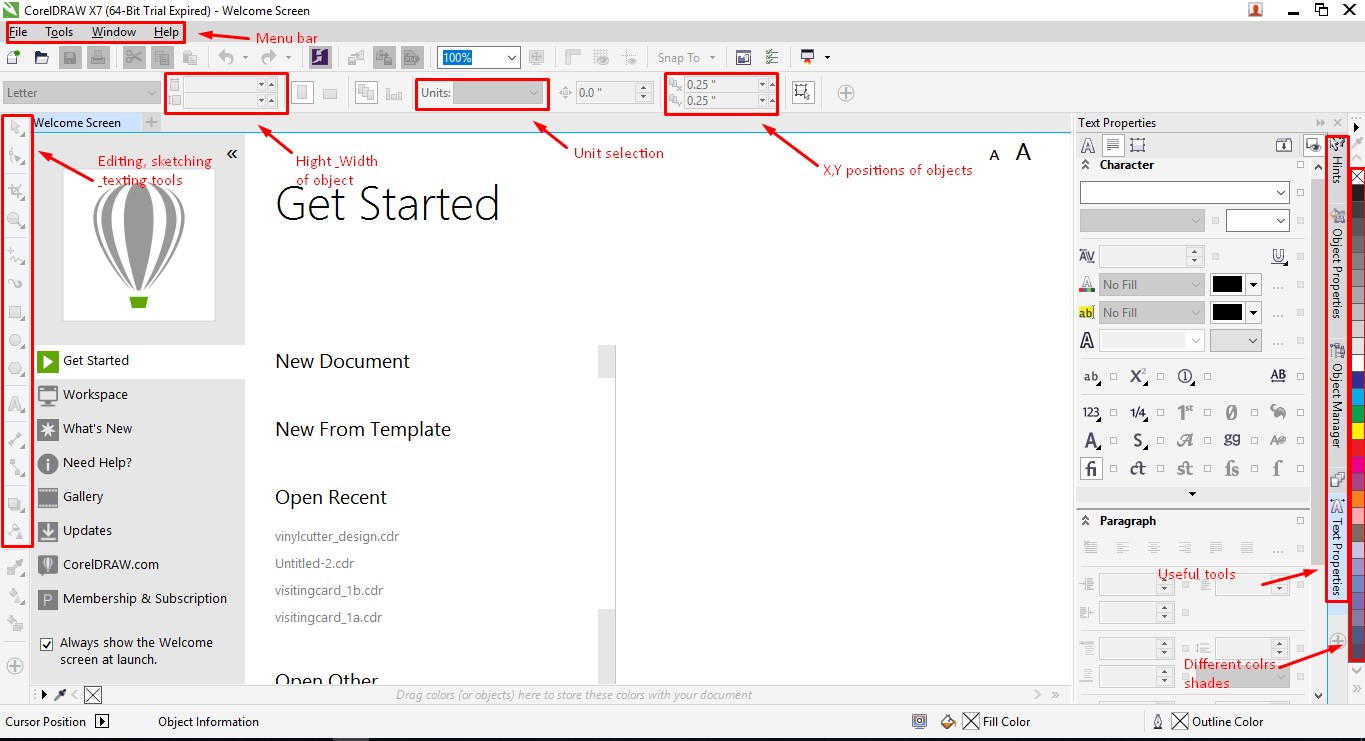
About CorelDRAW
CorelDraw is a vector graphics editor developed and marketed by Corel Corporation. It is also the name of the Corel graphics suite, which includes the bitmap-image editor Corel Photo-Paint as well as other graphics-related programs. CorelDraw is designed to edit two-dimensional images such as logos and posters.
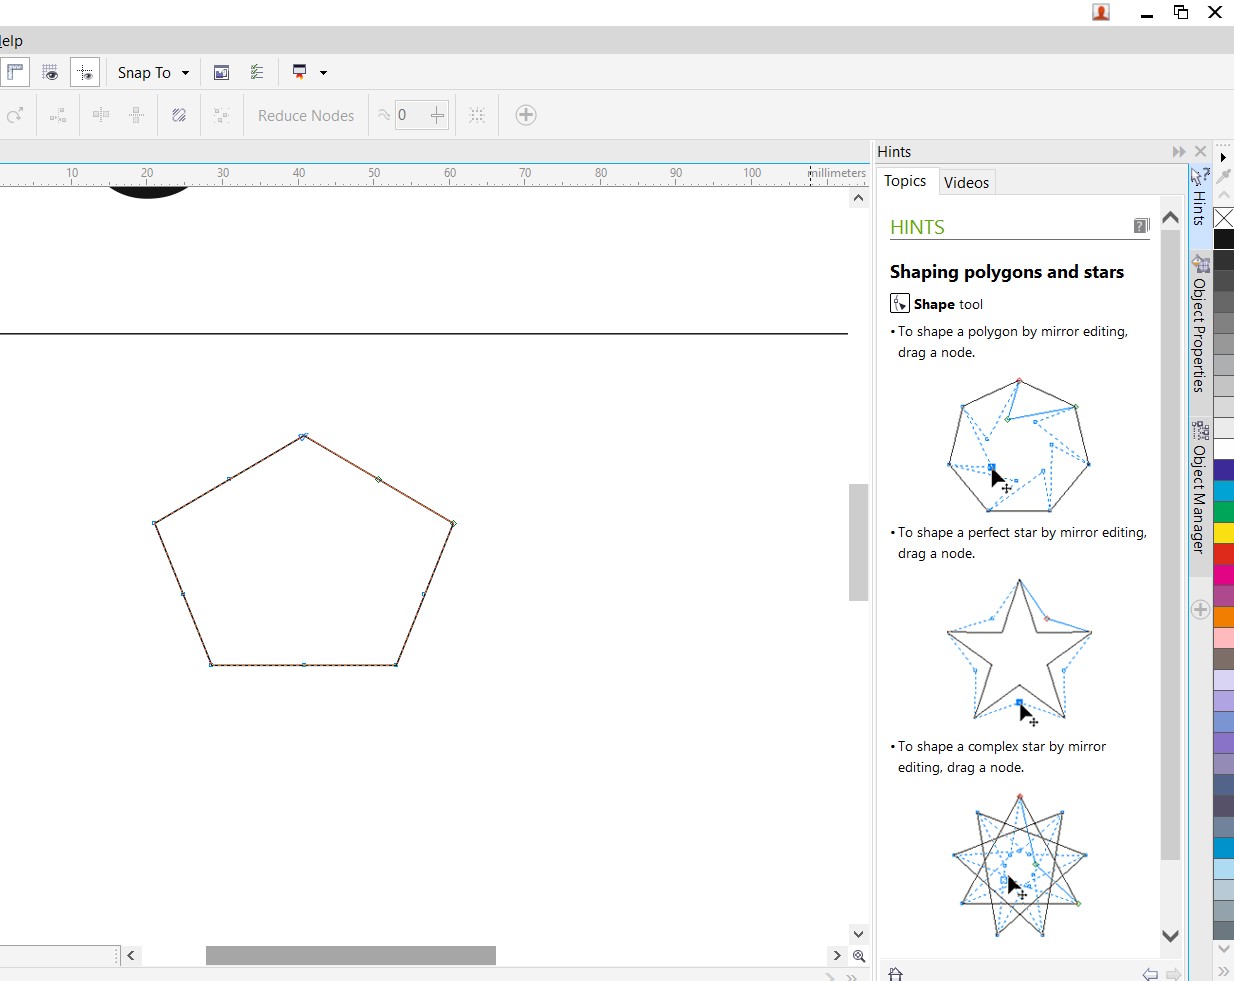
I am going to design for my t-shirt in 'CorelDRAW'. First I took a rectangle for border. then using 'Text' tool write my name 'JAYDIP'. And I'm want draw star in my design, so using 'polygon' tool we can vary the number of angles.
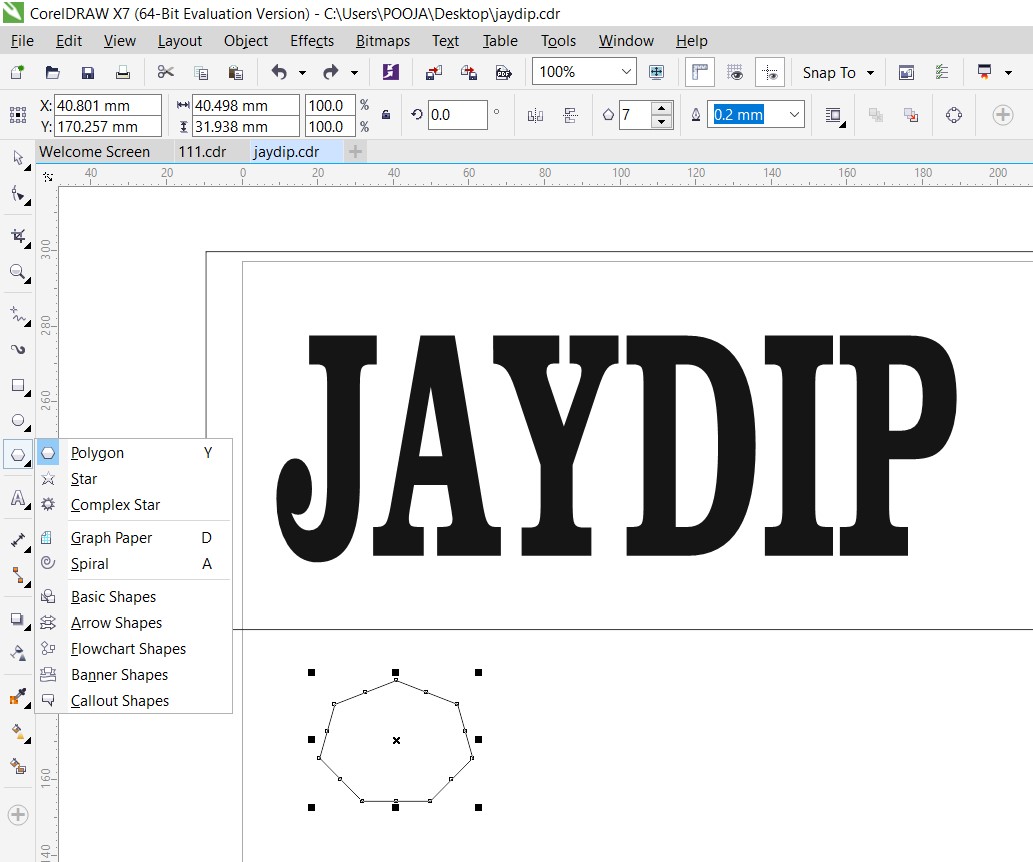
And I'm want draw star in my design, so using 'polygon' tool we can vary the number of angles. Also we can change shape of star dragging on option while we select the image.
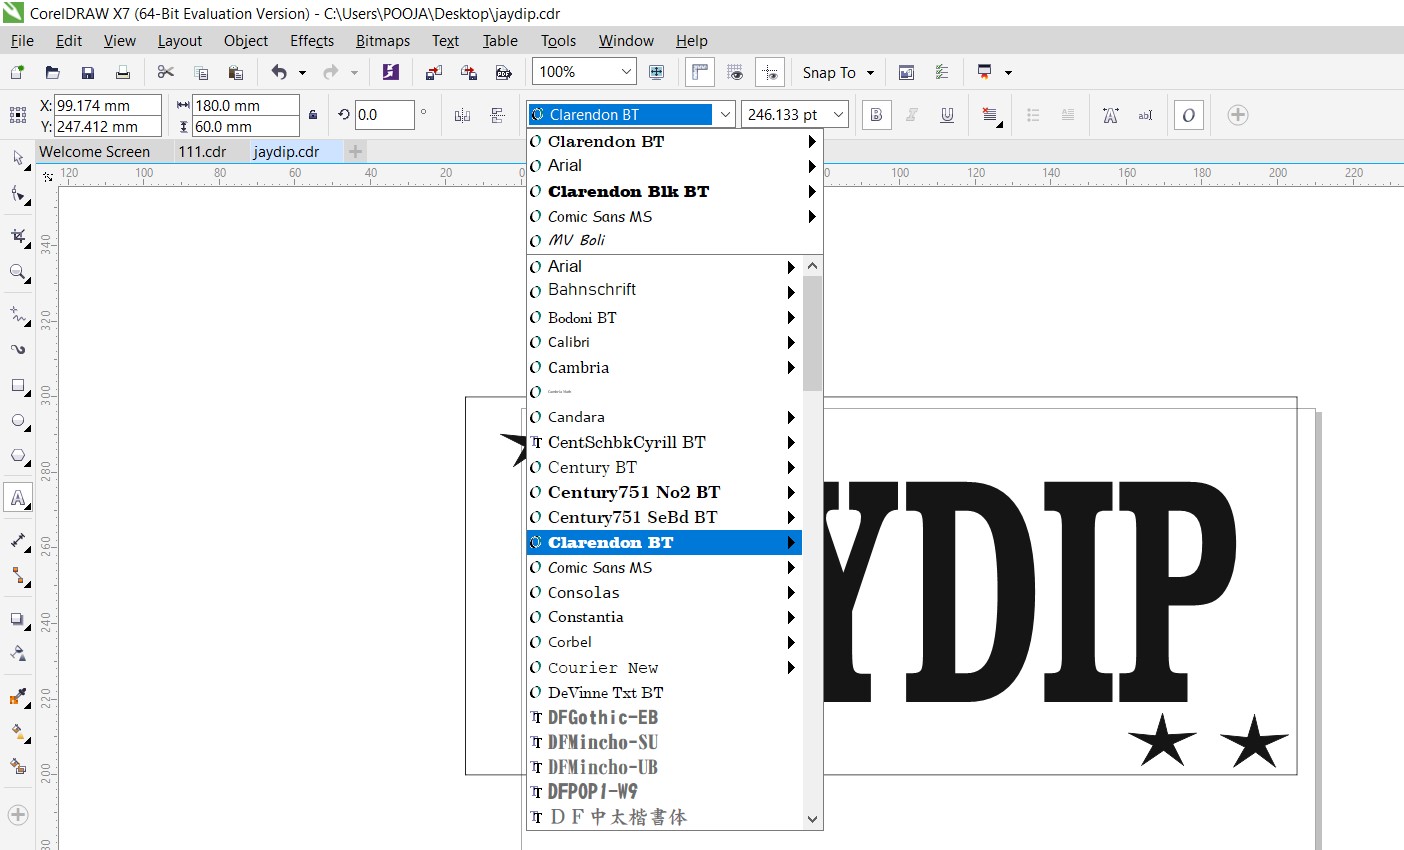
After draw the stars, I changed the text font using 'font'. I made font 'Clarendon BT' and adjust the height of text.
Finally my file is ready for vinyl cutting. Then save the file '.cdr' extension and also export the '.PNG' file.
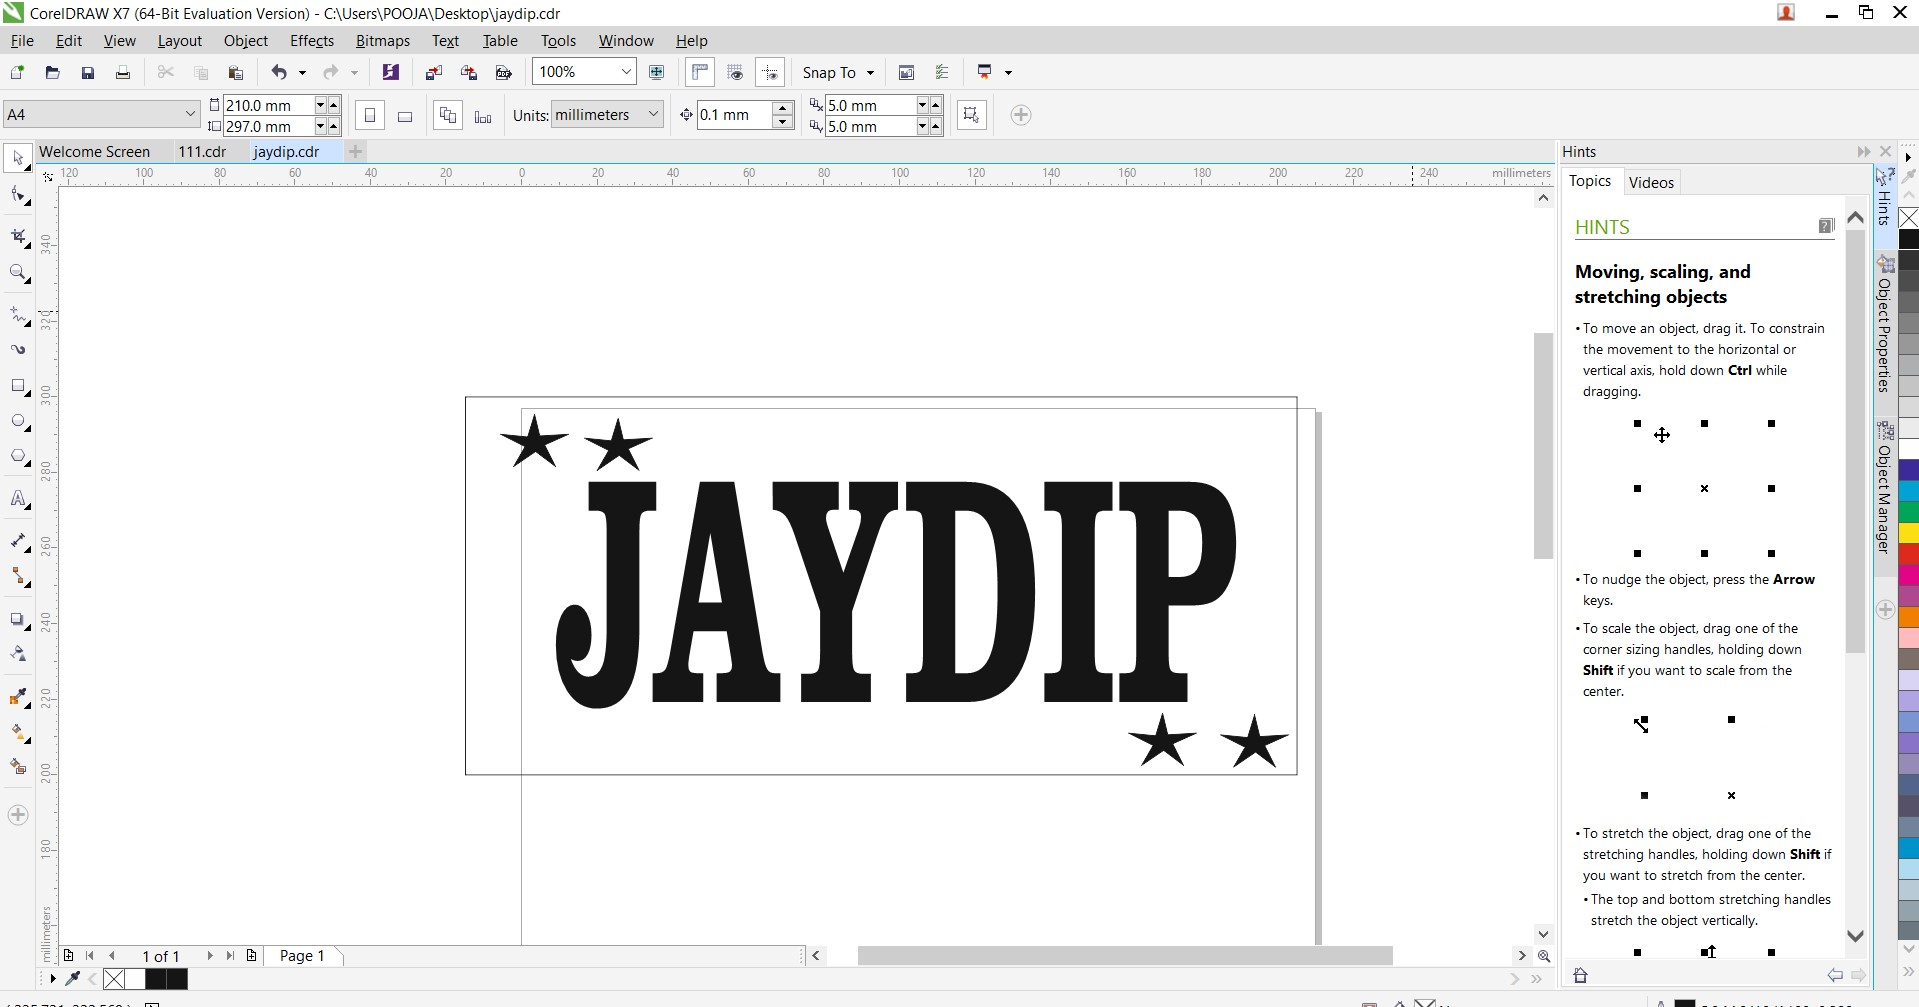
Desgined in CorelDRAW file export into PNG image as shwoing below:

Then I went for cutting my design file on vinyl cutter using 'Offline fab module'. First I import the '.PNG' image in offline fab module and make some settings and started cutting.
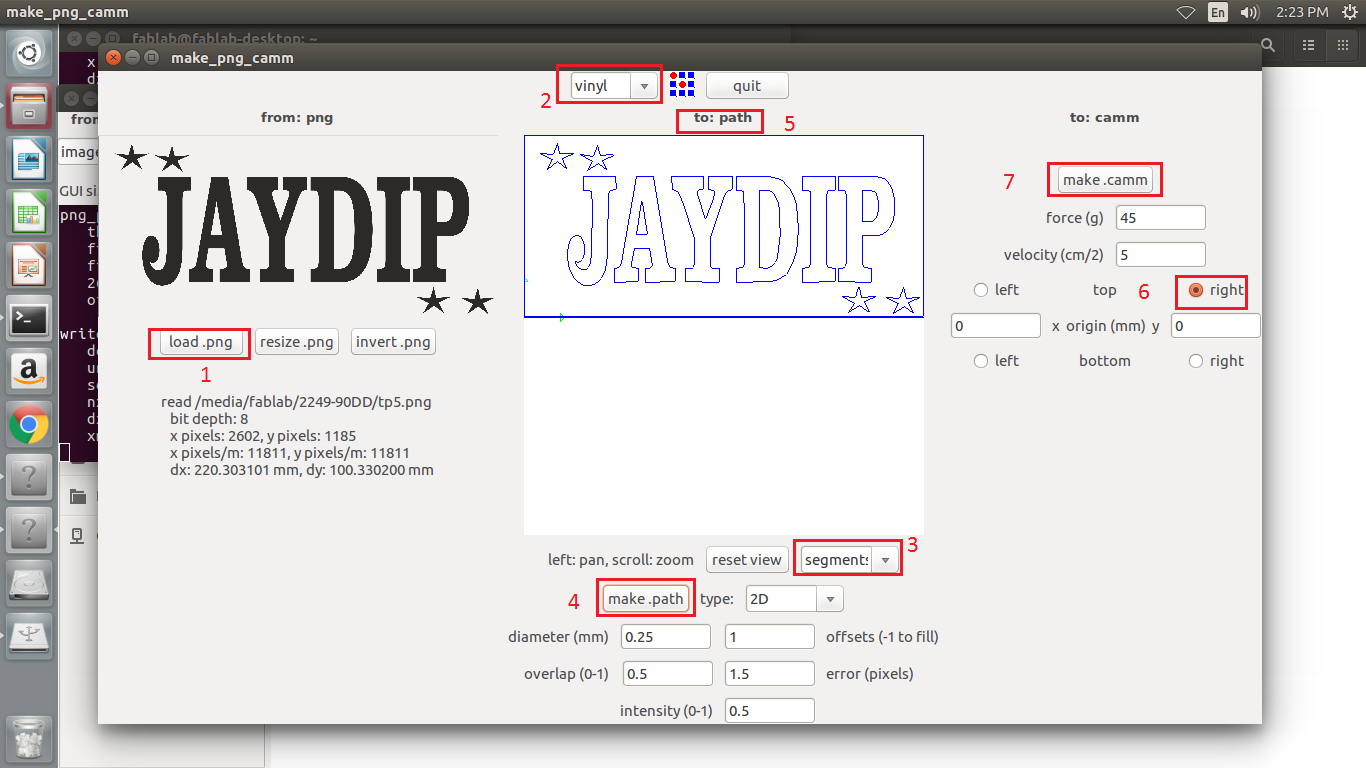
Now going to cut on vinvl cutter machine.
After completed cutting negative image of design is placed on mesh which attached to wooden frame with hepl of masking tape.
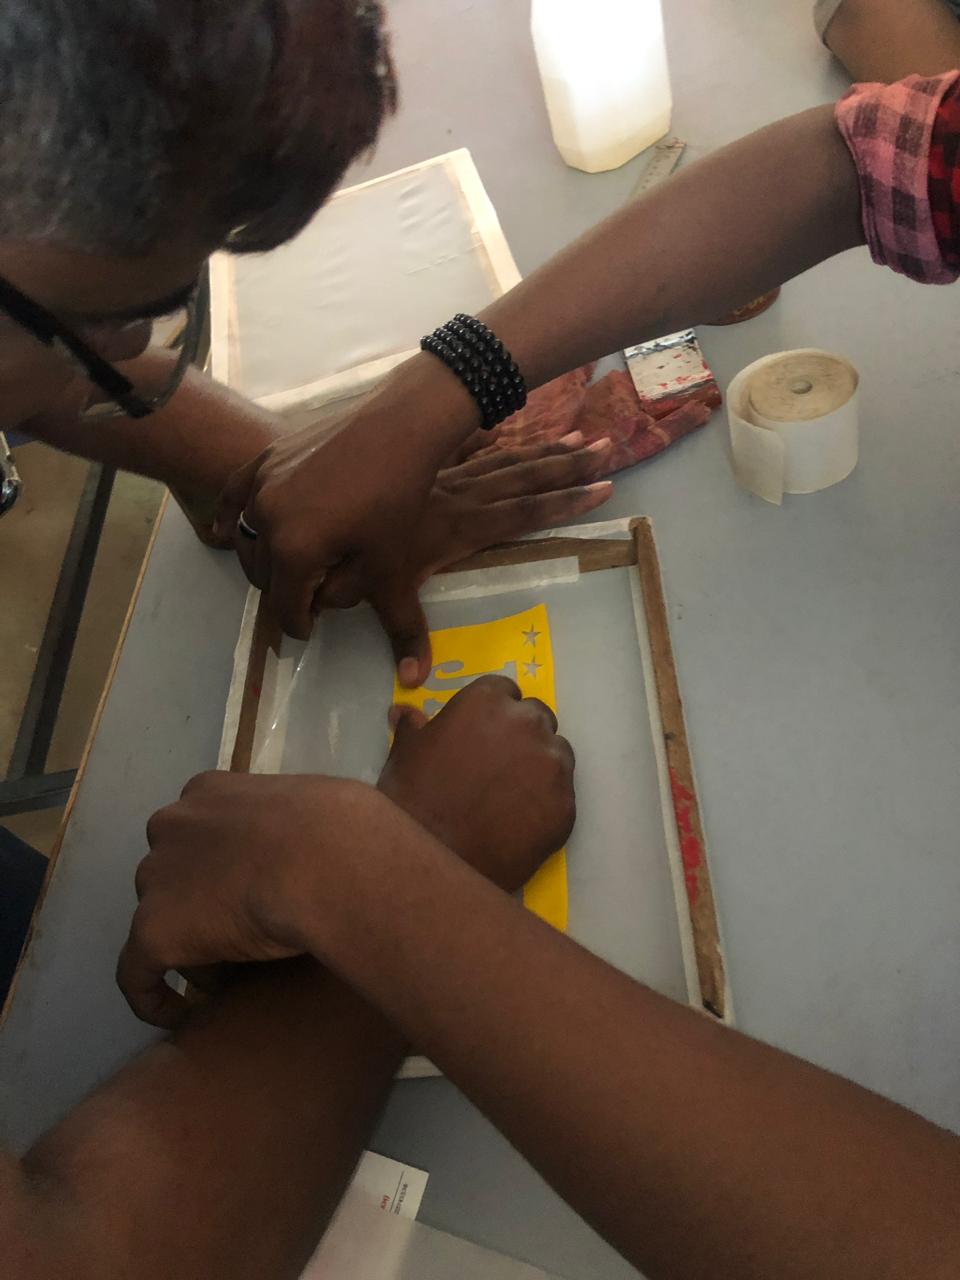
Sticking work is completed. Now ready for coloring.
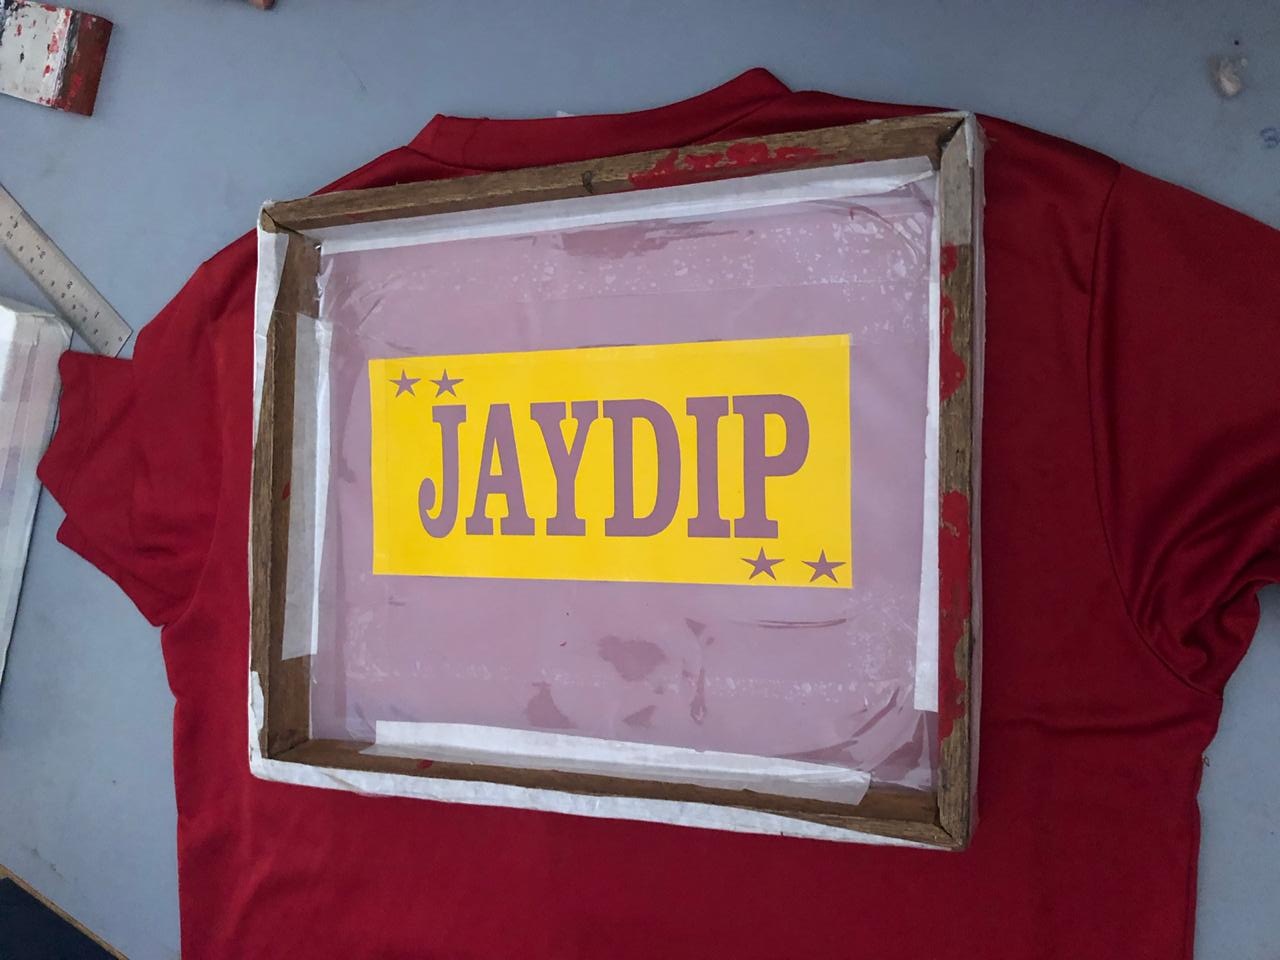
Then I pasted color on mesh using 'Squeegee'. My T-shirt was red color, so I used blue color for text and white color for stars.
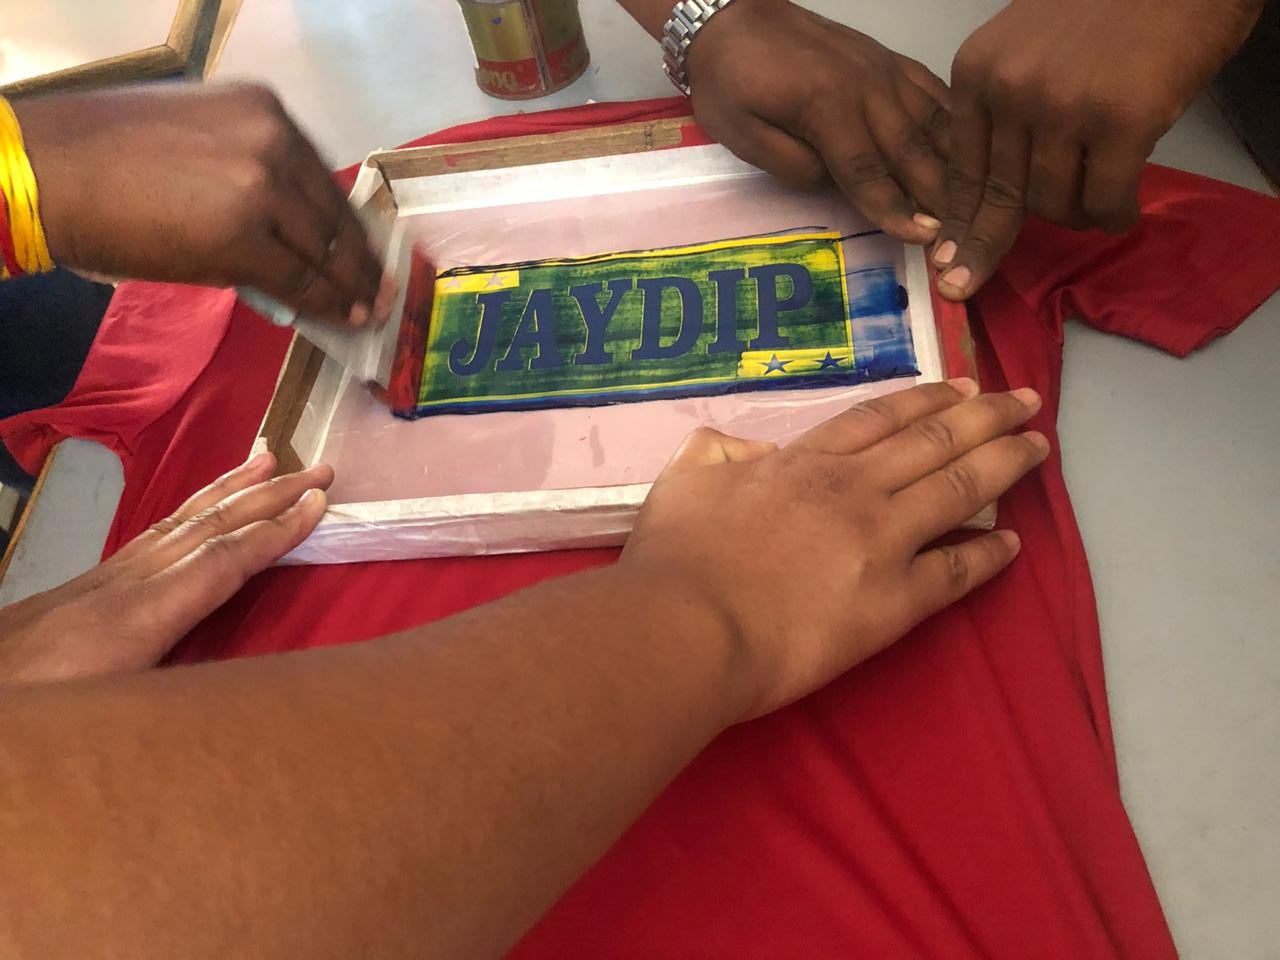
After coloring, I removed negative of vinyl paper. And dring t-shirt using 'hot air gun' for 15 minutes. Now ready to wear that t-shirt.
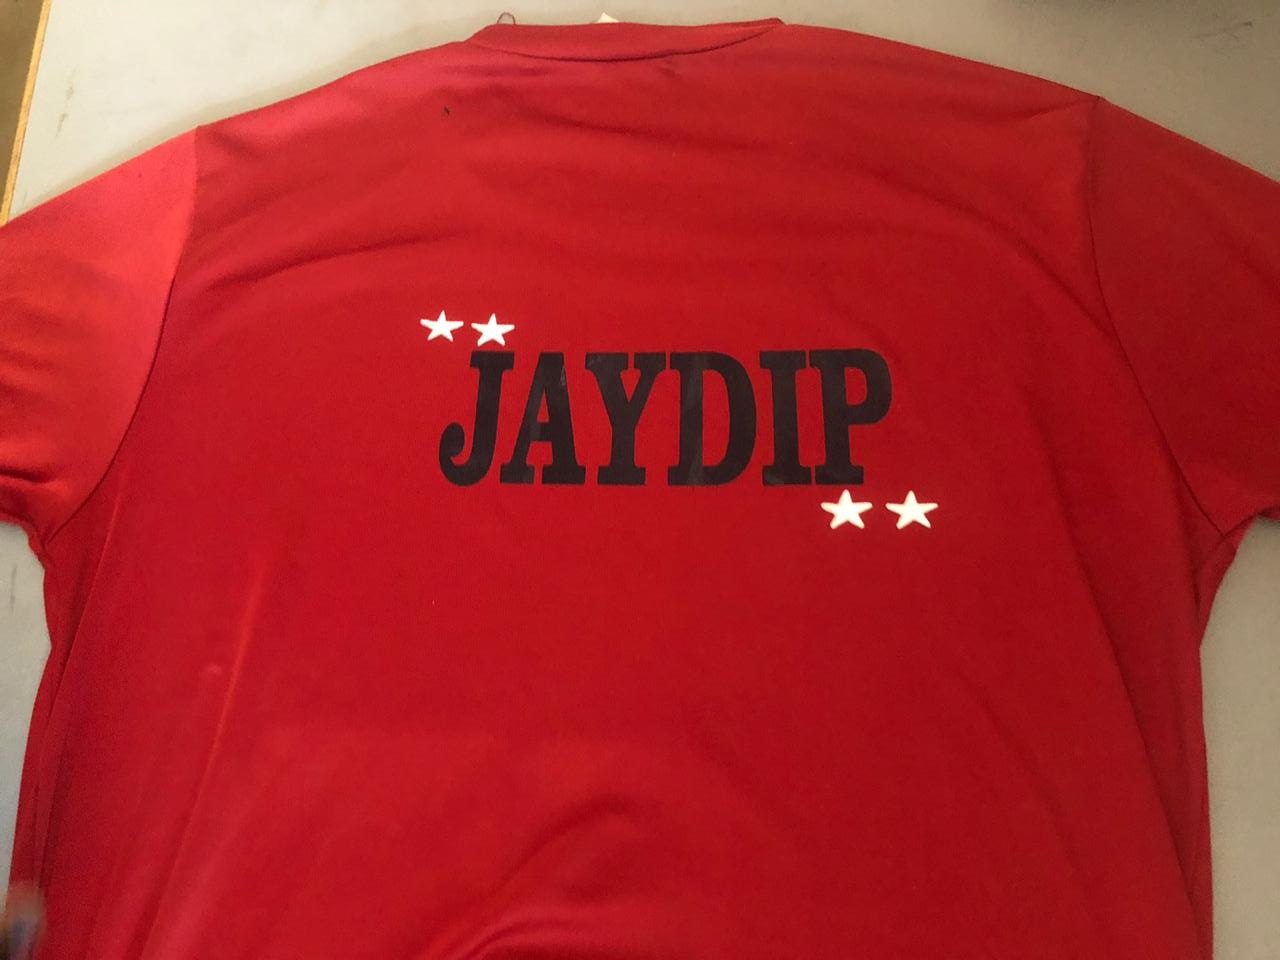
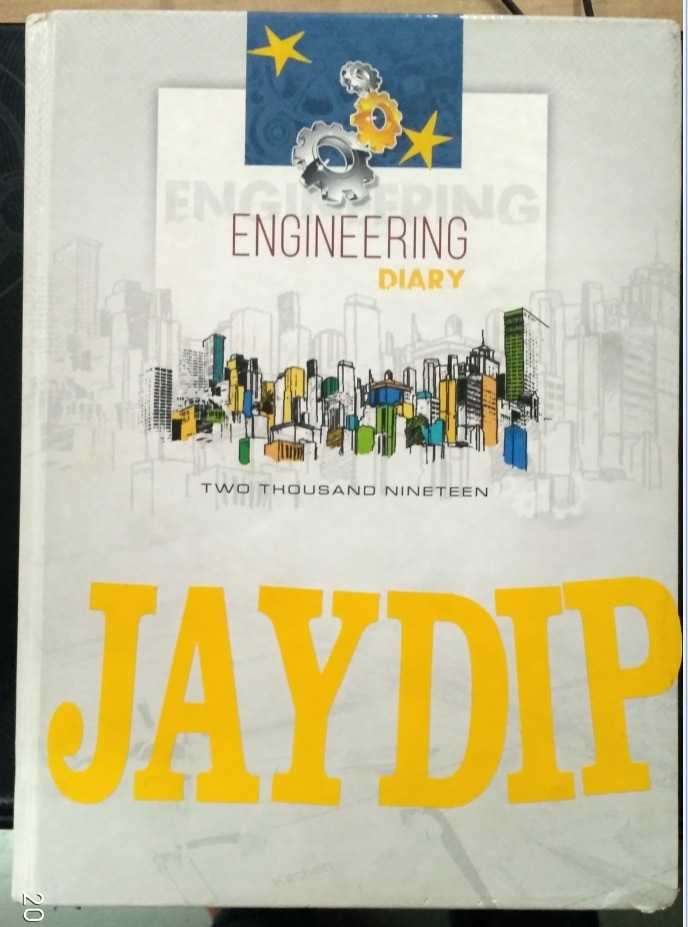
I used negative part of design in T-shirt printing. And positive part of design stick on my diary.
Learning Outcomes:
1. Learned new software "RD works", this is 'Machine software' for laser cutter. Also understood kerf calculation.
2. I did parametric design on solid works and cut it using laser cutter.
3. learned how to make design and cutting on 'Graphtec pro CE6000 plus' Vinyl cutter.
4. Understood the technique of T-shirt printing.