Group assignment:
Characterize the lasercutter, making test parts(s) that vary in cutting dimensions.
Individual assignment:
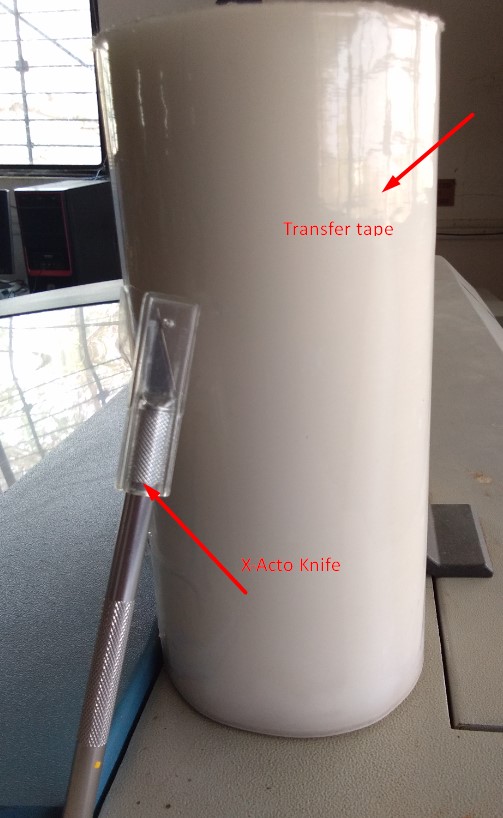
- Cut something on vinyl cutter
- Design,lasercut and document a parametric press-fit construction kit, accounting for laser kerf, which can be assembled in multiple ways
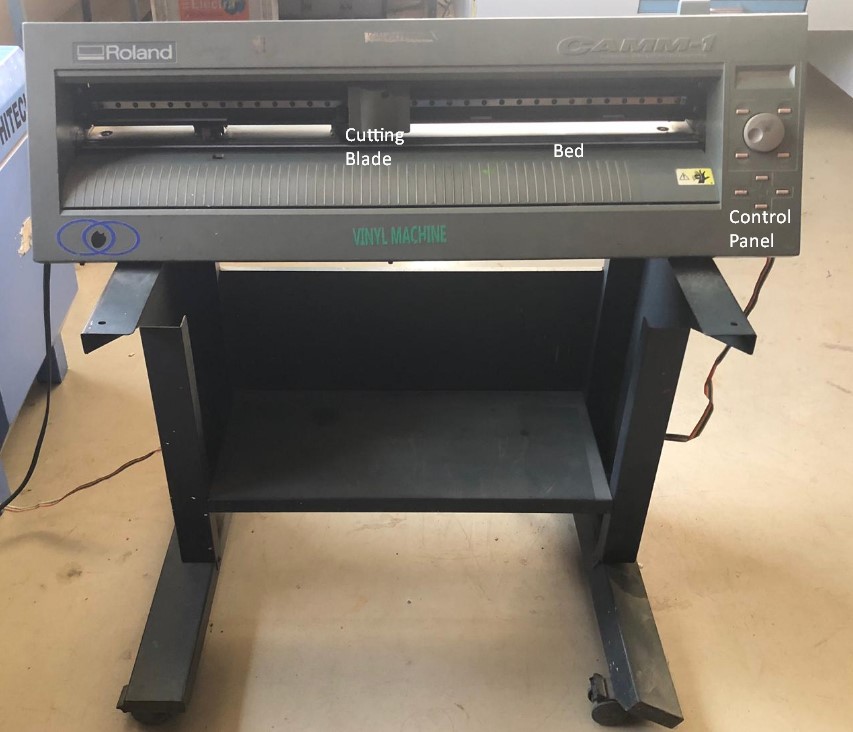
Vinyl Cutter
Specification
A vinyl cutter is a type of computer-controlled machine. This machine use blade to cut. Designed shapes in vector graphics. We have Roland Vinyl Cutter have sharp blades for cutting. This machine has 450mm bed area. any shapes,letters can be using it.
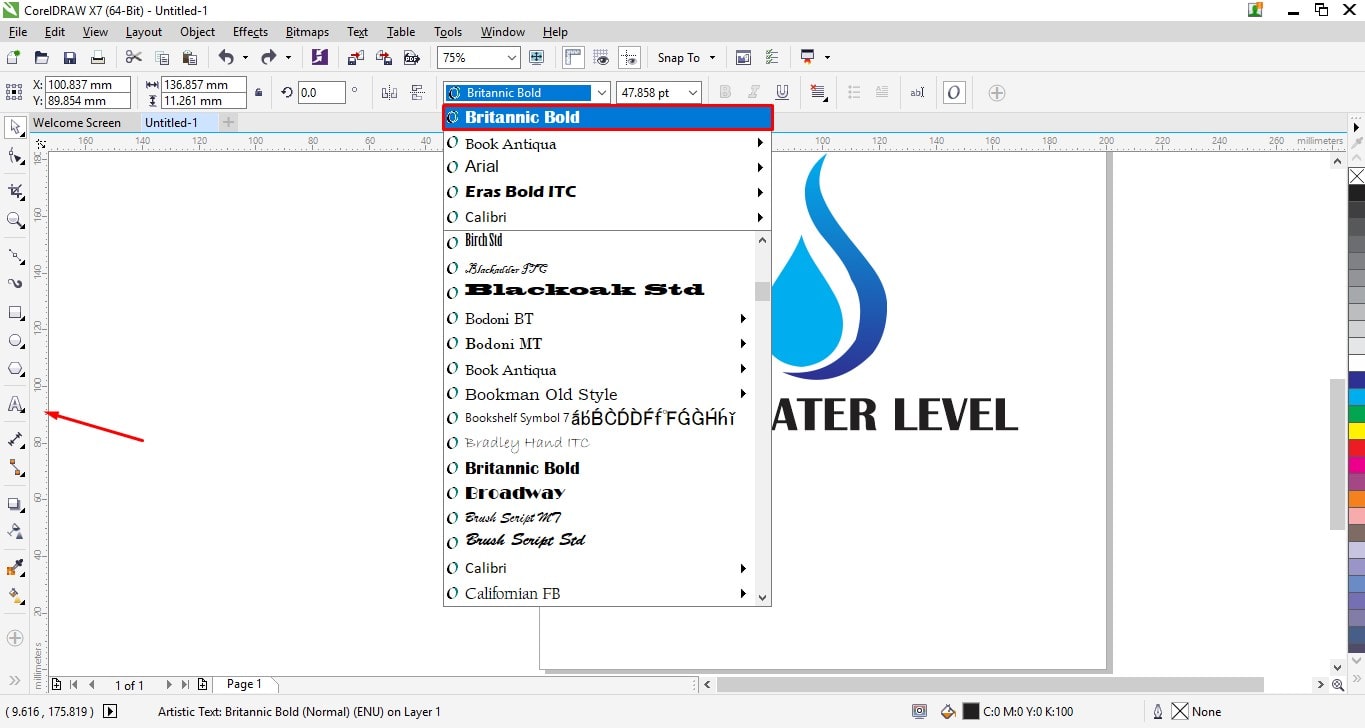
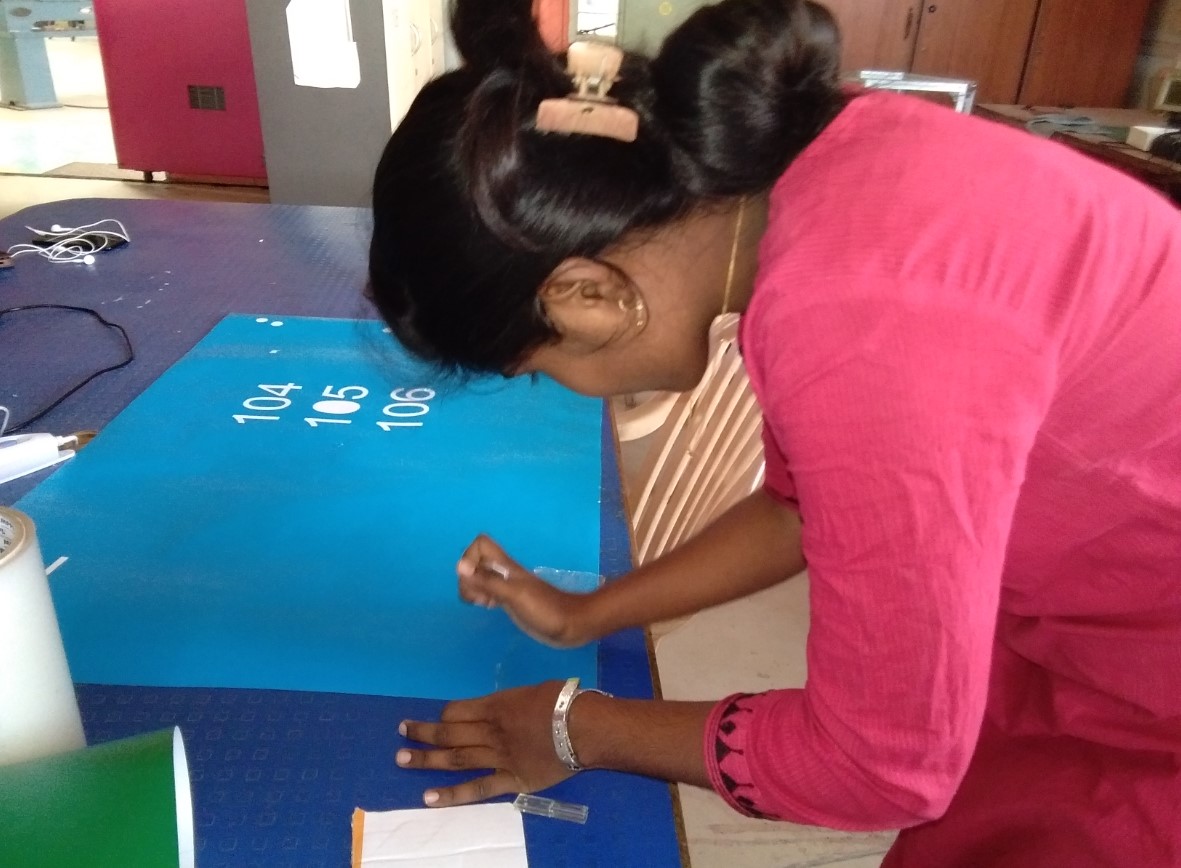
This is my first vinyl cutting experiance before I have just seen vinyl cutter used by others. I make my final project logo design in Corel Draw named "DAM WATER LEVEL". Make .png file and I use Fab Module to run the program. Now setup the vinyl paper and origin the blade according to the paper. Test run it before final cut. After final cut when I am weeding out by tweezers.
I decided to do more made another design for cutting by vinyl cutters. So I made sticker for my laptop in Corel draw and convert it into .Png file.Whole process is described in below.
Design
1.I Made a my final project design in Corel Draw.I did step to make water symbol using shape tool.

1.I did step to make water symbol using shape tool.
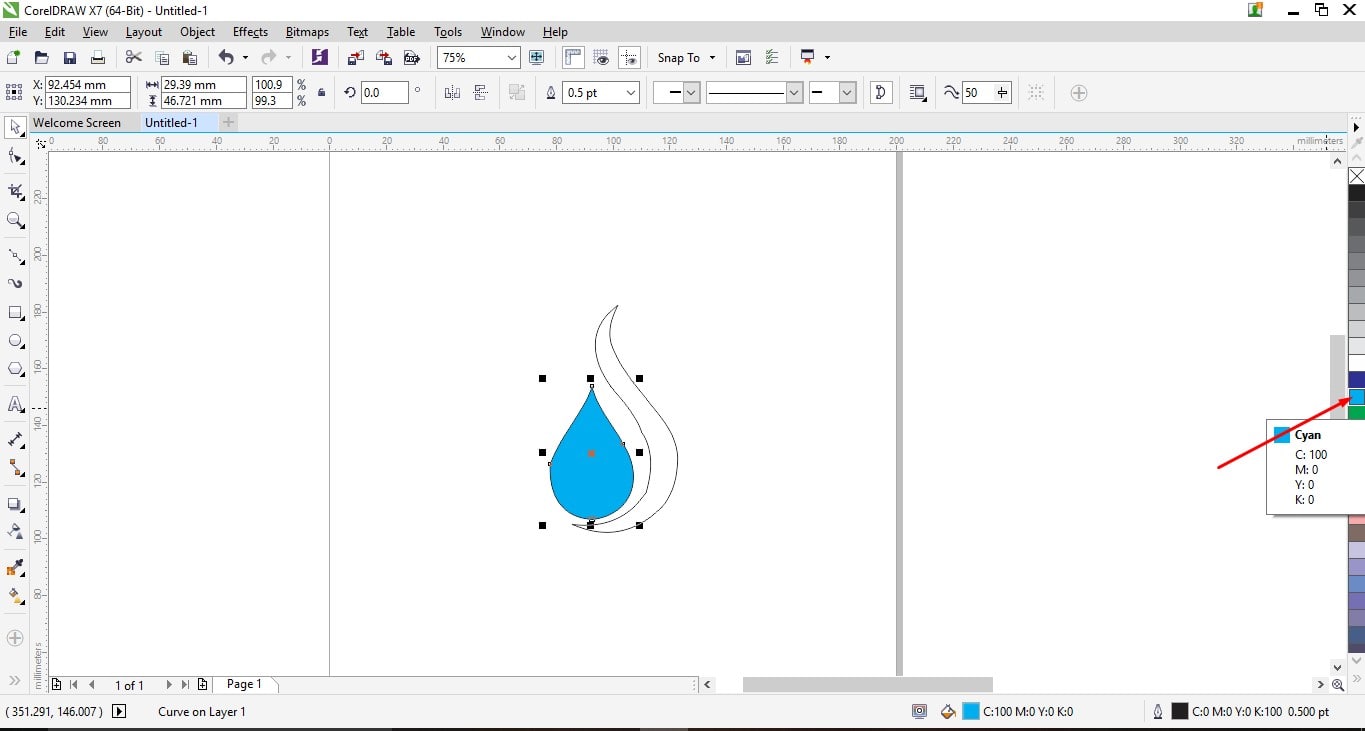
2.Then I colour this symbol in blue.
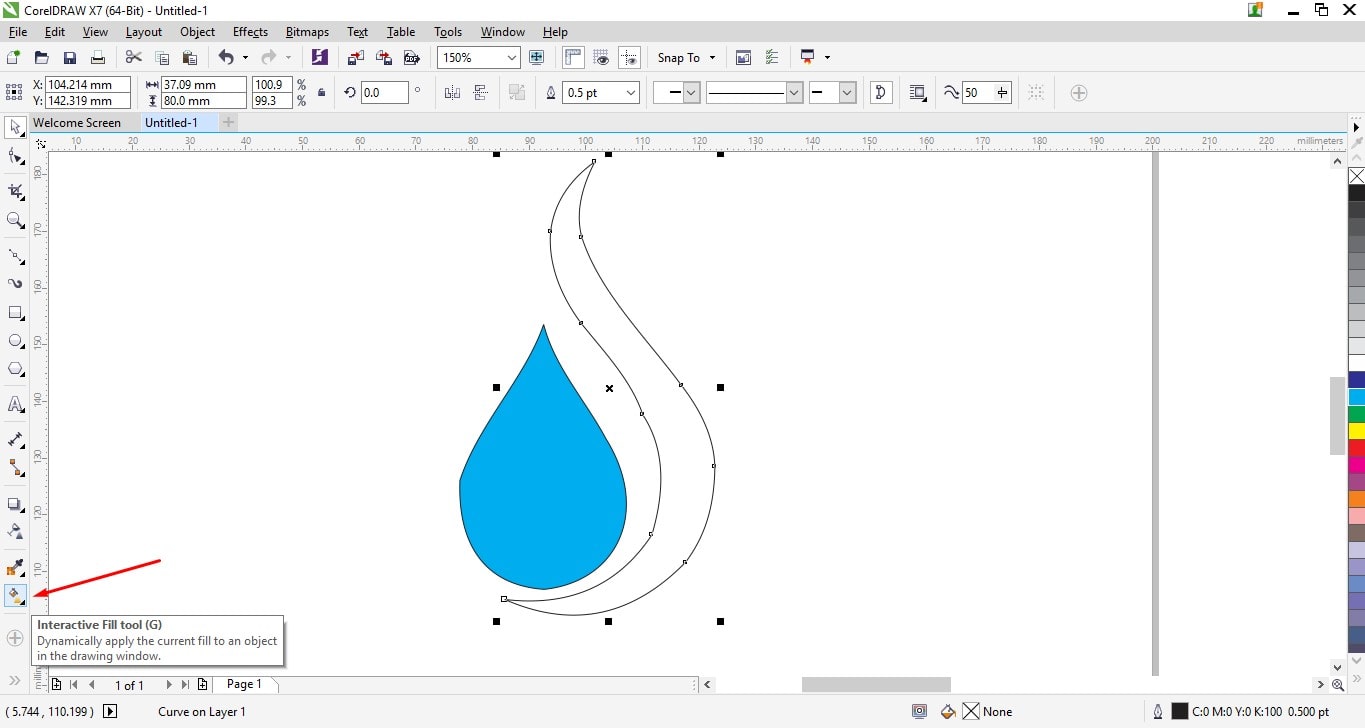
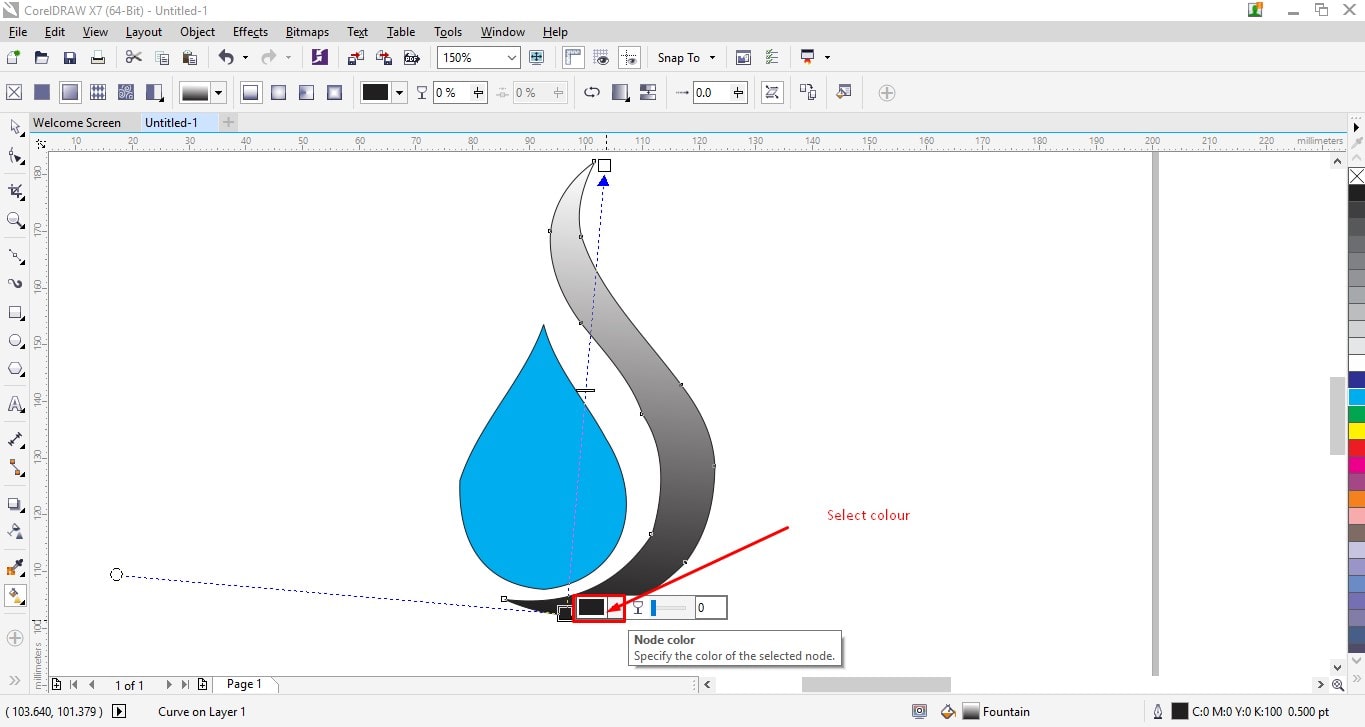
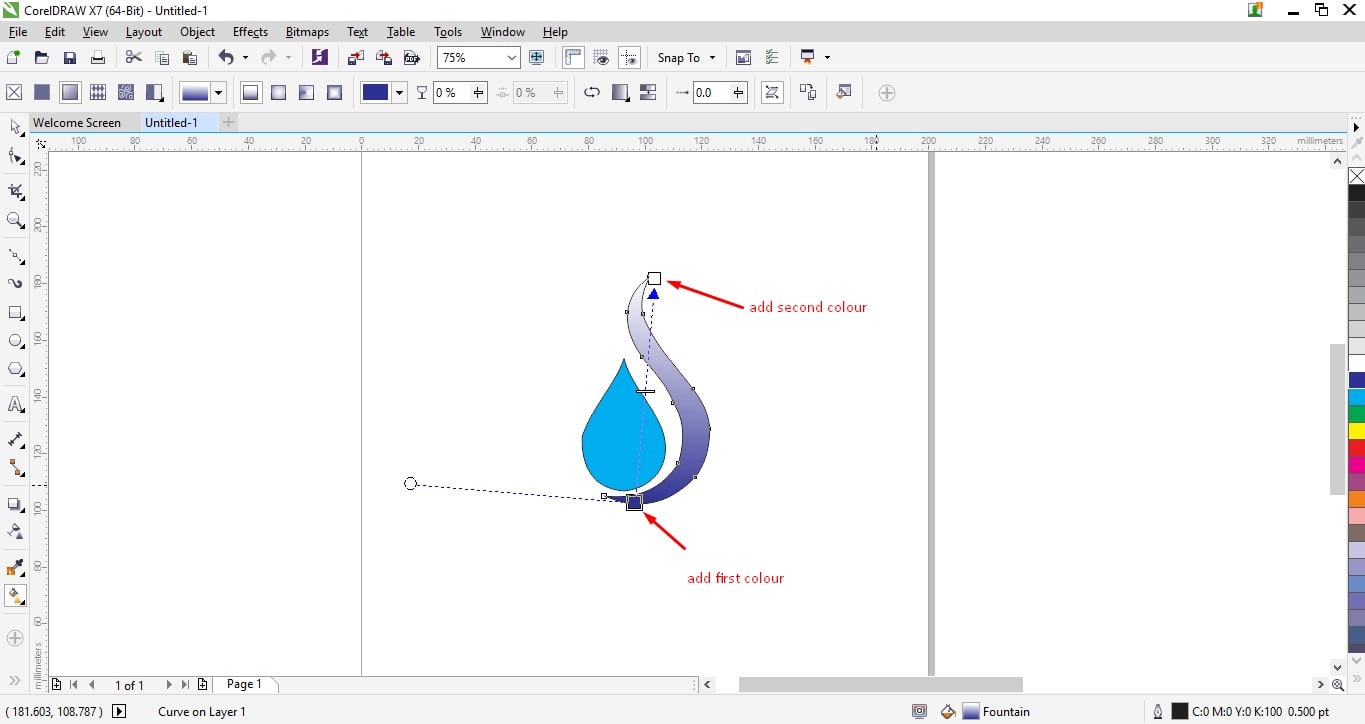
3.Then I draw another shape. its seeing like S. firstly I draw a plane line and convert into curves. for color this shape I used Interactive Fill Tool in the Tool Bar. and then I colored it in two colors. first one is black and another is blue. I used both colors because I like the color combination.
4.Then I remove Border.
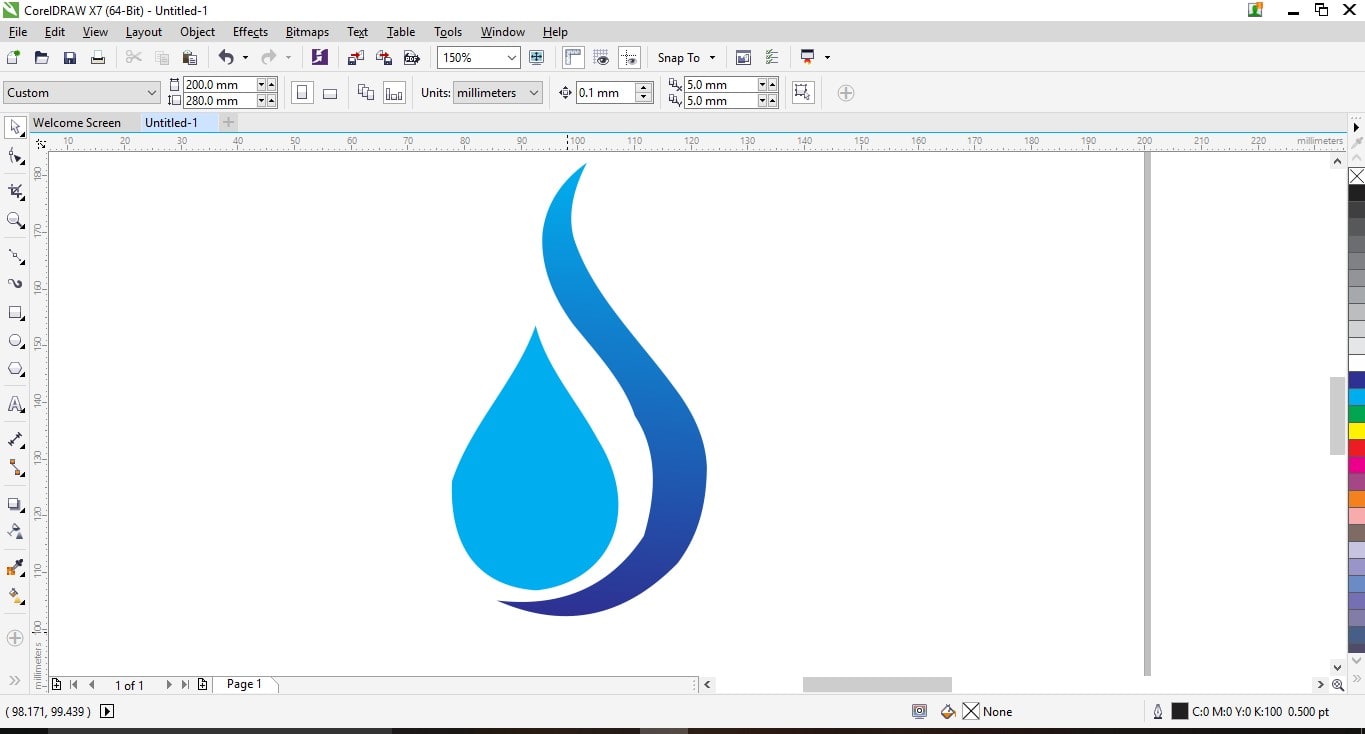
5.I took text tool in tool bar and wrote my project Name.
My Project product logo is ready
 Here,I was just learning more things in corel draw.I was making some more two logos
3. Then I draw another shape. It's seeing like S. Firstly, I draw a plane line and convert into curves. For color this shape I used Interactive Fill Tool in the Tool Bar. And then I colored it in two colors. First one is black and another is blue. I used both colors because I like the color combination. Then I remove Boarder. I took text tool in the toolbar and wrote my project Name.
Here,I was just learning more things in corel draw.I was making some more two logos
3. Then I draw another shape. It's seeing like S. Firstly, I draw a plane line and convert into curves. For color this shape I used Interactive Fill Tool in the Tool Bar. And then I colored it in two colors. First one is black and another is blue. I used both colors because I like the color combination. Then I remove Boarder. I took text tool in the toolbar and wrote my project Name. Machine Setting
1. I have to select the roll of vinyl and place it on the rollers behind the machine. Place the lever in the down position and load the vinyl.

2.Then I can see the rubber wheels and under the rubber wheels there is a white sticker indicator.
.jpg)
3.I have press lever for a press fit roll in vinyl. These Images show the lever up and down.
.jpg)
|
.jpg)
|
4.I have to ensure that the vinyl is aligned properly under the rubber wheels. Turn ON the vinyl cutter. Then sets the origin by pressing the "Origin" button on the control panel.
.jpg)
|
.jpg)
|
Fab Module Process
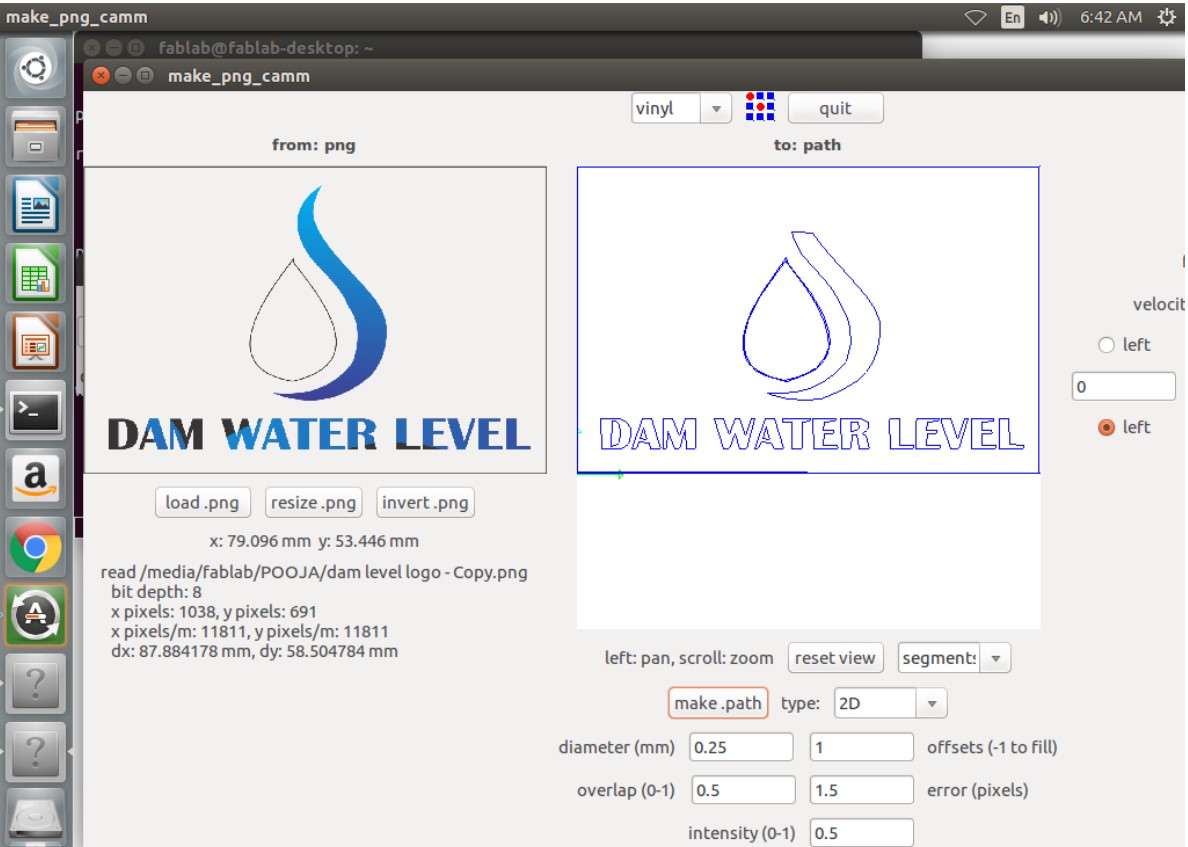
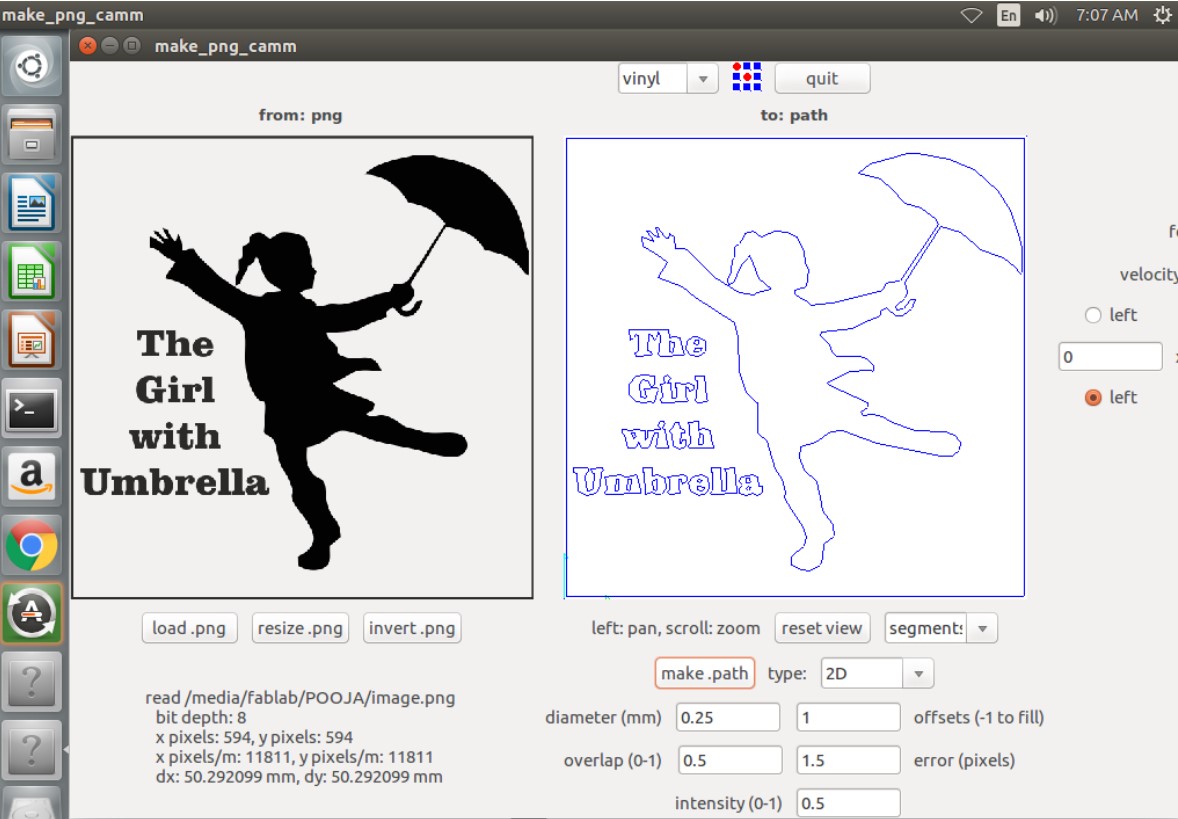
A.We used the fab modules, to interface with the cutter. Fab modules can be downloaded free from the Fab website. To run the module, use the sudo Fab command. Then put the password and press enter.
B.Then selected image(.png) and Roland vinylcutter(.cammm) then click on make_png_camm.
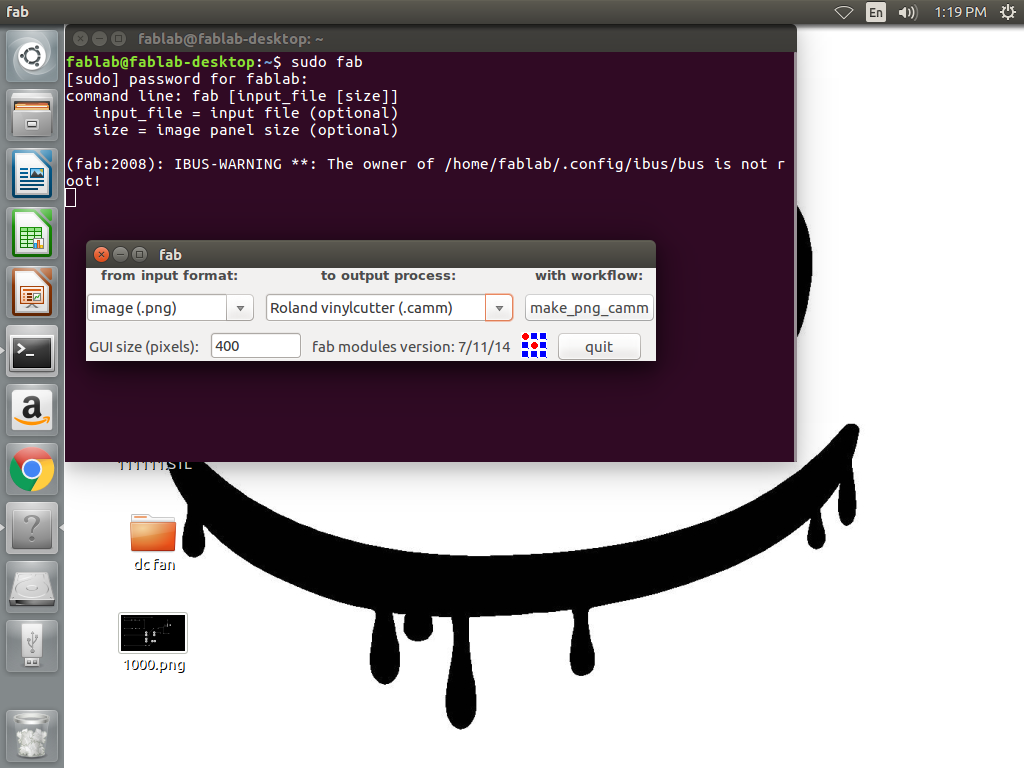
C.open a new window,then click on load_png ,selected vinyl and Segments and click on the path.then send it to a vinyl cutter.
D.Before sending its design to a vinyl cutter. I select the roll of vinyl and place it on the rollers behind the machine. Place the lever in the down position and load the vinyl. Then I can see the rubber wheels and under the rubber wheels there is a white sticker indicator.
E.Turn ON the vinyl cutter. set the origin by pressing the "Origin" button.upload file to a vinyl cutter.After cutting is done remove a vinyl paper from vinyl cutter and removed unwanted parts.
my final project logo is ready.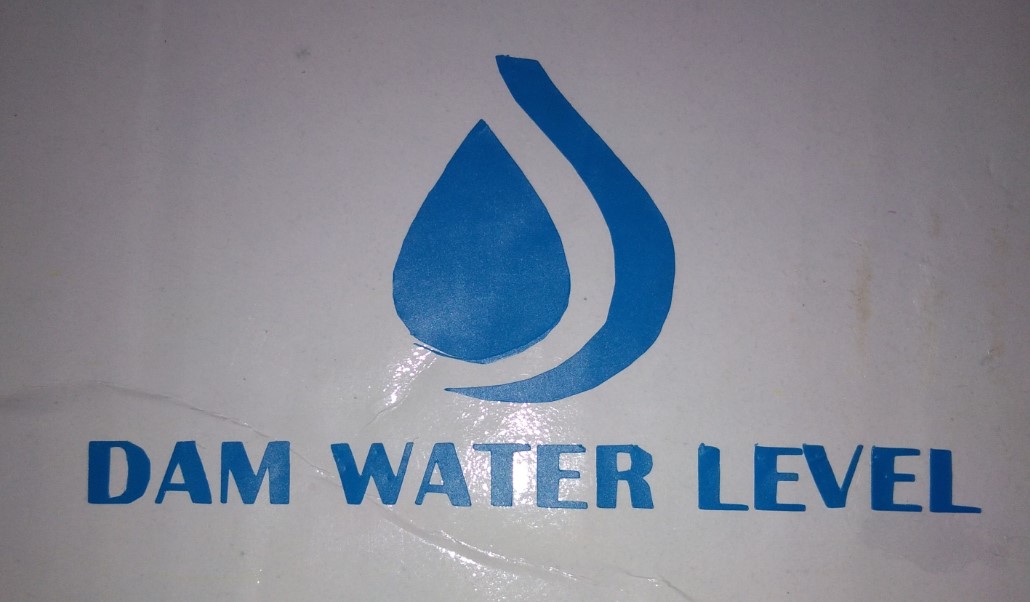
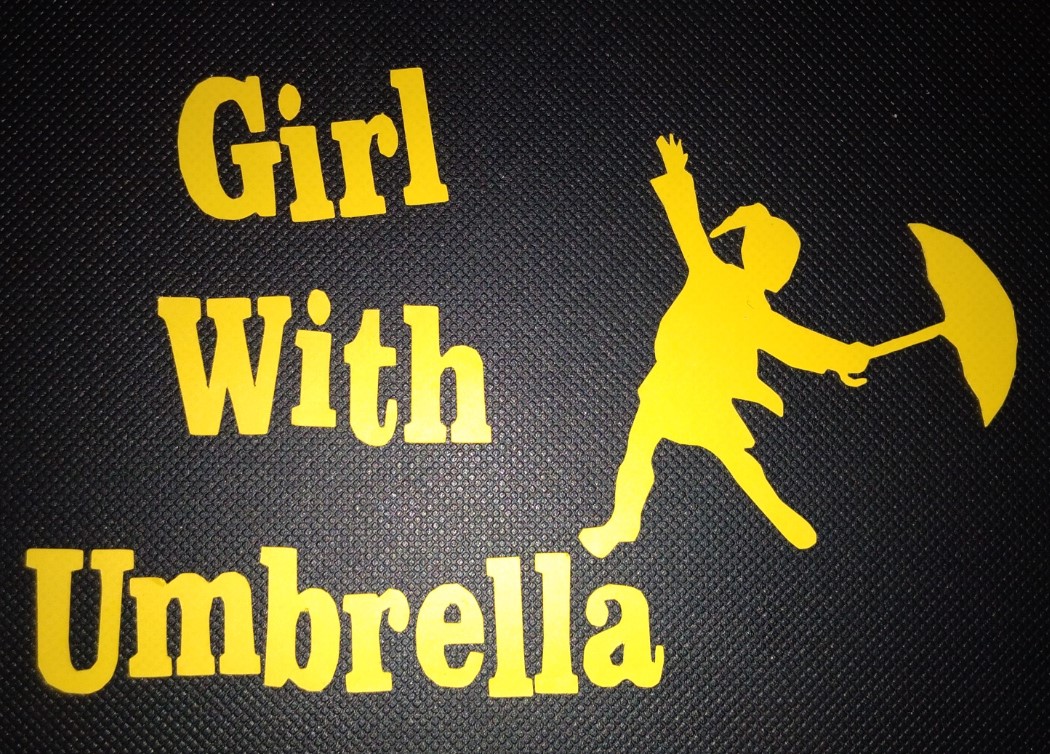
F.Next I downloaded Image of girl with Umbrella and edited it in Corel Draw.Added a text " The girl with Umbrella" and cut it on vinyl cutter by same process.
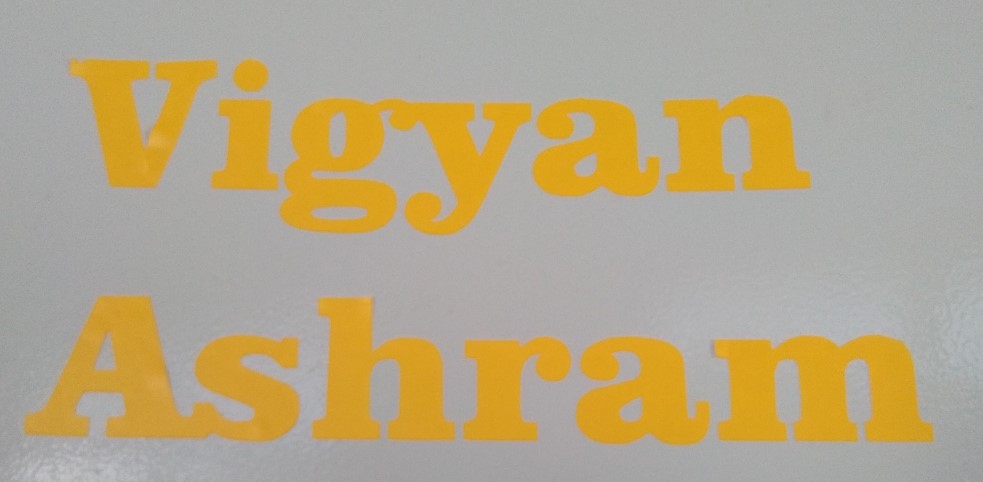
like this I also print cut the text of "Vigyan Ashram"
|
|
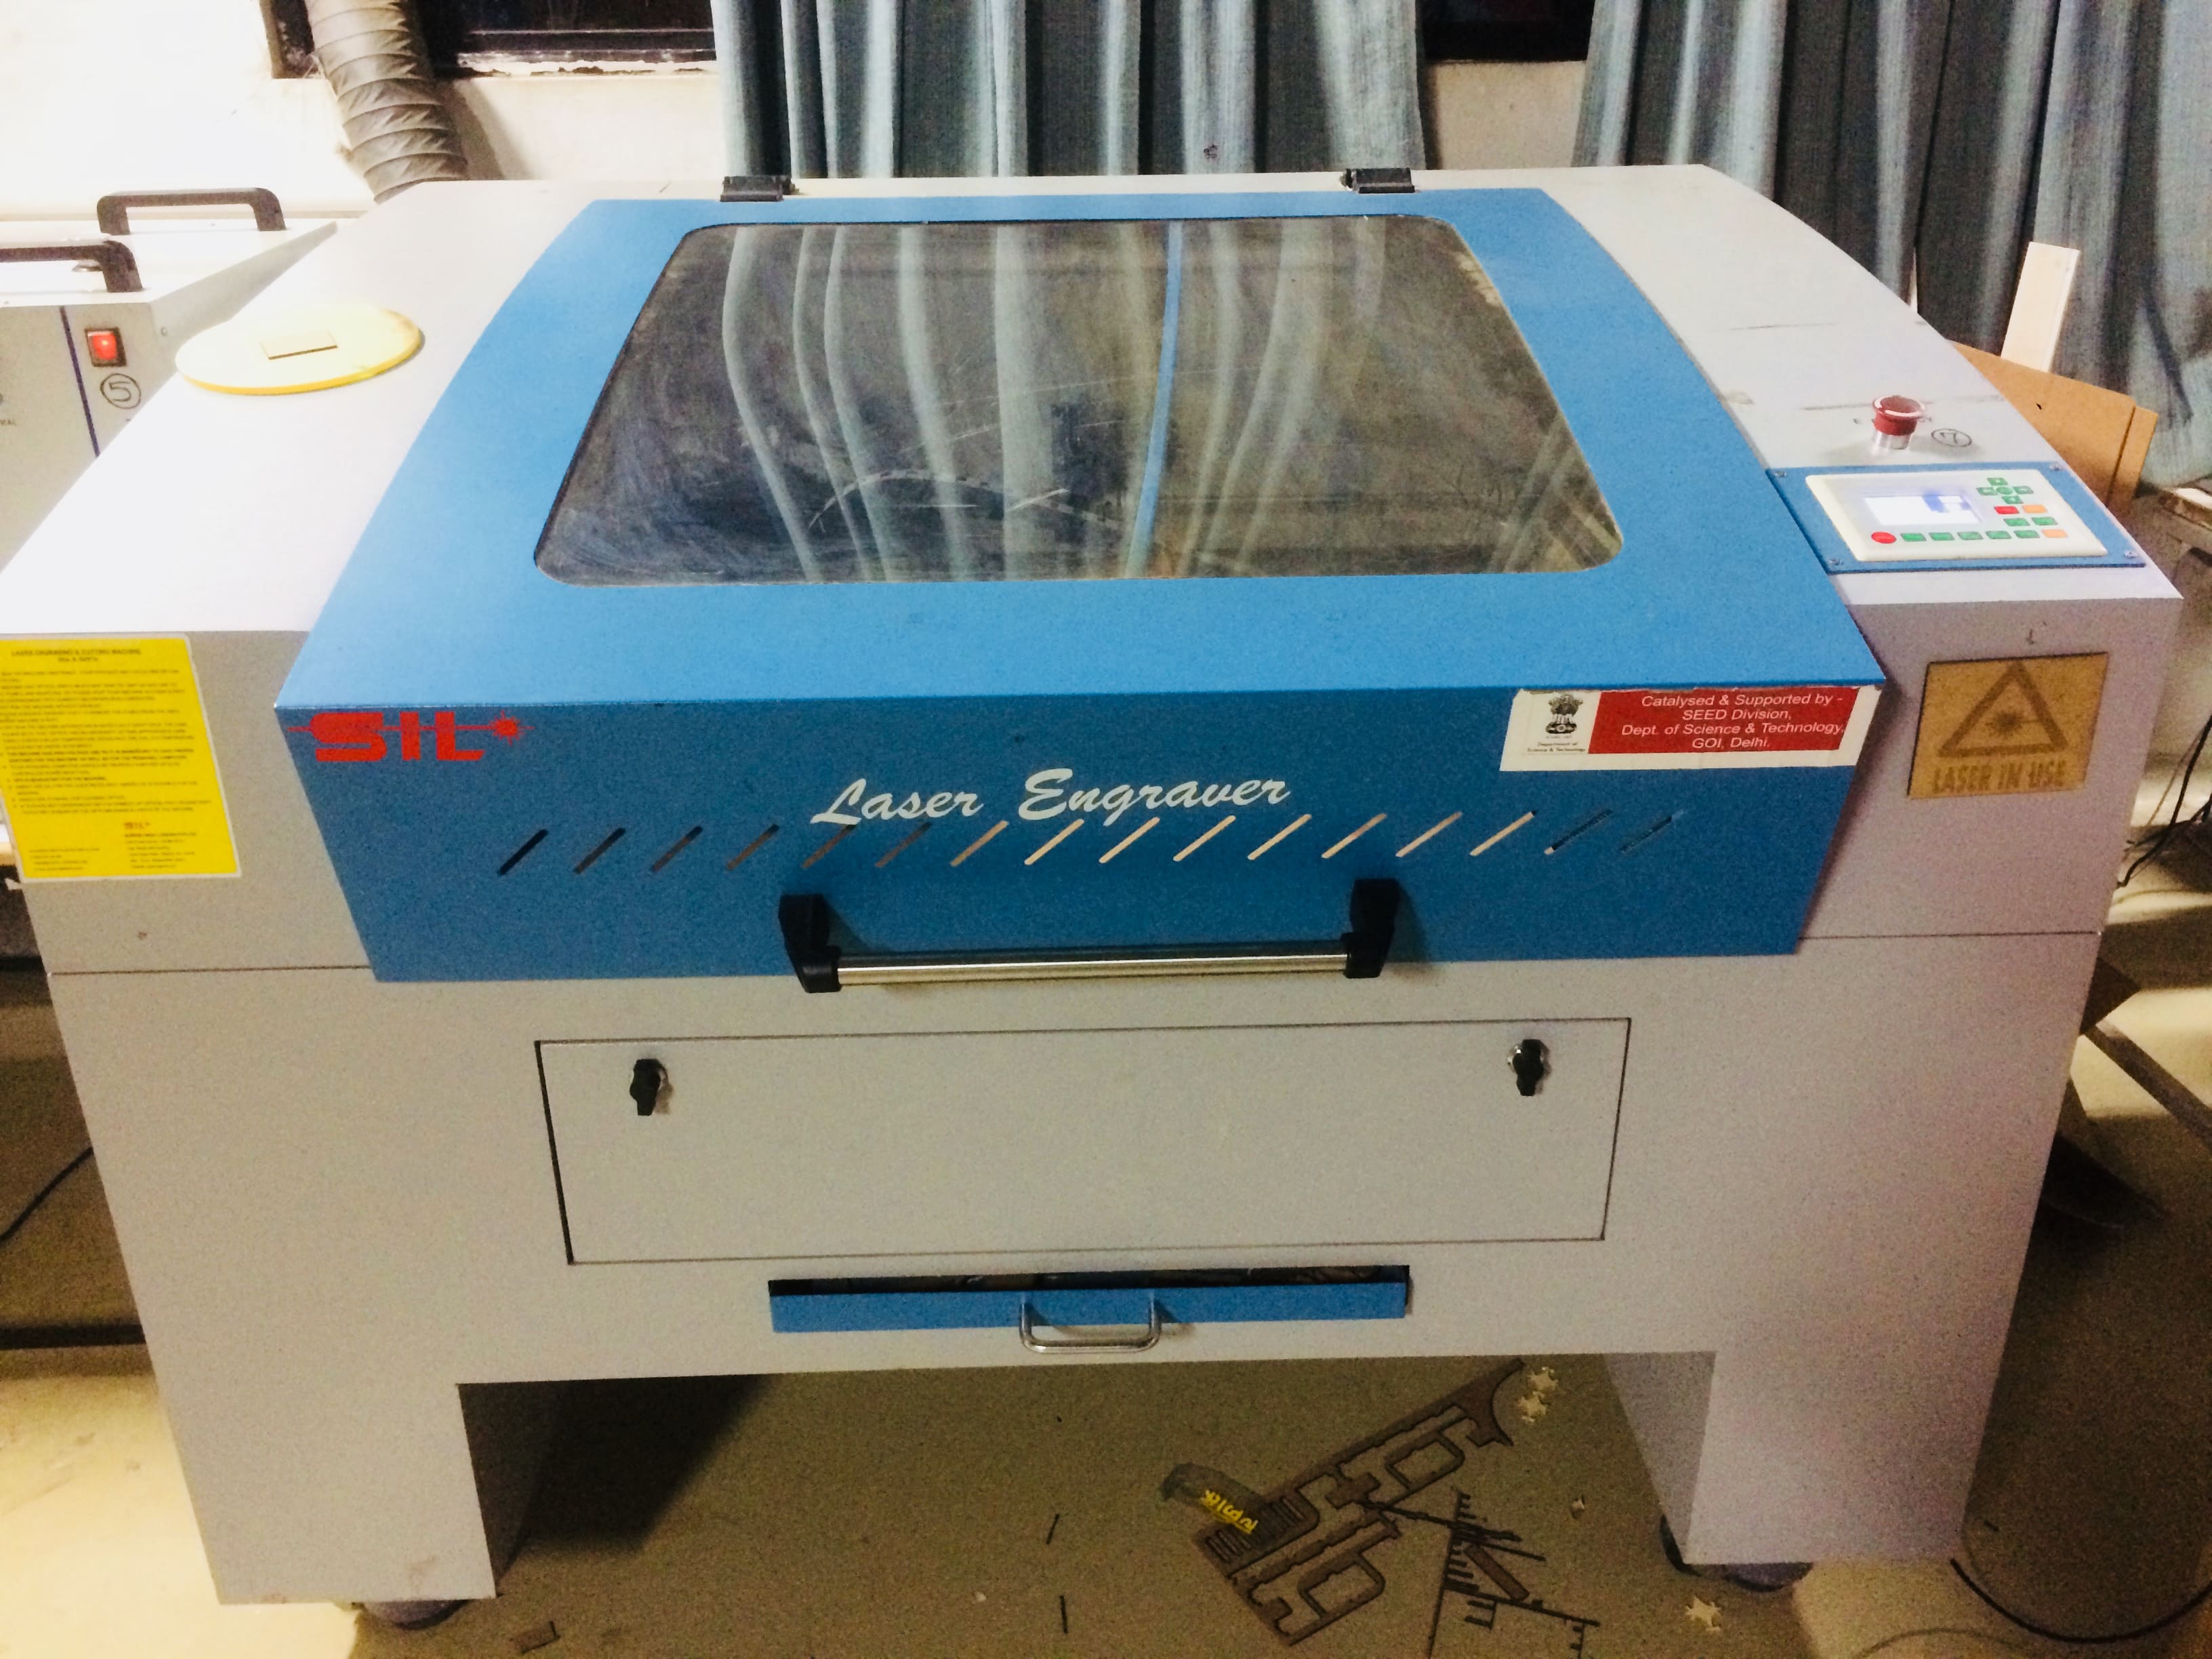
Laser Cutter
Specification
Here we have two types of laser cutter i.e SIL laser cutter and epilog laser cutter. Generally, we use SIL laser or CO2 laser cutter which have a 600*900mm bed area and can cut material up to 12mm. It has Own Software which is RD Work.It important only .dxf for cutting,engraving and Scanning speed and power modify according using a 2.06 mm Cardboard.
Precautions while using Laser Cutting machine
- Wear the required labor protection clothing and protective glasses.
- Never leave the laser cutter working unwatched
- Turn on the Exhaust when the laser is running
- Measure the distance from the surface which need to be cut and adjust it as necessary using the wooden ruler
- Weight down any elevated surface to avoid contact with the lens of the laser
- Be on the ready for fires, keep water spray near by, press stop & don’t panic
Group Assignment - Kerf Calculation
We decided to split up into three groups.til now I had this laser lot of time, but never calculate the kerf. So, we decided to check kerf for Cardboard with different power and speed.
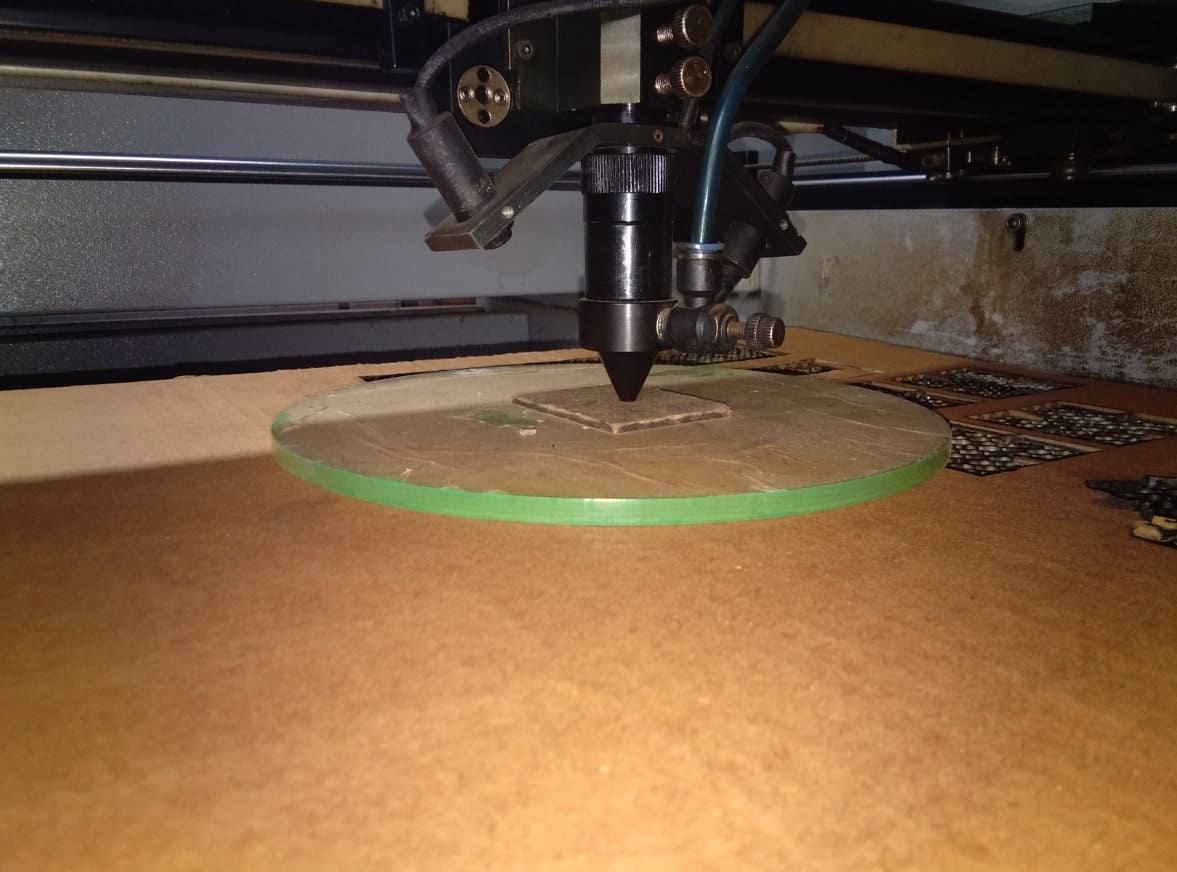
I design a 40 X 30mm rectangular shape.and sepearted cutting process and time at different speed and power.we found the best result in speed 40 and power72,the kerf form of 40mm width kerf was 0.4mm and 30mm height kerf was 0.29mm.
Make Design in any software and save as .dxf file format. Import file in RD works.setup the design,speed and Power.We can set different power and speed for different object by using different color. Gave speed and power for cutting and scanning.
Adjust the focus to minimizing the kerf and good cutting. This laser has manual focus adjustment. then Downloaded file or recent file. Select your file, press the file and then enter. Set the origin, check the frame and press "START" command for cutting.
3.After cutting....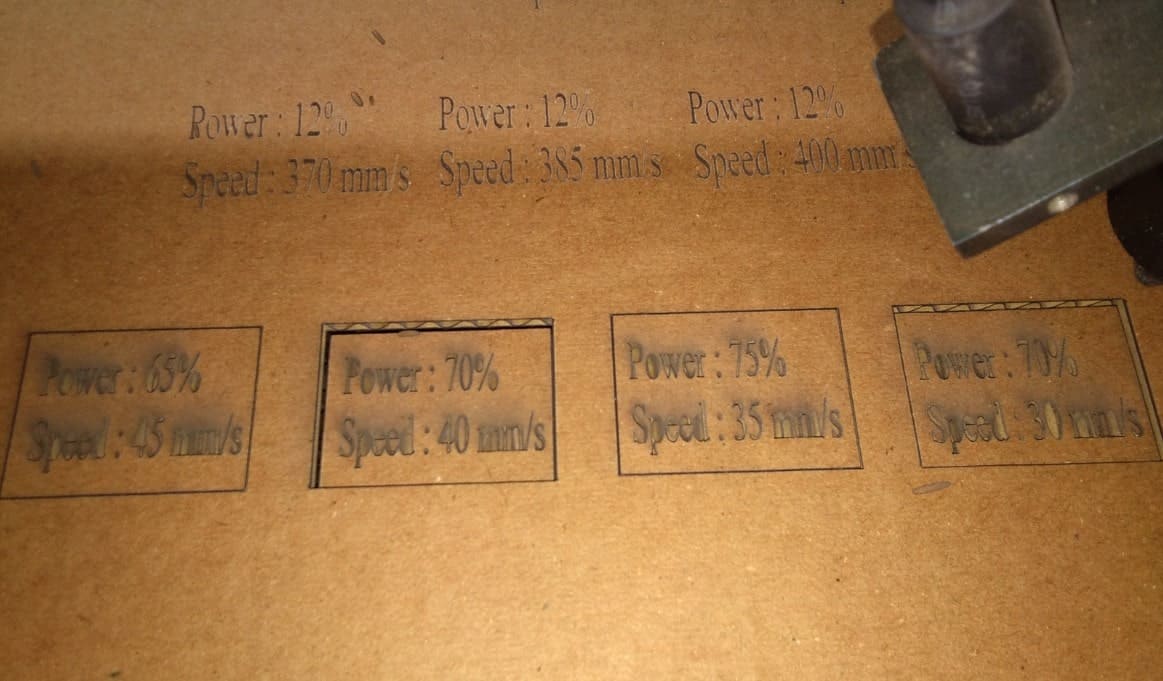
Check kerf of each part and sides.two Object was not cut properly because of low speed and Power.other two are well cut.
While measuring 40mm side.we found it was 39.60 so kerf was 0.4mm
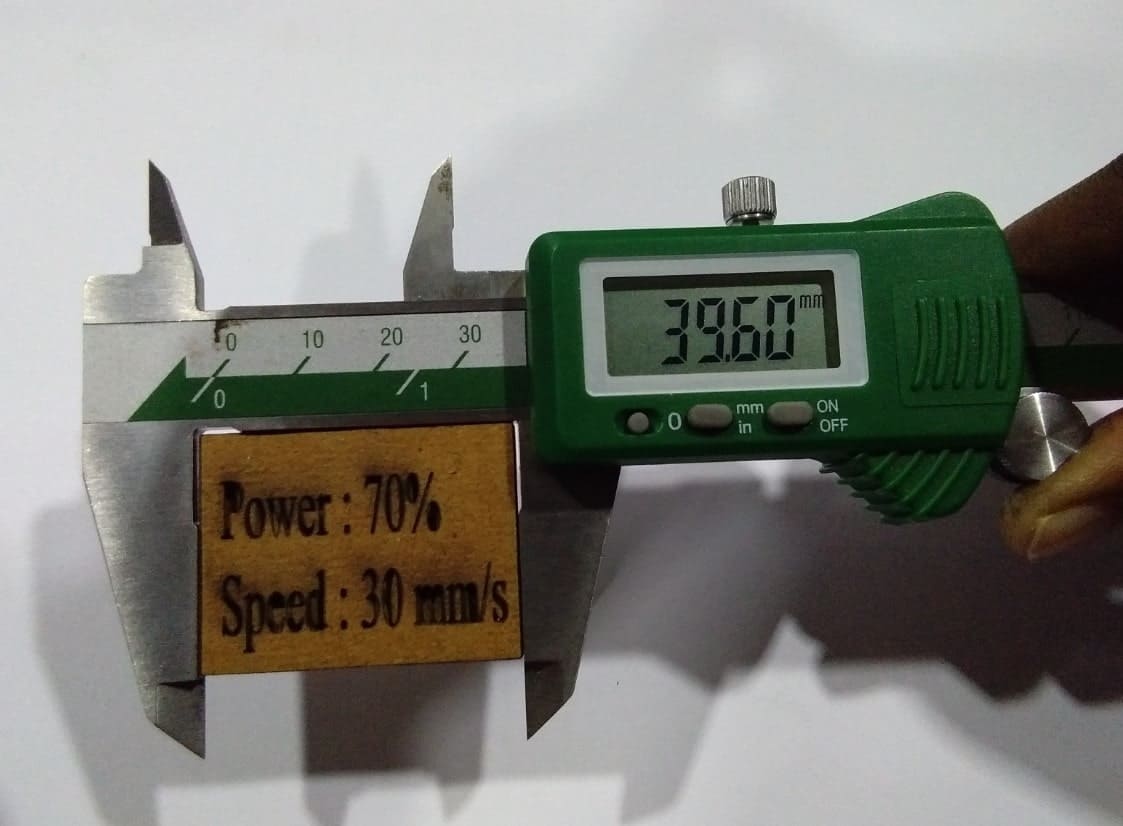
While measuring 30mm side.we found it was 29.66 so kerf was 0.34mm


Here the table of differnece and kerf.power 65 and speed 45 is not cutting well, that's why I am not adding kerf.
Problem during scanning and cutting
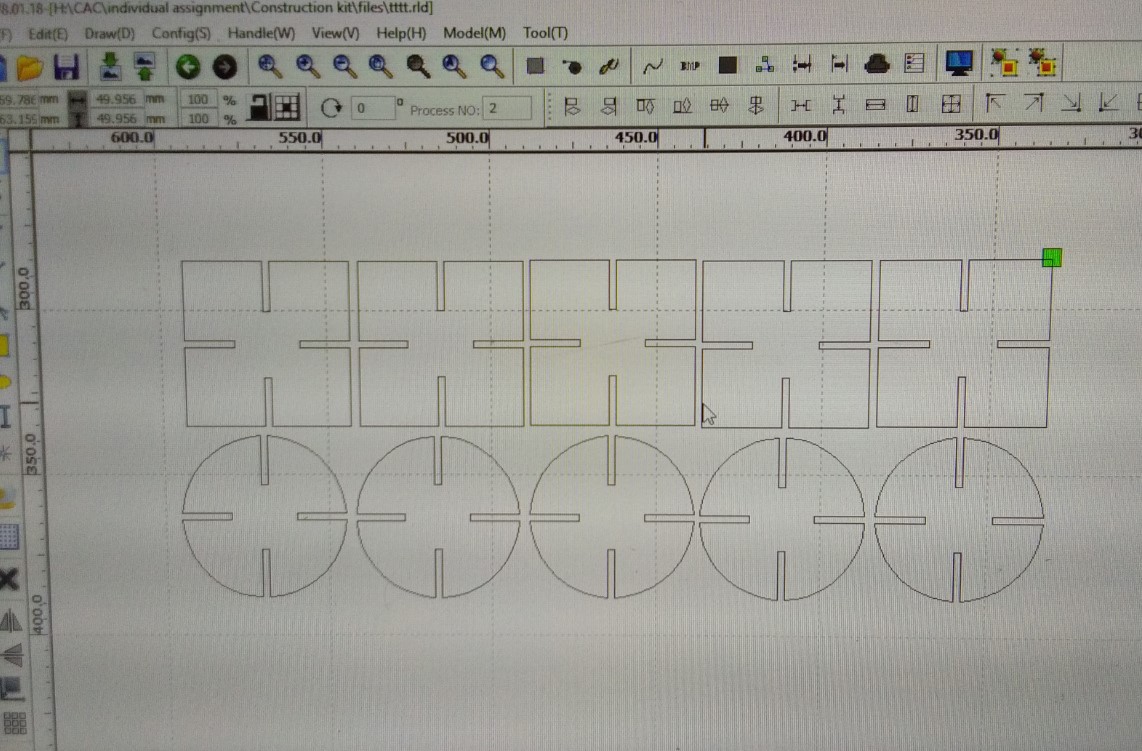
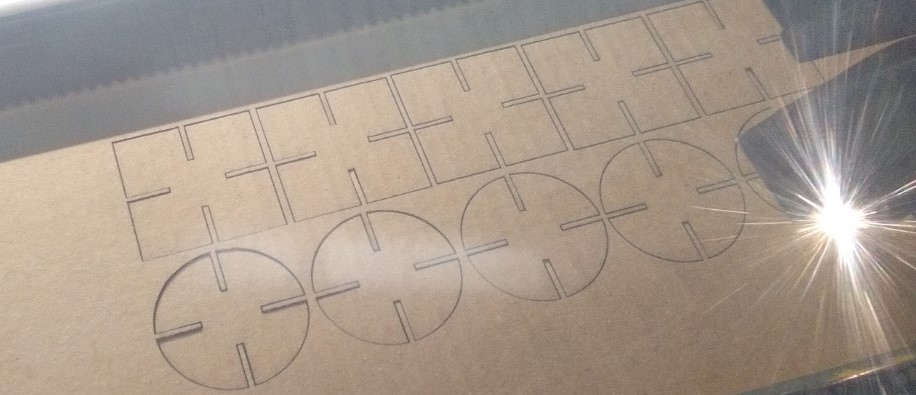
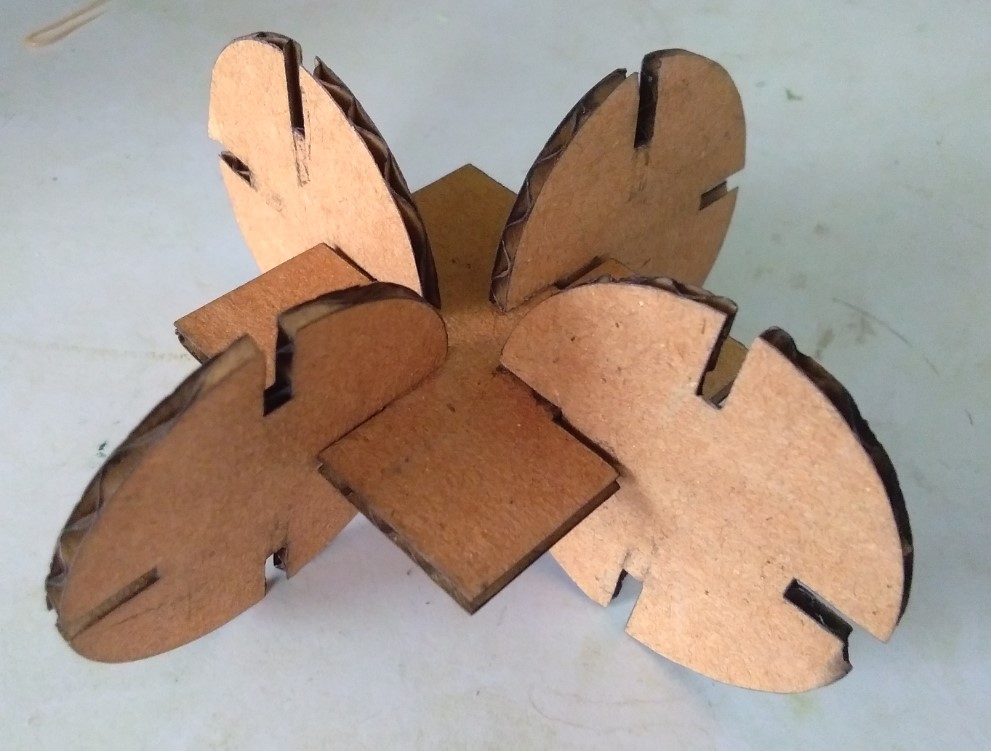
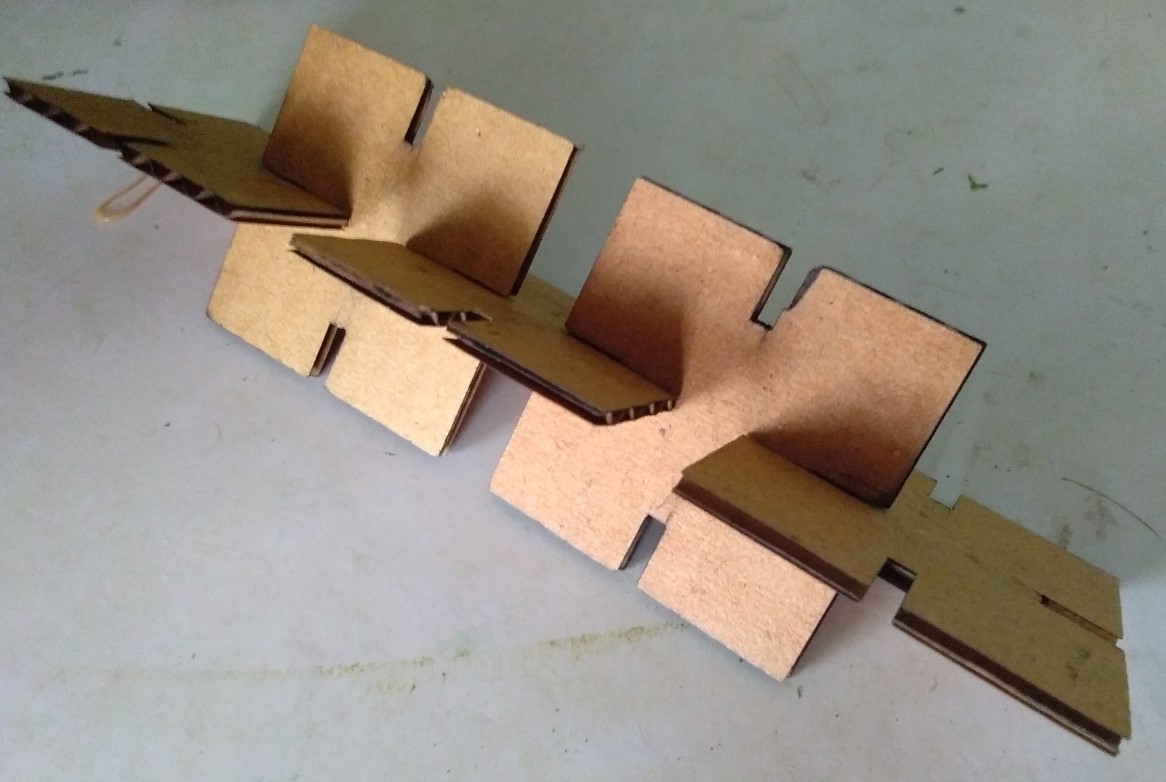
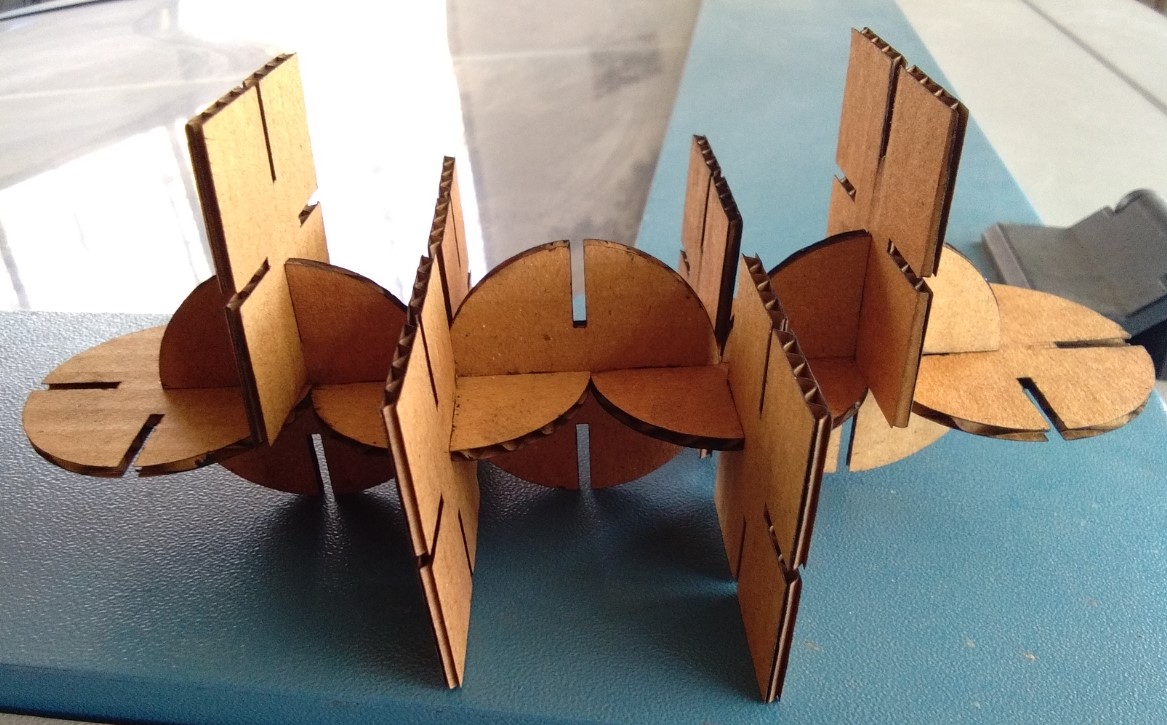
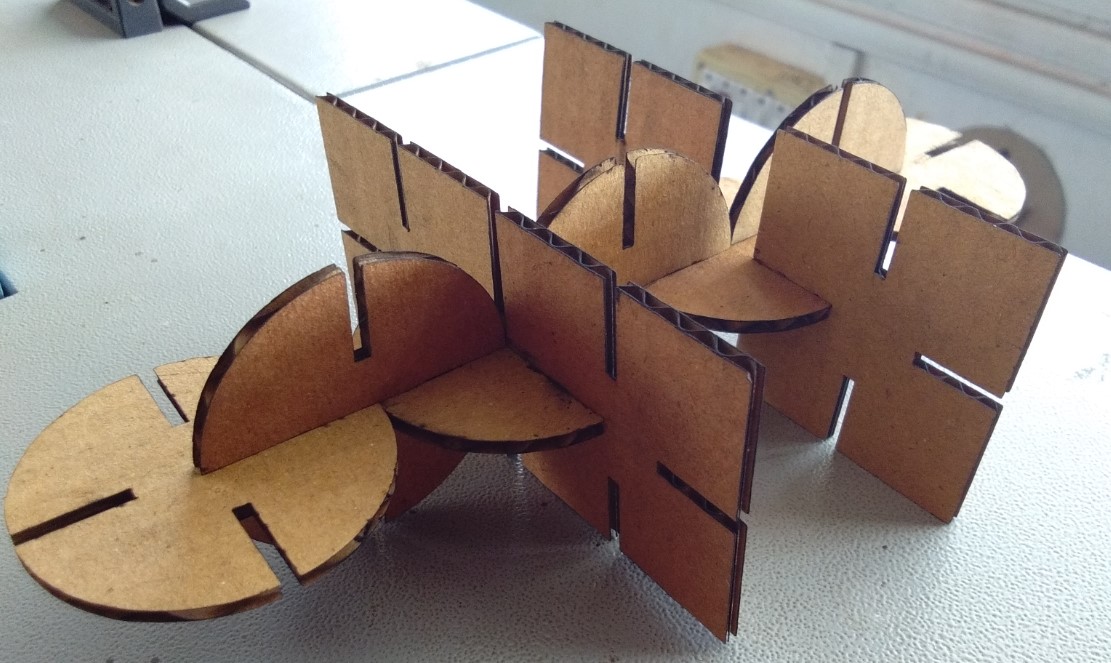
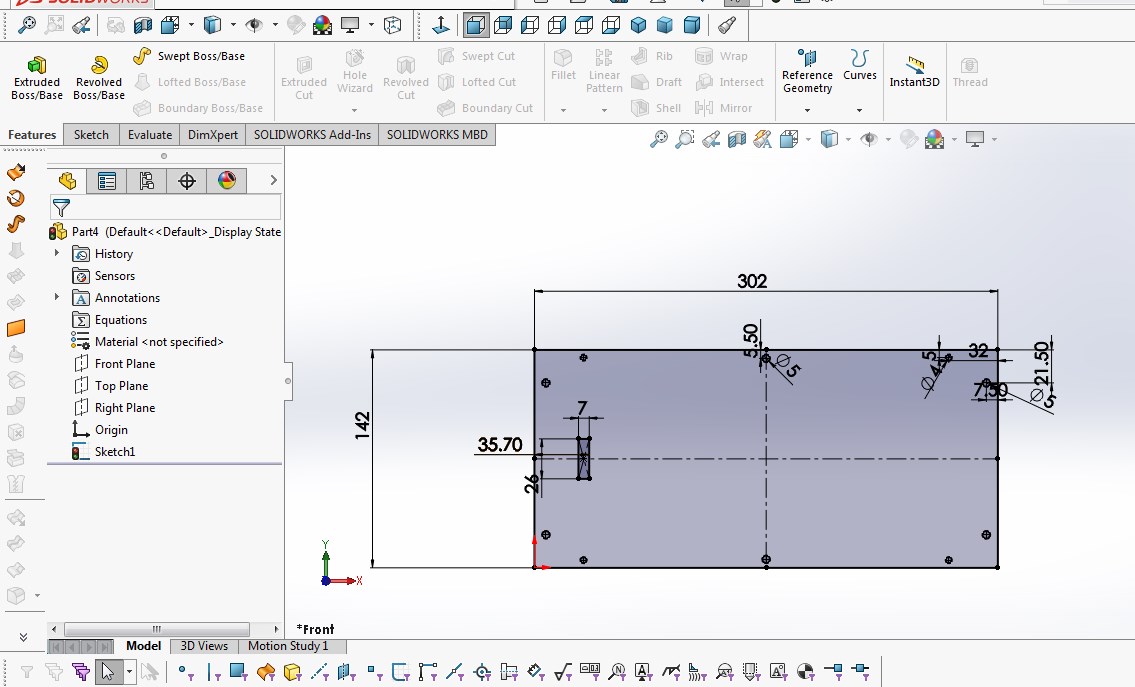
Press-fit Paramatric design
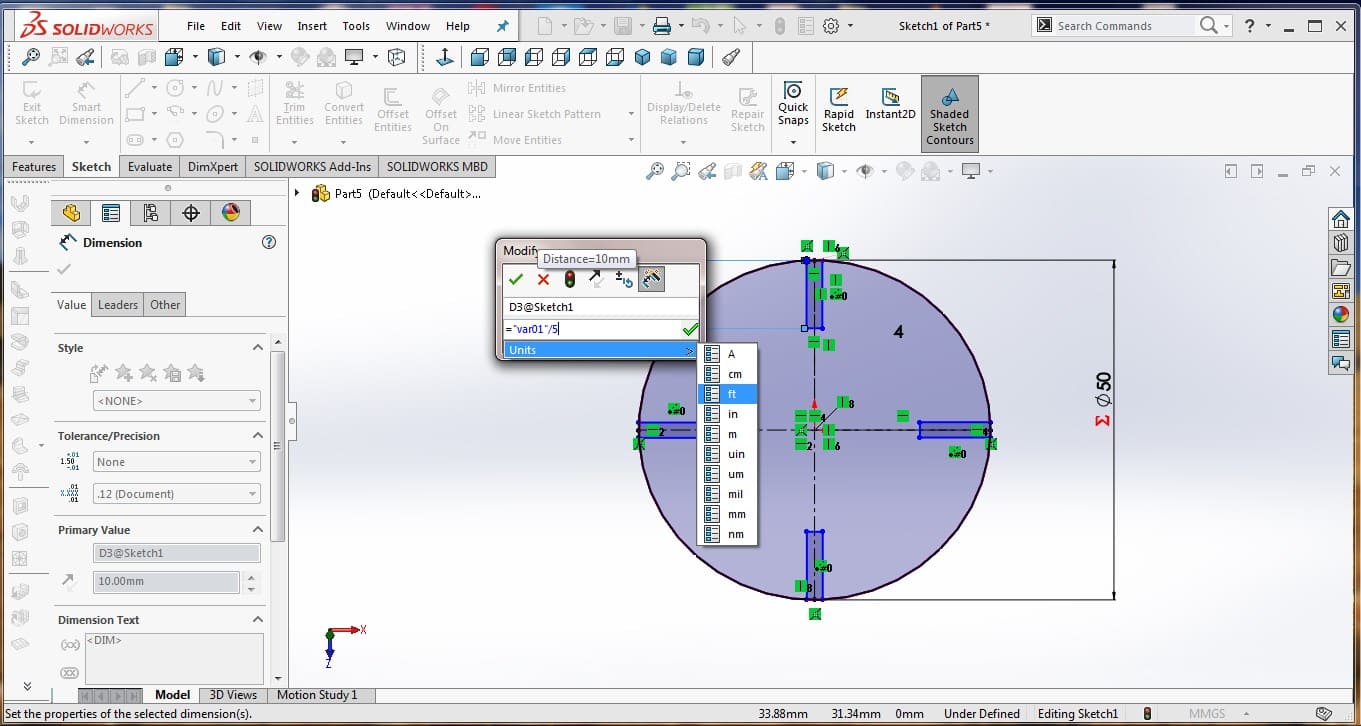
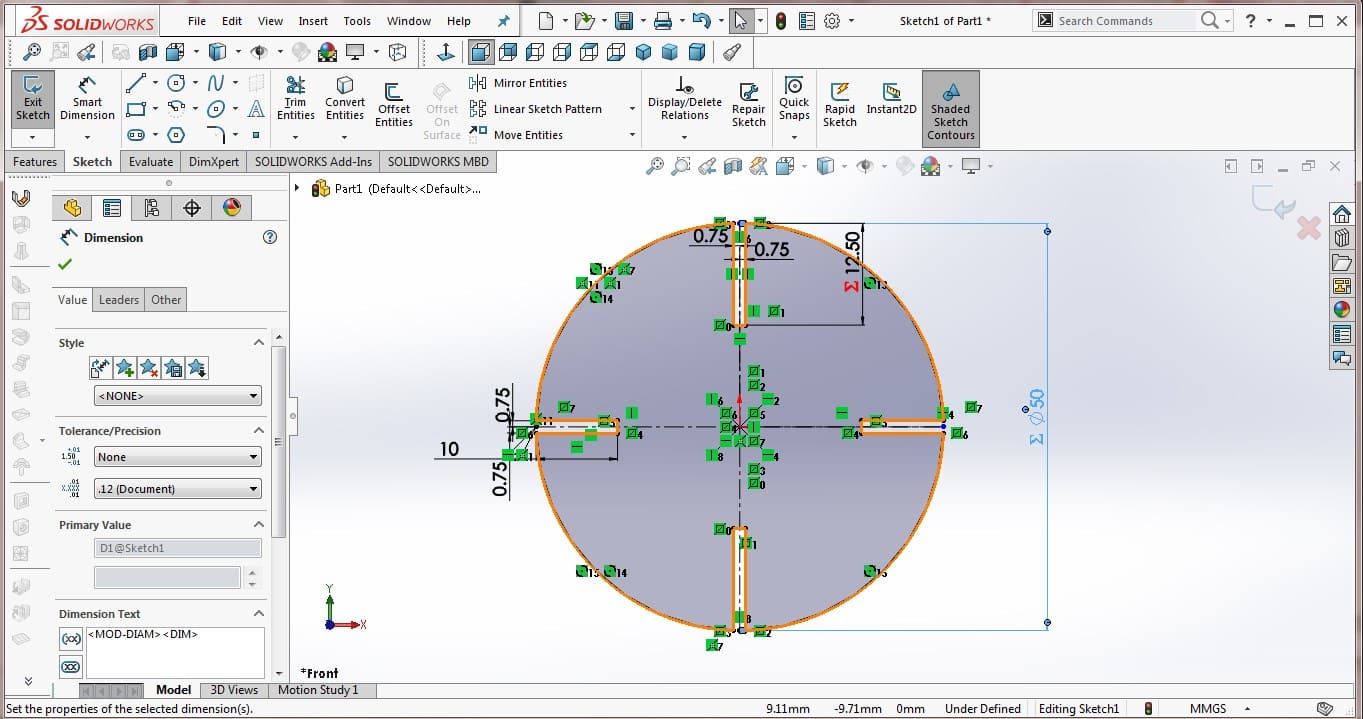
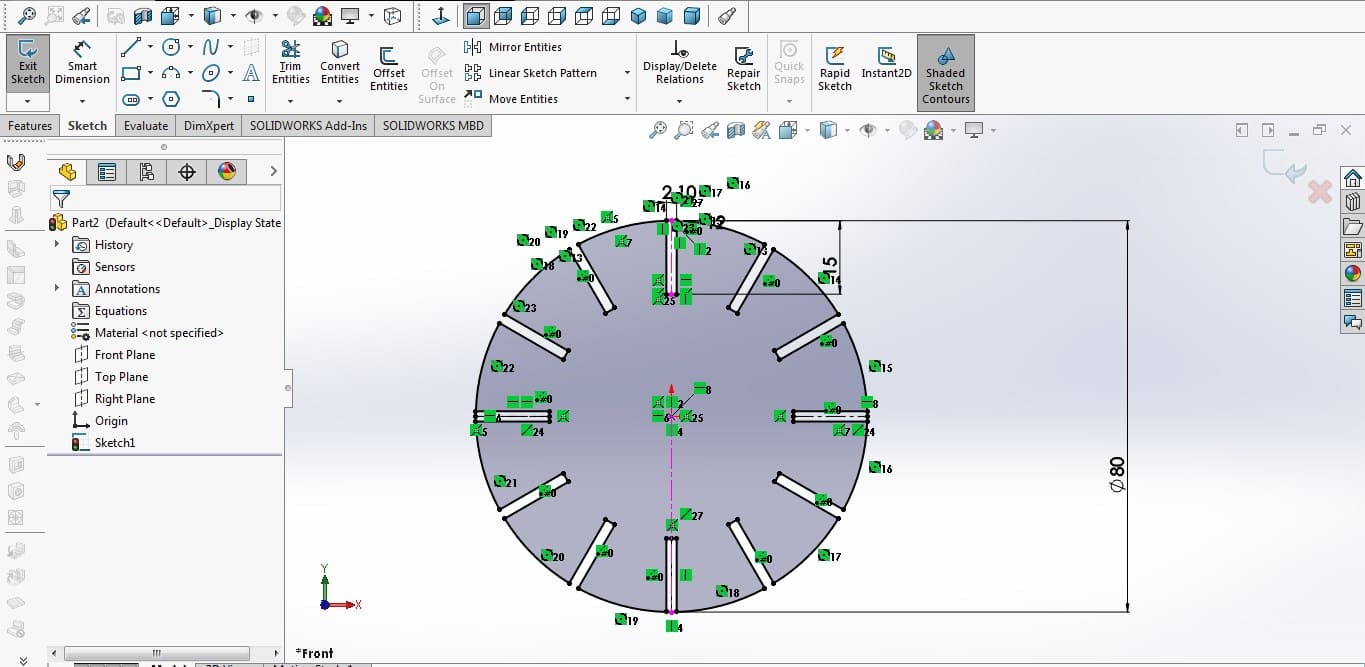
For press-fit kit I decided to make circle, Square shape in Solidworks. I used simple method, i.e. when I change one dimension automatically other dimensions will change.1.open the solid works and select the front plane. I draw circle on it.gave dimension, i.e. (50mm diameter). I draw a centerline in center of circle.
2. draw a notch and gave dimension and used circular pattern command. to duplicate notch on other three sides.
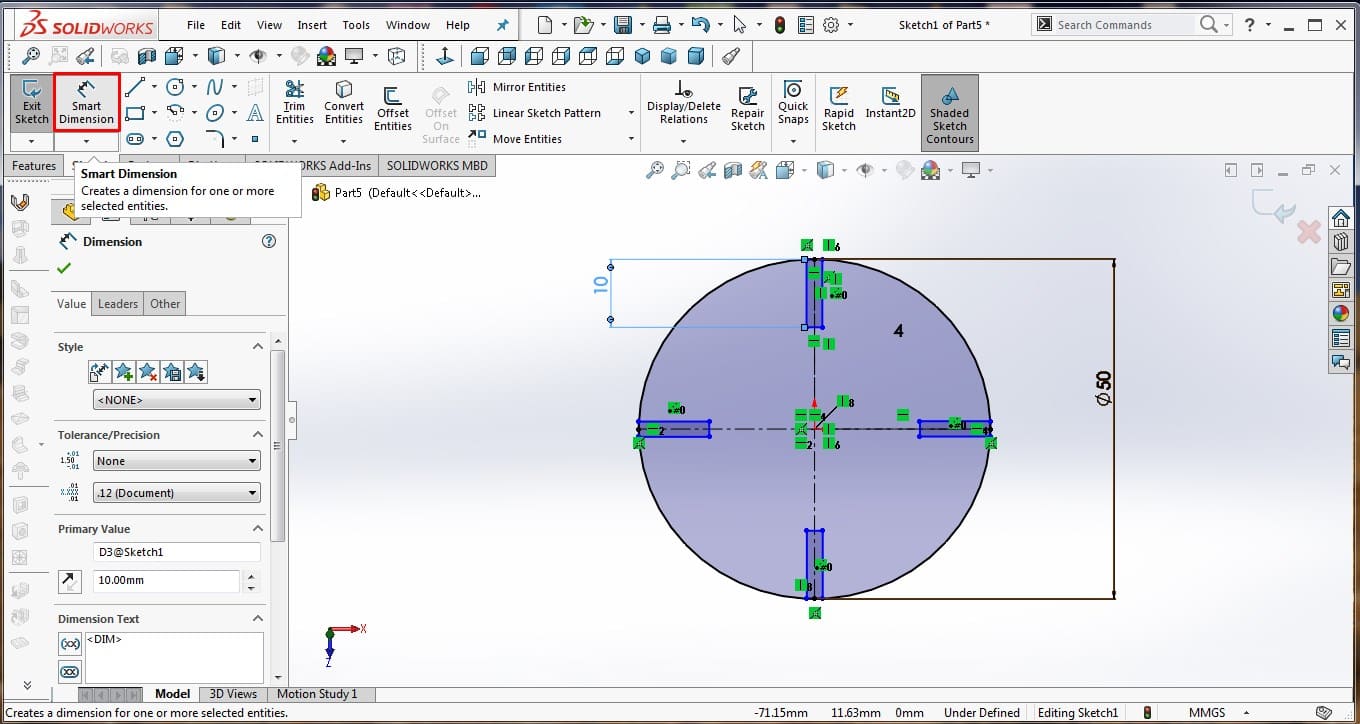
3.gave global variable equation of diameter of circle.
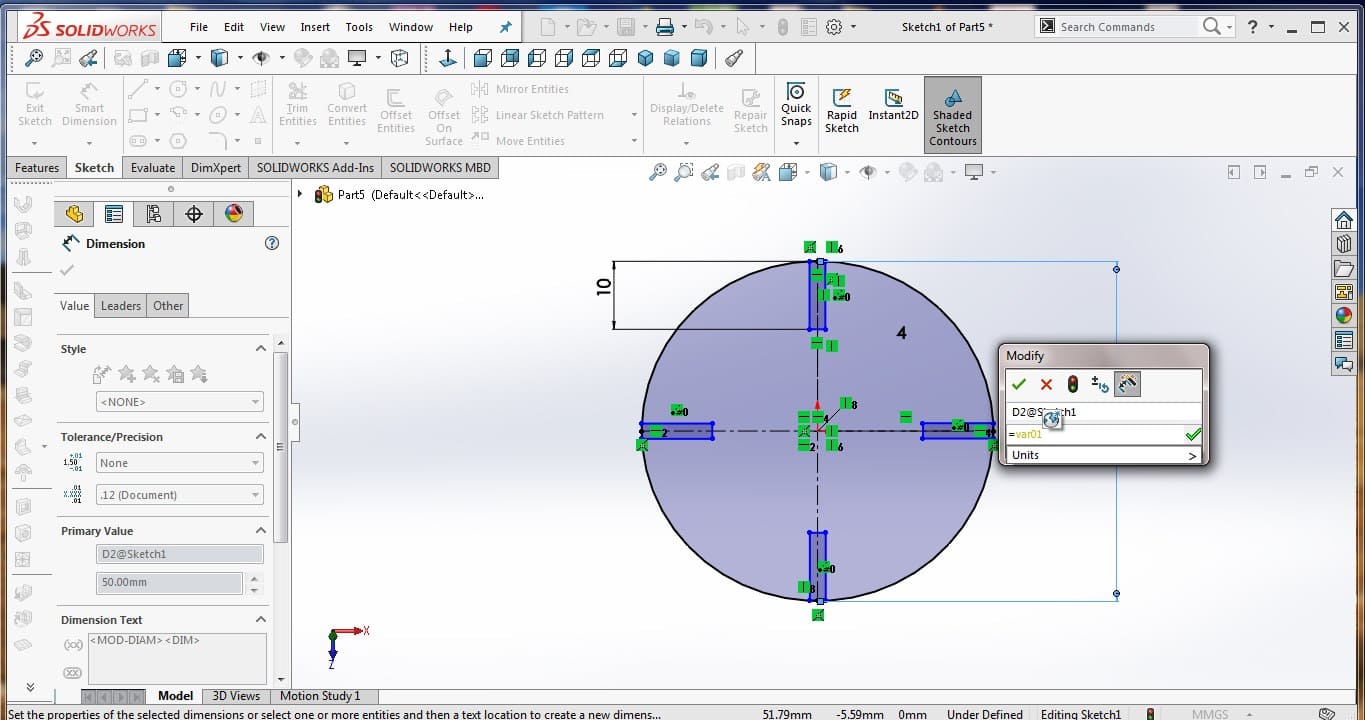
4.Also gave global variable equation of notches.
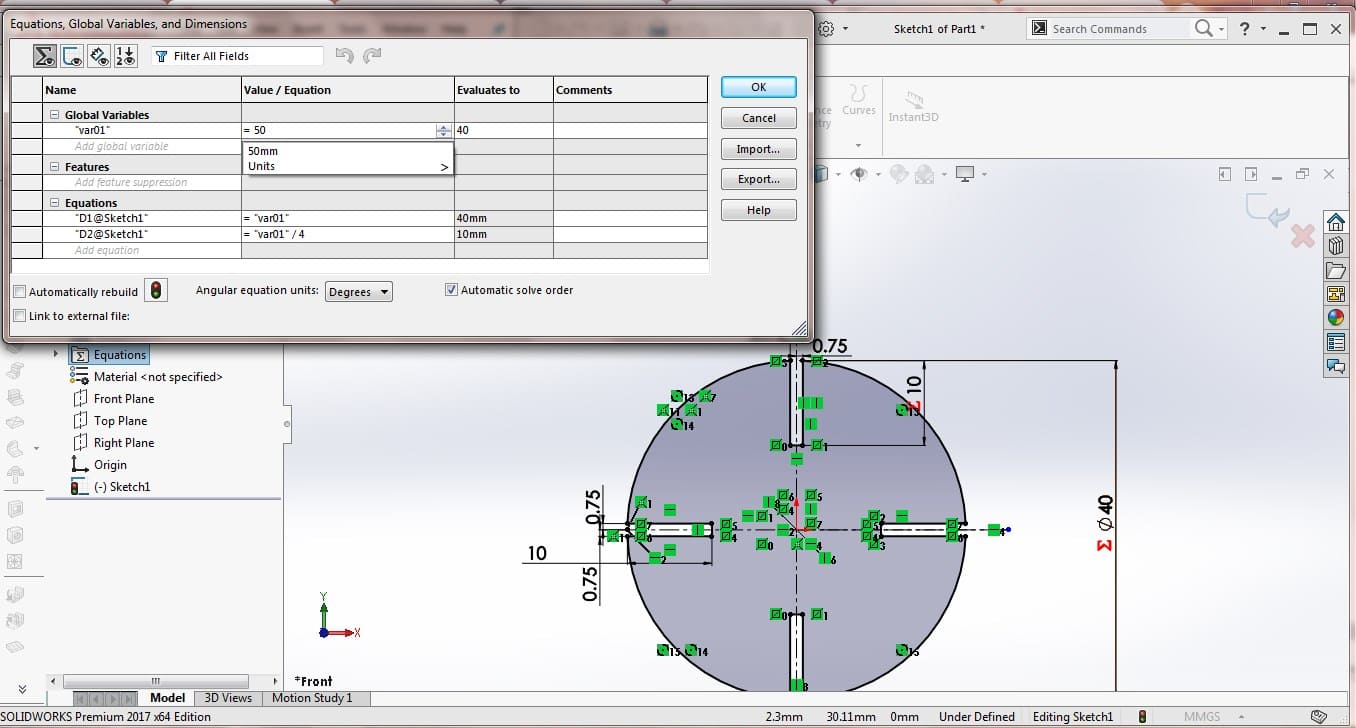
conclusion found that at speed 30 and power 30. Then the kerf was .020mm
After adding kerf.value on my design on laser.
now perfect in dimension.
|
|
|
|
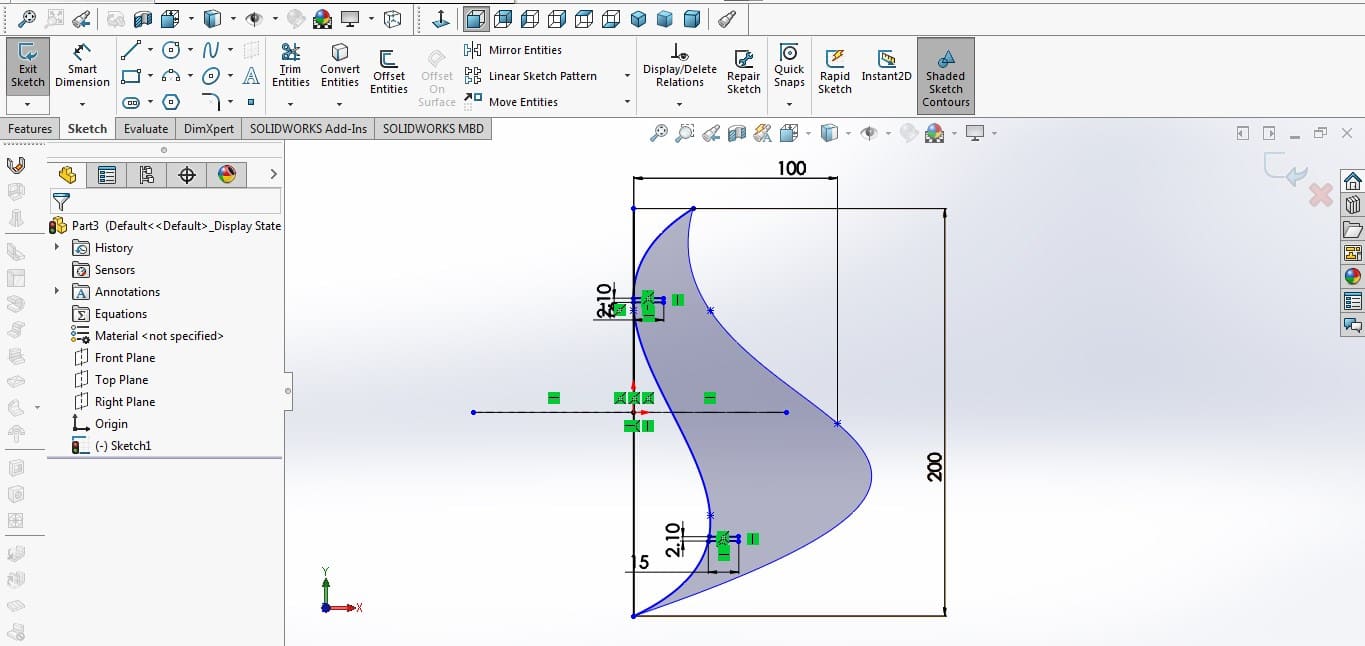
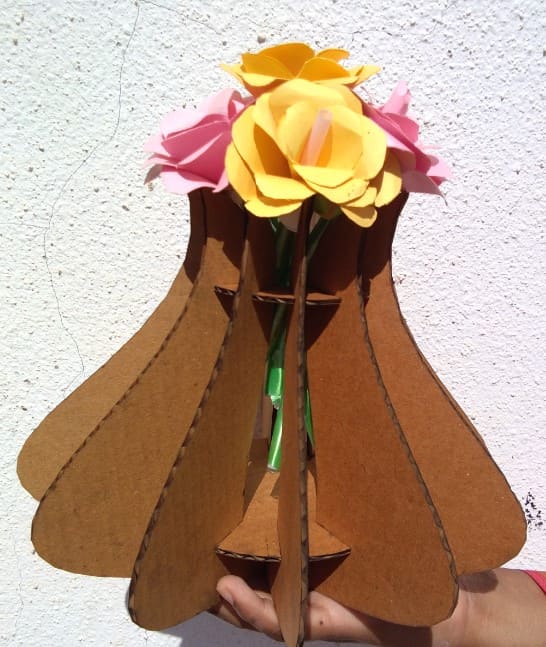
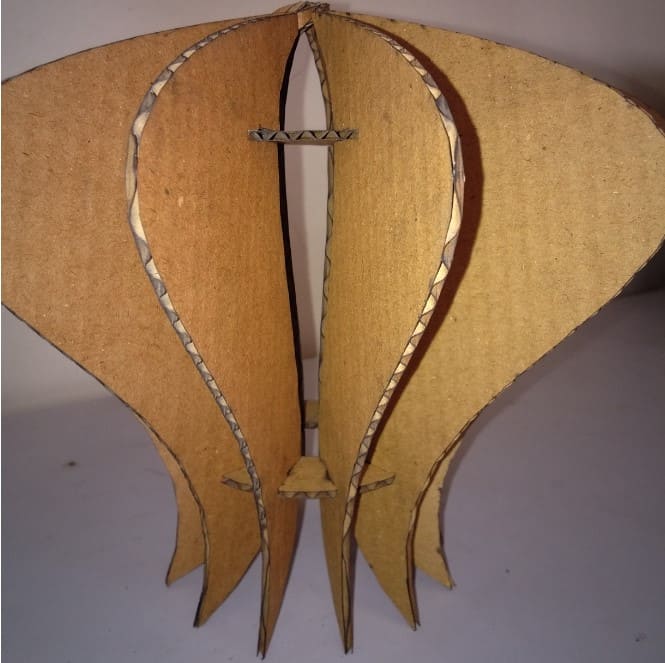
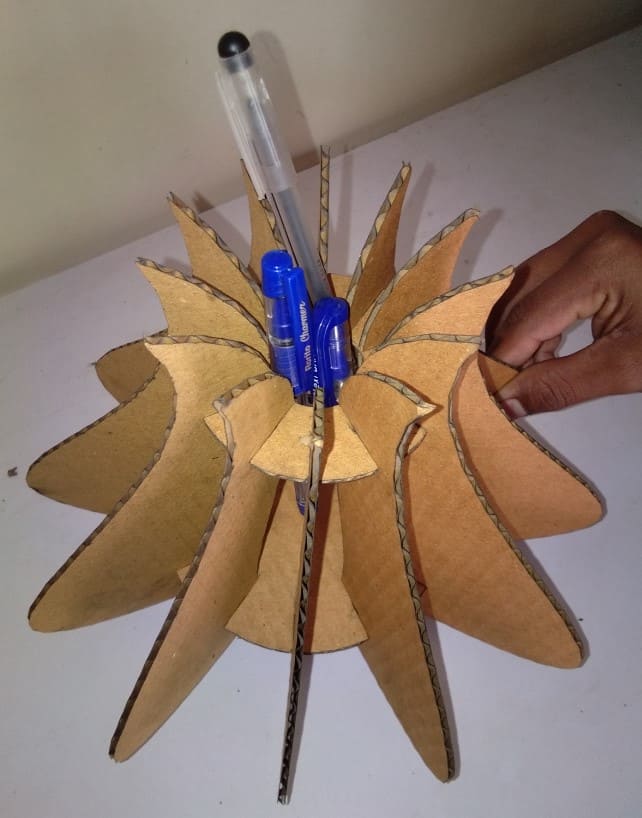
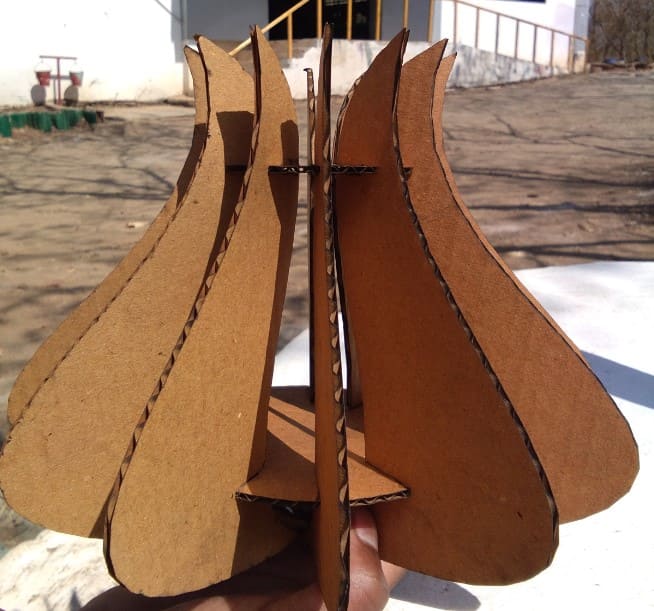
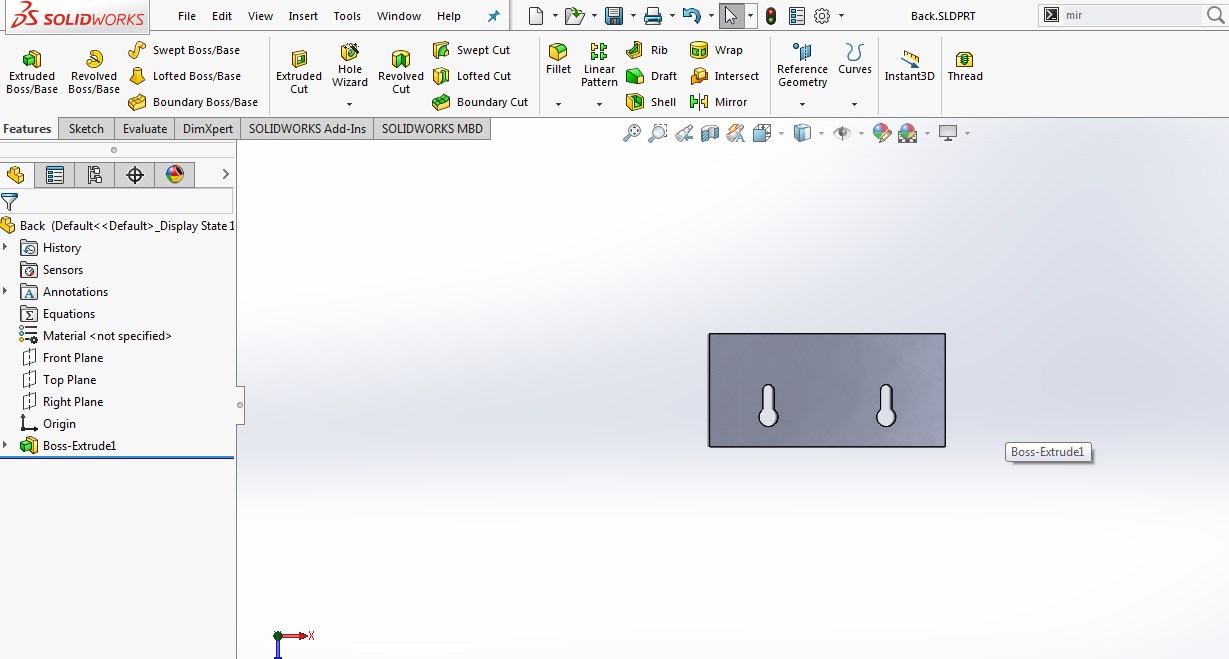
In paramatric pressfit design made a Flower pot with pen stand and also lamp. 1.I used solidworks for this designing selected Front plane.then go to Sketch and drew a circular shape.use a centrealine for alignment.draw a notch as cardboard thickness with adding Kerf. I used circular pattern for replicate pattern in circle.this a bottom part circle with 120mm diameter.

2.I follow similar steps for 80mm diameter.this is for part.
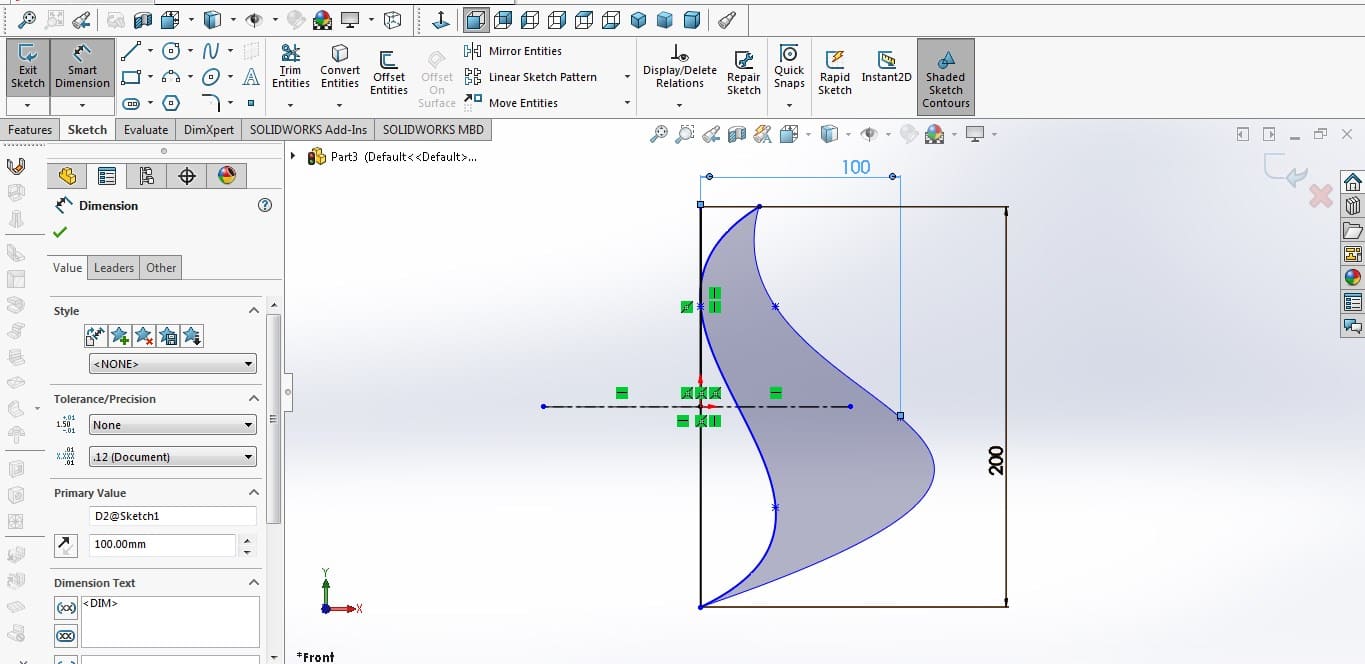
3. I draw outer design for flower pot.Here I used spine line for curve line and to give a shape.
4.make nothchs with same distance of circle notch.
 5.Flower pot ready.it can also used for pen stand or lamp.
|
|
|
|
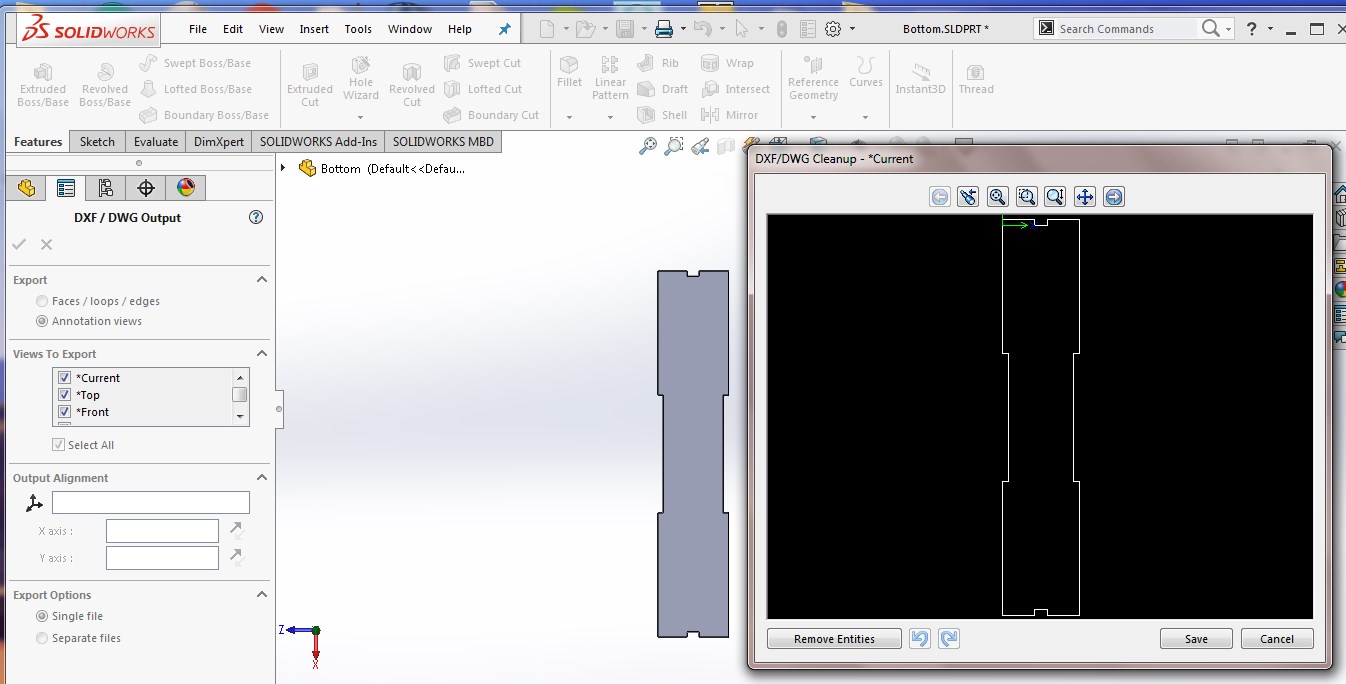
You can Download Original Files DXF file
I want to make something new in parametric design. so, I made a box with circular notch and flexible Pattern. 1.I Saw this design on google photo.I took a rectangle with dimension. Then draw a flexible liner and notches.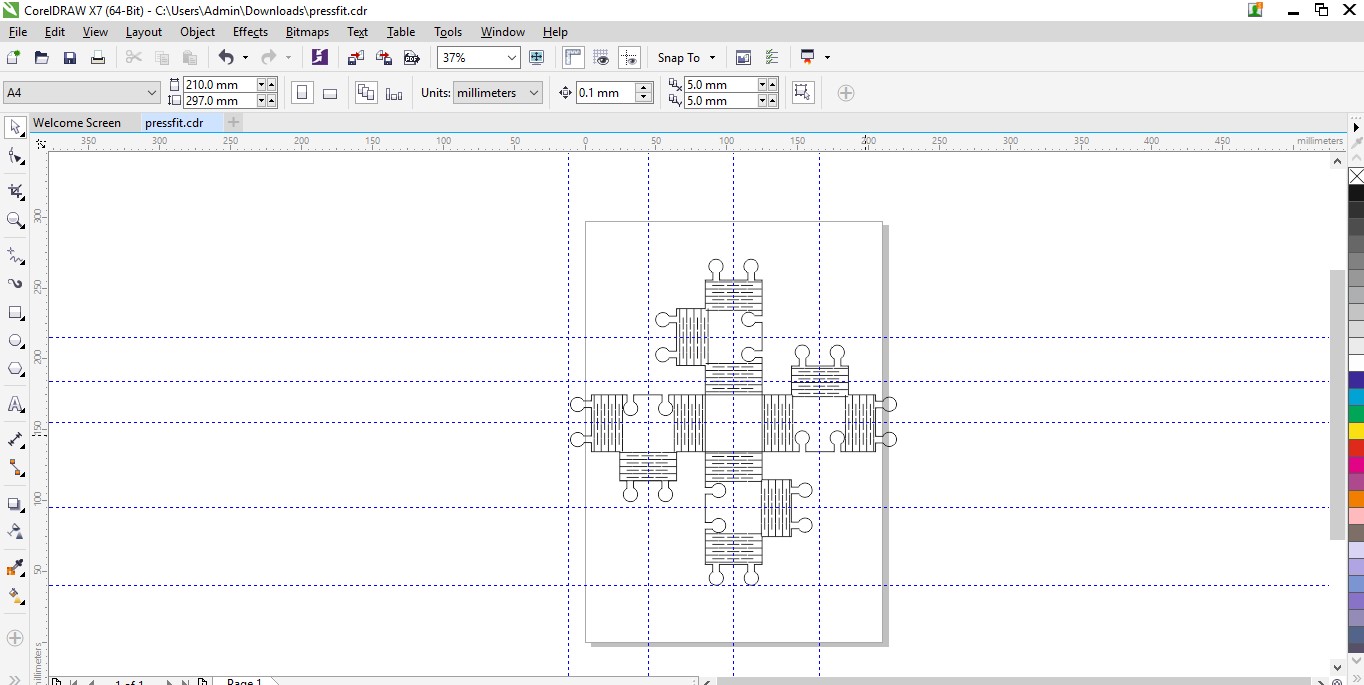
2.Here the cut Parts
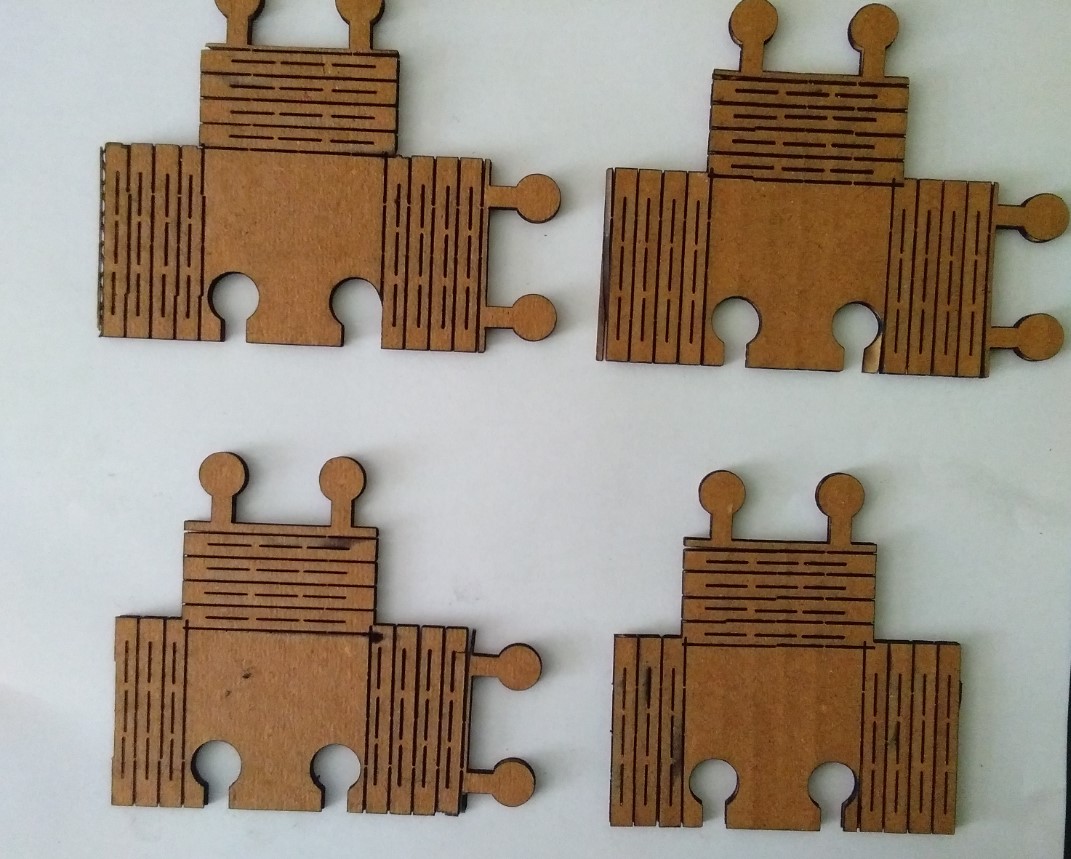
3.I Assemble it any notchs.
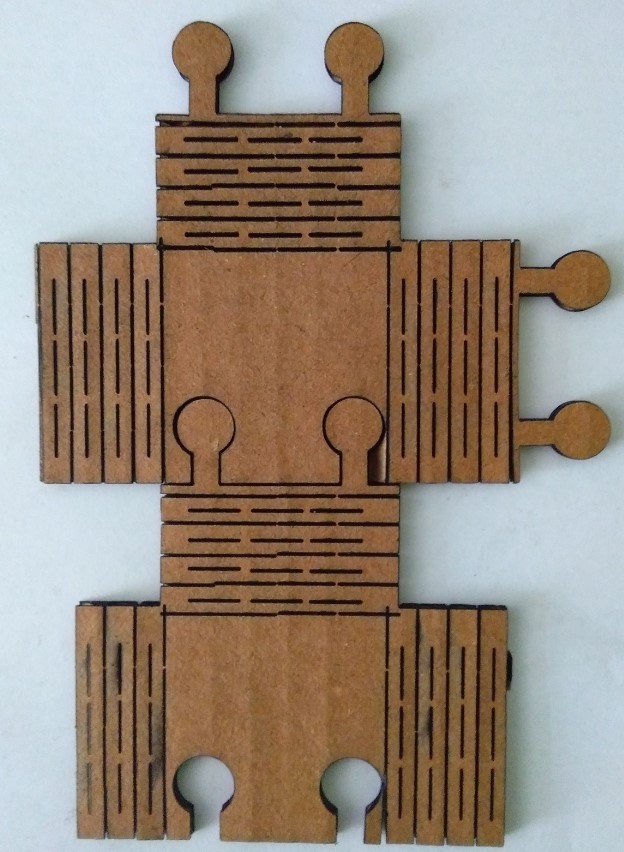
4.It can be fit anywhere
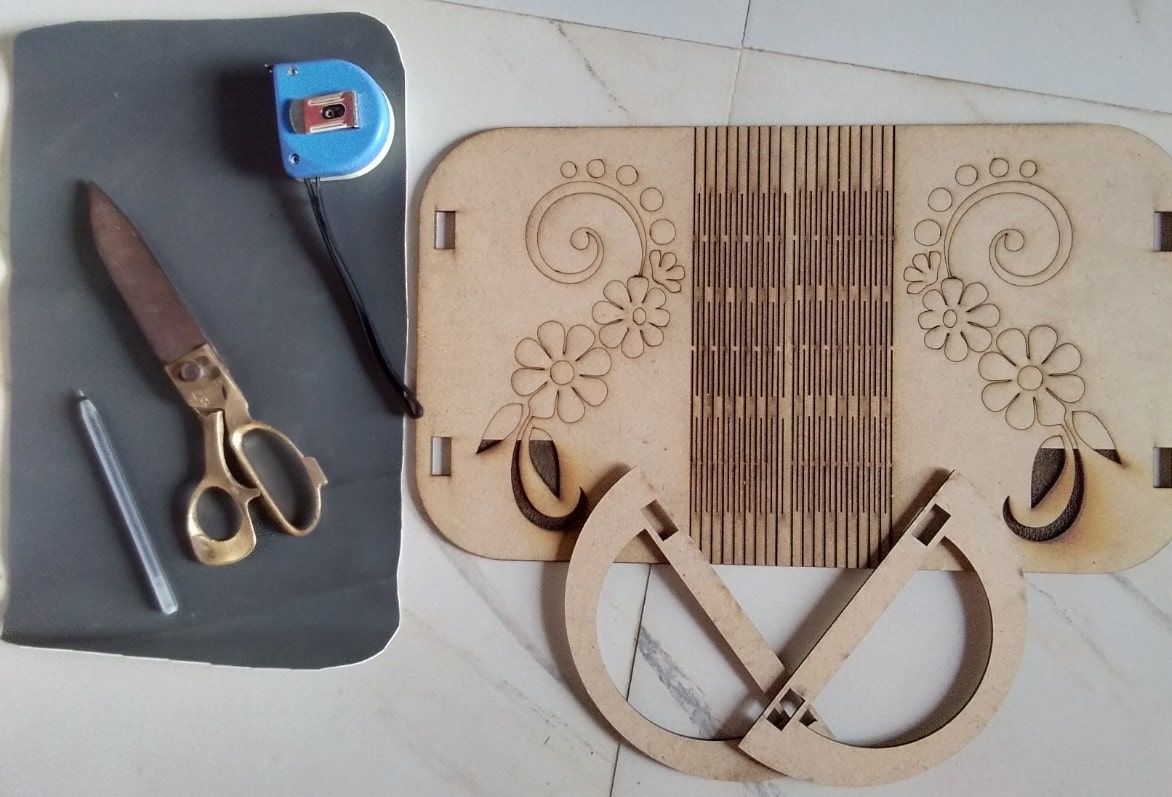
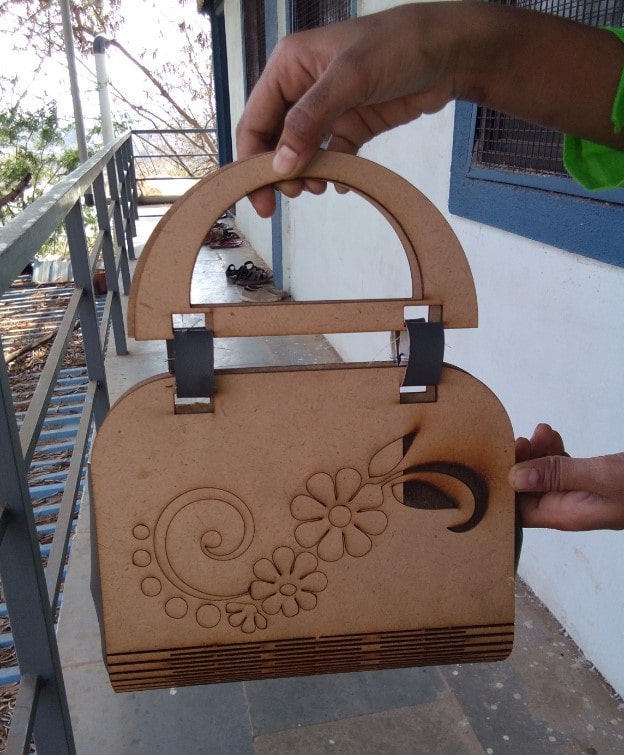
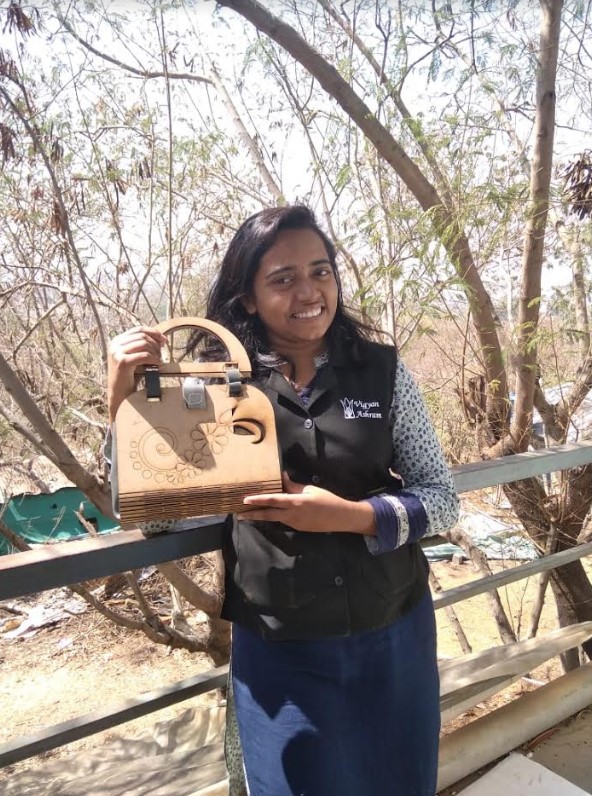
flexible Purse
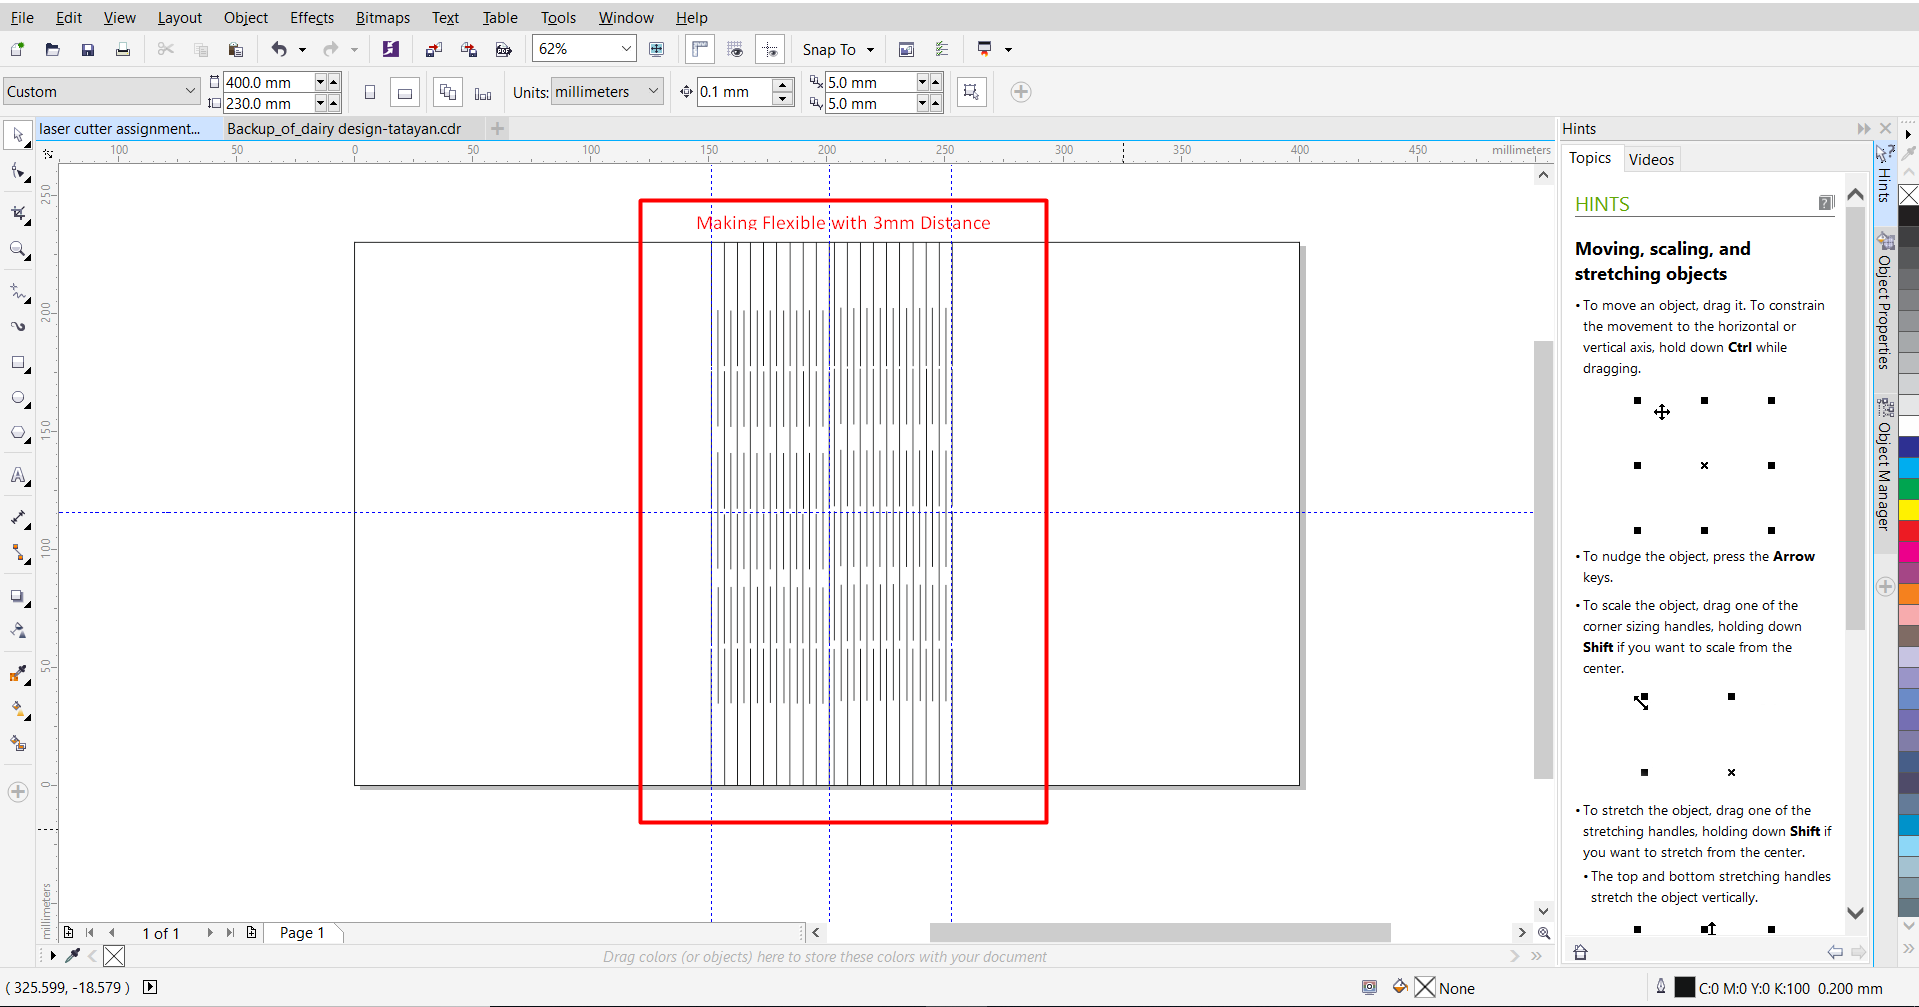
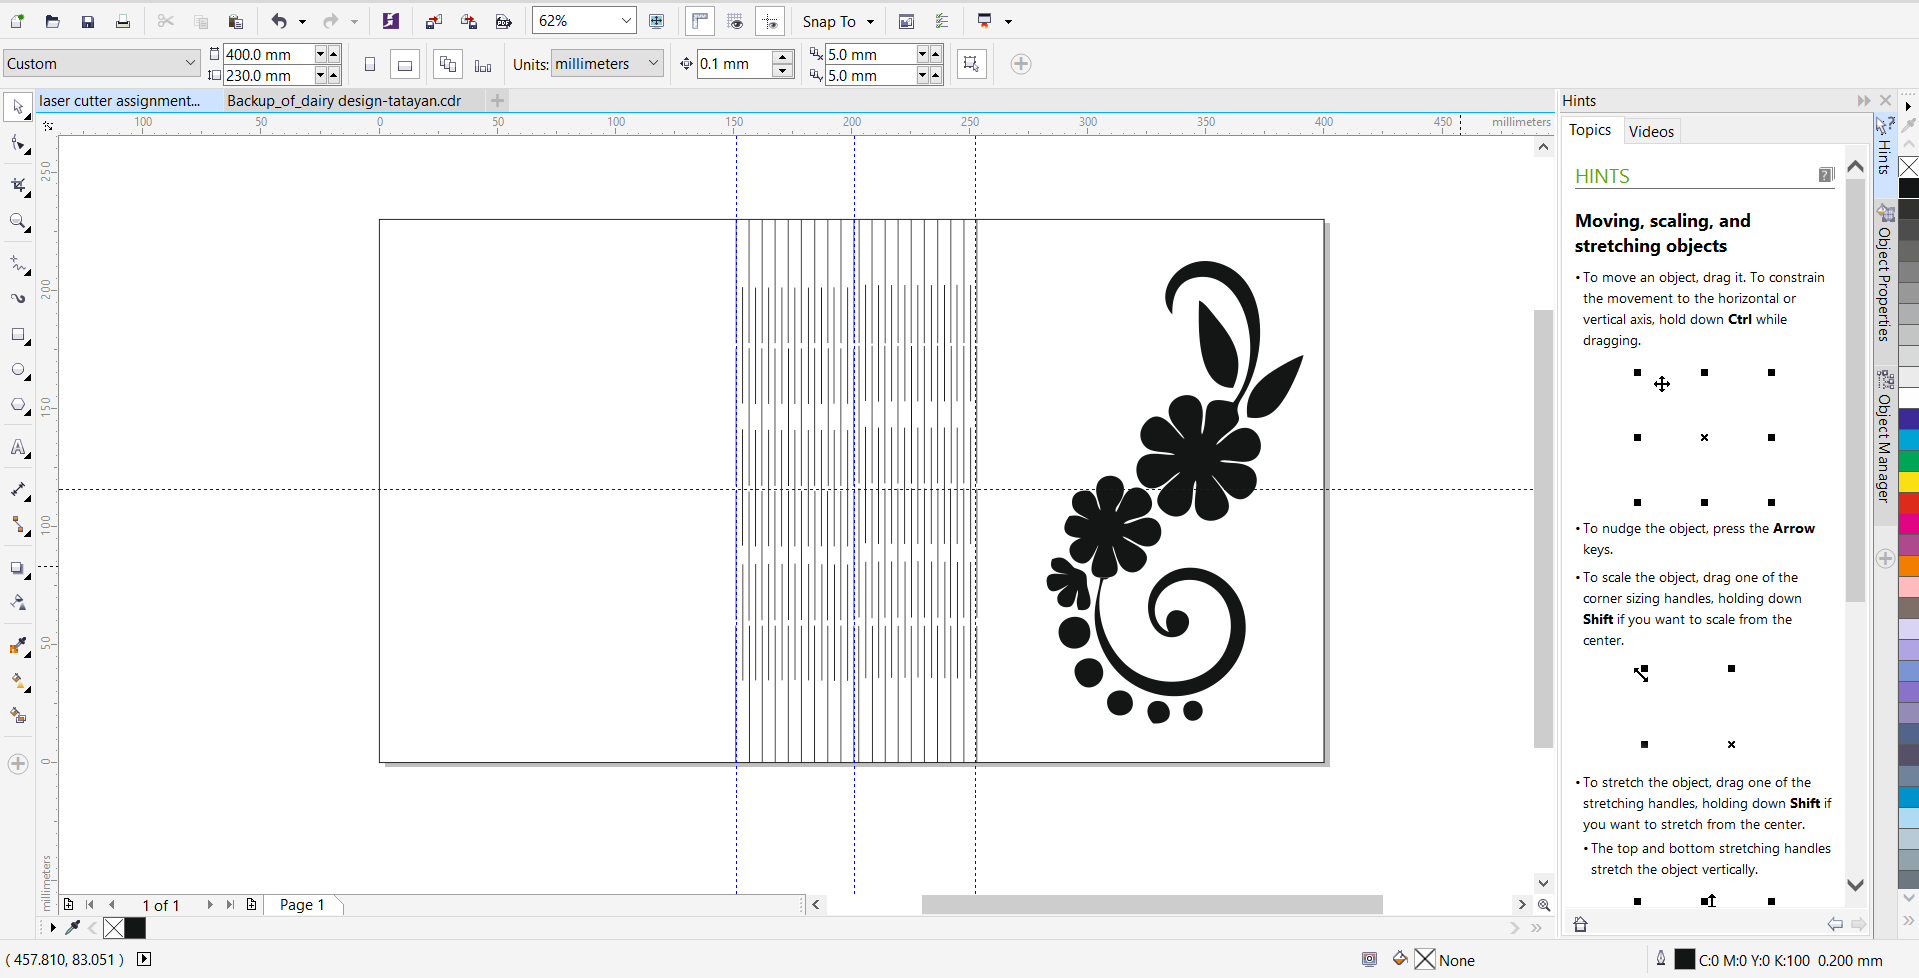
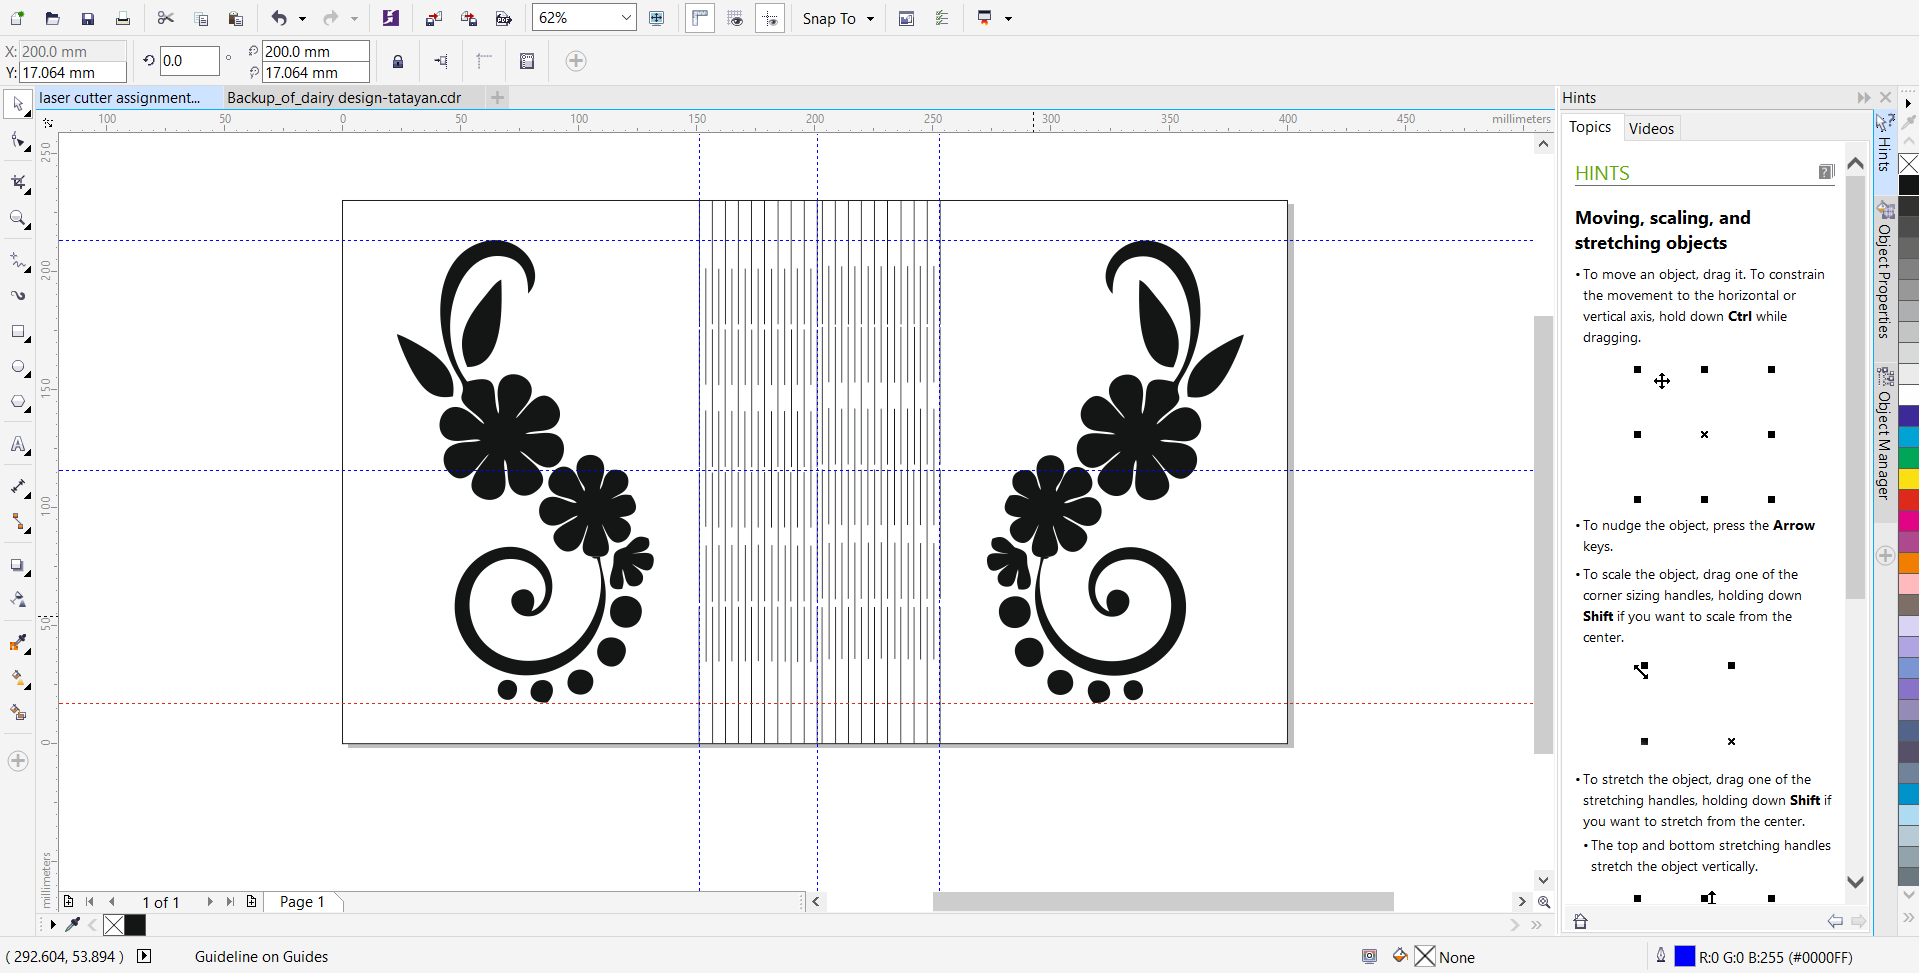
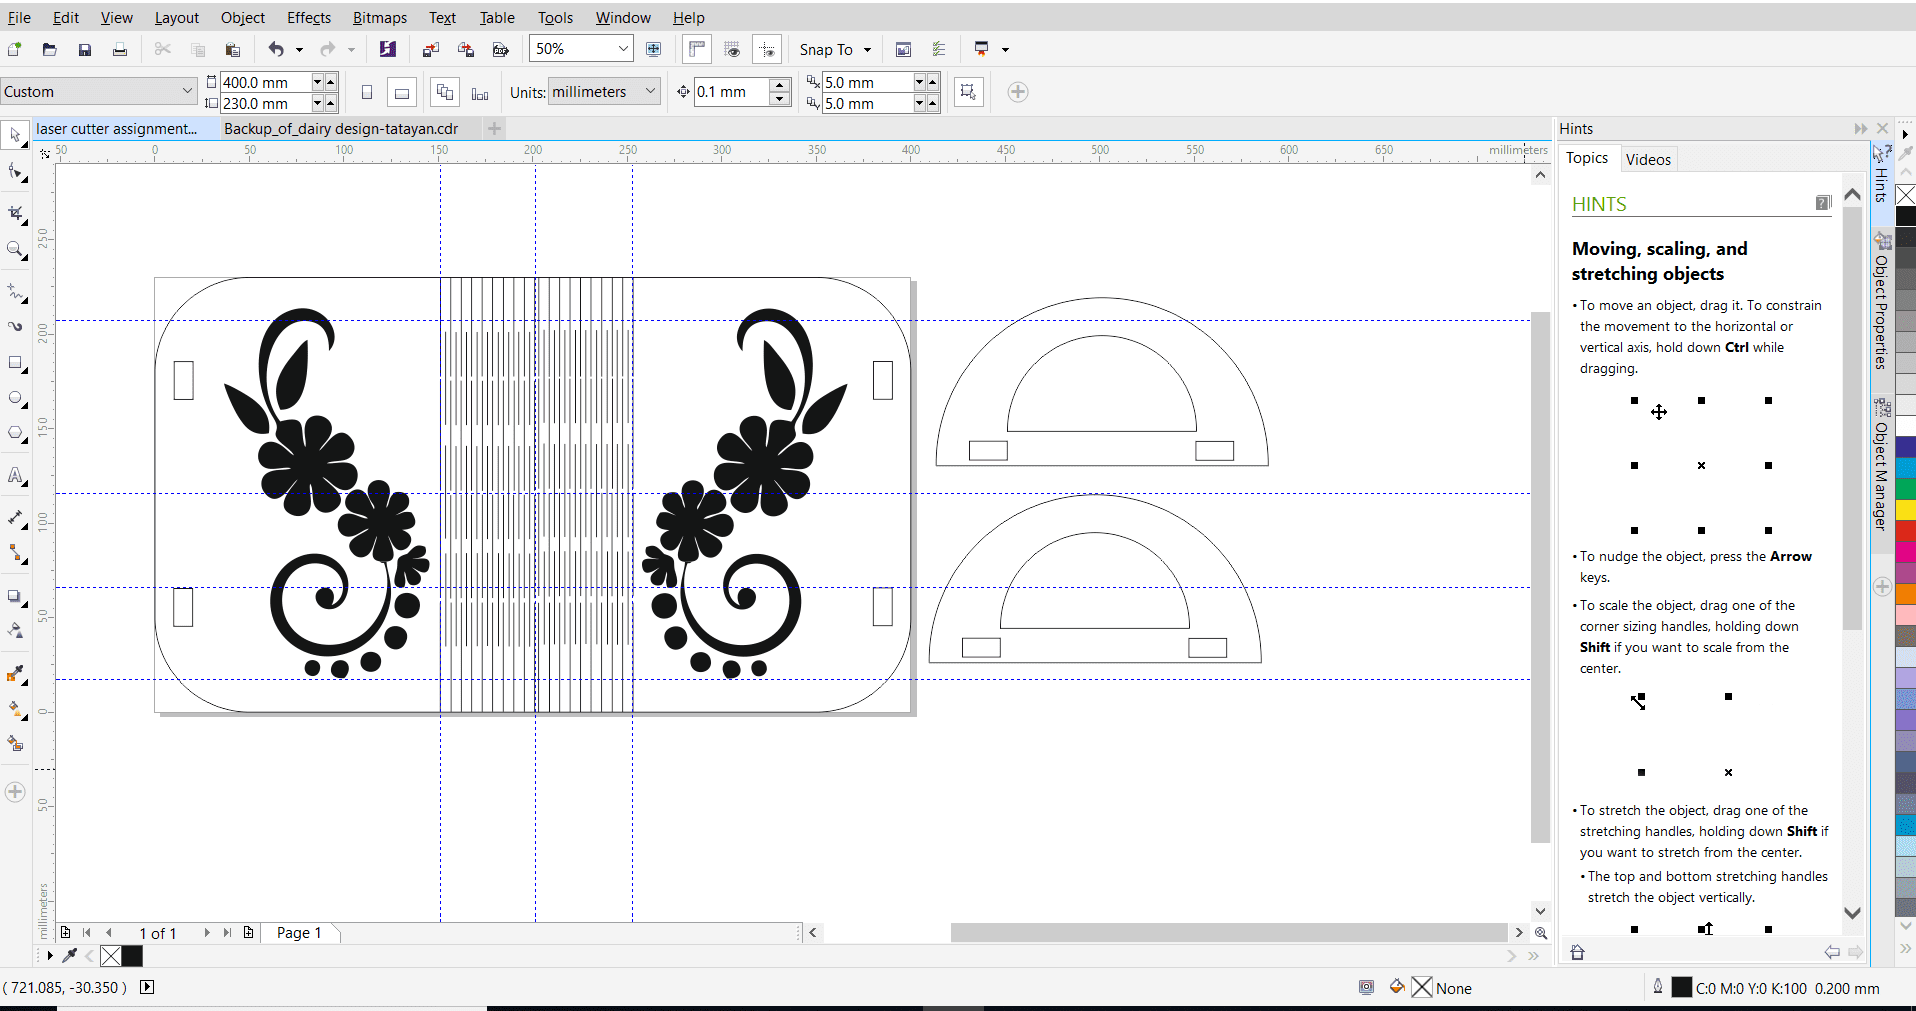
In this task I made the flexible Purse for girls. I made a file in Corel Draw. in this only by making the line one after one we get this linear pattern.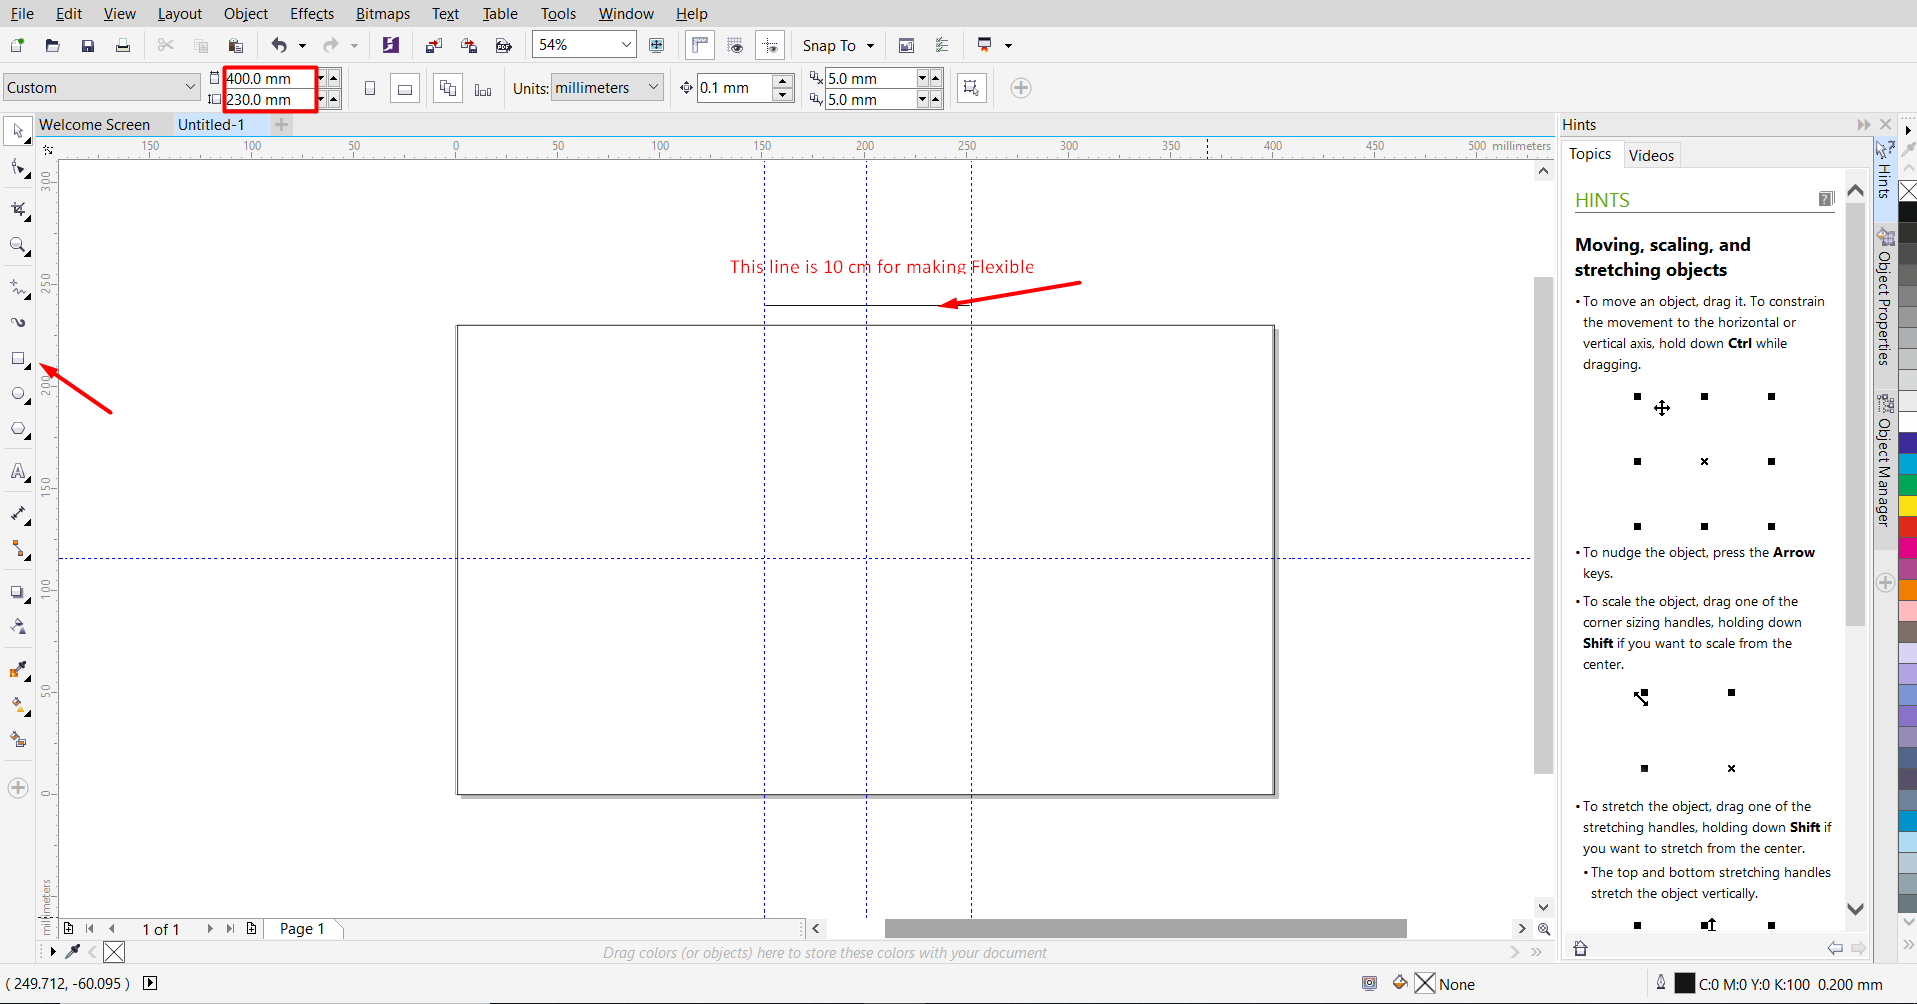

I took Rectangular shape and draw on a surface. then make a flexible Pattern on the center of rectangle shape with the 3mm distance of each line. after this step downloaded design image then I did trace bitmap of this image and set it outside of the flexible sheet.
Then I took design on internet. After I used Trace Bitmap
copied on left side.
then I did corner in curve shape. Draw a small rectangular shape for holding the purse.
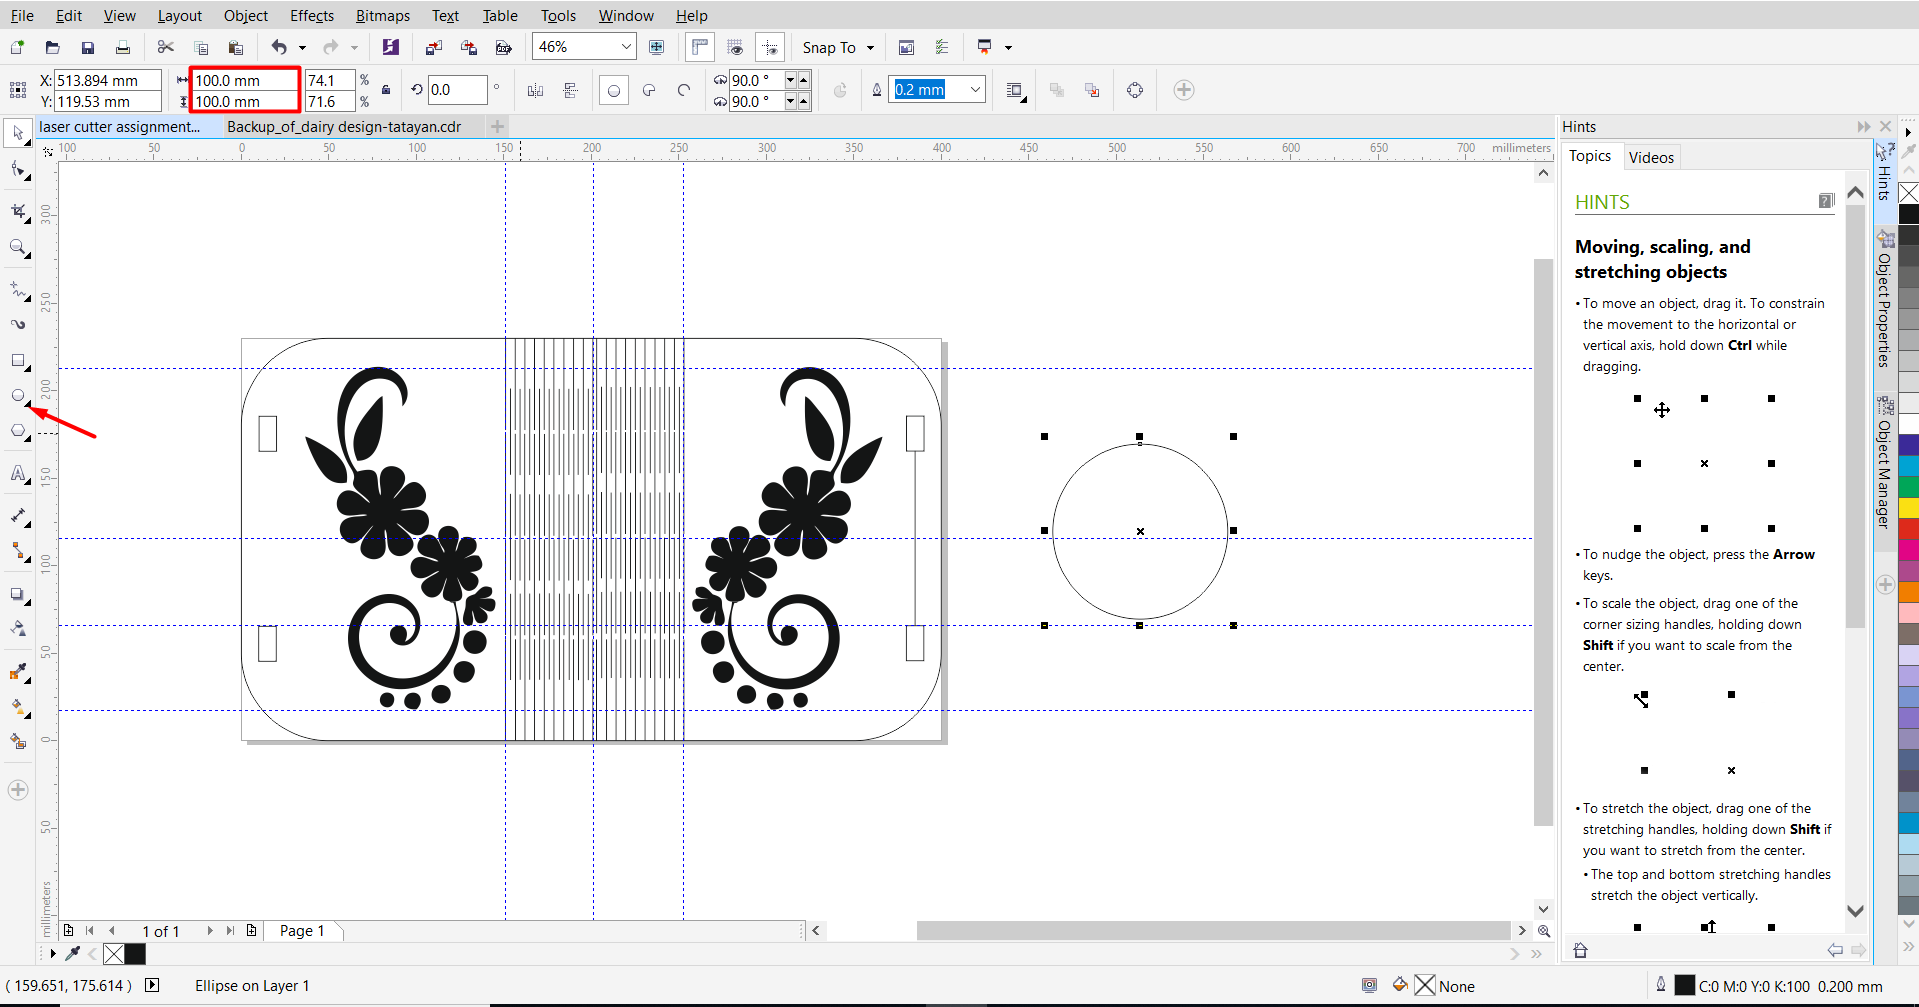
Then make handle design for purse. for joining handle Here I used leather material.
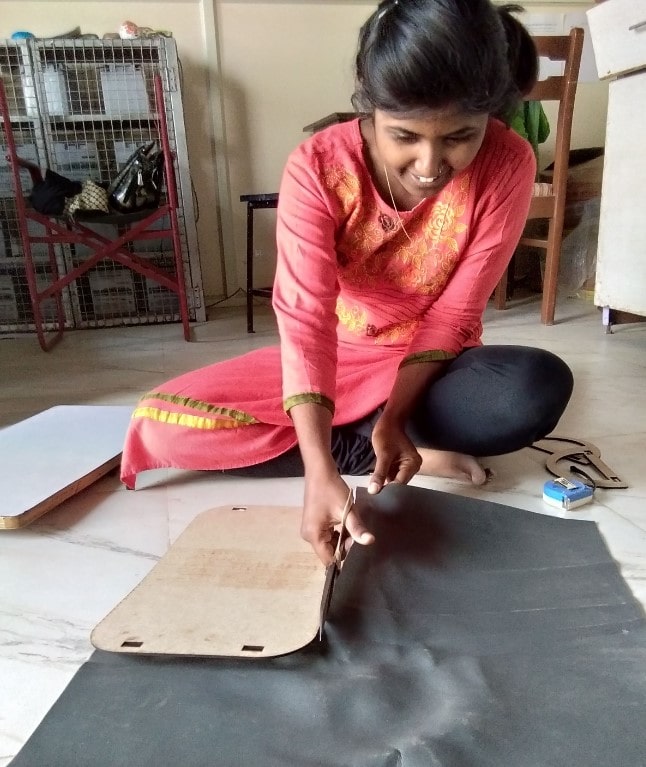
3.I cut out my design on laser cutter. here I set 250 scan power in laser that form why burn mark stating scanning part of my purse design. so I set 350 powers of laser. then it scanned properly.

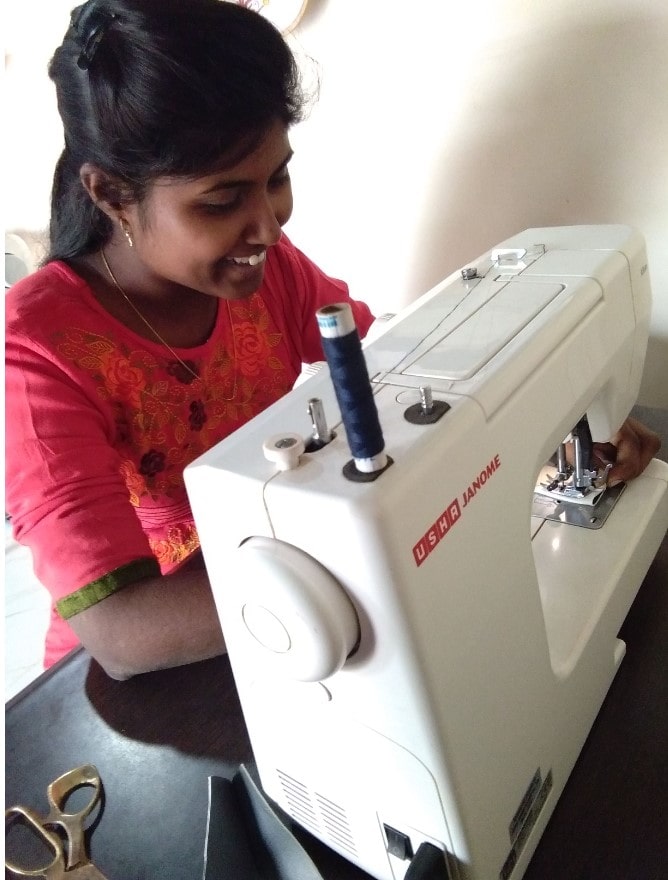
4. here We have also sewing lab. in which we have we also have sewing and Embroidery machine. so,After cutting out purse design with laser. I move to sew lab to join the parts using leather cloth material on with sewing machine.
5.Leather Measurement tape fabric scissor I used for cutting and joinning of leather.
I did following steps.
|
|
My flexible Purse is Ready
|
|
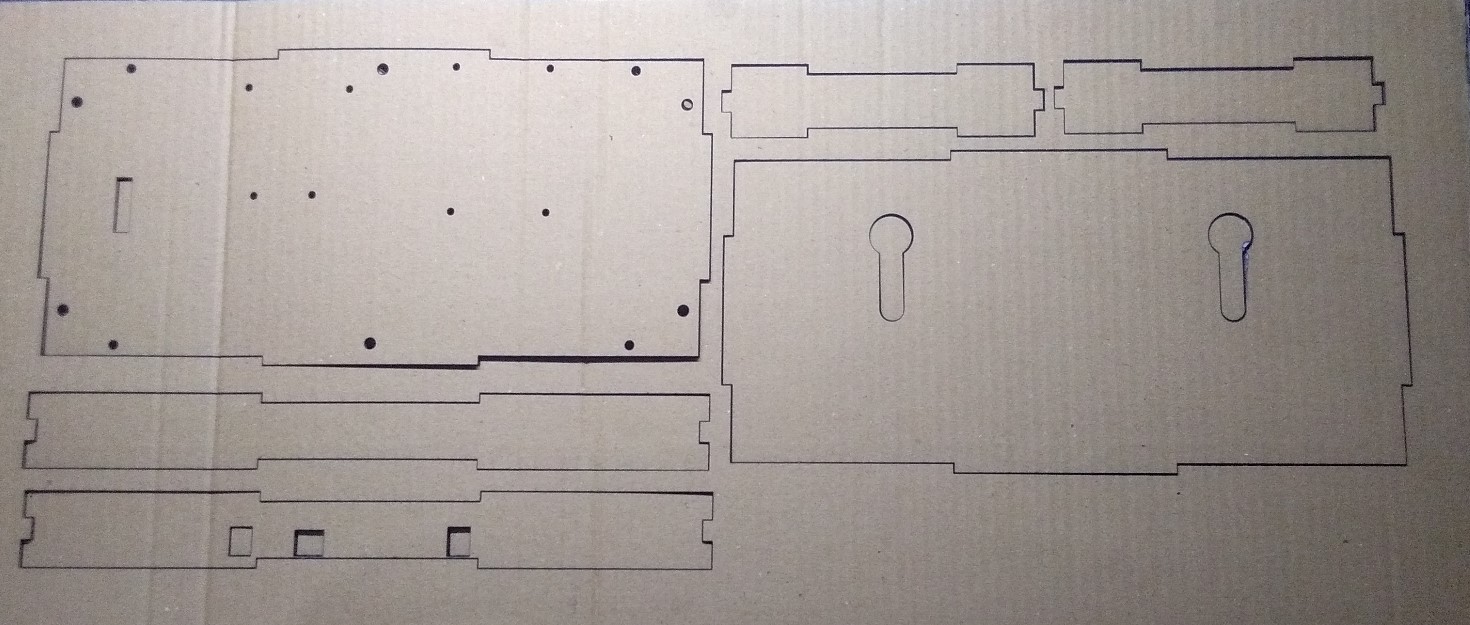
Project Parts.
I design box casing in solidwork.I drew 6 side plate.
This is the T-slot for holding this LED on Wall.
This plate for the surface mounting

made a dxf file
I made two board for transmitter side.So,I am using here arduino.

You can Download Original Files DXF file of receiver side
You can Download Original Files HERE.
Learning Outcomes
In this assignment I learn about parametric design. In group assignment we calculated kerf. Made lot of test parts with different speed and power on the laser cutter. I have good experience while working with groups.