What I learned?
In this week we introduced to different amazing software that are useful in designing 2D and 3D objects. I tried using CorelDRAW, Fusion 360, GIMP, Rhinoceros 3D, and LibreCAD
Task required:
We assigned to explore and use different software as well as make 2D and 3D designs.
what I did ?
I chose the interesting software that I would like to enhance my skills on them and try some new fun designs
Procedure:
CorelDraw
I enjoyed drawing a simple logo as my first time using this software. The following video presents my way in steps for drawing a happy engineer face :). I used ellipses, rectangle, 2-point line, and B-spline tools. Note: to make my design ready for cutting I should make it vector by clicking right on the selected sketch and choose convert to curves. Also, make all the lines thickness as the hairline. There are many nice features to design a 2D model. I'm excited to use it and explore it in the next weeks.

Fusion
I like it a lot! As a Mechanical Engineer I used to deal with 3D modeling and I took a course about geometric modeling where I assigned to develop 3D modeling using CATIA software that is used mostly for mechanical design in the industrial and automobile companies. On the other hand, I explored fusion 360 for designing bevel gears and it was so interesting, fun and easy for me to do it. In addition, the next steps and screenshot summarize my steps in designing bevel gears in Fusion as well as I added a, in the end, presenting a motion study.
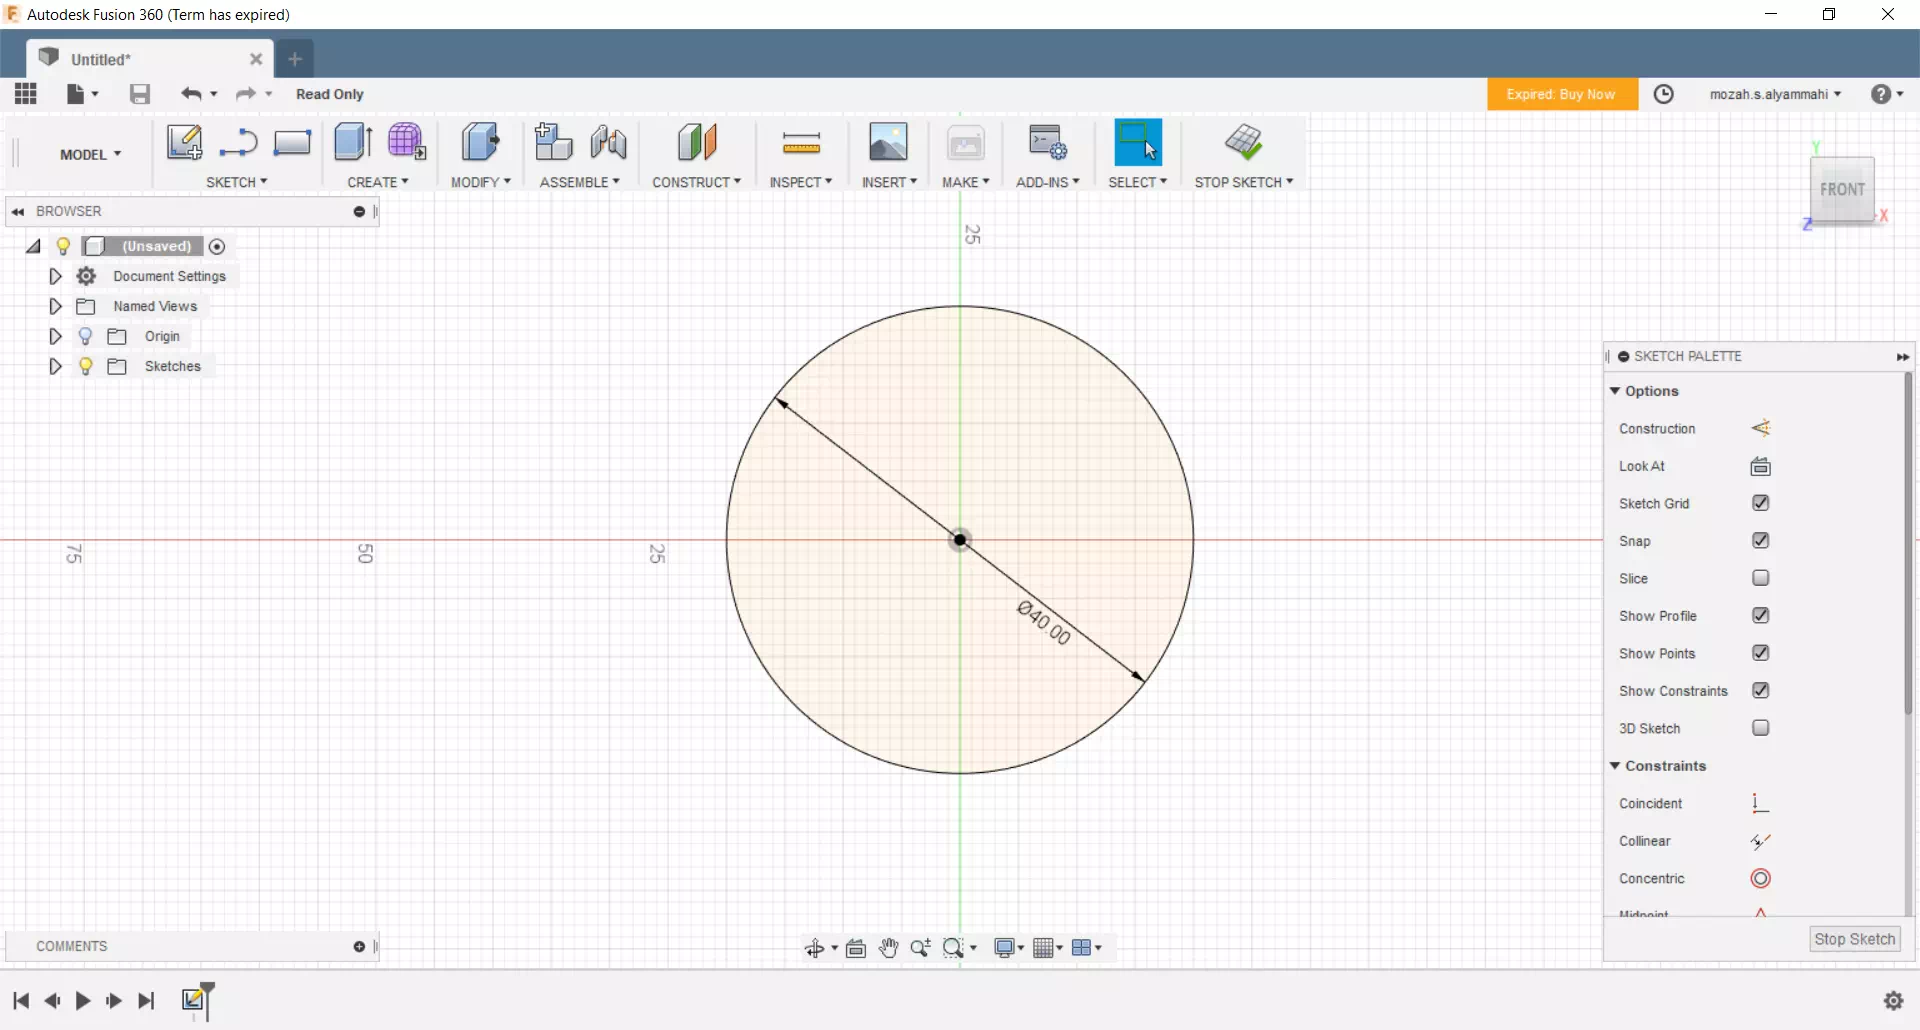
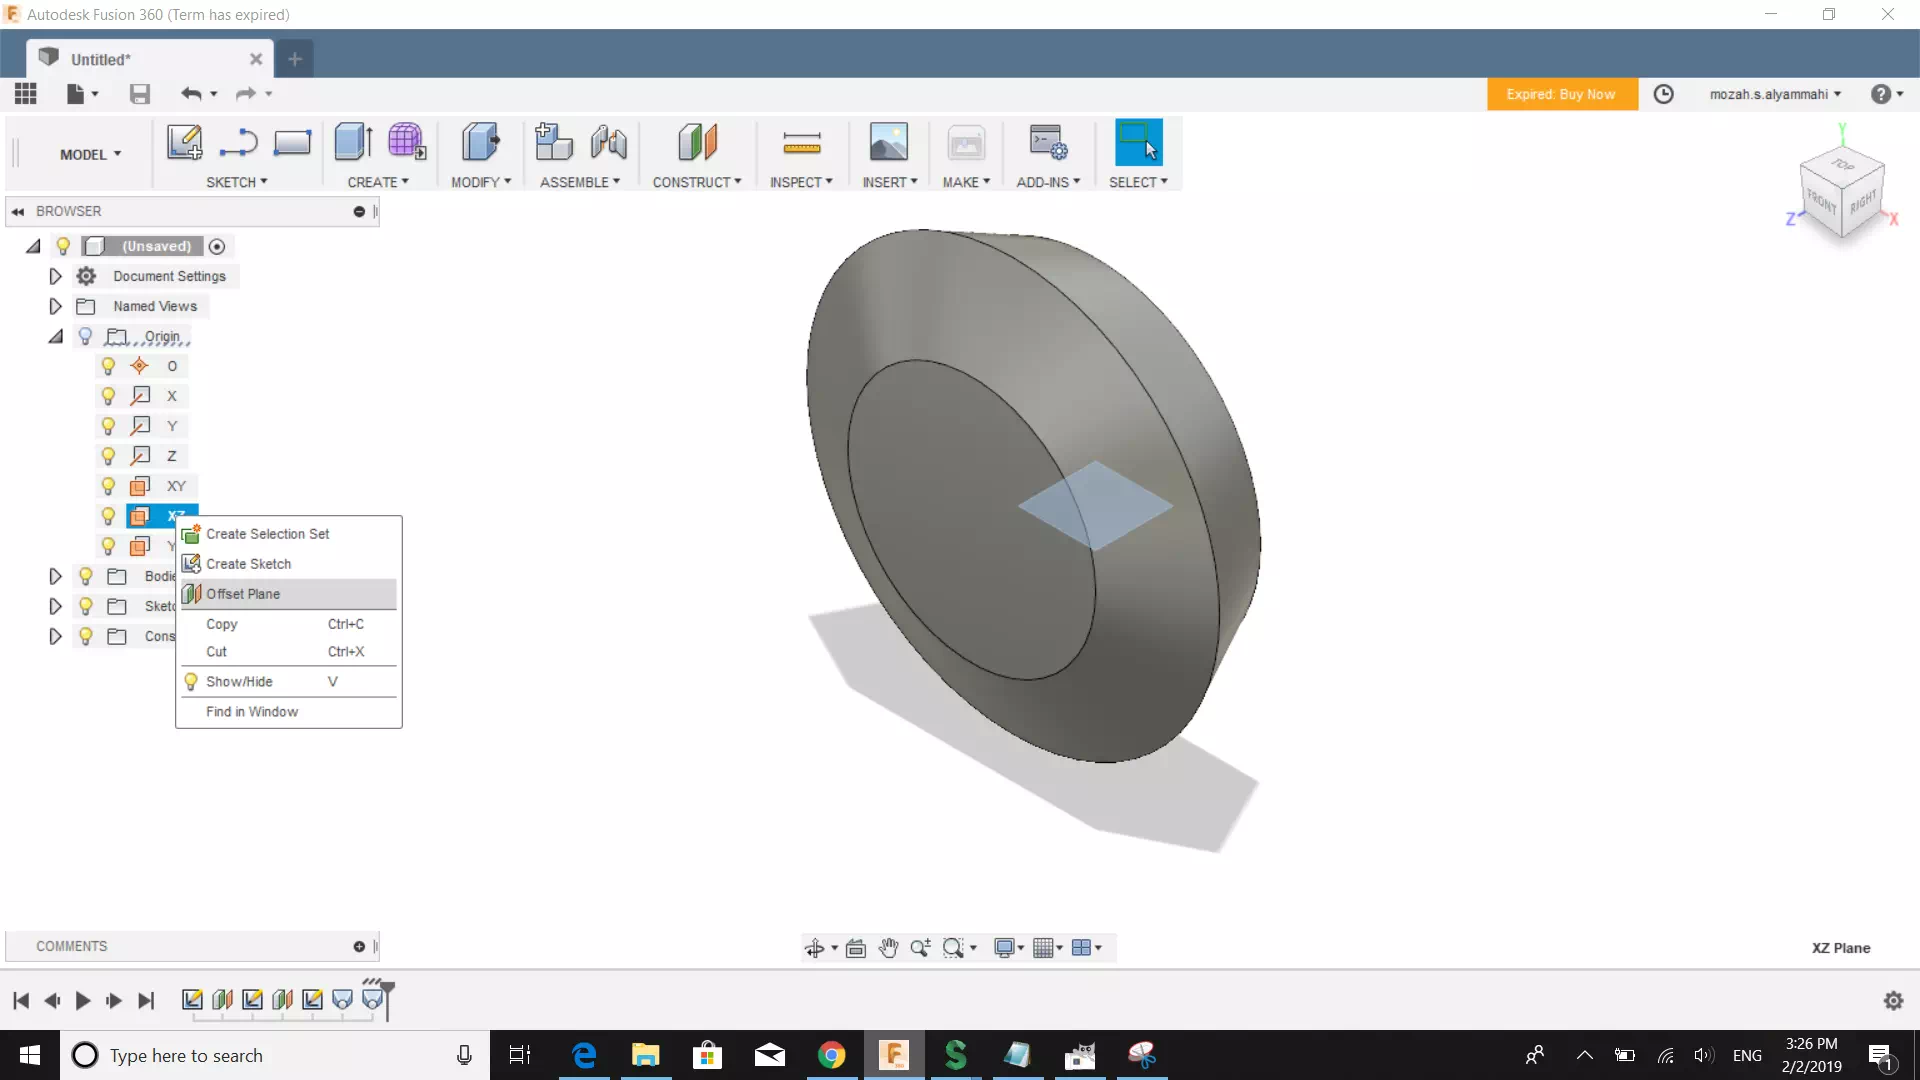
- Create a sketch for a circle with 40mm diameter as shown in the figure below.
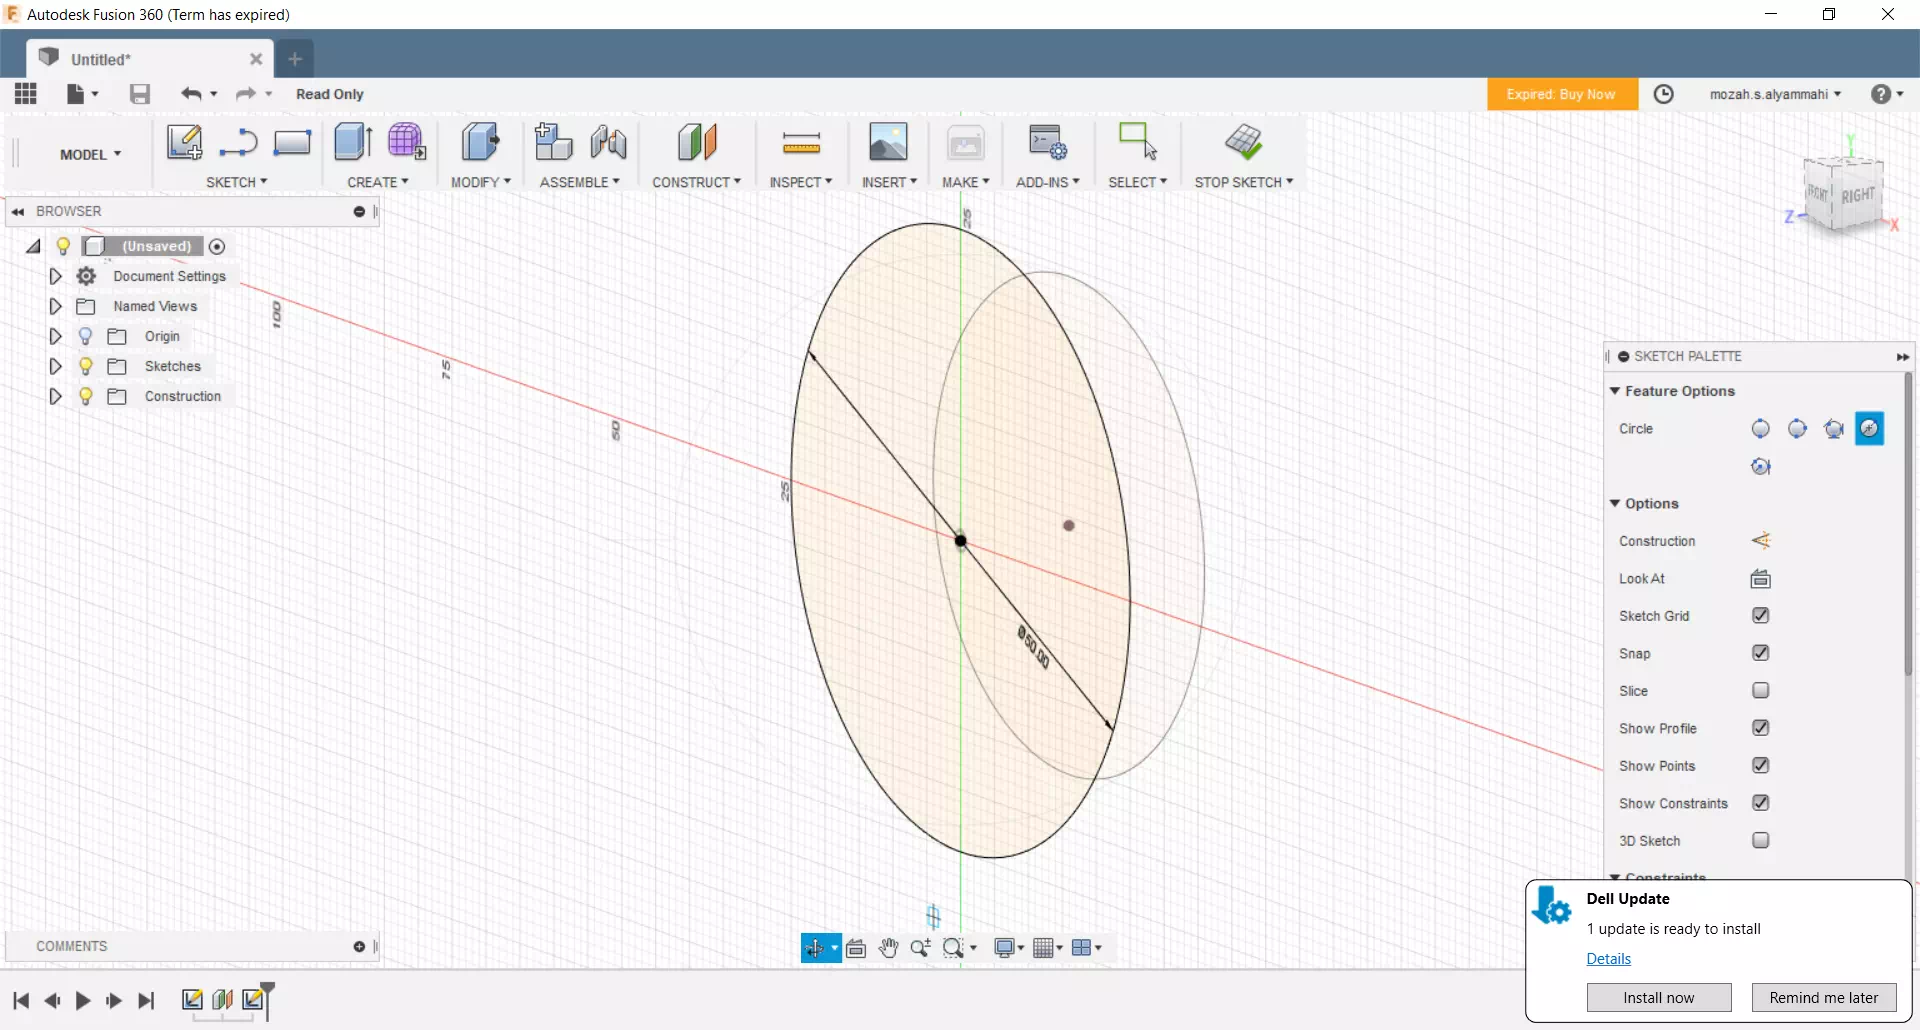
- Click right on the circle and create offset plane with distance 10mm and draw a circle with 50mm diameter as shown in the figure below.
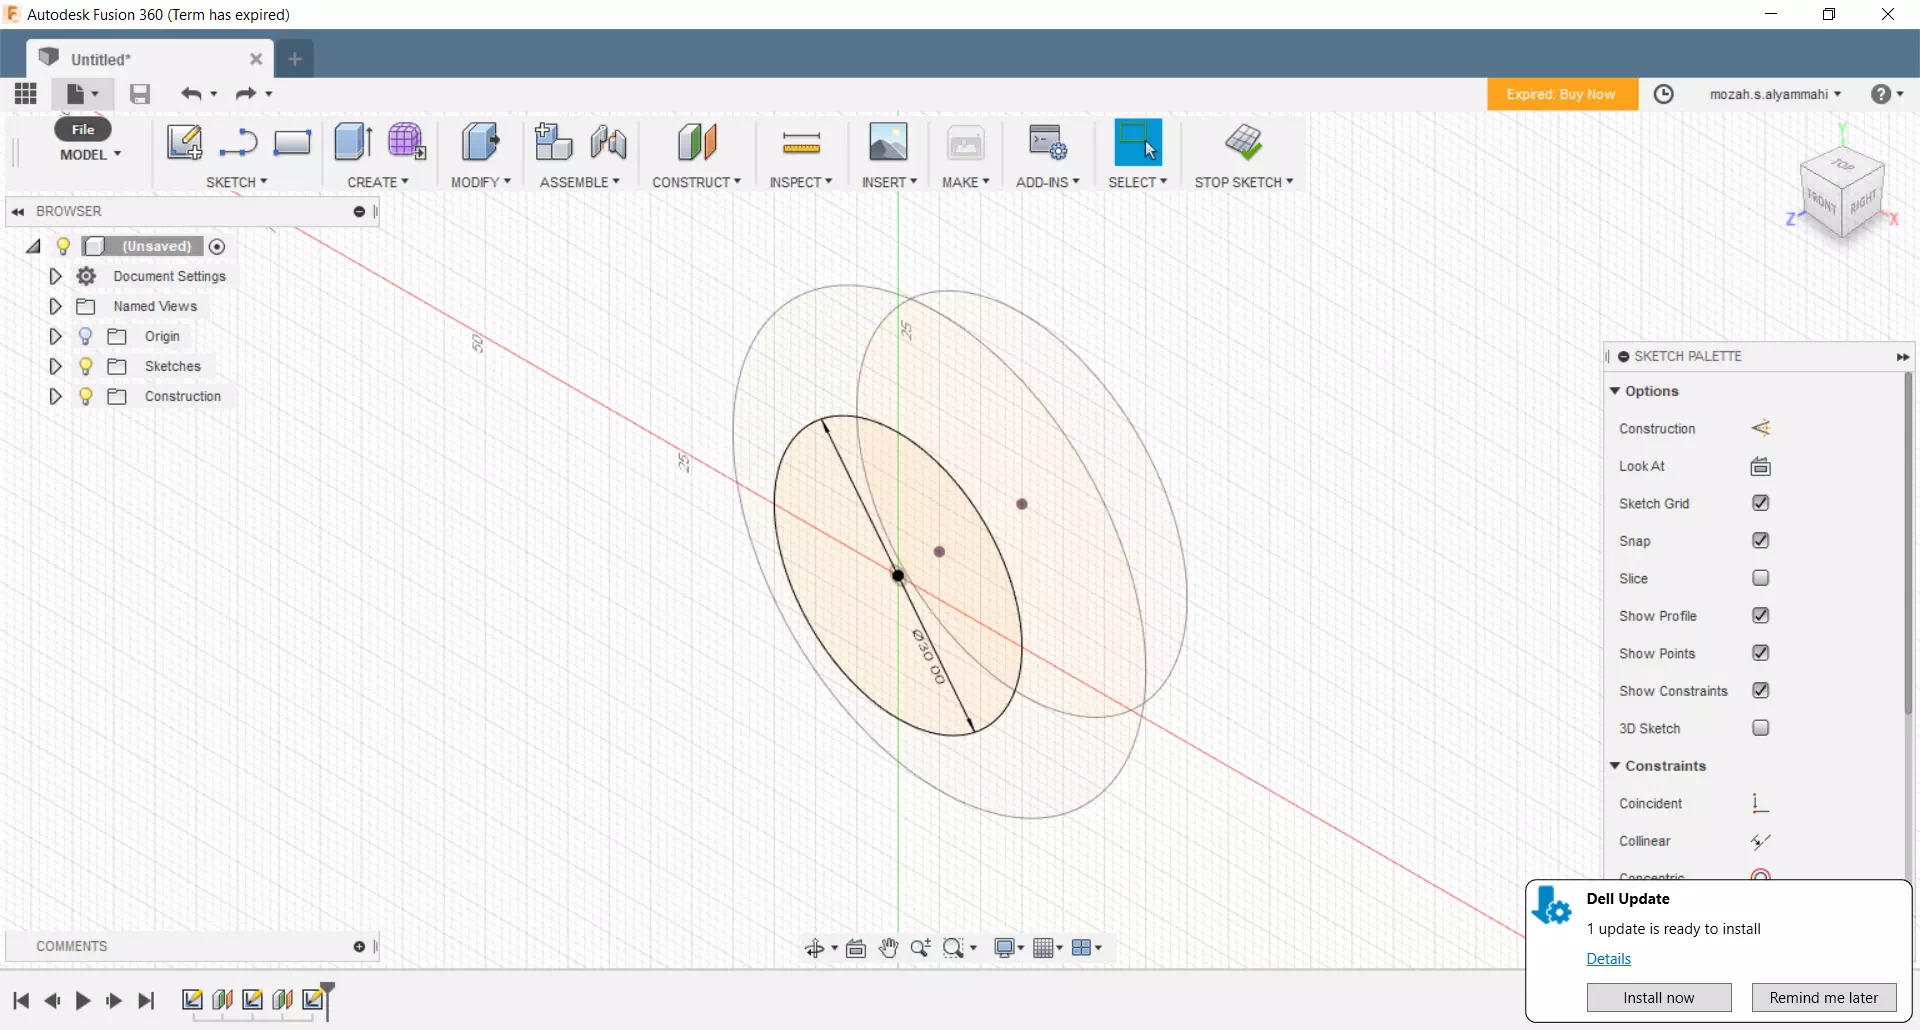
- Then, create the third circle with diameter 30mm on another new plane with offset 5mm from the previous one. As a result, there will be three circles on three different planes
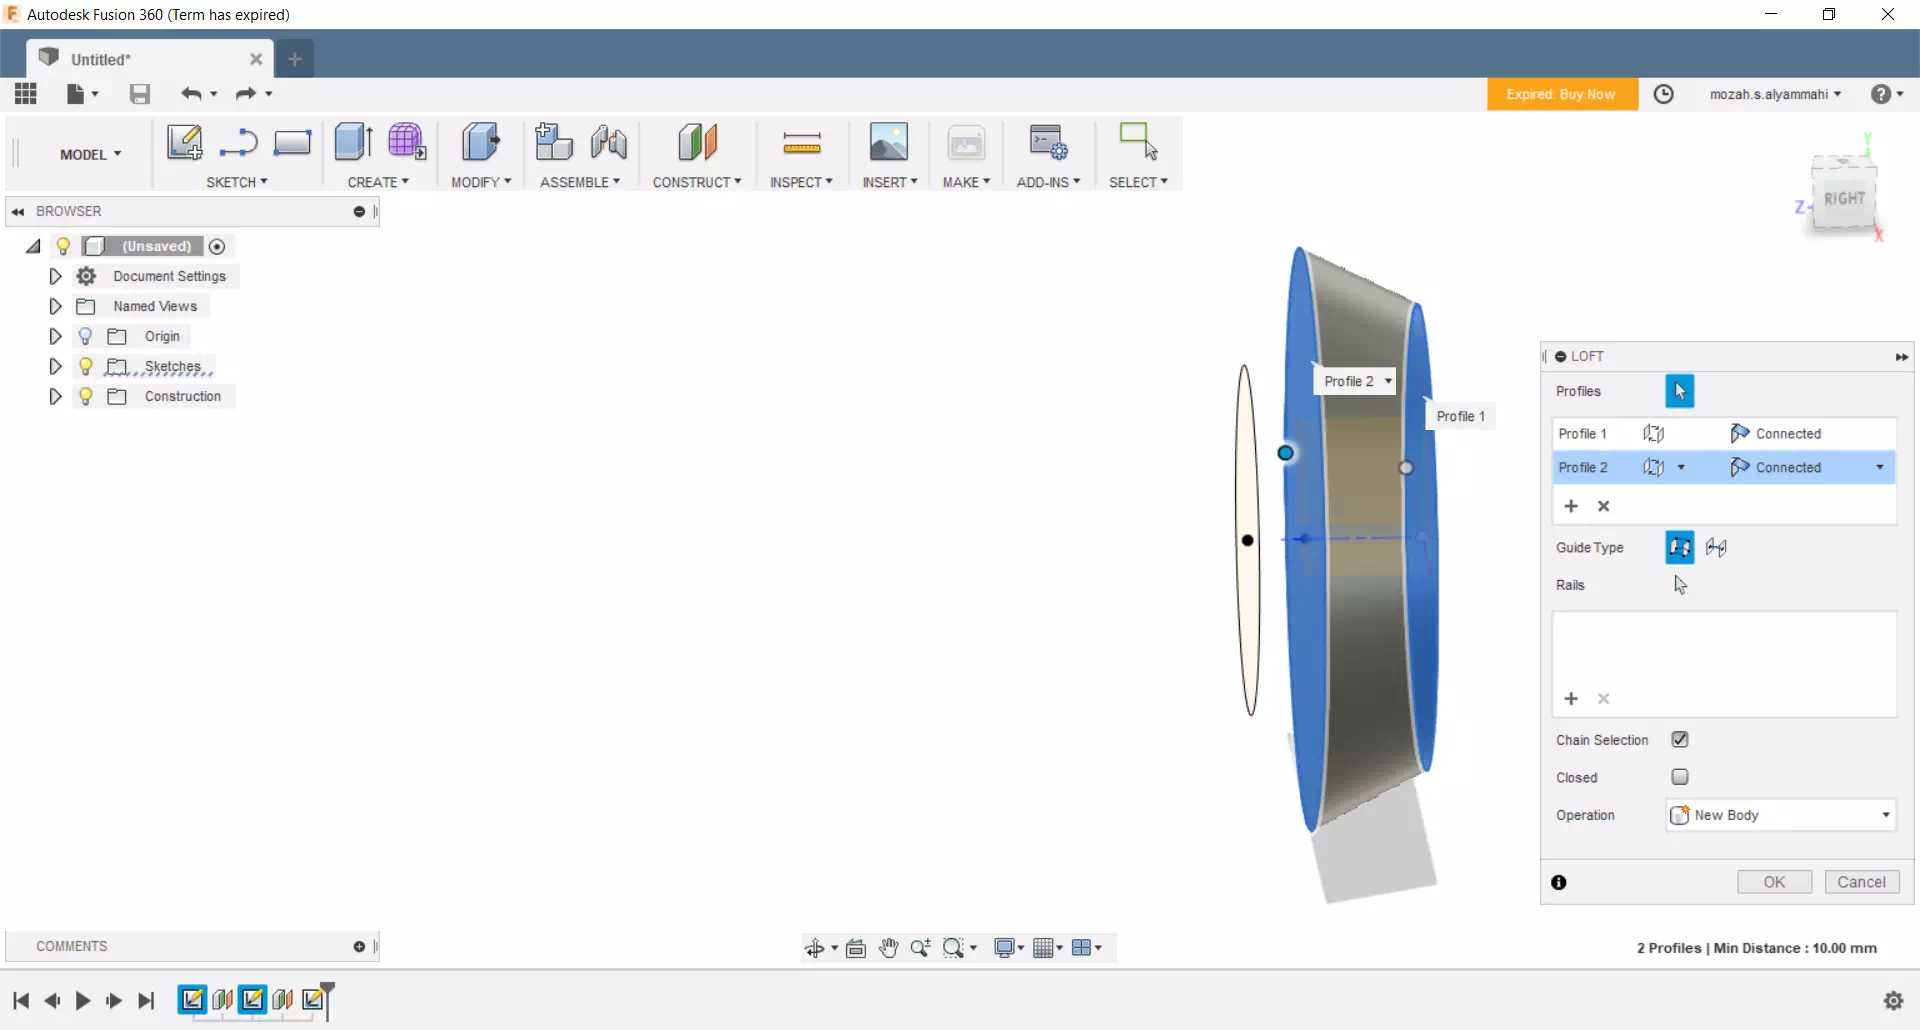
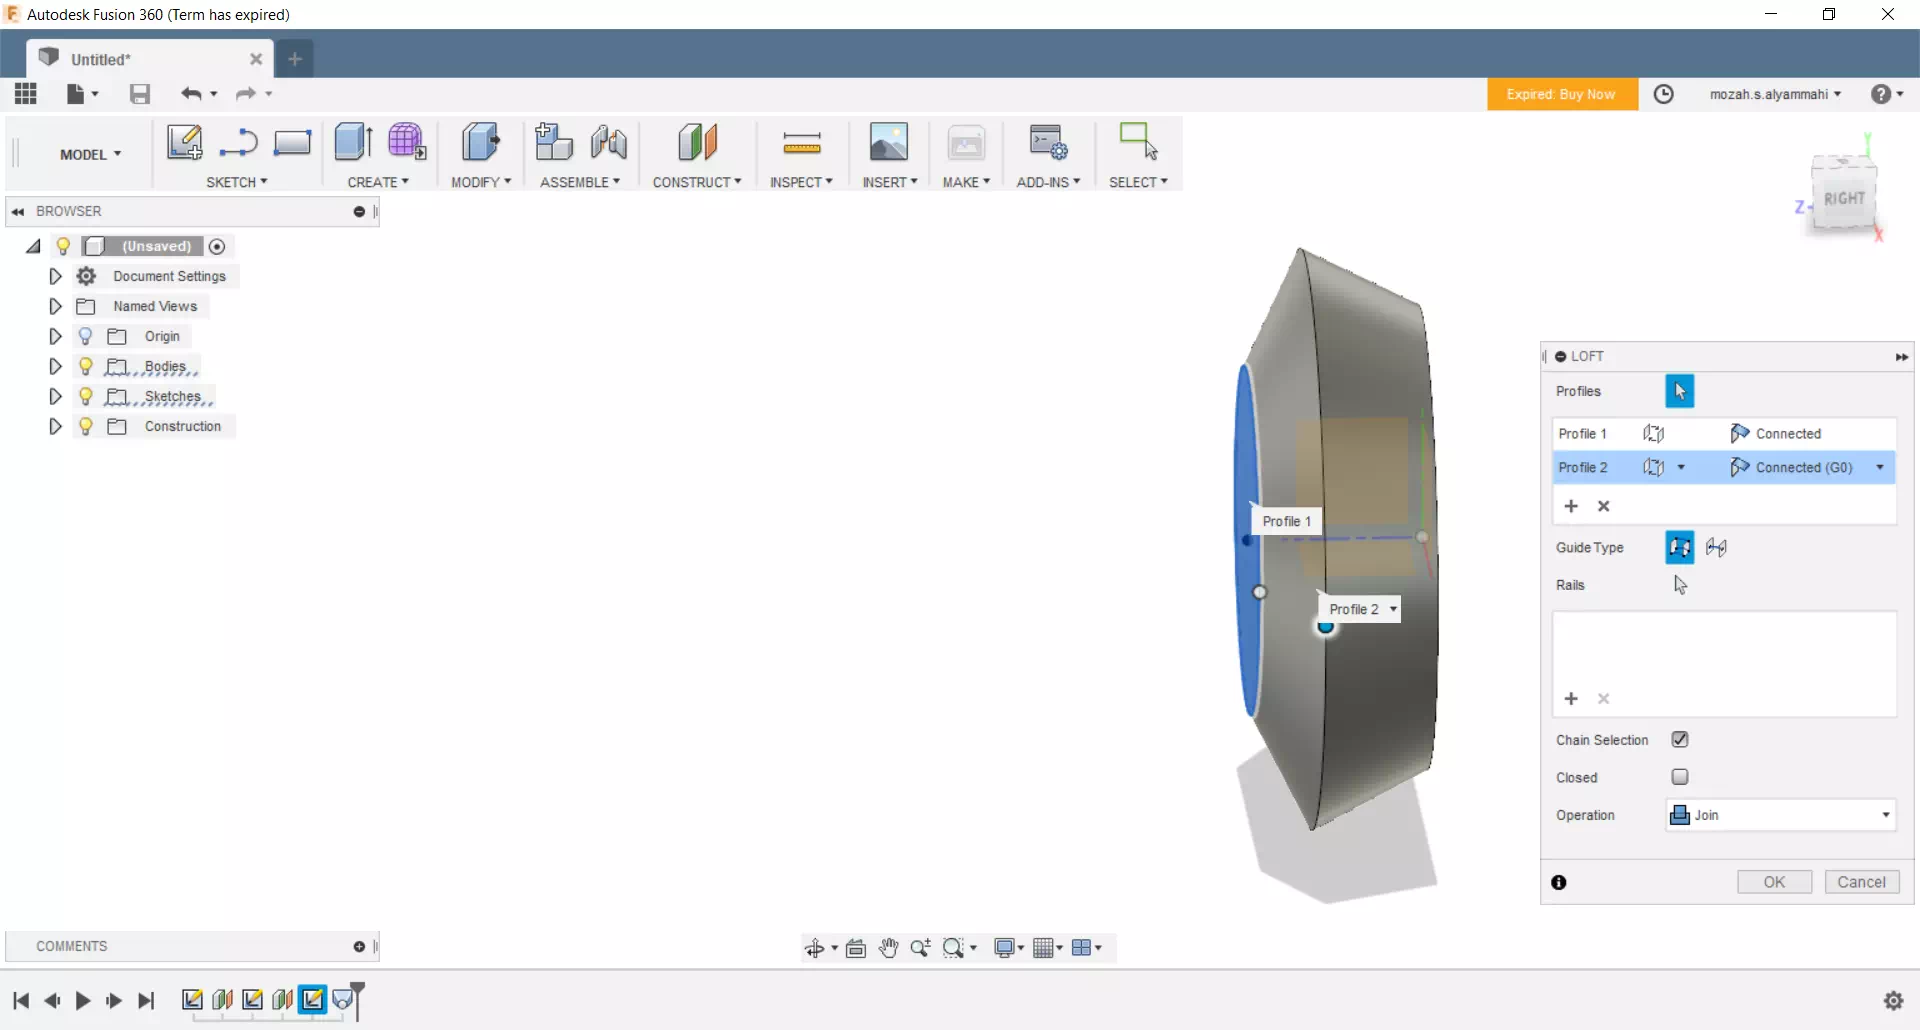
- Now, go to create>LOF then choose two planes as shown in the figure below. Notice that the operation should be a new body.
- Moreover, repeat the step of loft selecting the shown planes in the figure below. Notice in this step the operation should be joint
- Next, create another two planes on xz-axis. Notice that one should be with offset 15mm and the other one by 25mm.
 After that, you can sketch the tooth profiles and use loft feature to produce them as components. Finally, apply a circular pattern. The next video presents the complete steps of designing the gears.