Week 9
-
EMBEDDED PROGRAMMING
Group Assignment
Compare the performance and development workflows for other architectures.
Individual Assignment
Read a microcontroller data sheet
Program your board to do something, with as many different programming languages and programming environments as possible.
(GROUP ASSIGNMENT)
The group assignment on this week, was developed with Ivan Callupe and Diego Santa Cruz. The details are documented in Ivan's page at this link.
READING DATASHEET OF ATTINY44 (INDIVIDUAL ASSIGNMENT)
This week I read the datasheet of my MCU ATtinny44 form this link.
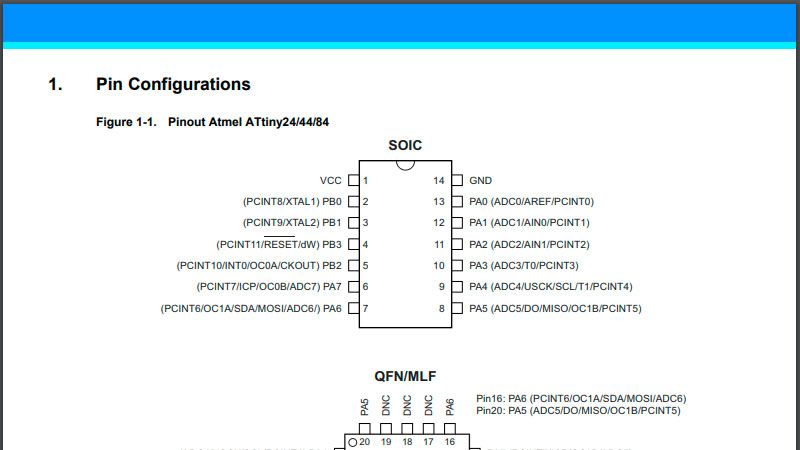
The first thing I read was the pinout. This is a diagram with the name (and number) of each pin of the microcontroller. This is very important for the design of circuits. We can connect an input or output device to this pins, according the use of each one. And obviously, we had to pay attention to the Vcc (voltage feed) and GND (ground) pins.
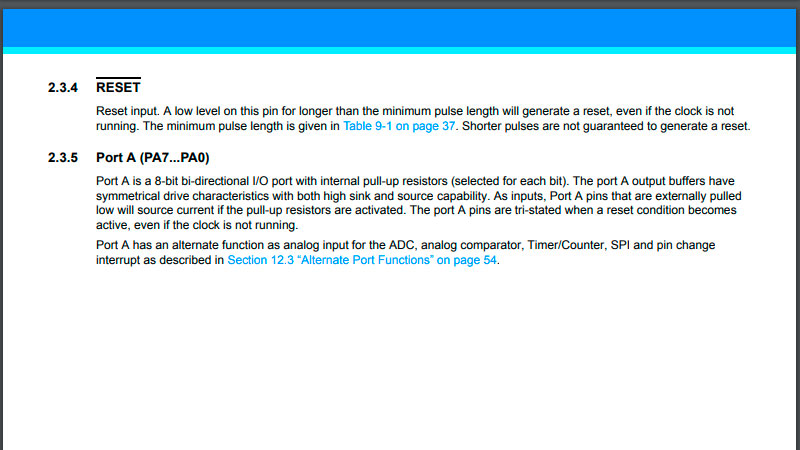
An important thing I learned, was about ADC. The pins marked with ADC, can receive analogic signals as inputs, and then convert it to digital. Actually ADC means analogic to digital. It is a nice feature, because without it we had to do this by software (consuming more MCU process).
Another important data is the operative temperatrure. We can forget it in "normal" conditions, but its important if we plan use the MCU on special applications with too high (or low) temperatures.

This ATTiny44, has two ports. Port A (8 bits) and Port B (with 4 bits). Each bit require a pin, that counts 12 pins, with Vcc and GND we have 14 pins on the MCU. The port B pins can be used like input or output (I/O). The pins of Port A can be setted like I/O too, and additionally can be used like ADC, like I mentioned before.
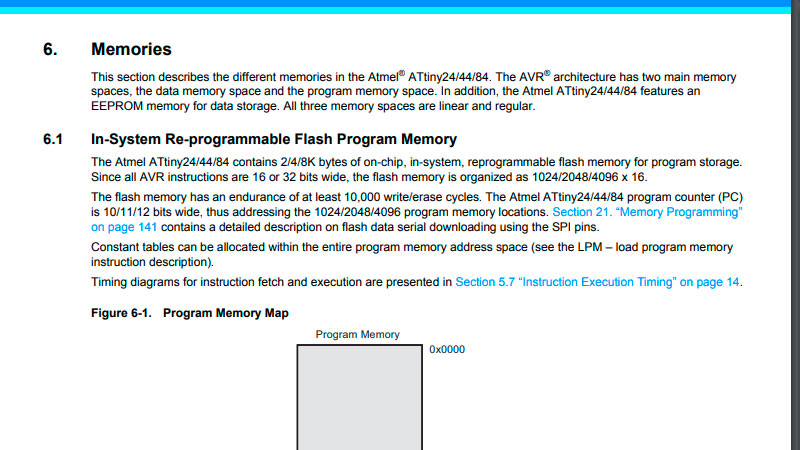
After all, the memory. The name of the MCU is related with the memory size. The ATTiny44, has 4K bytes. This is where we can load the programs to the board. At first sight it looks very small, but with a well programmed instructions, can be enough to our projects.
Questions an further learning
Well, I had to say that week was full of new things for me. There is a couple thing I want to learn more about. The internal clock (timing execution) and the interrupts. I know a few things about both, but I am curious about how I can do more effcicient software with this MCU features.
PROGRAMMING AN ATTINY44 (INDIVIDUAL ASSIGNMENT)
I am doing this assignment later than week 11. So, I am going to make the embedded program, with a board designed on Week 11 page. This board reads the signal of an digital encoder. That design, fabrication and program will be detailed on week 16 (Interface and application programming).

To warming up, I program the board making blink a LED for this assignement. Additionally I'll upload the program to the board using a couple of methods. The first: using Arduino IDE and the second: using AVRDUDE on Windows.
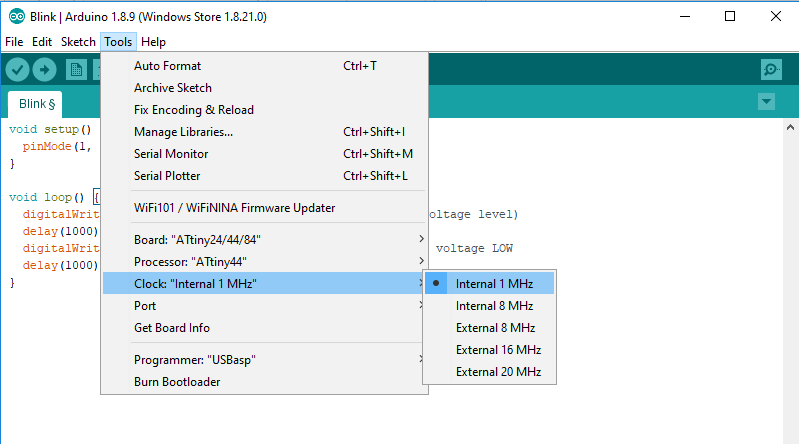
First at all, the program that I made is very simple. The LED connected to the pin PA01, blink 3 times for a 0.25 seconds and once for a second. Thats all for now.
  void setup() {
    pinMode(1, OUTPUT);
  }

  void loop() {
    digitalWrite(1, HIGH);   // turn the LED on
    delay(250);                       // wait for a 0.25 second
    digitalWrite(1, LOW);    // turn the LED off
    delay(250);                       // wait for a 0.25 second

    digitalWrite(1, HIGH);   // turn the LED on
    delay(250);                       // wait for a 0.25 second
    digitalWrite(1, LOW);    // turn the LED off
    delay(250);                       // wait for a 0.25 second

    digitalWrite(1, HIGH);   // turn the LED on
    delay(250);                       // wait for a 0.25 second
    digitalWrite(1, LOW);    // turn the LED off
    delay(250);                       // wait for a 0.25 second

    digitalWrite(1, HIGH);   // turn the LED on
    delay(1000);                       // wait for a 1 second
    digitalWrite(1, LOW);    // turn the LED off
    delay(250);                       // wait for a 0.25 second
  }
Programming AVR Attiny44 with Arduino IDE (On Windows)
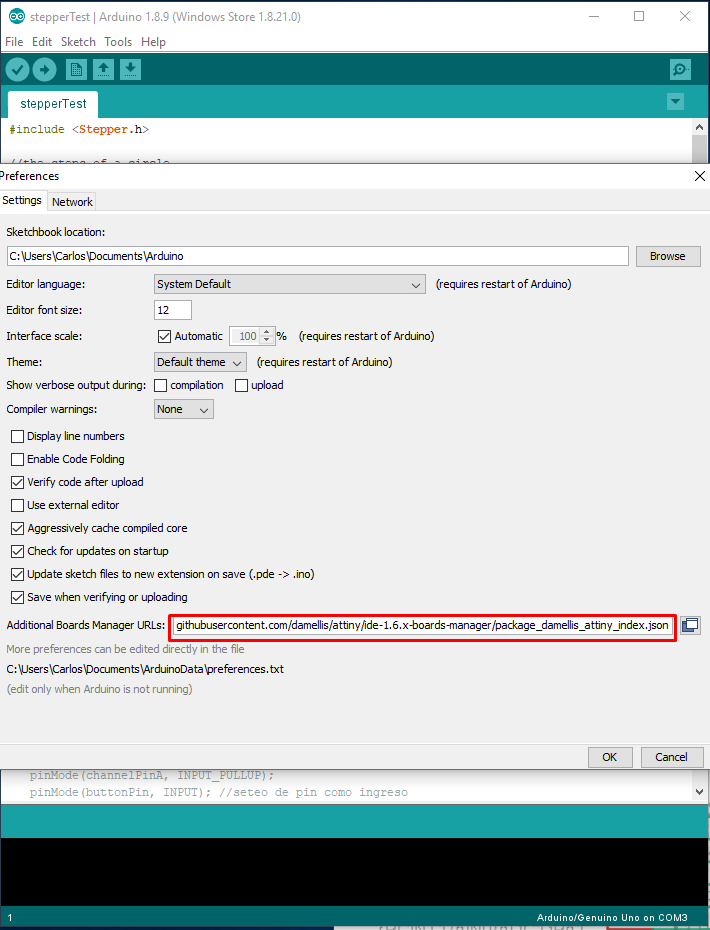
The first step is install additional boards to the Arduino IDE. This is due to by default, Arduino IDE can't program all the boards.
To do this, go to the Main Menu/File/Preferences. On the textbox "Additional boards manager URL" paste this URL:
(Taked from this link)
https://raw.githubusercontent.com/damellis/attiny/ide-1.6.x-boards-manager/package_damellis_attiny_index.json
Now, go to Tools/Boards/Board Manager/.
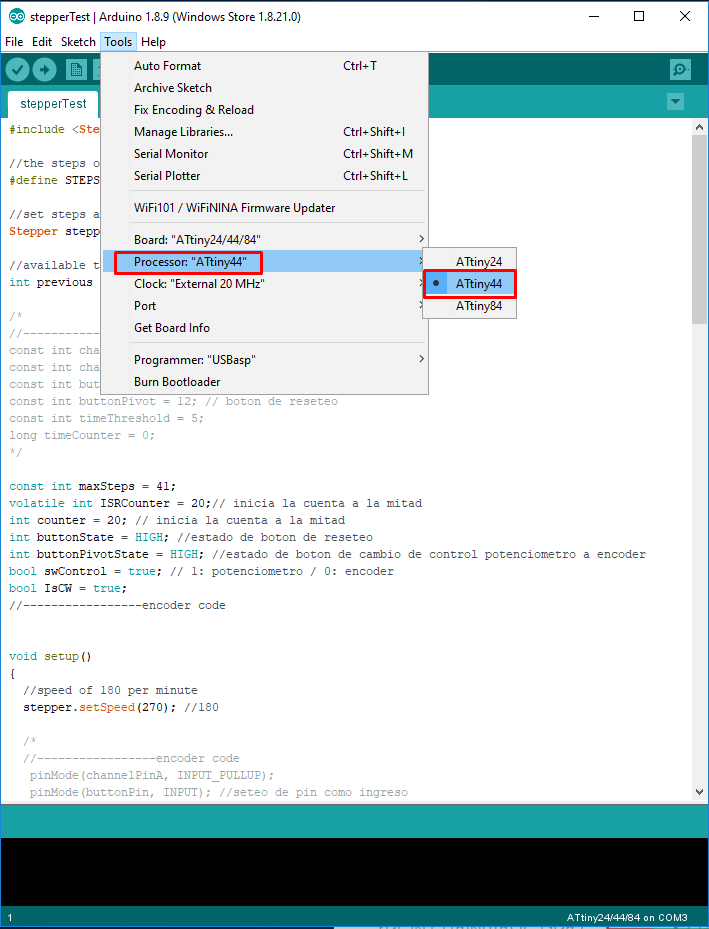
NOTE: Don't care about the code in this screenshots (I was working on other things before). The final program loaded is above.
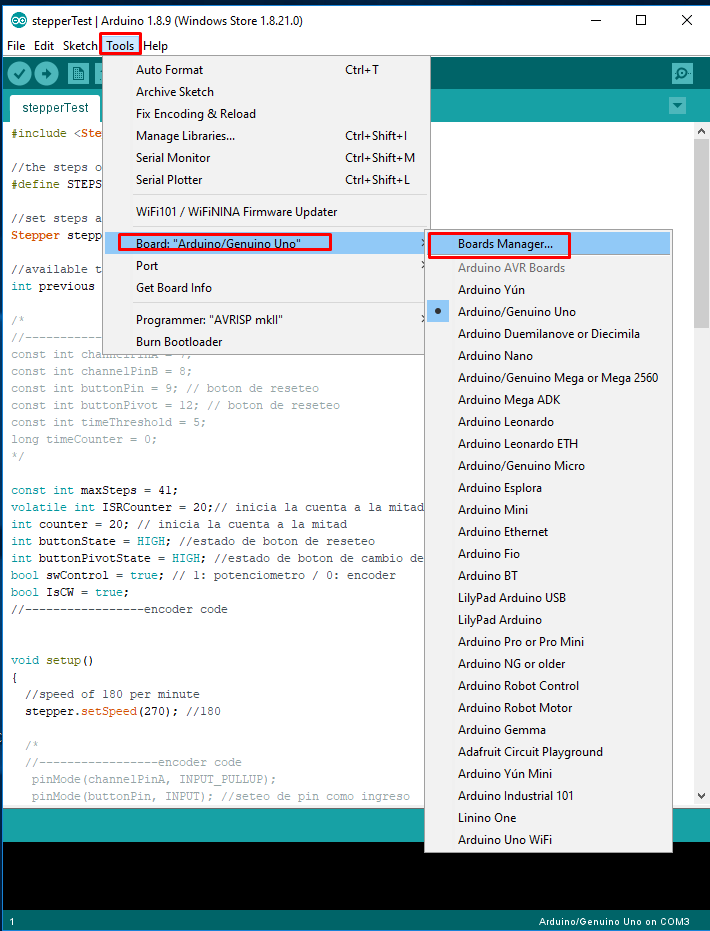
At the end of the list, there is a package to install.
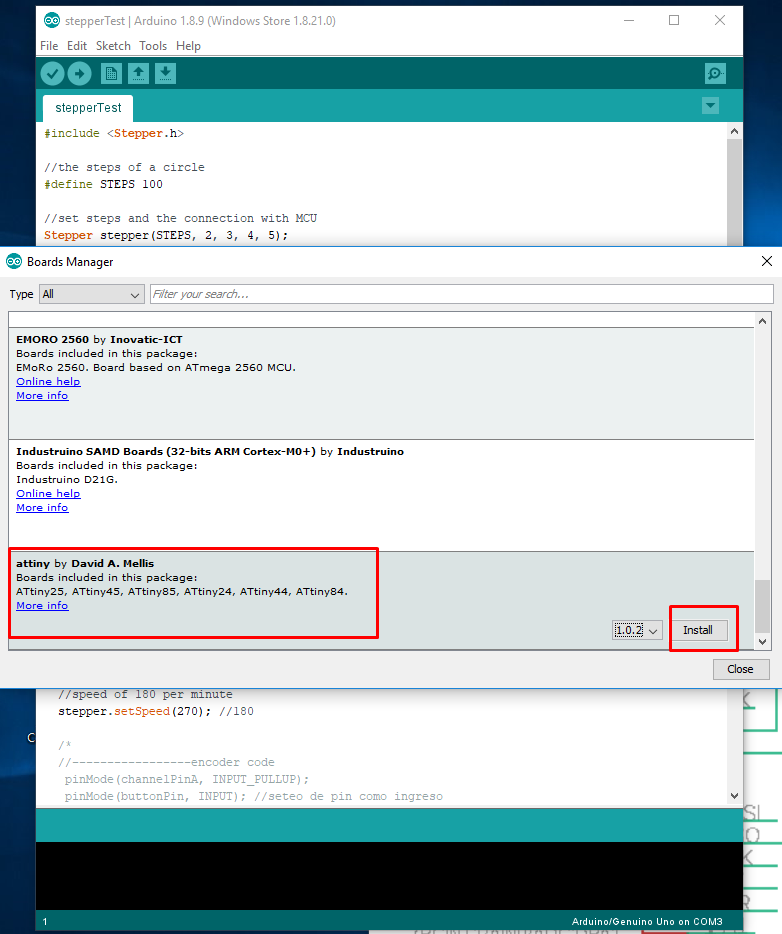
After the installaion you can select a board with ATTinny44. (Is possible you need to restart Arduino IDE)
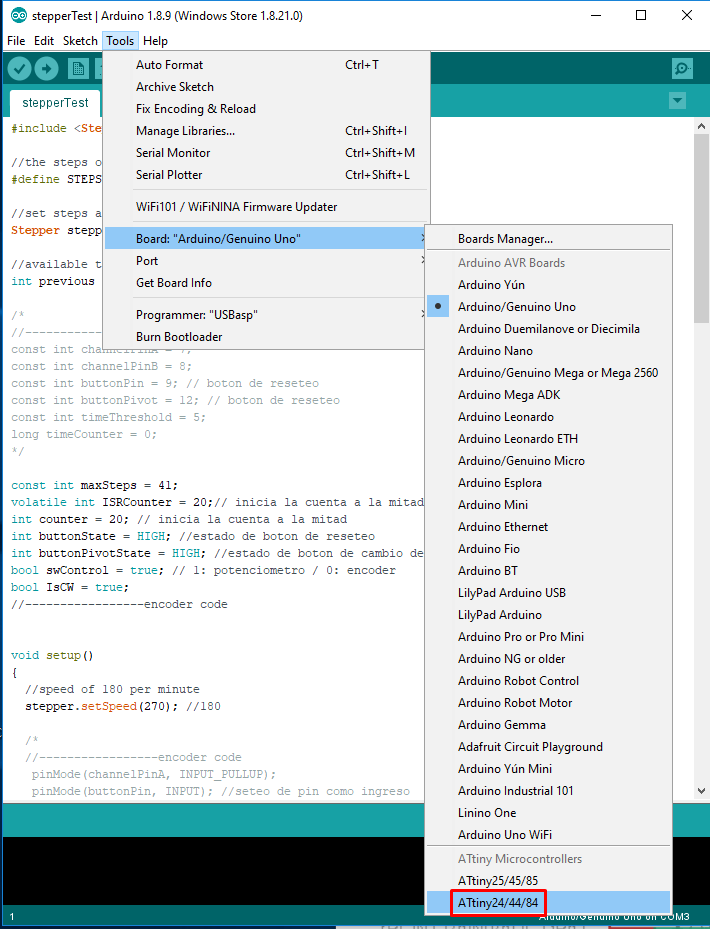
Ensure you choose the right processor on the list on Tools/Processor/
Select the clock, according to your design, on Tools/Clock. In my case, the board has a resonator of 20MHZ.
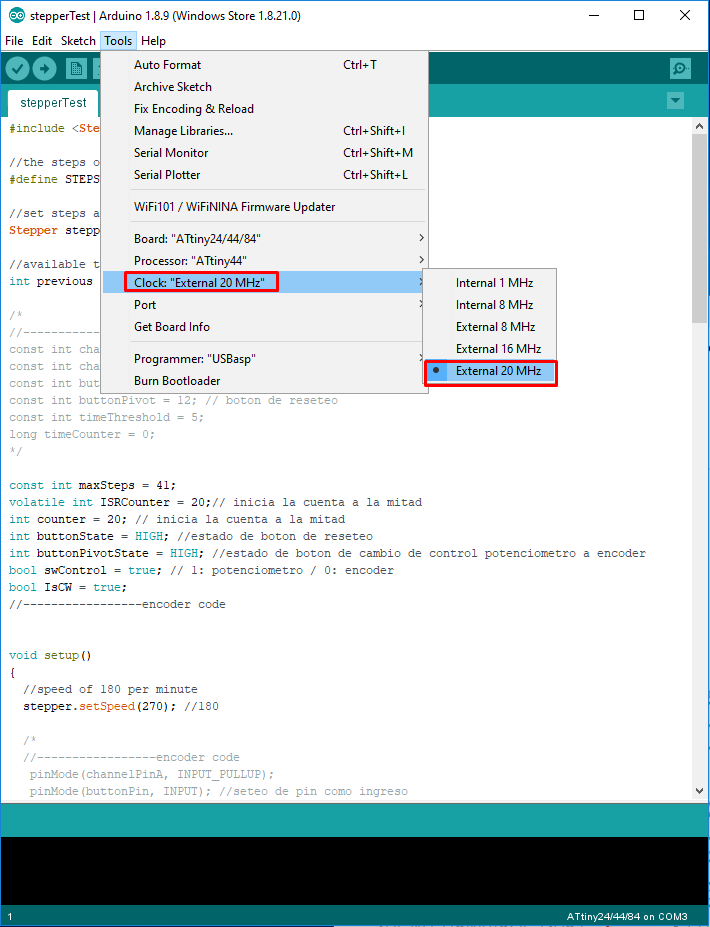
NOTE: With the previous value of 20MHZ, my board, take much time to blink. I had to change this value to 1MHz. I'm not sure if I picked up a wrong resonator from the stock or if there is a problem with the IDE. This will require a future lecture. By now, the board works very well.
Files of this assignment: