Week 8: Computer-Controlled Machining (CNC)
Assignment
BRAINSTORMING
CNC?
CNC (Computer Numerical Control) Machine cuts material in a subtractive method,
following a numerical code programmed instruction (G code)
The general Machine is a 3 Axis machine(x,y,z), but there are other CNCs that go up to 5 axisthere even are robot arms that can go all axis and carve any shape.
The goal for us is to go as fast as you can without breaking the machine and end mill.
It is powerful, but easy to use.
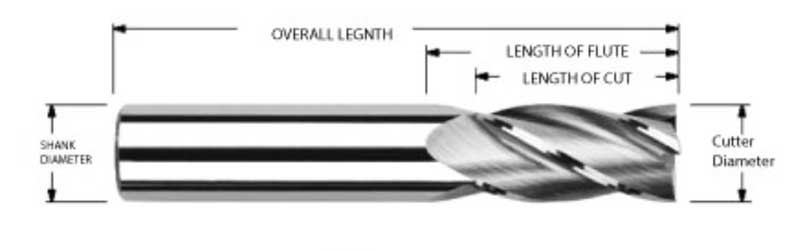
End mills
End mills used in a CNC machine may seem like a drill bit, but there are differences.

Drill bits are pointy and are used to make holes.
Router bits are in a top-like shape and are used to cut sideways.
End mills that we wil use with CNC machines can do both.
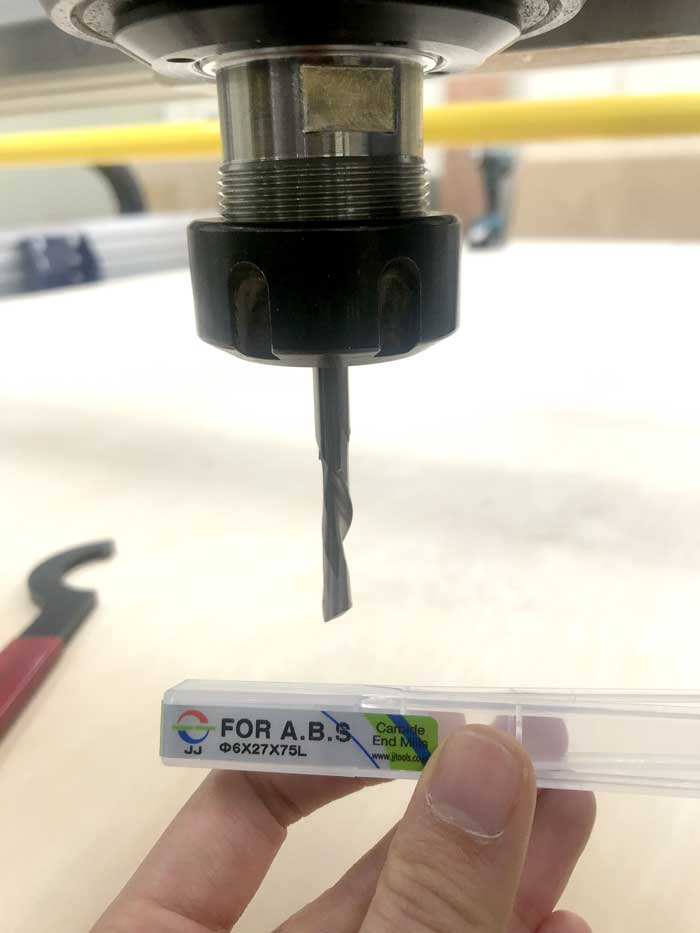
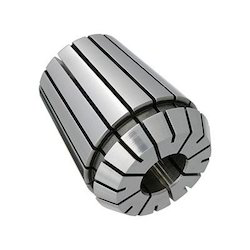 End mills go in a holder called "collet" and they have different collets for different shank diameter.
 There are many different types and sizes of end mills,
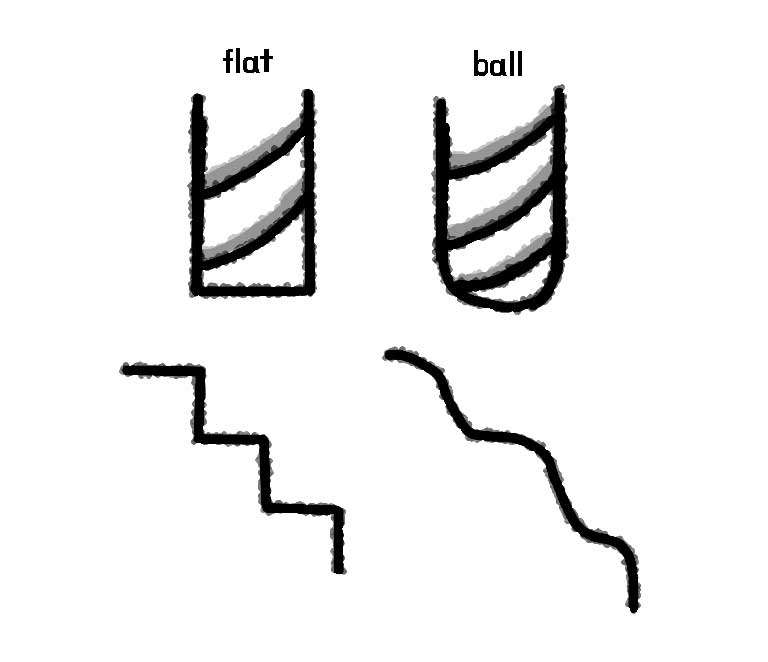
 but the most general ones we will be familiar with
are the flat end mills and ballnose end mills. Flat end mills cut at 90 degrees and makes steps ideal for rough cutting and flat 2D cutting.
Step Over (amount moved from one toolpath to the other sideways):50%
Step Down (amount moved down on z axis): 50% Ballnose end mills cut at 90 degrees also, but the end is rounded ideal for smooth round clean finish.
Step Over (amount moved from one toolpath to the other sideways):10%
Step Down (amount moved down on z axis): 10%
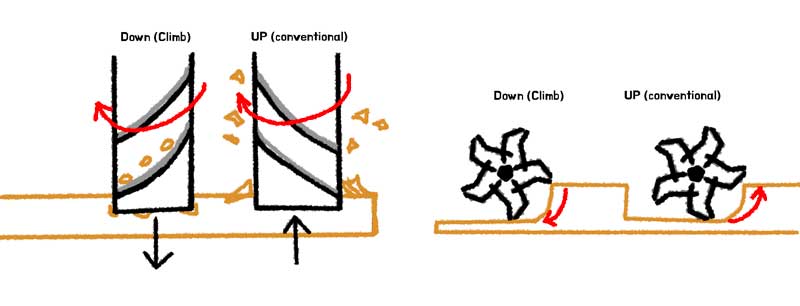 End mills have up cut and down cut. It depends on which direction the flutes go.
Up cut (conventional) means the blade entry (the bite) is shallow,
End mills have up cut and down cut. It depends on which direction the flutes go.
Up cut (conventional) means the blade entry (the bite) is shallow,and the chips are pulled up and out of the way. Down cut means the blade entry (the bite) is big,
and the chips are pushed down towards the material. There are positive and negative to both.
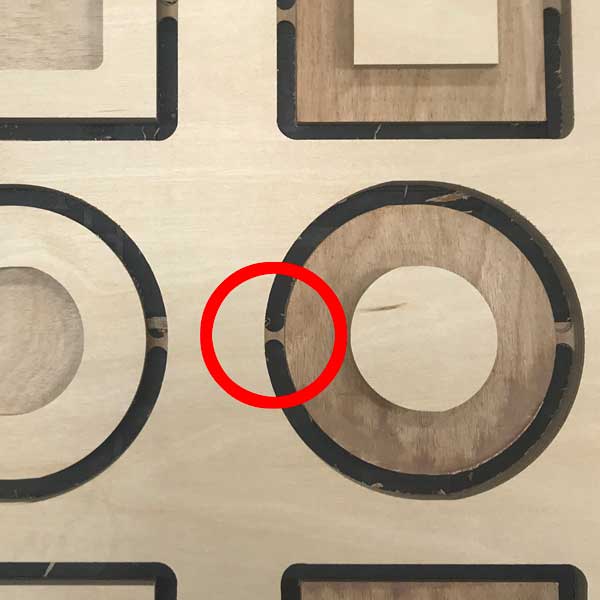
The feed rate can be bigger for the Up cut (-20%), but with materials like plywood, the edges will chip off.
With the Down cut, the feed rate need to be lower (-40%)
Understanding Feeds and Speeds
Spindle speed : measure on RPM (revolutions per minute)
Feed Rate: Horizontal Movement trough the material
Step Down: step down for cutting a material (usually 50% of the cut dia)
Step Over: Horizontal movement when pocketing an area (50% cutting dia)
Flutes: Cutting wings or blades on the end mill
The terms above are important to make your machining efficient and safe.
Here is how to calculate for your machining.

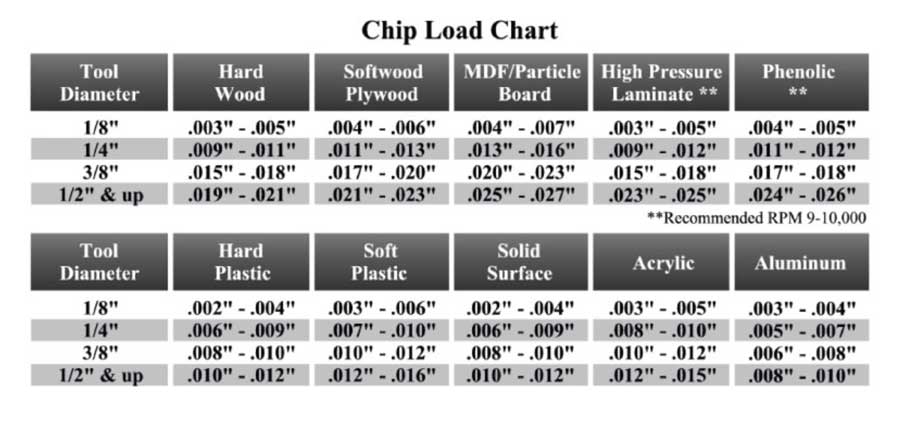
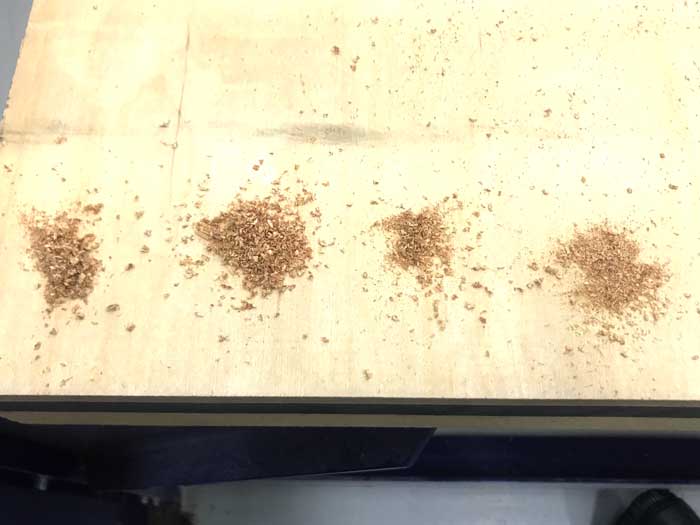
Chipload test.
Vcarve
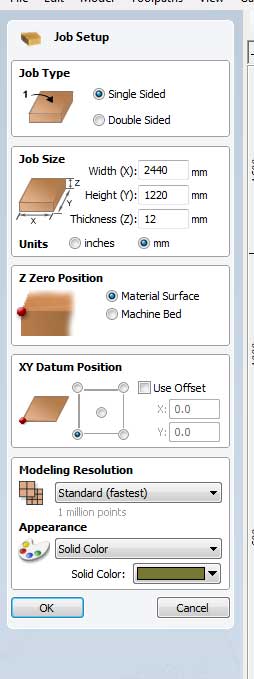
The size of my plywood board covers the entirety of the bed of Shopbot. (2440mX1220mm)
make sure you check the thickness of your material (check laser cutting week)
as the thickness may not be completely accurate.
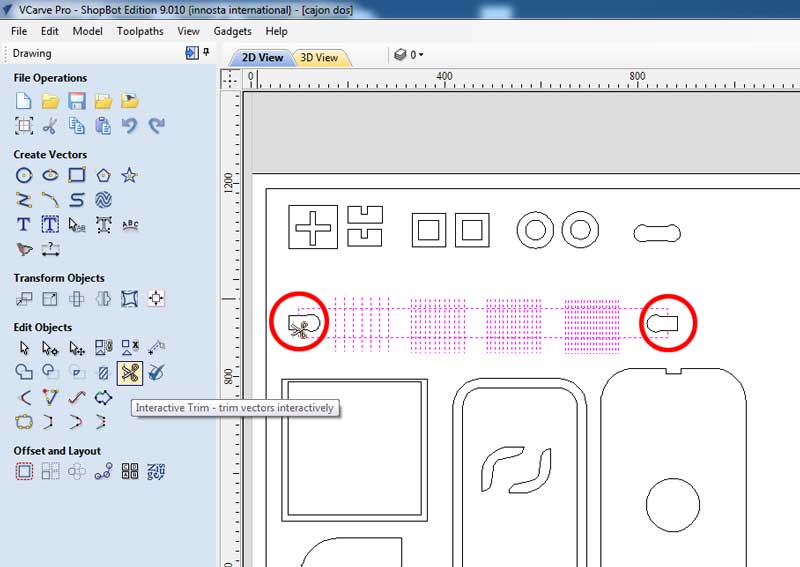
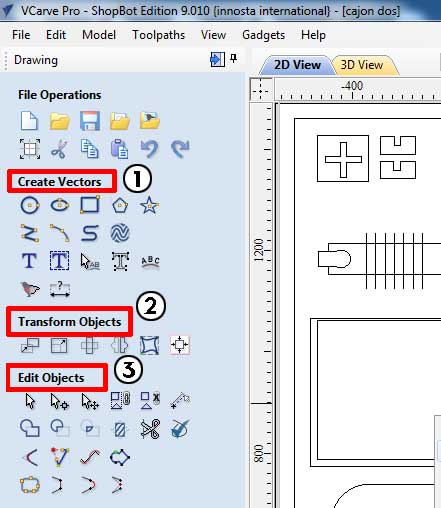 Once you have loaded up your design, you will be using these tools on the left.
- create vectors, if you forgot to add some simple geometry. (just make changes to your design and reload)
- transform objects, if you want to adjust the scales or duplicate design. (just make changes to your design and reload)
- Edit Objects, most used for moving design objects around
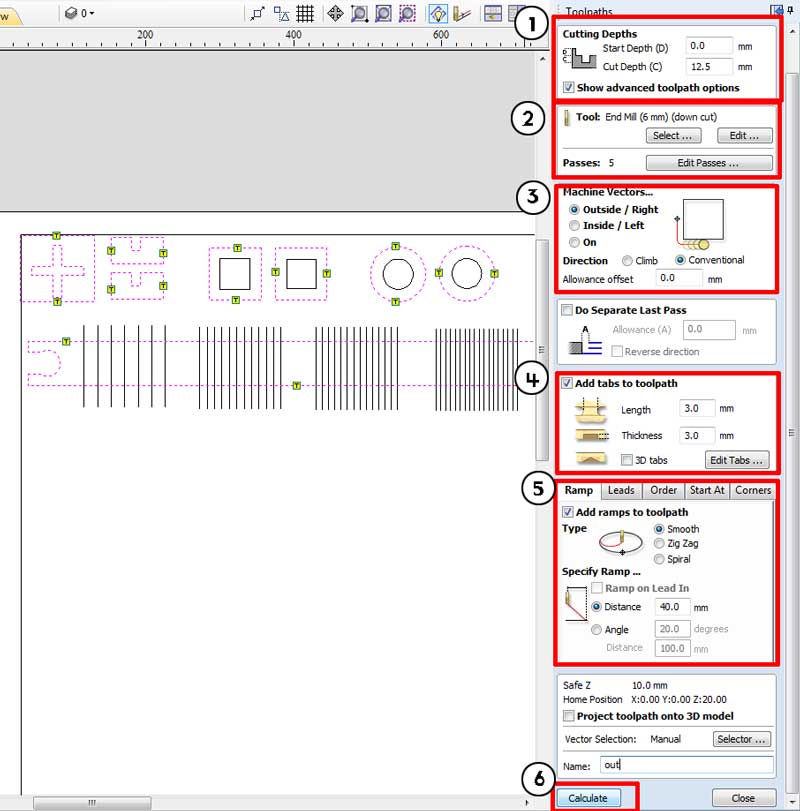
- Cutting depth: Set it to your material thickness + 0.5mm so that it cuts through the bottom.
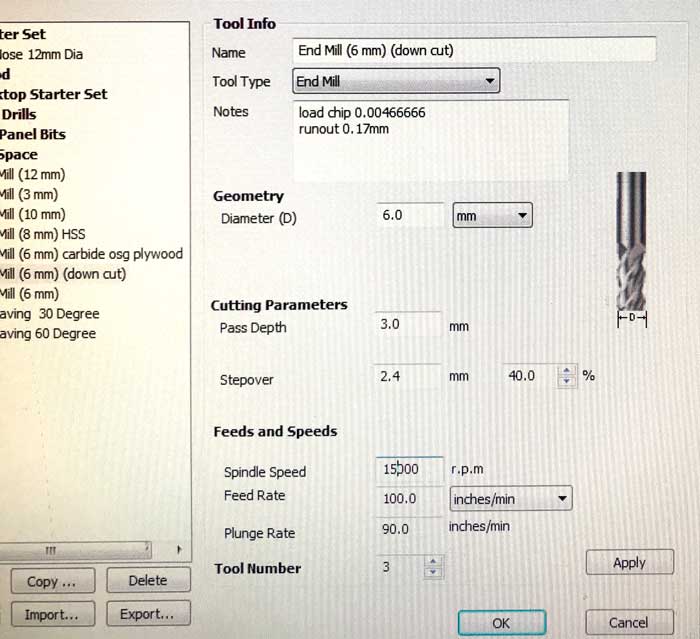
The different settings can be applied for up cut down cut combination. - Tool: Selecting your End mill. When you click [Select...]
a window will pop up for you to select the proper end mill along with editing your feed rate. - Machine Vector: you get choices of either Outside, Inside or On the vector.
This is important when you are cutting something specific to fit well and also with pockets - Add Tabs to Toolpath: You do not want to forget this. If your cuts are all the way through,
the cut might pop out and move around messing everything up (and possibly hurting something) - Ramp: If you don't have a Ramp, your machine will just plunge straight down and move from there,
which is a big cut from the start. You can make life easier for your friend the machine with the Ramp. - When this is all done, click the [Calculate] button to get a preview.
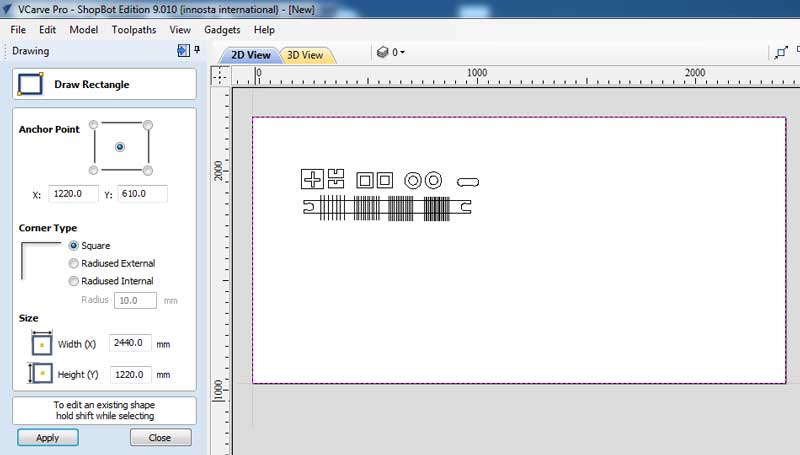 First draw a rectangle the size of your bed/material.
Have an offset of 30mm to avoid cutting on the fixing screws.
Then move your design components around to make the most of the wood to not waste it.
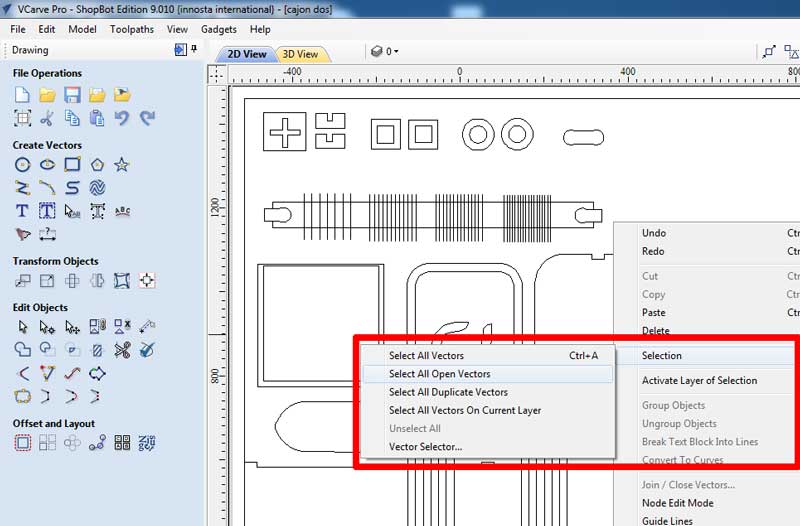
 Once you think your arrangement is ready, right click and check that your paths connected
with [Selection] > [Select All Open Vectors] IF there are open vectors, the program will automatically select them for you.
You can use the tools on you left to join, or cut necessary lines.
(scissors will help you cut away unnecessary lines and join them automatically)
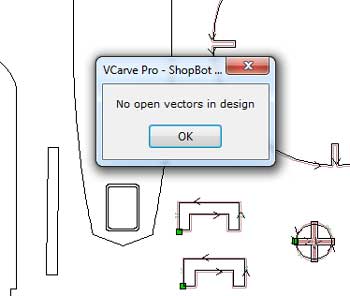
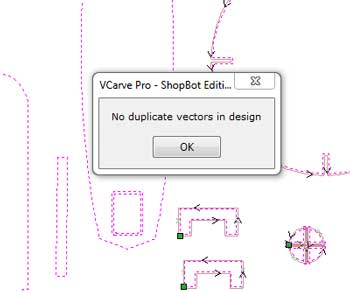 IF there are no open vectors, the program will give you a thumbs up to proceed.
Same goes for checking for duplicates.
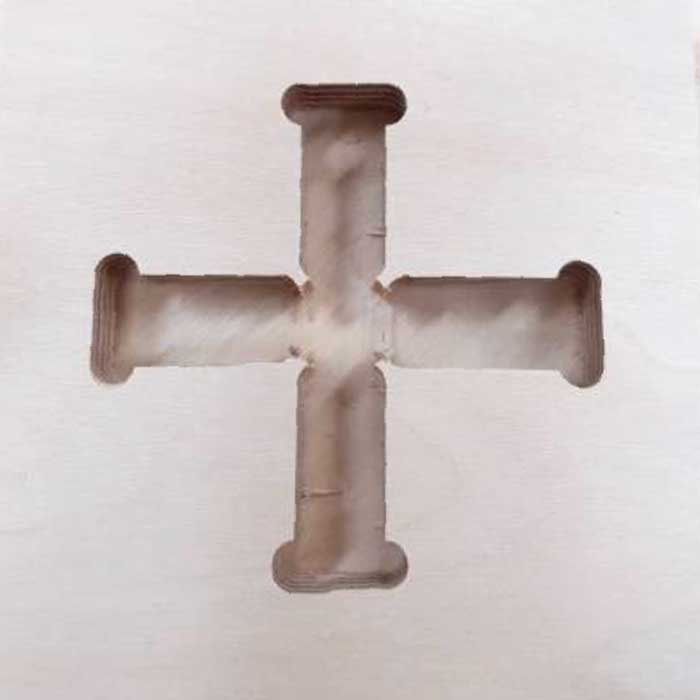
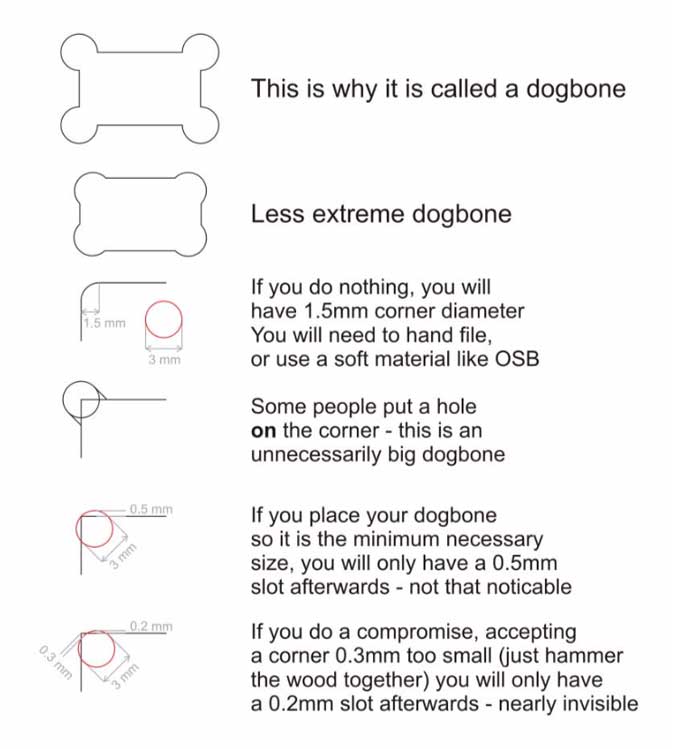 Last part for good designing for good cuts would be dogbones.
They are called dogbones because they look like bone shaped treat for dogs.
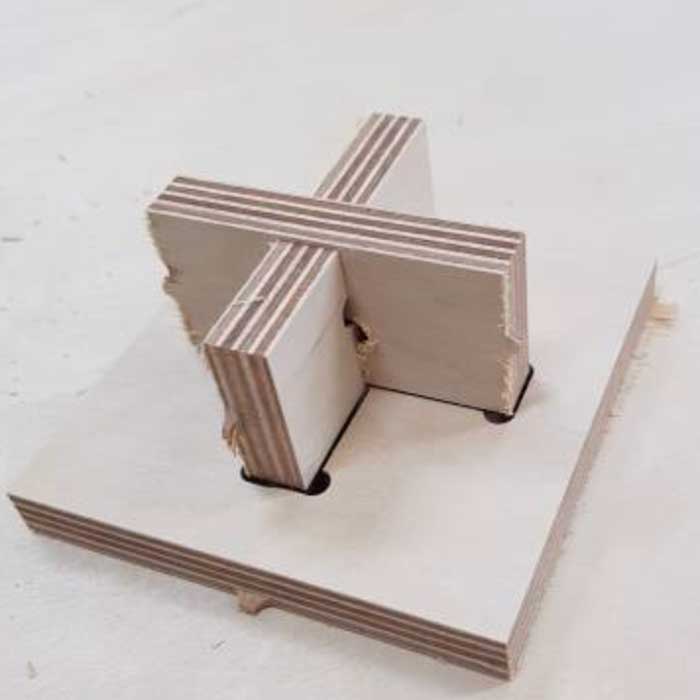
They are used for when you have press fit parts.
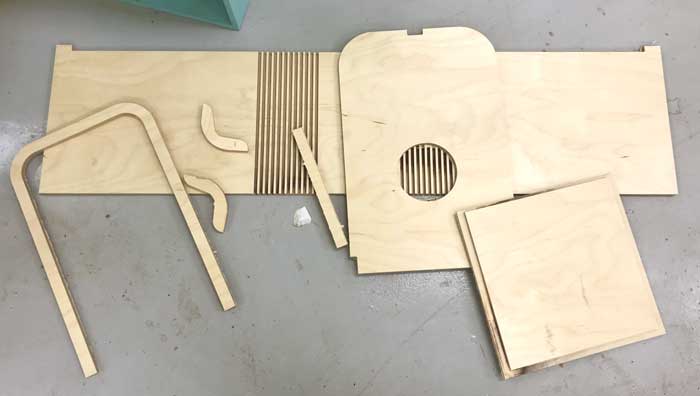
Making something Big
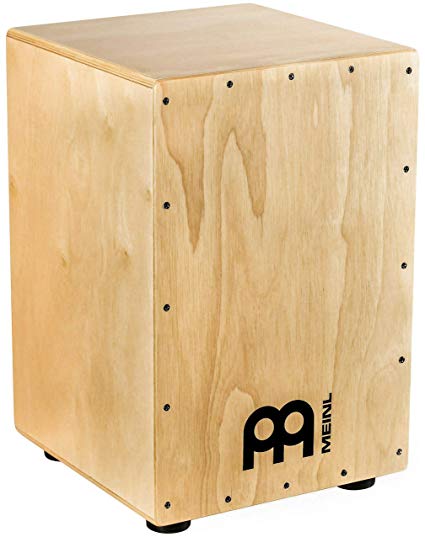
but I always had trouble with it's size and the corners were a nuisance for me when I played them.
So I decided to make one with a rounded top.
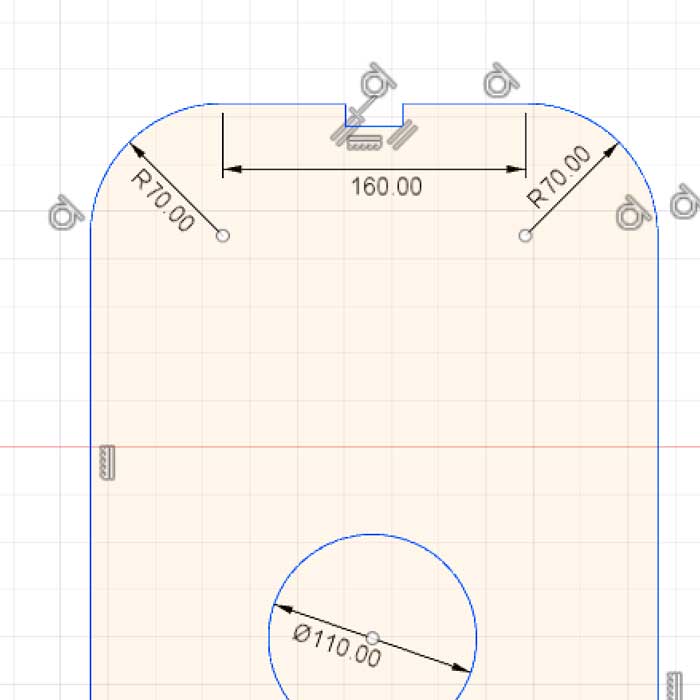 I needed to calculate the bend and the correct measurements.
Using Fusion360. I designed a basic box with rounded corner in the top using fillet [Shift+F].
I used a Kerf bend calculator to get a ball park idea.
(It was not very accurate or helpful)
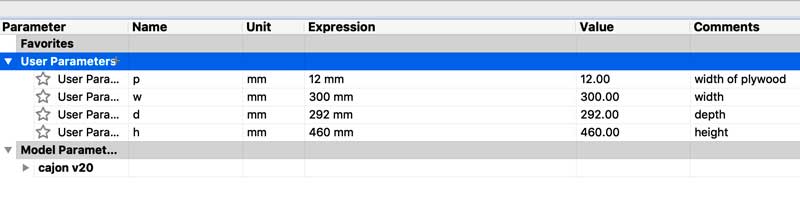
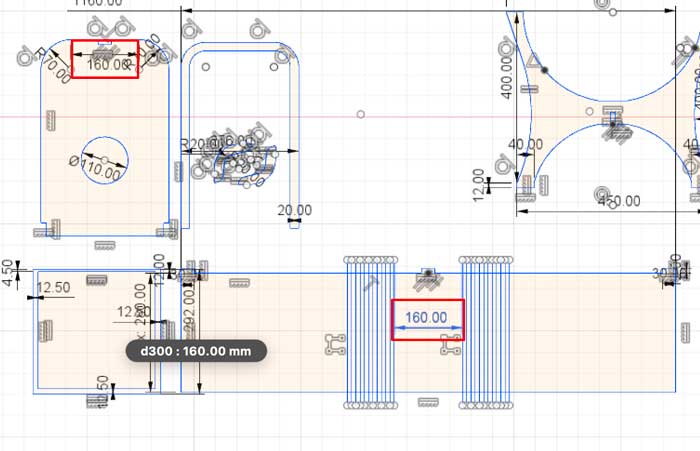 I knew the radius. so I was able to calculate the length of the sides and other measurements,
Using parametric design that we learned in week 4 but I still needed to check the bend
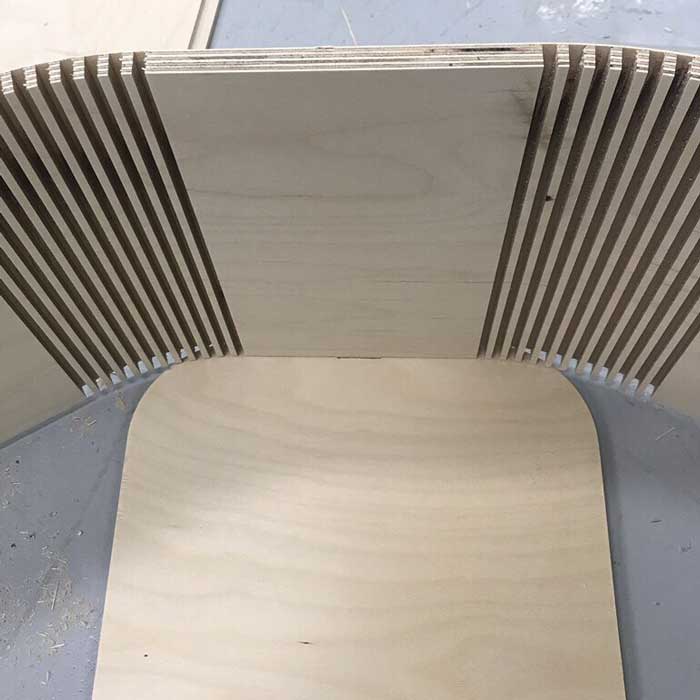
 I did a band of test cut to check the bend of the kerfing.
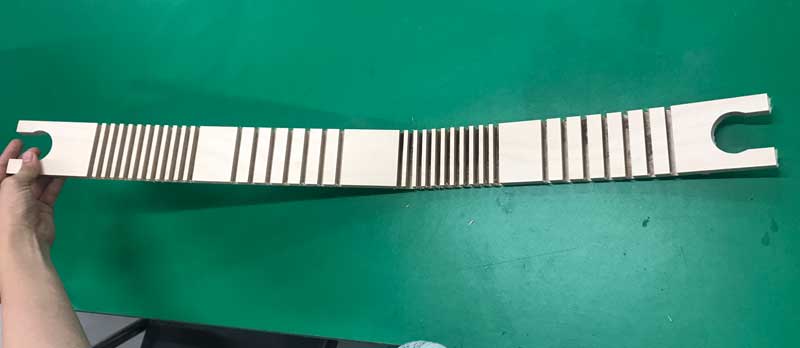
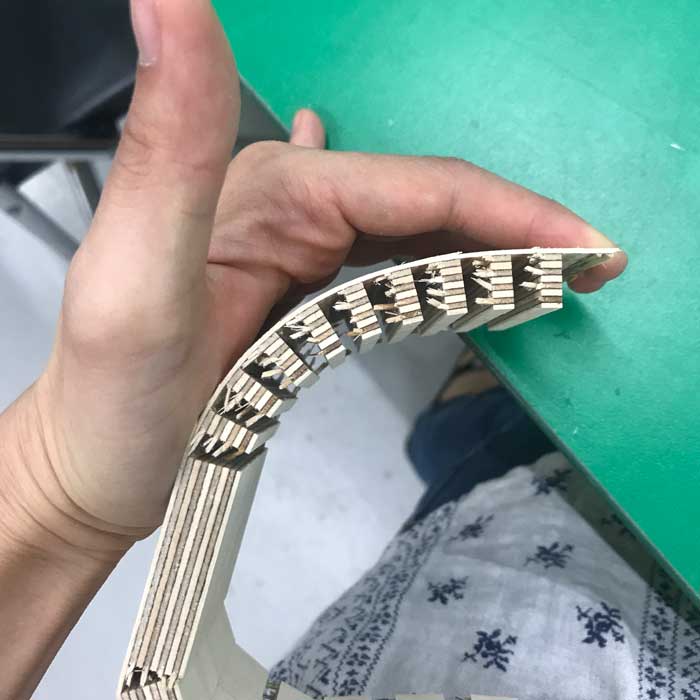 I did two different cuts with two different depth.
My instructor broke it before I could take a good picture, but I was able to salvage a cut.
(depth 1.0mm remaining.)
 Once your Design is at it's final stage, use the [Toolpath] menu on the right to set up your cuts.
Select the paths that you will be using for the particular toolpath The first setting is [Profile], like vector cut.
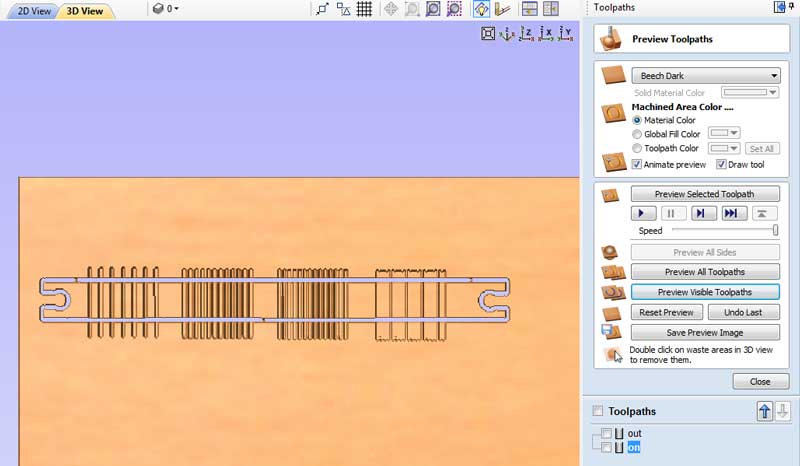 You can see the 3D preview of you cuts.
I have two different toolpaths.
One for the entire cut out, and one for the "pocket"cut.
Setting up the Machine
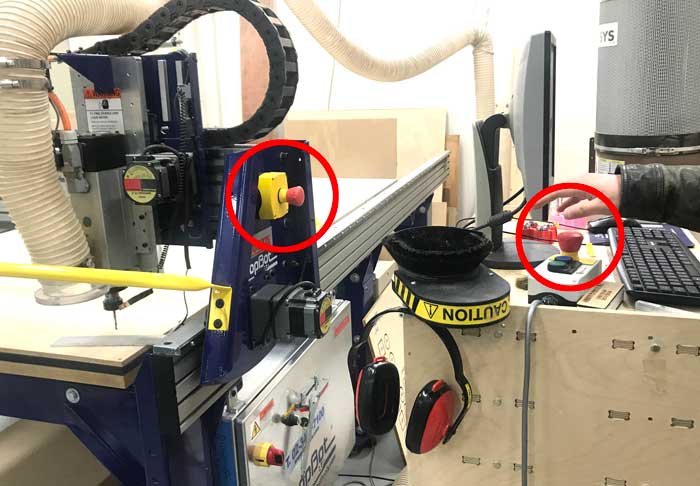
It has two giant red knob that stops the machine.
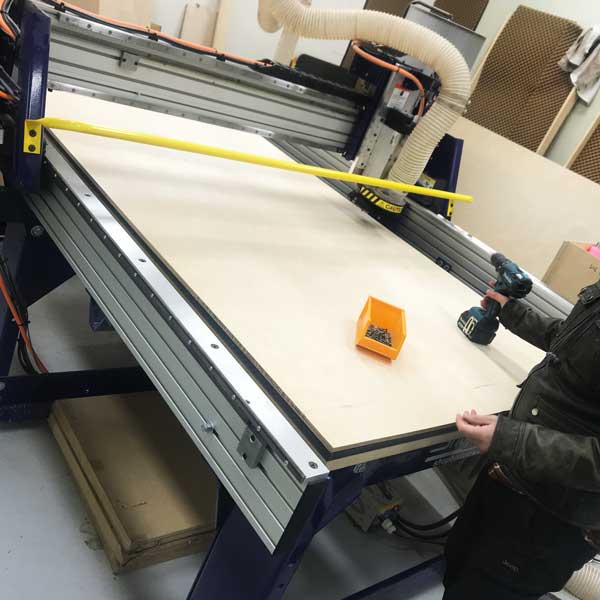
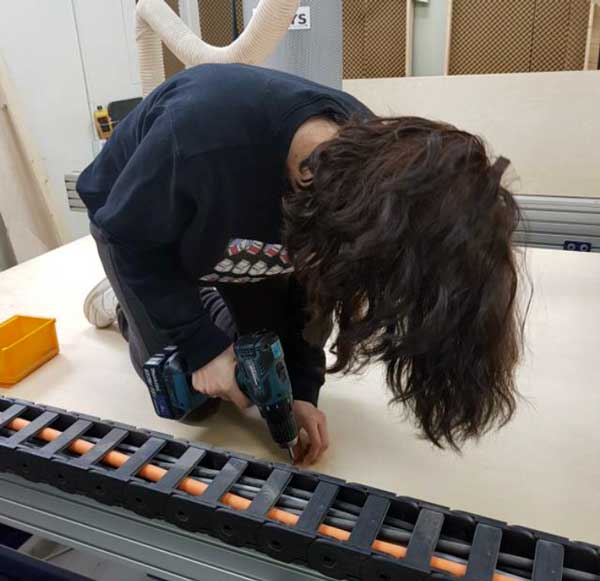 Screw in the plywood on to the bed. Make sure it is close to the edge and straight down.
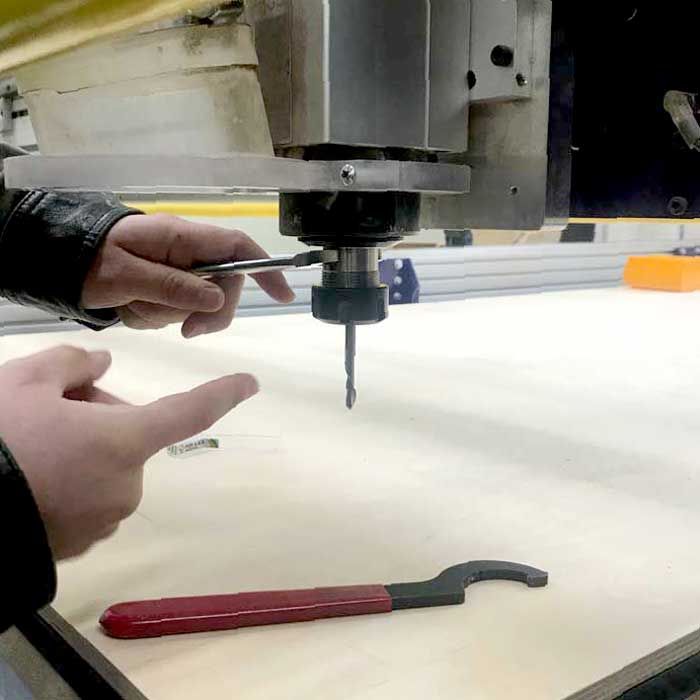
 Setting up the end mill.
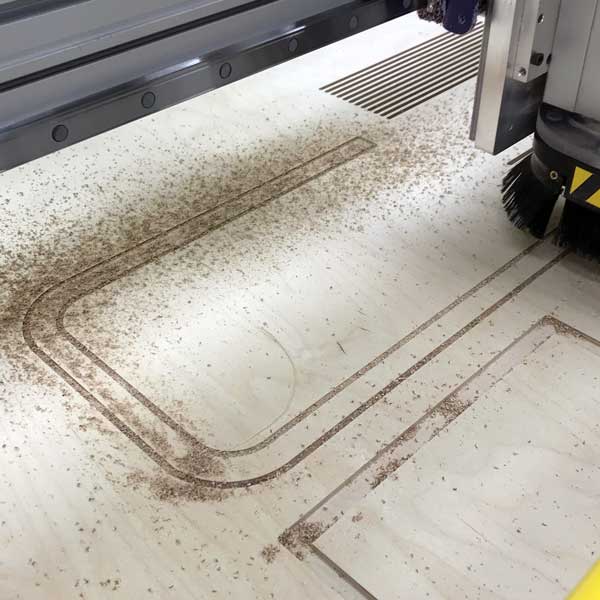 machine cutting the toolpath.
 Cut the tabs carefully, with a chisel or a knife.
 Carefully take out your machined pieces, and sand the edges well.
 I didn't put dogbones on my pressfit parts because I didn't want any holes for the acoustics.
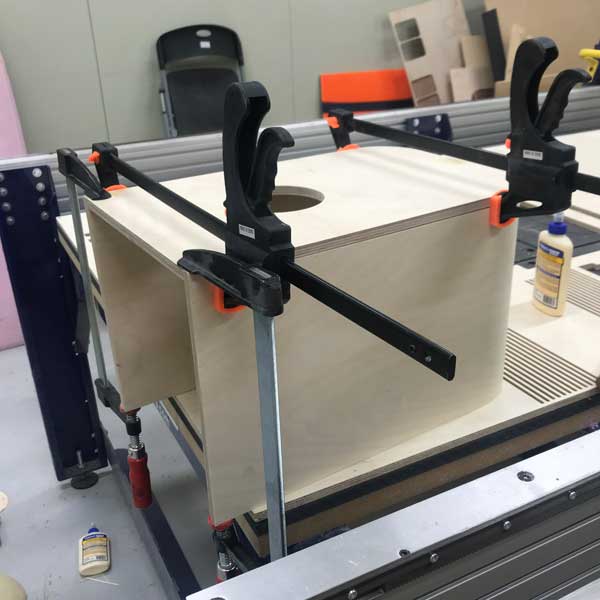
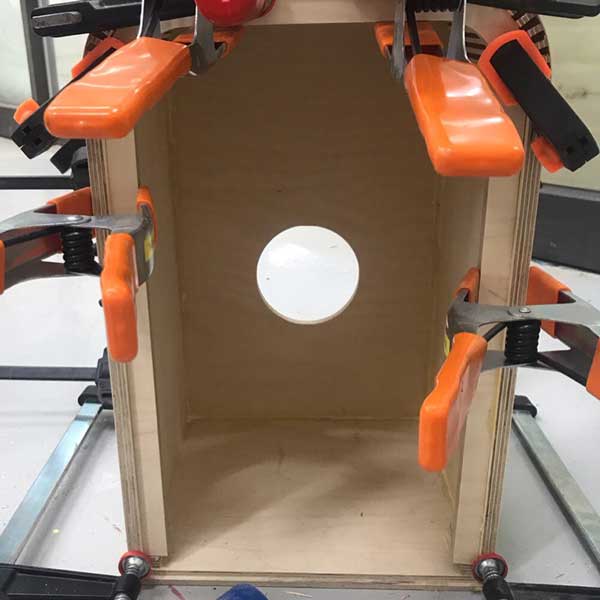 Using clamps and glue, I put the box together.
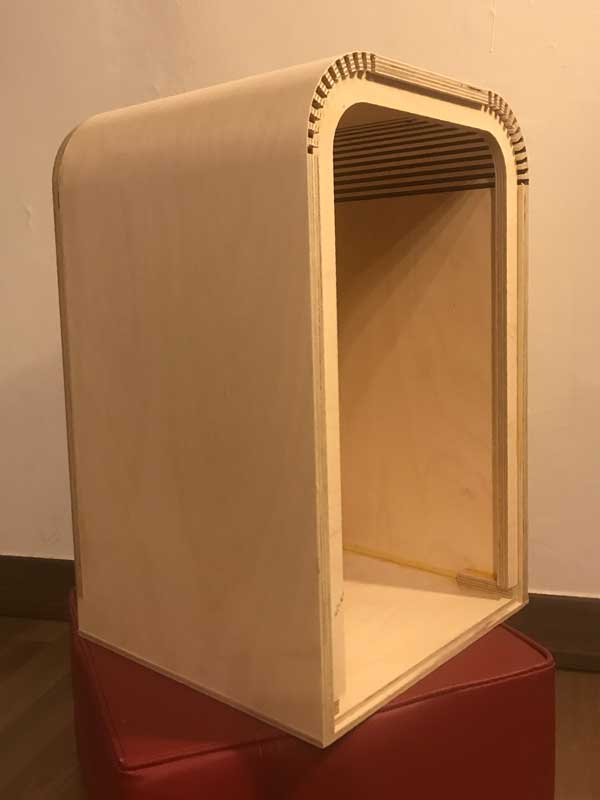
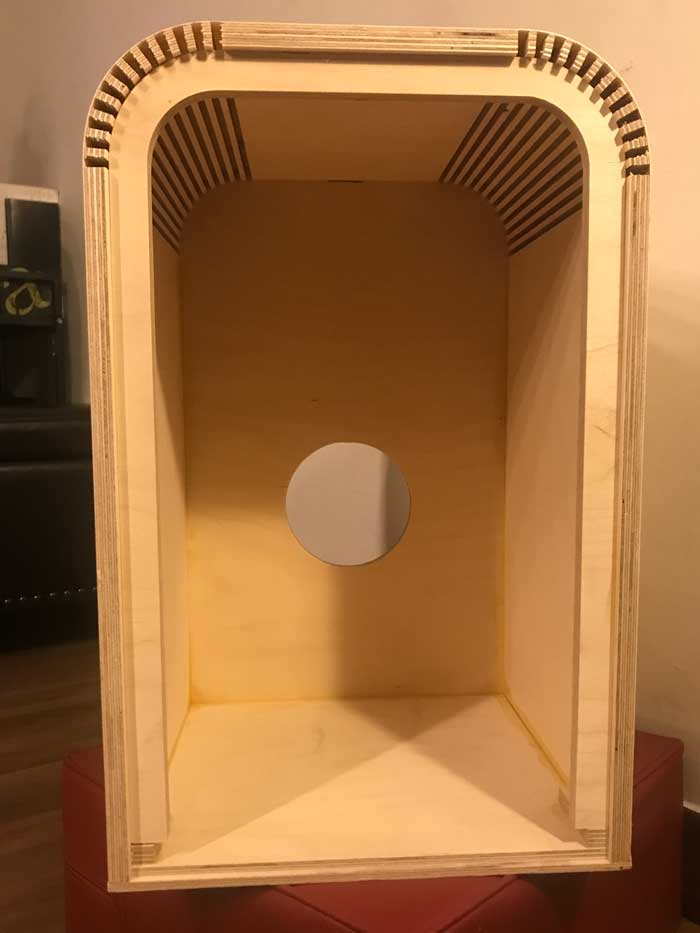 Finished!!! I need to put in a tapa, but that will come later.
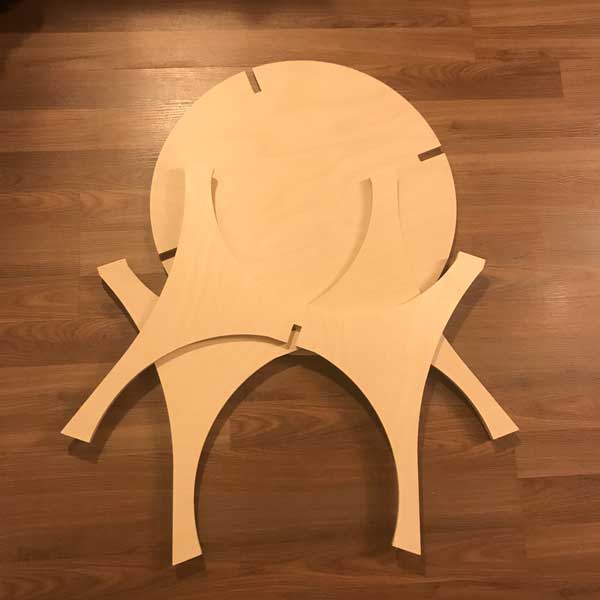
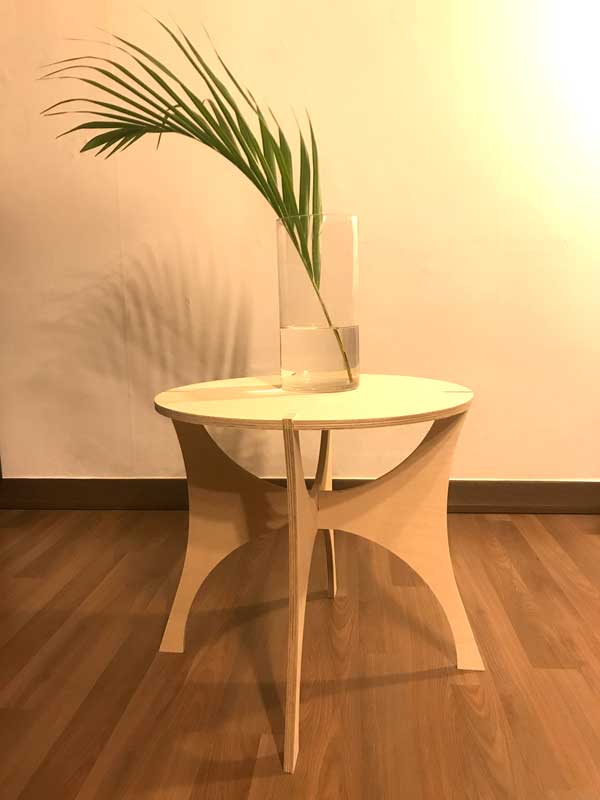 With leftover wood, I even got in a small table.