For the wildcard week, I decided to occupy myself with computational origami. Origami is the art of folding paper without cutting or glueing. I tested a couple of origami simulators and pattern generators, with mixed success. I folded some of the patterns and was surprised how sturdy the resulting structures can be.
First, I tried to generate crease patterns for arbitrary shapes, with the use of Software written by Tomohiro Tachi. However, I encountered two problems: first, the programs did not run well on my linux machine. Second, for the few models that I managed to get a pattern, the resulting pattern was quite complex and I (as an origami ~novice~ illiterate) could not fold it. Then, I stumbled upon Erik Demaine's maze folder, which can generate patterns for "everything square", that is, everything that can be represented by walls on a square grid. Finally, I wrote a plugin for Inkscape to create arbitrarily sized kirigami honeycomb patterns, and folded one after preprocessing the paper with our laser cutter.
Freeform Origami on Ubuntu 18.04
I used Tomohiro Tachi's Freeform Origami software. Unfortunately, it is not available for linux; I had to install WINE to get it running. These instructions are for Ubuntu 18.04. They may work for other linux versions, but I didn't try that.
First, add 32-bit architecture support:
$ sudo dpkg --add-architecture i386
Then, I installed Play On Linux, a graphical frontend for Wine:
sudo apt update
sudo apt install playonlinux
This installs Wine for both 32-bit and 64-bit systems. Play On Linux can now be found in the applications menu.
Simulating Paper Folding Online
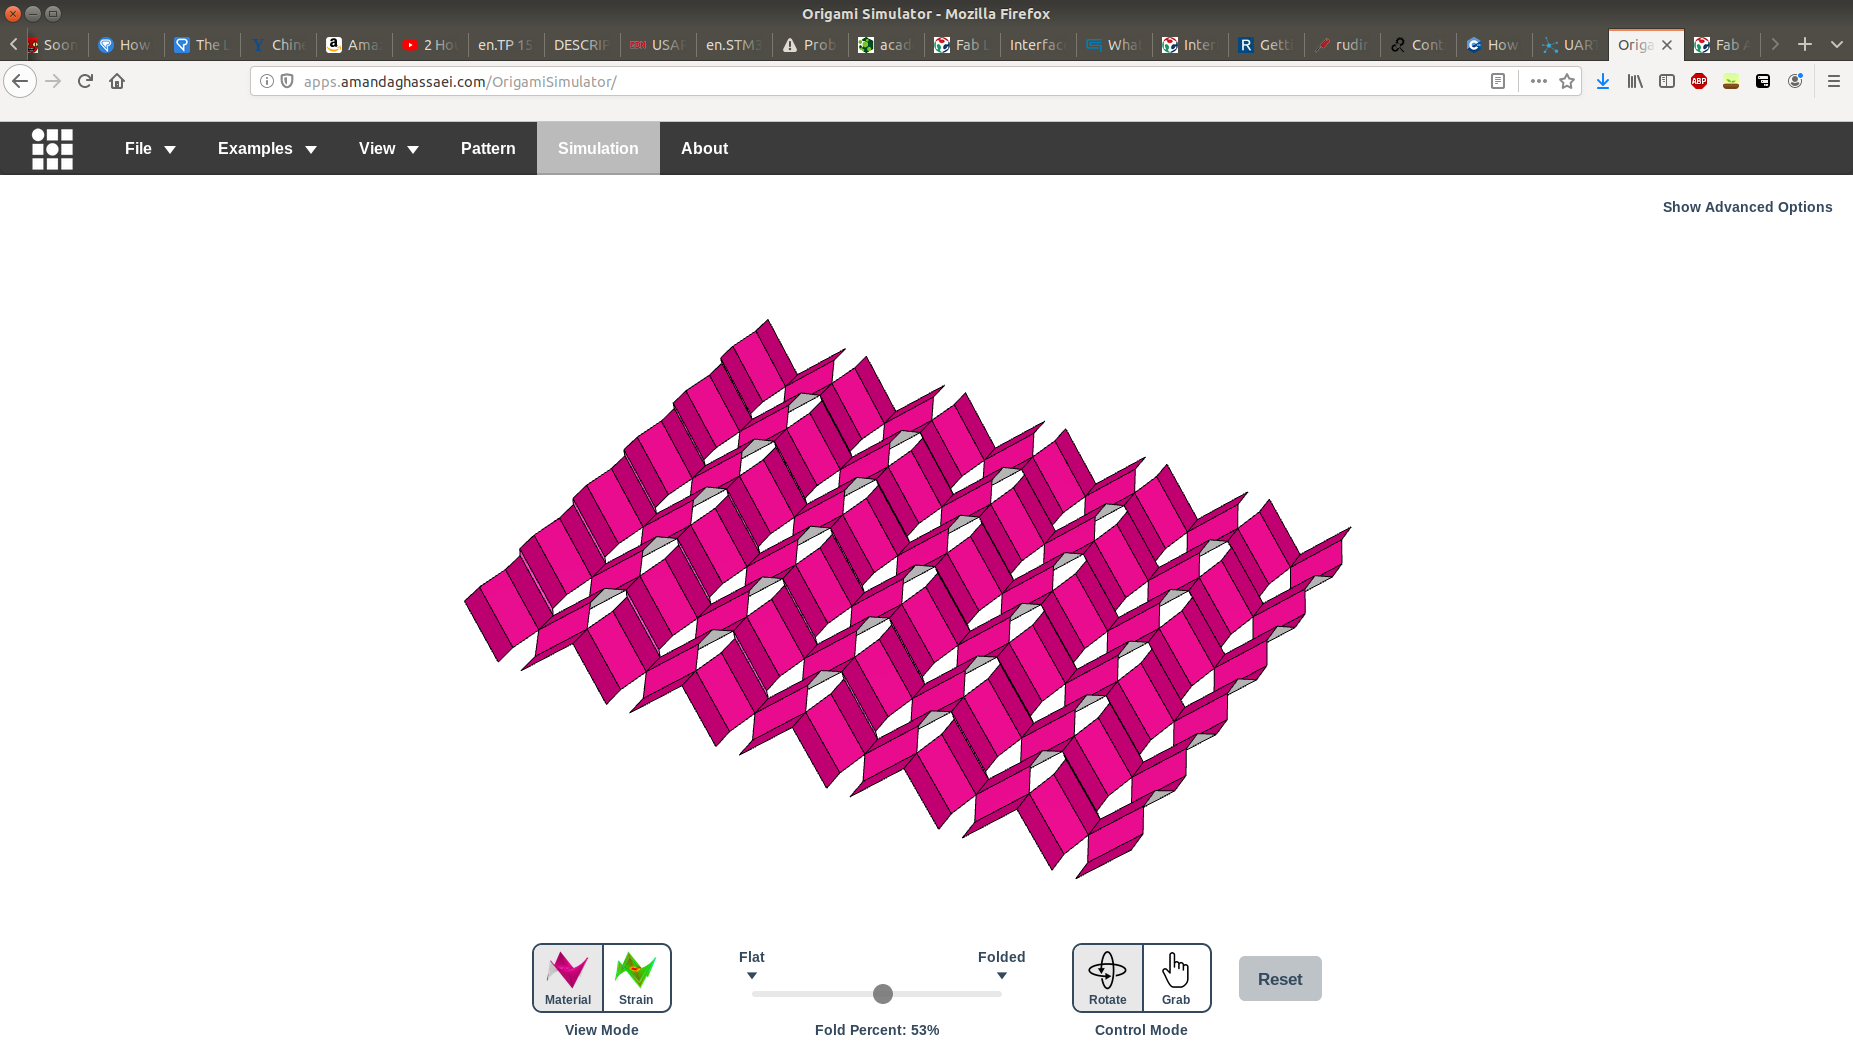
In contrast to my first effort, I stumbled upon an online origami simulator. Here, one can upload a crease pattern and simulate how it will fold. There are also a couple of examples available, which are quite interesting to study.
Folding a Maze
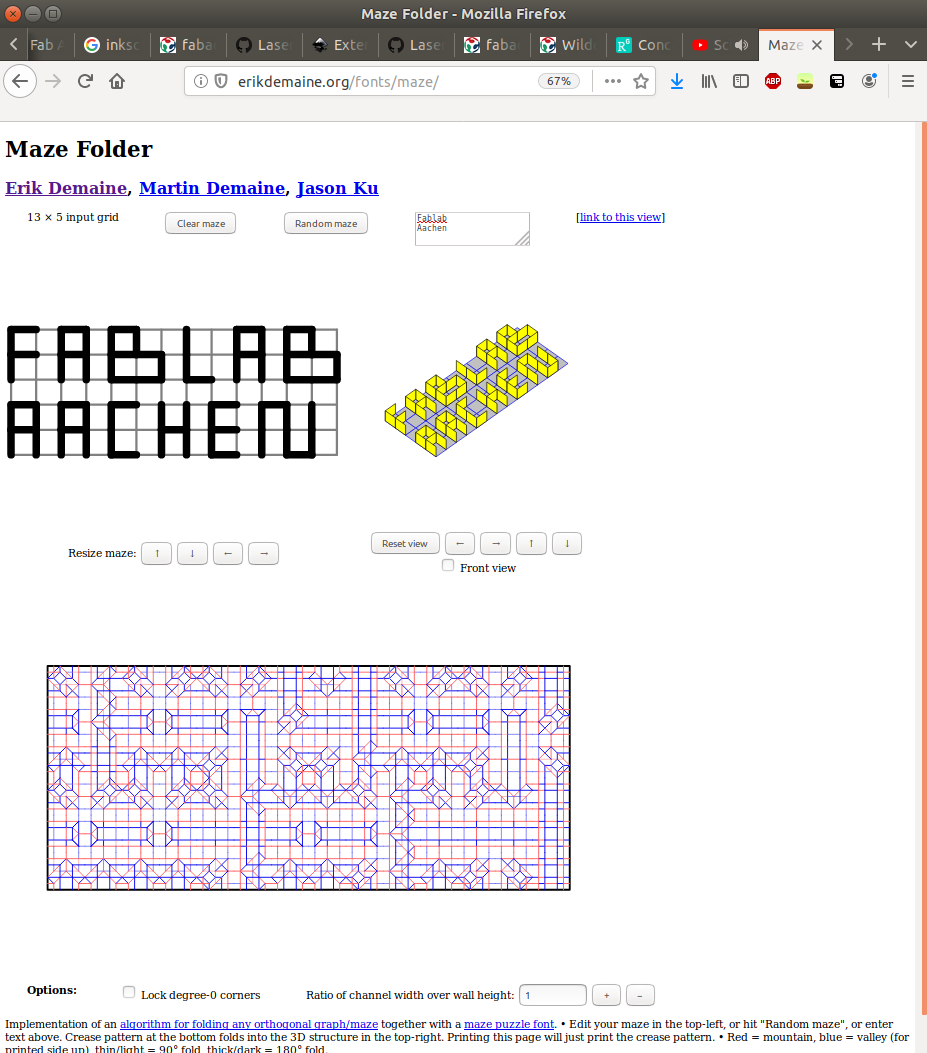
As I am not very good at origami myself, I printed out a simple pattern generated with the maze folder. The online generator is simple to use: just type some text in the text box, and the pattern below is updated so that the folded maze displays the given text.
Initially, I wanted a maze that said "Fab Lab Aachen" (or something similar), but the resulting pattern was too complex. So I generated a simpler one. When folded correctly, it should turn into a "maze" with four squares surrounded by walls and a single wall pointing into the middle. Folding was hard for me, because I had to figure which folds to fold first, and I had no clue on "usual tricks" that might have been used in the pattern. However, it turned out quite well, and the structure is quite sturdy, even though it is made out of thin paper.
Inkscape Plugin for Kirigami Honeycomb Pattern
I wrote an Inkscape plugin to create crease patterns for the Kirigami Honeycomb pattern. Contrary to Origami, one is allowed to make cuts in Kirigami. The honeycomb pattern turns a flat sheet of paper into a rigid net of vertical hexagons. The plugin consists of a python script and a file describing user definable options to inkscape; both can be found in the downloads section. The python script generates svg code that is appended to the current document; fortunately, I was able reuse the actual svg code generation from Leon's script. Since the honeycomb pattern itself rather simple (all shapes are rectangular), the code was straightforward to write.
To use the plugin, locate your user extensions folder via Edit -> Preferences -> System and paste both the python script and the description file in there.
Inkscape should load the extension at the next startup, and you can find it under Extenstions -> Kirigami -> Honeycomb Pattern....
Using the Laser Cutter for Precreasing
Folding large and complex patterns correctly is hard. Often, one tries to make folding easier by creasing all lines at least once before actually folding the whole pattern. However, this is quite time consuming, and not very fun. Using a laser cutter, or even better a vinyl cutter, one can remove a little material from the paper on the lines that need to be fold, thereby making the creases easier to fold.
I used 200g/m² paper and set our laser cutter, a 30W Epilog Zing to 20% power, 100% speed, 500 DPI for making cuts, and 4% power, 100% speed, 550 DPI for marking the crease pattern. The resulting pattern is much easier to fold than unmarked paper.


