Final Project
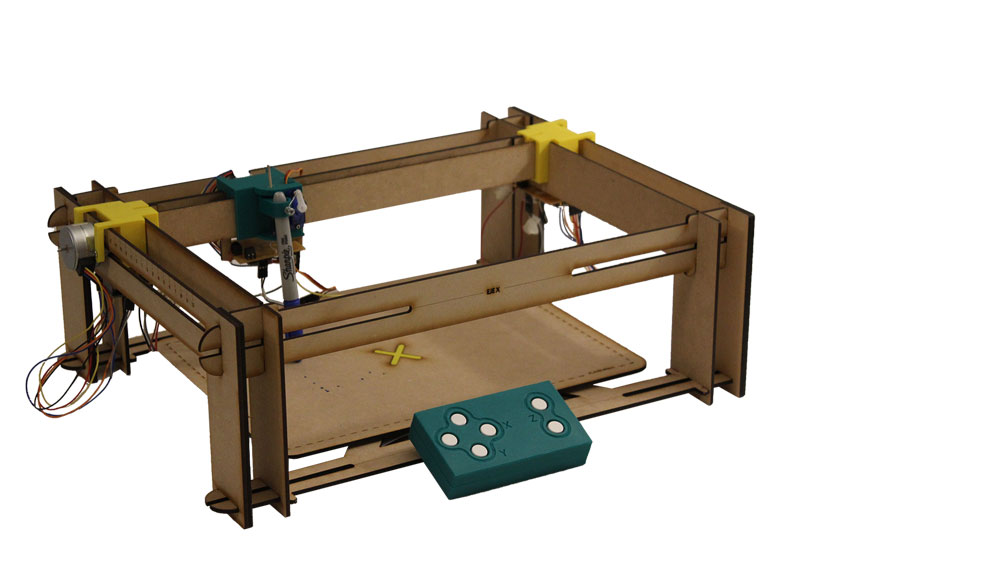
EDUCATIONAL CNC MACHINE
summary slide

summary video
FAB ACADEMY_EDUCATIONAL CNC MACHINE_PILAR BOLUMBURU from Pilar Bolumburu on Vimeo.
-Pre-development no-digital machine-
The idea of this machine born a few years ago from a necessity I observe in several workshops and talks of digital fabrication that I had done to kids. Where the kids were very excited about 3D printing, but just about printing anecdotic objects, like a case to the cellphone or little toys. I wanted they could understand that a CNC machine is a fantastic tool to fabricate whatever you want, not just plastic, you can use infinite materials, with different devices to make infinite solutions to necessities they had.
That why I developed a year ago, the abstraction of a CNC machine in just laser cut MDF that you can assemble and a 3D printed extruder where you can collect a syringe to extrude sand and glue.
These are some pictures of that workshop:


The kids could assemble the Tiny-CNC and understand how it works, and then they could understand the principles behind the desktop 3D printer that was working in the classroom.
After that workshop, I continue developing the idea, increase the scale of the machine. My plan was developing different extruders that could be exchangeable depending on what you were working. Also, this aloud to the kids to experiment creating their extruder for the CNC machine. I give a workshop of this machines on Fab13, where all the participants could build their extruder for the devices.(images)


This is a timeline of the evolving of the project:


Timeline of the evolving of adhesion extruder:


Timeline of the evolving of adhesion extruder:


Wire cutter extruder:


Last few months I had focused on developing a better way to assemble the machine, to make it easier to understand, more stable and more adaptable to future extruders.
So, these are the details of the last version of the analogue machine:
Analogue Machine for Education from Pilar Bolumburu on Vimeo.
-Educational CNC Machine-
Even the no-digital machine project is meant to keep analogue; I decide to make 2.0 version. In this version, where you can hack the same machine to be controlled by steppers and aloud kids to manage and understand the machine even more.
First, I want the machine still be very cheap an easy to fabricate. So I try that most of the framework was on laser cut MDF, some pieces in 3D printing, and inputs/outputs devices.
The Educational CNC Machine will:
Educational goals:
- Evidences the logic of operation of the CNC technology.
- Children can easily understand how it works and how to handle the machine.
- Allows and facilitate the customization of the extruders.
Technical goals:
- Steppers controlled by buttons automatize the X and Y axis.
- Mini Servo controlled by button automatize the Z axis.
- The extruder is interchangeable*.
- The machine is cheap and easy to fabricate.
*In the analogue version the machine has interchangeable extruders, but the final project is just going to had one extruder automatized by a micro servo. I going to develop an interchangeable & automatized extruder in the future of the project.
2D & 3D DESIGN
For 2D & 3D Design you should check Mechanical & Machine Assignment, there I explain all the process of development of the frame and axis of the machine.
The frame of 3mm MDF was designed in 2D in Rhinoceros, also the pincers that attach the board to the axis.
I use also Rhinoceros for the 3D Design, for:
- Y-axis
- X & Z-axis
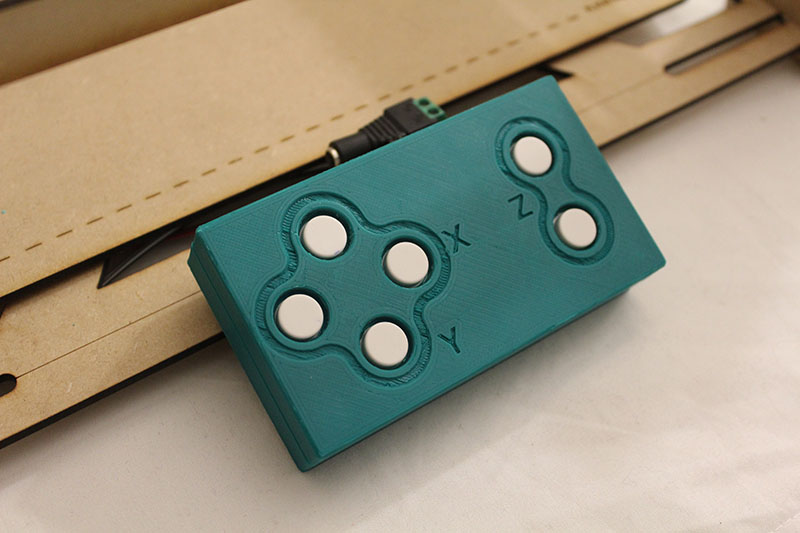
- Button interface
- Pieces that support the platform.


ADDITIVE & SUBSTRACTIVE FABRICATION PROCESSES
For fabrication, you should also check Mechanical & Machine Assignment, there you can see the detail where I fabricate my Educational CNC Machine.
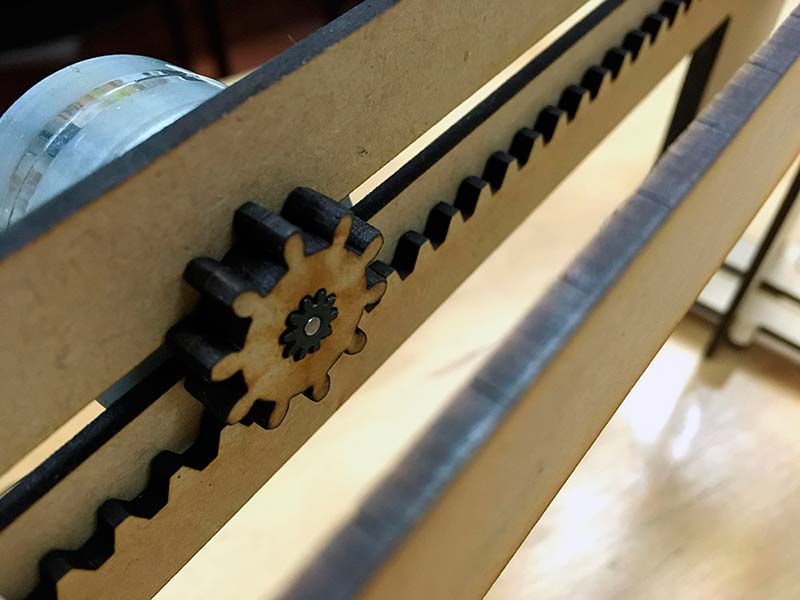
For the frame and pincers, I cut them in the laser cutter. And for the axis and pieces on 3D, I printed in ABS in a 3DWOX DP 200. I choose ABS because the axis and the extruder need it to be more resistance to the use they were going to have. They needed to take more than what the same piece of PLA would normally hold.

ELECTRONIC DESIGN & PRODUCTION
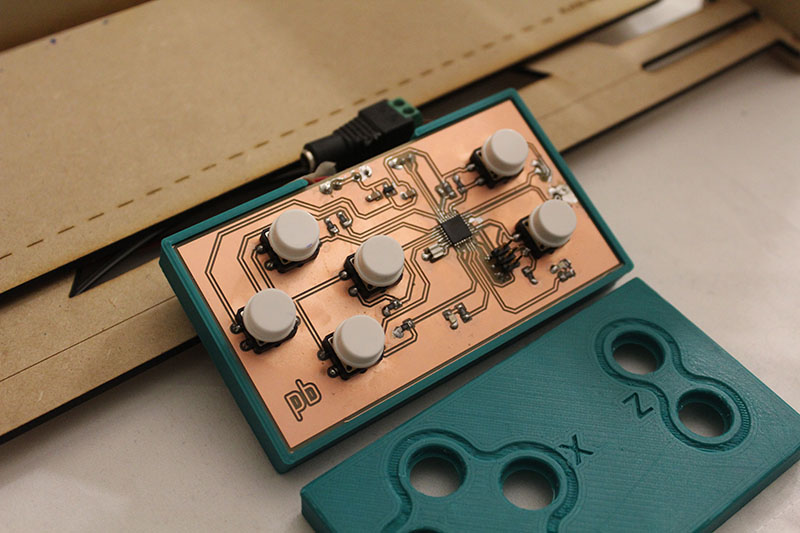
For review the electronic design and the production of it you need to visit my Networking Assignment, there you can read about the develop of the my main and node boards for the control of the Educational CNC Machine.
The main board control through buttons the movement of the axis, and the node boards had attached the steppers for the mechanisms of movement and the micro servo for the Z-axis.

MICROCONTROLLER INTERFACING & PROGRAMMING
This also can be found in the Networking Assignment, were I first prototype the connections and the code with an Arduino Nano. For the code I use Arduino IDE, which was very helpful because there's a lot of information how to control steppers and servos, also I could find all the library I need it. Because I use an atmega328P microcontroller, I had no problems with the weight of the code with the libraries.

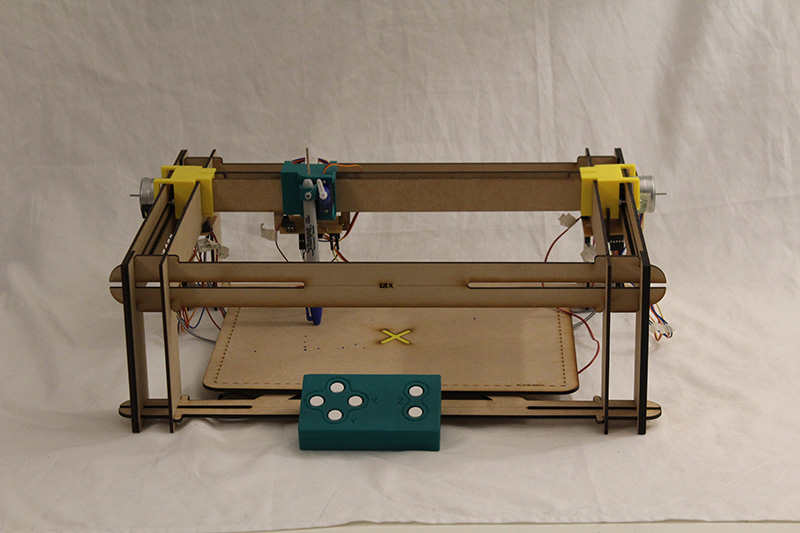
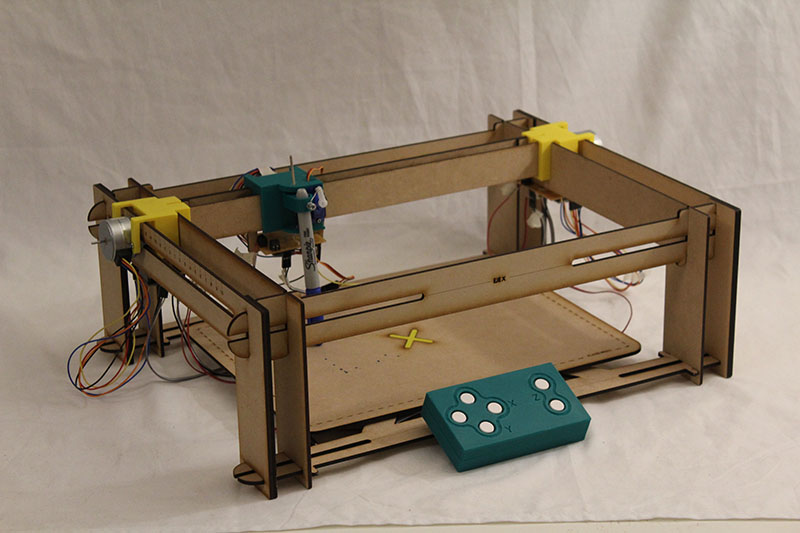
SYSTEM INTEGRATION & PACKAGING
For this, you should visit my Mechanical & Machine Assignment, where is all the final project design, fabrication and integration explained.
CONCLUSIONS AND FUTURE WORK
Power Supply: One of the main problems that I had were the power supply of the machine, which makes me realize that is very important to think since the beginning of the project the power needs of every component.
I have a real hard time trying to understand why the micro servo wasn't working, and at the end was that the 5V regulator that I add in the boards deliver less current than the micro servo need it (micro servo need 550 mA, and the resistor deliver 100mA*SOT 23-3 5V).
That's why, for this version, I connect the micro servo individually to a 5V power supply. I power the steppers through the main board with 3 batteries of 9V in parallel (to triple the capacity but not the voltage).
Movement: Improve the control of the movement of the axis, and replace the buttons with potentiometers for a more accurate control of the device. Also, add "end stops" to the machine.
Mechanism: I want to improve the mechanism of rack and pinion. Now both are on MDF, but maybe if the pinion is cut in acrylic or 3D printed or could be more accurate if this mechanism is fabricated in different materials.
Interface:Finally, Improve the interface to be more kid-friendly. I already work on that for this project. That's why, for example, every 3D piece is yellow except the Z-axis (that is green), I also add the measurements on centimetres in the frame of the machine and the name of the parts of the machine (platform, axis, etc.). Now I have to integrate the wires to the design. And I want to test it with children and improve it.
Files
Download Design Fabrication files (2D and 3D)
Download Electronic boards (png and eagle files)
Download Code Main Board Files
Download Code Node Board Files

Este obra está bajo una licencia de Creative Commons Reconocimiento-NoComercial-CompartirIgual 4.0 Internacional.