
Claudia Aguilar
FAB ACADEMY 2015

3D PRINTING
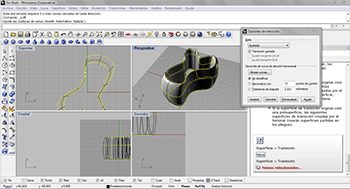
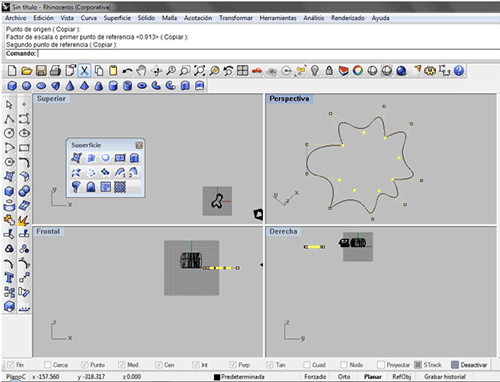
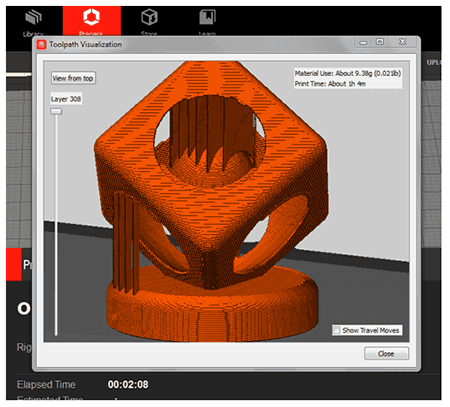
For this assignment I think alot about what to design and as I haven found anithing so functional for me to make I desided to create a shape that put in to prube the capabilities of what 3D print can get. At first I tried with Rhinoceros bus as I don't know that wel the program I wasn´t satisfy with the resoults.
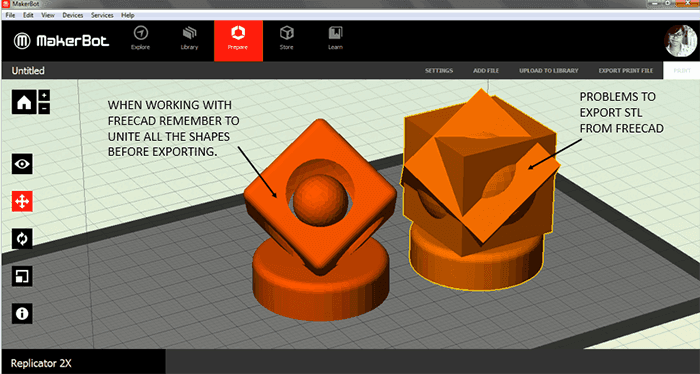
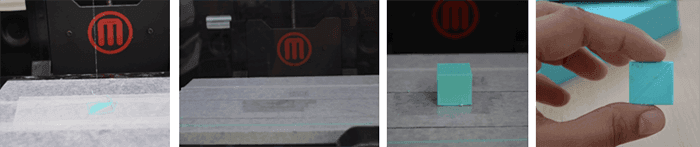
So for this I designed a simple sape created by cubes and circumference using diferent criterials thinking about the way the makerbots funcion.
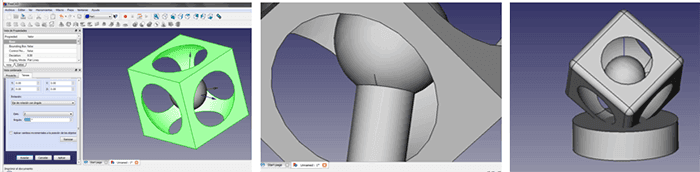
This design contains one element inside an other, it doesn't have strong angles, everything is contiguous and round. What I'm tying to show with this is the capability of designing weird shapes without having to use supports by the time of printing or previously contemplating what's necessary for it to come out fine.
You can download the STL file in here
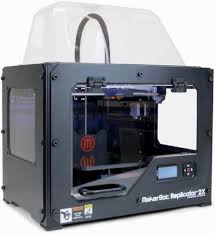
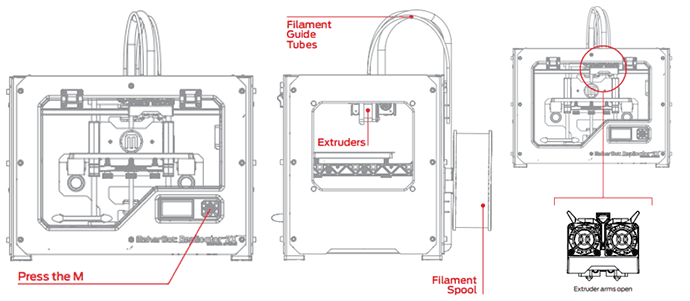
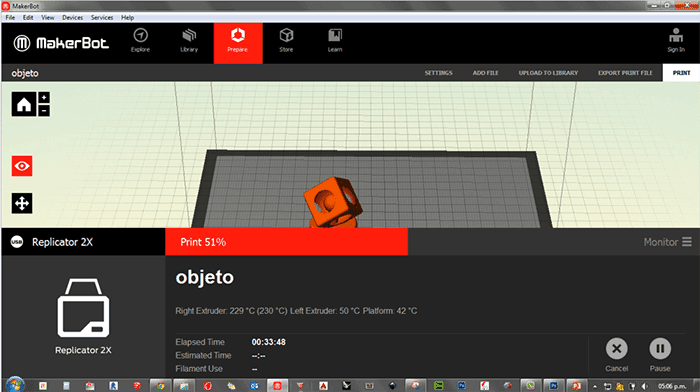
For this assignment I'm using the Makerbot Replicator 2X whith.
In this case, at the moment of making the STL file I had a problem, when I imported the file on the Makerbot Software it showed some shapes I used but I had taken off with boolean equations. What happened was that I didn't unite the final volume on FreeCAD so it exported all the shapes used. I unite the shapes of the model and exported it again and everything went fine.
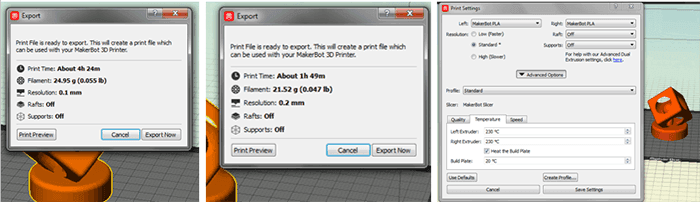
Once having imported the file into Makerbot software I started trying with the standard parameters to see how it turned up with each of them and what changed between them. The most important factor is the time, it could change from one hour to four between standard and high definition.
Considering I'm working with ABS and the facility it has to have a finish by using acetona wash I rather have standard or low quality printed models in a short amount of time.
After checking the parameters I started my printing/failing process as the first four times I tried to print failed.
The principal reason of the printing fails was the bond to the base of the Makerbot. I have worked before with a 5th Generation Makerbot which prints with PLA material. In this case working with ABS the base of the Makerbot has to be also hot, so watching the behavior of the material in the base I assume its lack of adherence was because of the bases temperature factor, so I started changing it and notice little changes.
Some of the people in the FAB LAB started telling me different hypotheses about it and told me to use different tapes for the base, even using glue or double sided tape. I've tried changing the bases tape and also by leveling the plate tree times in a road but even like this it didn't work.
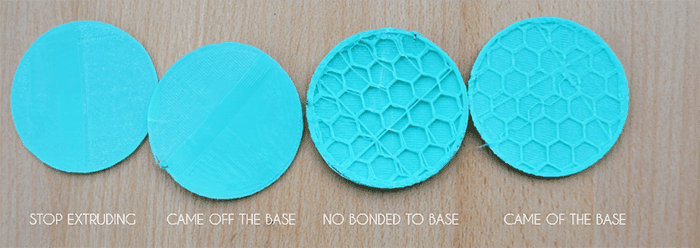
As a last try I use the double sided tape which made me also change the bases temperature factor down and as the files chargin time was taking so long I jus made a simple cube to see if it worked and it did.
Under my experience, everytime I printed, the left extruder of the Makerbot Replicator 2X interfered with the material the Right extrude was printing.
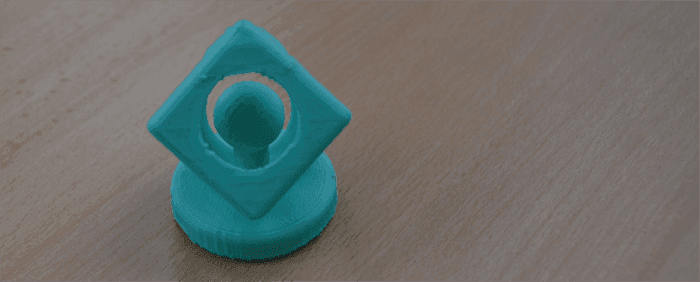

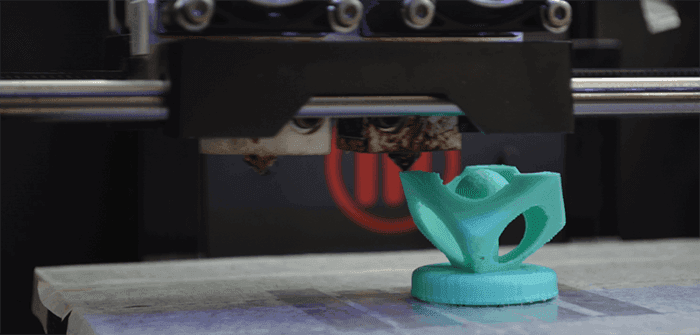
Finally having my printed object I could analize if the 3D printer suported the design I made without suports and it did, having small problems but at the end it's acceptable. Then I try turning on the suports in the Makerbot's software.
Everithing was printing good but there was an error on my pc and the print stoped. Then I tryed again and the problems with the base started again, after the second try it started to print good again.
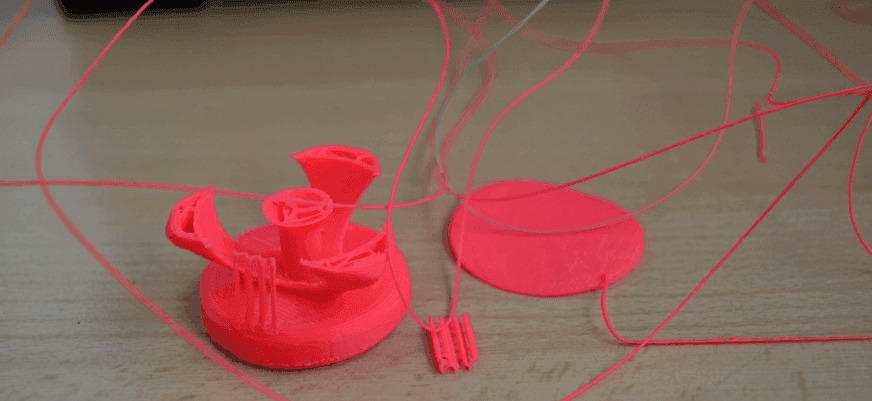

Once having my second 3D printed model I can tell I wouldn't change the first without suports for the seccond one.
I also printed the "Divino Salvador del Mundo" monument, the most important monument of my country. I did the 3D model for the Week 3 Assignment.
THINGIVERSE
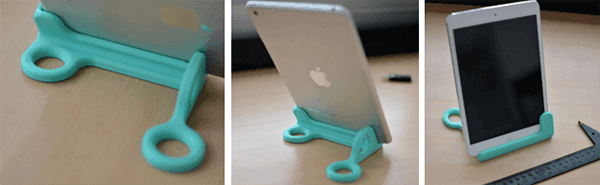
Actually before printing and designing my objet I downloaded one thin I needed for mi iPad mini, this allowed me to se the Makerbot working and understanding it better.
I downloaded the file prom the Thingiverse webpage, it has a big amount of files were you can share and find 3D printable projeccts.
You can download this model in here

3D SCANNING
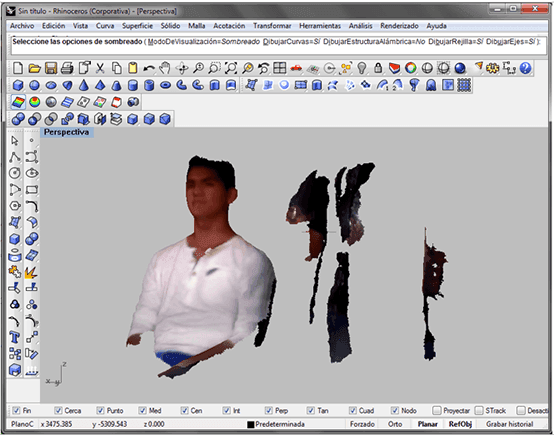
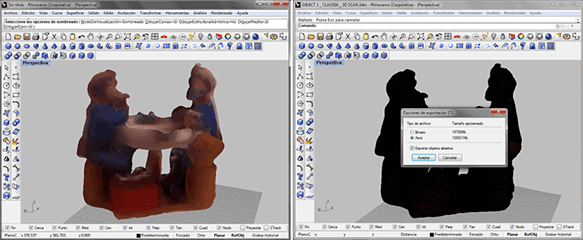
For this assignmen I use 3D Sense for scaning an object. At first I tried scanning a friend but I exported the project without enhacing it in the software so I didn't get a closed 3D object. I couldn't edit it again so I started over again with a new objecct this time.
Video tutorial of how to use 3D Sense
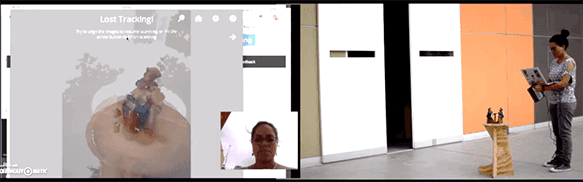
I notice it wasn't as easy as the 3D Sense publicity said, so I film myself wile scanning a small object to record my reactions and also the time it took me to do it. It lastet 20 minutes for me to finaly scan the object the best way posible.
This is the object I scanned.

This is the scanned object considered a "Medium" object.
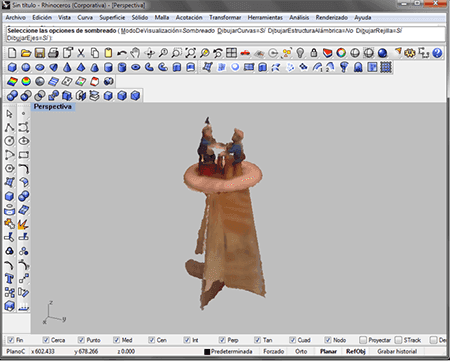
This is the scanned object considered a "Small" object. As you can se the Scanner doesn't take into acount the bench. In this case I did enhace the object and also fix some troubles.
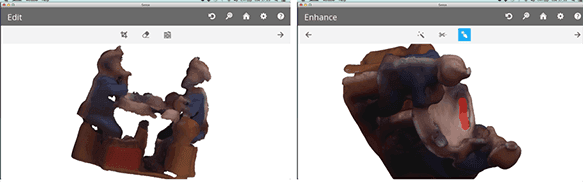
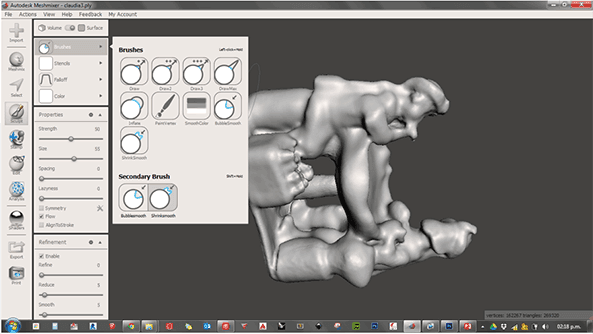
After exporting the Scanned file I open it on Rhino but I'm not good with it so I frustated and change to Autodesk Meshmixer.
Here is an image of Autodesk Meshmixer's editor interfase.
Here is a video of the process it took me to 3D scan a small object with 3D Sense. It was recorded in 20 minutes.
With this experience I can only say that it isn't as easy as it looks in the publicity of the 3D Sense scan, it's actually pretty uncomfortable to have to be carrying the Laptop around the object to scan it and it also limatates you to have to use a tablet or a small Laptop to do it or just not doing it by yourself but with someone else carrying the equipment for you. For this instance it becomes difficult to keep track of the object you're scanning because you have to be aware of the image in the computer and also the live object.
You can download this scanned object in here
Here you can see more pictures of my process
I've also try Scanning with 123D Catch, and the most recurrent problem I've had with this is loading the files. For this I searched and found this video Tutorial and after taking its recommendations all my process has improved
Click here to see this class content
Click here to see this class recorded video