Claudia Aguilar
FAB ACADEMY 2015

STEP ONE: GETTING TO KNOW THE EQUIPMENT
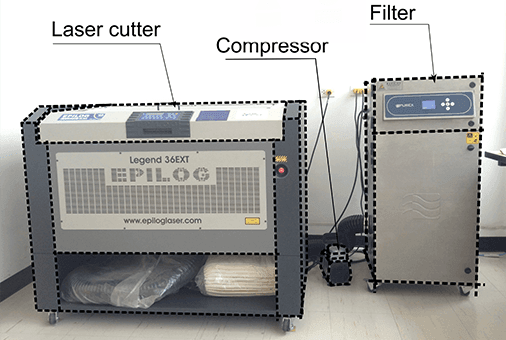
To begin with this weeks assignment, I started by helping cutting some projects from Vaneza Caycho a former student of FAB ACADEMY on 2014. This activity help me understanding how the machine works and also how to send to cut by myself. Next you can see the equipment I'm using in Fab Lab Tecsup
To practice I Took a material that didn't had a standard parameter to cut in that way I could generate them by trying.

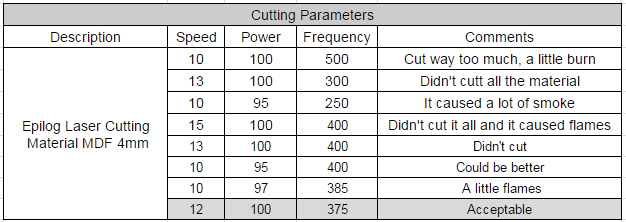

It was very useful for my to use a Sharpie and put a number immediately the piece was out of the Laser Cutter and in that way I never forget which piece was from which test.
After finishing this cuts I noticed that this material is harder to work with because it expands with the weather humidity because even havIing tested the parameters and having decided one that worked well I try to cut, the same material a couple of hours later and it didn't work because of the material expansion.
By this time I was so mad that I took the material outside the Laser cutter room which has air conditioned and left it outside the Fab Lab under the direct sunlight for a couple of hours and then I try again and it finally worked.
STEP TWO: DESIGN SOMETHING
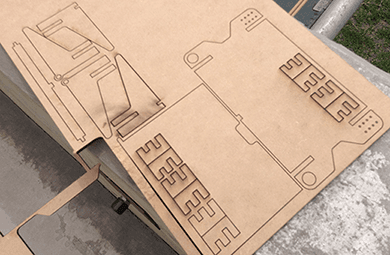
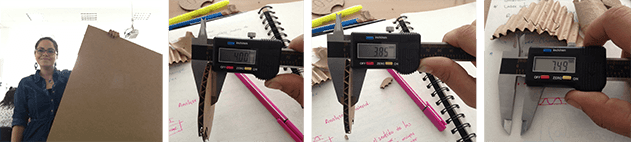
To start a design I procure to know which material I'll be working with to have it as a consideration, in this case I'm working with cardboard so I took the time to analyze it to then calculate opening parameters.
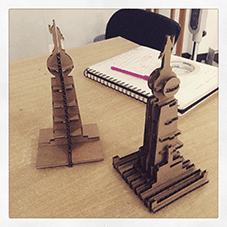
Like I mentioned in my homepage I'm trying to represent in my projects elements from my culture or my country and trying to make something symbolic of my country that doesn't exist I decided to take first of all the “Divino Salvador del Mundo” which translates The Divine Savior of the World which is our “patron saint”. For my country It is as symbolic as the statue of liberty for the United States and I didn't found it in a 3D model, so I decided making it and sharing it on Thingiverse and that way anybody can download it and 3D print it.
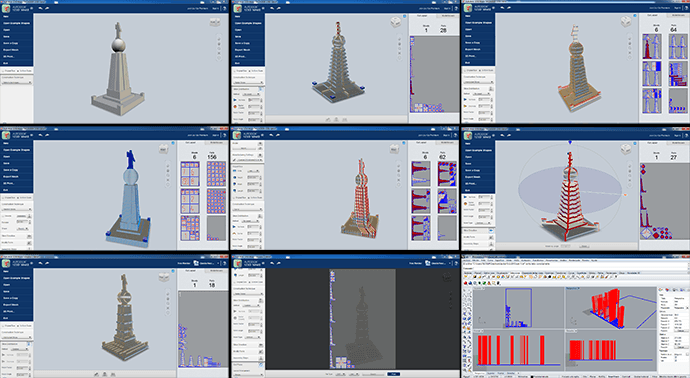
Once decided the two designs I wanted to try I prepare the files to print by changing each piece position in Rhino so I can use the material in the best way possible. Working this assignment with 123D Make was Fun and easy, I reali recomend it.
You can download this 3D model in here.
STEP TREE: SET AND CUT
The material we had to work with was bigger than the work space in the Laser cutter, so at first I cut it so it would fit perfectly.
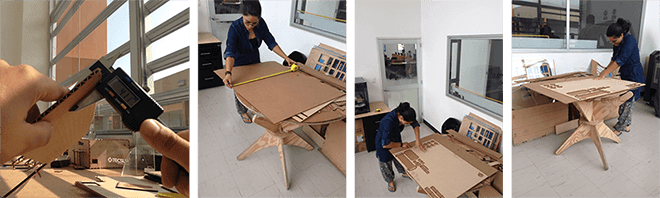

As I planned I used well the space of the cardboard which allowed me to keep making more tries.
You can download the cutting files here
STEP FOUR: ASSEMBLE
This is the funniest part of all, got to unite all the pieces and see if they all fit. I had no problem with the first prototype but with the second I did, because it had more pieces it was harder to assemble because of the small openings which made me realize that if you are working with a little quantities of openings it fine to use an exact size but if you are working with lots of openings its better to make them a little bigger to make the assemble easier.
VINYL CUTTING
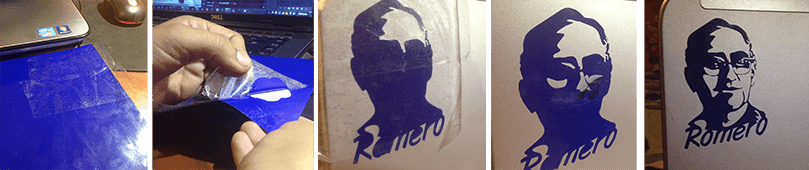
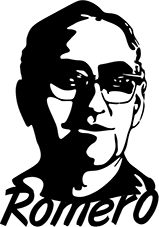
I wouldn't lose the opportunity to use also the vinyl cutter so I decided the the second Icon of my country to make would be “Monseñor Romero” who was a bishop of the Catholic Church in El Salvador, and declared a martyr by Pope Francis on 3 February 2015. I this case I searched the images that exist of him and decided to improve it as the images I found were always sad ones as we Salvadorans have never had the proper justice for his assassination. So I manipulated the most used image of him, vectorise it and manipulated it to make it a more positive facial expression. Having done it I printed it on de milling machine and pasted it on my computer.


You can download this files here
Here you can see more pictures of the process.
Click here to see this class content
Click here to see this class recorded video