
Claudia Aguilar
FAB ACADEMY 2015

Next you’ll see a compilation of all the work it took to create my Final Project “Torito Pinto Cart”, I’m happy to have completed all the tasks I planned for this as a prototype but now it’s on me to improve it more generating a box to hide all the electronic components and maybe searching for standard axis and wheels to change the ones I designed because it will be more durable for future use.
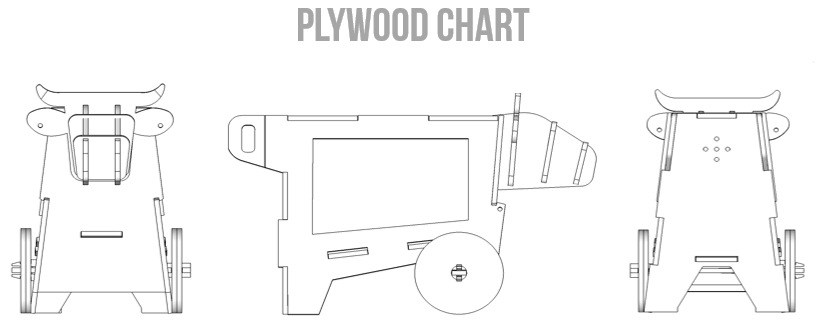
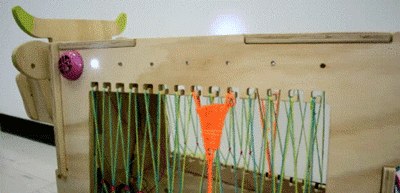
The principal component of my project is a plywood cart in shape of a small bull which has wheels and can be use for storage. It’s first design was made on the assignment “Something big” and this has been improved from the mistakes committed in that time besides making the necessary changes to implement all the electronics on it.
The cart has been 3D designed in Sketchup and I exported all the pieces together to AutoCAD to change positions and add some small details that depend only upon the material selected which in this case is a 12mm Plywood.
You can download the 2D cutting files in here.
You can download the 3D Sketchup files in here.
If it is useful for you, you can download here. the Pathworks files to cutt in Shopbot.
I'll have to say that for the design improvement I did lots of new test with laser cutting and that way I got the best shape so I didn't had to make more test in a big scale. And I also got lots of Toritos in a small size to give away.
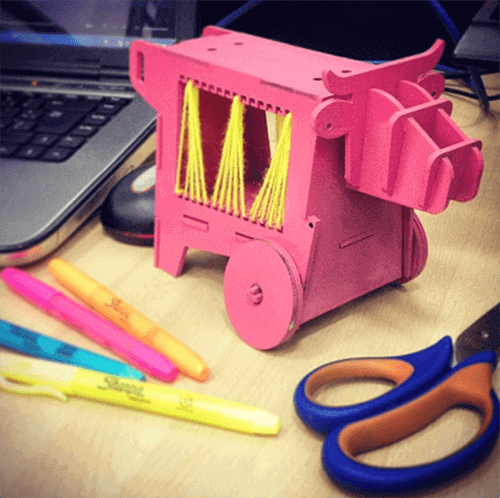
As usual the first big scale test are with the Torito head, this way I find out whats the best tolerance to use and go back to the 2D file to adjust whats necessary.
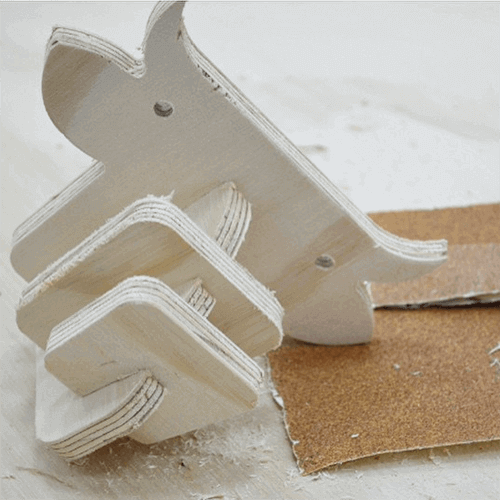
For this production I use the same parameters and process than week 8 and cut the pieces also in a Shopbot CNC, the only difficulty I had was that the material wasn’t as neat as the first time and it made me take a little longer than expected to have a good assembly of every part. The first time worked fine with a 1mm tolerance but in this time because of the material it worked sometimes and some other not so I had to sand it more.

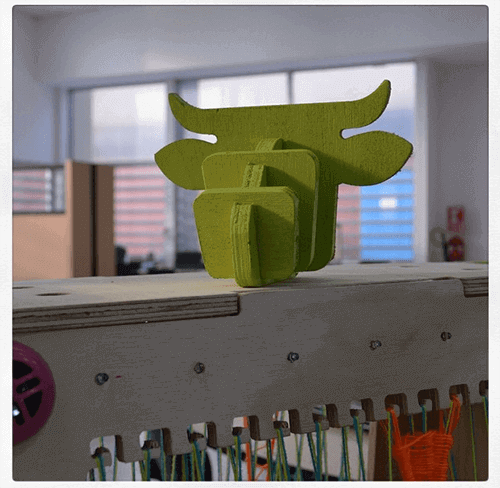
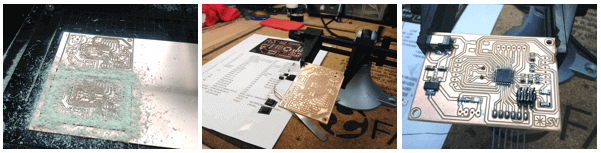
You can see below more images of the cart production process.
.
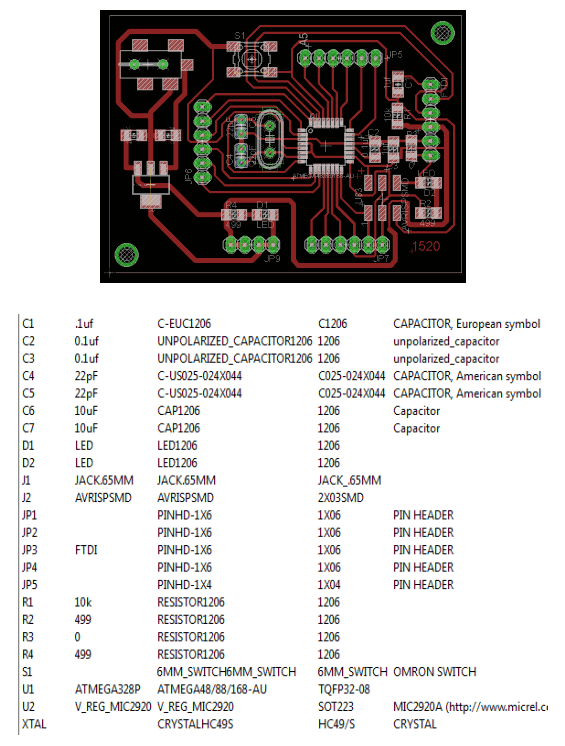
As I mention on the week 15 , for this project I'm using a Fabduino that is a Fab Lab produced Arduino which in this case has been improved for different students from past Academies in Tecsup laboratory especially José de los Ríos and Roberto Delgado.
By this time I'm actually pretty good soldering PCBs but the Fabduino chip is definitely a challenge, I had to make several tries to finally get a good and functioning one in the 4th or 5th attempt.
You can download the TECSUP FABDUINO files in here.
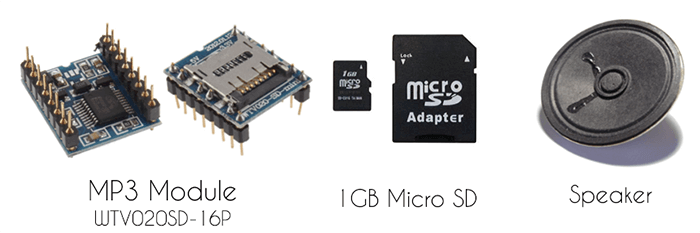
As I mention on the week 15 one of my electronics component is a MP3 Module (WTV020SD-16p) that works with a 1GB SD card or less. This component will allow me to reproduce music
I've never done anything like this before so it's pretty useful for me to find tutorials that explain me what to do. I found this tutorial in www.instructables.com that helped me in a first time but the best one and the one I use the most was this called Example 1- Using WTV020SD-16P music module with Arduino"
Finding the 1GB micro SD memory was a challenge, I thougt I wasn't going to make it, I search in as many stores I could and never find one until I told a friend and he had an old one.
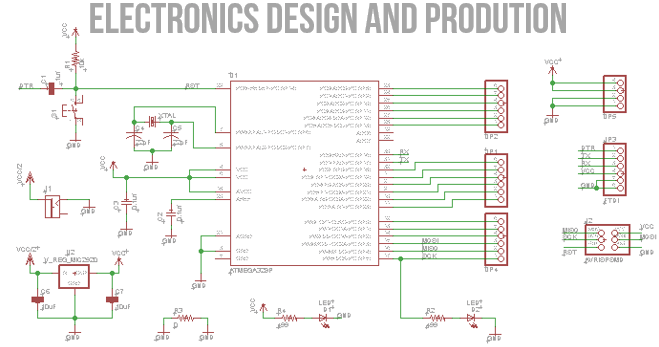
Next you can see a schematic image of the Shield I designed for the FABDUINO so I can adapt all the LEDs I'm using, the speakers, the switch and the sensor together. This was definitely a challenge also because I've never done something like this before but it was actually an enriching process and it helped me allot the supervision of my instructor José de los Ríos who is an electronic engineer and gave me lots of tips that I didn't know to get it.
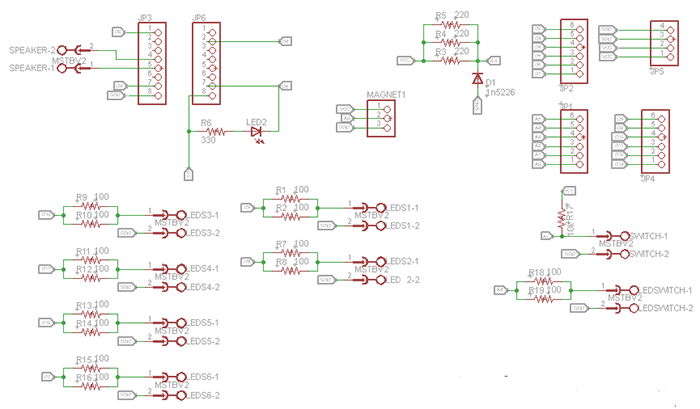
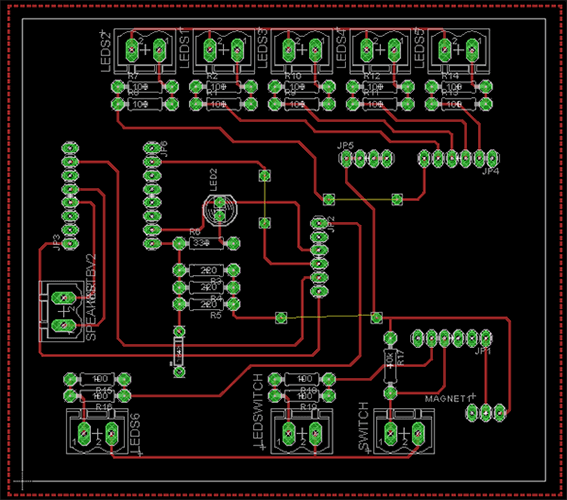
You want to download the FABDUINO SHIELD I designed here are the files.
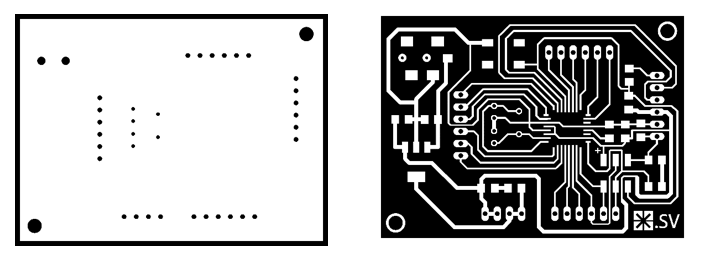
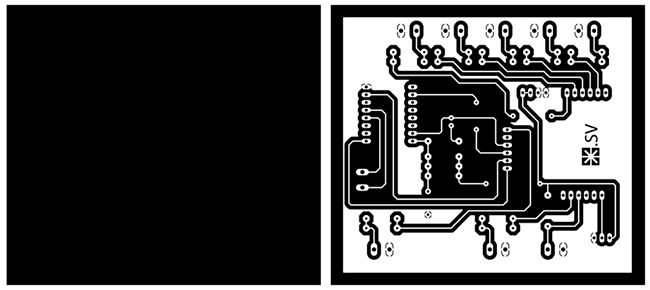
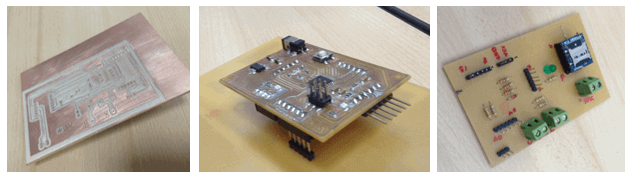
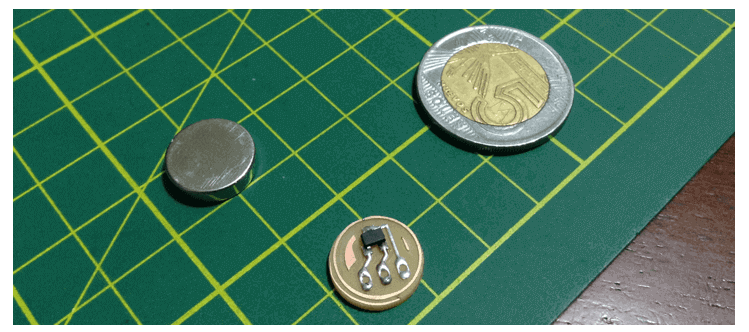
Next thing was to create a small PCB to attach the Hall Effect Sensor to the Toritos Cart. You can see how simple this was just adding the Sensor and three pins that will be wired to the Fabduino.
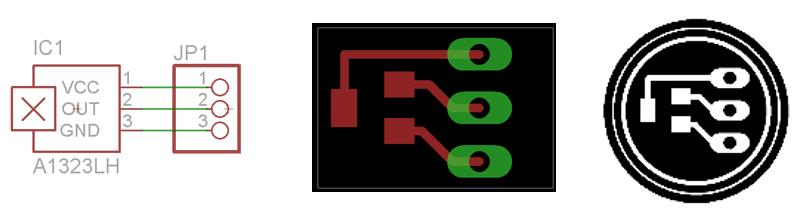
You can download this HALL EFFECT SENSOR files in here.
Once having all the pieces together and all the electronics produced is time to wire all together inside the cart, this was a fun process but it definitely took more time than I expected and also it took more wire than I had calculated.
One thing that was pretty useful for me to keep everything in order was to numerate the leds in the beginning and end of the wire this way I knew where to put it into the cart and also which way to put it in the shield.
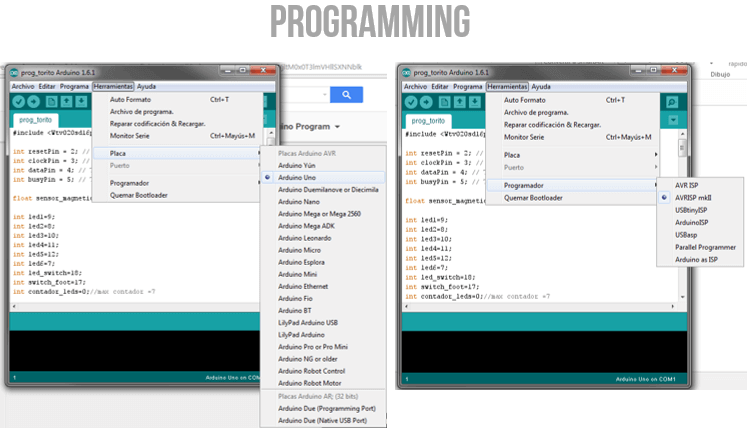
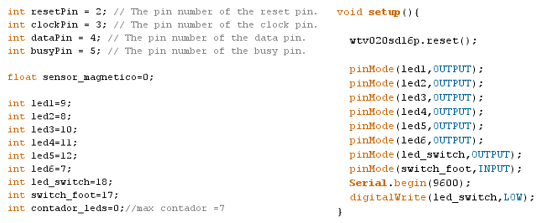
Working with a FABDUINO allowed me to program with Arduino which for my basic level is definitely the one I can use the most and because of the time to finish the project it's the best option to do what I intend to do which is to activate music and sensing when switch is pulled and then when sensore the magnetic field it'll turn the LEDs on a couple at a time and then when they're all on then they'll start going off again a couple at a time.
Once having all toghether and the program file it's time to program the board using it as a Ardiono UNO and using a AVRISP mkII as aprogrammer.
Time to test the censoring and the leds On.
You can download the Arduino programming file in here.
Having finished all my work I got new questions as how can I improve the electronics wireing in the cart? this is a part of the design I wouldn't know until I finished the first prototype, now having it gives me the time to realize more and start again the circle of design / test / improve.
.

.