
Claudia Aguilar
FAB ACADEMY 2015

NETWORKING AND COMMUNICATIONS

For this weeks assignment we have to design and build a wired or wireless network connecting at least two processes. Taking this into account and trying to put into practice the knowledge in electronics I have by this time I'll try to redesign the Hello.Bus changing it to generate a multi purpose board so I can use it for other projects.
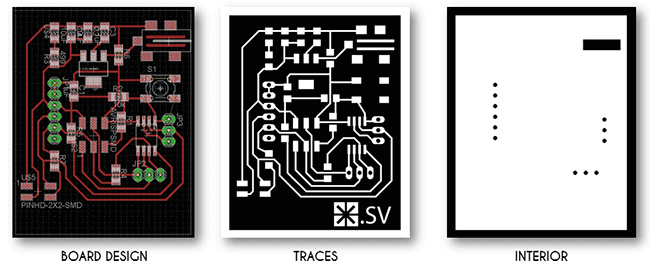
Next you can see an image of the original Board I'll be redesigning.
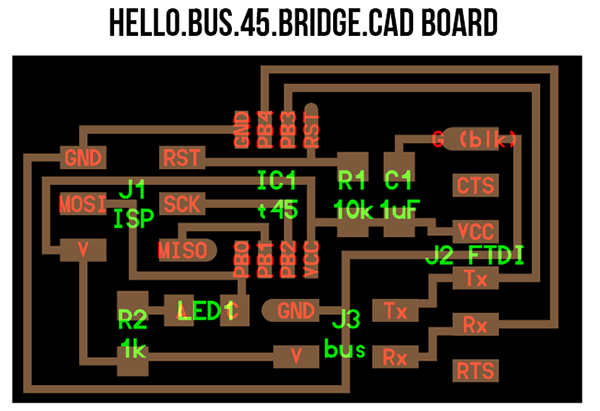
Understanding the components that generate this board I decide to add a Reset button, a Jack for energy and 12 more pins to have the capability to use all the pins from the microcontroller besides using it just for this assignment.
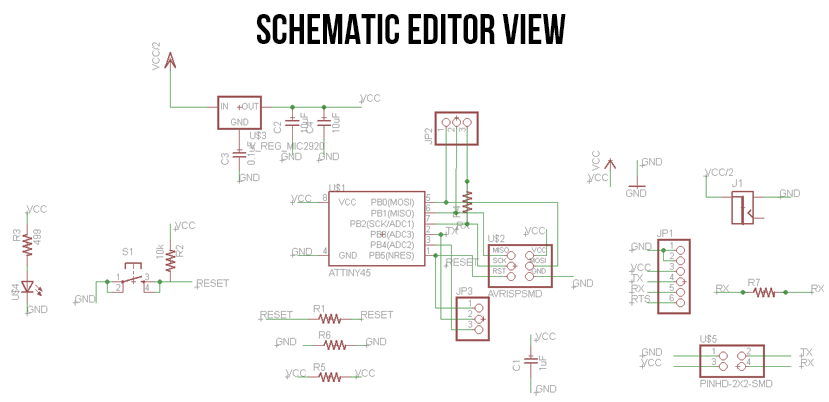
You can see next how my schematic view ended up.
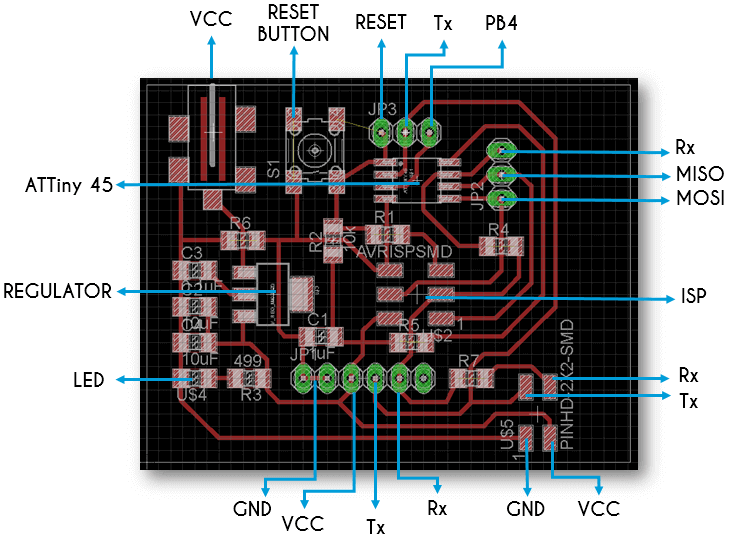
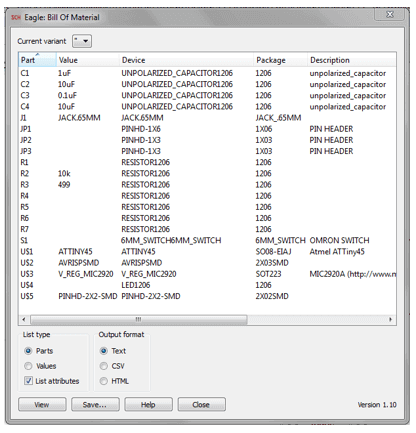
And next you can see the final board and bill of materials.
You can download this Multi Purpose Board design in here.
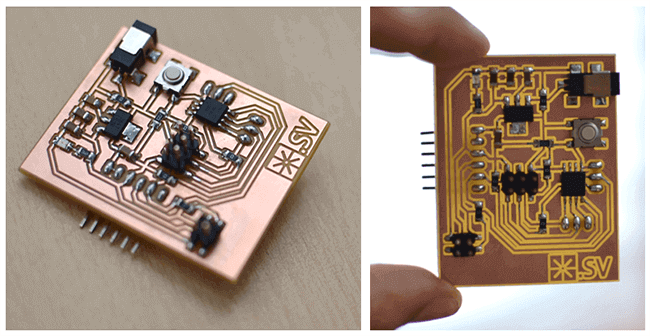
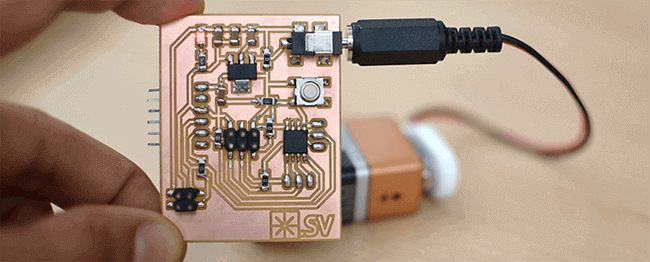
Once having the board finished I noticed there were two crossing paths but lucky me that was easy to fix as I use a cutter to separate them and I could add a zero resistance as a bridge, then connected with the FTDI and everything worked well.
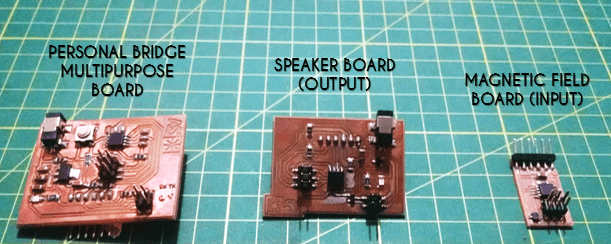
For this assignment I make this Multipurpose board as I want to connect my previous boards all together. The previous boards are the FAb academy's Magnetic sensor and the other one is my redesign for sound output.
Next you can see the image of the boards designs I want to connect together.
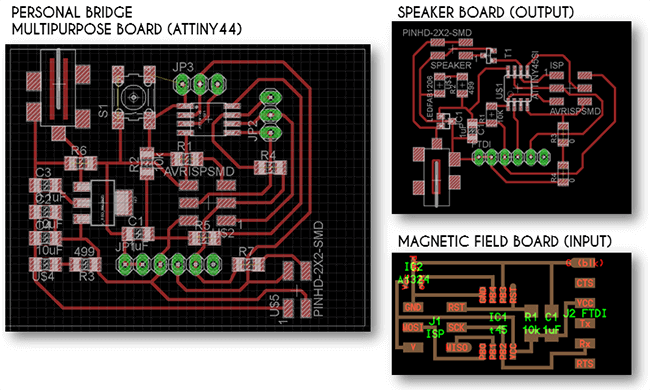
The Speaker board was developed in the Output Assignment and the Magnetic Field Board whas developed in the Input Assignment
I'll have to make a break in here as I conected this three boards and tried to programm them together but I'm having a serious problem bith the Multipurpose Board. I've seen that the programming it's ok but the communication doesn't work, this activity is taking me more time than expected so if I want to finish this assignment I'll have to do something quicker so I'll go back in this time to the standard Academy Node boards and use my Magnetic field board as a bridge.
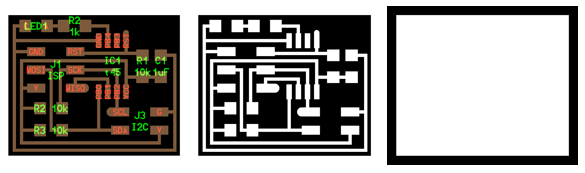
SECOND TRY
Below is the images of the Nodes I'll be using you can download them in here.
Next you can see the new components I'm using for my networking in this second try. This boards are so much easier to soldering.
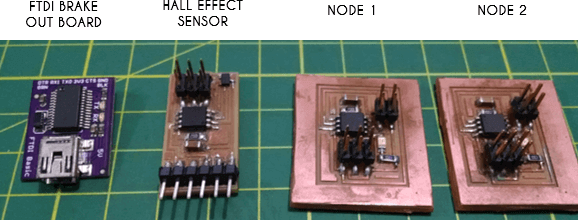
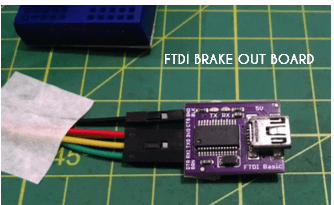
In this time I'm working out of the laboratory so I got a FTDI brakeout board to comunicate with the computer.
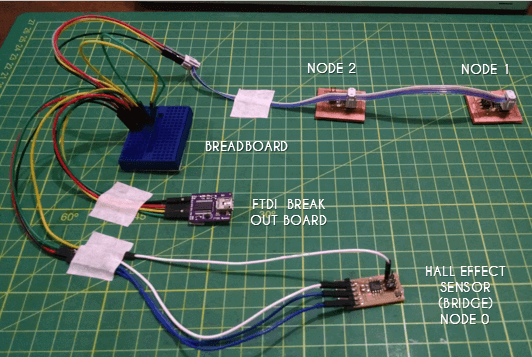
The network use the FTDI board for communications with the "term.py" program provided by Neil, I'm using it only for receiving messages coming from the boards. I've modified the magnetic board program to support the full communication from the bridge and to keep getting data from the hall effect sensor and converting it into a value just as the hello.mag.y does. So when it detects a polarity and goes beyond a threshold it sends a message indicating if it's wether positive polarity or inverse polarity and also sends a character for each of them, this char must arrive to both nodes and flash according the char corresponding to them. It's important to indicate that I crossed both rx and tx connections so a board can speak and listen to itself and other modules
Click here to see this class content
Click here to see this class recorded video