Week 14
Interface and Application Programming
Assignment purpose
This week the assignment was wrote an application that interfaces with an input &/or output device.
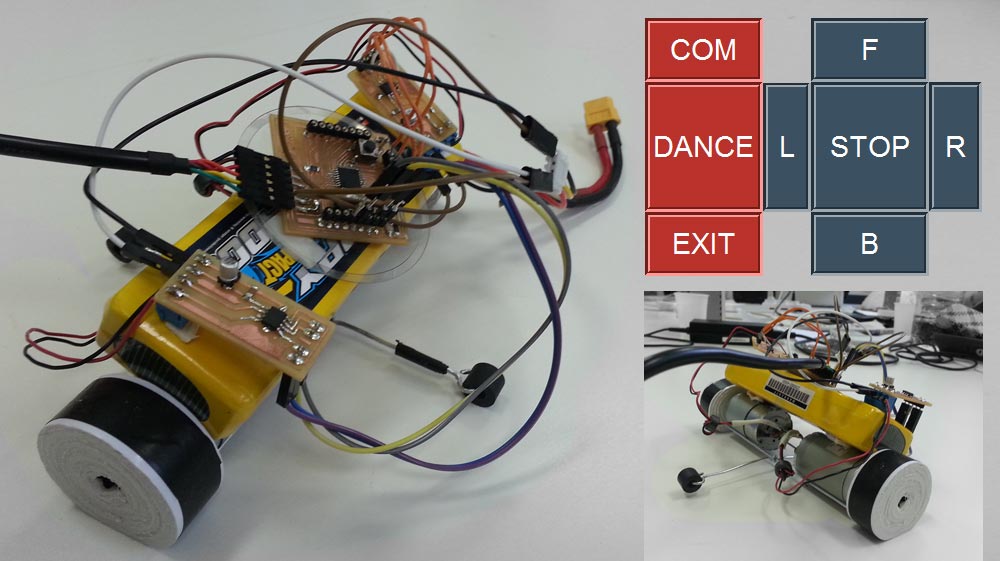
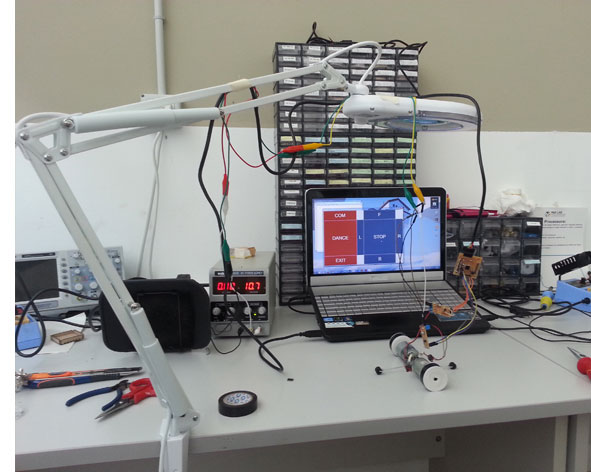
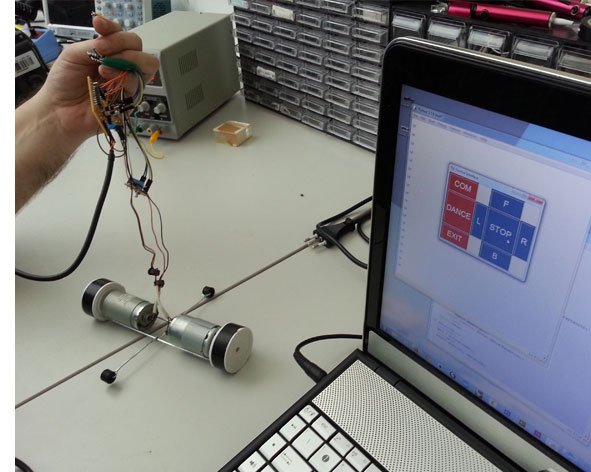
I chose to focus my attention on an output interface device useful for my final project. I created a computer interface to drive and to control my robot.
I used for the first time Python, for this reason I started studying some good tutorials and participating at the webinar of the Fab Lab Frosinone to dominate the basic commands. Then I studied on the web page of Arduino and other tutorials, the interaction between writing and reading serial.
Hardware
The hardware part of this assignment I used::
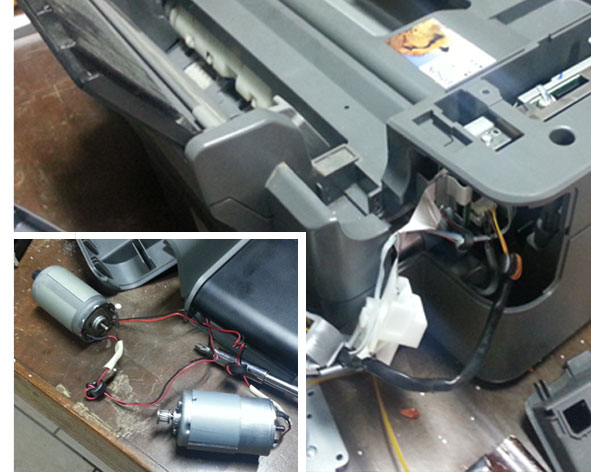
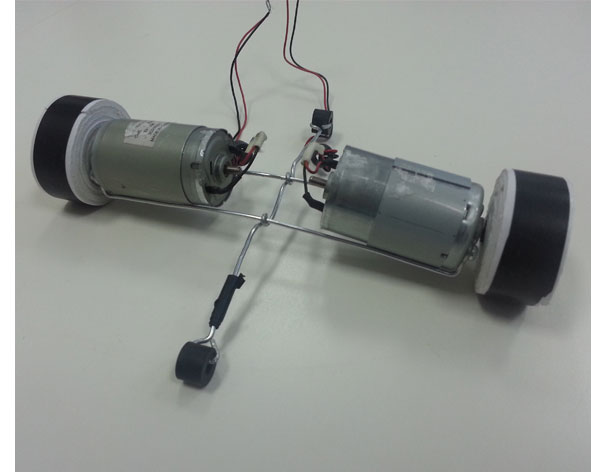
- 2 dc motors 12 V (Recovered from a broken printer);
- Fabkit;
- FTDI wire connector (to connect the Fabkit to computer)
- 2 shield H bridge
- Connector / wire
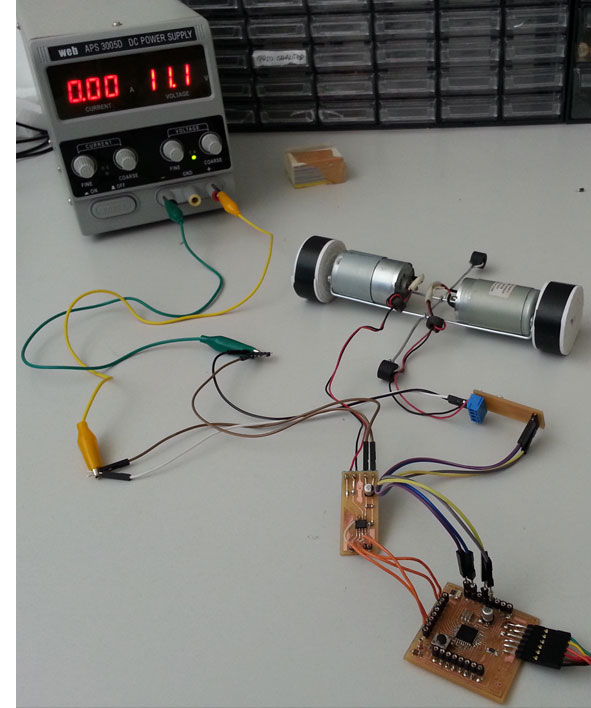
- Power supply (replaced with a Battery 12 V)
I built a simple structure to connect the two dc motors and give more stability; I connected the H bridge shields to Fabkit, dc motors and power source. For consignments problem, I could not use the wi-fi shield for this assignment, for this reason I used the FTDI connector to receive from the computer the “serial command”.
ARDUINO IDE and PYTHON GUI (Tkinter)
First I downloaded Python 2.7 (I chose this version to start because have more forum and tutorial) and I added the Tkinter library interface at the basic library.
Using Arduino IDE I wrote the C code; I programmed the microcontroller to read (using the serial port) the signals coming from the interface:
if (Serial.available()) { command = Serial.read(); }
and I imposed on each individual signal a basic command:
(Forward command example) if (command == 'A'){
analogWrite(hbridge_in1,150); //input1 dc motor n°1
analogWrite(hbridge_in2,0); //input2 dc motor n°1
analogWrite(hbridge_in3,150); //input1 dc motor n°2
analogWrite(hbridge_in4,0); //input2 dc motor n°2
}
INTERFACE: USING THE INTERFACE TO TALK TO ROBOT
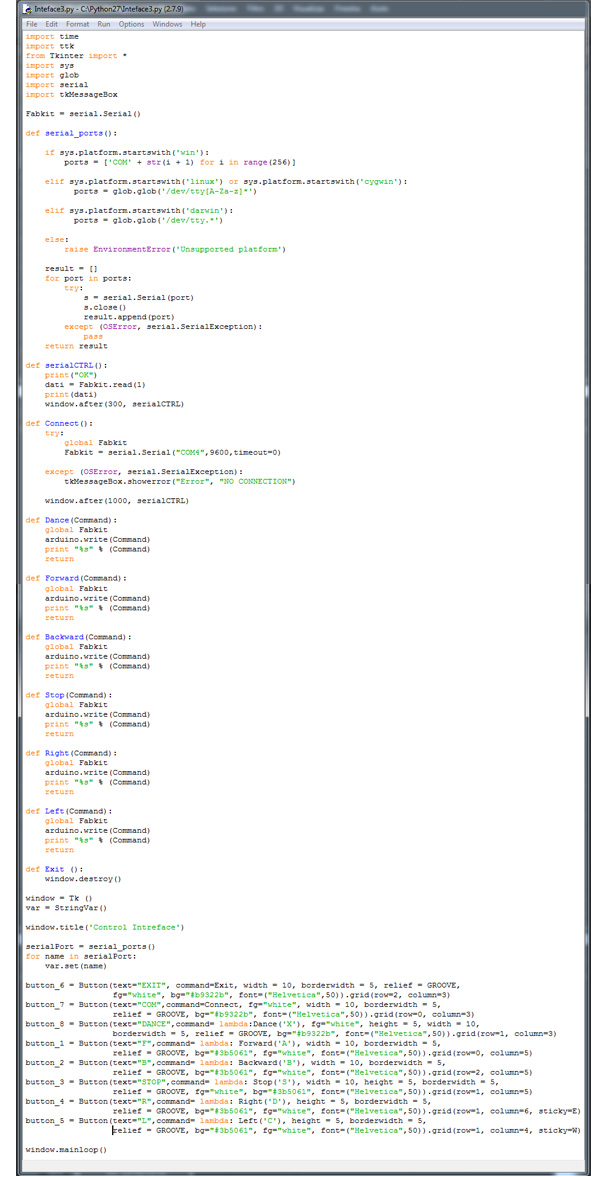
Then I wrote in Python the code and the GUI Design:
- Before to start the code I re-called the librarys:
(example) from Tkinter import *
import serial;
- I defined who’s the “reader/writer” of serial command:
Fabkit = serial.Serial();
- Then I defined the serial port and how to read/write the data;
- I finally set each command. In my case I have 4 types of command:
1)def serialCTRL(): # to periodically check the connection
print("OK")
dati = arduino.read(1)
print(dati)
window.after(300, serialCTRL) ;
2)def Connect(): # to connect the interface to the board (in my case from Serial port COM4)
try:
global Fabkit
Fabkit = serial.Serial("COM4",9600,timeout=0);
window.after(1000, serialCTRL) ;
3)def Forward (Command): # to send a signal (Forward command example)
try:
global Fabkit
Fabkit.write(Command)
print "%s" % (Command)
return;
-I closed the first part:
window = Tk ()
var = StringVar();
- Finally in the GUI Design Part I set the graphics interface and the elements that compose it, I assigned to each component the commands described before:
(Forward command example) button_1 = Button(text="F",command= lambda: Forward('A'), width = 12, borderwidth = 5, relief = GROOVE, bg="#3b5061", fg="white", font=("Helvetica",50)).grid(row=0, column=5)
- To close the code and enable the loop, I wrote:
window.mainloop();
I created a really simple command interface to control my robot, but I want to go into that and produce a better interface for the final project. I started to study also Processing.
Download Files
Arduino IDE:
Python GUI:
Programs: IDE Arduino, Python.
Machinery: Power Supply.