Week 7
Embedded programming
This week I had nothing to build but my days have nevertheless been well filled : I had to
program my echo hello-world board to make something with the three LEDs and the button.
So.. I had to watch a lot of tutorial to reminisce about my very small bases
in programming and acquire new ones. And for all my questions and issues, fortunately
there was the LabManager.
Here is a short list of what has been very useful for me :
Operators in C &
Step for programming
I started to read the data sheet to watch the opportunities offered by the microcontroller and especially how to program it with three LEDs (output) and a button(input). And finally I managed to write a code to flash the LEDs and use the button :)
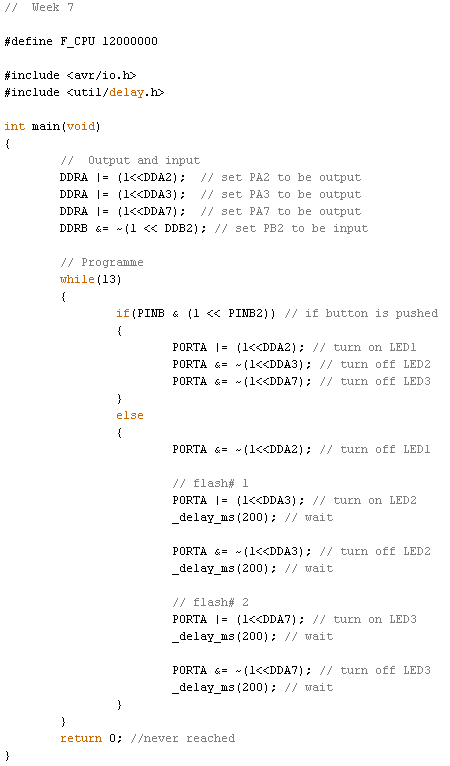
To write the code I used NotePad++ and to program the microcontroller I used AtmelStudio.
I had a very big problem to connect my ISP and to find it in the list of the devices in Atmel Studio.
And after a lot of testing and downloaded drivers I finally found why : it is necessary to plug
the USB cable to a port USB2. And my computer has only ports USB3...
I think I'm going to give up Atmel and try with Arduino, I found a
tutorial that seems not bad.
Not having found a solution for now, I used a computer in the fablab this week. I broke a microcontroller
forgetting the "A" of ATTINY44A...
Desoldering and resoldering when all the components are already on the pcb is horrible but it's working
now and I will make very very close attention to all the settings before start programming next time !!!
After having set this little problem, the LEDs flashed (:
But if everything seemed to work, there were still two problems !
First problem : When we only disconnected the AVR programmer, my pcb was not powered (while the power
was provided by the FTDI cable).
The Labmanager took one look at my pcb and found a micro cut (photo on the left). This kind of micro cut
happens when using the chemical process that I used to make my pcb. To avoid this problem, some people do
tinning before soldering the components. Maybe I'll do that next time ! To fix it I desoldered the FTDI
connector, made a little solder bridge and then resoldered the connector(photo on the right).

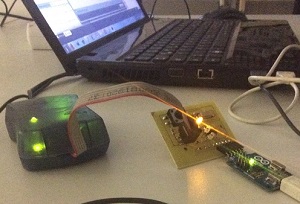
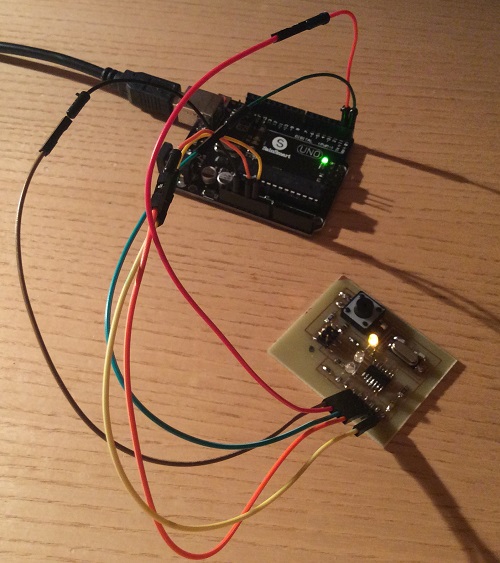
That was the problem because now it works. Also I could tested at home (photo below). I did not have the cables which were necessary but I used my Arduino to power my pcb. For that I followed the instructions I found here.
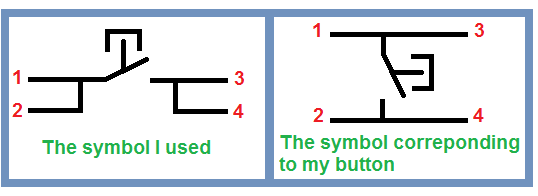
Second problem : The button didn't work.
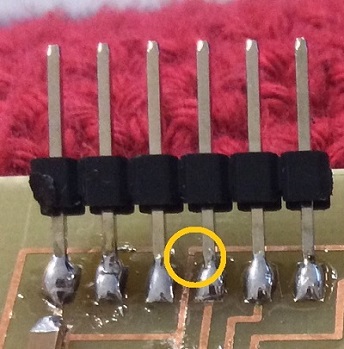
The problem was my circuit. In fact when I created the package for my button, I associated a
symbol that does not correspond to the architecture of my button.
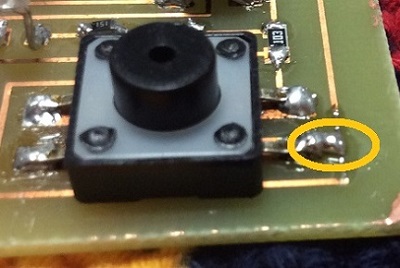
So I have made some changes to the board (orange circle). I cut the traces with a knife and I made a bridge with tin.
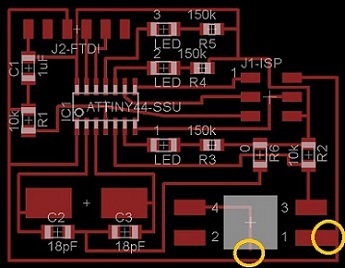
After that, everything worked (:
Next steps :
- Running it all on my computer (probably with the Arduino software)
- Use my FabISP to program the ATTINY instead of the AVR programmer
- Write more complicated programs
Software and website used