Week 2
Computer Aided Design
This week the aim was to draw my potential final project in 3D. Having already used Catia and Solidworks,
I wanted to try a new one : so I downloaded SketchUp. I did some tutorials and read the part from chapter 8
of the book "Getting Started with MakerBot" for SketchUp. It was very interesting to discover this tool.
However, I still prefer Solidworks, maybe because I used it for the past 5 years and I feel pretty
comfortable working with it.
So I used SolidWorks to design the separate parts of my alarm clock and then to make an assembly.
I started directly working on the 3D but 5 minutes after I realized that it was too complicated without
knowing the exact dimensions. Previously I had
a tutorial or at least a plan of the dimensions of the parts but here I only had my sketch. So I started by
defining the size and shapes of the pieces using a notebook (photo below - click on it to zoom).
I realized that as I had used my imagination as a generator for my ideas, I would probably had to make
lots of changes.
So I tried to do the quotations as simply as possible in order to make future alterations easier.
I also used functions to change the dimensions in all parts simultaneously.
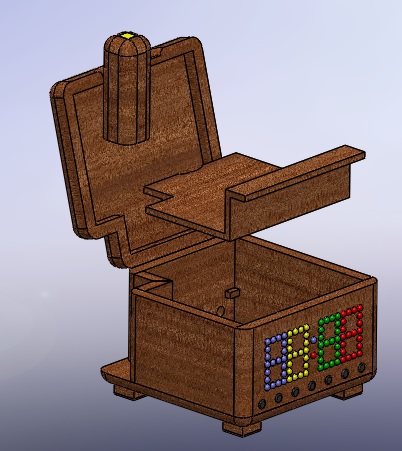
I finally managed to reproduce what I had in mind and you can see the result below. The double bottom
aims to hide the electronics below so that it could have a storage above. The flashlight will charge from
a socket located on the support.
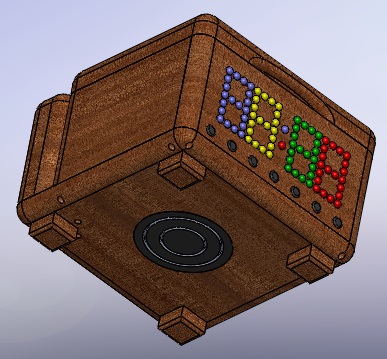
Finally, I decided to put the speaker below in order to have more room in the width of the box and
eventually to decorate the sides if I wanted.


Here is the ZIP file with all the parts.
I then decided to make a little video that would show the clock in more detail. I also used Solidworks.
For this I made a motion study which I then recorded. It was a bit new to me having in mind that I had never
actually used this tool for that. After that I uploaded my video on Youtube in order to save up space on
the server.
Software and website used


