****************************************************************************************************************
ASSIGNMENT: READ A MICROCONTROLLER DATA SHEET // PROGRAM YOUR BOARD TO DO SOMETHING
PROJECT: PROGRAM THE HELLO WORLD BOARD AND EMBEDDED PROGRAM WITH FAB ISP
SOFT: MAC OS TERMINAL
TUTORIAL: MASSIMO MENICHINELLI FAB ACADEMY 2012 EXERCISE: EMBEDDED PROGRAMMING // TERMINAL
DATASHEET: ATTINY 44
DOWNLOAD:
****************************************************************************************************************
![]()
This week we undoubtedly had the most difficult assignments since the beginning of Fab Academy.
We needed to read the DATASHEET of ATTINY 44 microcontroller at first and give our comments on it..
IIt's the first time that I looked at the specifications of ans electronic component. And it is not really easy to understand: in reality is completely crazy and I began to feel I was in a bad place. I'm not electronic engineer and I have a old man’s brain :-)
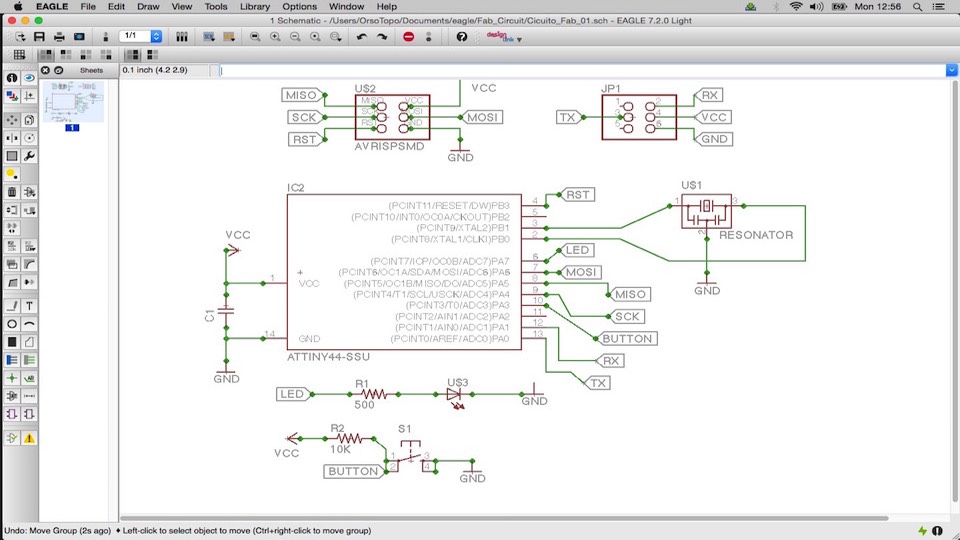
After a short pause, and after trying to read some general information about the "nature and History of microcontrollers" in Wikipedia, I tried to compare the pin out found on the datasheet of ATTINY 44 micro and the schematics of my Hello Boardboard.
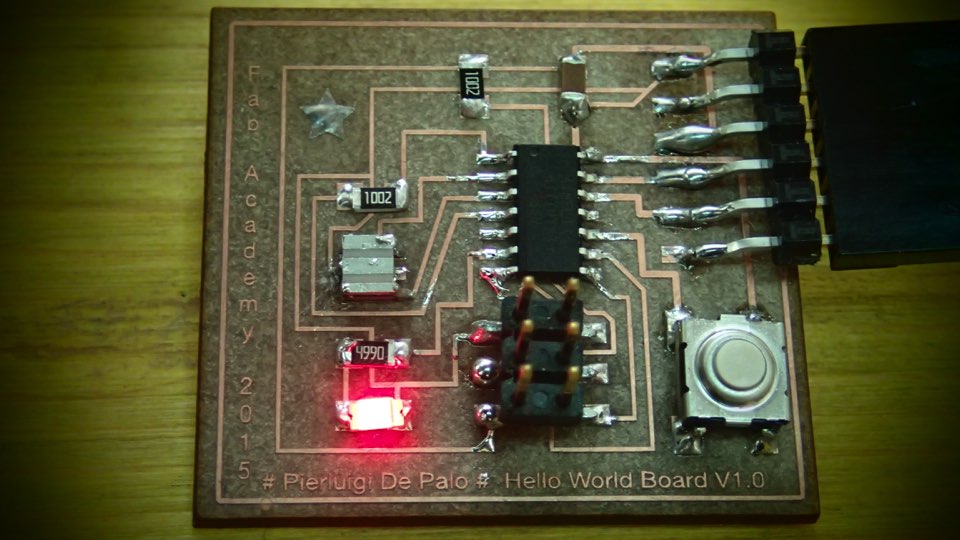
The Attiny 44 is the microcontroller of the "Hello Board" that we worked on last week
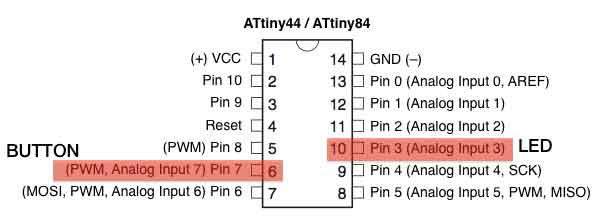
I understand that the same pins I found in the DataSheet of Attiny are used to communicate with other parts of electronic components on the board.
Each pin of the microcontroller is a kind of door: to communicate information it will transmit an electrical signal, running along the tracks of the pcb board. In reality electronics is just one part of the history of electricity. Inside a microcontroller there are a lot of transistors. The transistor is a sort of electrical switch: for on or off. Bette still r, 0 or 1 in the binary language. In each microcontroller we have thousands and thousands of transistors; and in recent ones there may even be millions of them
Once I understood the basic binary language, I was a lot happier.
Other interesting information was about the analog pin input or output pin configuration. This is where there is the VCC(+) pin or Ground(-) or information about the clock speed..
After understanding a little bit more, it was time to program the "hello board" to blink with the green Led light incorporated inside. We needed to use the Fab ISP programmer board that we made in WEEK 4.
And this is when the problems began.
To do this we needed to know the language. We needed to use Terminal for give the same command and modify the same file until it was burned on the in the "hello bord"
After connecting the Fab ISP with the "Hello Board" with a cool rainbow cable, I followed the instructions that the tutor give us. I didn’t really understand what I was doing but it worked like magic
I was really happy when I saw the little green led blinking
I know I need to revise the process; this was my first approach to the code and is not really friendly. However, I noticed my interest in the code; I think it's like learning a new and very difficult language
THE MAKE FILE
            PROJECT=steadyled
SOURCES=$(PROJECT).c
MMCU=attiny44
F_CPU = 20000000

CFLAGS=-mmcu=$(MMCU) -Wall -Os -DF_CPU=$(F_CPU)

$(PROJECT).hex: $(PROJECT).out
	avr-objcopy -O ihex $(PROJECT).out $(PROJECT).c.hex;\
	avr-size --mcu=$(MMCU) --format=avr $(PROJECT).out

$(PROJECT).out: $(SOURCES)
	avr-gcc $(CFLAGS) -I./ -o $(PROJECT).out $(SOURCES)

program-bsd: $(PROJECT).hex
	avrdude -p t44 -c bsd -U flash:w:$(PROJECT).c.hex

program-dasa: $(PROJECT).hex
	avrdude -p t44 -P /dev/ttyUSB0 -c dasa -U flash:w:$(PROJECT).c.hex

program-avrisp2: $(PROJECT).hex
	avrdude -p t44 -P usb -c avrisp2 -U flash:w:$(PROJECT).c.hex

program-avrisp2-fuses: $(PROJECT).hex
	avrdude -p t44 -P usb -c avrisp2 -U lfuse:w:0x5E:m

program-usbtiny: $(PROJECT).hex
	avrdude -p t44 -P usb -c usbtiny -U flash:w:$(PROJECT).c.hex

program-usbtiny-fuses: $(PROJECT).hex
	avrdude -p t44 -P usb -c usbtiny -U lfuse:w:0x5E:m

program-dragon: $(PROJECT).hex
  avrdude -p t44 -P usb -c dragon_isp -U flash:w:$(PROJECT).c.hex
THE STEADY LED.C FILE
#include
#include
#include


void delay_ms(uint16_t ms);
void init_io();
int button_is_pressed();
void toggle_led();

#define F_CPU 20000000UL         /* 20MHz crystal oscillator */

#define BUTTON_PORT PORTA       /* PORTx - register for button output */
#define BUTTON_PIN PINA         /* PINx - register for button input */
#define BUTTON_BIT PA3          /* bit for button input/output */

#define LED_PORT PORTA          /* PORTx - register for LED output */
#define LED_BIT PA7             /* bit for button input/output */
#define LED_DDR DDRA            /* LED data direction register */

#define DEBOUNCE_TIME 25        /* time to wait while "de-bouncing" button */
#define LOCK_INPUT_TIME 250     /* time to wait after a button press */

int
main (void)
{
        init_io();

        while (1)
        {
                if (button_is_pressed())
                {
                        toggle_led();

                }
        }
}

void delay_ms(uint16_t ms) {
        while ( ms )
        {
                _delay_ms(1);
                ms--;
        }
}

void
init_io()
{
        /* set LED pin as digital output */
        LED_DDR = _BV (LED_BIT);

        /* led is OFF initially (set pin high) */
        LED_PORT |= _BV(LED_BIT);

        /* turn on internal pull-up resistor for the switch */
        BUTTON_PORT |= _BV(BUTTON_BIT);
}

int
button_is_pressed()
{
        /* the button is pressed when BUTTON_BIT is clear */
        if (bit_is_clear(BUTTON_PIN, BUTTON_BIT))
        {
                delay_ms(DEBOUNCE_TIME);
                if (bit_is_clear(BUTTON_PIN, BUTTON_BIT)) return 1;
        }

        return 0;
}

void
toggle_led()
{
        LED_PORT ^= _BV(LED_BIT);
                }
GO USING TERMINAL IN THE DIRECTORY OF DOWNLOADED STEADYLED FILE
            MacBook-Pro-de-Luigi-3:~ Pierluigi$ cd Downloads/steadyled
            MacBook-Pro-de-Luigi-3:steadyled Pierluigi$
COMMAND : MAKE
            MacBook-Pro-de-Luigi-3:embedding PierluigiS make
avr-objcopy -0 ihex hello_world_blinking_by_massimo.out hello_world_blinking_by_massimo.c.hex:\
     avr-size --mcu=attiny44 --format=avr hello_world_blinking_by_massimo.out
AVR Memory Usage

Device: attiny44

Program: 140 bytes (3.4% Full)
(.text + data + .bootloader)

Data:     0 bytes (0.0% Full)
(.data + .bss + .noinit)
COMMAND : MAKE PROGRAM USBTINY FUSE --> FOR PROGRAMMING THE BOARD
        MacBook Pro de Luigi 3:embedding PierluigiS make program usbtiny.fuses
avr-objcopy -0 ihex helloworld_bl inking_ by mass Imo .out helloyorldblinking_bymassimo.c.hex:,
         avr size  mcu attiny44 -format avr hello world blinking by mass)mo.out
AVR Memory Usage

Device: attiny44

Program:      140 bytes (3.4% Full)
(.text • data      .bootloaden

Data:           0 bytes (0.0% Full>
.data - .bss • .noinit)


avrdude p t44 P usb -c usbt)ny U lfuse:w:Ox5E:m

avrdude: AVR device initialized and ready to accept instructions

Reading | ################################################## | 100% 0.00s

avrdude: Device signature - 0x1e9207
avrdude: reading input file "OxSE"
avrdude: writing lfuse      bytes):

Writing | ################################################## | 100% 0.00$

avrdude: 1 bytes of lfuse written
avrdude: verifying I fuse memory against OxSE:
avrdude: load data lfuse data from input file OxSE:
avrdude: input file Ox5E contains 1 bytes
avrdude: reading on chip lfuse data:

Reading | ################################################## | 100% 0.00s

avrdude: verifying ...
avrdude: 1 bytes of lfuse verified

avrdude: safemode: Fuses OK (H:FF. E:DF. L:SE)

avrdude done. Thank you.
COMMAND : MAKE PROGRAM USBTINY --> FOR UPLOAD THE BOARD
             MacBook-Pro-de-Lutgl-3:embedding PierluigiS make program-usbtfny
avr-objcopy -0 thex helloworld_blinking_by_massimo.out hello_world_blinking_by_massimo.c.hex:\
          avr-size --mcu=attiny44 --format=avr hello_world_blinking_by_massimo.out
AYR Memory Usage
----------------
Device: attiny44

Program:       140 bytes (3.4% Full)
(.text + data + .bootloader)

Data:            0 bytes (o.es Full)
(.data + .bss + .noinit)


avrdude -p l44 -P usb -c usbtiny -U flash:whello_world_blinking_by_massimo.c.hex

avrdude: AYR device initialized and ready to accept instructions

Reading | ################################################## | 166% 0.66s

avrdude: Device signature . 6x1e9207
avrdude: NOTE: "flash" memory has been specified, an erase cycle will be performed
          To disable this feature. specify the -D option.
avrdude: erasing chip
avrdude: reading input file "helloworldblinking_by_massimo.c.hex"
avrdude: input file hello_world_blinking_by_massimo.c.hex auto detected as Intel Hex
avrdude: writing flash (140 bytes):

Writing | ################################################## | 100% 0.20s

avrdude:  140 bytes of flash written
avrdude:  verifying flash memory against hello_world_blinking_by_massimo.c.hex:
avrdude:  load data flash data from input file hello_world_blinking_by_massimo.c.hex:
avrdude:  input file hello_world_blinking_by massimo. c.hex auto detected as Intel flex
avrdude:  input file hello worldla inking by massimo.c.hex contains 140 bytes
avrdude:  reading on chip Ilash data:

Reading | ################################################## | 0.27s

avrdude: verifying ...
avrdude: 140 bytes of flash verified

avrdude: salemode: Fuses OK (H:FF. E:OF. L:SE)

avrdude done. Thank you.
TEST: WOW!! IT'S WORK!!!